|
|
|
LR3 miscellaneous
|

|
This album contains both data and fun stuff.
The data is generally boring pdf wiring diagrams that do not seem to belong elsewhere as well as various system explanations. There are also a number of files related to the alternator and regulator plus some files related to various 18" and 19" D3/LR3 rated factory wheels.
The fun stuff, is well - look at it.
I note that the Marilyn file within this album is over a thousand views - a very discerning mindset I suppose on the part of the Disco 3 forum participants.
There are other albums here with a number of files exceeding 2,000 views, a few exceeding 3,000 and the odd file having 4,000 views. The majority of the files however show perhaps 400 to 500 views.
43 files, last one added on 13 Dec 2017
|
|
|
Traxide Dual Battery install in LHDrive
|
|
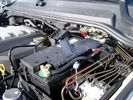
This album shows the Australian Traxide dual battery system installed in a LHD vehicle. Also included are files related to battery dimensions and cross reference material.
The Caterpillar file is of particular value regarding dimensioning and physical battery construction, post layout and tie down ridges etc.
15 files, last one added on 08 Jun 2010
|
|
|
ZF 6HP26 Automatic Transmission in LR3
|
|
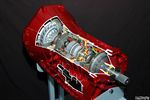
This album includes a number of ZF pdf's as well as LR material related to the ZF 6HP26X transmission in our 3. Included is material re the plastic oil pan and integral filter plus material on replacing the plastic pan with a metal pan and separate filter. There are some jpg's re cut thru views as well.
27 files, last one added on 06 May 2016
|
|
|
Brake Light Switch Replacement
|

|
This album contains jpg's showing the internal deterioration of the switch; also wiring diagrams of the brake light circuit showing how the brake light circuit ties into the ABS, the HDC, and a multitude of other systems. Included are instructions re replacing the switch. The effect of a deteriorating brake light switch appears as any number of invalid warnings and false problems in other systems.
10 files, last one added on 28 Dec 2014
|
|
|
NAV Radio BlueTooth phone and Rosen DVD
|
|
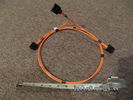
This is a collection of files related to the audio system, NAV and BlueTooth as well as the overhead Rosen DVD Video player.
Some of the pdf's discuss the differences between the low and high line radio head units, speaker systems, and the two different amplifiers. Pinouts are provided in many of the pdf's.
21 files, last one added on 24 Apr 2016
|
|
|
Liftgate release mod
|
|
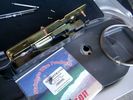
I installed this mechanical release in anticipation of the power operated upper hatch door release quitting for whatever reason. In the cases of the early production models, there is an L shaped plastic part that simply breaks. It has since been upgraded to metal and fails less often now. This mod provides a mechanical release as LR does not.
8 files, last one added on 03 Jan 2012
|
|
|
LR3 Air Suspension fuse 35P ECU Manual Shut Off Switch
|
|
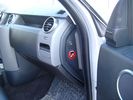
At first I did not quite understand how the system worked and thought that removing Fuse 35P was the key to freezing the suspension computer. I later determined that removing F26E in the engine compartment would kill the computer 24/7/365 and keep it dead. Removing F35P only put the computers to sleep while the engine is running; later when shut down, the zombies wake up and drop the 3 while parked. Removing F26E is pretty much equivalent to putting a stake to the heart and kills the suspension computer "good".
13 files, last one added on 29 Jan 2016
|
|
|
NAS Trailer Socket Pin ID and Wire Colours
|
|
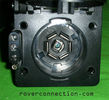
Album provides wiring hookup diagrams and colour codes for NAS trailer sockets; additionally an adapter box design that can be self built to eliminate pulsing of LED trailer lights.
The adapter also facilitates the required signalling to various onboard computer circuits that a trailer is connected and hence results in the automatic disabling of such features as the backup sensors and auto height lowering at speed.
Also depicted are various NAS hitches available as well as providing part numbers for an electric braking controller device that can be connected to the existing factory Ford wiring connector.
22 files, last one added on 06 Mar 2016
|
|
|
Broken Air Compressor RQG500060
|
|
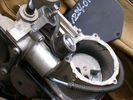
Shows the "crankshaft" and what happens when the single nut unscrews itself. Rotation continued, something jammed, and then the connecting rod to the piston snapped. Also there is a jpg of the compressor mounting bracket that snaps when you jack on it.
There is also a pdf of an older Technical Service Bulletin related to a valve update mod; also listing previous mods.
8 files, last one added on 20 Apr 2011
|
|
|
Schrader Valve Air Tank Air In install
|
|
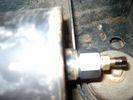
This details how to install a Schrader valve in the front end of the air tank of early 3's to facilitate "air in" in the event of compressor failure.
Later build 3's do not have the blanked off threaded bung that provides the required entry point.
4 files, last one added on 04 Dec 2017
|
|
|
Switch Replacement Rear Upper Hatch Release
|

|
This file shows the replacement of the LR3 rear upper hatch switch with a similar switch, but with a Range Rover Sport part number, hence a JAE connector has to be added to the LR3 wiring to accommodate the plug on the end of the RRS Switch.
4 files, last one added on 04 Jan 2012
|
|
|
Power Window and Door Lock Circuits
|

|
A collection of pdf's re the power window wiring and also the door lock wiring.
There is a 17 page pdf that attempts to explain how the door locking system is supposed to function. While the explanation is actually quite detailed and fairly easy to understand, overall, the locking system is not simple.
12 files, last one added on 23 Apr 2016
|
|
|
|
|
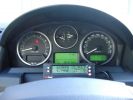
ScanGauge II on LR3
|
|
ScanGauge mounted above steering column
2 files, last one added on 20 May 2011
|
|
|
|
|
|
|
|
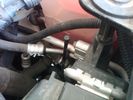
Breather Cap Front Differential installation
|
|
This album shows the installation of the Front Differential breather cap per Technical Service Bulletin LTB00245. What surprised me was that the piece I cut off, I could neither blow nor suck thru it; the new replacement breather cap, I could.
I tend to wonder what Land Rover knows that is not really mentioned in the instructions that generated the TSB.
10 files, last one added on 19 Dec 2021
|
|
|
Buzzer Replacement for Bumper Backup Sensors
|
|
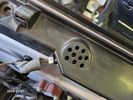
The jpg's within show how to access the parking aid buzzer on a left hand drive (USA spec) LR3 by removing just the bin cover rather than the whole cargo area side panel. The buzzer is located on the left hand (steering wheel side) of the LR3 just forward of that rear storage bin. The length of plastic that the storage bin is located within snaps into the side panel. Removal is not real easy but easier than removing the whole side panel. Also once the top portion is removed, getting to the buzzer, removal and reinstall is easy to accomplish.
8 files, last one added on 13 Sep 2024
|
|
|
Heater Air Conditioner System
|
|
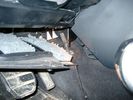
There are a number of pdf's and files that describe how the heater and AC system is supposed to operate. Both front and rear systems are covered.
Also included are files related to the fan box drain hoses disconnecting and allowing water to flow onto the carpet.
13 files, last one added on 04 Feb 2018
|
|
|
|
|
| Last additions - bbyer's Gallery |

D pillar speaker cover removed to facilitate removal of the bin cover.11 viewsThe pipe thing exposed when the D pillar cover is removed is something to do with the side curtain air bags and hence is not to be disturbed - at least my me. Removal of the cover make lifting of the bin cover easier.13 Sep 2024
|
|

Ford Sounder 4L1Z-15K864 A that I installed.12 viewsThis is the Ford sounder, part number 4L1Z-15K864 that I purchased and installed in lieu of the official Land Rover sounder. Note the part number is what is printed on the box (and also my invoice) but the part number on the sounder body is a bit different. I think a new box/invoice related part number is created each time the price of a part is changed. Regardless the Ford sounder was about half the cost of the Land Rover part and sounds the same as the removed factory buzzer.13 Sep 2024
|
|

Land Rover LR006482 replacement sounder10 viewsThis is the official Land Rover replacement sounder, part number LR006482 and costs about double the Ford part number sounder. I used the Ford sounder and it sounds the same as the original factory sounder in my 2005 LR3.13 Sep 2024
|
|
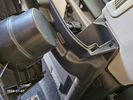
Bin Cover removed showing forward release clips that clip into the two rectangular slots.10 viewsOne has to pull up on the Bin Cover to unlatch the two metal clips, hence why release of the C pillar cover makes the bin cover removal and reinstall easier.13 Sep 2024
|
|

Buzzer located under black plastic cover.12 viewsThe white electrical connector clicks into the buzzer housing that is shown protruding from under the black plastic cover. There is a little tab on the white plastic that has to be squeezed to release the connector. In other words, do not pull on the two conductors. 13 Sep 2024
|
|
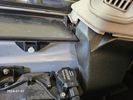
White plastic pin that has to be partly removed to assist in release of buzzer cover.10 viewsThe white coloured plastic pin is located near the C pillar and has to be partly pulled out to release the black plastic buzzer cover.13 Sep 2024
|
|

Bin cover removed to expose plastic moulding covering buzzer.10 viewsI guess this moulding is helping to retain the bin cover when in place rather than to "protect" the buzzer but that is also what it seems to do. In any case, unscrew the two large screws and lift moulding off exposing the buzzer.13 Sep 2024
|
|

C pillar cover removed to facilitate removal of bin cover.9 viewsNote the "ribbon" behind the top left corner of the C pillar cover. This is something to do with the curtain air bags, hence do not mess with it. I dislodged the cover to make it easier to pull up and extract the black plastic bin moulding. It is not necessary to totally remove it and would be what I call a big deal - seat belt, air vent and ducting as well as that curtain concern.13 Sep 2024
|
|