| Search results - "off" |
Thread upload3 viewsImage uploaded in new thread
|
|

Bit fell off111 views
|
|
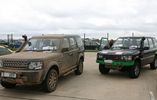
Silverstone Media Day85 viewsTook 3 cars for display .... a RRR members off-road modified RR p38a, unusual as it has the 2.8L version of the 300tdi fitted.
|
|

Offroad Training in Linthe, Germany.204 views9 Cars: Suzuki Jimny; Touareg V10 Diesel no difflock; Touareg V6 Diesel rear difflock; Disco 1; Disco 2; Disco 3; RR ´05; RR ´06; Q7.
|
|
The offending stone166 views
|
|
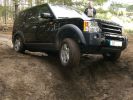
248 viewsMy baby showing off it´s air suspension :)
|
|
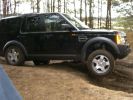
239 viewsIt simply is a true offroad car. Great balance, easy to drive, i love it!
|
|
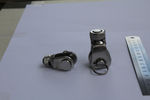
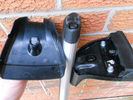
114 viewsboth adapter the larger one needed a bit chopped off the botom and the washers to fit
|
|
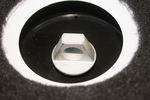
180 viewsThe offending adapter in the D4 courtesy of the bright young designers, who modified it from the perfectly acceptable hex nut
|
|
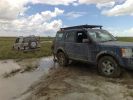
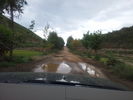
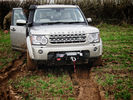
really sticky mud168 viewsCan\'t really see it in the pic, but off the road the mud was treacherous
|
|

2348 views
|
|

2465 views
|
|
2316 views
|
|
2527 views
|
|
The Office132 views
|
|
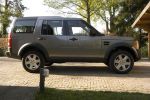
237 viewsoff road stand - hoogste stand van de vering
|
|

Thread upload19 viewsImage uploaded in thread 99451
|
|
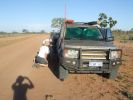
08 D3 stranded with a seized smoking wheel314 viewsAbout 1 hr after replacing the blown tyre, strange noises emanated from the stability control system and speed dropped off. Then I looked in the rear view mirror, and noted a cloud of dust along with a whiff of black smoke. This led to a very quick stop (no traffic on this route for over a week, so no worries about having to signal exiting the road). Took a look and WOW. The right rear wheel was glowing a dull red colour, and burning rubber smoke was wafting from the red glow over the fuel lines.
|
|
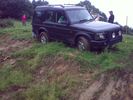
Almost a roll, but not quite...55 viewsI\'d \'launched\' myself at a 6ft hill and got to the top- but at an angle- the offside rear gripped and pulled us around to the right- perilously close to the edge... time for spare undies I think...
|
|
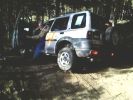
Freelander trying hard.107 viewsStill not stuck but getting there. In the end pulled it out with a Defender. Picture taken at Offroad-Training in Linthe/Germany
|
|
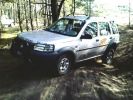
Still trying to prove it can hold up102 viewsFreelander not stuck - yet :)Picture taken at Offroad-Training in Linthe/Germany
|
|
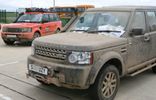
Silverstone Media Day87 viewsTook 3 cars for display .... a RRR members genuine 2005 RRS G4 & another members off-road modified RR p38a
|
|
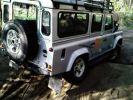
Same holes as the disco, took a picture from the right side. Picture taken at Offroad-Training in Linthe/Germany111 views
|
|
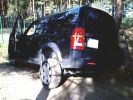
Not stuck - only got out to take a picture :) Picture taken at Offroad-Training in Linthe/Germany140 views
|
|
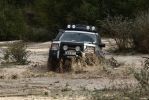
610 viewsTDV6 HSE Slindon Safari, Chichester. Private Off Road Day, May 2009.
|
|
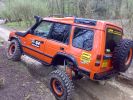
COVER SHOT FOR TOTAL OFF ROAD114 viewsG WAGEN AXELS FITTED WITH HYDRAULIC FRONT + REAR DIFF LOCKS + EXTREAM SUSPENSION SYSTEM FRONT + REAR WARN WINCHES.
|
|

Ready for the off at Tixover61 views
|
|

Cooper Zeon LTZ 285 60 18 #298 views
|
|
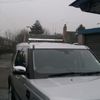
SR switched off82 viewsSR40 lightbar
|
|

Thread upload7 viewsImage uploaded in new thread
|
|
8 views
|
|
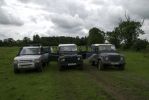
_DSC0185169 viewsCoffee break II
|
|

Plastic cover off230 views
|
|
Olga57 viewsCome on, its my day off!
|
|
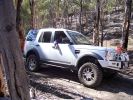
off-camber hill348 viewsAnd no, I wasn\'t hanging my arm out to balance the car - I was stopped at this point waiting for the Jeep in front to try and finish. It was a pretty steep off-camber slope!
|
|

The official Morocco 2007 Disco3.co.uk attire130 views
|
|
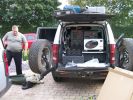
Offroad essentials...168 views
|
|
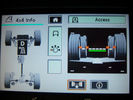
Offroad screen running behind tv57 views
|
|
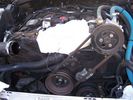
221 viewsRemove the air intake shuttle cut off valve, covering hole with rag
|
|
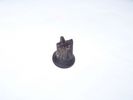
sunroof drain grommet - piece that broke off59 views
|
|
_DSC0187185 viewsCoffee break
|
|
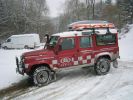
Extreme medics 110231 viewsFull Ambulance spec with extrem offroad cabability, 110 v8
|
|
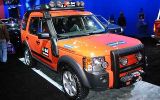
Offical G4698 views
|
|
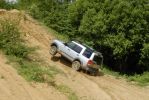
_DSC2048206 viewsTake off!
|
|

12S plug from eBay and Ctek lead (provided with MXS-10) - before cutting the ring terminals off.26 views
|
|
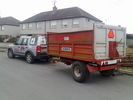
honestly officer....if it was overloaded, it would be sitting on the rear axel ??? heh heh79 viewsfunny how some cops will accept what their eyes tell must be the truth, a trailer load of logs home ....easy peasy, hahahahaha
|
|

Thread upload128 viewsImage uploaded in thread 92365
Chinese garbage knock off stolen from ARB / Rigid
|
|
44 views
|
|
39 views
|
|
38 views
|
|
37 views
|
|
Border Rover in Boughrood,what can i say,It was an Amazing Weekend.51 views
|
|
Off road at night92 views
|
|
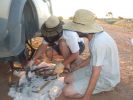
16 All the remains of a D3\'s parking brake371 viewsAfter 4 hours of hammering, finally removed the disk/park brake drum, and nearly all the parking brake bits fell to the ground. Cut rhe remaining brake cable loose as it was wrapped around the hub and a bit melted. Also having 2 jacks + 2 jack stands will support 4 hrs of hammering on the side of my D3.
|
|
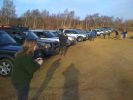
Ready for off at Yarwell71 views
|
|
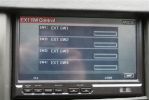
17298 viewsYou can add relay switches to the controller to turn on & off from the touch screen...pretty cool.
|
|
Suspension dragster mode440 viewsAfter I succesfully changed my wintertyres to summertyres, I found out that the front suspension was on access level and rear at off-road. Situation cleared after I switched engine on.
|
|
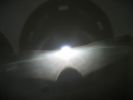
This is a H7R bulb fitted into the same headlight - look at cut off and no glare113 viewsPerfect like OEM what more can i say
|
|
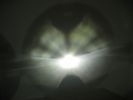
This is a normal H7 HID bulb installed in a BMW headlight to show glare above cut off line96 viewsThis is what the light pattern is that causes glare in most retofit applications including some projector lights. this is in fact a projector headlight on a BMW but the old projectors were only actually half projectors and half reflective bowls. the beam pattern should be clean cut like this ___/
|
|
Thread upload7 viewsImage uploaded in new thread
|
|
0 viewsMy 1st Land Rover 4x4 Off Roader
|
|

Thread upload21 viewsImage uploaded in thread 96341
|
|
Thread upload9 viewsImage uploaded in thread 96341
|
|
Wondering what to do next.....coffee!!198 views
|
|

Cooper Zeon LTZ 285 60 18111 views
|
|
Offroad in Estland108 views
|
|
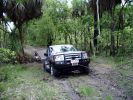
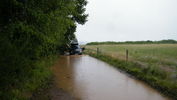
D3 in the Mary River Flood plains49 viewsFamily was down South with the In-laws, so I went for a drive on Boxing Day - which is the monsoon time, or \'The Wet\'. Was doing a test run with the off-raod trailer in preparation for the trip I was planning to the Kimberley six months later. Couldn\'t quite make it out of the creek, so a self-recovery was in order. Good thing it all worked, as I didn\'t see another car in over four hours. They were too smart to drive down the track I was on!
|
|

2010 D4 Official Release Notes157 views
|
|
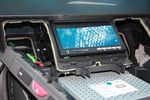
108 viewsTest fitting the screen. The bottom edge of the rear cover of the screen has been already dremeled off in this pic, notable as the circuit board can be seen.
|
|
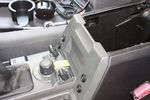
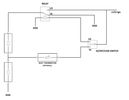
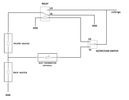
98 viewsAll 4 switches in place.
Driver's side switches are:
. Parking sensors master switch
. Reverse camera off/on/reverse-tiggered
Passenger side switches are:
. CarPC off/on/ignition-triggered
. 12V Regulator off/on/ignition-triggered
|
|

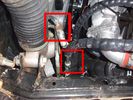
91 viewsBattery clamp needs to be modified due to the mouldings on the battery top to the side terminals. All that is needed is to cut off the bit as seen.
|
|

+7,5 cm + 5 cm offroad ANITAS height controller by mdm4x4.com metro48 views
|
|
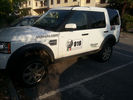
+7,5 cm + 5 cm offroad ANITAS height controller by mdm4x4.com 254 views
|
|
+7,5 cm + 5 cm offroad ANITAS height controller by mdm4x4.com58 views
|
|
Controller +7,5 cm + 5 cm offroad ANITAS height controller by mdm4x4.com61 views
|
|
off highway roads get worse19 views
|
|
14 viewsOffroad height but with the big tyres.
|
|

Opaque switch cover116 viewsKR switch on:off:on used for front and rear spots - but LEDs not visible with coloured switch cover!
(Located in sunroof switch position)
|
|
slightlyoffroad16 viewsNear Malvern
|
|
Jänschwalde offroad0 viewsTenTipi safir9 with stove
|
|
offroading dune bash13 views
|
|
offroad camel trophy14 views
|
|
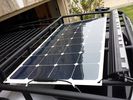
solar roof install437 viewsMore or less wrapped up my solar installation today. I added a Grape Solar Flex 100W panel, it's adequate to keep the vehicle topped off with the Fridge running, and Ham, but it could lose some ground if transmitting depending on how much, 2 would be awesome. One is enough, but barely. I am quite impressed with the Grape Solar flex panel version 2.0.
https://www.facebook.com/DifferentialPartsUS
|
|
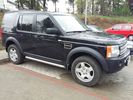
Off road hight 245 views
|
|
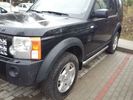
Off road hight 30 views
|
|

offending part head caught 9 viewsoffending part head caught when standing back up from picking up dropped LTO tape
|
|

Injector leak off pipes3 views
|
|

Wating for the proffessionals!44 views
|
|
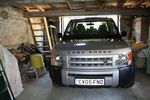
Using Mums garage to keep sun off sleeping daughter.... fit wise a bit tight 65 views
|
|
The proffessionals at work or is it play!56 views
|
|
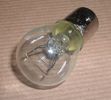
Land Rover Stop Tail Light dual filament bulb nominal 12 volt 21 / 5 watt filaments1412 viewsThis is the Land Rover part number 264590 dual filament bulb, (P21/5), that inserts into the upper two tail lamp receptacles. In the upper one, both filaments function, in the lower one, only the 5 watt tail light filament functions.
I regard it as not a good practice to routinely switch bulbs when the tail light filament, (5 watt), burns out on the lower bulb. The broken filament can jiggle over onto the brake light filament, (21 watt), and short the circuit to ground or something else not predicable.
There are also arguments to say that quality control is better on the Land Rover marketed bulbs than say far east sourced bulbs. Filament construction, and hence resistance can vary and mislead the current sensing circuits monitoring the signal light systems. Also when the bulbs are properly installed, all filaments should be standing vertically and not at any slope.
These are the sort of obscure circumstances that can lead to false trouble messages on the display, dropping to the stops, and subsequent concerns - all over a tail/signal light bulb.
For example, the filament life of both the tail light and the brake light filaments in the P21/5 bulb is significantly less than the USA common 1157 dual filament bulb, (1000/250 vs 5000/1200 hours); brightness in the P21/5 is a bit more, (3cp/35cp vs 3cp/32cp where cp is candle power), but current consumption is oddly less, (0.44a/1.86a vs 0.59a/2.10a where a is amps). It is the quest for efficiency vs maintenance trade off.
|
|
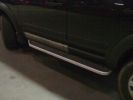
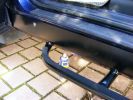
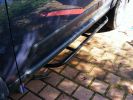
My new slider/steps - sideview offside264 views
|
|

Off road map in Garmin navigator251 views
|
|
We could not shake him off,and he loved it136 views
|
|
Old bumper off119 views
|
|
trying all settings but still no sucess even with DSC off279 views
|
|
S2a Roof Off5 views
|
|
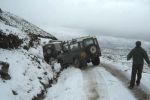
2 90's off at Lochearnhead206 viewsGuess this was why we turned round.
Photo pinched from SLROC website!
|
|
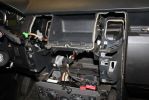
02278 viewsDash center console off and factory head unit out. LR clips suck.
|
|
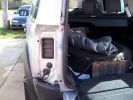
Off with the taillights239 views
|
|

Cooper Zeon LTZ 285 60 18110 views
|
|
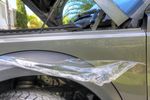
Taking damaged wrap off...192 viewsOnly because of the REAL damage to the car....
|
|

Billing Off-Road Course Water Splash43 viewsLottie\'s first off-road experience at the Billing off-road course with MikeS providing some vital guidance!
|
|

3 Point Hitch on Series 90148 viewsUsually one sees the Series units with just a conventional field plow hooked to a drawbar hitch, tractor style. This jpg however is the full meal deal - a 3 point hitch, probably off a Fordson tractor, in the long tradition of Ford/Land Rover cooperation.
|
|
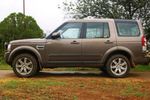
Normal height at off-road height (+50mm approx)199 views
|
|

Alternator and Regulator Wiring Diagrams, TDV6 and petrol V8 and V61973 viewsThis is a three page pdf that shows the alternator and regulator wiring for the petrol V6, petrol V8 and TDV6. The pdf can be either printed or by right clicking on the displayed pdf, rotated as required for viewing.
Of interest is that the regulator gets its instructions primarily from the Engine Control Module (ECM) and only secondarily from the vehicles electrical buss. The conductor from the battery thru the 5 amp fuse F20E is to provide initial power to excite the alternator at startup and then secondarily, to instruct it if the PWM signals were not available. Primary instructions to and from the ECM are thru the two other conductors via a digital like Pulse Width Modulated (PWM) signal.
If F20E, the 5 amp engine compartment fuse box fuse is blown, the red alternator light on the dash will be illuminated. This means that the alternator could be OK, but if the F20E fuse is blown, no electricity will be generated. Hence check the F20E fuse if you get a red ALT light or some indication of the alternator not working.
Regarding operation of the red ALT light on the dash, it is not the regulator within the alternator that tells the red light to illuminate, or not, but instead the ECM. This is the reason the red light does not function in the same manner as with older vehicles. With the 3, sometimes you have illumination and sometimes not depending upon what the ECM is thinking. What this means is that you can have an alternator that is failing but the red light does not illuminate as the ECM is compensating for reduced alternator output - maybe by draining the battery and or cutting back on vehicle electrical loads such as shutting off or cycling the radio amplifier or heated seats.
|
|
OFF CAMPING!62 views
|
|

TWOR 0753 views©theworldoffroad
|
|

TWOR 0550 views©theworldoffroad
|
|

TWOR 0347 views©theworldoffroad
|
|

TWOR 0141 views©theworldoffroad
|
|
TWOR 0640 views©theworldoffroad
|
|

TWOR 0445 views©theworldoffroad
|
|
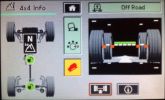
spare screen 4x4 info90 views
|
|
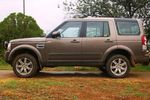
Off-road height + 50mm264 views
|
|
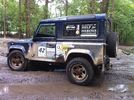
H4H 4x4 European Rally 2012 - Belguim Mud!7 viewsOff roading day during the first week of the rally 2012.
|
|
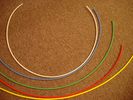
6mm Heat Shrink colours 362 viewsI decided to colour code the tubing so I used 6mm electrical heat shrink.
As there is no apparent colour coding re the 3, I tried to emulate the P38 coding; #1 LR red, #2 RR blue, #3 LF yellow, and #4 RF green. This was not doable as both left side air springs have green coloured tubing coming off the top of the front and rear air springs. I therefore arbitrarily chose the Left Rear to be red; Left Front green; Right Front yellow; Right Rear blue; and for the air compressor supply line, White coloured heat shrink. Since two new lines tie into each air spring line, I made the line between the air spring and the FASKIT, a single solid colour, and the line from the FASKIT to the valve block, White, plus the related appropriate solid colour.
|
|
Ready for the off at Tixover 269 views
|
|
Thread upload39 viewsImage uploaded in thread 102519
|
|
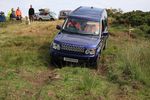
When it was new71 viewsLothian 4x4 Response off-road day at Bathgate July 2010
|
|
9 FBH Off58 views
|
|
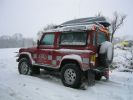
extreme medics rapid response 90201 viewsFast and awesome off road
|
|
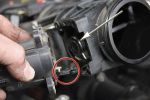
Removing the EGR Butterfly Valve Actuator1522 viewsRemove the 4 TORX screws to remove the actuator. The small black link (circled) connects the actuator drive arm with the butterfly valve spindle (arrowed). The spindle can now be very carefully levered out using a screwdriver inserted beneath the arrowed bit in the photo. A bit scary to do as it takes a fair bit of pressure before the spindle will free itself from the butterfly. Once it starts moving though, it gets easier to pull out.
|
|

Land Rover Aerial Fin images for both Glass and Metal Roof Disco3 / LR3850 viewsAs well as the two different fins, this pdf also shows the plastic blanking plate for glass roof vehicles where no fin is installed.
The glass roof fin is secured by two security screws from the top into a plastic frangible glue on gasket. The hope is that when struck, the fin will shear off and not crack the glass roof. Re the metal roof design, the fin is secured from underneath via two nuts.
The pdf also shows the various electrical bits related to the antennas. In the UK, the fin would house not only a cell phone antenna but the TV and satellite radio antenna electronics as well; in the States, the Sirius sat radio antenna and a G type cell phone antenna if the phone kit was installed would reside within the fin. The SAT NAV GPS antenna is located within the High Mount Brake Light plastic mounted to the upper rear hatch.
|
|
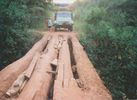
Africa 1991 Overland trip 17 viewsMe driving, one of many Doggy Bridges, Proper off-roading
|
|
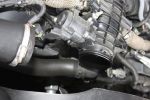
Air Box Removed1052 viewsView showing air box removed from front of EGR butterfly valve housing
|
|
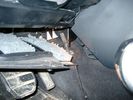
Air Conditioner Drain Hose on Drivers Side (LHD)2256 viewsThe corrugated rubber bit above and to the right of the gas pedal is the drain hose that goes down thru the carpet and floor sheet metal.
While it is bit hard to figure out from the jpg above, there is a rubber "strap" attached to the top of the corrugated hose that one uses to pull on to drag the hose up back around the black plastic heater "pan" drain. The same drain hose arrangement is on the other side as well.
One could I suppose run a plastic snap tie around the vertical pull strap if one was concerned about the hose slipping off again. See also the other jpg sketch which is from the Land Rover manual.
|
|
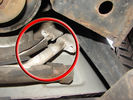
Air Conditioning Pipes (File 1)976 viewsIt\'s the smaller of the 2 pipes that is leaking. Both pipes are encased full length in the foam sleeve. You can see where the support bracket has \'crushed\' the sleeve. The bracket is what holed the small pipe. There is a bracket at each end and one in the middle. You need to remove the suspension reservoir to get to the centre bracket. Be aware that the bolts securing the brackets may be corroded and are likely to shear off on removal!
|
|
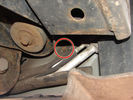
Air Conditioning Pipes186 viewsFront-to-rear aircon HP and LP pipes. The circled bit shows where the bolt securing the support bracket (removed)has sheared off
|
|
old front bracket cut off144 views
|
|

FOR SALE - ONE OFF Land Rover Disco 3 37 viewsOne of a kind Landrover Discovery TDV6 HSE LUX Model 5 door automatic 4x4 diesel evo blue. Upgrades: sidesteps, roof rails, privacy glass, front and rear heated seats/elec seats, landrover tv and headphones, 7 seater black leather, piano black dash/steering wheel, built in fridge, 6 disc changer, sat nav and bluetooth, harman kardon premium entertainment pack, by-xenon adaptive headlights , cruise control and front and rear park distance control, panoramic electric glass roof, 22inch alloy wheels, body kit
|
|

handrover app (android)27 viewslets offroad
|
|

Amp Drawing51 viewsThis is how many amps my vehicle was using when the ign in possision II. Lights where off, radio off,hvac off Crazy?
|
|

Arm Removal Tool - shows offset28 views
|
|
Stuck213 viewsFirst introduction to offroading:)
|
|

Frame Jacking Points showing where holes are located.1078 viewsThe four points marked with the arrows show where the holes in the underside of the frame are located such than one could insert a trolley jack pin type lifting adapter, (or as designed), the official LR scissors jack.
|
|

showing off80 views
|
|
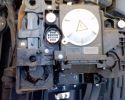
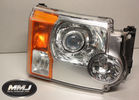
Back of Headlight119 views
|
|

198 views
|
|

106 views
|
|
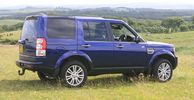
Admiring the view220 viewsLothain 4x4 Response off-road day Bathgate July 2010
|
|

Negotiating a gate73 viewsLothain 4x4 Response off-road day Bathgate July 2010
|
|
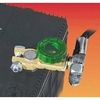
Battery Disconnect Wirthco 20308 Knob Top Post 889 viewsThis is a battery post style disconnect, usually for the negative terminal. There is a hole drilled in the round end off the battery so that flat terminal can be attached as well as the normal battery post terminal. I did not use this hookup arrangement, however I show it for information only.
|
|
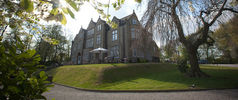
Woodlands Hotel5 viewsGreen Oval Garage would like to say thank you to the Woodlands Hotel in Leeds for allowing us the use of their beautiful grounds for all our future photos shoots.
Woodlands is one of the finest luxury hotels in Leeds. This boutique hotel is set in beautiful landscaped grounds on the outskirts of Leeds city centre, just 2 minutes drive from junction 27 of the M62 motorway, with 23 individually designed bedrooms and an award winning restaurant. Packed with character, this lovingly restored hotel is only three miles from the vibrant, cosmopolitan city of Leeds with superb nightlife and unrivalled shopping.
Woodlands also offers a stylish and contemporary functions venue for all kinds of social and business events. Our three stunning event spaces are suitable for everything from wedding ceremonies and receptions, to corporate meetings and events. The permanent marquee, attached to the hotel, can accommodate up to 150 for dining and 200 for evening parties and receptions, making it one of the most elegant settings for a wedding venue in the Leeds area.
For more information or to make a booking, please contact us on enquire@woodlandsleeds.com or 0113 2381 488
|
|

Thread upload3 viewsImage uploaded in thread 144213
|
|
Thread upload1 viewsImage uploaded in thread 198799
|
|

Turn light off69 views
|
|
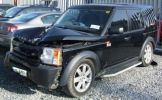
Bent Black Betty228 viewshard to believe that in this condition she\'s a write off, what got her was the cost of tricknology repairs, seatbelt pretensioners, airbags etc etc, & declining values, repair estimates €12500, value €13000. a no brainer really
Note TASTEFULL G4 sticker
|
|
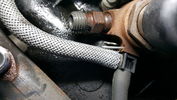
LEAK OFF PIPE7 views
|
|

Thread upload20 viewsImage uploaded in thread 113517
|
|
Thread upload6 viewsImage uploaded in new thread
|
|

Thread upload3 viewsImage uploaded in thread 201546
|
|

Thread upload6 viewsImage uploaded in new thread
|
|

206 views
|
|
102 views
|
|

D3 Diesel - Body Off44 views
|
|

Body_Off_Diesel.pdf65 views
|
|
offroad39 views
|
|
offroad53 views
|
|
offroad39 views
|
|

LED light OFF - looking out from boot67 views
|
|

LED light OFF - looking into boot73 views
|
|
Thread upload19 viewsImage uploaded in thread 106786
|
|

B&Q 15% Off This Weekend95 views
|
|

Black Deposits on Brake Light Switch Plunger2730 viewsThis jpg I got off another forum and is typical of what one will see when one opens up the removed brake light switch. The black powder is residue from arcing of one of the pair of contacts within.
Hopefully the newer switches with the FOMOCO logo moulded into the plastic are improved from the Land Rover logo marked early units, however I doubt it.
The Ford part number is SW-6572 and/or 7E5Z-13480-A as used on the 2006 to 2009 Ford Fusion's and Mercury Milan's; the Land Rover part number is XKB500110. Cost of switch could be about twenty five dollars. A previous LR part number for the switch was XKB500030, so hopefully the newer LR part number, XKB500110, reflects some improvement in reliability.
It is possible that the new switches are better as I installed a replacement 72,000 km, (45,000 miles) later, at 195,000 km (121,000 miles). When I took the removed switch apart to inspect, it was clean inside. There was no black dust - the switch looked like new, hence they must be improved now.
|
|
Breather line with factory cap cut off.2275 viewsIf you expand the jpg by clicking on it, in the bottom right corner if you look closely, one can see the black plastic factory vent tubing with the OEM cap cut off.
Note the tubing is cut at a 45 degree angle facing to the rear. Also shown in the top right is the cut off portion sitting on the coolant water hose and on the top left also sitting on the coolant hose, the new to be installed Gore manufactured replacement breather cap.
|
|
New Breather Cap installed.1674 viewsThis shows the new Gore brand angled breather cap installed. The cap points rearward to the firewall. Also shown is the cut off piece.
The new Gore breather cap is what one now sees on the LR4 and RR Sport.
|
|
Vertical Breather Hose before cutting off OEM cap.1740 viewsThis shows the plastic vertical breather tubing and OEM cap prior to being cut off. The tubing is located on the driver side at the front near the radiator. One cuts about 3/4" to 1" off from the top. The TSB says 20mm.
I tried blowing thru the cut off piece and was not very successful. The cap seemed plugged. I am beginning to think that there was a very good reason for Land Rovers's Technical Service Bulletin, (TSB).
|
|

Bumper Off132 viewsReady to cut holes
|
|
D3 Side Step Repairs152 viewsHow I repaired my damaged side step after a days offroading at Tong in November 2008
|
|
D3 Side Step Repairs164 viewsFinished job all I need to do now is wash it all off. I had already replaced the front door trim using new trim fixers and as you can see it was still dirty.
|
|
D3 Side Step Repairs145 viewsThe old rivet ends which I removed from the trim. I took one rubber end off the trim and let them all out by shaking it to save them rattling around inside the trim for years to come.
|
|

Can Bus10 views0s - Start of trace
5s - unlock 1
10s - ignition on (In-I-II)
30s - ignition off (II-I-Out)
Non accurate timings - +/- ~2s.
|
|
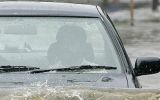
Off road fun in my Zafira165 views
|
|

The Disco3 Squad, Saturday Morning214 viewsA stitch together of two photos showing all sixteen vehicles read for the off out and about in the Peak District on 1st July
|
|
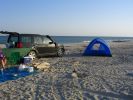
Campsite on Mazirah208 viewsA fabulous deserted sandy beach that runs for miles on the east coast of Mazirah Island, off the Omani mainland , views across the Arabian Gulf, and turtles and hatched terrapins.
|
|
LRs stick together129 viewsA date plantation alongside a wadi in the Western Hajar mountains of Oman. My mate\'s Disco 2 in company. Cracking drive on this day some 100km off-raod through wadis and mountain graded roads. Sheer, unadulterated pleasure.
|
|
Front wheel off 80% inflation172 views80% inflated and both front and rear wheels are off with suspension in extended mode
|
|
RHS view371 viewsSHows the Front Runner (SA) slimline windcheetah rack which is immensely strong. Takes my 110kg (oh gawd, I must get back on the diet and exercise regime) tramping over it when loading/unloading gear without a problem. Fittings are simply fixed or removed, and IMO very well designed and made. IPF 800 series driving and spots fitted to the front of the rack. IPF cam/reversing fitted each side and to rear of rack for negotiating rocky wadis at night. The G4 stickers were bought off E-bay as a set.
|
|
Long Ranger auxilairy fuel tank pump switch and tank gauge307 viewsFitted to the right of the air vent thumbwheel, the neat combination switch and gauge take sup no room at all. Switch locks on or off, but no pump running warning lamp! Contents of the tank are indicated by 5 LEDS, 4 green and 1 red for full, 3/4, 1/2, 1/4 and empty. Pump transfer rate of just 2 litres p/min is disappointing. I transfer on the move when main tank is at 1/4.
|
|
TracTronics loadspace power socket 379 viewsThe 2nd power socket fitted alongside the original in the loadspace runs off the auxiliary Optima Bluetop battery to run a fridge when engine is not running. No more starting worries!
|
|

32 views
|
|
Thread upload6 viewsImage uploaded in thread 156978
|
|
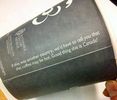
Canadian Coffee19 views
|
|

Thread upload1 viewsImage uploaded in thread 200758
|
|

Thread upload12 viewsImage uploaded in thread 70979
|
|
Thread upload14 viewsImage uploaded in thread 119150
|
|
Thread upload2 viewsImage uploaded in thread 159579
|
|
Thread upload2 viewsImage uploaded in thread 183933
|
|
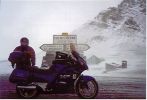
10,000ft up in the Alps!!! Honda Pan European Sept'01389 viewsThis was the first time I had ever fallen off a bike. Snow didn't help! Nothing hurt or damaged so we stopped to take a picture...
|
|
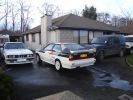
Toy box opened for cleaning465 viewsWork this out! 3x4x4, 1x4x2, 1x2x1, 1x2x0. (Hint: There is a motorbike hiding behind the BMW). SWMBOs car is off to visit the out-laws so I got to wash my toys.
|
|
compresor_shut_off_valve_219 views
|
|
Bracken Ridge September 2005414 viewsSteel protection bar falls off!
|
|
Access, Off-Road & Super Extended321 views
|
|
Calendar 2008 Entry563 viewsLeft to right: Access Height, Off Road Height & Super Extended Mode
|
|

Coming off the Wayfarer.172 views
|
|

Coming off the Wayfarer.168 views
|
|
Engine Cover Removed895 viewsView of the engine before blanking off the EGRs. The inset sort of shows one of the EGR valve/pipe flange securing bolts. The EGR valves are not easy to get at!
|
|

XS3600 official user manual166 views
|
|
![Filename=Cura Neve D3 12-2008 05 - 28 dic 2008 - 05 [1280x768].JPG
Filesize=146KB
Dimensions=1024x768
Date added=28.Dec 2008 Cura Neve D3 12-2008 05 - 28 dic 2008 - 05 [1280x768].JPG](albums/userpics/12685/thumb_Cura%20Neve%20D3%2012-2008%20%2005%20-%2028%20dic%202008%20-%2005%20%5B1280x768%5D.JPG)
Cura di Vetralla neve 12-2008-6109 viewsDiscoragno official sticker
|
|

Cylinder Offsets5 views
|
|

Oops. Bit of off-road damage?471 views
|
|
Offroading Sweden155 views
|
|
67 viewsHidden winch solution for D3 and D4.
Supplier: Taubenreuther in Germany.
Link: http://www.offroad24.de/shop/index.php?pli=1005055010&artnr=16-4950&view=detail
|
|
Thread upload24 viewsImage uploaded in thread 167901
|
|
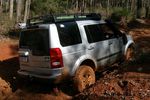
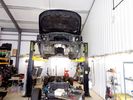
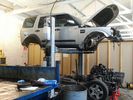
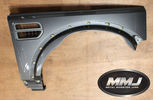
Stand off tubes214 viewsMy rock sliders and stand-off tubes in action
|
|
2 views
|
|
113 views
|
|
Thread upload5 viewsImage uploaded in new thread
|
|

D3 XS Wedding58 views
|
|
Thread upload3 viewsImage uploaded in new thread
|
|
Animation of suspension in different positions65 viewsAccess, Normal, Off-road, Extended Mode and (partial) Super-Extended Mode
|
|
Thread upload4 viewsImage uploaded in new thread
|
|
105 views
|
|
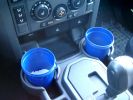
375 ml jam container369 viewsThese are the 375ml Danish Orchard brand jam containers. They fit fairly tightly into the original old style, (2005/6) Land Rover 3 factory cup holders. The extra height provided by the containers can be an advantage. I have a similar assortment of containers in some of the door panel located wine bottle holders to better hold containers of lesser valued products.
|
|
Thread upload6 viewsImage uploaded in thread 126243
|
|
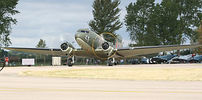
DC338 viewsDC3 taxi prior to takeoff
|
|
36 views
|
|
42 views
|
|
37 views
|
|

Off Road Day at Henly in Arden486 views
|
|

Video showing TR working to counter wheelspin570 viewsTaken at off road day in Henley In Adren Warwickshire, a good fun day out.
|
|
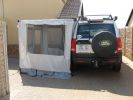
Awning243 viewsI have dual mounted awnings which can convert to tents if required. The outer side walls are an off the shelf purchase, but
the inner ( vehicle side )have to be made to spec.
|
|
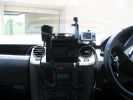
363 viewsHome made console, GPS in clip off mount, 29Mg radio,dual battery moniter,long rang tank gauge & elecric switches.A clip out removable console with no screws.PS also a camera mount.
|
|
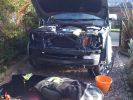
273 viewsgot the front all off ready t put the new bumper
|
|

256 viewspulled off the factory plastic and found 2 6inch cracks in the drivers side top in front of head light
|
|

Thread upload1 viewsImage uploaded in thread 206363
|
|
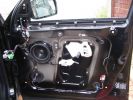
panel off 2569 views
|
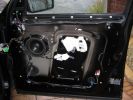
|
panel off495 views
|
|

Suggested Tyre Pressures75 viewsTyre pressures used onroad and offroad, using both OEM HT and Goodyear MTR tyres.
|
|
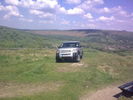
113 viewsbit of off raoding near castleton
|
|

OSR_Brake45 viewsFriction material loose and broken off.
|
|

Official Disco 4 Specs and Options69 views
|
|

98 viewsSORRY FOR THE LEVEL.....but
In the world there are only 2 OFF ROAD VEHICLE: the old italian Fiat Campagnola and new Land Rover Discovery3..
The 1st is dead, the 2nd is sold...Why the best have a problems?
|
|

Discovery_3_Body_Off31 viewsDiscovery_3_Body_Off
|
|

Thread upload19 viewsImage uploaded in thread 162369
|
|

Thread upload11 viewsImage uploaded in thread 139047
|
|

Thread upload11 viewsImage uploaded in thread 139047
|
|

Thread upload14 viewsImage uploaded in thread 139047
|
|
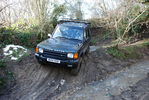
Thread upload10 viewsImage uploaded in thread 139047
|
|
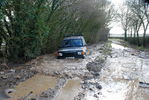
Thread upload9 viewsImage uploaded in new thread
|
|
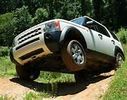
Thread upload10 viewsImage uploaded in new thread
|
|
Nick Offroading98 views
|
|
Thread upload3 viewsImage uploaded in new thread
|
|
Thread upload8 viewsImage uploaded in thread 156210
|
|
Thread upload31 viewsImage uploaded in thread 95339
|
|
162 viewsDe-cat pipe
|
|
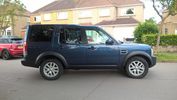
Thread upload78 viewsImage uploaded in thread 171927
|
|
Thread upload5 viewsImage uploaded in thread 121876
|
|

113 views
|
|

Who needs a snorkel?158 views
|
|
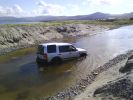
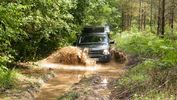
disco 3 wading80 viewsa nice river crossing, the ground was mostly sand and a bit of silt. just remember to turn off dsc. and its salt water. ekkkk
|
|

Snow in derby - it's official!!435 views
|
|
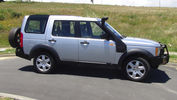
Disco 3 Set to Normal Drive Height132 viewsLlams off, Normal Selected
|
|
Disco3 with Llams set to +50mm and Offroad set148 viewsApprox 90mm lift
|
|
Off the ground143 viewsCar is on a desert sand sideslipe towards the camera - worst combination I could think of. Fully inflated, jack lifts the rear off by about 25mm, with suspension in extended mode.
|
|
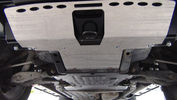
GOE Bash Plates117 viewsGreen Oval Experience Bash Plates. Front, Transmission and Compressor.
Might have to mod the front one a bit to let air into the trans cooler, it sits over the outside of the ARB bar which has vents for the cooler. If I cut slots in the Allow Plate to match those might do the trick.
I added a rear bolt to the Compressor Plate as it looked like it could get hooked on something and tear off. Two bolts onto the slider and two up onto the chassis now.
|
|

Lead Car Entering the Finish115 views7 May 2007 - My D3 on duty as lead car in shinfield 10K road race. what a nightmare driving at low speed in the rain. Clock was mounted on standard crossbars. connection to additional batteries in boot cable thru side window. There is a small offroad section (actually an un-made road) Oaklands Road, Shinfield, Reading (suggest anyone test driving in the Reading area take this road)
|
|
13th Sept LRO Show off road course38 views
|
|

565 viewsMy father's last wish was to ride in my car one last time, and as such I believe him to be the first person to be carried to his funeral in a Disco 3.
My father's coffin was 6'5" and he was safely carried in the back of my Disco, and for once didn't complain about my driving. Air suspension helped enormously, being set to off-road height, to ease getting him in and out safely.
|
|
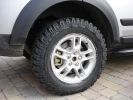
Cooper STT at off-road height505 views
|
|

Off Road, New York style311 views
|
|
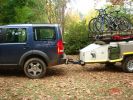
Towing conqueror trailer with standard towbar. D3 at offroad height (looks different now with new tent & wheels)336 views
|
|

Coffeecup makes Mrs.10 smile369 views
|
|
DLR's OFF53 views
|
|
DLR take off66 views
|
|

469 viewsDad as we will remember him. Off to all parts of the world, video camera always at hand.
|
|
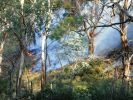
Local burning off - making a fire-break49 views
|
|
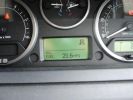
Ahem1061 viewsDid manage 42.1 mpg on the way back to dropping it off, down a hill!
|
|
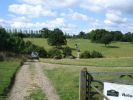
Discos off on a jolly290 views
|
|

Gripper, wags his tail so much he\'s nearly wagged it off!!160 views
|
|
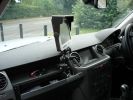
Screen profile434 viewsNote that the passnger airbag is switched off when the screen is fitted - no problems to date with solar gain on the rear of the screen
|
|
blanked off lampholder265 viewssorry about the quality!
|
|
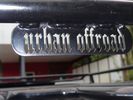
Exodus Roof Rack17 viewsMade by Derek Chase of Urban Offroad in the USA - nice and strong (and quite light for steel) rack.
|
|

Beige sets the black off .... 184 views
|
|
Heated Washer Jets Offside24 views
|
|

Exellent Fiskars470 viewshard core offroading
|
|
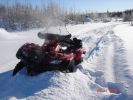
Stucked550 viewshard core offroading
|
|

IBS contoller showing battery condition (engine off)214 views
|
|
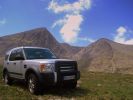
Disco3 at Carantouhill CALENDAR ENTRY 2009441 viewsCarantouhill, Irelands highest peak. a group of us set off in my disco 3 and friends defender 90. it was a nice trek to the base, with a small river crossing and some big rocks to navigate around. we camped out and climbed the mountain the next day. summer of 2008.
|
|
My other off roader72 views
|
|

86 viewsLHS rear wheel well, with inner guard off. The rear AC lines (assuming you have an HSE) don\'t run in same way as the RHS, so on all cars, you can fold the red line inboard, with the bend roughly at the blue line, so that the very rare contact with larger tyres is eliminated.
|
|
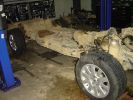
Chassis172 viewsChassis with body lifted off, and engine out
|
|

Body Off14 views
|
|
Let's Off Road211 views
|
|
D2 TD5 off road59 views
|
|
266 viewsCalendar 2010
Off-road around Mont Cenis, France
|
|
191 viewsFirst off was the TJ Jeep. Made it to halfway along pit 2
|
|
237 viewsLining up the D3 for our first run. Mud/ruts, DSC off, HDC off, Jimi Hendrix on the stereo ... yup, ready to go!
|
|
436 views"off-road" height - most wheel flex at this setting
|
|
376 views"off-road" height - measuring the RTI
|
|
new alloy sliders267 viewsNew 6mm sliders + stand-off tubes in 6mm alloy
|
|
new alloy sliders 1259 viewsNew 6mm sliders + stand-off tubes in 6mm alloy
|
|
The Road I came up.330 viewsThis is the road which caused my problem, drove up it, not realising there was a T junction which I had to turn right, turned, but could not get myself to get off the brakes and accellarate, so went straight on down a ditch!
|
|

offside263 views
|
|
rear offside195 views
|
|
After and off.267 viewsClean underpants were also required
|
|
Top view Left side of water tank127 viewsThis view shows the protective cap off, displaying tank vent point.
|
|
View of both hose connections to power steering system149 viewsBoth connections are shown. My friendly Qantas hydraulic hose expert cut off the elbow and modified it so I can re-install it to the PS rack before warranty work (and certainly before the vehicle is lifted off the body!!).
|
|
offroad38 views
|
|
offroad41 views
|
|
Security cover off showing lock.21 views
|
|
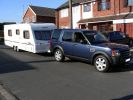
ready for the off152 views
|
|

D3 loaded up for a wheel change269 viewsD3 loaded up with 17" wheels and 3-tonne jack for a wheel change when going off-road.
|
|
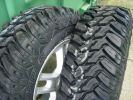
Cooper Discoverer STT tyre on 17" rim297 viewsNew Cooper Discoverer STT 246/70 R17 tyres. 80% off road, 20% on road.
|
|
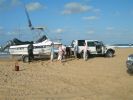
D3 doing great job pulling boat (1.5t) off beach237 views
|
|
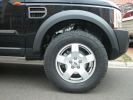
at raised off-road height240 views
|
|
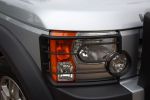
Front lamp guards, look great but offer little protection388 views
|
|
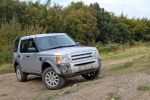
411 viewsCALENDAR ENTRY
Our D3 resting on the hill after a day of off-road action in Tong.
|
|
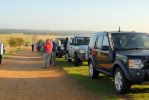
Before the off69 views
|
|
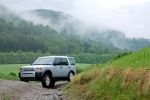
416 viewsCALENDAR ENTRY
Off-road obstacle maneuvering under misty hills
|
|
First Discovey 3 off the line (US Spec LR3)420 views
|
|

First Discovey 3 off the line (US Spec LR3)380 views
|
|
First Discovey 3 off the line (US Spec LR3)446 views
|
|
First Discovey 3 off the line (US Spec LR3)620 views
|
|
Off Roading in Wales503 viewsTrip into wales borders - church stretton green lane
|
|
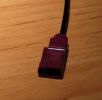
Photo off coax connector on roof top ariel, can you identify it? The name and type is needed.273 views
|
|
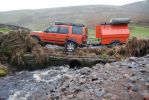
Flood damaged bridge G4 with offroad trailer171 viewsTaken on 2008 GToN www.gton.co.uk
|
|
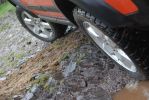
Rock crawl124 viewsG4 on 2008 GToN www.gton.co.uk
|
|
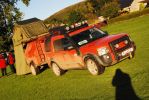
G4 sankey and howling moon tent139 viewsG4 taken on 2008 GToN www.gton.co.uk
|
|
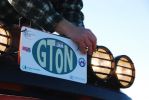
2008 GToN vehicle plaque107 viewsFrom 2008 GToN www.gton.co.uk
|
|
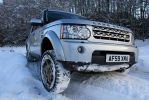
160 viewsCar balanced at this point on front nearside and rear offside wheels
|
|
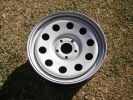
Dynamic 17" steel wheel for V6/TDV6 Disco3s78 views17"x7"; offset +30mm; weight 15.3kg.
|
|
Thread upload4 viewsImage uploaded in new thread
|
|

Thread upload24 viewsImage uploaded in thread 159240
|
|

South African Disco 3 2007 model (VIN 7A) EGR valve Right hand side.46 viewsIt is still an EU3 spec vehicle, so the EGRs can be blanked off successfully.
|
|
Vibration-proof Engel Power takeoff fitted117 views
|
|
Vibration-proof Engel Power takeoff fitted131 views
|
|

Engine off8 viewsEngine off
|
|

Thread upload8 viewsImage uploaded in thread 128758
|
|
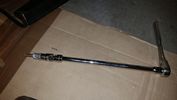
Thread upload17 viewsThis is how you reach that TOP BOLT holding your air compressor bracket on. 10" extension, swivel, and 10mm socket taped so it won't fall off while your feeding it through the air compressor maze.
|
|
faultmate EAS off side up 97 views
|
|
Just arrived off the transporter172 views
|
|
tow bar removal32 views
|
|

Fluid, Filter/Pan Combo removal and install5949 viewsThese are the LR instructions re removal and install of the plastic pan/filter combo for the ZF 6HP26X transmission on the 4.4L petrol V8 LR3.
The instructions tend to ignore the reason you have to lift the right hand side of the engine about 40 mm. This is because of a frame cross member that interferes with dropping down of the plastic pan. The real problem is a vertical "oil filter spout" that rises out of the filter/pan combo up into the transmission. The spout is the suction pipe for filtered transmission oil back up into the tranny.
On the metal pan versions, the filter is separate from the pan, hence the filter remains with the tranny when the metal pan is dropped. The filter is then removed or installed independent of the metal pan, hence with the metal pan, there is no need to lift the engine.
If one is removing the plastic pan so as to install the metal pan, then some do not lift the engine but just drop the plastic pan enough to gain access to saw off the vertical plastic spout - it is a one time procedure.
Be aware however that the metal pan uses a flat gasket and the plastic pan uses a O ring like perimeter gasket that sits in a half round groove in the tranny casing. Also the metal pan uses 21 shorter torx M6x22.5 metric cap screws for the perimeter bolts. The plastic pan uses longer M6x28.5 torx metric cap screws.
|
|

Wiring Diagram Fog Lamps76 viewsR130 is the (R5 relay under the hood) The wire is blue grey that is hot when the high beams are on and opens the relay contact that turns off power to the fog lamps. North America Only
|
|
284 views
|
|
Jänschwalde offroad0 views
|
|

Front Mudflaps off 110 (2)214 views
|
|
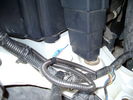
Front coupler pad to right front under air filter housing 158 viewsCoupler Pad is attached to the flat metal surface just behind the rectangular drain off of the air filter housing. The last 3 inches (75mm) of the 1/4" (5mm) black flex wiring loom was then threaded over the last bit of wiring. One of the other jpg's is less washed out and shows the coupler pad a bit better.
|
|
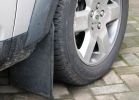
Front Mudflaps off 110223 views
|
|

383 views
|
|

Official instructions on how to remove the bumper906 viewsWhen removing the front bumper - you start with the front grill, then the headlamps, then the wheelarch trims, then the bumper...
|
|

Official instructions on how to remove the wheel arch trims620 viewsWhen removing the front bumper - you start with the front grill, then the headlamps, then the wheelarch trims...
|
|

Front_clearance_offroad_mode753 views275/65/18 Cooper Discoverer STT mud tires - minimum clearance between front wheel and crappy plastic wheel arch. Although it lokos tight, there is actually more room between the tire and arch than the pictures shows.
|
|

Front control arm clearance737 views275/65/18 Cooper Discoverer STT mud tires - clearance between tire and control arm
|
|
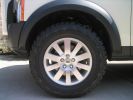
Front_offroad_mode564 views275/65/18 Cooper Discoverer STT mud tires - front in offroad mode
|
|

Front_offroad_mode_turned748 views275/65/18 Cooper Discoverer STT mud tires - tread view while turned
|
|
Thread upload5 viewsImage uploaded in new thread
|
|
Thread upload7 viewsImage uploaded in new thread
|
|

log off158 views
|
|
Thread upload7 viewsImage uploaded in thread 124147
|
|
Thread upload5 viewsImage uploaded in thread 155907
|
|

Thread upload1 viewsImage uploaded in thread 200758
|
|

197 viewsmy lads painting any offers
|
|
Thread upload11 viewsImage uploaded in thread 159787
|
|
Thread upload12 viewsImage uploaded in thread 159787
|
|
Thread upload12 viewsImage uploaded in thread 159787
|
|

15 views
|
|
Highland 4WD Club Run 2009.75 viewsWhen we go offroad, we GO offroad!
|
|

Highland 4WD Club Run 2009. 18 miles on offroad tracks continuously. (special permission granted from landowners)65 views
|
|
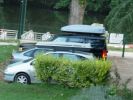
Les Falaises Cahors France151 viewsOur first hotel stop. View of car and coffin from our room.
|
|

Hose pinch off pliers20 views
|
|

Thread upload0 viewsImage uploaded in thread 194599
|
|
Hats off to the people who served up here in WWII ...155 views
|
|
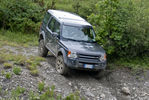
Discovery 3 offroad43 viewsDiscovery 3 offroad
|
|
Thread upload1 viewsImage uploaded in thread 156978
|
|
Black Chrome on Santorini black - os rear38 viewsSet slightly back off centre
|
|

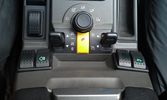
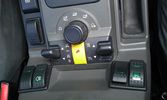
The on/off switch for the middle outlet8 viewsThe left switch without the label is the one that now controls the middle 12V outlet on the second row. It used to be the power on/off of the car-computer.
|
|
The on/off switch for the compressor11 viewsThe rocker switch for the compressor is the outer right one with the label of the .. euh, compressor :D
|
|
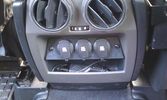
12V outlets for the 2nd row13 viewsI used a part of the old front (which was broke) to cut out a 'mount' for three 12V outlets for the second row.
The outer outlets are switched on whenever the ignition is on as I used the connector that originally was out there.
The middle outlet is connected to the auxiliary battery and is switched on/off through a rocker switch in the central console. (other picture)
This middle one is going to be used for our small fridge that usually resides just there when we're on holiday.
|
|
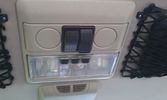
The on/off switches of the multimedia headrests14 viewsThese switches were installed to power on/off the previously installed gamecube and the screens attached to it.
When I removed the gamecube and lately the screens as well, I was clever enough (surprised as well) to leave the switches and all the wiring that I had running around.
They came in handy when I installed the multimedia headrests and are now adding an extra power on/off control of the screens.
|
|
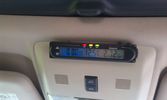
Battery check display14 viewsI mounted a digital battery display in order to see the voltage on the auxiliary battery.
There's also a thermometer which gives the inner and outer (via a side switch) values.
The display is switched on/off via another rocker switch.
|
|
The on/off switch for the battery display20 viewsThe right inner switch 'powers' the auxiliary battery display. I might use that one to power on/off the driving camera (which will be arriving soon) as well. Although I'm not sure yet.
|
|
34 viewsWhen adding two single DIN supports together, you get quite a gap at the front.
This gap was way too much in my case, as it turned out that both supports started to bend when putting them both in the facia. Not that good, so I decided to cut off the upper part of the lower DIN support.
|
|

prague Mcdonalds coffee18 views
|
|

Body off!!47 views
|
|
Off road yorkshire30 views
|
|
First - swap the private plate off75 views
|
|
All bits off - low riding after Formula 1 wheel change102 views
|
|
Grass Gravel Snow on the TR dial, HDC on and DSC off.433 views
|
|

I\'ve been offroad117 viewsSee the raised suspension and close proximity of some real mud.
Didnt put a foot wrong all trip!
|
|
Off road Yorkshire 229 views
|
|

Dash off roading24 views
|
|
Off road Yorkshire 331 views
|
|

Land Rover Experience, Drive Your Own Day11 viewsDrive your own vehicle off road in thousands of acres of Peckforton Estate.
|
|
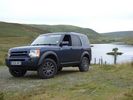
Off Forge Road12 views
|
|
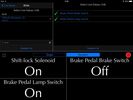
D3 Ian Brake On Off10 views
|
|
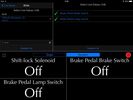
D3 Ian Brake Off9 views
|
|

D4 LP Fuel Off13 views
|
|
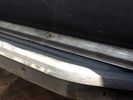
trim that fell off23 views
|
|
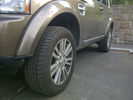
View in off road height248 views
|
|
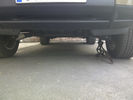
front view in off road height357 views
|
|
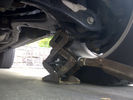
off road height, jack in position, no pressure, just touching547 views
|
|
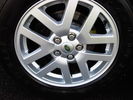
Wheels79 viewsAll 4 wheels in good order - would say "Perfect" but one of the 4 has an absolute minor scratch to it - which I had not noticed until I inspected them prior to sale. That minor not previously noted. Not bothered to take full size spare off to look at it, but as far as I am aware also in perfect condition.
|
|
All four wheels off223 viewsHopefully the closest I\'ll come to the whole body off!
Note: Those aren\'t my new tyres.
|
|

961 viewsRipping off the cheap carpet reveales the galvanised steel box with sharp edges that has been fixed in with 4 ton of silicon.
|
|
1691 viewsAfter cutting the hole for the hawser i offered it up to check the fitting.
|
|
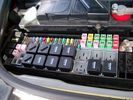
Picture of the engine compartment fuse panel5752 viewsEngine compartment fuse panel located near the battery. This is where F3E, (5 amp), F26E, (20 amp), Fuseable link 10E, (60 amp) and Relay 7E, the now upgraded 70 amp air compressor motor relay, part number YWB500220, (E is for Engine compartment fuse box), are all located. Fuse F35P, (5 amp), is inside the Passenger compartment behind the lower glove box door.
To keep the suspension from going down to the stops when driving, (or parked), it appears that it is only really necessary to remove F26E to depower the exhaust valve and generally keep all the valve block solenoid valves in a closed position trapping whatever air is within the air springs. F3E gets its power thru F26E, so when F26E is removed, the F3E circuit is automatically de-powered. F35P is more interesting in that battery power goes thru the ignition switch and F35P and then into the air suspension control unit. Apparently however, if F26E is removed, removing the F35P is not needed even when the engine is running.
With all fuses still in, if you have a problem, in practice, ideally, the compressor still works and will raise the 3 to an appropriate height. If so, one can then shut the engine off and allow the computers to go to sleep and then you remove the fuse(s). In actual practice, it seems that one need only pull the F26E fuse and can do so with the engine running. All the same, one might consider that the 3 is first a mobile computer, and secondly a 4x4. Computers prefer to go to sleep before the plug is pulled on them, however given that F26E circuit is always alive, then the computer never sleeps. With the fuse(s) pulled, and if you are still up, you can now be a 4x4 instead of a low rider. The whole purpose of the fuse pulling exercise is to depower the one and only system exhaust valve that is physically located within the compressor unit, (to keep it from opening), and secondarily to keep closed the four air spring solenoids within the block valves. This also shuts the air compressor down and stops the air compressor from making air even if the compressor is still good. That is why you initially need the fuse(s) in to allow the compressor to make air if it can.
|
|

Irish off road181 views
|
|
|
|