| Search results - "LR" |
73 views
|
|

50 views
|
|

my lr3106 views
|
|

gumball 3000 Meetup9 views
|
|

0000 LR Bluetooth dealer Kit install instructions1610 viewsThis 17 page pdf is mostly a series of pictures showing how to install the original Land Rover dealer installed Bluetooth kit for circa 2005 / 2006 three's. Also included are three wiring diagrams sheets related to the pairing code 0000 Bluetooth install.
This pdf is useful if you are now removing the 0000 kit to install the optical 2121 MOST D4 module, an easier install than the 0000 kit ever was.
|
|
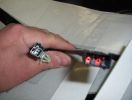
heated seat (base) wiring411 viewsThe Small connector takes the plug from the seat back pad, the larger connector (with red) is fitted into the multiplug casing uder the seat - the male side of this is already pre-wired.
|
|

Thread upload5 viewsImage uploaded in new thread
|
|
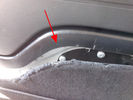
Rimozione pannello dalla sponda - Tailgate panel removing45 viewsPer togliere il pannello moquettato dalla sponda ho fatto leva con un cacciavite abbastanza grosso nel punto indicato, è stato veloce e non ho rovinato niente.
To remove the carpeted panel away from the tailgate I used a big enought screwdriver at the point indicated, it was fast and I have not ruined anything.
|
|
394 views
|
|

Lining Up Before the Event375 views10 trucks in all - 2 Heavily modded D2s, modded 03 D2, 90' RRC, lifted P38 on ATs, my LR3, modded D1, an older CJ, a Rubi that joined, and a Series III!
|
|
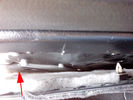
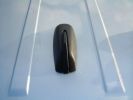
Riparazione attuatore sponda posteriore - Tailgate actuator repair38 viewsL'attuatore si trova dietro la pellicola nera incollata alla carrozzeria che va strappata.
The actuator is located behind the black film glued to the body must be torn.
|
|
384 views
|
|
03horn43 views
|
|

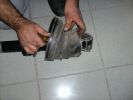
Morsetto - Clamp34 viewsPer la riparazione ho utilizzato un morsetto per fili elettrici.
To repair I used a clamp for electrical wires.
|
|
LRX Allots60 views
|
|

LRX Boot55 views
|
|
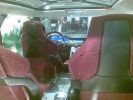
LRX Cabin55 views
|
|

LRX Dashboard60 views
|
|
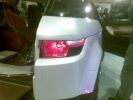
LRX Rear Light Cluster49 views
|
|
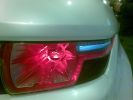
LRX Rear Light Close Up52 views
|
|
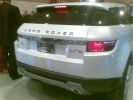
LRX Rear End59 views
|
|
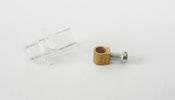
Morsetto - Clamp33 viewsHo smontato il morsetto, il diametro del foro è esattamente quello di quello che rimane del particolare che si è rotto.
I removed the clamp, the hole diameter it's the same of the detail that is broken.
|
|

1979 views
|
|

2899 views
|
|

2427 views
|
|

I love the wet elements..., )528 views
|
|

2334 views
|
|

2843 views
|
|

2550 views
|
|

2156 views
|
|

On the test track496 views
|
|

2304 views
|
|

Vroom on snow535 views
|
|

2465 views
|
|

idea140 views
|
|

2320 views
|
|

2413 views
|
|

2530 views
|
|

2407 views
|
|

2593 views
|
|
2640 views
|
|

2673 views
|
|

2227 views
|
|

Picture by \'X\' for calendar222 views
|
|

2356 views
|
|

2209 views
|
|

2080 views
|
|

2256 views
|
|

2359 views
|
|

1914 views
|
|
5156 views
|
|

4891 views
|
|

5211 views
|
|
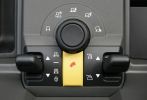
Terrain Response Switchgear2379 views
|
|
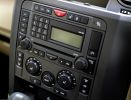
5657 views
|
|
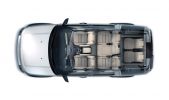
4519 views
|
|
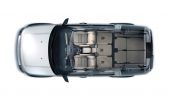
4480 views
|
|

Morsetto - Clamp42 viewsIl morsetto è della misura esatta della sede dell'attuatore.
The clamp is the same size of the actuator slot.
|
|

Morsetto - Clamp36 views
|
|
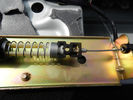
Cavo nel morsetto - Cable in clamp48 viewsHo inserito il terminale rotto nel morsetto: bisogna sforzarlo molto e ho praticato una cava attraverso il foro della vite con una punta in modo che il terminale non possa scivolare.
I entered the terminal broke into the clamp: you have to force it a lot, and I practiced a quarry through the screw hole with a bit so that the terminal can not slip.
|
|
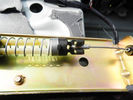
Lavoro finito - Finished work39 viewsEcco come appare a lavoro finito
Here is how it looks, finished the job
|
|
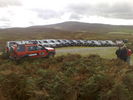
LRE Bala77 views
|
|

09 D3 headrest DVD78 views
|
|
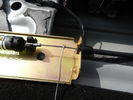
In caso di emergenza - For emergency48 viewsNel caso dovesse succedere nuovamente ho predisposto un cavetto da tirare.
If it were to happen again I have set up a cable to pull.
|
|
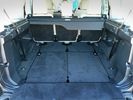
Thread upload40 viewsImage uploaded in thread 104454
|
|
Thread upload9 viewsImage uploaded in new thread
|
|

Before fitting the OE display97 views
|
|
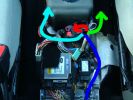
1 Ctr csle ICE loom routing56 views
|
|

1 Dash Loom61 views
|
|
1 FBH Loom71 views
|
|

1 ICE Loom - Behind boot trim drivers side. TMC and Nokia modules93 views
|
|
1 Listening47 views
|
|
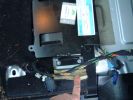
1 Navigation Bracket - bolts76 views
|
|
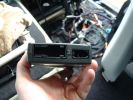
1 Nokia - Connections and loom appearing79 views
|
|
1 Dash SCREEN51 views
|
|
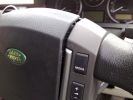
1 Removing air bag46 views
|
|

1 TMC Amplifier51 views
|
|
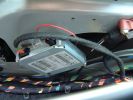
1 TMC - mounting TMC Module93 views
|
|

7 views
|
|

LR In Portugal308 views
|
|
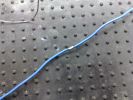
10 Dash Loom42 views
|
|
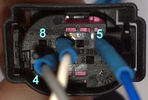
10 FBH Loom78 views
|
|
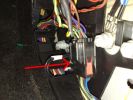
10 ICE Loom - Drivers kick ICE Loom / Dash Loom connector87 views
|
|

167 views
|
|
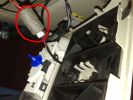
10 Telephone / Voice Mic Plugs70 views
|
|
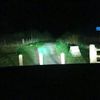
all lights switched on 80 viewsthis is the Bixenon with LR HID converted spotlights and the rigid SR40 lightbar switched on
|
|

Dettaglio LR329 views
|
|

Attuatore rimontato - Actuator reassembled40 viewsAttuatore rimontato col cavo di emergenza.
Actuator riassemble with emergency cable.
|
|
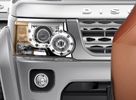
Thread upload13 viewsImage uploaded in thread 149931
|
|

Thread upload11 viewsImage uploaded in thread 149931
|
|
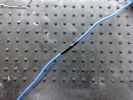
11 Dash Loom40 views
|
|
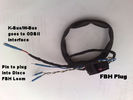
11 FBH Loom77 views
|
|
132 views
|
|
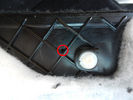
Foro pannello - Panel hole40 viewsHo forato il pannello moquettato per far passare il cavo di emergenza.
I drilled the carpeted panel to drive the emergency cable.
|
|
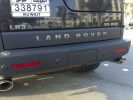
Larini Exhaust & LR letters378 views
|
|

Muddy LR3 at US SUV of the Year Awards3659 views
|
|
12 Dash Loom47 views
|
|
12 FBH Loom80 views
|
|

158 views
|
|

Finito - At the end47 viewsEcco come appare la sponda a lavoro finito.
Here is how is the job ended.
|
|

49 views
|
|
13 Dash Loom44 views
|
|

159 views
|
|

super extended mode166 views
|
|
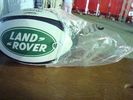
Rugby ball prize16 viewsWon this at the Dubai 7's in 2010. The LR stand had a competition. You had to push a LR4 over a something like an uphill speedbump. A modified bullbar resembling a scrumming machine allowed 3 people to touch, engage and push the beast over the bump. Me and my 2 kids - with a little bit of help, managed it and for our trouble got this ball !!!
|
|
14 Dash Loom40 views
|
|

199 views
|
|
15 Dash Loom44 views
|
|
166 views
|
|
2008 Calendar Entry - DiscoStu at Boughrood with LROI magazine657 views2008 Calendar Entry - DiscoStu in the mud at Boughrood, September 2007 with LROI magazine
|
|
16 Dash Loom43 views
|
|

147 views
|
|

Thread upload8 viewsImage uploaded in thread 135796
|
|
17 Dash Loom44 views
|
|
18 Dash Loom47 views
|
|
19 Dash Loom42 views
|
|

Thread upload12 viewsImage uploaded in thread 181321
|
|
2 4x444 views
|
|
2 Airbag Connectors58 views
|
|
RH Side Ctr Csle46 views
|
|
2 Dash Loom44 views
|
|
2 Dash SCREEN65 views
|
|
2 FBH Loom77 views
|
|

2 GPS Blank Removal62 views
|
|
2 ICE Loom - Rear Passenger door65 views
|
|
2 Navigation Bracket - in place71 views
|
|
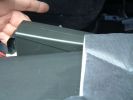
2 Nokia - Location of Nokia Module on trim71 views
|
|
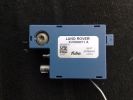
2 TMC Facra Blue47 views
|
|
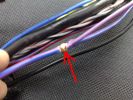
20 Dash Loom45 views
|
|
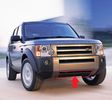
Thread upload9 viewsImage uploaded in new thread
|
|
Thread upload12 viewsImage uploaded in thread 79090
|
|

Thread upload15 viewsImage uploaded in new thread
|
|
Thread upload15 viewsImage uploaded in thread 79090
|
|
LR3 V8 SE785 views
|
|
Thread upload2 viewsImage uploaded in thread 5
|
|
Thread upload1 viewsImage uploaded in thread 5
|
|
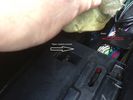
Thread upload8 viewsImage uploaded in thread 137258
|
|

Thread upload7 viewsImage uploaded in thread 137258
|
|
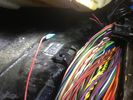
Thread upload8 viewsImage uploaded in thread 137258
|
|
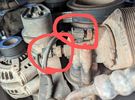
Thread upload2 viewsImage uploaded in new thread
|
|

71 views
|
|

74 views
|
|

89 views
|
|

114 views
|
|

97 views
|
|
116 views
|
|
119 views
|
|
98 views
|
|

119 views
|
|
92 views
|
|
91 views
|
|

94 views
|
|
88 views
|
|
83 views
|
|
99 views
|
|

96 views
|
|

Thread upload6 viewsImage uploaded in thread 180038
|
|

771 views
|
|

1144 views
|
|
![Filename=2010_Discovery4_002_LR[1].jpg
Filesize=65KB
Dimensions=600x292
Date added=12.Apr 2009 2010_Discovery4_002_LR[1].jpg](albums/userpics/14549/thumb_2010_Discovery4_002_LR%5B1%5D.jpg)
46 views
|
|

691 views
|
|

912 views
|
|

665 views
|
|

761 views
|
|

690 views
|
|

833 views
|
|

459 views
|
|

466 views
|
|

469 views
|
|

462 views
|
|

475 views
|
|

412 views
|
|

677 views
|
|

449 views
|
|

1807 views
|
|
1568 views
|
|

1194 views
|
|

1246 views
|
|

674 views
|
|

1223 views
|
|
754 views
|
|

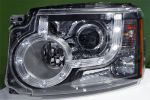
D4 headlamp61 views
|
|
1200 views
|
|

Thread upload3 viewsImage uploaded in thread 154757
|
|

1063 views
|
|

712 views
|
|

1157 views
|
|

120 views
|
|

668 views
|
|

414 views
|
|

450 views
|
|
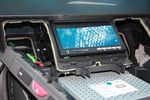
108 viewsTest fitting the screen. The bottom edge of the rear cover of the screen has been already dremeled off in this pic, notable as the circuit board can be seen.
|
|
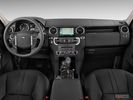
Thread upload26 viewsImage uploaded in thread 155077
|
|

LR009705 Filter26 views
|
|
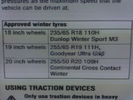
h rating tyres 19/20"21 viewsfound it at last. knew I had seen H rated in LR manual for 19/20"
|
|

Thread upload2 viewsImage uploaded in thread 71927
|
|

Thread upload4 viewsImage uploaded in thread 71927
|
|
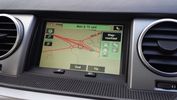
Proof of updated map data23 viewsPostal code CH4 0FB
Showing roundabouts where on current LR DVD are none.
|
|
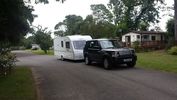
Thread upload193 viewsLR Disco 3 SE Buckingham Blue. along with our Coachman 535/4 caravan.
|
|

Thread upload129 viewsOriginal LR rubber hose just before removing (turbo end).
|
|
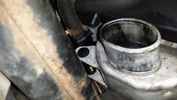
Thread upload124 viewsBottom end Passenger side after original LR hose removed
|
|

Thread upload12 viewsImage uploaded in new thread
|
|

Thread upload18 viewsImage uploaded in thread 152884
|
|

Thread upload18 viewsImage uploaded in thread 152884
|
|

Thread upload22 viewsImage uploaded in thread 152884
|
|

Thread upload14 viewsImage uploaded in thread 128561
|
|
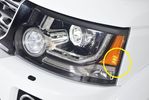
Thread upload30 viewsImage uploaded in thread 160792
|
|

Rear WIndow mechanisms brand new LR0138709 views
|
|
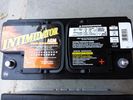
Deka 9A49 AGM Intimidator327 viewsThe Deka 9A49 AGM Intimidator makes an excellent primary battery alternative to the factory or Interstate. Made in US of premium quality. This is an excellent match with the Traxide system w/another Deka or Yellow Top optima.
This will behave properly in your D3/4 LR3 with slightly less wear and tear on your alternator.
|
|
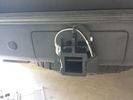
Rhino Hitch429 viewsCover fitted over the 75A Anderson plug with Rhino Hitch fitted which is a Class IV hitch. https://www.facebook.com/DifferentialPartsUS
Fits the Disco 3, Disco 4 and Range Rover Sport
|
|
Thread upload31 viewsImage uploaded in thread 160792
|
|

Thread upload28 viewsImage uploaded in thread 160466
|
|

Thread upload3 viewsImage uploaded in thread 156202
|
|

Thread upload4 viewsImage uploaded in thread 156202
|
|

2017-07 JLRP00100 Service indicator message and oil dilution9 views
|
|

Thread upload14 viewsImage uploaded in thread 128561
|
|

Thread upload5 viewsImage uploaded in new thread
|
|

Thread upload4 viewsImage uploaded in new thread
|
|

D3 Ambulance LR Experience Tour Malaysia 200841 views
|
|
21 Dash Loom44 views
|
|
22 Dash Loom43 views
|
|

Wating for the proffessionals!45 views
|
|
23 Dash Loom41 views
|
|
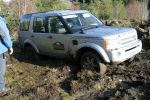
The proffessionals at work or is it play!56 views
|
|

24 Dash Loom42 views
|
|
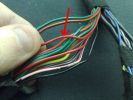
25 Dash Loom45 views
|
|
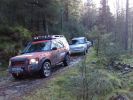
Calendar 2010 - Expidition with LRE Snowdonia417 views
|
|
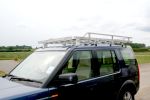
113 views
|
|
26 Dash Loom47 views
|
|
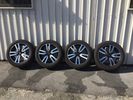
Ruote LR023736 con Continental 265/50R2025 views
|
|

Ruote LR023736 con Continental 265/50R2034 views
|
|

27 Dash Loom46 views
|
|

28 Dash Loom50 views
|
|
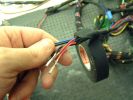
29 Dash Loom51 views
|
|

13 views
|
|
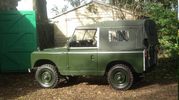
Thread upload3 viewsImage uploaded in thread 185846
|
|

2 90's off at Lochearnhead208 viewsGuess this was why we turned round.
Photo pinched from SLROC website!
|
|

Thread upload9 viewsImage uploaded in thread 189350
|
|
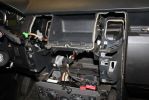
02279 viewsDash center console off and factory head unit out. LR clips suck.
|
|
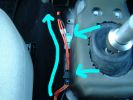
LH Side Ctr Csle52 views
|
|
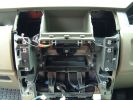
3 Radio etc removed ready to remove dash pocket86 views
|
|

3 Dash loom47 views
|
|
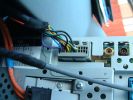
3 Dash Loom Rear of Display56 views
|
|
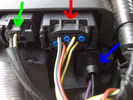
3 FBH Loom65 views
|
|

3 GPS/Telephone Pre drilled Holes61 views
|
|
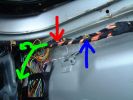
3 ICE Loom - Passenger duct62 views
|
|
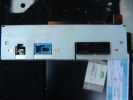
3 Navigation Bracket - nav connectors83 views
|
|
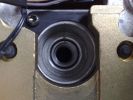
3 Splines and alignment mark44 views
|
|
3 TMC Facra Route53 views
|
|
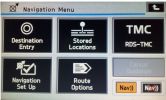
3 TMC53 views
|
|
32 Dash Loom39 views
|
|
33 Dash Loom39 views
|
|
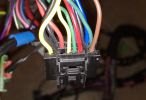
34 Dash Loom35 views
|
|
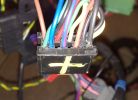
35 Dash Loom42 views
|
|

7 views
|
|

LR Dog Guard Fitting Instructions80 views
|
|

JLR 3.0 24V DOCH DIESEL THIGHTENING TORQUES29 views
|
|
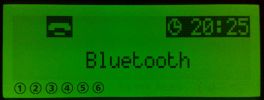
4 Bluetooth53 views
|
|
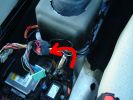
4 phone cadle loom routing51 views
|
|
4 Where to cut soft dash55 views
|
|
4 cutout45 views
|
|

4 Dash Loom40 views
|
|
4 Dash SCREEN56 views
|
|
4 FBH Loom60 views
|
|
4 GPS Ant Fitted in Place58 views
|
|
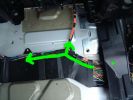
4 ICE Loom - routing of cable behind drivers seat58 views
|
|
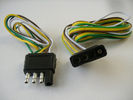
4 pin NAS flat connector from NAS small trailer382 viewsThe connector with the three exposed pins is the end that would commonly be located at the trailer hitch end, (front), of a small NAS lightweight trailer that has no electric brakes. This plug would connect into the flat 4 pin connector at the rear of the 3.
Note the order of the pin functions and wire colours: White is ground; the next pin is for tail/marker lights using the Brown wire; the Yellow conductor is for the left turn signal, and the far pin uses the Green conductor for the right turn signal.
There is no separate brake light conductor as NAS spec vehicles most often combine the brake and signal light functions to the same bulb filament rather separate filaments in different bulbs. The LR factory harness resolves that design difference.
Fortunately, the Land Rover NAS assembly pin order for the 4 pin flat plug maintains the above described conventions.
|
|
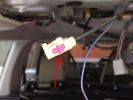
4 TMC Facra41 views
|
|
Thread upload12 viewsImage uploaded in thread 188247
|
|
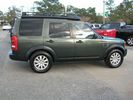
Tonga Green LR347 views
|
|
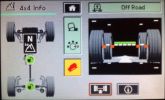
spare screen 4x4 info91 views
|
|
Thread upload39 viewsImage uploaded in thread 102519
|
|
5 phone cradle loom42 views
|
|
5 Where bottom of pocket attaches to dash55 views
|
|

5 Dash Loom38 views
|
|
5 Dash SCREEN50 views
|
|
5 FBH Loom68 views
|
|
5 GPS Connectors GPS blue and Telephone burgandy72 views
|
|
5 ICE Loom - Location of pre fitted Voice / Speed pulse connector67 views
|
|
5 No 4x443 views
|
|
5 TMC b46 views
|
|

LRO Show 2004 - Testing my 3 Month old Disco Metropolis - Those were the days!19 views
|
|

D4/LR4 501-12-floor console upper panel install instructions / german language72 viewsD4/LR4 501-12-floor console upper panel install instructions / german language
|
|

Thread upload16 viewsImage uploaded in new thread
|
|

Thread upload19 viewsImage uploaded in new thread
|
|
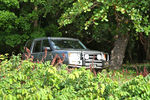
283 viewsCALENDAR 2011 ENTRY
This is in Puerto Rico. LR3 parked in the shade while we hang-out at a secluded beach that can only be accessed in 4x4.
|
|

Thread upload5 viewsImage uploaded in thread 174083
|
|
6 close view of where the pocket is bonede to bottom of dash58 views
|
|
6 Dash Loom44 views
|
|
6 Dash SCREEN50 views
|
|
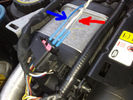
6 FBH Loom75 views
|
|
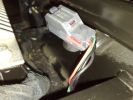
6 ICE Loom - Voice / Telephone & speed pule connector65 views
|
|
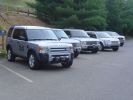
Line up of LR\'s (ignore the Toyota at the end :-()162 views
|
|
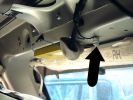
6 Radio diversity Amplifier59 views
|
|
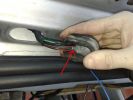
6 TMC C45 views
|
|

Cocacapana Beach... A first for LR!222 views
|
|
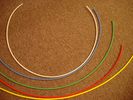
6mm Heat Shrink colours 362 viewsI decided to colour code the tubing so I used 6mm electrical heat shrink.
As there is no apparent colour coding re the 3, I tried to emulate the P38 coding; #1 LR red, #2 RR blue, #3 LF yellow, and #4 RF green. This was not doable as both left side air springs have green coloured tubing coming off the top of the front and rear air springs. I therefore arbitrarily chose the Left Rear to be red; Left Front green; Right Front yellow; Right Rear blue; and for the air compressor supply line, White coloured heat shrink. Since two new lines tie into each air spring line, I made the line between the air spring and the FASKIT, a single solid colour, and the line from the FASKIT to the valve block, White, plus the related appropriate solid colour.
|
|
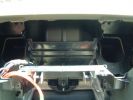
7 Pocket now cut out of dash66 views
|
|

7 Dash Loom43 views
|
|
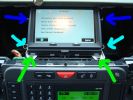
7 Dash SCREEN82 views
|
|
7 FBH Loom75 views
|
|
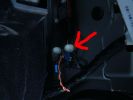
7 ICE Loom - Earth location B piller drivers side70 views
|
|

179 views
|
|
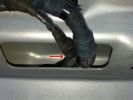
7 Tailgate loom51 views
|
|
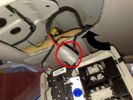
7 Voice / Telephone Mic Cable - pre fitted in roof70 views
|
|

Thread upload53 viewsImage uploaded in thread 107688
|
|

8 Dash Loom47 views
|
|
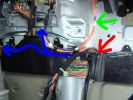
8 FBH Loom71 views
|
|
8 ICE Loom - routing at centre consoule66 views
|
|
180 views
|
|
8 Tailgate loom54 views
|
|
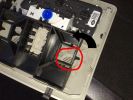
8 Where Voice / Telephone Mic goes65 views
|
|

5 views
|
|
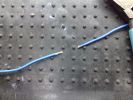
9 Dash Loom43 views
|
|
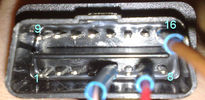
9 FBH Loom72 views
|
|
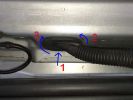
9 Gromet46 views
|
|
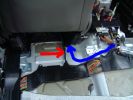
9 ICE Loom - routing behind passenger front seat for DVD Nav79 views
|
|

175 views
|
|
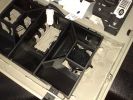
9 Voice Telephone Mic Fitted64 views
|
|
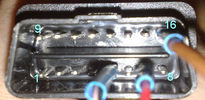
Thread upload6 viewsImage uploaded in thread 121272
|
|

Rosen A7 \'alternative\' install459 views
|
|

LRO SHow33 viewsPeterborough LRO SHow
www.picman.co.uk
|
|

LRO Show34 viewsPeterborough LRO SHow
www.picman.co.uk
|
|

LRO Show37 viewsPeterborough LRO SHow
www.picman.co.uk
|
|

24 views
|
|

Thread upload16 viewsImage uploaded in new thread
|
|

Thread upload12 viewsImage uploaded in thread 146818
|
|

Land Rover Aerial Fin images for both Glass and Metal Roof Disco3 / LR3864 viewsAs well as the two different fins, this pdf also shows the plastic blanking plate for glass roof vehicles where no fin is installed.
The glass roof fin is secured by two security screws from the top into a plastic frangible glue on gasket. The hope is that when struck, the fin will shear off and not crack the glass roof. Re the metal roof design, the fin is secured from underneath via two nuts.
The pdf also shows the various electrical bits related to the antennas. In the UK, the fin would house not only a cell phone antenna but the TV and satellite radio antenna electronics as well; in the States, the Sirius sat radio antenna and a G type cell phone antenna if the phone kit was installed would reside within the fin. The SAT NAV GPS antenna is located within the High Mount Brake Light plastic mounted to the upper rear hatch.
|
|
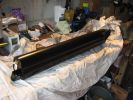
new air tank - LR part number LRQN500070171 views
|
|

Thread upload1 viewsImage uploaded in new thread
|
|
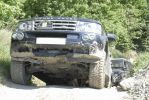
81 views
|
|

Alloy Side vent LR site143 views
|
|

Thread upload20 viewsImage uploaded in thread 172661
|
|

ALMA CUSTOM VEHICLE FOR MOVING MASTS OVER DESERT92 views
|
|

Ipod interface in Spanish for the touchscreen205 views
|
|
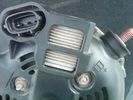
Alternator Plug and B+ terminal919 viewsPictured is the rear of the older Land Rover part # YLE500190 alternator showing the shiny cooling fin of the Regitar VRH2005-142 regulator under.
The first pin in the far left side of the connector is numbered #1 in the LR electrical wiring diagrams and is Battery Voltage Sensing (BVS); the middle pin, #2 receives a Pulse Width Modulated (PWM) signal from the Engine Control Module (ECM), and the right pin, #3 carries a PWM signal back to the ECM. Terminal Pin #2 on the LR wiring diagrams is called Alternator Control or ALT CON; Pin #3 per LR is called Alternator Monitoring or ALT MON.
Pin #1 is similar to what in older designs used to be called A or Batt, but is now called by Denso, S, AS, or Alternator Sensing for this design. Pin #1 also provides power to excite the alternator at startup until the PWM instructions over ride the battery voltage info. Land Rover calls the electronics under the pins a Smart Regulator, ironic, as it has to follow orders from the ECM rather than give the orders - new age thinking I guess. This is different from older design internal regulators that look at just the battery or the electrical buss voltage and then decides itself what to do.
It is almost like we are back to the external regulator designs of old, except that the ECM may decide that instead of telling the alternator to make more power, to load shed, and hence shut down the heated windscreen, seats, or whatever other electrical loads it decides are appropriate. My view is that the "smarts" are in the ECM and that the "regulator" should be regarded if not dumb, then as being a slave to the ECM.
|
|

Thread upload6 viewsImage uploaded in thread 116514
|
|

Thread upload5 viewsImage uploaded in thread 116514
|
|

Thread upload11 viewsImage uploaded in thread 189588
|
|

11 views
|
|

Argentina - Taken by Alex, LRE.207 viewsCamp above Salta. No it's not dust on the lens!
|
|

Arrival at Axel56 views
|
|

Inside LRE hospitality tent, FOS 210228 views
|
|
Thread upload11 viewsImage uploaded in thread 166244
|
|

Studded AT2\'s. 5 new waiting in garage, and one additional spare already used two seasons.52 views
|
|

Riparazione attuatore rotante volante - Steering rotary coupling repairing22 viewsCome riparare l'attuatore rotante del volante quando si accende la spia dell'airbag.
How to repair the steering rotary coupling when airbag warning light turns on.
|
|

Thread upload5 viewsImage uploaded in thread 72978
|
|
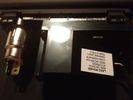
LR Aux Panel (rear)61 viewsBack of LR rear aux input panel
|
|
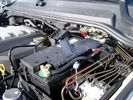
BCI Group 40R Deka 640RMF battery showing vent hose run forward to windshield washer reservoir area 1430 viewsRecessed post "Euro profile" battery to "match" OEM and stock Land Rover bracket; note that the Traxide SC80-LR module is mounted at an angle to allow for the main cable to sit under the cover so cover still closes.
The battery is a nominal 7", (180mm), high, but sits on a 1" battery spacer set under to raise the bottom front end of the battery such that the approx 11", (290 mm), length of the BCI 40R battery rises above the angled plastic nibs at the forward end bottom of the case front; hence sufficient space, (1/4", 5mm) remains at the brake reservoir end.
Also the 40R battery does not have hold down "flanges" on each end; on the sides yes, but not the ends so no additional length is required.
When I had to replace the 40R, this time I installed the shorter, (9.625"), taller, (7.5") Interstate BCI 47 / DIN H5 battery which eliminated the spacer on the bottom and better fit the stock LR tie down bolt lengths. Deka also has a BCI 47 / DIN H5 that would work fine as well.
|
|
LR Aux Panel (front)68 viewsLR rear aux panel
|
|
Aux Input Wiring Harness69 viewsUsed a modified PC CD interface cable to connect to stock female harness. Pins 3(R), 4(L), 5(G)
|
|
Avatar182 views
|
|

Thread upload3 viewsImage uploaded in new thread
|
|

Frame Jacking Points showing where holes are located.1088 viewsThe four points marked with the arrows show where the holes in the underside of the frame are located such than one could insert a trolley jack pin type lifting adapter, (or as designed), the official LR scissors jack.
|
|

A Pillar Black Plastic cover install pdf - new type.1039 viewsThis 3 page LR pdf explains how to install the newer A pillar plastic covers and avoid instant water leakage as a result of the new design.
|
|

me having fun700 viewsSorry, not LR related (other than I got there in the Disco)
Al
|
|
Thread upload6 viewsImage uploaded in thread 162372
|
|

LR driving lamps mounted on A Bar95 views
|
|
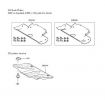
LR Bash Plates79 views
|
|

The new with the old694 viewsCALENDAR 2011
The new with the old: a Discovery 4 and a Series 1 during the Scottish Land Rover Owners Club (SLROC) Tyro event at Ballencrieff Farm, Bathgate, Saturday, 5th of December 2009.
|
|

Uphill45 viewsPeterborough LRO SHow
www.picman.co.uk
|
|

Beaker in the woods63 views
|
|
57 views
|
|
86 views
|
|

Thread upload7 viewsImage uploaded in thread 132797
|
|

Thread upload9 viewsImage uploaded in thread 132797
|
|
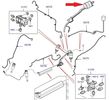
Thread upload17 viewsImage uploaded in thread 160956
|
|

Thread upload5 viewsImage uploaded in thread 116621
|
|
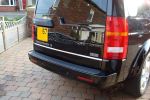
TDV6 lettering removed, LR Supercharged Badge fitted135 views
|
|

One of the trails at George Washington National Forest - Harrisonburg, VA139 views
|
|

G4 with trailer124 viewsTaken with digital SLR - slow shutter, narrow ap. zoom during exposure - so I\'m told - great effect just don\'t look at it for too long!
|
|
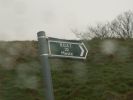
This definitely needs investigating.....176 viewsI had already picked this BOAT out on the O/S map but now I\'ve seen it in the flesh, it needs to be investigated
|
|

Thread upload23 viewsImage uploaded in thread 157551
|
|

Black Deposits on Brake Light Switch Plunger2758 viewsThis jpg I got off another forum and is typical of what one will see when one opens up the removed brake light switch. The black powder is residue from arcing of one of the pair of contacts within.
Hopefully the newer switches with the FOMOCO logo moulded into the plastic are improved from the Land Rover logo marked early units, however I doubt it.
The Ford part number is SW-6572 and/or 7E5Z-13480-A as used on the 2006 to 2009 Ford Fusion's and Mercury Milan's; the Land Rover part number is XKB500110. Cost of switch could be about twenty five dollars. A previous LR part number for the switch was XKB500030, so hopefully the newer LR part number, XKB500110, reflects some improvement in reliability.
It is possible that the new switches are better as I installed a replacement 72,000 km, (45,000 miles) later, at 195,000 km (121,000 miles). When I took the removed switch apart to inspect, it was clean inside. There was no black dust - the switch looked like new, hence they must be improved now.
|
|
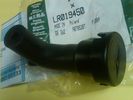
Breather Cap part # LR0194501541 viewsThis is the replacement breather cap as manufactured by the Gore Tex people, (Gore), for the engine compartment end of the front differential breather line.
You can with some difficulty, both blow and suck thru the breather filter material. The Gore Tex filter material has what are called hydrophobic and oleophobic properties. This means the filter material keeps oil in and water out, while at the same time, allowing air pressure to slowly equalize, (air permeable). Additionally, the transfer of dust, salt, and road debris is inhibited.
|
|
Breather Cap Installed2008 viewsThe black L shaped tube is is the Gore manufactured, (the Gore-Tex people), LR4 Breather Valve installed in an LR3. Naturally the installation looks similar to what one sees on an LR4 or RRS as the Gore breather valve is now OEM for new production.
The part number of this upgraded front differential breather valve is LR019450 and costs about thirty dollars.
|
|
New Breather Cap installed.1712 viewsThis shows the new Gore brand angled breather cap installed. The cap points rearward to the firewall. Also shown is the cut off piece.
The new Gore breather cap is what one now sees on the LR4 and RR Sport.
|
|

Thread upload1 viewsImage uploaded in new thread
|
|
Thread upload1 viewsImage uploaded in new thread
|
|
Thread upload4 viewsImage uploaded in new thread
|
|

Climbed right up the hill with no hesitation whatsoever, I was shocked, because it took my Dad\'s F150 three tries and a lot of speed to get up it...103 views
|
|

84 views
|
|
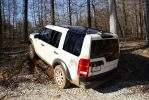
76 views
|
|

75 views
|
|

75 views
|
|

Thread upload0 viewsImage uploaded in new thread
|
|
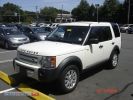
LR3102 viewsC6169014_1.jpg
|
|

LR3106 viewsC6169014_3.jpg
|
|
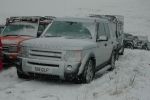
Disco3 in snow415 viewsThis photo was taken in Jan 2009 on a SLROC green road run. This was at the summint of Glen Shria
|
|
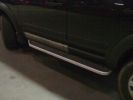
D3 Side Step Repairs165 viewsFinished job all I need to do now is wash it all off. I had already replaced the front door trim using new trim fixers and as you can see it was still dirty.
|
|

Camping at Axel76 views
|
|

LR luggage rack39 views
|
|

Thread upload5 viewsImage uploaded in new thread
|
|

Thread upload3 viewsImage uploaded in thread 184519
|
|

Thread upload7 viewsImage uploaded in new thread
|
|
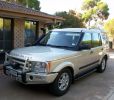
New LR D3 MY2009 TDV6 HSE Auto with Addons.114 views
|
|

LR3 crests Carinya Flinders Ranges399 views
|
|

LR3 gets its first dust bath405 views
|
|
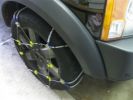
Snow Chains Installed - Land Rover LR3HSE94 viewsSnow Chains that seem to fit a Land Rover LR3HSE
|
|

Newest LR recruits NIECES from my little bro127 views
|
|
| 2426 files on 7 page(s) |
 |
1 |  |
 |
 |
 |
 |
 |
|