| Last additions |
GWNF Feb 2010103 views25 Feb 2010
|
|
GWNF Feb 201079 views25 Feb 2010
|
|
GWNF Feb 201074 views25 Feb 2010
|
|
GWNF Feb 201075 views25 Feb 2010
|
|
GWNF Feb 201080 views25 Feb 2010
|
|
GWNF Feb 201069 views25 Feb 2010
|
|
GWNF Feb 201043 views25 Feb 2010
|
|
GWNF Feb 201042 views25 Feb 2010
|
|
GWNF Feb 201050 views25 Feb 2010
|
|
GWNF Feb 201053 views25 Feb 2010
|
|

163 views24 Feb 2010
|
|

160 views24 Feb 2010
|
|
245 views24 Feb 2010
|
|
216 views24 Feb 2010
|
|

71 views24 Feb 2010
|
|
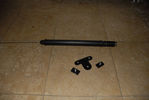
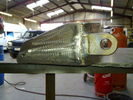
RLD heavy duty antenna mount58 views24 Feb 2010
|
|
M25?52 views24 Feb 2010
|
|
Descent58 views24 Feb 2010
|
|
Quarry64 views24 Feb 2010
|
|
D3 Quarry64 views24 Feb 2010
|
|

Who put the sun out?54 views24 Feb 2010
|
|
G4 Quarry again...59 views24 Feb 2010
|
|
Parking51 views24 Feb 2010
|
|
G4 Quarry45 views24 Feb 2010
|
|
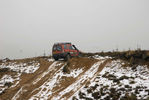
Quarry track40 views24 Feb 2010
|
|
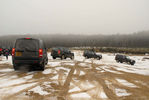
Queueing ......45 views24 Feb 2010
|
|
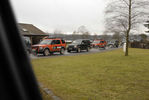
Lunch over38 views24 Feb 2010
|
|
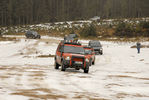
D3 Quarry44 views24 Feb 2010
|
|
Sporting Fellows44 views24 Feb 2010
|
|

Midland Tinting / TD Directions63 views24 Feb 2010
|
|
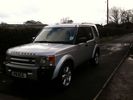
arch in silver, another view68 views24 Feb 2010
|
|
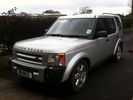
silver arch and sitting low77 viewsThis was after I changed the arches, I\'d jacked it up so the air bags had let all air out to try and level car24 Feb 2010
|
|
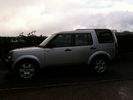
Silver after change68 viewsThis is after the arch change24 Feb 2010
|
|
Black arches63 viewsBefore the arch change24 Feb 2010
|
|
79 views24 Feb 2010
|
|
44 views24 Feb 2010
|
|

Near Klosters, Switzerland38 views24 Feb 2010
|
|

Looking for shade in Tuscany32 views24 Feb 2010
|
|

Near Klosters, Switzerland41 views24 Feb 2010
|
|

The Disco gets another admiring glance.38 views24 Feb 2010
|
|
Wilko driving, Richard Aston navigating, Yarwell33 views24 Feb 2010
|
|

In Bruges36 views24 Feb 2010
|
|

Nr Klosters, Switzerland34 views24 Feb 2010
|
|

Motorway Services, Germany49 views24 Feb 2010
|
|

L'Estartit, Spain34 views24 Feb 2010
|
|
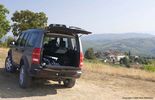
Near Castellini in Chianti, Tuscany48 views24 Feb 2010
|
|

National park near Peniscola, Spain40 views24 Feb 2010
|
|

View towards Belvoir Castle from Hickling Pastures41 views24 Feb 2010
|
|
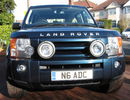
latest spots 2419 views24 Feb 2010
|
|

latest spots - side on393 views24 Feb 2010
|
|
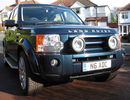
latest spots432 views24 Feb 2010
|
|

The girls62 views24 Feb 2010
|
|
The Cheviot from my Kitchen32 views24 Feb 2010
|
|
The Puma that had to go55 views24 Feb 2010
|
|
Kielder pre Uncle Ray plate53 views24 Feb 2010
|
|

50 views24 Feb 2010
|
|
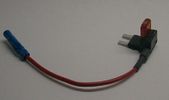
Littelfuse Mini Add-A-Circuit FMH200BP and OFH0200ZP1610 viewsFound this jpg somewhere on the forum - others are using them as it is a good way to tap the fuse box to add a fused circuit, or in this case, to modify a circuit to add a switch such that the fused circuit is switched. In my SmoothTalker gallery, there is a PDF from Littelfuse specifically related to this Add-A-Circuit device.
Before you install the Add A Circuit for any application, take an ohm meter and trace out the circuit path of the two pair of slots that fuses could insert into. The path is more complicated than one might first think. As such, the orientation of the fuse holder in the socket may matter depending upon the application. If the application is a circuit diverter, (as the F35 mode is), as opposed to a mere accessory adder, orientation matters. 23 Feb 2010
|
|

PDF of Mini Fuse data re LR3 / Disco 3 fuses.1846 viewsThis is just a data sheet regarding the MINI fuses that are common in the 3.23 Feb 2010
|
|
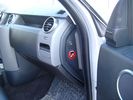
Air Suspension ECU Fuse 35P Shut Off Switch2623 viewsA more distant view of the shut off rocker switch in the ON position which is the normal position for when all is working as Land Rover intended.
Ideally, (but not totally necessary), the F35P circuit should be powered or de-energized after the various computers have gone to "sleep".
Similarly, removal of the F26E or F3E fuses is preferable after the computers have all gone to sleep but it appears that no real damage will be done if the fuses are removed while the system is energized. Pulling F26E is the main full time fuse that powers the air suspension computer. As such, once F26E is removed, pulling F3E is not really required.
Power for the compressor goes thru the 60 amp fusible link and relay, however control of the relay is via the air suspension computer so depowering the air suspension computer effectively depowers the air compressor and the internal exhaust valve relay/port. 23 Feb 2010
|
|
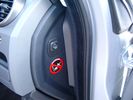
Air Suspension ECU Fuse 35P cut off switch.3802 viewsThis shows the SPST rocker switch mounted in the blank plate installed in lieu of a manual passenger side air bag shut down switch - now automatic via passenger seat pressure switch. Fuse 35P (5 amps) is located in the interior fuse box behind the lower glove box and protects the ignition power supply to the Air Suspension ECU. When the SPST switch is moved to the OFF position, the RAISE /LOWER switch on the centre console is not powered, and hence does not function. As such, some signals from the wheel height sensors and CPU are ignored. By itself however, removing F35P will probably not stop the 3 from self dropping, particularly after the engine is turned off.
Fuse F3E, (5 amps), located in the engine bay fuse box by the starting battery protects the circuit that provides feedback to the Air System ECU indicating that the Compressor Relay has successfully operated and that the Air Compressor is or should be operational, can also be removed, (but is probably not totally necessary), as it gets its power thru F26E. Hence Fuse F26E, (20 amp), also located in the engine compartment fuse box is the fuse that must be removed. This fuse protects the circuit that provides full time battery power to the Air System ECU. When in place, current thru the fuse powers the periodic re-levelling action, (usually lowering a bit with that brief air release noise), that often occurs when the vehicle is parked and the engine is off.
Removing F26E fuse will stop the auto levelling action and also inhibit any other down to the stops signals, (engine running or not). When F26E is removed, no power can flow thru to F3E, hence removing F3E is more for insurance than an absolute requirement. The same with F35P, removing F26E removes primary full time power from the Air Suspension ECU, and hence removing the F35P fuse should not really be required either as long as F26E has been removed.23 Feb 2010
|
|

Saddell Castle49 views23 Feb 2010
|
|

The Vale of Belvior and Nottingham in the background58 views23 Feb 2010
|
|
Old Colston Basset Church53 views23 Feb 2010
|
|
289 views23 Feb 2010
|
|
301 views23 Feb 2010
|
|

283 views23 Feb 2010
|
|
252 views23 Feb 2010
|
|
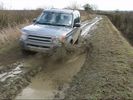
Green laning in the Vale of Belvior57 views23 Feb 2010
|
|
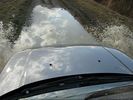
Green laning in the Vale of Belvior48 views23 Feb 2010
|
|
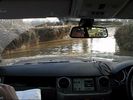
Ford Crossing, LROAC Navigational Challenge Feb 201051 views23 Feb 2010
|
|

64 views23 Feb 2010
|
|
50 views23 Feb 2010
|
|

Sotted in Alnwick60 views23 Feb 2010
|
|
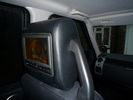
Headrests75 views23 Feb 2010
|
|
Power Connectors70 views23 Feb 2010
|
|
Brodit Brackets71 views23 Feb 2010
|
|
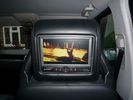
Casino Royale from iPod75 views23 Feb 2010
|
|
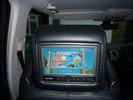
Chicken Little from in-built DVD64 views23 Feb 2010
|
|

101 views23 Feb 2010
|
|
98 views23 Feb 2010
|
|

94 views23 Feb 2010
|
|

exhaust 1310 views23 Feb 2010
|
|
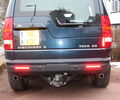
rear view427 views23 Feb 2010
|
|

SMB881 views23 Feb 2010
|
|
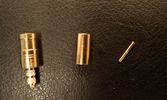
SMB684 views23 Feb 2010
|
|

SMB389 views23 Feb 2010
|
|

31 views22 Feb 2010
|
|

107 views22 Feb 2010
|
|
50 views22 Feb 2010
|
|

99 views22 Feb 2010
|
|

Parts diagram for 2007 D3 TDV6 HSE glass top aerial fin42 views22 Feb 2010
|
|
46 views22 Feb 2010
|
|
D486 views22 Feb 2010
|
|
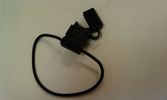
Waterproof fuse holder63 views22 Feb 2010
|
|

58 views22 Feb 2010
|
|
88 views21 Feb 2010
|
|
109 views21 Feb 2010
|
|
121 views21 Feb 2010
|
|
139 views21 Feb 2010
|
|
127 views21 Feb 2010
|
|
104 views21 Feb 2010
|
|
110 views21 Feb 2010
|
|
106 views21 Feb 2010
|
|
126 views21 Feb 2010
|
|
106 views21 Feb 2010
|
|
76 views21 Feb 2010
|
|
72 views21 Feb 2010
|
|

62 views21 Feb 2010
|
|

65 views21 Feb 2010
|
|
66 views21 Feb 2010
|
|

62 views21 Feb 2010
|
|

62 views21 Feb 2010
|
|
65 views21 Feb 2010
|
|
65 views21 Feb 2010
|
|
60 views21 Feb 2010
|
|
66 views21 Feb 2010
|
|
64 views21 Feb 2010
|
|
58 views21 Feb 2010
|
|
65 views21 Feb 2010
|
|
77 views21 Feb 2010
|
|

71 views21 Feb 2010
|
|
59 views21 Feb 2010
|
|
64 views21 Feb 2010
|
|
61 views21 Feb 2010
|
|
58 views21 Feb 2010
|
|
56 views21 Feb 2010
|
|
60 views21 Feb 2010
|
|
56 views21 Feb 2010
|
|

56 views21 Feb 2010
|
|
55 views21 Feb 2010
|
|
53 views21 Feb 2010
|
|
54 views21 Feb 2010
|
|
53 views21 Feb 2010
|
|
55 views21 Feb 2010
|
|
52 views21 Feb 2010
|
|
54 views21 Feb 2010
|
|
52 views21 Feb 2010
|
|
50 views21 Feb 2010
|
|
50 views21 Feb 2010
|
|
48 views21 Feb 2010
|
|
50 views21 Feb 2010
|
|
50 views21 Feb 2010
|
|
51 views21 Feb 2010
|
|
43 views21 Feb 2010
|
|
45 views21 Feb 2010
|
|

46 views21 Feb 2010
|
|

44 views21 Feb 2010
|
|
48 views21 Feb 2010
|
|
50 views21 Feb 2010
|
|
52 views21 Feb 2010
|
|

43 views21 Feb 2010
|
|
54 views21 Feb 2010
|
|
53 views21 Feb 2010
|
|
52 views21 Feb 2010
|
|
49 views21 Feb 2010
|
|
52 views21 Feb 2010
|
|
50 views21 Feb 2010
|
|
54 views21 Feb 2010
|
|
52 views21 Feb 2010
|
|
47 views21 Feb 2010
|
|
105 views21 Feb 2010
|
|
106 views21 Feb 2010
|
|
95 views21 Feb 2010
|
|
92 views21 Feb 2010
|
|
93 views21 Feb 2010
|
|
109 views21 Feb 2010
|
|
101 views21 Feb 2010
|
|
109 views21 Feb 2010
|
|
102 views21 Feb 2010
|
|
98 views21 Feb 2010
|
|
100 views21 Feb 2010
|
|
102 views21 Feb 2010
|
|
99 views21 Feb 2010
|
|
98 views21 Feb 2010
|
|
101 views21 Feb 2010
|
|
145 views21 Feb 2010
|
|

109 views21 Feb 2010
|
|
105 views21 Feb 2010
|
|

101 views21 Feb 2010
|
|
102 views21 Feb 2010
|
|
107 views21 Feb 2010
|
|
109 views21 Feb 2010
|
|
121 views21 Feb 2010
|
|
124 views21 Feb 2010
|
|
122 views21 Feb 2010
|
|
87 views21 Feb 2010
|
|
89 views21 Feb 2010
|
|
85 views21 Feb 2010
|
|

92 views21 Feb 2010
|
|
104 views21 Feb 2010
|
|
99 views21 Feb 2010
|
|
89 views21 Feb 2010
|
|
83 views21 Feb 2010
|
|
85 views21 Feb 2010
|
|
88 views21 Feb 2010
|
|
86 views21 Feb 2010
|
|

85 views21 Feb 2010
|
|
99 views21 Feb 2010
|
|

84 views21 Feb 2010
|
|
98 views21 Feb 2010
|
|
69 views21 Feb 2010
|
|
69 views21 Feb 2010
|
|
116 views21 Feb 2010
|
|
82 views21 Feb 2010
|
|
79 views21 Feb 2010
|
|
55 views21 Feb 2010
|
|
89 views21 Feb 2010
|
|

116 views21 Feb 2010
|
|

82 views21 Feb 2010
|
|
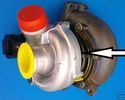
33 viewsBV50VTG21 Feb 2010
|
|
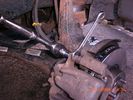
Removing Caliper117 views21 Feb 2010
|
|
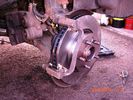
New disc and carrier fitted114 views21 Feb 2010
|
|
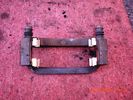
Caliper carrier with new anti rattle clips101 views21 Feb 2010
|
|
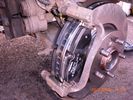
New pads insitu122 views21 Feb 2010
|
|
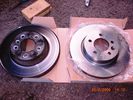
Old and New Disc113 views21 Feb 2010
|
|
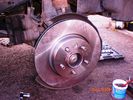
New disc fitted99 views21 Feb 2010
|
|
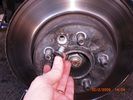
Disc retention screw108 views21 Feb 2010
|
|
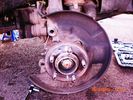
Disc removed103 views21 Feb 2010
|
|
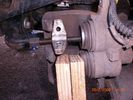
Improvised Piston Retract124 views21 Feb 2010
|
|

Land Rover Aerial Fin images for both Glass and Metal Roof Disco3 / LR3850 viewsAs well as the two different fins, this pdf also shows the plastic blanking plate for glass roof vehicles where no fin is installed.
The glass roof fin is secured by two security screws from the top into a plastic frangible glue on gasket. The hope is that when struck, the fin will shear off and not crack the glass roof. Re the metal roof design, the fin is secured from underneath via two nuts.
The pdf also shows the various electrical bits related to the antennas. In the UK, the fin would house not only a cell phone antenna but the TV and satellite radio antenna electronics as well; in the States, the Sirius sat radio antenna and a G type cell phone antenna if the phone kit was installed would reside within the fin. The SAT NAV GPS antenna is located within the High Mount Brake Light plastic mounted to the upper rear hatch.21 Feb 2010
|
|

199 views20 Feb 2010
|
|

104 views20 Feb 2010
|
|
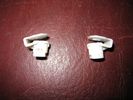
Clips to be removed when fitting a Mantec Plate139 views20 Feb 2010
|
|
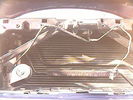
Front Horn and extra cable and socket234 views20 Feb 2010
|
|
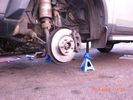
Securely supported on axle stands122 views20 Feb 2010
|
|
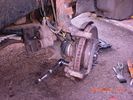
Remove caliper carrier116 views20 Feb 2010
|
|
527 views20 Feb 2010
|
|
468 views20 Feb 2010
|
|
371 views20 Feb 2010
|
|
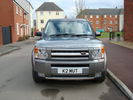
I love her!!481 views20 Feb 2010
|
|

Alluminium grille & Black badge426 views20 Feb 2010
|
|
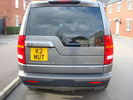
k2mut\'s rear end425 views20 Feb 2010
|
|
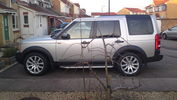
New 295/45R20 114V XL Hankook Ventus ST tyres fitted on 20" RRS Supercharged 20" Alloys123 views20 Feb 2010
|
|
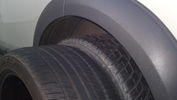
RRS tyre next to Disco tyre83 views275/40R20 tyre from a RRS next to a 295/45R20 Disco3 tyre20 Feb 2010
|
|
143 views20 Feb 2010
|
|
148 views20 Feb 2010
|
|
189 views20 Feb 2010
|
|
166 views20 Feb 2010
|
|
180 views20 Feb 2010
|
|
162 views20 Feb 2010
|
|

Kudu bull Chobe57 views20 Feb 2010
|
|

Chobe49 views20 Feb 2010
|
|

Buffalo39 views20 Feb 2010
|
|

African Fish eagle34 views20 Feb 2010
|
|

Another Baby Zuma Botswana47 views20 Feb 2010
|
|

Fishing Kwando River Namibia Botswana Border36 views20 Feb 2010
|
|

Camp Kwando on Kwando river Namibia35 views20 Feb 2010
|
|

Sable Chobe Botswana33 views20 Feb 2010
|
|

Drotsky\'s camp Botswana52 views20 Feb 2010
|
|

Lechwe in Mahangu Nat park Namibia34 views20 Feb 2010
|
|

Camp Kwando Namibia37 views20 Feb 2010
|
|

Rockface29 views20 Feb 2010
|
|

Penquin and whale36 views20 Feb 2010
|
|

Africa rocks38 views20 Feb 2010
|
|

Mokoro boat trip on delta45 views20 Feb 2010
|
|

Okavango delta Botswana37 views20 Feb 2010
|
|

Tsodilo hills Botswana39 views20 Feb 2010
|
|

Road to Guma Lagoon42 views20 Feb 2010
|
|

Sunrise Okavango Delta Botswana40 views20 Feb 2010
|
|

Planet Baobab camp Botswana49 views20 Feb 2010
|
|

Makgadikgadi pans Botswana39 views20 Feb 2010
|
|

Bulperd55 views20 Feb 2010
|
|

Father and son trip64 views20 Feb 2010
|
|

Sunset Okavango river Namibia36 views20 Feb 2010
|
|
Nata Bird sanctuary48 views20 Feb 2010
|
|

45 views19 Feb 2010
|
|
Top view of HSE fin57 views19 Feb 2010
|
|
Side view of HSE fin57 views19 Feb 2010
|
|

64 views19 Feb 2010
|
|

28 views19 Feb 2010
|
|

D3 Ambulance LR Experience Tour Malaysia 200841 views19 Feb 2010
|
|

TWOR 0753 views©theworldoffroad19 Feb 2010
|
|

TWOR 0640 views©theworldoffroad19 Feb 2010
|
|

TWOR 0550 views©theworldoffroad19 Feb 2010
|
|

TWOR 0445 views©theworldoffroad19 Feb 2010
|
|

TWOR 0347 views©theworldoffroad19 Feb 2010
|
|

TWOR 0141 views©theworldoffroad19 Feb 2010
|
|

D4 Österreichische Feuerwehr78 views19 Feb 2010
|
|
51 views19 Feb 2010
|
|
48 views19 Feb 2010
|
|
41 views19 Feb 2010
|
|
46 views19 Feb 2010
|
|
43 views19 Feb 2010
|
|
49 views19 Feb 2010
|
|
48 views19 Feb 2010
|
|
43 views19 Feb 2010
|
|

45 views19 Feb 2010
|
|
44 views19 Feb 2010
|
|
40 views19 Feb 2010
|
|
43 views19 Feb 2010
|
|
37 views19 Feb 2010
|
|
47 views19 Feb 2010
|
|
41 views19 Feb 2010
|
|
39 views19 Feb 2010
|
|

36 views19 Feb 2010
|
|

31 views19 Feb 2010
|
|
35 views19 Feb 2010
|
|

88 views18 Feb 2010
|
|
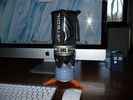
Jetboil!47 views18 Feb 2010
|
|
82 views18 Feb 2010
|
|
74 views18 Feb 2010
|
|
Snowy Coventry142 views18 Feb 2010
|
|

136 views18 Feb 2010
|
|
80 views18 Feb 2010
|
|
75 views18 Feb 2010
|
|
87 views18 Feb 2010
|
|
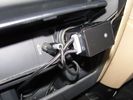
66 views18 Feb 2010
|
|

XS3600 official user manual166 views18 Feb 2010
|
|
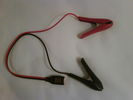
Croc clips52 viewsCrocodile clips with connector without dust/moisture cap.18 Feb 2010
|
|
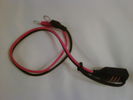
Permanent fixing56 viewsPermanent fixing with eyelet connectors and dust/moisture cap18 Feb 2010
|
|
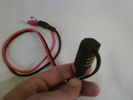
Permanent fixing65 viewsDust/moisture cap on permanent fixing18 Feb 2010
|
|
Pouch included - rear49 viewsRear view with transparent pocket18 Feb 2010
|
|

Pouch included - front44 viewsFront side of included storage pouch18 Feb 2010
|
|
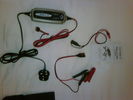
All contents61 views18 Feb 2010
|
|
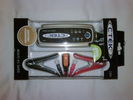
As delivered74 views18 Feb 2010
|
|
Quick guide61 views18 Feb 2010
|
|
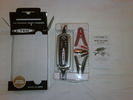
Packaging48 views18 Feb 2010
|
|
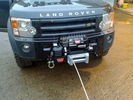
PowerPlant on Robs 1160 views18 Feb 2010
|
|

74 views17 Feb 2010
|
|
78 views17 Feb 2010
|
|
41 views17 Feb 2010
|
|

Tailgate Spoiler166 views17 Feb 2010
|
|
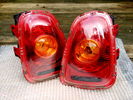
R56 MINI Rear Lights58 views17 Feb 2010
|
|
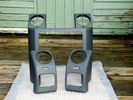
"H" Trim and outter vent trims63 views17 Feb 2010
|
|
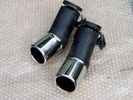
Exhaust Trims66 views17 Feb 2010
|
|

gvif manual rev 379 views17 Feb 2010
|
|

gvif install89 views17 Feb 2010
|
|
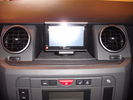
73 views17 Feb 2010
|
|
109 views17 Feb 2010
|
|

av123 views16 Feb 2010
|
|
99 views16 Feb 2010
|
|
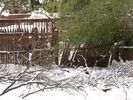
cleanup37 viewsI cut the branch up myself and will replace the fence when the weather clears. It snowed again after I cut it up.16 Feb 2010
|
|
44 views16 Feb 2010
|
|
42 views16 Feb 2010
|
|
37 views16 Feb 2010
|
|

176 views16 Feb 2010
|
|

146 views16 Feb 2010
|
|

Interstate Battery Dimension sheet640 viewsThis sheet is hard to find - the sheet is not on the Interstate corporate web site but some dealer web sites display it. The pdf shows most of their available batteries including the H7 and H8 sizes that are the LR North America replacement batteries for the main starting battery. These batteries are of the Land Rover desired "shallow" cycle high discharge current Maintenance Free, (Ca Ca), internal construction, (not AGM, but instead, Wet Flooded Lead Acid with battery "caps" and Ca grid separators).
For the AUX battery , the H6, (BCI Group 48), is probably similar in dimensions to the Varta E12V75N that is popular in Australia. For that battery to fit in the second battery compartment, you must grind out the angled nibs on the inside front bottom of the LR black plastic surround, something I did wish to do and hence installed a Group 40R on a spacer. Alternately, one can choose an Interstate BCI Group 47 which is similar to a DIN H5 for the AUX location. I did this when I had to replace my 40R. No vertical spacer is required and the stock battery tie down bolts and clamp work well.16 Feb 2010
|
|

Varta Battery Dimension chart568 viewsThis pdf provides Varta dimensions for among others, the E12V75N, (old DIN H6 or 85605 or BCI Group 48 size). This appears to be a deep cycle battery and the choice for many re the Aux battery install as long as you are willing to grind away the angled nibs at the bottom front of the battery surround. My choice was a shallow cycle battery intended for cold weather related engine starting rather than winch use.
Note the pdf Varta batteries are all deep cycle batteries suitable for running fridges, winches etc, rather than for engine starting and hence a good Aux battery if those are the intended uses rather than engine starting.
Varta now makes a Varta G14 with AGM technology and known as a Stop Start Plus battery. It is 95Ah, CCA of 850A; length 353mm; Width 175mm; Height 790mm and is specific for these newer stop start vehicles such as some D4's. For the 3's, one is still probably better off with an H8 sized battery but of the older Wet Flooded Lead Acid type and battery caps rather than a sealed AGM.
The Land Rover part number for the recommended battery is LR033179.16 Feb 2010
|
|

Caterpillar Battery Size cross reference chart and battery profiles including post layout749 viewsThis pdf has a dimension, (metric and inches), cross reference chart plus another sheet that provides BCI and DIN cross reference numbers and shows post locations plus bottom ridge tie down locations, (or the lack of).
This data was for me, hard to find, and helps one in selecting a suitable physical size of Aux battery for the space available.16 Feb 2010
|
|

Deka Battery Dimension Data613 viewsThe battery size that I installed for my auxiliary was a BCI 40R battery as it was for me the easiest to fit and was also a cranking battery. The case profile was such that no tie down fins were located on either bottom end, (sides yes), and length wise, it was only about 11" (290 mm) long. As such, I did not have to grind the nibs at the front bottom of the plastic surround.
I did however raise the bottom of the battery above the angled nibs as I set the battery on a 1" (25mm) high plastic spacer. The total height, (battery plus spacer), was about 8" (200mm) so the battery top still fit under the Land Rover factory cover.
For the Aux battery, when I replaced the 40R, I installed an Interstate BCI 47 which is similar in size to a DIN H5. I was therefore able to eliminate the vertical spacer as the Group 47/H5 is the same height as the DIN H7/H8 stock LR spec starting battery. As such, the standard battery tie down bolts can be used without modification. The Group 47 battery is 9 11/16" long x 6 7/8" wide x 7 1/2" (190mm) high.16 Feb 2010
|
|
92 views15 Feb 2010
|
|
53 views15 Feb 2010
|
|
78 views15 Feb 2010
|
|
73 views15 Feb 2010
|
|
73 views15 Feb 2010
|
|
75 views15 Feb 2010
|
|
79 views15 Feb 2010
|
|
68 views15 Feb 2010
|
|
58 views15 Feb 2010
|
|
58 views15 Feb 2010
|
|
51 views15 Feb 2010
|
|

49 views15 Feb 2010
|
|
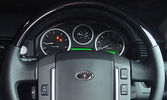
PTI steering wheel88 views15 Feb 2010
|
|
41 views15 Feb 2010
|
|

45 views15 Feb 2010
|
|

99 views15 Feb 2010
|
|
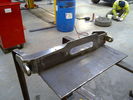
Discotech Power Plant Winch Tray 02155 views15 Feb 2010
|
|
Discotech Power Plant Winch Tray 01145 views15 Feb 2010
|
|

79 views15 Feb 2010
|
|

66 views15 Feb 2010
|
|
57 views15 Feb 2010
|
|
73 views15 Feb 2010
|
|
59 views15 Feb 2010
|
|
62 views15 Feb 2010
|
|

58 views15 Feb 2010
|
|

57 views15 Feb 2010
|
|

57 views15 Feb 2010
|
|
45 views15 Feb 2010
|
|

37 views15 Feb 2010
|
|

36 views15 Feb 2010
|
|

155 views15 Feb 2010
|
|
42 views15 Feb 2010
|
|
37 views15 Feb 2010
|
|
37 views15 Feb 2010
|
|
34 views15 Feb 2010
|
|
36 views15 Feb 2010
|
|
42 views15 Feb 2010
|
|
40 views15 Feb 2010
|
|
37 views15 Feb 2010
|
|
43 views15 Feb 2010
|
|
35 views15 Feb 2010
|
|
38 views15 Feb 2010
|
|
36 views15 Feb 2010
|
|
38 views15 Feb 2010
|
|

39 views15 Feb 2010
|
|

35 views15 Feb 2010
|
|
36 views15 Feb 2010
|
|
33 views15 Feb 2010
|
|

Kielder 201045 views15 Feb 2010
|
|

Kielder 201044 views15 Feb 2010
|
|

Kielder 201045 views15 Feb 2010
|
|

Kielder Feb 201043 views15 Feb 2010
|
|
Yarwell Big Splash30 views15 Feb 2010
|
|
Yarwell26 views15 Feb 2010
|
|
Yarwell28 views15 Feb 2010
|
|
Yarwell lake22 views15 Feb 2010
|
|
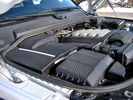
Overview of engine compartment from Main Battery side, (Passenger, LHD), looking across to Aux Battery749 viewsNote labels on main battery cover. The one you cannot read says that an auxiliary battery is installed on the other side. This is to warn service people should they wish to shut off all battery power.
The main starting battery is supposed to be of CaCa separator construction and DIN H8 or BCI Group 49 size. This means Calcium separators Wet Flooded Lead Acid, 13.9" long, 7.5" high and 6.9" wide.
On the Aux battery cover is a label saying to disconnect the blue Anderson single pole connector located under the cover by the brake reservoir. BCI Group 40R battery is small enough that the cover goes back on.15 Feb 2010
|
|
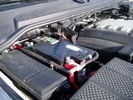
Main starting battery showing 1/2" hole drilled for power cable egress905 viewsView of OEM battery in Left Hand Drive LR3. This is supposed to be a Battery Group BCI 49 or H8 sized battery but in reality is the slightly shorter BCI 94R or H7 battery that fits easier lengthwise, (12 3/8" vs 14").
Note the 10mm hole drilled in plastic of surround to allow for entry of main power cable that runs between batteries. The cable bolts to a spare 6mm threaded hole in the OEM battery cable end; the light gauge wire runs to the front of vehicle to a connector for the CTEK MULTI US 3300 charger. Coloured felts, (red and green), are a material treated to reduce battery post corrosion. The OEM battery ground cable is only about a foot long and runs to an 8mm stud located on the inner fender just to the rear of the fuse case.15 Feb 2010
|
|
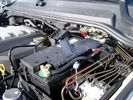
BCI Group 40R Deka 640RMF battery showing vent hose run forward to windshield washer reservoir area 1424 viewsRecessed post "Euro profile" battery to "match" OEM and stock Land Rover bracket; note that the Traxide SC80-LR module is mounted at an angle to allow for the main cable to sit under the cover so cover still closes.
The battery is a nominal 7", (180mm), high, but sits on a 1" battery spacer set under to raise the bottom front end of the battery such that the approx 11", (290 mm), length of the BCI 40R battery rises above the angled plastic nibs at the forward end bottom of the case front; hence sufficient space, (1/4", 5mm) remains at the brake reservoir end.
Also the 40R battery does not have hold down "flanges" on each end; on the sides yes, but not the ends so no additional length is required.
When I had to replace the 40R, this time I installed the shorter, (9.625"), taller, (7.5") Interstate BCI 47 / DIN H5 battery which eliminated the spacer on the bottom and better fit the stock LR tie down bolt lengths. Deka also has a BCI 47 / DIN H5 that would work fine as well.15 Feb 2010
|
|
| 233901 files on 585 page(s) |
 |
 |
 |
 |
 |
 |
 |
513 |  |
 |
 |
 |
 |
|