Webasto Thermo Test Setup
This is a brief guide to setting up the Webasto Thermo Test (WTT) software.
NOTE! The Thermo Test software is compatible with Windows ONLY. The is no OSX or Linux version.
Contents
Adapter Installation
This guide covers setting up using the widely available "VAG KKL"/"KKL VAG COM for 409.1" adapter.
The adapters currently available are generally dark translucent blue in colour and contain the CH340G adapter chip.
Some older or more expensive adapters may use the FTDI FT232 adapter chip.
There is no functional difference between the two chips as far as the Thermo Test software is concerned.
The only difference is which driver you may need to download for Windows versions prior to Windows 7.
Drivers
Drivers for the CH340G and FT232 chips are built into Windows from Windows 7 onwards.
Older versions of Windows will require a driver downloading and installing.
These are links to the manufacturers' driver download sites:
- CH340G driver: http://www.wch.cn/download/CH341SER_ZIP.html
- FT232 driver: http://www.ftdichip.com/Drivers/VCP.htm
- (to tell if you have 32 bit or 64 bit Windows see here: http://windows.microsoft.com/en-gb/windows/32-bit-and-64-bit-windows
Your adapter may also have been supplied with the drivers on CD.
Connect your adapter to a free USB port on your laptop (it will be helpful later if you always use the same USB port every time you connect the adapter).
Windows should either automatically install a driver (Windows 7 and later) or prompt you for one (Vista and earlier).
Allow the driver installation to complete.
Driver Configuration
The WTT software only works with COM port numbers less than 20. Often the COM port selected when an adapter is installed is higher than this, so we need to change it.
Open "Device Manager" as follows:
- Open the Run window by pressing and holding the Windows key, then press the R key
- Type devmgmt.msc and press the "OK" button
Device Manger should open:
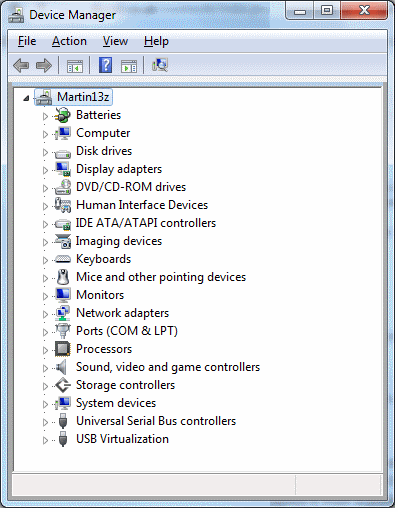
Now find the adapter device and change its settings:
- Click the triangle next to "Ports (COM & LPT)"
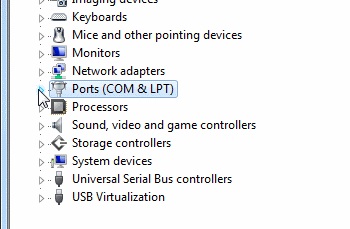
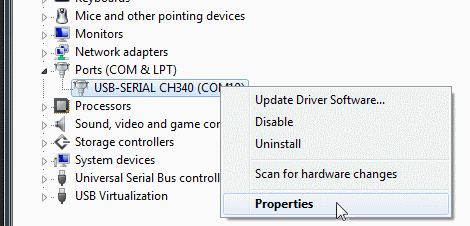
- Right click on "USB-SERIAL CH340 (COMnn)" [nn is a variable number] and click "Properties"
- (Note that an FTDI FT232RL based adapter will be called "USB Serial Port (COMnn)")
- Click on the "Port Settings" tab

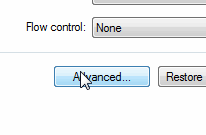
- Click on the "Advanced" button
- From the drop-down list, select a COM port less than 20. To avoid possible conflicts with hardware serial ports, a number greater than 3 is best - e.g. COM5 as shown.
- (Note that an FTDI FT232RL based adapter has this list at the top of the window)
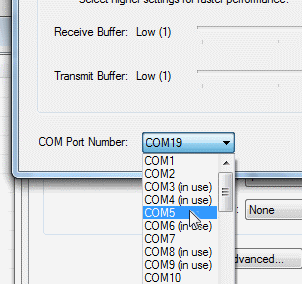
- If possible pick a port without "(in use)" against it. But if you have no COM port between 3 and 19 without "(in use)" next to it then do not worry, it does not normally cause a problem to pick one with "(in use)" against it.
- Make a note of the COM port.
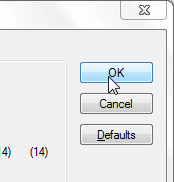
- Click the "OK" button
- Close the device properties using the red cross
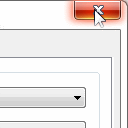
- Close Device Manager using the red cross
- Unplug your USB adapter and plug it back into the same USB port. I find this helps WTT find your adapter with its new COM port.
Your adapter is now ready for use with WTT.
Software Installation
Download the software (and manual) from Fuel Burning Heater#Thermo_Test_Software
Run the installer and install the software using the default options. A more comprehension guide is in the manual, pages 14 and 15 (ignore the part about connecting the adapter at the end of page 15).
Once installed the Webasto Thermo Test software is available in the Start Menu. It is in the "Webasto Thermo Test" folder, then "WTT" icon.
Configuring the software
You can now start the WTT software from the Start Menu icon as above.
Before attempting to use the software you should configure it.
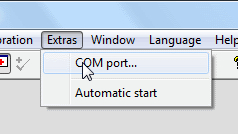
- From the "Extras" menu select "COM port...".
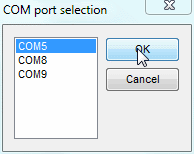
- Select the COM port you selected in the adapter configuration above and click the "OK" button
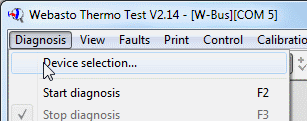
- From the "Diagnosis" menu select "Device selection..."
- Now select "W-Bus" and click the "OK" button
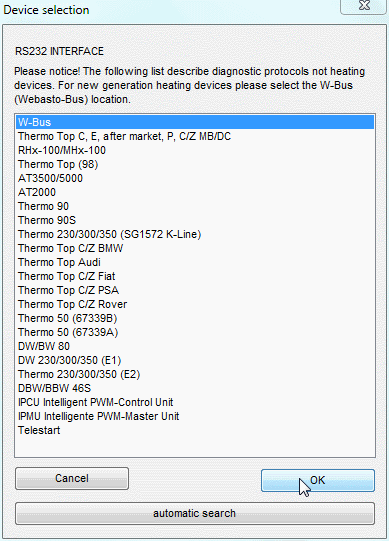
WTT should now be configured ready to use.
When you use WTT in the future you can start from this point!
- Connect your diagnosis loom to the FBH, the battery and the OBD port on the adapter.
- Looms are available to buy from http://www.disco3.co.uk/shop/fbh-diagnostic-loom-lead-for-webasto-p66.html
- Click the "Start diagnosis" button on the toolbar
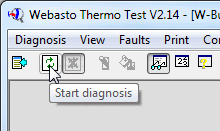
- The WTT software will now connect to the FBH and undertake status and fault code reading.
Troubleshooting
More coming soon - if you need help please ask on the forum!
No connection to the FBH
- Double check your connections from the OBD adapter to the FBH.
- Make sure the power LED is lit on the OBD adapter
- If you have made a loom yourself, try both pin 4 and pin 5 of the OBD adapter for the ground connection to the battery.
- Some OBD adapters are wired to one or the other and not both.
- The DISCO3 site shop loom bridges pins 4 and 5: http://www.disco3.co.uk/shop/fbh-diagnostic-loom-lead-for-webasto-p66.html
Attention - the selected COM port cannot be used
This window appears roughly infinity times if the "Automatic start" option has been selected in WTT, and the software cannot find the COM port you have selected.

If it does it on starting WTT, you cannot access the "Extras" menu to switch it off.
To fix this:
- Download and apply this registry file:
http://media.disco3.co.uk/misc/wtt_autostart_off.reg
- Double click the file. Windows will ask "Do you want to allow the following program to make changes....". Click Yes.
- Windows will then ask "Adding information can unintentionally change or delete values...". Click Yes.
- On the confirmation window, click OK.
- Now start WTT again. DO NOT SELECT THE AUTOSTART OPTION AGAIN!!
