| Search results - "stud" |
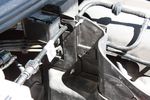
110 viewsBolts through the plastic box. These function as studs for the traxide brain to be mounted to.
|
|
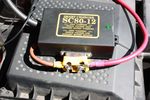
132 viewsTraxide SC80 brain modified. Cut the studs down to the nuts and removed the rubber cover. Had to do this as otherwise it wouldn't fit comfortably and would squash the brake vacuum pipe
|
|
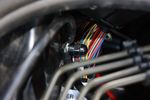
103 viewsEarth stud with earth cables attached
|
|

Thread upload53 viewsImage uploaded in thread 107688
|
|

Studded AT2\'s. 5 new waiting in garage, and one additional spare already used two seasons.52 views
|
|
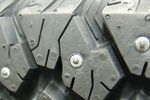
Studs mounted to AT244 views
|
|
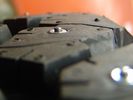
Maximum allowed stud protrusion is 1.2 mm new and 2.0 mm when used!45 views
|
|

115 views
|
|

Roof Rail Stud24 views
|
|

D/3/4 wheel stud aligner11 viewsPDF drawing of dimensions to manufacture your own.
Alternatively, I can do it for you.
( One for Defender coming shortly)
Suggestions welcome.
|
|

Defender wheel stud aligner - for aluminium wheels2 viewsPDF file
|
|

Wheel Stud Aligner for Defender with STEEL wheels2 views
|
|
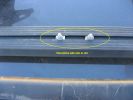
Awning174 viewsStud bolts in slot of bottom rib of expo rack.
|
|
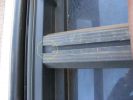
Awning156 viewsStud bolt fitting slot in rib.
|
|
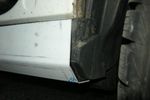
treeslide side protection study98 views
|
|
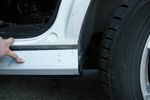
treeslide side protection study83 views
|
|
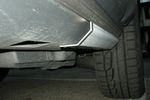
treeslide side protection study83 views
|
|
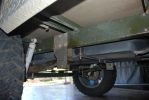
143 viewsraised susspension - this i bought from the factory, so I assume you could order a trailer with this fitted. only necessary if you are fitting big tyres like I have. the axle is a standard alco axle which I ordered from alco with blank hubs. hubs were machined to accept LR studs. Wheel centres had to be slightly machined to fit over bearing caps
|
|
Thread upload2 viewsImage uploaded in thread 179548
|
|

L319 - The Design Case Study29 views
|
|

Thread upload19 viewsImage uploaded in thread 94478
|
|

Thread upload13 viewsImage uploaded in thread 120562
|
|
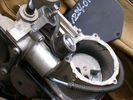
Compressor Con Rod Stud 1342 viewsVisible in the expanded view of this picture is the worn rounded threaded screw that tied the con rod bearing to the electric motor eccentric. I think the stud unscrewed itself and pulled out; then the piston jammed and the con rod broke.
|
|
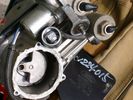
Compressor Exhaust and Inlet 1535 viewsThe two temporary black plugs cover off the 8mm and 10mm push fit lines to the air inlet and exhaust lines. Also visible is the worn threaded stud that I think was the initial failure mode.
|
|

LR3 Denso Alternator YLE500390 rear view709 viewsThis picture shows the rear of the YLE500390, the Land Rover part number for a newer design alternator utilizing the Transpo IN6349 regulator with the "hidden" cooling fins. Note the visual difference in the rear view of the next file jpg.
If the alternator is a rebuilt, (service exchange unit), but Land Rover supplied, then the part number is LR008860 or similar. (Note that 0 in LR0 is zero.)
Two Denso part numbers exist for the alternator as well, 4280003690 and 4280003691. The rating of the petrol V8 alternator is nominal 12 VDC and 150 amps. In normal day to day operation, they seem to run about 14VDC - usually between 13.9 and 14.1 volts at the OBD port.
For the petrol V6, the LR service exchange number is LR008862, and the 2.7TDV6 is LR008861.
The bridge rectifier within the alternator is a 12 diode avalanche type, 117mm diameter, as used in Nippondenso 120 to 160 amp alternators with the Hair Pin stator. It is similar to a Transpo INR421 which is rated for 120 to 150 amp alternators. That is probably our primary problem - the rectifier is just too light. Alternate part numbers for the bridge rectifier are Cargo 237607, Mobiltron RM-29 and AS ARC6021.
Re the B+ stud, the INR421 calls it up as an M8 x 1.25 x 30 mm long course threaded stud; some say 34 mm but that may be longer than desirable.
|
|

451 views
|
|

443 views
|
|

Thread upload1 viewsImage uploaded in new thread
|
|
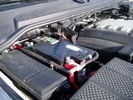
Main starting battery showing 1/2" hole drilled for power cable egress910 viewsView of OEM battery in Left Hand Drive LR3. This is supposed to be a Battery Group BCI 49 or H8 sized battery but in reality is the slightly shorter BCI 94R or H7 battery that fits easier lengthwise, (12 3/8" vs 14").
Note the 10mm hole drilled in plastic of surround to allow for entry of main power cable that runs between batteries. The cable bolts to a spare 6mm threaded hole in the OEM battery cable end; the light gauge wire runs to the front of vehicle to a connector for the CTEK MULTI US 3300 charger. Coloured felts, (red and green), are a material treated to reduce battery post corrosion. The OEM battery ground cable is only about a foot long and runs to an 8mm stud located on the inner fender just to the rear of the fuse case.
|
|

MY14 D4207 views
|
|

Turbo Change15 viewsDrilling out the old studs
|
|
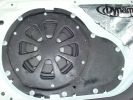
Pioneer TS-SW1041D 10" sub installed123 viewsAfter cutting off the factory sub mount studs, it took ages to bash the indents. To gain more space behind the driver - I changed the driver\'s side license plate from plastic push in lug - to stainless bolt with nyloc nut. Cr@ppy paint job in wrinkle-finish - all I had on hand at the time. Sealed and treated lower tailgate with Dynamat.
|
|

Thread upload8 viewsImage uploaded in thread 187861
|
|

Thread upload7 viewsImage uploaded in thread 187861
|
|
12 views
|
|

61 views
|
|
50 views
|
|
Thread upload8 viewsImage uploaded in thread 119769
|
|

Thread upload4 viewsImage uploaded in thread 128061
|
|

Thread upload4 viewsImage uploaded in thread 13859
|
|

Thread upload21 viewsImage uploaded in thread 115982
|
|

Thread upload7 viewsImage uploaded in thread 169092
|
|

Thread upload12 viewsImage uploaded in thread 195700
|
|
Thread upload9 viewsImage uploaded in thread 203517
|
|

25 views
|
|

Thread upload1 viewsImage uploaded in thread 196848
|
|
Thread upload2 viewsImage uploaded in new thread
|
|
Thread upload1 viewsImage uploaded in new thread
|
|

Thread upload6 viewsImage uploaded in new thread
|
|
10 views
|
|
Thread upload8 viewsImage uploaded in thread 159603
|
|
|
|
|