| Search results - "start" |

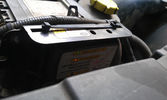
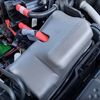
Put a link wire in these 2 holes (use a fairly thick wire ) - compressor will start ..you do not need the ignition on 945 views
|
|
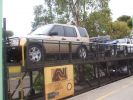
01 Start of Xmas 07 trip across the Australian Nullabor243 viewsThis is the preferred method of travelling 2500km of Nullabor desert when time is short (the Indian Pacific train). Next stop is Adelaide.
|
|
02 On banks of Darling River, Back of Bourke158 views"Back of Bourke" is the typical definition of the start of the Australian Outback. This was after crossing the Darling River "back of Bourke" on 8 Jan 08. We were the first vehicle to start driving after floods had closed (first time in 8 yrs there was any water in the river).
|
|
02 Last Photo before the little wheel problem saga222 viewsThis is my D3 with trailer on the banks of the Darling River, literally "back of Bourke" (the regional definition of the start of the Australian Outback). We were the first vehicle in a week to try and drive this route from Bourke to Wilcannia on the account of floods (first water in 7 years). Little did we know that 3 hours later there\'d be a bit of a wheel and tyre problem appearing...
|
|
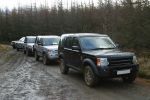
Silver Group Start44 views
|
|
9 views
|
|

09 Starting to remove the seized brake assembly296 viewsBy this time we\'d poured about 8l of water on the dull-red glowing and burning wheel assembly (too close to 140l of 98 octane petrol). Sudden cooling cracked the disk brake which showed mangled park brake parts. How to remove a brake disk without the right star fitting? First remove the caliper then get a sledge hammer?!!
|
|

10 Cracked smoking parking brake drum339 viewsNote the crack in the face of the brake. This showed mangled parking brake springs and other bits. Also a bit of melted rubber was drooling out of the crack. Started to remove the brake caliper and enjoying the flies in 45 deg C heat. Ah, the wonderful Aussie climate in January.
|
|
Start of Round 2189 viewsLined up with some of the Class B entries
|
|
Round 2 start194 viewsSome of the Class C and D cars
|
|
194 viewsWe start...........
|
|

Virgin Snow134 viewsWent for a play in some new snow so I could practice and get my driving style right on close to zero friction surfces. Hard to tell from this photo, but car is parked on a 1:6 slope heading uphill, with hard packed ice under the fresh snow covering. I stopped here to practice my hill starts on ice...I was there for some time :)
|
|

18 Brake "repairs" finished at sunset296 viewsWe just finished the repair at sunset and were driving slowly with 3 brakes. Oddly the D3 didn\'t behave any differently at 50 km/hr than it did normally. We had 4 instances of hitting the (3) skids for kangaroos before arriving in Wilcannia 3 hrs later. The brake light warning was making very distinctive noises and flashing randomly, though.
|
|
On the beach at the start38 views
|
|
On the beach at the start34 views
|
|
start of climb137 views
|
|
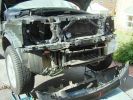
Stripped down ready to start1015 views
|
|
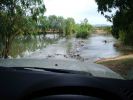
D3 in the Mary River Flood plains47 viewsIn this part of the world, on the flood plains out to Kakadu, you never get out to wade a creek first as the theory says you should. If the water isn\'t clear, like it was on this causeway, and it is this wide, you either wait for someone else who is braver than you to cross first, or you turn around and go home. These rivers are full of estuarine (salt-water) crocodiles, and they are starting to reach 7 metres in size in some still rare instances. However, seeing as a 2.5m crocodile can kill a grown man,
|
|
34 viewsStarting point
|
|

85 viewsStarting point
|
|
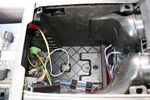
74 viewsStarting the switch wiring
|
|
Thread upload2 viewsImage uploaded in thread 201091
|
|

Quick it\'s starting to melt217 views
|
|

Alternator and Regulator Wiring Diagrams, TDV6 and petrol V8 and V61991 viewsThis is a three page pdf that shows the alternator and regulator wiring for the petrol V6, petrol V8 and TDV6. The pdf can be either printed or by right clicking on the displayed pdf, rotated as required for viewing.
Of interest is that the regulator gets its instructions primarily from the Engine Control Module (ECM) and only secondarily from the vehicles electrical buss. The conductor from the battery thru the 5 amp fuse F20E is to provide initial power to excite the alternator at startup and then secondarily, to instruct it if the PWM signals were not available. Primary instructions to and from the ECM are thru the two other conductors via a digital like Pulse Width Modulated (PWM) signal.
If F20E, the 5 amp engine compartment fuse box fuse is blown, the red alternator light on the dash will be illuminated. This means that the alternator could be OK, but if the F20E fuse is blown, no electricity will be generated. Hence check the F20E fuse if you get a red ALT light or some indication of the alternator not working.
Regarding operation of the red ALT light on the dash, it is not the regulator within the alternator that tells the red light to illuminate, or not, but instead the ECM. This is the reason the red light does not function in the same manner as with older vehicles. With the 3, sometimes you have illumination and sometimes not depending upon what the ECM is thinking. What this means is that you can have an alternator that is failing but the red light does not illuminate as the ECM is compensating for reduced alternator output - maybe by draining the battery and or cutting back on vehicle electrical loads such as shutting off or cycling the radio amplifier or heated seats.
|
|

Thread upload1 viewsImage uploaded in thread 175193
|
|
Italian Cruise ship captain starts new job45 views
|
|

Thread upload0 viewsImage uploaded in new thread
|
|
7 FBH Loom75 views
|
|

Start buttons2 views
|
|
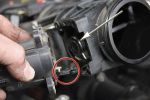
Removing the EGR Butterfly Valve Actuator1538 viewsRemove the 4 TORX screws to remove the actuator. The small black link (circled) connects the actuator drive arm with the butterfly valve spindle (arrowed). The spindle can now be very carefully levered out using a screwdriver inserted beneath the arrowed bit in the photo. A bit scary to do as it takes a fair bit of pressure before the spindle will free itself from the butterfly. Once it starts moving though, it gets easier to pull out.
|
|
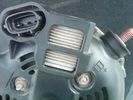
Alternator Plug and B+ terminal920 viewsPictured is the rear of the older Land Rover part # YLE500190 alternator showing the shiny cooling fin of the Regitar VRH2005-142 regulator under.
The first pin in the far left side of the connector is numbered #1 in the LR electrical wiring diagrams and is Battery Voltage Sensing (BVS); the middle pin, #2 receives a Pulse Width Modulated (PWM) signal from the Engine Control Module (ECM), and the right pin, #3 carries a PWM signal back to the ECM. Terminal Pin #2 on the LR wiring diagrams is called Alternator Control or ALT CON; Pin #3 per LR is called Alternator Monitoring or ALT MON.
Pin #1 is similar to what in older designs used to be called A or Batt, but is now called by Denso, S, AS, or Alternator Sensing for this design. Pin #1 also provides power to excite the alternator at startup until the PWM instructions over ride the battery voltage info. Land Rover calls the electronics under the pins a Smart Regulator, ironic, as it has to follow orders from the ECM rather than give the orders - new age thinking I guess. This is different from older design internal regulators that look at just the battery or the electrical buss voltage and then decides itself what to do.
It is almost like we are back to the external regulator designs of old, except that the ECM may decide that instead of telling the alternator to make more power, to load shed, and hence shut down the heated windscreen, seats, or whatever other electrical loads it decides are appropriate. My view is that the "smarts" are in the ECM and that the "regulator" should be regarded if not dumb, then as being a slave to the ECM.
|
|
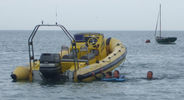
78 viewsThe Smaller Nashers and Friend using \'The Nashers Revenge\' as a diving platform in Start Bay, Devon
|
|

11 views
|
|
27 views
|
|

Bamford Top55 viewsStart of the decent into the lane at the top of Bamford
|
|
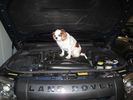
Always start with removing the dog from the engine compartment55 views
|
|

Thread upload3 viewsImage uploaded in new thread
|
|

80 views
|
|

D3 Side Step Repairs167 viewsWhilst I held the trim in place a second person inserted the rivets from behind the step edge. We started in the middle and worked out either way to ensure a snug fit of the aluminium trim.
|
|
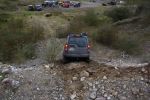
DiscoWex comitted to going down74 views
|
|

Can Bus14 views0s - Start of trace
5s - unlock 1
10s - ignition on (In-I-II)
30s - ignition off (II-I-Out)
Non accurate timings - +/- ~2s.
|
|

74 viewsMS excel sheet for monthly mileage report will give average fuel consumption.(most cells have formulas to help fill in from previous line)
on first sheet add details you want on monthly sheets. during use the data needed to be added is ending reading on clock, places visited (if you want).
how much fuel when you purchased it also fuel in tank at start and end of month
|
|
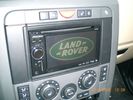
Job done - after adding nice start screen :-)237 viewsPinoeer AVIC-F910BT installation
|
|
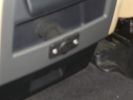
Auxiliary power sockets - TracTronics, Australia383 viewsA complete kit including two outlets, wiring etc connected to auxiliary Optima Blue top battery using their very effective SC40 split charge relay. One outlet between rear and front seats, and 2nd alongside loadspace 12v outlet, enables fridge to run when engine is not running, without affecting start capacity or vehicle functions.
|
|
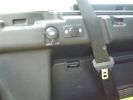
TracTronics loadspace power socket 382 viewsThe 2nd power socket fitted alongside the original in the loadspace runs off the auxiliary Optima Bluetop battery to run a fridge when engine is not running. No more starting worries!
|
|

Thread upload1 viewsImage uploaded in thread 189482
|
|

Thread upload5 viewsImage uploaded in thread 199688
|
|
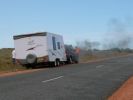
It started in the front - Sept 2008 near Coral Bay WA162 views
|
|
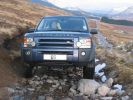
Start of Corrieyairack Pass482 views
|
|

B1D2938 viewsN0 Start Even after Restart
|
|

Thread upload1 viewsImage uploaded in new thread
|
|
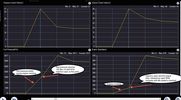
Thread upload17 viewsImage uploaded in thread 167323
|
|

Thread upload26 viewsImage uploaded in thread 184914
|
|

Thread upload31 viewsImage uploaded in thread 184914
|
|

Thread upload0 viewsImage uploaded in new thread
|
|
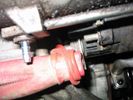
Thread upload4 viewsImage uploaded in thread 209240
|
|
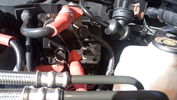
+12V supply143 views+12V taken from the regulator used to power the start/stop battery from MY14 onwards
|
|

A fresh start4 viewsMy frame after it had a ‘treatment’
|
|

Disco3 on the move in Dangalli Conservation Park - at speed (south of Yunta)178 viewsMusic heard in video is from the stero blasting away inside the Disco - and yes...that was a cattle grid being crossed at the start :-)
|
|
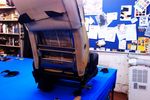
arm rest fit234 viewsthe start of a long night.
|
|

Deka Battery Dimension Data617 viewsThe battery size that I installed for my auxiliary was a BCI 40R battery as it was for me the easiest to fit and was also a cranking battery. The case profile was such that no tie down fins were located on either bottom end, (sides yes), and length wise, it was only about 11" (290 mm) long. As such, I did not have to grind the nibs at the front bottom of the plastic surround.
I did however raise the bottom of the battery above the angled nibs as I set the battery on a 1" (25mm) high plastic spacer. The total height, (battery plus spacer), was about 8" (200mm) so the battery top still fit under the Land Rover factory cover.
For the Aux battery, when I replaced the 40R, I installed an Interstate BCI 47 which is similar in size to a DIN H5. I was therefore able to eliminate the vertical spacer as the Group 47/H5 is the same height as the DIN H7/H8 stock LR spec starting battery. As such, the standard battery tie down bolts can be used without modification. The Group 47 battery is 9 11/16" long x 6 7/8" wide x 7 1/2" (190mm) high.
|
|

Ford at Fen End, Start of UCR507 viewsToo thin this UCR for my big diso 3 though
|
|

Ford at Great Alne - Warwickshire489 viewsGood long drive through here, a big drop into the start though and some deep water at the left on driving in, you can see me steer right to avoid!!
|
|
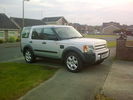
105 viewsas i got it,efore the modding starts
|
|

61 viewsA frosty start to the day.
|
|
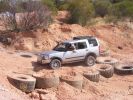
232 viewsDisco at the start of the hill climb
|
|
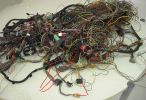
Donar Loom100 viewsThis ball of wires is from a LHD which has been opened and had all audio wires removed, however it is a gold mine for the bits i need. I have pointed out the connectors i know i need for starters near the bottom.
|
|
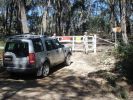
Locked gate and wire rope fence at start of Limeburners.68 views$11,000 fine if you are caught in a vehicle on the other side!
|
|
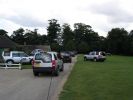
The start line324 views
|
|
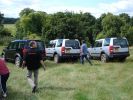
Gentlemen, start your engines!376 views
|
|
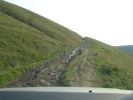
The start of Chapel gate...... looks easy!198 views
|
|
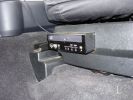
Base unit458 viewsFixed to seat base so it moves with the seat, two power supplies are needed to start up and shut down with the vehicle
|
|
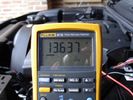
Voltage 10 seconds after start51 views
|
|
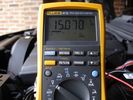
Voltage 40 seconds after start55 views
|
|
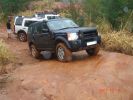
The "alternative route"161 viewsThis was the start of the rocky bit that cut out the snotty slopes. Wasn\'t the way to go unless you quit
|
|
RR had a starter wire break360 views
|
|
Arthur starting the descent196 views
|
|
Richard at start of log crossing207 views
|
|

rear vents trim181 viewsto remove just pull starting from the lower part
|
|
Back to normal after scrutineering134 viewsWe passed! Starting from position 28 (random draw)
|
|
We passed! Back to \'normal\'221 viewsWe drew start position 28 (random draw). Event starts Sept 6th!
|
|

the start of the snow40 views
|
|
Twister - start88 views
|
|
Thread upload1 viewsImage uploaded in thread 178588
|
|

just starting to fill7 viewsafter 1 day draining / cleaning
|
|

pump just started8 viewsafter 1.5 days draining / cleaning / filling, pump just turned on
|
|

Official instructions on how to remove the bumper909 viewsWhen removing the front bumper - you start with the front grill, then the headlamps, then the wheelarch trims, then the bumper...
|
|

Official instructions on how to remove the wheel arch trims624 viewsWhen removing the front bumper - you start with the front grill, then the headlamps, then the wheelarch trims...
|
|
Thread upload1 viewsImage uploaded in thread 198799
|
|
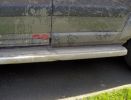
Hmmm, that dent wasn't there when I started.137 views
|
|

Last leg into Inverness, via Aviemore (glow in the distance ) .. Starting to flag !140 views
|
|
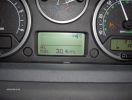
At the 1303 mile mark, Av MPG was 30.4 !!!!!!!!!!!!! With all teh start / stop, and general moochign about, this was quite good !307 views
|
|

Thread upload15 viewsImage uploaded in thread 132564
|
|
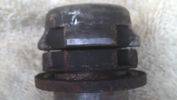
Locker starting to sepreate25 views
|
|
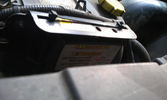
Solenoid not yet engaged18 viewsWith the engine running, the counter in the solenoid starts running and the green light blinks until the timer hits 5 minutes.
|
|
Solenoid engaged15 viewsAfter the engine's running for 5 minutes, the solenoid gets engaged and starts charging the auxiliary battery.
|
|
39 viewsWhen adding two single DIN supports together, you get quite a gap at the front.
This gap was way too much in my case, as it turned out that both supports started to bend when putting them both in the facia. Not that good, so I decided to cut off the upper part of the lower DIN support.
|
|
Finished project75 viewsScary start but the end result is AWESOME!!
|
|

The start of a 2 day adventure109 viewsOverall, car performed really well in all desert conditions, but doesn't do so well on side slopes or full on straight and soft dune climbs. Find an easier approach with plenty of power on and she'll climb the sandy equivalent of Everest!
|
|
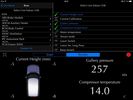
Gallery Pressure Before Start25 views
|
|
Oops17 viewsThat's why it stopped moving forwards and started moving down!
|
|

FBH Start16 views
|
|

785 viewsStarting to put it all back togther
|
|

825 viewsThe start of using the otherwise wasted space in the Irish commercial convertion
|
|
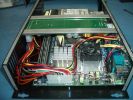
1315 viewsA view of the PC opened, the board at the top is the power supply with the start stop timing built in.
|
|
Dead Starter Motor105 viewsLuckily we were back in civilisation
|
|
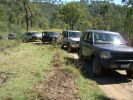
After ditch crossing awaiting driving instructors184 viewsTR mode Rock Crawl - nearside front wheel apparently got to about 1 metre free of ground when we started on the climb to this section but no photos - sorry.
|
|
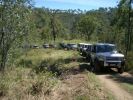
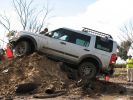
Start of easy hill climb172 viewsTR mode Rock Crawl - although I did turn off Hill Descent as the other side was not too steep and she wanted to keep slowing dramatically which I didn't appreciate in convoy. (Where is my old Pajero that had the inclinometer?)
|
|
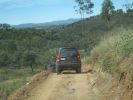
Start of approach to creek crossing174 views
|
|
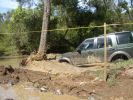
Last D3 through the deep crossing229 viewsThe water was stirred up by this time (didn't start off too clean due to heavy rains in the previous week) water was between 500 and 600mm deep depending on where the driver crossed. Away from the tree was slightly deeper but most drivers chose that line to be well clear of the tree.
|
|
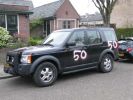
50 years, starting with a new toy109 views
|
|

533 viewsAdded an extra switch to the + leading to my PC and to the MP3 changer. As such I can cut off the power to both systems when needed. Learned that one after 2 days constantly working in the car, lighting the whole thing up during 2 days and noticed I couldn't start anymore :D. Saved by my wife's Freelander next to me :)
Also to be seen is the remote controller of the MP3-changer.
|
|
254 viewsStart of stage E
|
|

Yes, thats right, it started first time!30 views
|
|

TPT start34 views
|
|

Movember, punishment for not starting on time. Bye Bye beard.47 views
|
|

Fuel pressure at startup1 viewsFuel pressure starts at about 0.3 bar when ignition is on and lift pump is priming - then it goes off the scale - engine starts but it is not as smooth as normal
|
|

L'Estartit, Spain36 views
|
|
Just starting the run with my 4x4 group.309 views
|
|

Nanocom start up13 views
|
|
Dry ground at the start of the bog..129 views
|
|
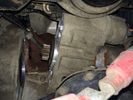
Starter only needs to be moved out of the way13 views
|
|

Interstate Battery Dimension sheet643 viewsThis sheet is hard to find - the sheet is not on the Interstate corporate web site but some dealer web sites display it. The pdf shows most of their available batteries including the H7 and H8 sizes that are the LR North America replacement batteries for the main starting battery. These batteries are of the Land Rover desired "shallow" cycle high discharge current Maintenance Free, (Ca Ca), internal construction, (not AGM, but instead, Wet Flooded Lead Acid with battery "caps" and Ca grid separators).
For the AUX battery , the H6, (BCI Group 48), is probably similar in dimensions to the Varta E12V75N that is popular in Australia. For that battery to fit in the second battery compartment, you must grind out the angled nibs on the inside front bottom of the LR black plastic surround, something I did wish to do and hence installed a Group 40R on a spacer. Alternately, one can choose an Interstate BCI Group 47 which is similar to a DIN H5 for the AUX location. I did this when I had to replace my 40R. No vertical spacer is required and the stock battery tie down bolts and clamp work well.
|
|
Crystal Palace 2008125 viewsEarly morning at Crystal Palace before thr L2B start.
|
|

17 views
|
|

18 views
|
|

The start190 views
|
|

Freelander 2 on the start line302 views
|
|

Thread upload20 viewsImage uploaded in thread 113591
|
|

Thread upload19 viewsImage uploaded in thread 113591
|
|

233 viewswe start um young
|
|

Scaling Dam. The crew at start of a fine day off-roading46 views
|
|

Thread upload0 viewsImage uploaded in thread 190385
|
|
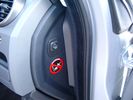
Air Suspension ECU Fuse 35P cut off switch.3824 viewsThis shows the SPST rocker switch mounted in the blank plate installed in lieu of a manual passenger side air bag shut down switch - now automatic via passenger seat pressure switch. Fuse 35P (5 amps) is located in the interior fuse box behind the lower glove box and protects the ignition power supply to the Air Suspension ECU. When the SPST switch is moved to the OFF position, the RAISE /LOWER switch on the centre console is not powered, and hence does not function. As such, some signals from the wheel height sensors and CPU are ignored. By itself however, removing F35P will probably not stop the 3 from self dropping, particularly after the engine is turned off.
Fuse F3E, (5 amps), located in the engine bay fuse box by the starting battery protects the circuit that provides feedback to the Air System ECU indicating that the Compressor Relay has successfully operated and that the Air Compressor is or should be operational, can also be removed, (but is probably not totally necessary), as it gets its power thru F26E. Hence Fuse F26E, (20 amp), also located in the engine compartment fuse box is the fuse that must be removed. This fuse protects the circuit that provides full time battery power to the Air System ECU. When in place, current thru the fuse powers the periodic re-levelling action, (usually lowering a bit with that brief air release noise), that often occurs when the vehicle is parked and the engine is off.
Removing F26E fuse will stop the auto levelling action and also inhibit any other down to the stops signals, (engine running or not). When F26E is removed, no power can flow thru to F3E, hence removing F3E is more for insurance than an absolute requirement. The same with F35P, removing F26E removes primary full time power from the Air Suspension ECU, and hence removing the F35P fuse should not really be required either as long as F26E has been removed.
|
|
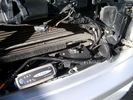
Battery Maintainer switching box plug and CTEK Multi US 3300 charger. 709 viewsThe CTEK Multi US 3300 maintainer is just sitting there for the picture. In addition to topping up both batteries, the CTEK can provide power such that if the batteries were completely dead, there would be power to the door locks and hence, one could most likely still gain access via the remote once the starting battery charged up a bit.
The Land Rover recommended method is via the hidden key hole which is mechanical, however that presumes the mechanism is not frozen from lack of use. As such, the manual lock should be exercised at least once a year to ensure that it still functions.
The blanking plug sitting on top of the plastic box is of the GM Weather Pack series. That is what I like to use for vehicle wiring that is subject to moisture, (or not).
|
|

55degiphone323 viewsHere is the proof... I had calibrated it before the event started...
|
|

Horn Wiring Circuit LR3580 viewsThe is the wiring diagram for the dual horn circuit.
The Horn Relay, (R133), is not a big black thing hidden somewhere but instead what is called a FET, (and it is hidden)!
This is a Field Effect Transistor that is built into the circuit board that is mounted to the back of the fuse box that is located behind the lower glove box door on the passenger side of the 3. The related 15 amp fuse, 12P, is mounted in this fuse box and is often called F12P, where F is for fuse, and P is for Passenger compartment.
This is to help differentiate from another fuse and relay box, (the usual kind), that is located beside the starting battery in the Engine compartment. FxxE is often used in the naming of those fuses.
|
|
![Filename=LR3_Radio_Removal[1].pdf
Filesize=190KB
Dimensions=320x240
Date added=04.Feb 2014 LR3_Radio_Removal[1].pdf](images/thumb_pdf.jpg)
Radio Removal from Radio Stack572 viewsThis shows how to remove the radio from the stack. Basically you remove the H surround first and then at least loosen all the Torx 20 screws left and right sides from the top down starting at the narrow unit that the four way flasher/locking buttons are mounted on.
The units kind of interlock, hence some movement of each is required to remove the radio by itself. I find it best to take out the four way flasher/locking buttons assembly first as that allows access to the fibre optic cable connector into the back of the radio head without too much tugging.
|
|

Thread upload28 viewsImage uploaded in new thread
|
|

LTB00051 - Technical Bulletin - Starter Motor Solenoid Replacement90 views
|
|

LTB00067 - Technical Bulletin - Chirp Noise on Engine Cold Start - Repair Procedure91 views
|
|

LTB0030240 views
|
|
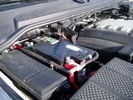
Main starting battery showing 1/2" hole drilled for power cable egress911 viewsView of OEM battery in Left Hand Drive LR3. This is supposed to be a Battery Group BCI 49 or H8 sized battery but in reality is the slightly shorter BCI 94R or H7 battery that fits easier lengthwise, (12 3/8" vs 14").
Note the 10mm hole drilled in plastic of surround to allow for entry of main power cable that runs between batteries. The cable bolts to a spare 6mm threaded hole in the OEM battery cable end; the light gauge wire runs to the front of vehicle to a connector for the CTEK MULTI US 3300 charger. Coloured felts, (red and green), are a material treated to reduce battery post corrosion. The OEM battery ground cable is only about a foot long and runs to an 8mm stud located on the inner fender just to the rear of the fuse case.
|
|
118 views
|
|
starting easy53 views
|
|
D3 in the Kimberley - on the track to the Mitchell Falls, crossing the King Edward River49 viewsSix weeks after the tharck has been opened the water levels in the King Edward River have greatly reduced. This is the start of the 80km track up onto the Mitchell Plateau.
|
|
MY14 Stop Start21 views
|
|

83 viewsTha whole family at speed in Start Bay, Devon
|
|
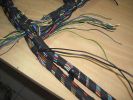
new wires in85 viewsStarting to pull the new wires through.
|
|
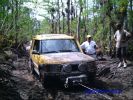
179 viewsPart of the trail the D2s trainsmission started working in reverse so he drove the trails backwards until he got stuck here!
|
|

Fuel pressure at startup1 viewsFuel pressure starts at about 0.3 bar when ignition is on and lift pump is priming - then it goes off the scale - engine starts but it is not as smooth as normal
|
|
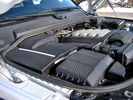
Overview of engine compartment from Main Battery side, (Passenger, LHD), looking across to Aux Battery754 viewsNote labels on main battery cover. The one you cannot read says that an auxiliary battery is installed on the other side. This is to warn service people should they wish to shut off all battery power.
The main starting battery is supposed to be of CaCa separator construction and DIN H8 or BCI Group 49 size. This means Calcium separators Wet Flooded Lead Acid, 13.9" long, 7.5" high and 6.9" wide.
On the Aux battery cover is a label saying to disconnect the blue Anderson single pole connector located under the cover by the brake reservoir. BCI Group 40R battery is small enough that the cover goes back on.
|
|
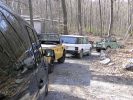
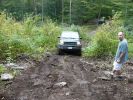
start of the day418 viewsVery nice selection of Rovers attended the trials. I had the only LR3. The had two classifications, short wheel base (under 100 inches) and Long Wheel base (over 100). LR3 was classified in the long.
|
|
Starting Line218 views
|
|
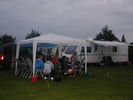
73 viewsSaturday evening start of BBQs and afew drinks..
|
|
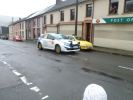
Rally GB going up to start of stage Rhondda Stage 68 views
|
|
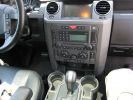
212 viewsThe start. Yes, the cupholders are dirty... get over it!
|
|
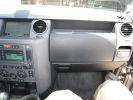
217 viewsThe start. I plan to place all the electronics into the lower glove box.
|
|

Poor cold start bulletin51 views
|
|
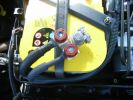
340 viewsConnection on the aux battey- Starter cable and supply wire
|
|

Thread upload3 viewsImage uploaded in new thread
|
|
Thread upload2 viewsImage uploaded in thread 198799
|
|

Thread upload0 viewsImage uploaded in thread 198799
|
|
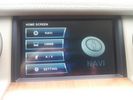
chinese satnav screen44 viewsthis is what it looks like when I exit sat nav.
It gives options to restart nav,TV,a/v(not fitted)and settings
|
|

Thread upload1 viewsImage uploaded in thread 200210
|
|

Thread upload2 viewsImage uploaded in thread 200210
|
|
Thread upload4 viewsImage uploaded in thread 200210
|
|
Gibb River Rd67 views
|
|
804 views
|
|

Thread upload15 viewsImage uploaded in new thread
|
|

158 views
|
|
Thread upload6 viewsImage uploaded in thread 187134
|
|

Thread upload32 viewsImage uploaded in thread 171079
|
|

Thread upload6 viewsImage uploaded in new thread
|
|
Thread upload2 viewsImage uploaded in thread 198799
|
|
Thread upload0 viewsImage uploaded in thread 198799
|
|

Thread upload1 viewsImage uploaded in thread 198799
|
|

Thread upload0 viewsImage uploaded in thread 198799
|
|

starting system60 views
|
|

78 views
|
|

Thread upload3 viewsImage uploaded in new thread
|
|

Thread upload3 viewsImage uploaded in new thread
|
|

Thread upload17 viewsImage uploaded in new thread
|
|

Thread upload23 viewsImage uploaded in thread 178409
|
|
Thread upload11 viewsImage uploaded in thread 177417
|
|
Thread upload2 viewsImage uploaded in thread 198799
|
|

Thread upload1 viewsImage uploaded in new thread
|
|

Unidentified ticking noise3 viewsAnyone familiar with this ticking noise? It's at the front of the engine down low. 1st heard on startup this morning.
|
|

Bali Beast at the start of Rommel\'s Pass129 views
|
|

Varta Battery Dimension chart572 viewsThis pdf provides Varta dimensions for among others, the E12V75N, (old DIN H6 or 85605 or BCI Group 48 size). This appears to be a deep cycle battery and the choice for many re the Aux battery install as long as you are willing to grind away the angled nibs at the bottom front of the battery surround. My choice was a shallow cycle battery intended for cold weather related engine starting rather than winch use.
Note the pdf Varta batteries are all deep cycle batteries suitable for running fridges, winches etc, rather than for engine starting and hence a good Aux battery if those are the intended uses rather than engine starting.
Varta now makes a Varta G14 with AGM technology and known as a Stop Start Plus battery. It is 95Ah, CCA of 850A; length 353mm; Width 175mm; Height 790mm and is specific for these newer stop start vehicles such as some D4's. For the 3's, one is still probably better off with an H8 sized battery but of the older Wet Flooded Lead Acid type and battery caps rather than a sealed AGM.
The Land Rover part number for the recommended battery is LR033179.
|
|

Disco on a sideways-slope135 viewsActually watching your own Disco tilted 30 degrees by a friend is not THAT funny... I got it so far that the back right wheel indicator in the 4x4-screen started blinking red. Pure adrenalin, won´t do it again though...
|
|
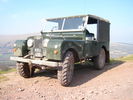
Where it all started.56 viewsMid Wales Easter 2007
|
|

Clean line up at start136 views
|
|

The bike started it129 views
|
|
Thread upload1 viewsImage uploaded in thread 187493
|
|
|
|
|