| Search results - "sea" |

D4 HSE seat in cream188 views
|
|
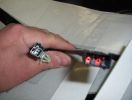
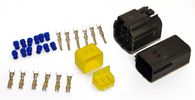
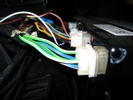
heated seat (base) wiring410 viewsThe Small connector takes the plug from the seat back pad, the larger connector (with red) is fitted into the multiplug casing uder the seat - the male side of this is already pre-wired.
|
|
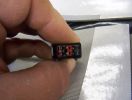
heated seat wiring351 views
|
|

Scorched Pad12 viewsThis is where the seat rod made contact with heating element.
|
|

Burnt seat pad/ heating element17 viewsYou can see where the rod has broken and breached the heating element
|
|
At the seaside64 views
|
|

fuseable link 73 views
|
|
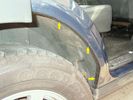
Arches rusting - now undersealed100 views
|
|
Arches rusting - now undersealed92 views
|
|
116 viewsFinal placement after 3rd row seats closed down
|
|
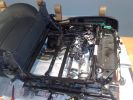
Seat base interior129 views
|
|
381 views
|
|
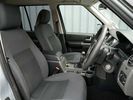
Front seats68 views
|
|
Thread upload8 viewsImage uploaded in new thread
|
|
Thread upload0 viewsImage uploaded in new thread
|
|
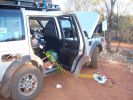
Fuelling up from 200 litre tank replacing rear seat343 views
|
|
Units in place under pass seat117 views
|
|
D4 350 viewsRear seat aircon gone missing
|
|

Mercedes E320 Rear Seat19 views
|
|
Mercedes E320 Back Seats22 views
|
|
Mercedes E320 Back of Front Seats23 views
|
|
Mercedes E320 Passenger's Seat17 views
|
|
Mercedes E320 Drivers Seat20 views
|
|
Mercedes E320 Back Seats17 views
|
|
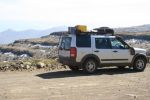
3400m above sea level!!149 views
|
|

Radio location537 viewsMy remote head UHF CB mounted on the front of the ashtray, ham HF/VHF/UHF remote head radio mounted on a block in the coin tray and my GPS on a turned wooden block in the cup holder. Both radios are under tha driver and passenger seat and the antenna for the GPS is suction mounted inside the windscreen.
|
|
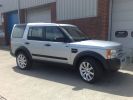
my disco58 views
|
|

HSE seat frame170 views
|
|

seat air bag module104 views
|
|

bent seat back113 views
|
|
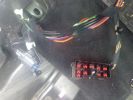
Under seat loom - manual118 views
|
|

Under seat connector - manual121 views
|
|

Trolley Jack Premier 2ton Long Reach Super Rocket Lift Sealey 2000LQ111 views
|
|

Drivers seat connector60 views
|
|

Drivers seat connector46 views
|
|

Drivers seat connector45 views
|
|
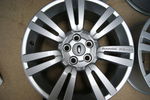
2010 FFRR 20inch SE alloy37 views
|
|

Where the Rain Forrest meets the Sea - Cape Tribulation, Daintree Cape York20 views
|
|
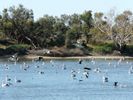
Thousands od Sea Birds Thousands of Km from Ocean - Innamincka28 views
|
|

94 viewsOut at the C pillar. From here wires were threaded through the rear seatbelt anchor point into the commercial box, which is the hub of all the wiring and CarPC installation
|
|
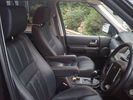
RRS 2010 seats662 views
|
|
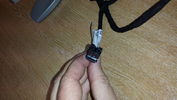
black plug for rear heated seat11 views
|
|
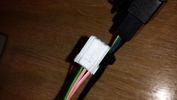
white plug for rear heated seat11 views
|
|
Thread upload9 viewsImage uploaded in thread 147037
|
|
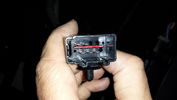
Connector on underseat harness for heated rear seats16 views
|
|
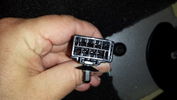
Connector from Main Loom to Heated Rear Seat Harness17 views
|
|
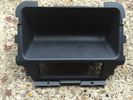
Rear Console trim which i replaced with one with heated rear seats.11 views
|
|
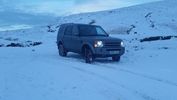
Gospel Pass Jan 2015146 viewsThe Gospel Pass (Welsh: Bwlch yr Efengyl) is the highest road pass in Wales. It is at the head of the Vale of Ewyas in the Black Mountains of southeast Wales.[1] The narrow mountain road climbs steeply from Hay-on-Wye to a height of 549 metres (1,801 ft) [2] above sea level, squeezing between the mountains of Twmpa to the west and Hay Bluff to the east, before dropping down into the valley to the south on its way to Llanthony Priory, Llanfihangel Crucorney and Abergavenny.
|
|
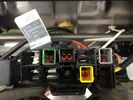
Seat plug 217 views
|
|
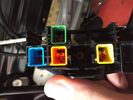
Seat Plug 318 views
|
|
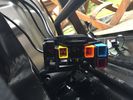
Seat Plug117 views
|
|

D4 Seats5 views
|
|
Thread upload3 viewsImage uploaded in thread 198510
|
|

Rear seats1 views
|
|

Rear Seat1 views
|
|
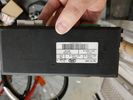
Driver Seat Memory Module2 views
|
|

Rear heated seat loom and switches3 views
|
|
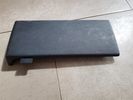
Rear Seat Trim2 views
|
|
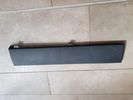
Rear Seat Trim4 views
|
|

Front Seat Trim6 views
|
|

Rear Seat Belts4 views
|
|

Seat Switches7 views
|
|

Seat Loom8 views
|
|

Seat Loom8 views
|
|
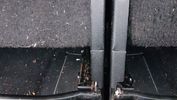
RAW jack1 viewsCasing just catches the inner legs of the seat backs.
|
|
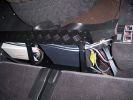
RAW jack1 viewsAccess to winch between folded seats.
|
|
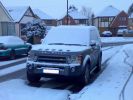
HF radio on RH side Inverter on LH. Frame is fitted behind second row of seats. (I have removed 3rd row as they will never be used)307 views
|
|
Heated seats, pre-heater, heated screens. Bring it on!262 views
|
|
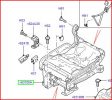
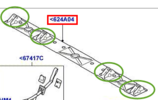
HTG500042 RH Out 2nd Row Seat Frame Assy203 views
|
|
Thread upload23 viewsImage uploaded in thread 138841
|
|

Thread upload7 viewsImage uploaded in new thread
|
|
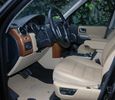
Front seats24 views
|
|

Rescue Call Out 392 viewsRescue Call Out in North Yorkshire; Cleveland Search and Rescue and the Police
|
|

124 views3rd row seat removal
|
|
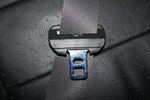
Seat Belts 3rd 4th 5th Seat26 views
|
|

Thread upload8 viewsImage uploaded in new thread
|
|
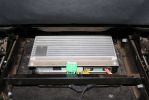
03284 viewsStock amp, underneath passenger front seat. In order to integrate the factory head unit with the V1000 we had to go through the stock amp. This is because of the MOST (fiber optic) connection between the two.
|
|

Back seats.18 views
|
|
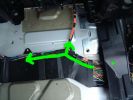
4 ICE Loom - routing of cable behind drivers seat58 views
|
|

Alternator and Regulator Wiring Diagrams, TDV6 and petrol V8 and V61973 viewsThis is a three page pdf that shows the alternator and regulator wiring for the petrol V6, petrol V8 and TDV6. The pdf can be either printed or by right clicking on the displayed pdf, rotated as required for viewing.
Of interest is that the regulator gets its instructions primarily from the Engine Control Module (ECM) and only secondarily from the vehicles electrical buss. The conductor from the battery thru the 5 amp fuse F20E is to provide initial power to excite the alternator at startup and then secondarily, to instruct it if the PWM signals were not available. Primary instructions to and from the ECM are thru the two other conductors via a digital like Pulse Width Modulated (PWM) signal.
If F20E, the 5 amp engine compartment fuse box fuse is blown, the red alternator light on the dash will be illuminated. This means that the alternator could be OK, but if the F20E fuse is blown, no electricity will be generated. Hence check the F20E fuse if you get a red ALT light or some indication of the alternator not working.
Regarding operation of the red ALT light on the dash, it is not the regulator within the alternator that tells the red light to illuminate, or not, but instead the ECM. This is the reason the red light does not function in the same manner as with older vehicles. With the 3, sometimes you have illumination and sometimes not depending upon what the ECM is thinking. What this means is that you can have an alternator that is failing but the red light does not illuminate as the ECM is compensating for reduced alternator output - maybe by draining the battery and or cutting back on vehicle electrical loads such as shutting off or cycling the radio amplifier or heated seats.
|
|
Sea Gull Poo84 views
|
|
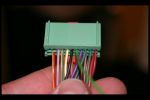
Heated Seat connections in front footwells 3187 views
|
|
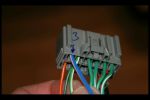
Heated Seat connections in front footwells 2182 views
|
|
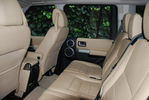
Back seats21 views
|
|

Running Cable Through Rear - under seats126 views
|
|

My Working Girls22 viewsLast day of the season 2012 picking up.
|
|
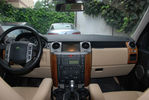
Front seats21 views
|
|

Thread upload12 viewsImage uploaded in thread 163574
|
|
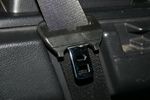
Seat Belts 6th 7th Seat25 views
|
|
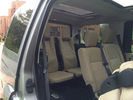
Thread upload31 viewsImage uploaded in new thread
|
|
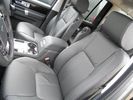
Discovery ebony seats44 views
|
|
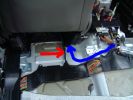
9 ICE Loom - routing behind passenger front seat for DVD Nav77 views
|
|
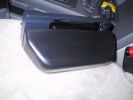
Ham Radio446 viewsThe remote head of an Icom IC706 was mounted on a piece of wood shaped to fit into the coin holder. This is quite a tight fit and does not shake loose. The radio is mounted under the driver seat.
|
|

Next seasons haircut, apparently.152 views
|
|
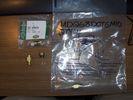
Air parts62 viewsSubstitute airs spring parts - reuseable
|
|
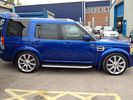
FOR SALE - ONE OFF Land Rover Disco 3 37 viewsOne of a kind Landrover Discovery TDV6 HSE LUX Model 5 door automatic 4x4 diesel evo blue. Upgrades: sidesteps, roof rails, privacy glass, front and rear heated seats/elec seats, landrover tv and headphones, 7 seater black leather, piano black dash/steering wheel, built in fridge, 6 disc changer, sat nav and bluetooth, harman kardon premium entertainment pack, by-xenon adaptive headlights , cruise control and front and rear park distance control, panoramic electric glass roof, 22inch alloy wheels, body kit
|
|
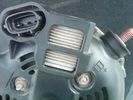
Alternator Plug and B+ terminal910 viewsPictured is the rear of the older Land Rover part # YLE500190 alternator showing the shiny cooling fin of the Regitar VRH2005-142 regulator under.
The first pin in the far left side of the connector is numbered #1 in the LR electrical wiring diagrams and is Battery Voltage Sensing (BVS); the middle pin, #2 receives a Pulse Width Modulated (PWM) signal from the Engine Control Module (ECM), and the right pin, #3 carries a PWM signal back to the ECM. Terminal Pin #2 on the LR wiring diagrams is called Alternator Control or ALT CON; Pin #3 per LR is called Alternator Monitoring or ALT MON.
Pin #1 is similar to what in older designs used to be called A or Batt, but is now called by Denso, S, AS, or Alternator Sensing for this design. Pin #1 also provides power to excite the alternator at startup until the PWM instructions over ride the battery voltage info. Land Rover calls the electronics under the pins a Smart Regulator, ironic, as it has to follow orders from the ECM rather than give the orders - new age thinking I guess. This is different from older design internal regulators that look at just the battery or the electrical buss voltage and then decides itself what to do.
It is almost like we are back to the external regulator designs of old, except that the ECM may decide that instead of telling the alternator to make more power, to load shed, and hence shut down the heated windscreen, seats, or whatever other electrical loads it decides are appropriate. My view is that the "smarts" are in the ECM and that the "regulator" should be regarded if not dumb, then as being a slave to the ECM.
|
|
Thread upload14 viewsImage uploaded in thread 178285
|
|

Studded AT2\'s. 5 new waiting in garage, and one additional spare already used two seasons.50 views
|
|
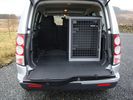
B24 TransK9 Dog Transit Box for Discovery 470 viewsThis box is designed specifically for the Discovery so that the 6th seat can also be used.
|
|
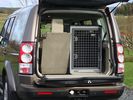
TransK9/B24 in Discovery 4 with 6th seat in use35 views
|
|
20 views
|
|
back seat temp25 views
|
|

Thread upload0 viewsImage uploaded in thread 205170
|
|

Thread upload0 viewsImage uploaded in thread 203014
|
|
Shower at sea97 views
|
|

Middle seat strike plate11 views
|
|
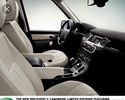
Thread upload19 viewsImage uploaded in thread 173075
|
|
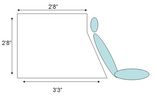
Dimensions65 viewsshown with 2nd row seat rake angle
|
|
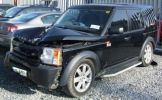
Bent Black Betty228 viewshard to believe that in this condition she\'s a write off, what got her was the cost of tricknology repairs, seatbelt pretensioners, airbags etc etc, & declining values, repair estimates €12500, value €13000. a no brainer really
Note TASTEFULL G4 sticker
|
|
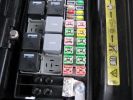
Fuseable link for rear windows 18e (50amp ) bottom right hand red square 135 views
|
|
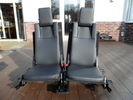
Thread upload2 viewsImage uploaded in new thread
|
|
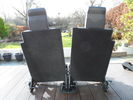
Thread upload1 viewsImage uploaded in new thread
|
|

Thread upload2 viewsImage uploaded in thread 157188
|
|

Black Deposits to interior of Brake Light Switch2831 viewsThere are two contacts, one on each side of the vertical plunger under the copper metal. The set of normally open contacts on the left side that carries the power for the brake light filaments, (15 amp fuse F15P), is apparently not heavy enough as the contacts deteriorate and generate the black residue.
The set of normally closed contacts on the other side appear to be sized OK. There is not as much current, (5 amp fuse F66P), flowing thru the contacts to the ABS module, however the contacts are likely adversely affected by the black residue produced by the other deteriorating set of contacts.
One presumes/hopes that the newer replacement switch now has contacts heavy enough to carry the brake light power. It would be ideal if the ABS set of contacts were sealed from the brake light contacts to prevent contamination of the normally closed set of contacts.
|
|

Brake Light Switch, Find, Remove, and Install Instructions 7778 viewsThis is a two page doc outlining where to find the brake light switch, how to remove it, and then install the new one.
Note, do not move the brake pedal when removing or installing the switch. Let the brake pedal hang where it wants to. The switch design is actually cunning, and as such is supposed to make the removal and install fool proof. Hence if you think too much about it, you can wreck the new switch.
If you want to inspect the interior of the switch, wait until you have removed the old switch. You can then just unsnap the blue from the white to get it apart. Inside, the switch is quite simple, (no circuit boards), but it will probably show black dust from failing contacts.
I think the reason the switch fails is that the Normally Open, (NO), contacts of the brake light contacts were made too light to carry the current load for make and break of the tail light filaments. I also think the black dust created then fouls the Normally Closed, (NC), second set of contacts for the ABS circuit. As such, the Normally Closed contacts become intermittent in operation and display as a fluctuating open and closed circuit condition to the ABS system when the ABS should be seeing a steady closed circuit. Hopefully the replacement switch contacts are more robust and may be as I recently replaced my switch again just as a matter of maintenance. While in a redesign, ideally the NC contacts should be sealed or at least separated from the NO contacts, when I inspected the removed switch, this time there was no black dust present.
Probably the removed switch will have a Land Rover oval logo moulded into it, the new one, FOMOCO.
|
|
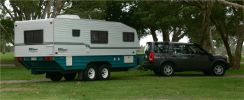
AUS11 with the BT at Swansea (Newcastle) Feb 2008274 views
|
|
Thread upload1 viewsImage uploaded in new thread
|
|
Thread upload1 viewsImage uploaded in new thread
|
|

Thread upload0 viewsImage uploaded in new thread
|
|

Thread upload2 viewsImage uploaded in new thread
|
|

Thread upload0 viewsImage uploaded in new thread
|
|

Thread upload2 viewsImage uploaded in thread 142370
|
|
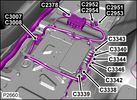
Camera Control Module D451 viewsHarness connection detail, camera module, located beneath L/H passenger side front seat UK D4 spec 2012.
|
|

Thread upload7 viewsImage uploaded in new thread
|
|

Thread upload7 viewsImage uploaded in new thread
|
|

Search on Google323 views
|
|
78 views
|
|

Bridge of death96 views
|
|

Thread upload7 viewsImage uploaded in new thread
|
|
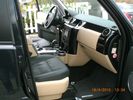
82 viewsPainted the H panel and the vents and got new lether seats - all in all a nice change to the original look
|
|
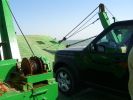
All at sea in an LR3103 viewsThe ferry from the mainland to Mazira Island was packed to the gunnels with vehicles. My LR3 was last on and they left the bow doors partially open for 14 lonnnnng sea miles across the Arabian Gulf!
|
|
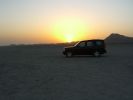
Sunset on Mazirah100 viewsOur camp site for the night - nothing but us, sand and green turtles. Fabulous view out over the Arabian Gulf, blue skies, blue seas and isolation. Almost paradise.
|
|
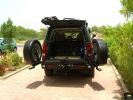
Rear end open329 viewsEccentric latch clamps for wheel carriers are very strong. No rattles on graded roads. Canvas seat covers from \'Escape\' in SA on rear jump seats can be seen, and Front Runner Wolfpack storage boxes - great for toolkit, winch and recovery straps etc.
|
|
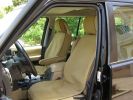
\'Escape\' canvas seat covers269 viewsFull set of these well made SA seat covers fitted to protect the Alpaca leather from constant exposure to Middle EAst sunlight and sand. They fit well, and to date have proved very durable. They include headrest and arm rest covers too.
|
|
Auxiliary power sockets - TracTronics, Australia381 viewsA complete kit including two outlets, wiring etc connected to auxiliary Optima Blue top battery using their very effective SC40 split charge relay. One outlet between rear and front seats, and 2nd alongside loadspace 12v outlet, enables fridge to run when engine is not running, without affecting start capacity or vehicle functions.
|
|
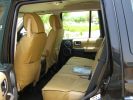
Escape seat covers rear254 viewsJust shwing the good fit of these canvas seat covers made in South Africa. The whole set for a 7 seat HSE £542 with air freight as unaccompanied baggage (inside 5 Front Runner Wolf pack boxes) costing and additional £150 - still a bargain out here!
|
|
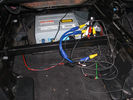
GVIf module under seat33 views
|
|

heated seats57 views
|
|

power to mats112 views
|
|
commercial kit bracket behind driver seat60 views
|
|
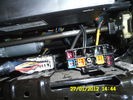
Connector under seat103 views
|
|
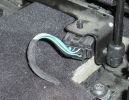
Rear Seat Warm Connector64 views
|
|
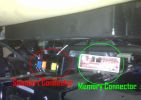
Under seat connectors80 views
|
|

Searching The C2084-C004151 views
|
|
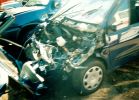
Not much left of bonnet!278 viewsCrash in a Renault Scenic
Head on colition with a Nissan Terrano he lost control came over the central reservation & ended coming at us sideways!
We hit him in the back wheel arch & spun him around so he then hit my drivers side, I walked away having a air bag wife had broken solder coursed by the seat belt, but it did save her life!
Our car was trashed but it did its gob (was only 2 weeks old!) the bonnet tacking lots of energy out of the collision & the inertia staying relatively in tacked.
|
|

Thread upload2 viewsImage uploaded in thread 198799
|
|
Thread upload6 viewsImage uploaded in new thread
|
|

Thread upload1 viewsImage uploaded in thread 198799
|
|

Thread upload1 viewsImage uploaded in thread 198799
|
|

Thread upload2 viewsImage uploaded in thread 198799
|
|
Thread upload2 viewsImage uploaded in thread 206816
|
|

Thread upload1 viewsImage uploaded in new thread
|
|

Thread upload1 viewsImage uploaded in new thread
|
|

Thread upload7 viewsImage uploaded in new thread
|
|
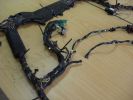
Drivers seat wiring Cut146 viewsSpare connector from my second hand seats shows where wiring to seat gets cut presumably by emergency services.
|
|

43 views
|
|
Thread upload5 viewsImage uploaded in thread 176545
|
|

Thread upload6 viewsImage uploaded in new thread
|
|

Thread upload12 viewsImage uploaded in new thread
|
|
Thread upload4 viewsImage uploaded in thread 176545
|
|

Thread upload0 viewsImage uploaded in new thread
|
|

Thread upload9 viewsImage uploaded in new thread
|
|

Thread upload8 viewsImage uploaded in new thread
|
|

Thread upload6 viewsImage uploaded in new thread
|
|

Thread upload6 viewsImage uploaded in new thread
|
|

Thread upload6 viewsImage uploaded in new thread
|
|

Thread upload6 viewsImage uploaded in new thread
|
|

Thread upload0 viewsImage uploaded in new thread
|
|

Thread upload0 viewsImage uploaded in new thread
|
|
Thread upload5 viewsImage uploaded in new thread
|
|
Thread upload36 viewsImage uploaded in new thread
|
|

Seat base electrics cover39 views
|
|

Front seat lower cover removal replacement43 views
|
|

Lower Seat Cover and T40 Torx bit for seat base removal45 views
|
|

Hog Rings and Hog Ring Pliers47 viewsHog Rings and Hog Ring Pliers showing an open and closed hog ring with 20p for scale
|
|

New Seat Base40 views
|
|

Seat Base out of car rear view36 views
|
|

Seat Base out of car37 views
|
|

Rear Seat Cover retainer - Seat Base41 views
|
|

Front and Side Clips - Seat Base38 views
|
|

Per replacement of seat base foam - note creasing on right side due to collapsed foam40 views
|
|

Rear side clip removal - seat base44 views
|
|

Seat Base cover front and side clips released43 views
|
|

Seat Base cover partially removed - just hog rings to go44 views
|
|

Heated Seat Element Wiring - Seat Base47 views
|
|

Seat Base and Cover43 views
|
|

Seat Base Cover - hog ring attachment points43 views
|
|

Seat Base Cover and Foam44 views
|
|

Seat Base Heating Element Side View37 views
|
|

Seat Base Heating Element40 views
|
|

Protection material fitted between seat base and seat pan38 views
|
|

Heating element removed from base foam42 views
|
|

Old and New Seat Base Foam45 views
|
|

Glueing heating element to new base42 views
|
|

Heating Element refitted to new base39 views
|
|

Hog ring pliers load with hog ring48 views
|
|

Attaching one of the hog rings42 views
|
|

Ready to refit the cover38 views
|
|

Position of protection material between base and pan37 views
|
|

Seat base finished and ready to fit39 views
|
|

Finished - new seat base fitted back into D351 views
|
|

D3 Seating and Heater Mats24 views
|
|
Thread upload4 viewsImage uploaded in new thread
|
|

Thread upload9 viewsImage uploaded in new thread
|
|
Thread upload5 viewsImage uploaded in thread 176545
|
|
Thread upload5 viewsImage uploaded in thread 176545
|
|
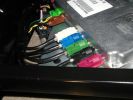
Under seat module148 views
|
|

Thread upload22 viewsImage uploaded in new thread
|
|

Thread upload76 viewsImage uploaded in thread 87558
|
|

Thread upload3 viewsImage uploaded in thread 148429
|
|
Thread upload6 viewsImage uploaded in new thread
|
|

D5 rear seat18 views
|
|
93 views
|
|
83 views
|
|
105 views
|
|

Thread upload11 viewsImage uploaded in new thread
|
|

Thread upload3 viewsImage uploaded in new thread
|
|

Seats -Description and Operation.pdf484 views
|
|
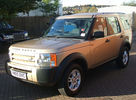
My new D3 Nov. 2010 161 views7 seater base with air.
|
|

333 viewsCentre seat removed, fridge fitted & my al cheepo seat covers.
|
|

174 viewssealant used for sticking resistor to rear light and spot fixing the D4 front grill this stuff is superb but needs 24 hrs to cure
|
|
Disco3 overlooking our city of Adelaide, Australia212 viewsThe TDV6 will make it a dream to climb the 450m above sea level to our ridge top home from the city each day.
|
|
Thread upload0 viewsImage uploaded in new thread
|
|
Thread upload0 viewsImage uploaded in new thread
|
|

Perth to Shark Bay spearing trip. 9 viewsDisco 3 Tdv6 auto. Air suspension. Arb bullbar. BFG All Terrain KO 265/65r18. 6m Seafarer Honda 150hp
|
|
Thread upload0 viewsImage uploaded in new thread
|
|
Thread upload6 viewsImage uploaded in thread 50066
|
|
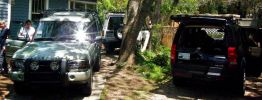
2004 D2, 1996 D1, 2007 D3259 views- possibly last reunion of all 3 as D2 goes to Minnesota, D1 stays in NC, LR3 goes to Seattle.
|
|

Thread upload30 viewsImage uploaded in thread 133490
|
|

Thread upload27 viewsImage uploaded in thread 133490
|
|
Thread upload19 viewsImage uploaded in thread 109290
|
|
Thread upload17 viewsImage uploaded in thread 109290
|
|
39 views
|
|

Passenger side seat....106 viewsBlack leather stiched in silver...
|
|
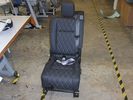
rear seat..70 views
|
|
my new interior...75 viewsThanks to my friends at transcal.... stunning job chaps
|
|
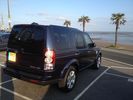
Seaside12 views
|
|
2012 D4 Seats77 views2012 D4 seat
|
|

D4 2012 Seat61 views
|
|

Thread upload55 viewsImage uploaded in thread 175673
|
|
184 views
|
|

Thread upload6 viewsImage uploaded in new thread
|
|
79 views
|
|
74 views
|
|

Thread upload2 viewsImage uploaded in new thread
|
|

Door Seal27 views
|
|

Thread upload1 viewsImage uploaded in new thread
|
|
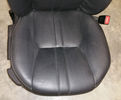
Thread upload2 viewsImage uploaded in thread 157188
|
|

Thread upload1 viewsImage uploaded in thread 207823
|
|
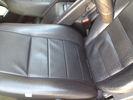
Drivers_seat50 views
|
|

Thread upload1 viewsImage uploaded in new thread
|
|

Thread upload1 viewsImage uploaded in new thread
|
|

26 views
|
|
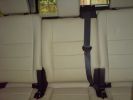
Rear Perforated Seats287 views
|
|
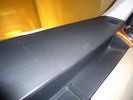
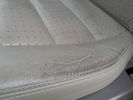
Passenger side Airbag35 viewsAirbag seams cracking
|
|
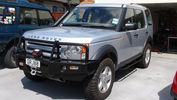
Ready to Roll114 viewsCompleted putting on sliders, mud tyres etc ready for Kauri Coast 2013.
youtube.com search snafu4wd
|
|
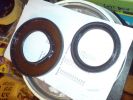
Transfer box seals109 views
|
|
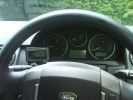
View from Drivers seat102 views
|
|
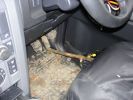
Disco 3 version of a hand throttle - if you have electric seats!718 views
|
|
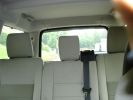
Seats, Demonstrator908 views
|
|
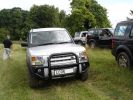
Slimer takes the passenger's seat333 views
|
|
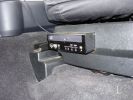
Base unit456 viewsFixed to seat base so it moves with the seat, two power supplies are needed to start up and shut down with the vehicle
|
|
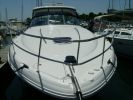
Our friend\'s Sea Ray56 views
|
|
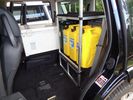
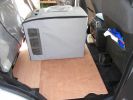
2nd Row seats out and fridge and jerries "in"21 viewsA false floor was made out of ply to support the freezer and 5 x water jerries. I used 3 x fuel jerries for photographic purposes only.
|
|
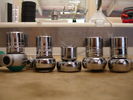
Wera-Facom Flex-HP Vortex-HP-Facom Sealed Pear59 views
|
|
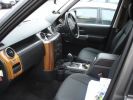
New Wood Dash and Retro-Fit Leather Seats108 views
|
|

78 viewsThis metal body seam gets touched by larger rear tyres. If you don\'t have rear AC, you can fold it out of the way. If you do, the two pipes mean you have to leave it alone.
|
|

Rear Seats19 views
|
|

Front Seats19 views
|
|
RRS 2010 Seats & Blackvue 304 views
|
|
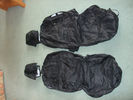
seat covers0 views
|
|
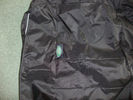
seat covers0 views
|
|
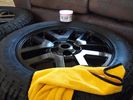
Poorboys wheel sealer22 views
|
|
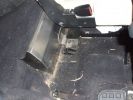
Internal water tank right side view160 viewsShows right front side of tank, with RH seat lifted. Note seat bolt is used to also hold the tank secure. This is a 5-seat D3, which has a cover over what is normally the 3rd row footrest. This is where the water tank is located.
|
|
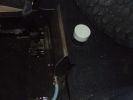
Internal 40 Litre water tank - top view of left side of tank105 viewsShows my spare tyre, but also bright white protective cap of top fill point and vent. Blue hose is water dispensing point. Note seat bracket bolt secures tank to D3. Similar bolt point on other side. Only these two bolts secure the tank and it is very secure.
|
|
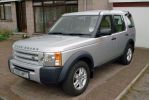
Discovery 3 5 Seat488 views
|
|
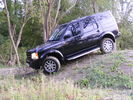
In search of fun172 views
|
|
searcher105 views
|
|

Over The Top front seat covers167 views
|
|
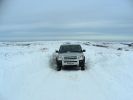
CALENDAR 2010272 viewsFebruary 2009
Danby Rigg , with North Sea on the horizon.
North York Moors
|
|
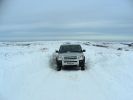
CALENDAR 2010279 viewsFebruary 2009
Danby Rigg , with North Sea on the horizon.
North York Moors
|
|
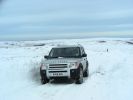
CALENDAR 2010286 viewsFebruary 2009
Danby Rigg , with North Sea on the horizon.
North York Moors
|
|
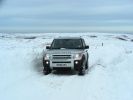
CALENDAR 2010274 viewsFebruary 2009
Danby Rigg , with North Sea on the horizon.
North York Moors
|
|
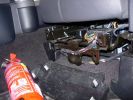
Mounting a non-LR fire extinguisher531 viewsShowing the plastic cover removed. I will make up a metal plate or bar so that the extinguisher frame can be mounted directly to this framework under the seat.
|
|
Sea breeze front22 views
|
|
Sea breeze front22 views
|
|
Sea breeze front24 views
|
|
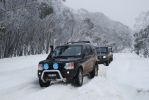
Mt Skene, Victoria, Australia - leading 2 D2s up the hill...192 viewsA great snow season in 2008. The Mt Skene road is one of the few alpine roads that is left accessible, but uncleared, so we can go and play!
|
|
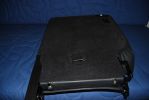
196 viewsback of the driver side back seat back rest, sweet
|
|
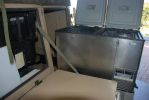
116 viewsthis shows the fridge on the 2 x 180kg sliders. i had to slightly modify the door opening to fir the fridge hinges thru. I just gently bent it, and fitted additional seals, hence it can easily be returned to standard. having the fridge in the kitchen is a major bonus, plus the back door of the trailer is now used for easy access to the cavernous interior, whereas prior to this youhad only access thru the front doors, which are only 500mm wide
|
|

130 viewsLooks a lot worse from the drivers seat!
|
|
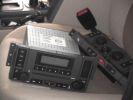
All the bits - don\'t let your wife see them like this!587 viewsHere\'s the stack all dumped on the passenger seat while i run the wires.
|
|
Thread upload9 viewsImage uploaded in thread 122912
|
|
Thread upload2 viewsImage uploaded in new thread
|
|

2 views
|
|

Wiring Seats56 views
|
|
Thread upload0 viewsImage uploaded in new thread
|
|
Thread upload11 viewsImage uploaded in new thread
|
|
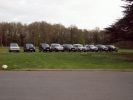
View from the Fairmile Carpark of 9 members cars194 viewsRange Rover Au Poivre had turned up by now - VA was having seat as well as steak sauce problems! I think we had 2 more turn up after this photo was taken
|
|
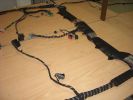
Finished seats area107 viewsThis is a shot of the loom when it was finished from the pass (RHD) door
Both of the seats wiring can be seen, i replaced the conduit on the bottom right and the Yaw rate sensr connector can also be seen in the middle.
|
|

Pass seat wiring107 viewsClose up showing the re worked Pass seat wiring on the D3 loom next to the sport one.
|
|
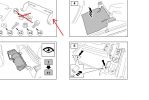
LR D3 Fire Extinguisher Bracket - Manual Seats389 views
|
|

The full story how I fitted RSS seats in D3517 views
|
|
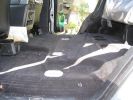
2nd row seats removed reveals uneven floor152 views
|
|
Engel positioned for easy access from front seats145 views
|
|

Searching for the correct Aux socket in passenger footwell176 views
|
|
driverseat244 views
|
|

driverseat38 views
|
|

Missing grip seat front - left22 views
|
|

127 views
|
|
58 views
|
|
0 views
|
|
0 views
|
|

Thread upload13 viewsImage uploaded in new thread
|
|
Thread upload0 viewsImage uploaded in new thread
|
|

Thread upload0 viewsImage uploaded in new thread
|
|
Thread upload1 viewsImage uploaded in thread 207823
|
|

Front_Seat_Control_Switch159 views
|
|

Front_Seat_Cushion.pdf70 views
|
|

Front_Seat_Cushion_Cover.pdf72 views
|
|

Front Seat Cushion Cover56 views
|
|

Front Seat Cushion 66 views
|
|
Thread upload6 viewsImage uploaded in new thread
|
|
Thread upload11 viewsImage uploaded in thread 158956
|
|

wiring diagram133 views
|
|

pdf wiring diagram 1170 views
|
|
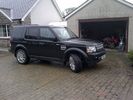
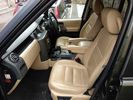
MY D4136 viewsxs, black, 20 alloys, tinred glass, shot roof rails ebony leather, piano black trim, electric/armrest seat, panoramic roof, harmon kardon, rear camera and tow bar.
|
|
Head phone jack rear seats378 views
|
|
Head phone jack - 7 seater394 views
|
|
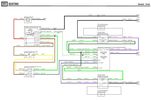
Thread upload20 viewsImage uploaded in thread 178763
|
|

Thread upload4 viewsImage uploaded in thread 143292
|
|
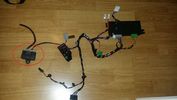
D4 Seat wiring loom9 views
|
|
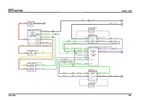
Thread upload19 viewsImage uploaded in new thread
|
|
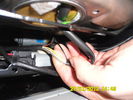
Heat_seat_close view73 views
|
|
heated seats30 views
|
|
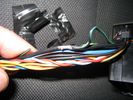
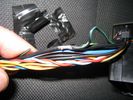
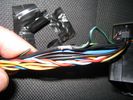
Earth or -Ve connection required under Driver Seat. Cut the green and black and splice into the blac.130 views
|
|
wiring116 views
|
|
Thread upload5 viewsImage uploaded in thread 160739
|
|
Thread upload2 viewsImage uploaded in thread 191745
|
|
Door seal wearing out255 views
|
|
heated seats27 views
|
|
heated seats26 views
|
|
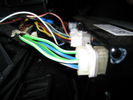
hvac controller120 views
|
|
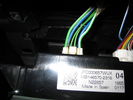
cable onto controller103 views
|
|
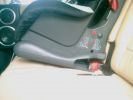
Car seat fitting93 views
|
|
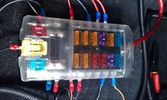
Fuse box in the rear12 viewsI installed the fuse box in the rear. Since I do have a 5-seater, there's plenty of space in the booth beneath the 2nd cover, which rests behind the second row seats.
|
|
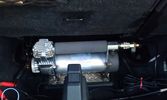
The compressor in the booth16 viewsThe rear of the second row seats are visible and the space behind was big enough to put the compressor.
The compressor is powered from the rocker switch in the front.
|
|
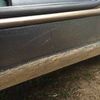
Extra seal18 views
|
|

Seagate 2TB USB20 views
|
|
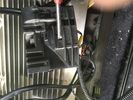
Seat change15 views
|
|

Seagate 2TB bare22 views
|
|

2nd Row Seats plate35 viewsImage uploaded in new thread
|
|

My new 13my108 viewsHatchbag, rear door protector and seat covers fitted :)
|
|

seated25 views
|
|
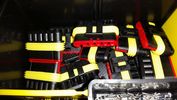
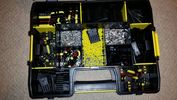
Superseal212 views
|
|
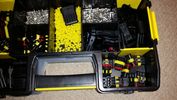
Superseal112 views
|
|
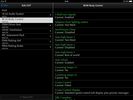
Superseal312 views
|
|
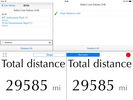
CCF Search BCM21 views
|
|
Searchable Live Date White Background10 views
|
|

My new 13my153 viewsHatchbag, rear door protector and seat covers fitted :)
|
|
4 seasons chiang mai19 views
|
|
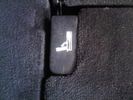
Existing 3rd row backseat lever (left side from back of car)29 views
|
|
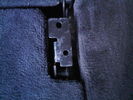
Missing 3rd row backseat lever (right side from back of car)28 views
|
|
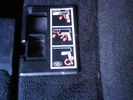
3rd row seat cushion slider (glued but broken) - right side as from back of car35 views
|
|
10 viewsHalfshaft seal
|
|
halfshaft seal11 views
|
|
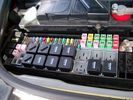
Picture of the engine compartment fuse panel5752 viewsEngine compartment fuse panel located near the battery. This is where F3E, (5 amp), F26E, (20 amp), Fuseable link 10E, (60 amp) and Relay 7E, the now upgraded 70 amp air compressor motor relay, part number YWB500220, (E is for Engine compartment fuse box), are all located. Fuse F35P, (5 amp), is inside the Passenger compartment behind the lower glove box door.
To keep the suspension from going down to the stops when driving, (or parked), it appears that it is only really necessary to remove F26E to depower the exhaust valve and generally keep all the valve block solenoid valves in a closed position trapping whatever air is within the air springs. F3E gets its power thru F26E, so when F26E is removed, the F3E circuit is automatically de-powered. F35P is more interesting in that battery power goes thru the ignition switch and F35P and then into the air suspension control unit. Apparently however, if F26E is removed, removing the F35P is not needed even when the engine is running.
With all fuses still in, if you have a problem, in practice, ideally, the compressor still works and will raise the 3 to an appropriate height. If so, one can then shut the engine off and allow the computers to go to sleep and then you remove the fuse(s). In actual practice, it seems that one need only pull the F26E fuse and can do so with the engine running. All the same, one might consider that the 3 is first a mobile computer, and secondly a 4x4. Computers prefer to go to sleep before the plug is pulled on them, however given that F26E circuit is always alive, then the computer never sleeps. With the fuse(s) pulled, and if you are still up, you can now be a 4x4 instead of a low rider. The whole purpose of the fuse pulling exercise is to depower the one and only system exhaust valve that is physically located within the compressor unit, (to keep it from opening), and secondarily to keep closed the four air spring solenoids within the block valves. This also shuts the air compressor down and stops the air compressor from making air even if the compressor is still good. That is why you initially need the fuse(s) in to allow the compressor to make air if it can.
|
|

As normal with the seats in the upright position65 views
|
|
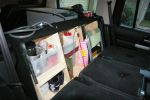
View with all 3 seats folded down87 views
|
|
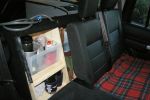
Access Shot with 1 seat down64 views
|
|
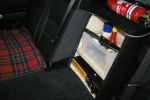
View from passenger side with 1 seat down68 views
|
|
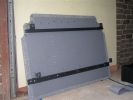
Underneath platform - bolts to seat mounts. T-nuts to through bolt fittings174 views
|
|
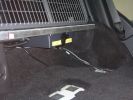
HF radio under rear floor (5 seater)166 views
|
|
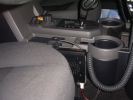
UHF radio beside drivers seat167 views
|
|

Back Seats19 views
|
|

Back Seats24 views
|
|

Front Seats26 views
|
|
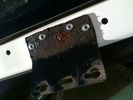
A pillar mount pop-rivetted in place and form-a-gasket used to seal underneath161 views
|
|

AV connector for RSE60 viewsdecided to install AV connector in Cubby box between seats (no fridge in my car) so I can store an iPod hidden in there to provide media for Rear Seat Entertainment
|
|
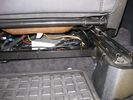
AV switch mounted beneath the front passenger seat62 views
|
|
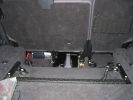
510 viewsMP3-changer and PC beneath the back seats (5 seater). Left and right, 2 USB hubs
|
|

Glass on seat53 views
|
|
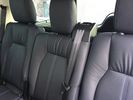
Seat Surgeons 78 viewsLeather seats
|
|
Tesla in Seattle51 views
|
|
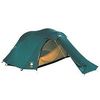
My 4 season "clamshell" tent.9 views
|
|

Connected to the Rear Seat Heat fuse39 views
|
|
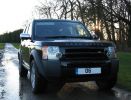
06 7seat138 views
|
|
06 7seat173 views
|
|
06 7seat166 views
|
|

Centre console and cubby storage removed for wiring loom of rear seat entertainment19 views
|
|
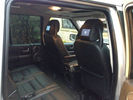
New Rear Seat Entertianment System newly installed15 views
|
|

10 viewsPlug on electric memory seat
|
|

Under Drivers Seat - Connector box (being opened)44 views
|
|

Under Drivers Seat - Connector box38 views
|
|

Under Drivers Seat - Element connector31 views
|
|
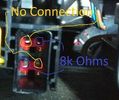
Under Drivers Seat - Element connector - Annotated43 views
|
|

Seat Electrical connector55 views
|
|

T40 Torx Seat Base Bolt46 views
|
|
Blue sea2 views
|
|
| 790 files on 2 page(s) |
 |
1 |  |
|