| Search results - "run" |

Thread upload4 viewsImage uploaded in new thread
|
|

29 views
|
|
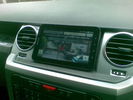
Samsung Galaxy Tab Sat Nav122 viewsVery nearly a very good fit for pauper-spec D3\'s - the Galaxy Tab running Google Map Navigation
|
|

key out and car running 123 views
|
|

07 Back side of failed tyre340 viewsThis is the back of the blown tyre. It looks like any other worn tyre which has run a bit while flat. Note that we were running on wider 19" RRS wheels (have 4 19" MTRs + 1 old A/T on the original 5 wheels). Also have a rear-mount spare tyre holder which is really convenient with the wider rim and the fact that the tyre was still hot (it had some melted rubber on the other side!!)
|
|

Plains first run19 views
|
|

Plains first run21 views
|
|
36 views
|
|
35 views
|
|
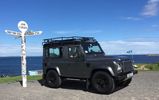
John o Groats NC 500 run8 views
|
|
35 views
|
|
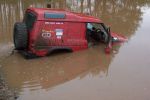
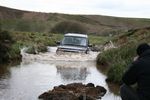
bit of water70 viewsdidnt think it was so deep. I got my feet a little wet. Car is still running and it also survived this and is still in use now. Bet a Disco 3/4 wouldn't work after this.
|
|
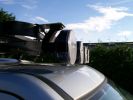
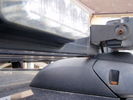
264 viewsOriginal Frontrunner brackets, but installed upside down to reduce the total height
|
|
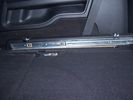
Side runner in position showing front lower than rear.33 views45%
|
|
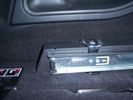
Close up of side runner, showing load hooks countersunk into runner .24 views50%
|
|
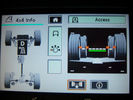
Offroad screen running behind tv59 views
|
|

44 views
|
|
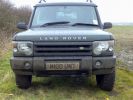
5 Pot Grunter!!!!123 views
|
|

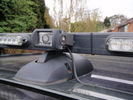
Cabling on Front Runner forSpots199 views
|
|
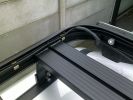
Cabling Front Runner Spots229 viewsThanks to Ifor Williams clips ;)
|
|

194 views
|
|

Reduced Width FR133 views
|
|
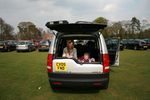
boot is handy as a play pen84 views
|
|
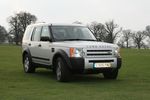
Calk abby51 views
|
|
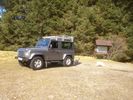
Ben Lawers weekend run8 views
|
|

Kielder Classic Car Run 201815 views
|
|
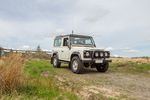
Kielder Classic Car Run 201816 views
|
|
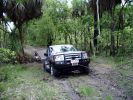
D3 in the Mary River Flood plains50 viewsFamily was down South with the In-laws, so I went for a drive on Boxing Day - which is the monsoon time, or \'The Wet\'. Was doing a test run with the off-raod trailer in preparation for the trip I was planning to the Kimberley six months later. Couldn\'t quite make it out of the creek, so a self-recovery was in order. Good thing it all worked, as I didn\'t see another car in over four hours. They were too smart to drive down the track I was on!
|
|
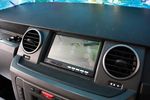
117 viewsCarPC running
|
|
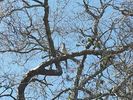
roadrunner - treed85 views
|
|
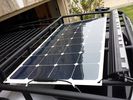
solar roof install444 viewsMore or less wrapped up my solar installation today. I added a Grape Solar Flex 100W panel, it's adequate to keep the vehicle topped off with the Fridge running, and Ham, but it could lose some ground if transmitting depending on how much, 2 would be awesome. One is enough, but barely. I am quite impressed with the Grape Solar flex panel version 2.0.
https://www.facebook.com/DifferentialPartsUS
|
|
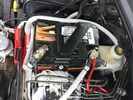
Wiring342 viewsThis is the final wiring configuration. It shows the dual battery wiring, 75A wiring run to the boot, the winch and in the lower right you can see a few turns of coax with a snap on ferrite near the base of a VHF Antenna.
|
|
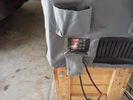
66L 172 views66L Fridge Freezer running in 90F heat. https://www.facebook.com/snomasterusa
|
|
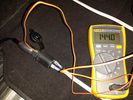
Marine Plug346 viewsRunning a cigarette plug rated at 15a with a plug rated at 20a drawing 5a at 12.8v will generate more heat than you want. Use Anderson or hardware.
|
|

screen wash supplies12 viewsnever enough screen wash when family run 3 in winter
|
|

End of the runway :-(15 views
|
|
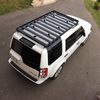
Front runner6 views
|
|

Full Width FR117 views
|
|

Nice lane by Belvoir stopped to let GGs past so photo op taken57 views
|
|

269 viewsCALENDAR 2011 full size available if required
|
|
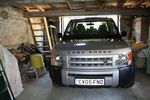
Using Mums garage to keep sun off sleeping daughter.... fit wise a bit tight 65 views
|
|
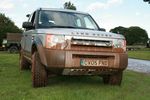
Stoneleigh show54 views
|
|
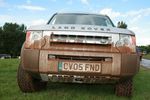
Stonleigh53 views
|
|
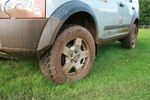
49 views
|
|
48 views
|
|

47 views
|
|

Running Cable Through Rear - under seats126 views
|
|

Even in Oman they have water splashes!104 viewsThe sheer joy of driving through fresh water in a mountain wadi. Rare enough to find running water when it isn\'t raining, but to drive through too is a real bonus for us Middle Eastern ex-pat drivers!
|
|

Shade is a rare commodity88 viewsRunning through the wadis approaching Jebel Achter, shade is a commodity scarce enough not to waste.
|
|
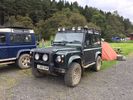
Kielder Forest Run11 views
|
|
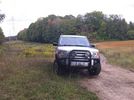
Ooops, found the mountain bike trail. KW Hydrocut16 viewswe were out one day and suddenly I seemed to recognize the power lines, and the fact that the mountain bike trail runs alongside the lines.
This is obviously a wide section of trail, but it's still the KW Hydrocut mountain bike trail.
|
|
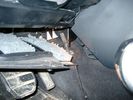
Air Conditioner Drain Hose on Drivers Side (LHD)2296 viewsThe corrugated rubber bit above and to the right of the gas pedal is the drain hose that goes down thru the carpet and floor sheet metal.
While it is bit hard to figure out from the jpg above, there is a rubber "strap" attached to the top of the corrugated hose that one uses to pull on to drag the hose up back around the black plastic heater "pan" drain. The same drain hose arrangement is on the other side as well.
One could I suppose run a plastic snap tie around the vertical pull strap if one was concerned about the hose slipping off again. See also the other jpg sketch which is from the Land Rover manual.
|
|
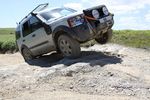
Calendar 2011 entry - MrH in Basic Coil Sprung D3 on 2010 Pot Noodle Challenge Rock Crawl Section477 views
|
|
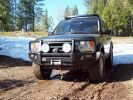
Snow run168 views
|
|

Inside LRE hospitality tent, FOS 210228 views
|
|

Entering Slindon37 views
|
|
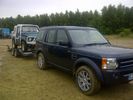
Slindon60 views
|
|
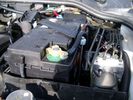
Aux Battery showing ground cable bolt "upside" down 1577 viewsIn order to obtain sufficient height clearance to get the plastic cover back on, I had to install the ground cable to the underside of the battery post connector.
Note the battery vent hose, (approx 5 ft required) is run down into where the windshield washer fluid container is located. There is not much electrical or metal in that area to be corroded by battery gas plus the open end of the vent hose tends to be protected from dirt and stays clean as well.
|
|
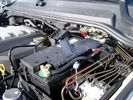
BCI Group 40R Deka 640RMF battery showing vent hose run forward to windshield washer reservoir area 1430 viewsRecessed post "Euro profile" battery to "match" OEM and stock Land Rover bracket; note that the Traxide SC80-LR module is mounted at an angle to allow for the main cable to sit under the cover so cover still closes.
The battery is a nominal 7", (180mm), high, but sits on a 1" battery spacer set under to raise the bottom front end of the battery such that the approx 11", (290 mm), length of the BCI 40R battery rises above the angled plastic nibs at the forward end bottom of the case front; hence sufficient space, (1/4", 5mm) remains at the brake reservoir end.
Also the 40R battery does not have hold down "flanges" on each end; on the sides yes, but not the ends so no additional length is required.
When I had to replace the 40R, this time I installed the shorter, (9.625"), taller, (7.5") Interstate BCI 47 / DIN H5 battery which eliminated the spacer on the bottom and better fit the stock LR tie down bolt lengths. Deka also has a BCI 47 / DIN H5 that would work fine as well.
|
|
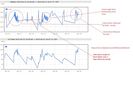
154 viewsRunning a 72L fridge on 100W solar with some driving. Conditions, overcast with some occasional sun. Overnight on Battery power. https://www.facebook.com/snomasterusa
|
|

Thread upload12 viewsImage uploaded in thread 187861
|
|

109 views
|
|

Buckingham Blue D3 Screen Saver206 views49 frame (8 base frame) animated 100x46 pixel image in size cut from the Discovery 3 Accessory Builder screen - modelled after my D3 - running on my phone!
|
|

Thread upload0 viewsImage uploaded in new thread
|
|
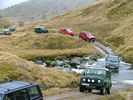
Another Highland 4WD Club Run. Boxing Day 2005, south of Inverness. We're in the second green 90.78 views
|
|
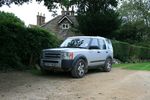
51 views
|
|

Nice looking piece of engineering 53 views
|
|
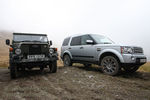
CALENDAR 2011429 viewsD4 and an ex-military Lightweight
|
|

Thread upload22 viewsImage uploaded in thread 92518
|
|

Thread upload26 viewsImage uploaded in thread 92518
|
|
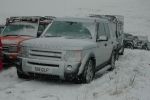
Disco3 in snow415 viewsThis photo was taken in Jan 2009 on a SLROC green road run. This was at the summint of Glen Shria
|
|

126 views
|
|
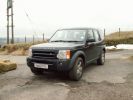
Found some snow for the third weekend running242 views
|
|

32 viewsRunning 20's
|
|
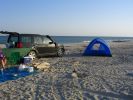
Campsite on Mazirah208 viewsA fabulous deserted sandy beach that runs for miles on the east coast of Mazirah Island, off the Omani mainland , views across the Arabian Gulf, and turtles and hatched terrapins.
|
|
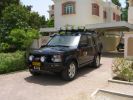
RHS view371 viewsSHows the Front Runner (SA) slimline windcheetah rack which is immensely strong. Takes my 110kg (oh gawd, I must get back on the diet and exercise regime) tramping over it when loading/unloading gear without a problem. Fittings are simply fixed or removed, and IMO very well designed and made. IPF 800 series driving and spots fitted to the front of the rack. IPF cam/reversing fitted each side and to rear of rack for negotiating rocky wadis at night. The G4 stickers were bought off E-bay as a set.
|
|
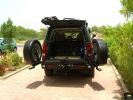
Rear end open330 viewsEccentric latch clamps for wheel carriers are very strong. No rattles on graded roads. Canvas seat covers from \'Escape\' in SA on rear jump seats can be seen, and Front Runner Wolfpack storage boxes - great for toolkit, winch and recovery straps etc.
|
|
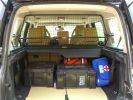
Load space368 viewsShows the SA Front Runner Wolfpack stacking plastic storage boxes that I keep laod straps etc in and the 2nd is tool kit, spare belts, jerry can funnel and tools, plus airline and tyre inflator/deflaotr for ARB on-board compressor, HD jump leads. ARB Winch pack (Orange)with strops, snatch blocks, shackles, gloves, and 2 ARB recovery dampers. Really great 4x4 1st Aid kit from Outdoors warehouse in SA. LRs own loadspace guard - not the best design if you want to store a long load. Mods to be carried out!
|
|
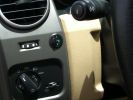
Long Ranger auxilairy fuel tank pump switch and tank gauge308 viewsFitted to the right of the air vent thumbwheel, the neat combination switch and gauge take sup no room at all. Switch locks on or off, but no pump running warning lamp! Contents of the tank are indicated by 5 LEDS, 4 green and 1 red for full, 3/4, 1/2, 1/4 and empty. Pump transfer rate of just 2 litres p/min is disappointing. I transfer on the move when main tank is at 1/4.
|
|
Auxiliary power sockets - TracTronics, Australia382 viewsA complete kit including two outlets, wiring etc connected to auxiliary Optima Blue top battery using their very effective SC40 split charge relay. One outlet between rear and front seats, and 2nd alongside loadspace 12v outlet, enables fridge to run when engine is not running, without affecting start capacity or vehicle functions.
|
|
Escape seat covers rear254 viewsJust shwing the good fit of these canvas seat covers made in South Africa. The whole set for a 7 seat HSE £542 with air freight as unaccompanied baggage (inside 5 Front Runner Wolf pack boxes) costing and additional £150 - still a bargain out here!
|
|
TracTronics loadspace power socket 382 viewsThe 2nd power socket fitted alongside the original in the loadspace runs off the auxiliary Optima Bluetop battery to run a fridge when engine is not running. No more starting worries!
|
|
34 Length Frontrunner Roofrack148 views
|
|
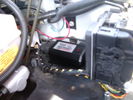
CounterAct Power Supply mounted 246 viewsPicture is blurred, however power supply is 3M two sided tape to the flat black plastic of the second battery compartment just under the antilock brake pipes to the fender side of the brake fluid reservoir. The white wire to the left rear coupler pad runs thru the firewall hole near the steering column. The blue wire to the right front coupler runs across and above the engine following the other wiring looms that cross the vehicle.
|
|

Thread upload15 viewsImage uploaded in thread 130712
|
|

37 views
|
|

biskit first in50 views
|
|

first stuck54 views
|
|

dicky spinning up48 views
|
|

silver ish40 views
|
|

rich on the up40 views
|
|

who keeps parking that jap thing in the way?42 views
|
|

doh believe it or not but i think i know what happend no special program selected50 views
|
|

Biskit tunes it the trees46 views
|
|

not making progrees47 views
|
|

more power = progess55 views
|
|

bigger boys 52 views
|
|
air for john50 views
|
|
dicky just about to not make progress59 views
|
|

dicky still not making progress50 views
|
|

biskit 3 wheels50 views
|
|

Biskit first in again i fear there is a pattern forming54 views
|
|

Dicky not putting enough effort in to this recovery57 views
|
|

thats a better effort G O52 views
|
|

at least you are not alone biskit60 views
|
|

Simon on for another clear round59 views
|
|

head to head62 views
|
|

dry route65 views
|
|

it could go down and up here...... but i wont try58 views
|
|

moist route60 views
|
|

fixed penalty is in the post67 views
|
|

line up60 views
|
|

286 viewsCALENDAR 2011 full size available if required
|
|

Simon doing a load test64 views
|
|

Poser No 179 views
|
|

Poser No 272 views
|
|
70 views
|
|
Poser No 369 views
|
|

I think reverse gear is called for. Ooh my sump guard was still straight here!98 views
|
|

328 viewsCALENDAR 2011 full size available if required
|
|

Cant be a poser as he smoked his tyres to get in to this spot........ Bravery blobs 174 views
|
|
65 views
|
|
62 views
|
|
63 views
|
|
66 views
|
|
78 views
|
|
63 views
|
|
62 views
|
|
61 views
|
|

58 views
|
|
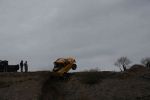
V8 4.6 71 viewsD3 completed a down run & not to be out done 90 completed an up run in grand style
|
|
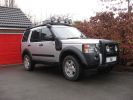
King Spring Lifted D3 Coiler397 views
|
|
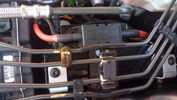
100A fuse mounted in secondary battery compartment15 views
|
|
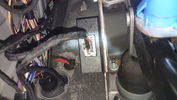
Electronic Relay156 viewsRelay mounted to mounting frame of the brake pedal
|
|

A-Pillar 117 viewsWires run from the roof console along the A-pillar
|
|
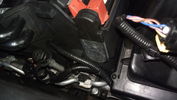
Cable routed from secondary battery box to front grille113 views
|
|
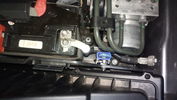
Fuse mounted in secondary battery box111 views
|
|
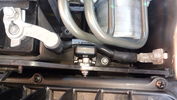
Fuse mounted in secondary battery box95 views
|
|

Description and Operation - daytime running lights127 views
|
|

Diesel - Ethanol co-fuel Paper114 viewsInteresting read - one local authority (Redland Shire Council) has 180 vehicles on trial and is pleased with the results; more power, engines run cooler; lower emissions including reduced smoke and it is a renewable resource to boot!
|
|
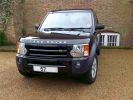
One D3, 2 days old98 viewsOur first trip out ..... Sunday Lunch (well you\'ve got to run it in gently, haven\'t you!).
|
|

Thread upload7 viewsImage uploaded in thread 157670
|
|
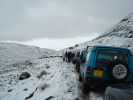
Coming back down121 viewsReturning after aborting the run.
|
|
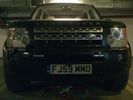
philips drl day light running lights84 views
|
|

169 views
|
|

drunk21 views
|
|

Thread upload13 viewsImage uploaded in thread 128696
|
|

225 views
|
|

108 views
|
|

65 views
|
|

Thread upload18 viewsImage uploaded in new thread
|
|
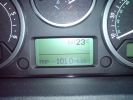
total for weekend work run185 views
|
|

Mud run643 views
|
|
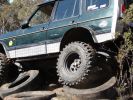
Tyre hill 3217 viewsC class V8 Disco made it through using the "grunt" approach
|
|
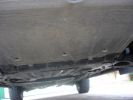
Sump guard, note drain holes to rear453 viewsThe sump guard runs back to the crossmember, it\'s a good idea to drill some large - ish drain hiles as there is no way water and mud can escape once it has entered round the revovery point
|
|
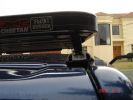
detail of Front Runner track291 views
|
|

199 viewsChopped VW camper with 7 litre V* in rear running 190mph+
|
|
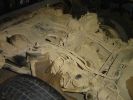
103 viewsRear shot, showing diff and fuel tank breather pipes running up to filler neck at top LHS
|
|

86 viewsLHS rear wheel well, with inner guard off. The rear AC lines (assuming you have an HSE) don\'t run in same way as the RHS, so on all cars, you can fold the red line inboard, with the bend roughly at the blue line, so that the very rare contact with larger tyres is eliminated.
|
|
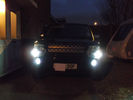
Day running lights & led side light upgrade287 views
|
|

239 viewsLining up the D3 for our first run. Mud/ruts, DSC off, HDC off, Jimi Hendrix on the stereo ... yup, ready to go!
|
|
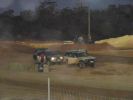
210 viewsLining up for the last two runs - only one make of vehicle left in the comp!
|
|
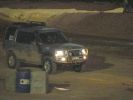
233 viewsSizing it up for the last run of the night
|
|
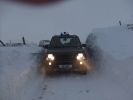
D3 in the snow101 viewsOn Running Hill Lane
|
|
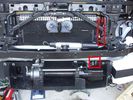
Installed winch with hydraulic hoses178 viewsThe hydraulic hoses are stiff, so I had to run them up the side of the radiator (can just see inside red boxes) to near the top of the radiator, then back down inside the engine compartment, then underneath the engine (behind the radiator) to the D4's power steering rack, where the hoses become metal. This hose routing may not be possible if the fuel-burning heater is in place (we don't have those in Aust and the space allowed room for my hands to bend and run the hoses without kinking).
|
|
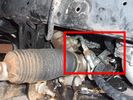
Detail of hydraulic hoses attached to power steering hoses155 viewsHoses are attached to the upstream side of power steering rack. When winch not running, PS rack sees full pressure (ie, no change from design). Biggest challenge is running stiff hoses so that they align with attach points. I got Qantas employee who repairs hydraulic baggage loaders to braise in fittings (very tight spaces and tough access).
|
|

calendar entry 2009541 viewsCrossing a river in Iceland June 2008 - some of the rivers have deep sticky black basalt sand on their edges and some times needs a running approach! Car is G4 Challenge Event Car from 2006 - Team Germany / Spain - Stage 3/4 Bolivia
|
|

calendar entry 2009525 viewsCrossing a river in Iceland June 2008 - some of the rivers have deep sticky black basalt sand on their edges and some times needs a running approach! Car is G4 Challenge Event Car from 2006 - Team Germany / Spain - Stage 3/4 Bolivia
|
|

calendar entry 2009522 viewsCrossing a river in Iceland June 2008 - some of the rivers have deep sticky black basalt sand on their edges and some times needs a running approach! Car is G4 Challenge Event Car from 2006 - Team Germany / Spain - Stage 3/4 Bolivia
|
|
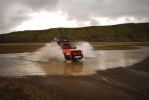
calendar entry 2009539 viewsCrossing a river in Iceland June 2008 - some of the rivers have deep sticky black basalt sand on their edges and some times needs a running approach! Car is G4 Challenge Event Car from 2006 - Team Germany / Spain - Stage 3/4 Bolivia
|
|
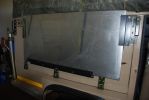
Attached Front Runner table to outside kitchen door101 views
|
|
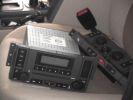
All the bits - don\'t let your wife see them like this!587 viewsHere\'s the stack all dumped on the passenger seat while i run the wires.
|
|

49 viewsFault, Viscous fan allways running
|
|
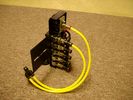
FASKIT on end view 864 viewsEnd and rear view of the FASKIT. Yellow lines are as shipped for hooking to the air supply; one line to valve/filler and other is to gauge. I will modify the arrangement to delete one of the yellow lines such that gauge line plugs into where the second yellow line is right now,(will be only one yellow tube), and then the air source line will plug into the port controlled by the valve, (hidden in this view but visible in other view). When white valve is in the ON position, gauge will read air source pressure, and be available to supply air to any of the selected four air springs. When valve is closed, the gauge will show individual air pressure in each of the air springs when a jumper is run between the gauge Schrader valve and the appropriate air spring Schrader valve.
|
|
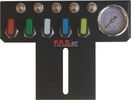
FASKIT air panel unmounted842 viewsThis is the manual air valve panel that is mounted in the "empty" space where the FBH normally resides. The gauge reads to a maximum of 25 Bar. The air tank relief valve is set just over 16.5 Bar (240 psig); the front air springs run maybe 9 Bar, (130 psig) and the rear, somewhat less, perhaps between 5 and 8 Bar. (70 to 115 psig). Max theoretical air spring pressure at full compression due to a big bump and full gross is approximately 27 Bar (390 psig).
|
|
Thread upload11 viewsImage uploaded in thread 135213
|
|
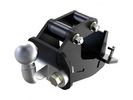
Thread upload16 viewsImage uploaded in new thread
|
|

Thread upload6 viewsImage uploaded in thread 158506
|
|

Thread upload3 viewsImage uploaded in thread 40682
|
|
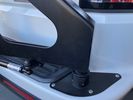
Thread upload4 viewsImage uploaded in thread 158506
|
|
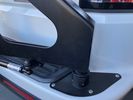
Thread upload2 viewsImage uploaded in thread 40682
|
|

Thread upload2 viewsImage uploaded in new thread
|
|
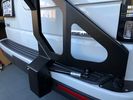
Thread upload1 viewsImage uploaded in thread 158506
|
|
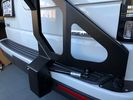
Thread upload5 viewsImage uploaded in thread 40682
|
|
Thread upload2 viewsImage uploaded in thread 158506
|
|
Thread upload3 viewsImage uploaded in thread 158506
|
|
Thread upload4 viewsImage uploaded in thread 40682
|
|
99 views
|
|

40 views
|
|

Thread upload8 viewsImage uploaded in new thread
|
|
Grumpy Runner145 views
|
|
Highland 4WD Club Run 2009.75 viewsWhen we go offroad, we GO offroad!
|
|

Highland 4WD Club Run 2009. 18 miles on offroad tracks continuously. (special permission granted from landowners)66 views
|
|
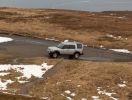
No one about .. Left it running .. just in case ... LRA would take awhile !164 views
|
|
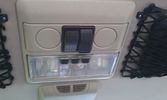
The on/off switches of the multimedia headrests17 viewsThese switches were installed to power on/off the previously installed gamecube and the screens attached to it.
When I removed the gamecube and lately the screens as well, I was clever enough (surprised as well) to leave the switches and all the wiring that I had running around.
They came in handy when I installed the multimedia headrests and are now adding an extra power on/off control of the screens.
|
|
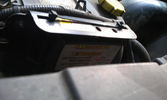
Solenoid not yet engaged18 viewsWith the engine running, the counter in the solenoid starts running and the green light blinks until the timer hits 5 minutes.
|
|

12V to dual USB10 viewsAs the USB cables were running to the booth, I added a 12V to dual USB charger in the booth and connected the USB cables.
|
|
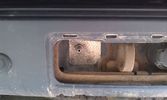
Outside connection to the compressor14 viewsFrom the compressor which is in the booth, the air hose runs to the back of the car.
I was able to install the connector in the space of the second trailer plug (which wasn't installed anyway).
|
|
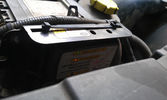
Solenoid engaged15 viewsAfter the engine's running for 5 minutes, the solenoid gets engaged and starts charging the auxiliary battery.
|
|

An extra twist on running lights30 viewsAdded those nice 120mm LED rings on the covers of the roofrack lights and have them connected to my roofrack lights switch, as I wanted to control the LED manually as well (I don't believe this is 'road-legal', hence why I opted for the manual solution).
|
|

my umbrella shrunk29 views
|
|

rain shrunk it33 views
|
|
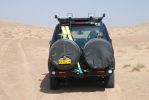
View the Nissans saw106 viewsRecovery strap pre-shackled to the rear recovery eye and secured with a bungey strap to the rear door ladder saves a lot of time when running against the clock - and having to recover a bogged in Nissan!
|
|

Nexus 7 running navfree7 views
|
|

LP scoped 222 viewsBy connecting a Low Amps probe to the fuel pump's voltage supply wire, you can view the pump's current waveform on a digital storage oscilloscope (DSO). The scope pattern will reveal internal wear in the brushes and commutator that may not show up in a traditional pressure or volume test.
Observing the waveform will show if the pump's amp draw is normal for the application or is high or low, and if the pump is operating at normal speed or is running slow. Problems such as a bad spot on a commutator or a short or open in the armature also will be obvious in the waveform.
A "good" electric fuel pump waveform will generally seesaw back and forth with relative consistency and minimal variation between the highs and lows. A "bad" waveform will show large or irregular drops in the pattern, with large differences between the highs and lows.
|
|
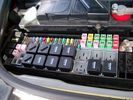
Picture of the engine compartment fuse panel5779 viewsEngine compartment fuse panel located near the battery. This is where F3E, (5 amp), F26E, (20 amp), Fuseable link 10E, (60 amp) and Relay 7E, the now upgraded 70 amp air compressor motor relay, part number YWB500220, (E is for Engine compartment fuse box), are all located. Fuse F35P, (5 amp), is inside the Passenger compartment behind the lower glove box door.
To keep the suspension from going down to the stops when driving, (or parked), it appears that it is only really necessary to remove F26E to depower the exhaust valve and generally keep all the valve block solenoid valves in a closed position trapping whatever air is within the air springs. F3E gets its power thru F26E, so when F26E is removed, the F3E circuit is automatically de-powered. F35P is more interesting in that battery power goes thru the ignition switch and F35P and then into the air suspension control unit. Apparently however, if F26E is removed, removing the F35P is not needed even when the engine is running.
With all fuses still in, if you have a problem, in practice, ideally, the compressor still works and will raise the 3 to an appropriate height. If so, one can then shut the engine off and allow the computers to go to sleep and then you remove the fuse(s). In actual practice, it seems that one need only pull the F26E fuse and can do so with the engine running. All the same, one might consider that the 3 is first a mobile computer, and secondly a 4x4. Computers prefer to go to sleep before the plug is pulled on them, however given that F26E circuit is always alive, then the computer never sleeps. With the fuse(s) pulled, and if you are still up, you can now be a 4x4 instead of a low rider. The whole purpose of the fuse pulling exercise is to depower the one and only system exhaust valve that is physically located within the compressor unit, (to keep it from opening), and secondarily to keep closed the four air spring solenoids within the block valves. This also shuts the air compressor down and stops the air compressor from making air even if the compressor is still good. That is why you initially need the fuse(s) in to allow the compressor to make air if it can.
|
|
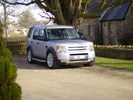
2005 D3 with New Bodykit (from TLO).445 viewsJan 2010
One of the last body kits bagged from TLO in Jan 2010... colour-coordinated in Zambezi Silver by local spray shop... Left the centre section Brunel silver for contrast. Really pleased with the resulting look.
Sadly missed
|
|

Run!! Newbie coming down!93 views
|
|

105 viewsextended wire running from glove box to loom connector.
|
|
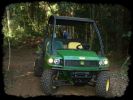
John Deere136 viewsFarm runabout (don't need a Disco all the time).
|
|
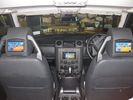
Rear screens running from the Pioneer Avic headunit72 views
|
|
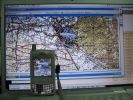
TTQV and PathAway on a Mac...384 viewsThat picture was taken as I was using TTQV from Touratech on a Mac running Windows XP SP2 under Parallels Software beta... The mobile is a Palm Treo 650 running PathAway...
|
|

Discovery 4 DRL Land Rover Fitted112 viewsThese are the official Land Rover Fitted Daytime Running Lights. They are very good with a sharp clear light. They are on all the time but as soon as the normal lights come on they switch off. These were fitted to my car by Land Rover when I picked it up.
|
|

Discovery 4 DRL 117 viewsThe photo shows the Land Rover Discovery 4 fitted with the Land Rover Daytime Running Lights. These were fitted by Land Rover when I got the car. The are on when the lights are not. As soon as the main lights come on the DRL's switch off.
|
|

Northampton Services AA breakdown61 viewsAll the warning lights and messages, total loss of power (though engine still running).
|
|
New snow at Fieberbrunn177 views
|
|

28 viewsFrontrunner sump guard
|
|

Frontrunner sump guard 229 views
|
|
Main run in Kelchsau133 views
|
|
Before wheeling49 viewsBefore embarking on a forest run with the MN Land Rovers Club in the Superior National Forest in Minnesota.
|
|
Frontrunner Sump Guard10 viewsFrontrunner Sump Guard unpacked
|
|

Frontrunner Sump Guard Fitted12 viewsSGLD009
https://www.frontrunneroutfitters.com/en/be/protection-equipment/under-vehicle-protection/land-rover-discovery-2014-present-sump-guard-4-5mm-3cr12-stainless-steel-front-runner.html
|
|

Kitzsteinhorn, Kaprun, Austria86 views
|
|
"Waterover"as described by 5 year old daughter282 viewsSmall run through Burn at Drumclog
|
|
In Fieberbrunn177 views
|
|

60 viewsCharger for tom tom, cable running behind H trim
|
|
December Trundle 2010 350 views
|
|

December Trundle 2010 248 views
|
|
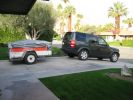
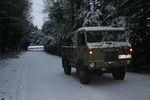
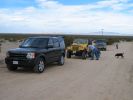
Trying out the trailer hitch for a 'dump run'.344 views
|
|
Just starting the run with my 4x4 group.309 views
|
|

Black-backed Jackal - Etosha159 viewsNamutoni camp seems to be overrun with Jackals and Honey Badgers. This guy had no fear of humans, and tried to take food off our table
|
|
Calender Entry - Salisbury night run Aug 2008463 viewsbit late but here\'s my entry!
|
|

Thread upload21 viewsImage uploaded in thread 92518
|
|

128 viewsWiring Diagram for HEVAC-System
|
|
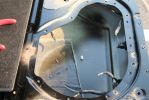
Subwoofer Install275 viewsThe stock sub has 2 sets of wires running to it. Both of these wires lead back to the stock amp.
The new sub only needs two wires - a positive and a ground. So, we just cut the stock wiring harness off the wires in the tail gate and wired them together. On the other end of these wires, we did the same thing.
|
|

Brunel Metallic Interior178 views
|
|
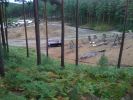
Run to the Castle55 views
|
|
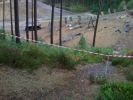
Run to the Castle58 views
|
|

Brighton 2008140 viewsArrival at Brighton on the 2008 L2B road run.
|
|
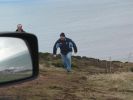
JKP The Running Man166 views
|
|
Skiing in Austria - Very Cold!720 views
|
|

Key in Ignition Electrical Wiring Diagram1051 viewsThis shows the key in ignition wiring, (LGW, 1.5D), running from the key lock cylinder to the Central Junction Box, (CJB), thru 5 amp fuse F40P, located in the fuse box behind the lower glove box door.
You can remove the 5 amp fuse and the good news is that the ignition chime will not sound any longer; the bad news is that a bunch of other circuits that rely on knowing if the key is in or out no longer work.
Also note the Transponder Coil D219 reference.
|
|

Thread upload30 viewsImage uploaded in new thread
|
|
Thread upload1 viewsImage uploaded in thread 202927
|
|

on the shop run 224 views
|
|

Thread upload9 viewsImage uploaded in new thread
|
|

Thread upload18 viewsImage uploaded in thread 131662
|
|
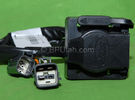
Harness section that runs behind the rear bumper.410 viewsThis is the harness section that clips up inside the rear bumper and includes the circular 7 pin, (6 flat +1 round), NAS socket, and also the 4 pin NAS flat connector.
The two small plug ends connect under the rear left tail light to the harness section that exits from the interior.
The Land Rover part number for the NAS trailer tow kit, (both cables), is YWJ500220.
|
|

OSRAM DLR/FOGLIGHT Installation Manual30 views
|
|
Running Lights39 views
|
|

Running Lights31 views
|
|
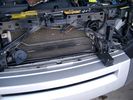
19mm wiring loom in trough behind bumper and in front of rad792 viewsThe 19mm wiring loom is large enough that a maximum of six 6mm air lines can be fished thru as required. The loom runs from the FASKIT panel located in the engine compartment behind the left front headlight, down and across in front of the rad and then down to the front axle valve block located behind and below the right fog light.
|
|

LR3 Air Conditioner Drain Tubes behind centre console2131 viewsThis shows the two air conditioner drain tubes located left and right under the radio stack.
The tube on the left side, (steering wheel side, LHD), disattached itself and the carpet on the floor under the gas pedal etc became soaked. I think rain water from outside that comes in the outside cowl vents also exits via the tubes as I first noticed the carpet was wet after parking outside during a big rain storm.
It was relatively easy to slide up and reattach the rubber hose that runs from the rectangular shaped plastic discharge hole(s) of the heater "pan" down along the transmission hump area and thru the floor pan. There is a hose on each side of the transmission hump, but only one hose had let go on my 3. The rubber hoses just slide over the rectangular plastic openings of the two heater housing drain outlets.
To get at each drain hose, remove the vertical sort of triangle carpeted piece below each side of the radio stack. The triangles of carpet will just pull away as each is held on with those metal U clips Land Rover so likes. Dislodge each triangle at least sufficiently to get ones hand in to slide the rubber hose back on.
You will rarely see AC water on the ground as the front drains pour onto a metal underside protection skid plate and the rear drain onto the top of the left rear muffler.
|
|
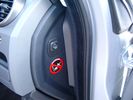
Air Suspension ECU Fuse 35P cut off switch.3820 viewsThis shows the SPST rocker switch mounted in the blank plate installed in lieu of a manual passenger side air bag shut down switch - now automatic via passenger seat pressure switch. Fuse 35P (5 amps) is located in the interior fuse box behind the lower glove box and protects the ignition power supply to the Air Suspension ECU. When the SPST switch is moved to the OFF position, the RAISE /LOWER switch on the centre console is not powered, and hence does not function. As such, some signals from the wheel height sensors and CPU are ignored. By itself however, removing F35P will probably not stop the 3 from self dropping, particularly after the engine is turned off.
Fuse F3E, (5 amps), located in the engine bay fuse box by the starting battery protects the circuit that provides feedback to the Air System ECU indicating that the Compressor Relay has successfully operated and that the Air Compressor is or should be operational, can also be removed, (but is probably not totally necessary), as it gets its power thru F26E. Hence Fuse F26E, (20 amp), also located in the engine compartment fuse box is the fuse that must be removed. This fuse protects the circuit that provides full time battery power to the Air System ECU. When in place, current thru the fuse powers the periodic re-levelling action, (usually lowering a bit with that brief air release noise), that often occurs when the vehicle is parked and the engine is off.
Removing F26E fuse will stop the auto levelling action and also inhibit any other down to the stops signals, (engine running or not). When F26E is removed, no power can flow thru to F3E, hence removing F3E is more for insurance than an absolute requirement. The same with F35P, removing F26E removes primary full time power from the Air Suspension ECU, and hence removing the F35P fuse should not really be required either as long as F26E has been removed.
|
|
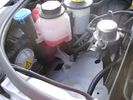
Empty space in NAS LR3 for location of FASKIT panel599 viewsThe empty space is available as the North America Spec gasoline engine LR3's do not have the Fuel Burning Heater installed. The air lines from the four air springs and the air tank will appear to rise up from under the headlight assembly. The lines to the front block valve assembly located behind the front right fog light will sort of run within the bumper across the front of the radiator down into behind the righthand fog light. The rear lines somewhat follow the path of the existing air feed line from the front valve assembly to compressor. Rather than be located between the left front fender liner and left metal wing however, the four lines will feed thru the empty wing space inside and above the wheel well arch and exit down by the left front mud flap. From there, the lines run along the left frame member above the air tank and then parallel the frame over top the compressor to the top of the rear left air spring where the rear air block valve assembly is located.
|
|
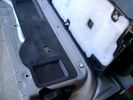
Carpeted cover removed showing uncut dust seal and underside of carpeted cover. 1628 viewsNote that there are all sorts of electrical wires sticking to the underside of the dust shield - so be very careful when you cut thru the shield.
I used a box knife very slowly and was surprised at how many conductors there were running just under the shield membrane.
|
|

Brits and their tea!106 viewsWhenever there's a problem to solve - put the kettle on. After running out of fuel, 18km from the nearest balcktop and fuel station, 3 of the team's cars waited for the return of the other two with fuel. What does one do at times like these? Have a nice tidy up inside, dust off the sand and put the kettle on for a cuppa tea.
|
|
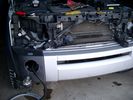
Wiring, (tubing), loom exiting temporarily from the front right fog light.569 viewsThe front axle air valve block is located just behind and below the fog light. Access to the valve block is by removing the right front fender liner, (or the bumper). The FASKIT lines are attached to the left and right front air spring lines at this location; also compressor air is taken from this location as well. Cutting the lines at as few different locations makes it easier to find leaks at a later date. As above, five 6mm air lines run from the FASKIT panel to the front axle air valve assembly and run within the loom. Two pair of the lines are for control of the air springs, and the fifth line taps the air supply at the valve block assembly off the compressor. This will be the air source line rather than tapping in directly to the high pressure air tank.
|
|

lr3-kaymar-closed with 20"405 viewsthe kaymar carrier, designed to allow two tires, sets them both a bit outboard, thus blocking the lamp. that\'s when I realized why they put the fully functional lamps in the bumper (functions: running, brakes, signals, hazard)
I plan to re-weld the locating section more towards the middle of the rear similar to Disco II orrientation.
|
|

LR3 Denso Alternator YLE500390 rear view709 viewsThis picture shows the rear of the YLE500390, the Land Rover part number for a newer design alternator utilizing the Transpo IN6349 regulator with the "hidden" cooling fins. Note the visual difference in the rear view of the next file jpg.
If the alternator is a rebuilt, (service exchange unit), but Land Rover supplied, then the part number is LR008860 or similar. (Note that 0 in LR0 is zero.)
Two Denso part numbers exist for the alternator as well, 4280003690 and 4280003691. The rating of the petrol V8 alternator is nominal 12 VDC and 150 amps. In normal day to day operation, they seem to run about 14VDC - usually between 13.9 and 14.1 volts at the OBD port.
For the petrol V6, the LR service exchange number is LR008862, and the 2.7TDV6 is LR008861.
The bridge rectifier within the alternator is a 12 diode avalanche type, 117mm diameter, as used in Nippondenso 120 to 160 amp alternators with the Hair Pin stator. It is similar to a Transpo INR421 which is rated for 120 to 150 amp alternators. That is probably our primary problem - the rectifier is just too light. Alternate part numbers for the bridge rectifier are Cargo 237607, Mobiltron RM-29 and AS ARC6021.
Re the B+ stud, the INR421 calls it up as an M8 x 1.25 x 30 mm long course threaded stud; some say 34 mm but that may be longer than desirable.
|
|
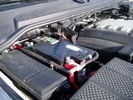
Main starting battery showing 1/2" hole drilled for power cable egress909 viewsView of OEM battery in Left Hand Drive LR3. This is supposed to be a Battery Group BCI 49 or H8 sized battery but in reality is the slightly shorter BCI 94R or H7 battery that fits easier lengthwise, (12 3/8" vs 14").
Note the 10mm hole drilled in plastic of surround to allow for entry of main power cable that runs between batteries. The cable bolts to a spare 6mm threaded hole in the OEM battery cable end; the light gauge wire runs to the front of vehicle to a connector for the CTEK MULTI US 3300 charger. Coloured felts, (red and green), are a material treated to reduce battery post corrosion. The OEM battery ground cable is only about a foot long and runs to an 8mm stud located on the inner fender just to the rear of the fuse case.
|
|
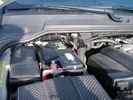
Main Battery showing aux cable feed running off positive battery post.776 viewsThe black wiring loom around the battery cable to the aux battery was a part provided with the Traxide kit. My goal was to run the cable low enough such that the battery box cover would go back on as previous.
Note the hole drilled in the side of the battery box such that the new cable could thread thru to allow the battery box top to still fit the same as prior to the addition of the cable to the auxiliary battery.
|
|

front runner spare wheel carrier instructions111 views
|
|
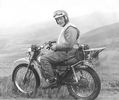
Me many years ago (c.1977) in Mid-Wales. Weekend run with Welsh Trail Riders.69 views
|
|
Completely normal behaviour in a pub car park 50 views
|
|

Odd goings on in the bushes 38 views
|
|

39 views
|
|
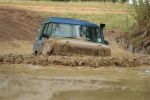
Billing 200958 viewsMy disco 1 on the mud run
|
|
MOscow driving - brrrrrrr, but runs!292 views
|
|

28 views
|
|

Mt Tamborine - panorama180 viewsPhotos taken on run into northern New South Wales - Hang gliders launch from here. Compiled from 5 images stitched with AutoStitch, a freeware application in development - superb application that requires little input other than reasonably good images.
|
|

Thread upload14 viewsImage uploaded in thread 136036
|
|

Thread upload4 viewsImage uploaded in thread 168440
|
|

Thread upload19 viewsImage uploaded in thread 92518
|
|

Not much water here!143 viewsThe last rains in this area were in June and photo taken in October. Water does run, but its very dangerous in the flash floods that follow rain in the mountains.
|
|
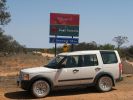
New rims and tyres taken for a run241 views
|
|

Aerial cable run150 views
|
|

Aerial cable run148 views
|
|

Aerial cable run143 views
|
|
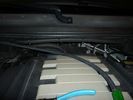
traxide cable run742 viewsTraxide cable between primary and secondary battery.
|
|
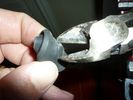
firewall plug run722 viewsThe rubber grommet from firewall plug, removed, with a hole cut in the middle. Instructions say to cut it to the center, but you can cut a hole out by bending it, and using a pair of diagonal pliers, removing excess material so you can fit the plug back in.
|
|
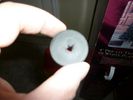
firewall plug run664 viewsThe rubber grommet from firewall plug, removed, with a hole cut in the middle. Instructions say to cut it to the center, but you can cut a hole out by bending it, and using a pair of diagonal pliers, removing excess material so you can fit the plug back in.
|
|
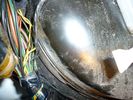
firewall plug run933 viewsThis is the engine side view, of where to poke the hole with a screwdriver to make a hole into the vehicle. You can barely see the edge of the hole. Note: The Rubber plug should be removed for this operation.
|
|
firewall plug run883 viewsScrewdriver poked through the firewall hole
|
|
firewall plug run920 viewsHow to get the cable from the engine bay to the rear of the vehicle.
|
|
Wire Run670 viewsThis is the inside the vehicle view of the hole, to run the feed wire through the firewall.
|
|
firewall plug run855 viewsThrough the firewall to the right of the brake master cylinder. On left hand drive, this hole would be closest to the outside edge of vehicle.
|
|
rear socket install1038 viewsShows to white cable run, cable routing, cable ties and socket placement. Rear sockets fitted. Note the white power cable, and cable tie location. The socket in this position are neatly back out of the way, but handy.
|
|
Front Runner 359 views
|
|
Front Runner 267 views
|
|
Front Runner 157 views
|
|
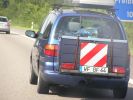
how to use a bike carrier as extra trunk....241 views
|
|
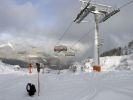
New 8-seat chairlift on the Kammerkör run221 views
|
|

My Packed LR Expedition Roof Rack39 viewsShovel, 60" Hi-Lift Extreme, (2) 5 Gallon Jerry Cans in a Front Runner dual can holder, TRED 4x4 Recovery boards, and my spare 275/65/18 Goodyear MTR/Kevlar on a t-bolt mount. Almost everything is locked down except the shovel, and now the TRED's until I find a good way to mount them.
|
|
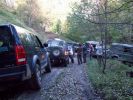
When 10 Landrovers meet and only 9 are runners!225 viewsAt the bottom of Pindale we met 5 fully prepared 90/100\'s coming the other way - interesting when one of yours is dead!
|
|

front runner roofrack and led lights15 views
|
|

front runner roof rack14 views
|
|
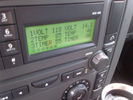
Voltage Display Page Radio Head Unit 118 14.2840 viewsThis shows the voltage/temperature/timer display page within the 6CD-465 radio head. There is a second file within this album, a doc file, that outlines the procedure to access the diagnostics.
The 14.1 volts number was the approximate vehicle system voltage with the engine running; the 118 number infers 11.8 volts which is the low power infotainment system shutdown cutoff voltage. The factory default setting is 135 or about 13.5 volts. By holding the keypad 1 button down, the 3 digit volts numbers will decrease 001 at a time until the keypad 1 button is released. Decreasing the number from 135 to some lower number should increase the time the system will remain on with the engine off.
The TEMP numbers refer to Fuel Burning Heater, (FBH), temperature values. 85 is apparently a high limit and 46 was the number when the jpg was taken. This number varies and given that there is no diesel fueled FBH in our NAS petrol engine vehicles, what the value refers to is unclear. The TIMER numbers also relate to the diesel fuel burning engine heater and perhaps make more sense being 00.
|
|

Thread upload14 viewsImage uploaded in thread 168644
|
|

Thread upload15 viewsImage uploaded in thread 170216
|
|

Thread upload17 viewsImage uploaded in thread 170216
|
|
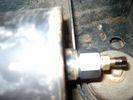
Reservoir Air In fitting installed 1660 viewsSchrader valve installed. Shop air can now be introduced into the tank to facilitate the raising of the 3 when there has just been a failure of the onboard air compressor rather than the electronics or valve block wiring etc.
Air could also be sourced from this point, however the purpose of the modification is air in, not air out as the air pressure normally runs above 200 psig, too high to be safe for routine use unless a pressure reducing regulator is added per the Mitchell Bros kit.
|
|
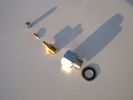
Reservoir Air In fittings exploded view 1892 viewsThis shows the fittings required for the mod. The reducer adaptor requires a 27mm socket and is M20 x 1.5 male thread x 1/4" NPT female. The 1/4" male NPT Schrader valve has the standard valve core removed and an AN/MIL spec aircraft oleo strut valve installed instead.
A standard automobile valve is rated at 200 psig, (14 bar); the air tank runs closer to 244 psig, (16.8 bar), with the relief valve set to open between 334 psig, (23 bar) and 370 psig (25.5 bar). The aircraft valve is rated at 2,000 psig, (138 bar).
|
|

Find the roadrunner?163 views
|
|
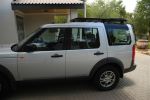
Side view of 1.6m Frontrunner roofrack131 views
|
|

122 viewsMy dog running to see what I'm doing.
|
|

NAS 7 pin + NAS 4 pin Flat Trailer Socket308 viewsThis is the vehicle end of the NAS trailer harness that is located behind the removable plate centered within the rear bumper by the towing loop. Re the four pin flat connector, from the bottom, the exposed bare lower pin is the ground, usually the White wire on a NAS trailer. The next pin up is normally a Brown wire on a trailer and is for the Tail Lights. The third pin, normally a Yellow wire, is the left signal light; the top pin, normally a Green coloured wire, is the right signal light.
Re the round connector, from the notch in the plastic surround, clockwise, the first blade is ignition controlled +12VDC battery power, (only alive when engine running), and on the Land Rover factory harness is an Orange wire; on a NAS trailer, usually Red but perhaps a Black wire.
Next blade clockwise at 3:00 o'clock above, is the Right Turn signal light, a Green wire on the LR harness, and also on a NAS trailer.
At 5:00 o'clock, the next blade is for the Electric Brakes and is Blue on both the LR harness and on a NAS trailer.
The Ground wire is next, White on both the LR harness and on a trailer.
At 9:00 o'clock above, is the Left Turn signal, Yellow on both the LR harness and on a trailer.
The last blade to the left of the line up notch is the Tail Light circuit. On the LR harness, the wire colour is Brown with two White stripes and on a NAS trailer, Brown.
The centre pin is for the Reverse Back Up lights and is Black on the LR harness and often Purple on NAS trailer wiring but can be Black also.
Note that when the socket assembly is installed on the 3, the notch in the plastic surround is on the left - that is rotated 90 degrees anticlockwise to the picture above. In other words, When installed on the 3, the 4 pin flat connector lays horizontal and is located below the round socket.
|
|

undergorund 2130 views
|
|

Thread upload12 viewsImage uploaded in new thread
|
|
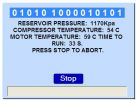
running compressor126 views
|
|

231 views
|
|

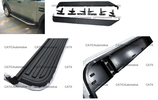
Running Boards with Sills4 views
|
|
8 views
|
|
74 views
|
|
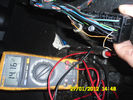
Voltage reading72 viewsHere is the voltage to the heated seat. Engine running. Did not enable heat on the hvac.Why 14v there now?
|
|
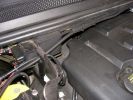
Main Feed799 viewsHere\'s the shielded positive feed from the main battery. Runs accross the fireall with lockties to support.
|
|

Thread upload8 viewsImage uploaded in thread 152024
|
|
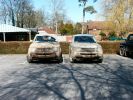
We didn\'t get em like this on the school run371 views
|
|
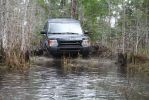
CALENDAR 2008 ENTRY851 viewsMiami Land Rovers Event at Corbett Nature Preserve, Florida Jan 2007
Sideview's first off-road experience in the LR3.
|
|
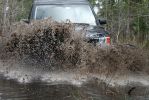
CALENDAR 2008 ENTRY849 viewsMiami Land Rovers Event at Corbett Nature Preserve, Florida Jan 2007
Sideview's first off-road experience in the LR3.
|
|
20 views
|
|

101 viewsDown in the river bottom there were a bunch of temporary run-off springs. These will be gone in a day or two.
|
|

100 viewsGood view of the run-off swollen river and another spring.
|
|

100 viewsAnother temporary run-off spring.
|
|
Defender stuck in the mud run!42 views
|
|

Kevin & Dilys100 viewsThis was 2005 longest landrover run. Best decorated (Teddy Bears Picnic)
|
|

Tekonsha Ford Brake Controller Adapter part number 3035-P274 viewsThis is the adapter cable between the Brake Controller and the existing C2590 female plug located near the brake pedal on NAS spec LR3's. The flat 4 pin plug of the adapter cable connects to the Controller; the rectangular 6 hole male plug to C2590.
There are only four conductors in the adapter cable, but one will see five pins within the Land Rover C2590 plug. The #2 pin is not required for the NAS setup. #2 pin is the circuit between the head lamp switch and vehicle side running lamps required in the civilized world.
The single pin at the bottom in the picture is #3 and on the Land Rover, a Black wire tied to ground. The other pin at the bottom and across to the left is #6, and Blue on the Land Rover. This is the Brake Controller output to the trailer socket at the rear.
#4 is the pin at the top left, and is a White coloured wire from the battery. Pin #5 is from the stop light switch, and is Green on the Land Rover.
Note that the adapter cable colours do not necessarily follow all the above referenced Land Rover colours.
|
|
Thread upload27 viewsImage uploaded in thread 92518
|
|

The Disco 3 the day I bought it73 viewsSince then here's what's been done
1) New slotted and dimpled EBC rotors and Pads
2) Rover Specialties rock sliders
3) Clear color side markers
4) Front & Rear LR lamp guards
5) Rebuilt both of my Non working Key FOBS by replacing batteries. - I can't believe I didn't even check these when I bought the vehicle.
6) Changed the LR3 emblem to Discovery 3
7) Terrafirma Front Skid Plate
8) Tactical 4x4 Gas Tank Guard
9) ASFIR Rear Diff Guard
10) Here are the things now mounted on Roof Rack
- Full size 18" MTR/Kevlar
- (2) 5 Gallon Jerry Cans mounted in Front Runner holder
- 60" Hi-Lift X-treme Jack
- Shovel
- Magnetic CB Antennae
|
|
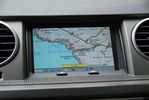
Memorymap on center screen103 viewsThis shows the PDA version from memory map on the center screen. It runs on the HTC Touch Pro in the cubby box that is connected through the GVIF box
|
|
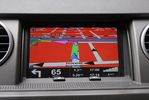
TomTom on center screen114 viewsTomTom running on HTC Touch Pro shows itself on the center screen
|
|
Egypt - Farafra - run off gas !!!147 views
|
|
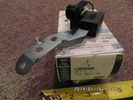
Radio Noise Filter Transmission Electronic Control Unit913 viewsThe jpg shows part number LR020488, a noise suppression capacitor located underneath on a bracket on the right side of the transmission forward of the selector shaft lever. The suppressor is connected to the transmission wiring harness and prevents solenoid operating noise affecting the audio system.
Failure of the capacitor is most often discovered as a result of either black smoke from below and or the blowing of 10 amp fuse F30E located in the engine compartment fuse box. This fuse protects the power circuit to the Transmission Engine Control Unit. When the fuse blows, the engine will still run however you have no gears, hence movement of the 3 is inhibited.
Anything over eight years in service is considered good capacitor life. If the capacitor does fail and fuse 30 blows, a quick fix is just to disconnect the capacitor and replace the fuse.
The capacitor might be missed by the DOT/FCC but the 3 does not seem to mind. With the filter disconnected, solenoid noise might be heard on some radio stations but at least the 3 would be in motion.
|
|

Front Runner Y style rear tyre carrier 582 viewsThis is the new Y or D shaped Front Runner, (out of South Africa), brand of rear bumper mount tyre carrier.
The big deal is the new self latching mechanism.
|
|

Varta Battery Dimension chart570 viewsThis pdf provides Varta dimensions for among others, the E12V75N, (old DIN H6 or 85605 or BCI Group 48 size). This appears to be a deep cycle battery and the choice for many re the Aux battery install as long as you are willing to grind away the angled nibs at the bottom front of the battery surround. My choice was a shallow cycle battery intended for cold weather related engine starting rather than winch use.
Note the pdf Varta batteries are all deep cycle batteries suitable for running fridges, winches etc, rather than for engine starting and hence a good Aux battery if those are the intended uses rather than engine starting.
Varta now makes a Varta G14 with AGM technology and known as a Stop Start Plus battery. It is 95Ah, CCA of 850A; length 353mm; Width 175mm; Height 790mm and is specific for these newer stop start vehicles such as some D4's. For the 3's, one is still probably better off with an H8 sized battery but of the older Wet Flooded Lead Acid type and battery caps rather than a sealed AGM.
The Land Rover part number for the recommended battery is LR033179.
|
|

Thread upload3 viewsImage uploaded in thread 183936
|
|

Thread upload0 viewsImage uploaded in thread 183936
|
|

Thread upload1 viewsImage uploaded in thread 183936
|
|

DiscoDunc with that 'runner'147 views
|
|
December Trundle 201053 views
|
|
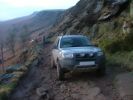
Freelander 1 on Stanage143 views
|
|
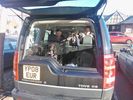
first run out in Layla - kids and dog and everything!!220 views
|
|

AT tread pattern on Yokohama G012417 viewsSmooth in the middle, crunchy on the outside! :)
|
|
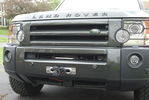
Hidden Winch Install11 viewsA front shot of my Front Runner Hidden Winch install with a Superwinch Talon 12.5 winch, D44 Hawse Fairlead, Factor 55 Flatlink Shackle, and Amsteel Blue synthetic line.
|
|
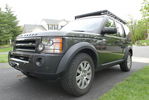
LR3 Front Shot8 viewsShot of my 2006 LR3 HSE with 18" wheels, General Grabber AT2 tires, hidden winch install, and Front Runner Slimline II Roof Rack.
|
|
|
|
|
|
|