| Search results - "rubber" |
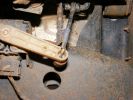
754 viewsNew control rod is carbonfibre/fibreglass hollow tube, with a rubber grommet fitted to one end (screwed and epoxy-ed) and steel rod bent into shape at the other (epoxy-ed).
|
|
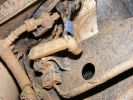
651 viewsNote blue rubber collar to hold lower part of control rod in arm.
|
|

07 Back side of failed tyre340 viewsThis is the back of the blown tyre. It looks like any other worn tyre which has run a bit while flat. Note that we were running on wider 19" RRS wheels (have 4 19" MTRs + 1 old A/T on the original 5 wheels). Also have a rear-mount spare tyre holder which is really convenient with the wider rim and the fact that the tyre was still hot (it had some melted rubber on the other side!!)
|
|
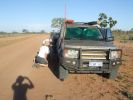
08 D3 stranded with a seized smoking wheel315 viewsAbout 1 hr after replacing the blown tyre, strange noises emanated from the stability control system and speed dropped off. Then I looked in the rear view mirror, and noted a cloud of dust along with a whiff of black smoke. This led to a very quick stop (no traffic on this route for over a week, so no worries about having to signal exiting the road). Took a look and WOW. The right rear wheel was glowing a dull red colour, and burning rubber smoke was wafting from the red glow over the fuel lines.
|
|

10 Cracked smoking parking brake drum338 viewsNote the crack in the face of the brake. This showed mangled parking brake springs and other bits. Also a bit of melted rubber was drooling out of the crack. Started to remove the brake caliper and enjoying the flies in 45 deg C heat. Ah, the wonderful Aussie climate in January.
|
|
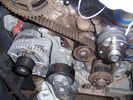
252 viewsThe old belt with rubber crumbs showing
|
|

15 First sign of bits of parking brake failure336 viewsNote the complete lack of pad from the parking brake. Not only was there no composite brake material left, but the drum was somewhat twisted and connecting bits all smashed. Also a small drip of melted rubber from wheel bearing parts....
|
|
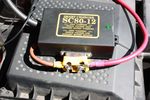
132 viewsTraxide SC80 brain modified. Cut the studs down to the nuts and removed the rubber cover. Had to do this as otherwise it wouldn't fit comfortably and would squash the brake vacuum pipe
|
|
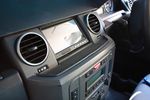
98 viewsCut the original rubber mat to fit flush with the screen
|
|
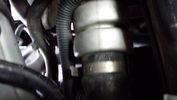
Thread upload129 viewsOriginal LR rubber hose just before removing (turbo end).
|
|
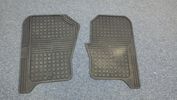
Rubber Mats3 views
|
|
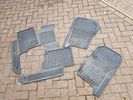
Rubber Mats3 views
|
|

Thread upload5 viewsImage uploaded in thread 173593
|
|
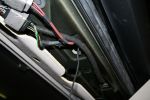
09239 viewsRan the GPS antena up through the rubber gromet in the top center of the boot door jam.
|
|
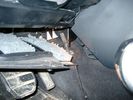
Air Conditioner Drain Hose on Drivers Side (LHD)2297 viewsThe corrugated rubber bit above and to the right of the gas pedal is the drain hose that goes down thru the carpet and floor sheet metal.
While it is bit hard to figure out from the jpg above, there is a rubber "strap" attached to the top of the corrugated hose that one uses to pull on to drag the hose up back around the black plastic heater "pan" drain. The same drain hose arrangement is on the other side as well.
One could I suppose run a plastic snap tie around the vertical pull strap if one was concerned about the hose slipping off again. See also the other jpg sketch which is from the Land Rover manual.
|
|
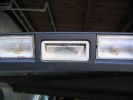
upper tailgate switch without rubber120 views
|
|
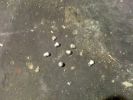
D3 Side Step Repairs147 viewsThe old rivet ends which I removed from the trim. I took one rubber end off the trim and let them all out by shaking it to save them rattling around inside the trim for years to come.
|
|
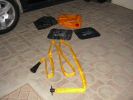
The kit as supplied180 viewsContains carry bag, 2 protector mats, exhaust jack and 7m reinfoced woven hose with bayonet connector to bag (inc non-return valve) and rubber cone for exhaust fitting
|
|

Thread upload3 viewsImage uploaded in new thread
|
|

Propshaft Support - Front view46 viewsNote the quality Sikaflex instead of the pathetic fragile rubber. :-)
|
|
Thread upload4 viewsImage uploaded in new thread
|
|
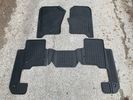
Thread upload2 viewsImage uploaded in new thread
|
|

Thread upload1 viewsImage uploaded in new thread
|
|
Thread upload2 viewsImage uploaded in new thread
|
|
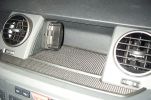
Mitac Mio Cradle448 viewsMitac Cradle adapted to fit to L shaped bracket (remainder sits under rubber mat) Allows PDA to be quickly removed when leaving the car unattended.
|
|
Thread upload10 viewsImage uploaded in new thread
|
|
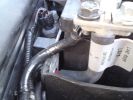
Take power direct from battery, routed cable through some rubber pipe, then taped up168 views
|
|
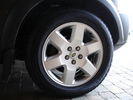
Vred Winter Rubber66 views
|
|
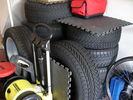
Rubber44 views
|
|
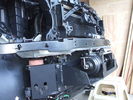
Front-right view (looking forward) of partially installed winch and mount124 viewsThe closest bracket, with three rubber grommets, is the air bag sensor. Before beginning any of this work, be sure to disconnect battery and discharge any remaining electrical power. I didn't want to accidently drop this assembly and cause the airbags to deploy.
|
|
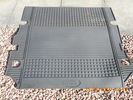
Rear load space rubber mat28 views
|
|

Rear load space rubber mat ( genuine )22 views
|
|
Rear load space rubber mat ( genuine )29 views
|
|
Mat Clips Discovery 4 201318 views
|
|

23 views
|
|

Underside106 viewsStrapping threaded and rubber feet added, to the alloy frame made for it to sit in
|
|
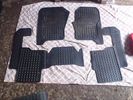
LR rubber mats25 views
|
|
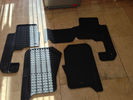
All D3 D4 Rubber Mat Genuine37 views
|
|

OSF D3 D4 Rubber Mat Genuine31 views
|
|

NSF D3 D4 Rubber Mat Genuine34 views
|
|
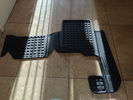
OSR D3 D4 Rubber Mat Genuine26 views
|
|

NSR D3 D4 Rubber Mat Genuine30 views
|
|
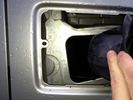
take rubber air intake to side349 views
|
|

Yeeeeeeeeee Hawwwwwwwwww...329 viewsMy Rubber ducky takes his first a plunge!
|
|

rubber matts32 views
|
|
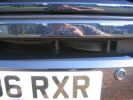
Flappy bit of rubber139 views
|
|

Gap in rubber seal28 views
|
|

Managed to hold the rubber bit with an old spanner23 views
|
|
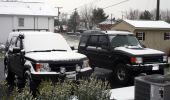
Rubber Ducky\'s First Snow!213 views
|
|
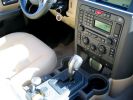
I have the screen lightly wedged between the rubber mat and the bottom of the ashtray567 viewsI plan to create a wooden block to attach the screen to and use foam tape (sticky on both sides) to hold it in. However, so far it hasn\'t moved and the ashtray is completely useable (for my parking meter quarters).
|
|

This is where my iPod will live, unless I need to take it out to add songs or update playlists.492 viewsI installed a rubber grommit between the cable and the hole to keep it from rubbing on the sharp plastic.
|
|

Boulder Pull198 viewsRubber Ducky helping the forest rangers block an off-limits section in George Washington National Forest.
|
|

Boulder Pull150 viewsRubber Ducky helping the forest rangers block an off-limits area in George Washington National Forest.
|
|
![Filename=IMG_6562[1].JPG
Filesize=451KB
Dimensions=960x1280
Date added=17.May 2019 IMG_6562[1].JPG](albums/userpics/10904/thumb_IMG_6562%5B1%5D.JPG)
Rubber Mat Set6 views
|
|

Harness that connects inside left rear compartment.445 viewsThis is the harness section that connects behind the left rear interior access panel and exits thru the large grommeted hole to below/behind the left rear tail light.
Note the two rubber grommets on the harness as there is both an interior metal skin and an exterior metal skin behind the left tail light assembly.
The two light grey connectors plug into two existing connectors near the top of the rear left interior access panel. The two darker connectors plug into the second piece of harness.
There is no little separate fuse box either with the NAS spec harness. The fuse box is included with the UK 13 pin dual plug units. If there was a fuse box, it would be on this portion of the harness.
|
|
![Filename=ld32rm-rubber-tailored-floor-mats-discovery-3-7s-2004-09-2528-1107898-p[ekm]270x252[ekm].jpg
Filesize=15KB
Dimensions=270x252
Date added=23.Oct 2017 ld32rm-rubber-tailored-floor-mats-discovery-3-7s-2004-09-2528-1107898-p[ekm]270x252[ekm].jpg](albums/userpics/33392/thumb_ld32rm-rubber-tailored-floor-mats-discovery-3-7s-2004-09-2528-1107898-p%5Bekm%5D270x252%5Bekm%5D.jpg)
Thread upload11 viewsImage uploaded in new thread
|
|

LR3 Air Conditioner Drain Tubes behind centre console2132 viewsThis shows the two air conditioner drain tubes located left and right under the radio stack.
The tube on the left side, (steering wheel side, LHD), disattached itself and the carpet on the floor under the gas pedal etc became soaked. I think rain water from outside that comes in the outside cowl vents also exits via the tubes as I first noticed the carpet was wet after parking outside during a big rain storm.
It was relatively easy to slide up and reattach the rubber hose that runs from the rectangular shaped plastic discharge hole(s) of the heater "pan" down along the transmission hump area and thru the floor pan. There is a hose on each side of the transmission hump, but only one hose had let go on my 3. The rubber hoses just slide over the rectangular plastic openings of the two heater housing drain outlets.
To get at each drain hose, remove the vertical sort of triangle carpeted piece below each side of the radio stack. The triangles of carpet will just pull away as each is held on with those metal U clips Land Rover so likes. Dislodge each triangle at least sufficiently to get ones hand in to slide the rubber hose back on.
You will rarely see AC water on the ground as the front drains pour onto a metal underside protection skid plate and the rear drain onto the top of the left rear muffler.
|
|
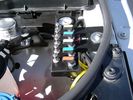
View of mounted panel from front left corner737 viewsI drilled a hole for the supplied 6 mm tie down toggle bolt in a flat portion of the wing on which the panel sits. I inserted a 50 mm flat rubber washer between the wing metal surface and the underside of the black painted panel plate; also a 40 mm flat rubber washer between the supplied fender washer and the metal plate - just seemed like a good idea so surfaces mate well even if wing metal not completely flat.
|
|
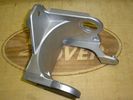
Replacement Bracket, LR part # RQU500064 for Air Compressor1026 viewsThis is a jpg of an aluminum replacement air compressor bracket, Land Rover part number RQU500064. The three rubber noise isolators are to be removed from the old bracket and inserted in the new bracket.
|
|
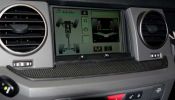
Rubber mat424 views
|
|

New Rubber37 views
|
|

Worn rubber33 views
|
|
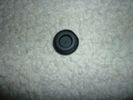
Firewall Plug539 viewsThis is the plug removed from the firewall, before cutting a hole to feed a wire through. Displace as much rubber as wire, so it is snug, but not to big, or you won't be able to snap it in.
|
|
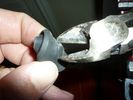
firewall plug run722 viewsThe rubber grommet from firewall plug, removed, with a hole cut in the middle. Instructions say to cut it to the center, but you can cut a hole out by bending it, and using a pair of diagonal pliers, removing excess material so you can fit the plug back in.
|
|
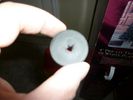
firewall plug run664 viewsThe rubber grommet from firewall plug, removed, with a hole cut in the middle. Instructions say to cut it to the center, but you can cut a hole out by bending it, and using a pair of diagonal pliers, removing excess material so you can fit the plug back in.
|
|
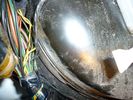
firewall plug run933 viewsThis is the engine side view, of where to poke the hole with a screwdriver to make a hole into the vehicle. You can barely see the edge of the hole. Note: The Rubber plug should be removed for this operation.
|
|
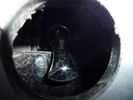
close up of 1 1/4" access hole493 viewsView of the 1.25" inch access hole. You can reach your finger or a screwdriver in this hole to move the lever up or down. It will be fitted with a rubber plug when not in use (and when found).
|
|
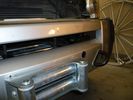
cross view showing access hole505 viewsCross view of the 1.25" inch access hole. You can reach your finger or a screwdriver in this hole to move the lever up or down. It will be fitted with a rubber plug when not in use (and when found)
|
|
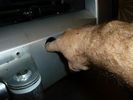
1 1/4" access hole for lever459 viewsAction view of the 1.25" inch access hole. You can reach your finger or a screwdriver in this hole to move the lever up or down. It will be fitted with a rubber plug when not in use (and when found)
|
|
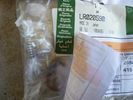
LR020590 KIT - COMPRESSOR 1481 viewsThere are 4 main parts you can get besides a whole compressor. This is the one with only a spring, o-ring and rubber valve.
YWB500220 electrical, fuse & relay, relay ENGINE COMPARTMENT, 70 amp 1
LR020590 KIT - COMPRESSOR 1
JPO500010 KIT - COMPRESSOR 1
VUB504700 - Dehydrator PARTS
|
|
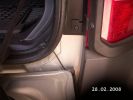
233 viewsRouting of the Trailer unit antennae through the rear door rubber & behind the bumper on the outside of the vehicle
|
|

the replacement rubber piece189 views
|
|
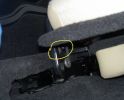
this is where the rubber piece should be233 views
|
|
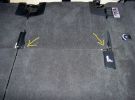
press here222 viewsif there is movement chances are the rubber parts are gone
|
|
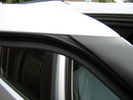
Rubber window seal 144 views
|
|
Rubber window seal 245 views
|
|
make sure rubber/fleece part are on outside of trim284 views
|
|
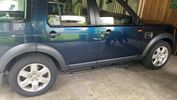
New Rubber27 viewsToday my new Pirellis are installed.
|
|

93 views
|
|
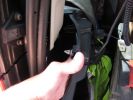
pulls out enough to get to connector - i put a rubber mallet in there to keep it open376 views
|
|
Thread upload6 viewsImage uploaded in new thread
|
|
261 views
|
|

Rubber113 views
|
|
Thread upload9 viewsImage uploaded in new thread
|
|
Thread upload10 viewsImage uploaded in new thread
|
|
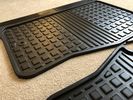
Thread upload9 viewsImage uploaded in new thread
|
|
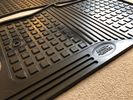
Thread upload9 viewsImage uploaded in new thread
|
|
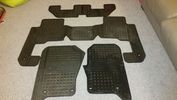
Mats6 views
|
|
Thread upload6 viewsImage uploaded in thread 173593
|
|
Thread upload1 viewsImage uploaded in new thread
|
|

Thread upload0 viewsImage uploaded in new thread
|
|
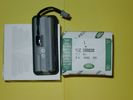
Upper Hatch Release Switch LR Part Number YUZ500020676 viewsThis is the Range Rover Sport switch, Land Rover part number YUZ500020, as it comes out of the box. Note the JAE, (Japanese Aviation Electronics), male wiring connector installed on the end of the power lead.
The rubber cover of the switch is sealed to the plastic body of the switch whereas in the previous switch design, there was no sealing. Also the replaced switch was hard wired into the same harness as the license plate lights - no JAE connector in other words.
|
|
Thread upload7 viewsImage uploaded in thread 132879
|
|
Thread upload7 viewsImage uploaded in thread 132879
|
|
Thread upload6 viewsImage uploaded in thread 132879
|
|
Thread upload11 viewsImage uploaded in thread 155715
|
|
|
|