| Search results - "plate" |
73 views
|
|
DRZ400 55 plate27 views
|
|

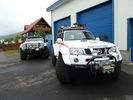
CALENDAR ENTRY 20091191 viewsBonatti grey TDV6 S, ambulance conversion, MTR's, winch, RAI, safety devices roof rack, rear ladder, bash plate, warn lighting, LED lighting throughout.
Owned by me, Rich Bell, Director of Extreme Medical Ltd, providers of medical support to Land Rover events.
|
|
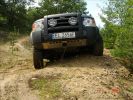
Here it is - long awaited Mantec plate in action directly after being installed! Thanks again John!!!169 views
|
|
Fabrication Template Work259 views
|
|
jkp's number plate - in situ164 views
|
|
jkp's number plate - when removed137 views
|
|
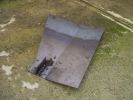
Steel compressor plate683 viewsIgnore my crappy welding attempts - I got a friend to finally weld the locator tab on the front!
|
|
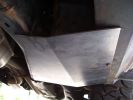
New compressor plate740 viewsFitted between the chassis rail and the new sill protector.
|
|
Thread upload321 viewsImage uploaded in thread 102519
|
|
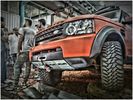
New front skid plate Mudtech4x4.com31 viewsNew front skid plate Mudtech4x4.com
|
|
Thread upload48 viewsImage uploaded in thread 141170
|
|
Thread upload46 viewsImage uploaded in thread 141170
|
|
Thread upload42 viewsImage uploaded in thread 141170
|
|
Thread upload43 viewsImage uploaded in thread 141170
|
|
Thread upload37 viewsImage uploaded in thread 141170
|
|
Thread upload40 viewsImage uploaded in thread 141170
|
|
Thread upload41 viewsImage uploaded in thread 141170
|
|
Thread upload40 viewsImage uploaded in thread 141170
|
|
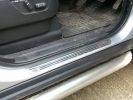
Sill tread plate51 views
|
|
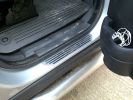
Sill tread plate49 views
|
|
Sill tread plate47 views
|
|
Sill tread plate45 views
|
|
discotech plate64 views
|
|
Pre-delivery ...... Plates still under the wiper blades152 views
|
|
D4 RLD Sump Plate311 views
|
|
D4 RLD Sump Plate100 views
|
|
D4 RLD Sump Plate287 views
|
|
D4 RLD Sump Plate273 views
|
|
Thread upload11 viewsImage uploaded in new thread
|
|
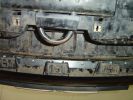
Rivetted in bracket, showing tabs that will be sandwiched by the plate95 views
|
|
Holes drilled and spacers positioned for the latch plate279 views
|
|
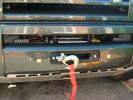
Nearly done, just need the number plate plinth to tidy it up972 views
|
|
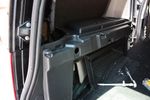
79 viewsHole for 12V accessory socket. This hole has a blanking plate on it on Commercial D3s. It just needed to be filed down in some areas to fit the socket I bought.
|
|
15 viewsnumberplate for sale
|
|
reg plate 98 views
|
|
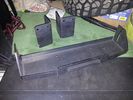
Hidden winch mounting plate discovery 3 4 RRS Mudtech4x4.com119 views
|
|
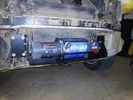
Hidden winch mounting plate discovery 3 4 RRS Mudtech4x4.com186 views
|
|
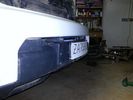
Hidden winch mounting plate discovery 3 4 RRS Mudtech4x4.com181 views
|
|
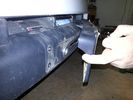
Hidden winch mounting plate discovery 3 4 RRS Mudtech4x4.com197 views
|
|
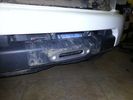
Hidden winch mounting plate discovery 3 4 RRS Mudtech4x4.com191 views
|
|
Hidden winch mounting plate discovery 3 4 RRS Mudtech4x4.com168 views
|
|
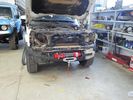
Hidden winch 12000 Disco 4154 viewsHidden winch mounting on a Discovery 4 3.0 TDV6 using Mudtech4x4 plate and 12000xc dual speed ALANWINCH
|
|

Rear sliding plate guard128 views
|
|
Locking Plate4 views
|
|
90Sill13 viewsDefender 90 Sill Chequer Plate 1
|
|
90Sill22 viewsDefender 90 Sill Chequer Plate
|
|
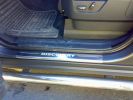
Sill Plates from Tasmod306 views
|
|
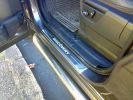
Sill Plates from Tasmod296 views
|
|
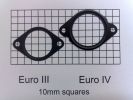
Photo of Euro III and Euro IV plates to show difference127 views
|
|
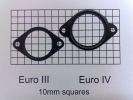
Photo of Euro III and Euro IV plates to show difference145 views
|
|
Thread upload3 viewsImage uploaded in new thread
|
|
189 views
|
|
186 views
|
|
52 views
|
|
46 views
|
|
45 views
|
|
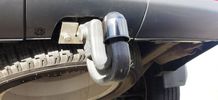
Thread upload8 viewsImage uploaded in thread 183986
|
|
Thread upload3 viewsImage uploaded in new thread
|
|
Thread upload6 viewsImage uploaded in new thread
|
|

Sideview of gearbox plate623 views
|
|

Thread upload43 viewsImage uploaded in thread 102519
|
|

abar mounting plates - revision A170 views
|
|
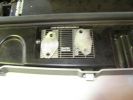
EGR Blanking214 viewsBlanking plates cut from stainless steel plate.
|
|
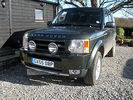
No. Plate77 views
|
|
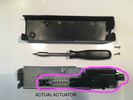
Thread upload2 viewsImage uploaded in thread 187641
|
|
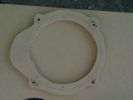
265 views
|
|

Land Rover Aerial Fin images for both Glass and Metal Roof Disco3 / LR3863 viewsAs well as the two different fins, this pdf also shows the plastic blanking plate for glass roof vehicles where no fin is installed.
The glass roof fin is secured by two security screws from the top into a plastic frangible glue on gasket. The hope is that when struck, the fin will shear off and not crack the glass roof. Re the metal roof design, the fin is secured from underneath via two nuts.
The pdf also shows the various electrical bits related to the antennas. In the UK, the fin would house not only a cell phone antenna but the TV and satellite radio antenna electronics as well; in the States, the Sirius sat radio antenna and a G type cell phone antenna if the phone kit was installed would reside within the fin. The SAT NAV GPS antenna is located within the High Mount Brake Light plastic mounted to the upper rear hatch.
|
|

Middle seat strike plate11 views
|
|

Thread upload13 viewsImage uploaded in thread 128830
|
|
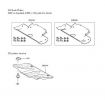
LR Bash Plates78 views
|
|
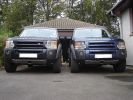
BCP & JMC Mantec Plates558 views
|
|

blanking plates63 views
|
|

Thread upload24 viewsImage uploaded in thread 113517
|
|

59 viewsFun with number plates...
|
|
85 views
|
|

Fabrication Template Work218 views
|
|
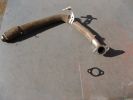
EGR Blanking205 viewsBlanking plates cut from stainless steel plate.
|
|
LH cable tucked under ribbed bumper plate165 views
|
|
RH cable tucked under ribbed bumper plate167 views
|
|
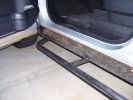
Sill protectors 2739 viewsThe side protection bar comes out a good 170mm. Prevents side panel damage and car-park knocks! Still deciding whether to fit the chequerplate tops, as originally designed.
|
|
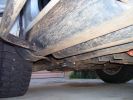
Sill protectors800 viewsThese replace the plastic sill protectors. 4mm mild steel plate, bolted through the existing holes in the side and underside.
|
|
134 views
|
|

Thread upload10 viewsImage uploaded in thread 181348
|
|
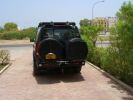
Rear end294 viewsLocally made wheel covers. LH is zipped from bottom to top to fit over registration plate with zip fasteners top and bottom. Rear IPF Reversing /camp lights on rack linked to reverse light circuit.
|
|
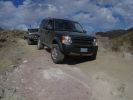
Mengel Pass154 viewsThe only Mantec skidplate in the US!
|
|
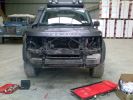
Mantec Plate , Bumper , Lights & Grille removed161 views
|
|
Thread upload4 viewsImage uploaded in thread 150447
|
|
Thread upload1 viewsImage uploaded in thread 150447
|
|
Thread upload221 viewsImage uploaded in new thread
|
|
Thread upload216 viewsImage uploaded in new thread
|
|
Thread upload260 viewsImage uploaded in new thread
|
|
Thread upload195 viewsImage uploaded in new thread
|
|
Thread upload260 viewsImage uploaded in new thread
|
|
Thread upload271 viewsImage uploaded in new thread
|
|
Thread upload218 viewsImage uploaded in new thread
|
|
Thread upload309 viewsImage uploaded in new thread
|
|
Kielder pre Uncle Ray plate56 views
|
|

D3 PLATE87 views
|
|
Black powder coated rayplate71 views
|
|
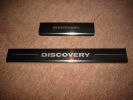
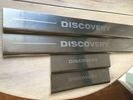
243 viewsStainless steel sill protector plates. Comes as a set of four.
|
|
Underbody Protection Plate209 views
|
|
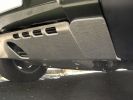
Underbody Protection Plate198 views
|
|
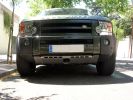
Underbody Protection Plate179 views
|
|
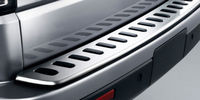
Thread upload4 viewsImage uploaded in new thread
|
|
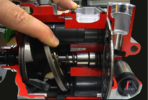
D3_aircon_compressor_maximum_swash_plate19 views
|
|
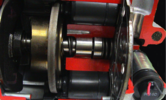
D3_aircon_compressor_minimum_swash_plate19 views
|
|
Thread upload2 viewsImage uploaded in thread 166766
|
|
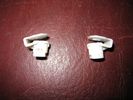
Clips to be removed when fitting a Mantec Plate140 views
|
|
Thread upload18 viewsImage uploaded in thread 40682
|
|
15 views
|
|

Thread upload15 viewsImage uploaded in thread 159658
|
|
D5 towbar cover plate9 views
|
|
arm rest fit270 viewsas you can see iv miged a plate on also
|
|

BS Reg Plate Details93 views
|
|

Would you want this plate?63 views
|
|

NEW REG PLATES29 viewsHi Guys,
I would like to buy these plates. they dont seem to sell them in the shop. Does anyone have any problem with me using the disco3.co.uk on the bottom of the plates. id rather do this as i do not want to add any stickers to my car.
d
|
|
162 views
|
|
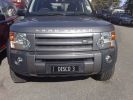
Number Plate101 viewsSeen recently in Pacific Landrover in Marochydore QLD, its genuine.
|
|
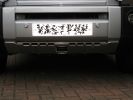
added light guards & bashplate57 views
|
|
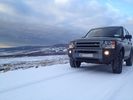
Snow150 viewsSnowy day in March in the Dublin/Wicklow mountains
|
|
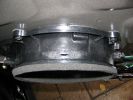
main speaker adapter plate360 views
|
|
added light guards & bashplate58 views
|
|
99 viewsASFIR engine guard and skid plate
|
|

36 views
|
|
Thread upload0 viewsImage uploaded in thread 27
|
|
Thread upload1 viewsImage uploaded in thread 5
|
|
Thread upload0 viewsImage uploaded in new thread
|
|
Thread upload1 viewsImage uploaded in new thread
|
|
Thread upload0 viewsImage uploaded in thread 5
|
|

Thread upload0 viewsImage uploaded in thread 5
|
|
Snow178 viewsSnowy day in March in the Dublin/Wicklow mountains
|
|

05 plate disco47 viewsover 120k on the clock leather damaged, guys wanted over 12k, said it had full farnell dealer service. mmm i think not, as checked
|
|
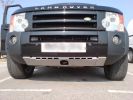
mantec plate256 views
|
|
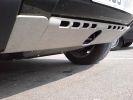
mantec plate239 views
|
|
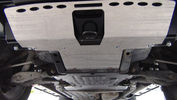
GOE Bash Plates118 viewsGreen Oval Experience Bash Plates. Front, Transmission and Compressor.
Might have to mod the front one a bit to let air into the trans cooler, it sits over the outside of the ARB bar which has vents for the cooler. If I cut slots in the Allow Plate to match those might do the trick.
I added a rear bolt to the Compressor Plate as it looked like it could get hooked on something and tear off. Two bolts onto the slider and two up onto the chassis now.
|
|
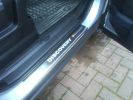
sill plates276 views
|
|

mantec plate180 views
|
|
Object under skid plate 238 views
|
|
Object under skid plate40 views
|
|
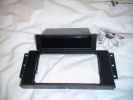
Face plate adapter49 views
|
|
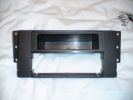
Face plate with 1 DIN pouch58 views
|
|
RLD Plate after 18 months68 views
|
|
view of winch behind bumper with front plate cover on.220 views
|
|
Mantec plate197 views
|
|
Mantec Plate fitted224 views
|
|
Mantec plate on show at Drumclog.178 views
|
|
The license plate says it all ...176 views
|
|
Front bumper with cutout for winch rope entry117 viewsBumper was initially cut "too small" with a low speed hand-held jig saw. It was then progressively filed to about the right size. Finally a very sharp box cutter was used to provide a smooth edge to the cut. This cutout is hidden behind the licence plate.
|
|
Winch as installed177 viewsLicence plate is held on by winch cable and 4 metal pins which fit into modified bumper body. Winch rope is green
|
|

Raytec Plate114 views
|
|
plates90 views
|
|
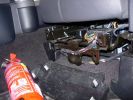
Mounting a non-LR fire extinguisher535 viewsShowing the plastic cover removed. I will make up a metal plate or bar so that the extinguisher frame can be mounted directly to this framework under the seat.
|
|
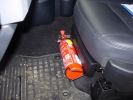
Mounting a non-LR fire extinguisher410 viewsSimply fixed it to the plastic cover for now, but will remove cover and mount further back later - just need to make up a metal plate first.
|
|
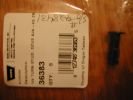
Warn number plate screws/fittings205 viewsPart no. of Warn fitting used to attached number plate to Warn winch carrier.
|
|
Warn Winch gromet/retainer for Warn Winch screws199 viewsPart no. for warn winch grommet/washer for warn number plate holder
|
|
Warn Winch grommet/retainer for number plate holder245 viewsPart no. for Warn grommets for numbe rplate holder.
|
|
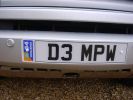
G4 challenge number plate257 views
|
|
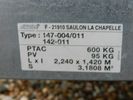
Trailer plate25 views
|
|
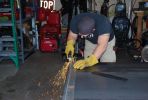
163 viewsUsing the plasma cutter to trim up slider plates
|
|
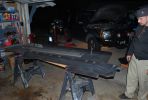
172 viewsFirst stab at the bottom plate welded to the support channel.
|
|
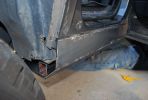
183 viewsRough fit showing the rear end with the support channel and slider plates.
|
|
GNVP Plate73 views
|
|
GNVP Plate - Black!91 views
|
|
62 views
|
|
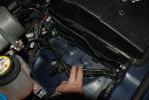
125 viewsExisting threaded holes to install plate onto
|
|
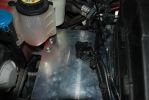
122 viewsThe plate installed on top of the bracket
|
|
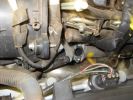
EGR Blanking267 viewsPipe removed for blank plate.
|
|
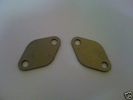
48 views
|
|
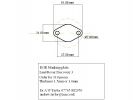
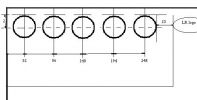
Dimensions of EGR plate for D3 group buy181 views
|
|
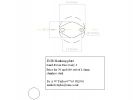
Drawing of Euro III engine EGR blanking plate213 views
|
|

188 views
|
|

Ent\'s new Plate....141 views
|
|

186 views
|
|
Volvo plate49 views
|
|

Eaten plate33 views
|
|

Tow Assist target template276 views
|
|
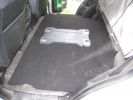
Floor Finished with Carpet and Engel Floor Plate172 views
|
|

Thread upload3 viewsImage uploaded in thread 142941
|
|

Front Bumper62 viewsFront Bumper Number plate holder
|
|
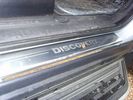
Front Plate99 views
|
|
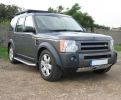
250 views
|
|

Mantec Plate236 viewsThanks to Simkna (Si)
|
|

RHD Discovery 3 Headlamp Mask120 viewsPrint on A4 paper and its all to size
|
|
Testing that sump plate!113 views
|
|
2 weeks old193 views
|
|
Thread upload5 viewsImage uploaded in new thread
|
|
Thread upload6 viewsImage uploaded in new thread
|
|
Thread upload7 viewsImage uploaded in new thread
|
|
SR bolted to the roof plate80 views
|
|
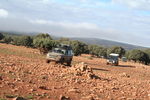
Morocco explorer4 viewsDriving on the plateau de rekkom eastern Morocco
|
|

Blanking plate removed290 views
|
|
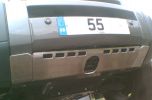
Mantec Plate Fitted264 viewsPlate fitted, Friday 20th July 2007
|
|
First - swap the private plate off79 views
|
|
Mantec Plate67 views
|
|

2nd Row Seats plate37 viewsImage uploaded in new thread
|
|
Tyre Valve Extension RLD plate24 views
|
|
Template on Rear of Bumper Drilled121 views
|
|
1735 viewsIndustrial elastic a stanless clip and a winch mount the number plate back in place
|
|
1523 viewsA close up of the numberplate in its origonal place
|
|
Roof box fixings379 viewsTop original with new one in middle!
Had to make the hole to the left of the plate longer to fit new brackets, it was the same size!
|
|
Template in place to drill holes through guard.149 views
|
|
A pillar template in place - ready to drill (through extremely hard metal!)167 views
|
|
Marked inner guard with template to enlarge hole in channel154 views
|
|
Nudge bar - bracket altered to fit with Mantec plate82 views
|
|
38 views
|
|
254 views
|
|

My underside386 viewsCheck out the full skid plate! It sacrificed itself for the LR. This event would have been dangerous without it...
|
|

Matt Black Porsche seen in Vienna42 viewsnote the body kit and the paint but the best bit is the cable tie keeping the number plate on.
|
|
Full frontal153 viewsWell hidden. Uncle Ray sump plate, Goodwinch 9.5T winch and tray.
|
|
Redg plate mounting127 viewsThe original redg plate mounting was modified. An L-shaped piece of plastic now sticks out rearward from the top of the mounting and this hooks over the back of the top edge of the bumper cover. Then 2 spring clips hold the bottom edge of the mounting in place. Proximity sensor and surround camera seen unaffected.
|
|
Recessed Hawse 143 viewsI had the hawse powder coated black which was not necessary in the end as it is normally hidden behind the number plate. The cutout of the hole in the bumper cover could have been a bit tidier, but again, it is usually hidden when winch not in use. Note the two clip receivers which hold redg plate mounting in situe.
|
|
EGR PLATES169 views
|
|
Thread upload0 viewsImage uploaded in thread 190216
|
|
Only way across "The Plateau"63 views
|
|
my 55 plate SE with D4 face lift182 views
|
|
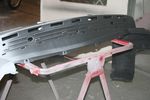
Rear Bumper High Build Primer & Showing Tread Plate Removed & Fixing Points Top84 views
|
|
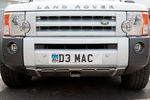
New Sump Guard101 viewsHead on of the new guard fitted last weekend.
The number plate has been Photoshopped! Its the one I\'d love to have, as its my initials - but is not for sale as far as I can see - and I wouldn\'t be able to afford it anyway! :)
|
|
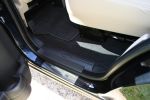
Sill Plates110 views
|
|
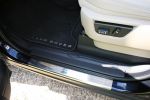
Sill Plates112 views
|
|
Sill Plates104 views
|
|
Sill Plates150 views
|
|
Sill Plates145 views
|
|

Thule 9705 plate40 viewsShows how the fixing plate reduces the departure angle
|
|
Modified Thule 9705 plate42 viewsShows the adapter plate after modification to improve departure angle
|
|
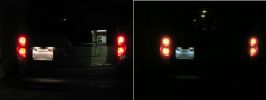
I replaced the incadescent license plate bulbs with new 6-LED bulbs for a cleaner look.420 viewsI was following a 2006 Lexus ES and noticed their license plate bulbs are now using LEDs, so I thought the same thing would look good on the rover.
|
|
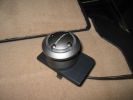
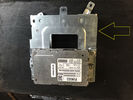
This is the controller unit that I attached to the emergency brake pop-out plate.386 views
|
|

UHF Antenna Mount384 viewsView from underside of bonnet. The lower half of the mount is folded from stainless steel and bolted through an exisitng oval shaped hole in the bonnet. This hole is throught the heavy steel plate that the bonnet hinges bolt to - not just the aluminium panel. A specially machined rectangular nut was made to pass through the oval hole, rotate 90 degrees and then stopped from turning by a slight shoulder on the nut.
|
|
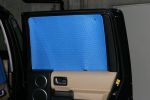
Rear Right217 viewsQuality. Made to measure. Making the template was the hardest part. Absolutely ZERO light ingress through these blinds and keeps those who go dogging out too.
|
|
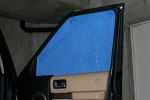
Front Right219 viewsQuality. Made to measure. Making the template was the hardest part. Absolutely ZERO light ingress through these blinds and keeps those who go dogging out too.
|
|
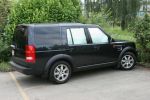
Side Windows237 viewsQuality. Made to measure. Making the template was the hardest part. Absolutely ZERO light ingress through these blinds and keeps those who go dogging out too.
|
|
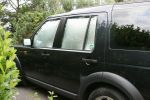
Side Windows167 viewsMade to measure. Making the template was the hardest part. Absolutely ZERO light ingress through these blinds and keeps those who go dogging out too.
|
|
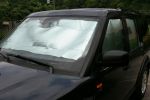
Windscreen Blind170 viewsThe windscreen is particularly hard to come up with an accurate shaped template to make a proper made to measure blind. I gave up.
Here is a make shift arrangement on the inside but I discovered it did little to reflect the heat as once the heat came through the glass it was already inside the car. Doh! Stretching it across the outside of the screen had a much better effect.
|
|
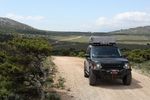
plateau41 views
|
|
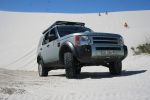
AT2 Grabber in Dunes270 viewsin extended mode, at rest, with AT2 tyres. Tested at Atlantis Dunes with flying colors.
Mantec non-winch plate visible.
|
|

DISCO3.CO.UK GET COMMISSION IF YOU ORDER FROM HERE http://www.craigsplates.co.uk25 viewsI AM GOING TO ORDER THESE FROM http://www.craigsplates.co.uk if that is ok. i see on the forum disco3.co.uk get a commission. Any issues with this?
|
|
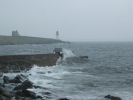
CALENDAR ENTRY - Islay 2008505 viewsSame as description for previous photo, with a bit more of a background. Looking towards Port Charlotte lighthouse. Sorry, number plate not visible, so probably inadmissible.
|
|

CB Aerial on Rack Floor Plate126 views
|
|

Replacement switch from RRS installed on LR3864 viewsThe switch shown is LR part number YUZ500020, the upper rear hatch release switch that is found on the Range Rover Sport.
The switch body is the same switch as on the LR3 except that there is no wiring disconnect on the LR3. Hence when the switch corrodes and requires replacement, the LR solution is to purchase a new handle and license plate light assembly. I instead cut off the old switch and installed a JAE mating connector to the existing wiring and hence just plugged the RRS switch in.
The replacement RRS switch snaps into the same rectangular space in the same manner as the removed LR3 switch, the difference is the JAE male wiring connector.
|
|
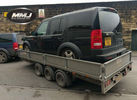
Thread upload13 viewsImage uploaded in thread 155913
|
|
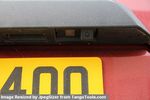
Number plate Camera 68 viewsThe camera includes a number plate light lens - left hand side of the camera.
Just plug in existing number plate bulb
|
|
Thread upload20 viewsImage uploaded in new thread
|
|
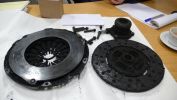
clutch plate and flywheel100 views
|
|
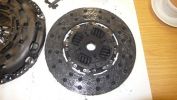
failed clutch plate94 views
|
|

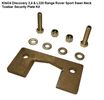
23 viewsL319 - Blocco Gancio Traino Romovibile
L319 - Detachable/removable Towbar Security Plate
|
|

Thread upload12 viewsImage uploaded in new thread
|
|
Cresting the hill!58 views
|
|

LR3 Air Conditioner Drain Tubes behind centre console2131 viewsThis shows the two air conditioner drain tubes located left and right under the radio stack.
The tube on the left side, (steering wheel side, LHD), disattached itself and the carpet on the floor under the gas pedal etc became soaked. I think rain water from outside that comes in the outside cowl vents also exits via the tubes as I first noticed the carpet was wet after parking outside during a big rain storm.
It was relatively easy to slide up and reattach the rubber hose that runs from the rectangular shaped plastic discharge hole(s) of the heater "pan" down along the transmission hump area and thru the floor pan. There is a hose on each side of the transmission hump, but only one hose had let go on my 3. The rubber hoses just slide over the rectangular plastic openings of the two heater housing drain outlets.
To get at each drain hose, remove the vertical sort of triangle carpeted piece below each side of the radio stack. The triangles of carpet will just pull away as each is held on with those metal U clips Land Rover so likes. Dislodge each triangle at least sufficiently to get ones hand in to slide the rubber hose back on.
You will rarely see AC water on the ground as the front drains pour onto a metal underside protection skid plate and the rear drain onto the top of the left rear muffler.
|
|
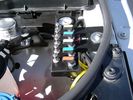
Air Suspension ECU Fuse 35P cut off switch.3820 viewsThis shows the SPST rocker switch mounted in the blank plate installed in lieu of a manual passenger side air bag shut down switch - now automatic via passenger seat pressure switch. Fuse 35P (5 amps) is located in the interior fuse box behind the lower glove box and protects the ignition power supply to the Air Suspension ECU. When the SPST switch is moved to the OFF position, the RAISE /LOWER switch on the centre console is not powered, and hence does not function. As such, some signals from the wheel height sensors and CPU are ignored. By itself however, removing F35P will probably not stop the 3 from self dropping, particularly after the engine is turned off.
Fuse F3E, (5 amps), located in the engine bay fuse box by the starting battery protects the circuit that provides feedback to the Air System ECU indicating that the Compressor Relay has successfully operated and that the Air Compressor is or should be operational, can also be removed, (but is probably not totally necessary), as it gets its power thru F26E. Hence Fuse F26E, (20 amp), also located in the engine compartment fuse box is the fuse that must be removed. This fuse protects the circuit that provides full time battery power to the Air System ECU. When in place, current thru the fuse powers the periodic re-levelling action, (usually lowering a bit with that brief air release noise), that often occurs when the vehicle is parked and the engine is off.
Removing F26E fuse will stop the auto levelling action and also inhibit any other down to the stops signals, (engine running or not). When F26E is removed, no power can flow thru to F3E, hence removing F3E is more for insurance than an absolute requirement. The same with F35P, removing F26E removes primary full time power from the Air Suspension ECU, and hence removing the F35P fuse should not really be required either as long as F26E has been removed.
|
|
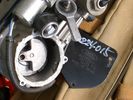
Compressor Con Rod Broken 1752 viewsThe model number of this compressor is RQG500060; the model number of my replacement compressor was LR015303, the unit that was apparently being installed on the D4 vehicles as of Spring 2010. As of Fall 2011, the new replacement part number is LR023964, the same as in the 4's.
Note the number hand written on the black plate. All the compressors seem to have some number hand written on them - hand built I presume, and every unit perhaps evolving a bit differently as LR struggles to build a compressor that will last. I guess Hitachi, (the manufacturer), should be given credit for that.
|
|
View of mounted panel from front left corner737 viewsI drilled a hole for the supplied 6 mm tie down toggle bolt in a flat portion of the wing on which the panel sits. I inserted a 50 mm flat rubber washer between the wing metal surface and the underside of the black painted panel plate; also a 40 mm flat rubber washer between the supplied fender washer and the metal plate - just seemed like a good idea so surfaces mate well even if wing metal not completely flat.
|
|
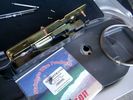
0.032" OD metal fishing leader and lead fishing weight clamped to existing wire rope 2118 viewsI used a size #0 lead fishing weight as a clamp to attach the 0.032" diameter flexible wire rope fishing leader to the release cable.
The pictured weight is the smaller #00 weight, however it did not work very well so reinstalled with the larger #0 size. I clamped to the cable as what breaks is the L retainer that is hidden in the actuator and holds the cable. When the L breaks, it lets go of the cable so you hear the clicking but there is no opening action.
Clamping on to the cable is an attempt to resolve that reality; also if the actuator electrically fails, the release mod should still do the task. Note in the picture the two Torx T15 screws that hold the gold plate to the plastic case and also the two 8mm cap screws that have to be loosened to remove the actuator from inside the door.
|
|
Dust seal rolled back showing electrical conductors 1658 viewsNote power conductors just under the dust seal which makes cutting the seal more interesting.
Also shown are the two 8mm nuts located in slots. One must loosen each nut to effect removal of the actuator. This will then reveal two T15 Torx screws that one must completely un-thread to remove the top gold plate from the actuator assembly.
|
|
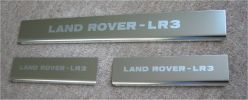
LR3 sill plates279 viewsLand Rover - LR3 sill plates for US market
|
|
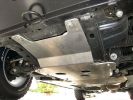
Rasta underbody protection plates448 views
|
|
Thread upload14 viewsImage uploaded in thread 169349
|
|
Thread upload10 viewsImage uploaded in thread 176633
|
|
Mantec plate796 views
|
|
Mantec Plate Fitted407 views
|
|
Mantec Plate Disco3.co236 views
|
|
\'Mantec plate\'!55 views
|
|
mantec plate267 views
|
|
Mantec144 viewsMantec plate fitted and stickered
|
|
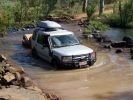
D3 in the Kimberley - on the track to the Mitchell Falls, crossing the King Edward River49 viewsSix weeks after the tharck has been opened the water levels in the King Edward River have greatly reduced. This is the start of the 80km track up onto the Mitchell Plateau.
|
|

427 views
|
|
362 views
|
|
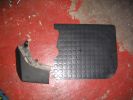
using old as templatefor fixings209 views
|
|
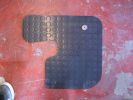
Rear template200 views
|
|
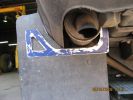
Bracket template187 views
|
|
Fitting Land Rover Series 3 Rear Mud Flaps to a Disco 3/4 - A956 viewsUsed Original Screws plus two extras, Had to cut around exhaust. Once first done, laid them back to back and used first as a template to drill and cut second. Used a 5.5mm drill for the holes in the flap for the original screws and a 7mm drill to make the new holes in the plastic wheel-arch trim and lining to take the two-part trim clip (see my gallery for a picture of this style clip) - this photo of the new flap shows two screws but I modified that design to avoid using screws which corrode with time. Ignore the fact the pics are taken on a D3 Coiler, it makes no difference.
|
|
Thread upload19 viewsImage uploaded in new thread
|
|
Gaydon D3s194 views
|
|
194 views
|
|
5 views
|
|
messing with the breed246 viewsCut and paste could change the view
|
|

Thread upload24 viewsImage uploaded in new thread
|
|
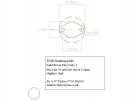
173 views
|
|

21 views
|
|

63 views
|
|

49 views
|
|

13 views
|
|

Number Plate Mount21 views
|
|
Thread upload19 viewsImage uploaded in thread 171045
|
|
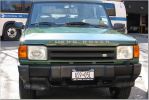
NY\'s finest161 views
|
|
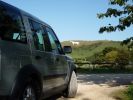
227 viewsCalendar Entry 2010: White Horse Westbury, Wiltshire. I know it does not have my number plate, but it is my fav pic!
|
|
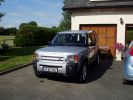
Finally on Irish plates :)274 views
|
|
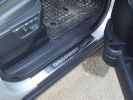
Sill plates309 viewstasmod\'s D3 sill trims
|
|
D44 Winch stainless fairlead660 viewsThe completed D44 winch installation, including the stainless fairlead. A stainless trim plate, and NA license plate holder is on the way.
|
|
Fitted, original mounts plus new holes with backing plates57 views
|
|
73 views
|
|
78 views
|
|
87 views
|
|
79 views
|
|
88 views
|
|
85 views
|
|
97 views
|
|
101 views
|
|
129 views
|
|
91 views
|
|
104 views
|
|
144 views
|
|
188 viewsKit Numbers, fittings of 3027 have a "L" shaped plate
|
|
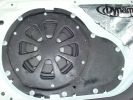
Pioneer TS-SW1041D 10" sub installed123 viewsAfter cutting off the factory sub mount studs, it took ages to bash the indents. To gain more space behind the driver - I changed the driver\'s side license plate from plastic push in lug - to stainless bolt with nyloc nut. Cr@ppy paint job in wrinkle-finish - all I had on hand at the time. Sealed and treated lower tailgate with Dynamat.
|
|
discotech plate 265 views
|
|
180 views
|
|

114 views
|
|

32 views
|
|

22 views
|
|

Thread upload24 viewsImage uploaded in thread 100720
|
|

11 views
|
|
Thread upload11 viewsImage uploaded in new thread
|
|

128 views
|
|

92 views
|
|
Thread upload5 viewsImage uploaded in new thread
|
|

Thread upload4 viewsImage uploaded in new thread
|
|
Thread upload5 viewsImage uploaded in new thread
|
|

54 views
|
|

15 views
|
|

BMW number plate159 views
|
|

Thread upload1 viewsImage uploaded in thread 196041
|
|

Thread upload0 viewsImage uploaded in new thread
|
|

Thread upload12 viewsImage uploaded in thread 156159
|
|
Thread upload13 viewsImage uploaded in thread 156159
|
|
Thread upload0 viewsImage uploaded in thread 166460
|
|
Thread upload3 viewsImage uploaded in thread 40682
|
|
Thread upload3 viewsImage uploaded in thread 40682
|
|
Somewhere in the Pyrenees21 views
|
|
Somewhere in the Pyrenees19 views
|
|
Thread upload35 viewsImage uploaded in thread 88705
|
|
Thread upload3 viewsImage uploaded in new thread
|
|
Thread upload2 viewsImage uploaded in new thread
|
|
140 views
|
|
167 views
|
|
141 views
|
|
127 views
|
|

12 views
|
|

7 views
|
|
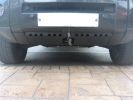
Rays mantec plate126 views
|
|
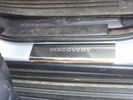
Rear Plate96 views
|
|
65 viewshttp://www.disco3.co.uk/gallery/albums/edit/preview_d530ea4b.JPG
|
|

225 views
|
|
299 views
|
|
284 views
|
|
291 views
|
|
285 views
|
|
301 views
|
|
256 views
|
|
217 views
|
|
Rev Camera No plate top162 views
|
|
Rev Camera no Plate103 views
|
|
Rev Camera no plate side88 views
|
|
Rev Camera Rear No Plate lamp rear of Vehicle126 views
|
|

rld plate122 views
|
|
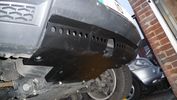
RLD sump plate on D4198 views
|
|
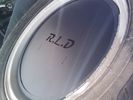
RLD Wheel Plate58 views
|
|
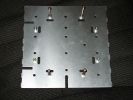
Sosen A9 Roof mounting plate182 views
|
|
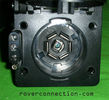
NAS 7 pin + NAS 4 pin Flat Trailer Socket308 viewsThis is the vehicle end of the NAS trailer harness that is located behind the removable plate centered within the rear bumper by the towing loop. Re the four pin flat connector, from the bottom, the exposed bare lower pin is the ground, usually the White wire on a NAS trailer. The next pin up is normally a Brown wire on a trailer and is for the Tail Lights. The third pin, normally a Yellow wire, is the left signal light; the top pin, normally a Green coloured wire, is the right signal light.
Re the round connector, from the notch in the plastic surround, clockwise, the first blade is ignition controlled +12VDC battery power, (only alive when engine running), and on the Land Rover factory harness is an Orange wire; on a NAS trailer, usually Red but perhaps a Black wire.
Next blade clockwise at 3:00 o'clock above, is the Right Turn signal light, a Green wire on the LR harness, and also on a NAS trailer.
At 5:00 o'clock, the next blade is for the Electric Brakes and is Blue on both the LR harness and on a NAS trailer.
The Ground wire is next, White on both the LR harness and on a trailer.
At 9:00 o'clock above, is the Left Turn signal, Yellow on both the LR harness and on a trailer.
The last blade to the left of the line up notch is the Tail Light circuit. On the LR harness, the wire colour is Brown with two White stripes and on a NAS trailer, Brown.
The centre pin is for the Reverse Back Up lights and is Black on the LR harness and often Purple on NAS trailer wiring but can be Black also.
Note that when the socket assembly is installed on the 3, the notch in the plastic surround is on the left - that is rotated 90 degrees anticlockwise to the picture above. In other words, When installed on the 3, the 4 pin flat connector lays horizontal and is located below the round socket.
|
|

6 views
|
|
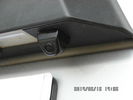
Tailgate Camera located above license plate.597 viewsThis aftermarket camera is mounted on my 2005 LR3 in almost the same location as the factory cameras. The factory units are mounted somewhat more forward closer to the metal of the tail gate and I could have done the same as well.
Note that the camera above is aimed a bit towards the centreline of the vehicle per the factory install.
|
|
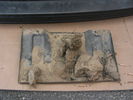
First protection plate, note all mud109 views
|
|

Scuff Plate Trim Panel78 views
|
|

Scuff Plate Trim Removal18 views
|
|

92 views
|
|

Thread upload7 viewsImage uploaded in new thread
|
|
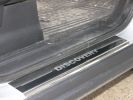
194 views
|
|
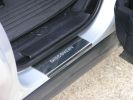
180 views
|
|
Sill Plates Rear409 views
|
|
Sill Plates Front433 views
|
|
Thread upload0 viewsImage uploaded in thread 134946
|
|
17 views
|
|

Skid plate diff255 views
|
|

Skid plate engine223 views
|
|

Gearbox skid plate219 views
|
|

Skid plate163 views
|
|

Skid plate tank 188 views
|
|
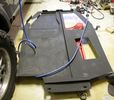
Skid plate tank184 views
|
|

Snorkel fitting26 viewsSnorkel fitting - with templates
|
|

Thread upload1 viewsImage uploaded in thread 31159
|
|
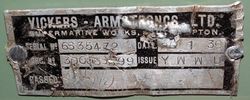
Thread upload3 viewsImage uploaded in thread 146453
|
|
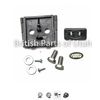
Thread upload0 viewsImage uploaded in thread 185996
|
|
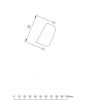
steering cutting template59 views
|
|
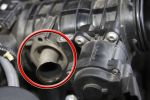
Stub Pipe837 viewsRemove these and fit the blanking plates. Make sure the seal comes out too!
|
|

147 views
|
|

112 views
|
|
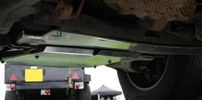
missing transmission plate 102 views
|
|
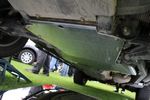
transmission plate 98 views
|
|
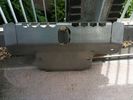
Sump Plate37 views
|
|
Thread upload207 viewsImage uploaded in new thread
|
|
Thread upload253 viewsImage uploaded in new thread
|
|
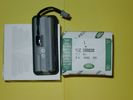
Upper Hatch Release Switch LR Part Number YUZ500020675 viewsThis is the Range Rover Sport switch, Land Rover part number YUZ500020, as it comes out of the box. Note the JAE, (Japanese Aviation Electronics), male wiring connector installed on the end of the power lead.
The rubber cover of the switch is sealed to the plastic body of the switch whereas in the previous switch design, there was no sealing. Also the replaced switch was hard wired into the same harness as the license plate lights - no JAE connector in other words.
|
|

The Disco 3 the day I bought it73 viewsSince then here's what's been done
1) New slotted and dimpled EBC rotors and Pads
2) Rover Specialties rock sliders
3) Clear color side markers
4) Front & Rear LR lamp guards
5) Rebuilt both of my Non working Key FOBS by replacing batteries. - I can't believe I didn't even check these when I bought the vehicle.
6) Changed the LR3 emblem to Discovery 3
7) Terrafirma Front Skid Plate
8) Tactical 4x4 Gas Tank Guard
9) ASFIR Rear Diff Guard
10) Here are the things now mounted on Roof Rack
- Full size 18" MTR/Kevlar
- (2) 5 Gallon Jerry Cans mounted in Front Runner holder
- 60" Hi-Lift X-treme Jack
- Shovel
- Magnetic CB Antennae
|
|
4 views
|
|
Thread upload25 viewsImage uploaded in thread 118365
|
|

Thread upload28 viewsImage uploaded in thread 104348
|
|
269 views
|
|
both leds 191 views
|
|

Spare whel protector off the car36 viewsMade this one up myself from 2mm Stainless steel plate.
|
|
Wheel protector fitted38 viewsFitted on the car
Made this one up myself from 2mm Stainless steel plate.
|
|

317 views
|
|
![Filename=white sump plate [1600x1200].JPG
Filesize=2KB
Dimensions=75x56
Date added=08.Mar 2011 white sump plate [1600x1200].JPG](albums/userpics/13223/thumb_white%20sump%20plate%20%5B1600x1200%5D.JPG)
248 views
|
|
| 404 files on 2 page(s) |
 |
1 |  |
|