| Search results - "pipe" |
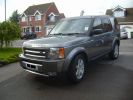
Disco 3 TDV6 GSLE75 viewsLimited Edition. Parking sensors front & rear, Full body skirts with chrome trim fog lights, Twin chrome tail pipes,
|
|
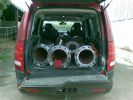
10" Pipe307 views
|
|
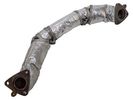
Thread upload21 viewsImage uploaded in thread 172546
|
|
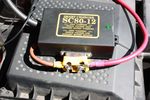
132 viewsTraxide SC80 brain modified. Cut the studs down to the nuts and removed the rubber cover. Had to do this as otherwise it wouldn't fit comfortably and would squash the brake vacuum pipe
|
|

122 viewsTraxide brain mounted. It's mounted slightly tilted towards the front of the engine bay so as to give as much space as possible to the brake vacuum pipe behind it.
|
|
Vacuum pipe + valve LHD 14 views
|
|

Injector leak off pipes4 views
|
|

AIr con pipe81 views
|
|

Water Pipe - solid77 views
|
|
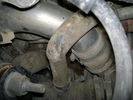
Charge Air Pipe - turbo end.101 viewsThe maint manual identifies releasing the pipe hose clip in the center of the photo. Pity who ever built this engine Put the hose in such a position that access to it was near impossible. I released the other clip at the turbo end of the flexi hose. Easy to get to but a right git to release the hose of the turbo.
|
|

Air con pipe65 viewsIts the brown pipe in the center of the photo. To remove this first you need to remove the "charge air cooler inlet hose" to allow access to the air con pipe securing fixings. But with the "charge air cooler inlet hose" disconnected it can\'t be removed from the veh because the air con pipe is in the way???
|
|

Thread upload0 viewsImage uploaded in new thread
|
|
Thread upload4 viewsImage uploaded in new thread
|
|

Thread upload18 viewsImage uploaded in thread 115198
|
|
Thread upload5 viewsImage uploaded in new thread
|
|

Thread upload5 viewsImage uploaded in new thread
|
|
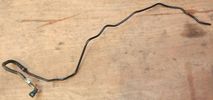
Thread upload5 viewsImage uploaded in new thread
|
|
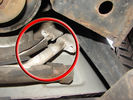
Air Conditioning Pipes (File 1)983 viewsIt\'s the smaller of the 2 pipes that is leaking. Both pipes are encased full length in the foam sleeve. You can see where the support bracket has \'crushed\' the sleeve. The bracket is what holed the small pipe. There is a bracket at each end and one in the middle. You need to remove the suspension reservoir to get to the centre bracket. Be aware that the bolts securing the brackets may be corroded and are likely to shear off on removal!
|
|
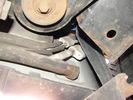
Air Conditioning Pipes (file 2)808 viewsShows location of front-to-rear air con pipes behind NS front wheel. You can just see the Vredestein tyre. The pipe connectors are tucked in behind the wheel arch inner cover. This has to be partially removed for access to bolts holding pipes together.
|
|
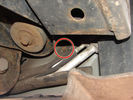
Air Conditioning Pipes188 viewsFront-to-rear aircon HP and LP pipes. The circled bit shows where the bolt securing the support bracket (removed)has sheared off
|
|

32 views
|
|

26 views
|
|
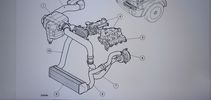
Thread upload5 viewsImage uploaded in thread 189910
|
|
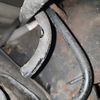
Air pipe leak3 viewsImage uploaded in thread 177818
|
|

Thread upload21 viewsImage uploaded in new thread
|
|
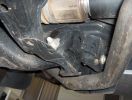
191 views
|
|
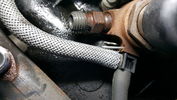
LEAK OFF PIPE11 views
|
|

Bolt holding exhaust silencer behind the front wheel26 views
|
|
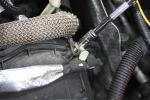
EGR Pipe Bracket 892 viewsRemoving EGR pipe bracket securing bolt
|
|

Thread upload6 viewsImage uploaded in thread 194608
|
|

Thread upload2 viewsImage uploaded in thread 199620
|
|

4 views
|
|

Thread upload4 viewsImage uploaded in thread 194608
|
|
62 views
|
|
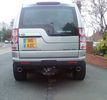
D4 tailpipes 364 views
|
|
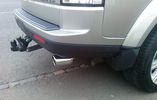
D4 tailpipes 276 views
|
|

D4 tailpipes 174 views
|
|
66 views
|
|

Thread upload1 viewsImage uploaded in new thread
|
|

Thread upload6 viewsImage uploaded in new thread
|
|

Thread upload5 viewsImage uploaded in new thread
|
|
Thread upload4 viewsImage uploaded in new thread
|
|
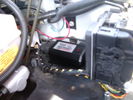
CounterAct Power Supply mounted 247 viewsPicture is blurred, however power supply is 3M two sided tape to the flat black plastic of the second battery compartment just under the antilock brake pipes to the fender side of the brake fluid reservoir. The white wire to the left rear coupler pad runs thru the firewall hole near the steering column. The blue wire to the right front coupler runs across and above the engine following the other wiring looms that cross the vehicle.
|
|
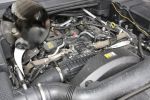
Engine Cover Removed901 viewsView of the engine before blanking off the EGRs. The inset sort of shows one of the EGR valve/pipe flange securing bolts. The EGR valves are not easy to get at!
|
|
Cross link air pipe194 views
|
|
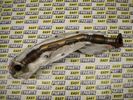
Thread upload8 viewsImage uploaded in thread 61199
|
|
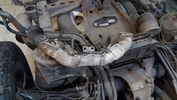
Thread upload9 viewsImage uploaded in thread 141909
|
|
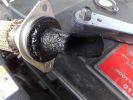
Grim EGR Inlet136 views
|
|

53 viewsD3 model year 2006 fuel pipes
|
|
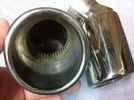
72 views
|
|

74 views
|
|

67 views
|
|
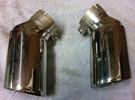
64 views
|
|

71 views
|
|
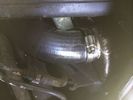
Thread upload28 viewsImage uploaded in thread 105014
|
|
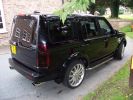
tail pipes86 views
|
|

Thread upload2 viewsImage uploaded in new thread
|
|
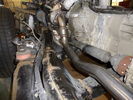
163 viewsDe-cat pipe
|
|

Thread upload17 viewsImage uploaded in new thread
|
|

16 views
|
|

Thread upload6 viewsImage uploaded in thread 177883
|
|

Thread upload10 viewsImage uploaded in thread 177883
|
|

Thread upload10 viewsImage uploaded in thread 177883
|
|
Thread upload3 viewsImage uploaded in new thread
|
|
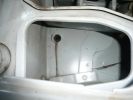
Driver (RHD) Sunroof Drain Pipe98 views
|
|
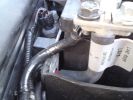
Take power direct from battery, routed cable through some rubber pipe, then taped up169 views
|
|
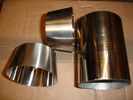
10 views2 reducing cones and short length of pipe ordered from the bay of evil
|
|
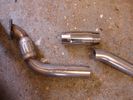
11 viewsPipe cut at location of cat on original pipe
|
|
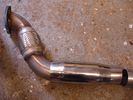
Adding a "Cat" to the decat pipe12 viewsReplica cat slipped over
|
|
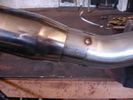
16 viewsPipe spot welded together and "Cat" slipped over to the joint
|
|
16 viewsPipe welded together encompassing the "Cat"
|
|
85 viewsFuel filler, showing rear diff breather pipe
|
|
103 viewsRear shot, showing diff and fuel tank breather pipes running up to filler neck at top LHS
|
|

78 viewsThis metal body seam gets touched by larger rear tyres. If you don\'t have rear AC, you can fold it out of the way. If you do, the two pipes mean you have to leave it alone.
|
|
Fresh air on the half pipe at Drumclog331 viewsFresh air on the half pipe at Drumclog
|
|
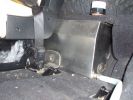
Left hand side of internal 40 Litre water tank162 viewsView from floor looking towards tank. Top white cover is 50mm plastic pipe cap. It protects the tank vent valve. Dispensing hose is at lower corner of tank
|
|
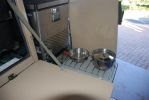
gas stove slides out under fridge110 viewsvery useful mod - youdon\'t have to unpack anythinig to be ready to cook. the stove gas is piped from the rear of the trailer, ie. the standard gas cylinder. pipe goes thru grommets along bodywork, and uder the fridge. works a treat. the door adds shielding in high winds if need be
|
|

D pillar speaker cover removed to facilitate removal of the bin cover.11 viewsThe pipe thing exposed when the D pillar cover is removed is something to do with the side curtain air bags and hence is not to be disturbed - at least my me. Removal of the cover make lifting of the bin cover easier.
|
|
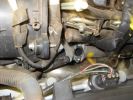
EGR Blanking267 viewsPipe removed for blank plate.
|
|
38 views
|
|
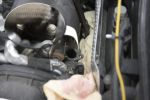
EGR Valve/Pipe Flange896 viewsThe bolts in the inset are the ones to be removed. Note the rag stuffed down beside the EGR to prevent dropped bolts or gaskets disappearing for ever. Don\'t forget to take the rag out if you don\'t want your D3 to go up in flames next time you use it!
|
|
Thread upload0 viewsImage uploaded in new thread
|
|
Thread upload2 viewsImage uploaded in new thread
|
|

Thread upload1 viewsImage uploaded in thread 203424
|
|

Thread upload2 viewsImage uploaded in new thread
|
|
Thread upload1 viewsImage uploaded in new thread
|
|
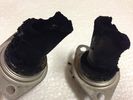
EGR Stub Pipes13 viewsThis what they looked like after 15K Km
Glad I fitted the Blanking kit
|
|
Thread upload2 viewsImage uploaded in thread 123654
|
|
Thread upload2 viewsImage uploaded in thread 123654
|
|

exhaust pipe4 views
|
|
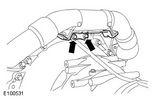
Exhaust Crossover Pipe157 viewsThis is the pipe that i am looking for.
|
|
Thread upload3 viewsImage uploaded in thread 109559
|
|
Thread upload3 viewsImage uploaded in thread 109559
|
|
Thread upload4 viewsImage uploaded in thread 109559
|
|

Fluid, Filter/Pan Combo removal and install5980 viewsThese are the LR instructions re removal and install of the plastic pan/filter combo for the ZF 6HP26X transmission on the 4.4L petrol V8 LR3.
The instructions tend to ignore the reason you have to lift the right hand side of the engine about 40 mm. This is because of a frame cross member that interferes with dropping down of the plastic pan. The real problem is a vertical "oil filter spout" that rises out of the filter/pan combo up into the transmission. The spout is the suction pipe for filtered transmission oil back up into the tranny.
On the metal pan versions, the filter is separate from the pan, hence the filter remains with the tranny when the metal pan is dropped. The filter is then removed or installed independent of the metal pan, hence with the metal pan, there is no need to lift the engine.
If one is removing the plastic pan so as to install the metal pan, then some do not lift the engine but just drop the plastic pan enough to gain access to saw off the vertical plastic spout - it is a one time procedure.
Be aware however that the metal pan uses a flat gasket and the plastic pan uses a O ring like perimeter gasket that sits in a half round groove in the tranny casing. Also the metal pan uses 21 shorter torx M6x22.5 metric cap screws for the perimeter bolts. The plastic pan uses longer M6x28.5 torx metric cap screws.
|
|
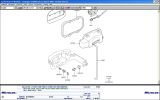
fuel pipe241 views
|
|

Thread upload9 viewsImage uploaded in thread 197477
|
|

Thread upload8 viewsImage uploaded in thread 206858
|
|

Thread upload1 viewsImage uploaded in new thread
|
|

tailpipes 2130 views
|
|
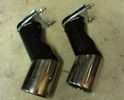
tailpipes1126 views
|
|

Recall vacum pipes81 views
|
|

sunroof drain pipe156 views
|
|
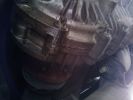
483 viewsappeared to be clogged up breather pipe uff
|
|

Piper69 views
|
|
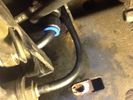
New Connector where worn pipe30 views
|
|
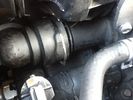
Water pipe28 views
|
|
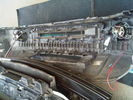
Pipes Fitted for Jets131 views
|
|
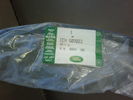
part number27 viewssunroof pipe and elbow comes together
|
|
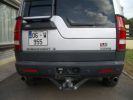
Showing rear view of the two pipes.795 views
|
|
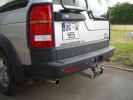
Shows the tail pipe of the exahust756 views
|
|
Tailpipes491 views
|
|
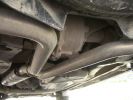
The New Fat Pipes635 views
|
|
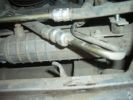
The Pipes, The Pipes are calling459 views
|
|
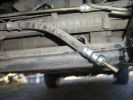
The HP Pipe cut467 views
|
|
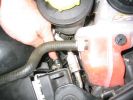
Pipe91 viewsPossible pipe that leaks oil.
|
|
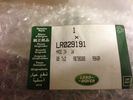
Aircon Pipe Rear30 views
|
|
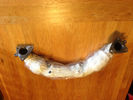
exhaust cross over pipe44 views
|
|
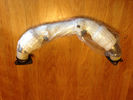
exhaust cross over pipe46 views
|
|
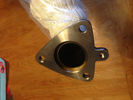
exhaust cross over pipe66 views
|
|
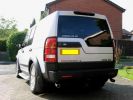
D3 sticker, chrome pipes, lamp gaurds....OMG I am going bling367 views
|
|
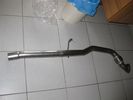
decat pipe47 views
|
|
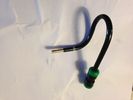
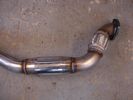
AMK compressor inlet pipe with brass fitting partially inserted16 views
|
|

pipe hole 112 views
|
|

pipe hole 211 views
|
|
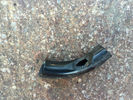
cut pipe 28 views
|
|

cut pipe 113 views
|
|
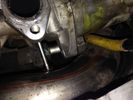
EGR replacement21 viewsThe left EGR valve is tight up against the turbo boost pipe. This make insertion of the long bolts difficult!
|
|
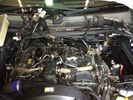
Wiring looms and cooling pipes need to be moved out the way13 views
|
|
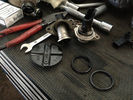
what you should be left with after the blanking procedure8 viewsApart from this, you'll also have to remove the pipes that connect the valves to the airbox. Not mandatory, but a proper job well done
|
|
Butterfly valve and varous leftovers from the EGR valve blanking and pipe removing17 views
|
|

50 views
|
|

Thread upload4 viewsImage uploaded in thread 120520
|
|
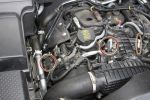
EGR Blanking220 viewsL.H.S pipe.
|
|
EGR Blanking Kit Fitted.944 viewsLook, no EGR pipes. The circled bits are the new blanks.
|
|
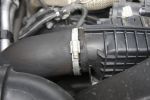
Air Box Jubilee Clip735 viewsLoosen to allow air inlet pipe to be removed from the air box
|
|
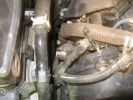
EGR Blanking214 viewsR.H.S PIPE, note the tight space to get your hands in. Loosen pipe clamp below air cleaner for better access.
|
|

Intercooler pipes176 views
|
|

pipe123 viewsThis shows the pipe I thought was the sunroof hose.. hope it was the water jet hose
|
|

Piped out after a two and a half year rebuild! A 90 V8.73 views
|
|

Thread upload4 viewsImage uploaded in thread 142778
|
|
Thread upload21 viewsImage uploaded in thread 156058
|
|
Thread upload5 viewsImage uploaded in new thread
|
|
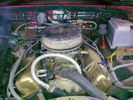
64 viewschevy v8,straight through pipes :)
|
|

Thread upload0 viewsImage uploaded in new thread
|
|
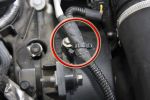
Tie-Wraps774 viewsWhen the EGR pipes are removed, you lose the brackets these cables are normally secured to because the brackets are part of the pipes. This is my solution to the problem - refit the bolts with an almost closed tie-wrap around them, then slip a new tie-wrap through the loop on that one and around the cable.
|
|

42 views
|
|

44 views
|
|
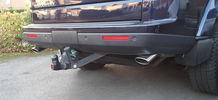
42 views
|
|

Thread upload7 viewsImage uploaded in new thread
|
|
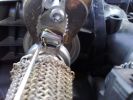
Pipe clamp EGR180 views
|
|
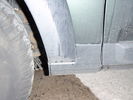
Picture of Aircon pipe locations103 views
|
|
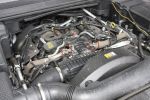
EGR Pipe Clips831 viewsRemove the 2 circled clips to disconnect upper ends of EGR pipes from the stub pipes fitted to the EGR butterfly valve housing.
|
|

42 views
|
|
327 views
|
|

Thread upload10 viewsImage uploaded in new thread
|
|
Thread upload16 viewsImage uploaded in thread 127500
|
|

Thread upload16 viewsImage uploaded in thread 173796
|
|

Thread upload14 viewsImage uploaded in thread 68068
|
|

Thread upload0 viewsImage uploaded in new thread
|
|

Thread upload3 viewsImage uploaded in thread 84165
|
|
Thread upload0 viewsImage uploaded in new thread
|
|
Thread upload0 viewsImage uploaded in new thread
|
|

Thread upload10 viewsImage uploaded in thread 133649
|
|

46 views
|
|

Thread upload11 viewsImage uploaded in new thread
|
|
Thread upload4 viewsImage uploaded in thread 204634
|
|
Thread upload16 viewsImage uploaded in thread 130996
|
|
Thread upload3 viewsImage uploaded in thread 189910
|
|

Rear AirCon Pipes330 views
|
|
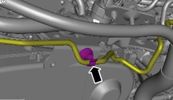
Thread upload2 viewsImage uploaded in thread 123654
|
|

Brake servo recall work - new pipework121 viewsThis is the new visible result of the recall work just done
|
|
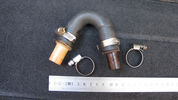
Recirculation pipe19 views
|
|
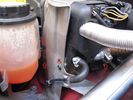
Bolts to remove left bracket of FBH with exhaust pipe23 views
|
|
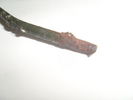
Brake pipe72 viewsCorroded where the clip had held it on
|
|
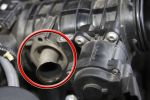
Stub Pipe Blank Fitted955 viewsRemember to fit 2 O-rings from the kit to each one!
|
|
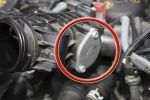
Stub Pipe838 viewsRemove these and fit the blanking plates. Make sure the seal comes out too!
|
|

EGR Stub Pipe866 viewsThis is one of the stub pipes that are fitted to the butterfly valve housing. When both are fitted, they meet in the middle of the housing and must present quite an obstruction to the flow of air to the engine inlet valves! Look how cruddy it is. All that muck is being fed to your engine. Ugh!
|
|
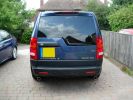
Tailpipes122 views
|
|
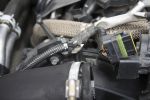
EGR Actuator Cable878 viewsThe cable is tie-wrapped to the EGR pipe bracket so I had to cut the tie-wraps. The bracket is part of the pipe.
|
|
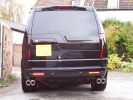
twin upswept tail pipes86 views
|
|
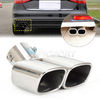
Thread upload11 viewsImage uploaded in new thread
|
|
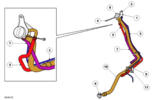
Fuel Pipes58 views
|
|
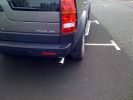
245 viewsthink the down pipes shown looking good
|
|
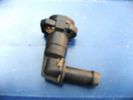
Headlight washer pipe connector60 views
|
|

Water Pipe23 viewsTop engine to radiator water pipe chafed through on the plastic sound damper.
|
|
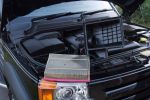
Removing air box is very easy, some screws and just loosen the jubilee clip around the air pipe149 views
|
|
Amdeal 30ft / 10M USB Digital Microscope Cable Wire Endoscope Camera Video Recording Inspection Pipe Camera - Waterproof, 4 LED Lights27 viewsUnder XP system, can watch video directly without install software. By using our software, can take photo,record video, and save the video in the PC. Such USB microscope widely used to inspect tube, check the body, magnify stamps, coins, antiques, insects, electric circuits, machines, fabrics, food, decorations, etc. Please notice that the wire camera is designed for industrial use, not for medical use.
Camera: 1/6" VGA COMS
Pixel: VGA 300K
Resolution: 640x480,352X288,320X240,176X144,160X120
Capture Resolu
|
|
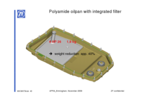
ZF_6HP26_Plastic_Filter_Pan_ combo.png1103 viewsThis is the plastic oil pan on the bottom of our ZF 6HP26X transmissions. Note the two round magnets at the right end of the pan; the drain plug is between them. The filter is the grey part and the vertical oil suction pipe is to draw oil up to the transmission from the filter element. There are 21 Torx screws around the perimeter and the pan gasket is O ring like in design where a half round channel is moulded into the plastic of the pan. The metal pan uses a more conventional flat gasket and in both cases, the metal mating surface of the transmission case is a flat machined metal surface.
|
|
Manul transmission has pipe in this gromit, not there on an Auto.114 views
|
|
|
|
|
|