| Search results - "parts" |
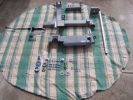
The full complement of bits and pieces, major parts back from the powder coaters, all bolts nuts washers replaced with stainless steel241 views
|
|
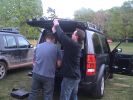
Ken and Slimer tried to steal parts whilst no one was looking!190 views
|
|

09 Starting to remove the seized brake assembly296 viewsBy this time we\'d poured about 8l of water on the dull-red glowing and burning wheel assembly (too close to 140l of 98 octane petrol). Sudden cooling cracked the disk brake which showed mangled park brake parts. How to remove a brake disk without the right star fitting? First remove the caliper then get a sledge hammer?!!
|
|

15 First sign of bits of parking brake failure336 viewsNote the complete lack of pad from the parking brake. Not only was there no composite brake material left, but the drum was somewhat twisted and connecting bits all smashed. Also a small drip of melted rubber from wheel bearing parts....
|
|
![Filename=15082008064 [640x480].jpg
Filesize=73KB
Dimensions=640x480
Date added=15.Aug 2008 15082008064 [640x480].jpg](albums/userpics/12862/thumb_15082008064%20%5B640x480%5D.jpg)
In Disgrace100 viewsThis is where its been for 3 weeks &3 days waiting for the parts to arrive from England. later that afternoon we aere able to take her home. Civilation at last :)
|
|
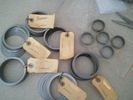
Custom Shim Assortment673 viewsMfd from https://www.facebook.com/DifferentialPartsUS
|
|
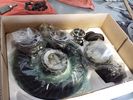
Locking Kit637 viewsready to install
Mfd from https://www.facebook.com/DifferentialPartsUS
|
|
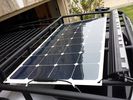
solar roof install444 viewsMore or less wrapped up my solar installation today. I added a Grape Solar Flex 100W panel, it's adequate to keep the vehicle topped off with the Fridge running, and Ham, but it could lose some ground if transmitting depending on how much, 2 would be awesome. One is enough, but barely. I am quite impressed with the Grape Solar flex panel version 2.0.
https://www.facebook.com/DifferentialPartsUS
|
|
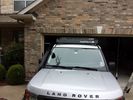
low profile solar panel211 viewsThe low profile solar panel, can be seen here, as the fine white line under the light bar. The way it's laid out, the panel should generate decent power between 10am and 4pm depending on the time of year, from the sides or front, with no shadows. Grape Solar 100W flex panel.
https://www.facebook.com/DifferentialPartsUS
|
|
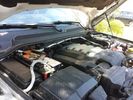
Traxide USI-160 Install515 viewsOverview picture of Traxide USI-160 upgrade install. This was an upgrade from the SC80 which performed flawlessly. The USI-160 had two relays and can deliver more amperage. As a result, the wiring was upgraded to 4/0 Welding Cable (warn) and heat shielding was added. The unit performs flawlessly to support 2 HAM Radios, Fridge, etc. Like me https://www.facebook.com/DifferentialPartsUS
|
|
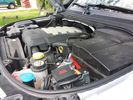
Winch Power upgrade318 viewsUsing 2 warn kits, and removing one of the wires to use on another project. The purpose was to replace the power and ground wire. I used Warn kits, which are 4/0 Welding cable. The original red #4 warped from getting a little too worn. The 2nd
Battery #1 Deka 9A94 AGM Intimidator, Battery #2 Deka 9A47 AGM Intimidator WARN 36080 28" Quick Connect Cable X 2, WARN 26405 Quick Connect Cable 7' X 2, WARN 15901 Black Cable X 1 -- winch control 72" X 1 https://www.facebook.com/DifferentialPartsUS
|
|
Rigid SR2 40" combo133 viewshttps://www.facebook.com/DifferentialPartsUS
|
|
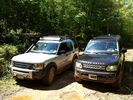
discrete winch mount415 viewsThe D44 winch mount on the trails. Like it on Facebook https://www.facebook.com/DifferentialPartsUS
|
|
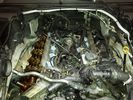
4.4 L Petrol Engine214 viewsIntake removed on V8 4.4L Petrol Engine to remove hose with T in it.
plse like my facebook page https://www.facebook.com/DifferentialPartsUS
|
|
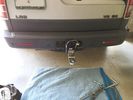
Rhino Hitch205 viewsRhino hitch https://www.facebook.com/DifferentialPartsUS
|
|
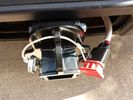
Rhino Hitch229 viewsRhino Hitch https://www.facebook.com/DifferentialPartsUS
|
|
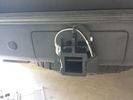
Rhino Hitch429 viewsCover fitted over the 75A Anderson plug with Rhino Hitch fitted which is a Class IV hitch. https://www.facebook.com/DifferentialPartsUS
Fits the Disco 3, Disco 4 and Range Rover Sport
|
|
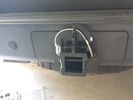
Rhino Hitch309 viewshttps://www.facebook.com/DifferentialPartsUS
|
|
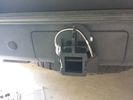
Rhino Hitch395 viewsMore info from https://www.facebook.com/DifferentialPartsUS
|
|

Victory Cup Polo Match141 viewsVictory Cup Bi Plane Polo Match2 viewsLand Rover event at Victory Cup Polo match 10/17/15. http://victorycup.org/bootsandpearls/
VIP Section by Texas Rovers and Land Rover Austin http://texasrovers.org and http://landroveraustin.com/ https://www.facebook.com/DifferentialPartsUS https://www.facebook.com/snomasterusa
https://www.facebook.com/DifferentialPartsUS
|
|

Victory Cup Bi Plane Polo Match121 viewsLand Rover event at Victory Cup Polo match 10/17/15. http://victorycup.org/bootsandpearls/
VIP Section by Texas Rovers and Land Rover Austin http://texasrovers.org and http://landroveraustin.com/ https://www.facebook.com/DifferentialPartsUS
https://www.facebook.com/DifferentialPartsUS
|
|
new parts waiting to be installed2 viewsImage uploaded in thread 177818
|
|
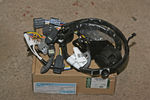
Thread upload1 viewsImage uploaded in thread 178271
|
|
2 parts electrics!!!!!160 views
|
|

Engine Accessory Drive Description and Operation882 viewsThis 2 page pdf shows both belts for the 4.4L petrol V8; the primary serpentine belt, (the long one), and the shorter secondary that drives only the radiator cooling fan.
The various accessory pulleys the two belts are each associated with are numbered and an included table describes each.
When replacing belts and pulleys, count the number of grooves on both your old items and your new replacement parts. It has been known for an pulley with the wrong number of grooves to come with a replacement part or the replacement belt has the incorrect number of grooves; hence make certain the groove count on the new parts are the same as the removed items.
|
|
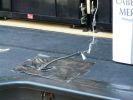
Temporary Tailgate Latch147 viewsTailgate jammed shut in Keep River NP (no access due to cargo barrier) 1000 km trip to Darwin dealer. After 3 days opened up and attached string. 2 weeks in Kakadu and Litchfield then back to Darwin when parts arrived
|
|

Air Suspension - parts diagram pic171 views
|
|

Air Suspension - parts diagram156 views
|
|
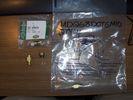
Air parts64 viewsSubstitute airs spring parts - reuseable
|
|
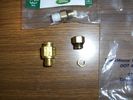
Air Parts57 viewsSubstitue push fit air spring terminators for Disco 3
|
|

178 viewsAudio Parts
|
|
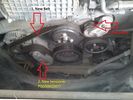
44 views
|
|
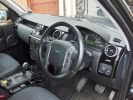
FULL DASH PARTS PAINTED154 views
|
|
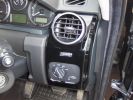
Dash parts painted171 views
|
|
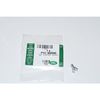
Clip Spring Metal FYC 500040 that holds LR together1747 viewsThe jpg is of the spring metal clip, Land Rover part number FYC 500040 that holds most of our 3 together - well at least most the interior trim parts.
If you are going to remove interior panels, you may as well stock up on a few for replacement as upon panel removal, the clips tend to spring away into deep never to be found voids within your 3.
|
|

Cooling system hoses - 4.4L petrol V81108 viewsThese are the cooling system hoses on the 4.4L petrol V8. The little odd shaped bleeder hose, (LR006158), shown in the top right hand corner can give problems. There is a plastic tee with a threaded air bleeder outlet located in the middle of the hose. The plastic tee can or will fail due to I guess heat distress.
A BIC pen can serve as a field fix, however for your parts kit, a nominal 3/8" ID hose size brass hose barb inline connector plus a couple of hose clamps is suggested. Better yet is a threaded hose barb brass coupling or a tee and bleeder valve to allow bleeding of the line. Land Rover now makes the plastic bleeder valve that breaks available as a separate part, # LR027661, where 0 is a zero. As such, one can now purchase that part only for addition to your field fix parts kit.
|
|
430 views
|
|
329 views
|
|

41 views
|
|

D4 A-Bar Parts59 views
|
|
Thread upload7 viewsImage uploaded in thread 126243
|
|

Thread upload15 viewsImage uploaded in new thread
|
|
Thread upload12 viewsImage uploaded in thread 107712
|
|
124 views
|
|
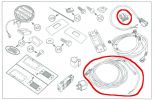
Driving Light Parts Picture48 views
|
|

470 viewsDad as we will remember him. Off to all parts of the world, video camera always at hand.
|
|
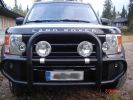
Driving lights installed435 viewsinstalled with Defender styled alu parts
|
|
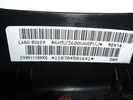
LR parts id on steering wheel19 views
|
|
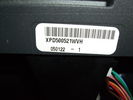
LR parts id on steering wheel20 views
|
|
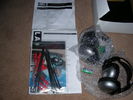
Instructions / parts etc (Un-opened)58 views
|
|

Exploded Parts view calling up 6R60/80 and 6HP26/28 variations3113 viewsThis single page jpg exploded parts view indicates some commonality between the Ford and ZF versions of the early and later six speed units. Technically this sheet is for the RWD units as there are variations between plain RWD units, 4WD, and AWD. The transmission in the LR3 is called by ZF to be a 6HP26X and by LR in some publications, the 6HP26
|
|

Front PDC Parts30 views
|
|

7 views
|
|

Thread upload9 viewsImage uploaded in thread 152126
|
|

Parts diagram for 2007 D3 TDV6 HSE glass top aerial fin42 views
|
|
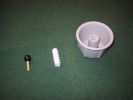
Parts of Tunedok143 views
|
|

Fridge Controls208 viewsSnomaster 72 Fridge controls. https://www.facebook.com/DifferentialPartsUS
|
|

72 Liter Fridge211 viewsSnomaster 72L Fridge / Freezer. https://www.facebook.com/DifferentialPartsUS
|
|
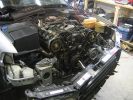
t-belt/h20 pump -$400 in parts/beer & $2200 saved at the dealer84 views
|
|

Thread upload0 viewsImage uploaded in new thread
|
|

Thread upload13 viewsImage uploaded in new thread
|
|

Parts from AF24 views
|
|

Missing Lampguard Fixings77 viewsI\'m missing these bits from my used lamp guards!
|
|

Air Suspension System Parts, Layout, and Operation7062 viewsThis 22 page pdf gives a pretty good description of how the system is supposed to work, plus shows the various parts and the electrical including fuses and relays etc. Of the files here, this is the most useful.
As with all the pdf's here, you can download and print it out.
|
|

Air System Schematic with parts identified.1374 viewsAir system block diagram with components numbered and identified.
|
|

Wheel cut thru definitions and specs898 viewsNote the location of REAR SPACING and also OFFSET; probably two of the most important dimensions and not always understood as related to wheel size and relationship to the brake components.
For the 3, Rear Spacing is approximately 6.5 inches or 165 mm for a nominal 8" rim. Offset is 53P or 53mm Positive, which means the distance from the machined hub flat mounting surface to the rim's true centreline is 53 mm in the outboard direction. (The rim illustrated has a negative offset.)
As Positive offset increases, this means the wheel wraps around the disc brake mechanism more deeply, and hence the more the wheel would cover the brake parts. This is why most 18" wheels will not fit with the larger Brembo "supercharged engine" brake calipers.
Pitch circle diameter is 120mm; Pattern is 5 lug, and the tyre load rating is 112 with a recommended tyre speed rating of H or higher along with the XL load rating. For the 3, the stock tyre diameter is about 30 inches. The 255/60/18 or 255/55/19 OEM tyre outside diameter is 30.04 inches; Wheel lug torque is from 130 to 150 Nm or 96 to 110 lbf-ft and the lug nut hex socket size is 22mm.
Max Load High Speed Driving Tyre pressures are Front, 33 psig, (230 Kpa) and Rear, 42 psig, (290 Kpa).
The OEM rims are rated at 940 kgs, the highest that LR makes, hence while rims from other Land Rover products may physically fit, the odds are they are under rated in a weight sense.
|
|
![Filename=LR3_BMW_Ford_ZF_6HP26X-28X_Catalog_with_metal_pans_[1].pdf
Filesize=1194KB
Dimensions=320x240
Date added=26.May 2011 LR3_BMW_Ford_ZF_6HP26X-28X_Catalog_with_metal_pans_[1].pdf](images/thumb_pdf.jpg)
ZF 6HP26X and 6HP28X transmission parts showing various pans2814 viewsThis 42 page pdf is probably the most informative of all the material in this album. It is called a spare parts catalog but is much more than that. The material is specifically for the X variety of ZF six speed transmissions that are in the Land Rover 4WD / AWD models as well as BMW and Ford AWD vehicles.
|
|

Excel file for Rotors and Brake Pads part numbers for 4.4L V8 petrol LR3768 viewsComparing the cost of the various brands of brake parts is time consuming. Once you have your parts costs, this little spreadsheet will make collating the info easier.
I did not make any provision for labour costs, but the file can be downloaded and then modified. You can change Dollars to Euros or Pounds or whatever and insert lines for labour costs as desired.
Do not pay too much attention to the $ numbers as they are a mix of US and CDN, and from differing time frames, (prior to Spring 2011) . Also the brake part numbers are for my 2005 North America spec LR3 with the petrol 4.4L V8; diesel powered and supercharged 3's may have different part numbers
|
|

Land Rover Brake Light switch XKB5001102699 viewsThis is what the switch looks like when removed from the parts box. Note that the plunger is recessed back into the body and when installing, the process of rotating the switch body 1/4 turn anticlockwise releases the plunger so it pops longer and engages the brake pedal. If you look down on the plunger you can see curved slots where the rotation takes place.
Do not try to rotate the new one - play with the one you remove. Also do not press on the brake pedal when removing or installing as you will damage the plunger - this is one of the reasons the plunger is retracted into the body for installation. It is also for this reason that if you try to confirm the operation of the switch contacts with an ohm meter by pressing the plunger, the switch will appear not to function as one might anticipate. Have faith, the switch will however, once installed and the plunger is in full motion.
|
|

Mirror parts42 views
|
|

PARTS_D4_FBH_REMOTE23 viewsARTS_D4_FBH_REMOTE
|
|
Thread upload2 viewsImage uploaded in new thread
|
|

LTB00222 - Technical Bulletin - Steering Gear Tie Rod Tie Rod End Diagnostic Procedure and Required Replacement Parts Information127 views
|
|
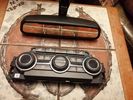
Thread upload5 viewsImage uploaded in thread 198328
|
|
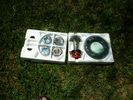
Rebuild Kit1032 viewsReplacement custom Crown Wheel & Pinion, upgraded seals, OE bearings, replacement needle bearings.https://www.facebook.com/DifferentialPartsUS
|
|
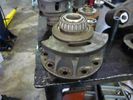
Locker and Bearing1381 viewsRusty shot bearing and locker mechanism https://www.facebook.com/DifferentialPartsUS
|
|
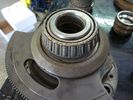
shot bearing1436 viewsshot rusty bearings https://www.facebook.com/DifferentialPartsUS
|
|
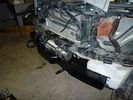
new inner bumper fitted with winch756 viewsD44 Discrete winch mount inner bumper fitted with Warn XD9000 winch. https://www.facebook.com/DifferentialPartsUS
|
|
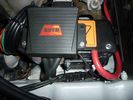
warn winch controller installation568 viewsLeft Hand Drive, fitted in engine bay near washer fluid fill for reference point.Remote control unit fitted on the box. Remotely installed due to space limitations, and to keep the unit dry.
https://www.facebook.com/DifferentialPartsUS
|
|
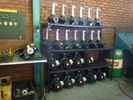
DIII Diffs stacked1217 viewsMfd from https://www.facebook.com/DifferentialPartsUS
|
|
Land Rover Parts stores148 views
|
|
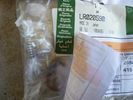
LR020590 KIT - COMPRESSOR 1481 viewsThere are 4 main parts you can get besides a whole compressor. This is the one with only a spring, o-ring and rubber valve.
YWB500220 electrical, fuse & relay, relay ENGINE COMPARTMENT, 70 amp 1
LR020590 KIT - COMPRESSOR 1
JPO500010 KIT - COMPRESSOR 1
VUB504700 - Dehydrator PARTS
|
|
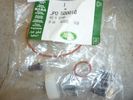
JPO500010 KIT - COMPRESSOR 1437 viewsThere are 4 main parts you can get besides a whole compressor. This is the one with more bits.
YWB500220 electrical, fuse & relay, relay ENGINE COMPARTMENT, 70 amp 1
LR020590 KIT - COMPRESSOR 1
JPO500010 KIT - COMPRESSOR 1
VUB504700 - Dehydrator PARTS
|
|
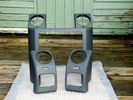
"H" Trim and outter vent trims66 views
|
|
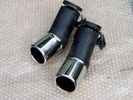
Exhaust Trims68 views
|
|
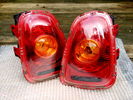
R56 MINI Rear Lights59 views
|
|
Thread upload2 viewsImage uploaded in thread 128594
|
|

Parts Wanted114 views
|
|

9 views
|
|

Thread upload12 viewsImage uploaded in thread 172552
|
|

Thread upload11 viewsImage uploaded in thread 172552
|
|

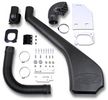
skimmer436 views
|
|
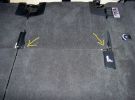
press here222 viewsif there is movement chances are the rubber parts are gone
|
|

32 views
|
|

Catalogue saved as jpg files38 views
|
|

36 views
|
|
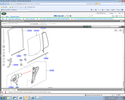
Rear window parts7 viewsas above
|
|

Redundant Parts977 viewsThese are what you are left with once the EGR blanking kit is installed. Best to hang onto them in case you need them again!
|
|

Sat Nav Parts info diagnostic screen9 views
|
|
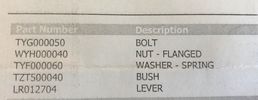
Parts 24 views
|
|
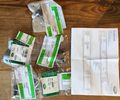
parts 16 views
|
|
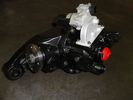
reman unit1129 viewshttps://www.facebook.com/DifferentialPartsUS
|
|
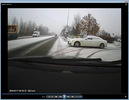
car cleared of snow14 viewsMaserati pulling out of gym car park with snow all over, only cleared parts of side window by lowering them and raising back up 4" .
from only drivers side quick wipe down and rear postbox size clear spot in centre
|
|

Parts list TTV evo14 views
|
|

Thread upload24 viewsImage uploaded in thread 169748
|
|
Thread upload2 viewsImage uploaded in new thread
|
|
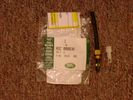
Voss System 203 connector 6 mm for valve blocks 905 viewsThis is Land Rover part number RQC000030, the Voss fitting for the axle valve blocks. I think it is a Voss System 203 6mm fitting, Voss part number 5 2 03 11 01 00.
The parts bag comes with the white plug inserted in the brass threaded bit with what is called the brass cutting ring placed on the tip of the white plastic plug. The idea is that one screws, (M10 x 1 thread), the brass insert into the appropriate hole with the white plug still in the brass insert. Once the brass is tight, (12 mm wrench), then the white plug is pulled from the assembly leaving the cutting ring down inside and under. One then pushes in the 6 mm tube end about 20 mm or so and the tube slides down thru the brass cutting ring, (2 internal sloped one way cutting ridges). When the tube is in far enough, one pulls upwards a bit and the ring cuts into the plastic such that the tube will not pull out. To remove tube, one unscrews the brass nut and all comes out, sort of like I have shown with the short piece of 6mm tubing. The white plug is a throwaway item upon install of the tubing.
|
|

ZF_Automatic_Transmission_Spare_Parts_Catalog_6HP26-28_Catalog25 views
|
|

ZF S6 - 53 Gearbox parts list.25 views
|
|

ZF Transmission parts exploded views1292 viewsA 35 page pdf showing exploded views of the inside of the transmission along with oil fill procedures and part numbers. There is also the suggestion of a metal pan but no part number given and the appearance of a more usual type of oil pan gasket, flat rather than O ring.
|
|
|
|
|
|