| Search results - "one" |
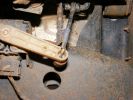
754 viewsNew control rod is carbonfibre/fibreglass hollow tube, with a rubber grommet fitted to one end (screwed and epoxy-ed) and steel rod bent into shape at the other (epoxy-ed).
|
|
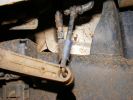
720 viewsFront height sensor - original is behind sensor arm, the new one is in the foreground.
|
|
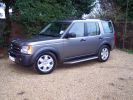
Fiist one217 views
|
|
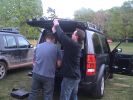
Ken and Slimer tried to steal parts whilst no one was looking!190 views
|
|
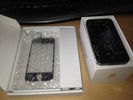
iphone 4 with knackered screen96 views
|
|

Silverstone Media Day85 viewsTook 3 cars for display .... a RRR members off-road modified RR p38a, unusual as it has the 2.8L version of the 300tdi fitted.
|
|
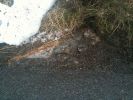
The offending stone166 views
|
|
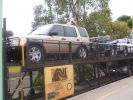
01 D3 on Train183 viewsEasiest method of crossing 2300 km of Nullabor Desert - on the Indian Pacific train. D3 with trailer - effectively have 5 spare tyres if it really gets desperate!
|
|
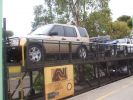
01 Start of Xmas 07 trip across the Australian Nullabor243 viewsThis is the preferred method of travelling 2500km of Nullabor desert when time is short (the Indian Pacific train). Next stop is Adelaide.
|
|
44 views
|
|
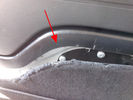
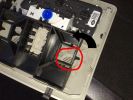
Rimozione pannello dalla sponda - Tailgate panel removing45 viewsPer togliere il pannello moquettato dalla sponda ho fatto leva con un cacciavite abbastanza grosso nel punto indicato, è stato veloce e non ho rovinato niente.
To remove the carpeted panel away from the tailgate I used a big enought screwdriver at the point indicated, it was fast and I have not ruined anything.
|
|
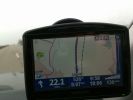
How fast?231 viewsI was driving along the Autobahn, glanced down at the speedo which was showing 140 mph, the Tomtom was telling the truth at 132 mph, but by the time I had switched the phone to camera I had dropped 2 mph, didnt try and do it again as there was no need.
|
|
Everyone heard that DG was at the bar161 views
|
|
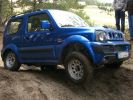
200 viewsSuzuki Jimny. Some holes were deep enough to swallow the little fella, but it got out as long as all wheels were on the ground. No difflocks or electronics in this one.
|
|

The old one, new one and the little one!73 views
|
|
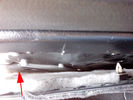
Riparazione attuatore sponda posteriore - Tailgate actuator repair38 viewsL'attuatore si trova dietro la pellicola nera incollata alla carrozzeria che va strappata.
The actuator is located behind the black film glued to the body must be torn.
|
|
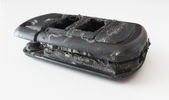
Tagliare lungo il perimetro della chiave - Cut along the key perimeter17 viewsI gusci sono saldati ad ultrasuoni. Con il disco tagliare lungo il perimetro della chiave in corrispondenza della giunta: lo spessore è di circa mm.3. Io non sono andato fino in fondo per evitare di danneggiare qualcosa, una volta inciso il solco per mm.2,7 ho fatto leva col cacciavite e ho strappato il materiale restante.
The body is ultrasonically welded. With the disc cut along the perimeter of the key in correspondence of the joint: the thickness is approximately 3mm. I have not gone all the way down
|
|
One of my favourite views!43 views
|
|
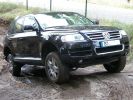
241 viewsThis Toureg is stuck - doesn´t look like it. After 8 hours of driving everyone agreed that with the big 10cyl. diesel engine you should probably oder the rear difflock as well... In this picture the rear left anf front right wheels have no grip, esp or whatever just doesn´t do it.
|
|

Silverstone Classic Media Day177 viewsAttended the media day for the Silverstone Classic, took 3 cars to display & tell 300 journalists what we do at the show.
David Coultard was one of the drivers who were taking the journalists around the track.
|
|
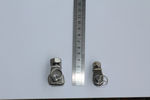
115 viewsside by side shows the larger one adapted at the base
|
|
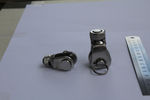
114 viewsboth adapter the larger one needed a bit chopped off the botom and the washers to fit
|
|
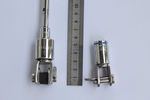
127 viewsleft hand adater adopted, decided right hand adapter was ok but right hand one fits and is stronger
|
|
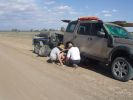
03 First bit of tyre/wheel trouble245 viewsIn the outback a tyre suddenly blew. "No worries" we thought, as we had 3 spares (+ two more if we abandoned the trailer), 150l of water, 3 days of food, and an EPIRB if things got really bad. At the time I didn\'t fully appreciate the fact that my index got a blister from the burning heat of one of the wheel nuts. It was 45 deg C at the time, so everything was hot.
|
|

Morsetto - Clamp34 viewsPer la riparazione ho utilizzato un morsetto per fili elettrici.
To repair I used a clamp for electrical wires.
|
|

Benone beach217 views
|
|
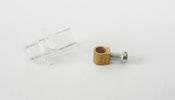
Morsetto - Clamp33 viewsHo smontato il morsetto, il diametro del foro è esattamente quello di quello che rimane del particolare che si è rotto.
I removed the clamp, the hole diameter it's the same of the detail that is broken.
|
|
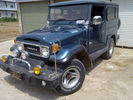
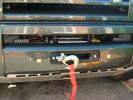
Seriously....anyone want to mess with that bumper71 views
|
|

Eindreid brú20 viewsMost bridges is only one car wide.
|
|

Morsetto - Clamp42 viewsIl morsetto è della misura esatta della sede dell'attuatore.
The clamp is the same size of the actuator slot.
|
|

remains of tensioner bolt25 views
|
|

252 viewsSilverstone weekend again. My other club (RRR Ltd) do courtesy rides to raise money for charity plus we all enjoy ourselves. After 7 Range Rovers this is my first Discovery.
|
|

Morsetto - Clamp36 views
|
|
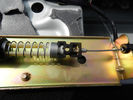
Cavo nel morsetto - Cable in clamp48 viewsHo inserito il terminale rotto nel morsetto: bisogna sforzarlo molto e ho praticato una cava attraverso il foro della vite con una punta in modo che il terminale non possa scivolare.
I entered the terminal broke into the clamp: you have to force it a lot, and I practiced a quarry through the screw hole with a bit so that the terminal can not slip.
|
|

Silverstone Classic Media Day60 views24 races, 1000+ classic race cars .... from Ferrari to Metro and everything in between.
|
|
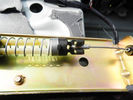
Lavoro finito - Finished work39 viewsEcco come appare a lavoro finito
Here is how it looks, finished the job
|
|

Silverstone Media Day87 viewsTook 3 cars for display .... a RRR members genuine 2005 RRS G4 & another members off-road modified RR p38a
|
|
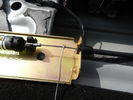
In caso di emergenza - For emergency48 viewsNel caso dovesse succedere nuovamente ho predisposto un cavetto da tirare.
If it were to happen again I have set up a cable to pull.
|
|

9 viewsClone Front
|
|

The s2a could not make this one - too deep.446 viewsGot towed through with a dead engine by a Tdi Defender - Betsy is petrol and needed a gallon of WD40 to get going after this!
|
|
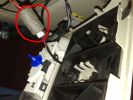
10 Telephone / Voice Mic Plugs70 views
|
|
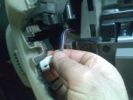
SGANCIARE ACCENSIONE107 views
|
|

Attuatore rimontato - Actuator reassembled40 viewsAttuatore rimontato col cavo di emergenza.
Actuator riassemble with emergency cable.
|
|
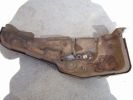
Compressor original cover657 viewsThe rock punctured straight through the plastic cover, snapped the soft compressor bracket and tore open one of the loom plugs.
|
|
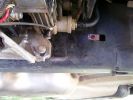
Repositioned compressor bracket737 viewsThe bracket was snapped in two, so I had it re-welded and slotted out the mounting holes so that it could be positioned 10mm higher (no longer protrudes under the chassis rail)
|
|
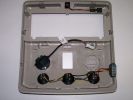
206 viewsRoof panel with wired switches and PTI microphone
|
|
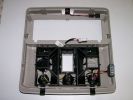
206 viewsRoof panel with switches, PTI microphone and bracket
|
|

192 viewsJob done
|
|
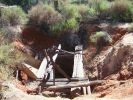
Abandoned Well216 views
|
|
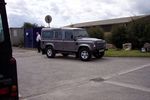
New Defender35 viewsTrade in of old Defender 90 and New Defender 110
Stratstone Pickering - Very friendly, good deal, but....
Same old Stratstone - not complete when collected.
|
|
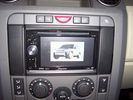
Pioneer Avic F900BT59 views
|
|
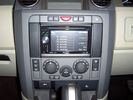
Pioneer Avic F900BT64 views
|
|
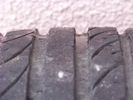
255/60/18 Bridgestone HP sport53 views
|
|
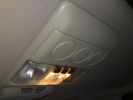
D4 353 viewsRear seat aircon gone missing
|
|

Iphone in D4435 viewsIphone connector
|
|
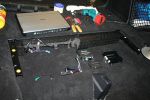
10260 viewsSet up all the controller components in the boot in the unused space available there. The V1000 is ready to be hooked up.
|
|
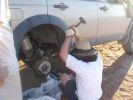
11 Lesson in removing a jammed brake assembly in the Outback378 viewsSpent the next 4 hours doing this to my D3. Gave the photos to Land Rover dealer and they did not think this constituted abuse of the vehicle. I thought that was charitable, but if we hadn\'t done this, the tow back to civilisation would have been even longer.
|
|
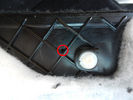
Foro pannello - Panel hole40 viewsHo forato il pannello moquettato per far passare il cavo di emergenza.
I drilled the carpeted panel to drive the emergency cable.
|
|

Installazione Ganasce Freno di Stazionamento30 viewsRimozione ed Installazione Ganasce Freno di Stazionamento
|
|

all the ones22 views
|
|
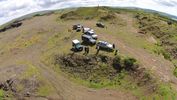
Ballynulto Drone20 views
|
|
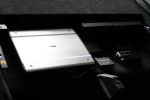
11207 viewsThe controller components are complete and fit neatly within the boot space.
|
|

Finito - At the end47 viewsEcco come appare la sponda a lavoro finito.
Here is how is the job ended.
|
|
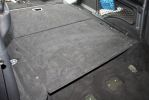
12220 viewsThe boot cover is back in place, hiding away all the controller components.
|
|
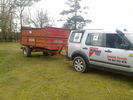
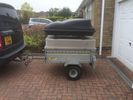
you need a trailer .....we got one !94 views
|
|
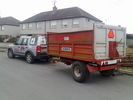
honestly officer....if it was overloaded, it would be sitting on the rear axel ??? heh heh79 viewsfunny how some cops will accept what their eyes tell must be the truth, a trailer load of logs home ....easy peasy, hahahahaha
|
|
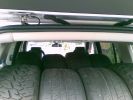
Thirteen Up92 views4 MTR\'s and 4 Sport 255/55 19\'s inside, One 18" Type 2 Mark 1 underneath and 4 18" Type 2 Mark 2\'s on the road
|
|
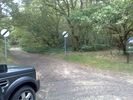
A De-restricted Bridleway,Well done Hampshire CC9 views
|
|
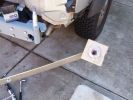
Nut holder for the difficult ones257 views
|
|
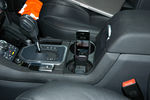
51 views
|
|

61 views
|
|
D4 HSE Baltic Blue363 views
|
|
Discovery 4 HSE Baltic Blue333 views
|
|
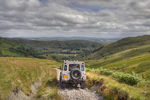
The view from the top of Breasthigh Road35 views
|
|
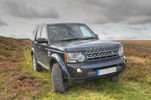
D4 HSE Baltic Blue with 255/55/19 General AT Tyres276 views
|
|
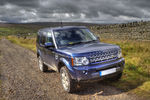
D4 HSE Baltic Blue with 255/55/19 General AT Tyres367 views
|
|
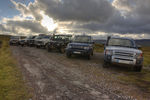
On Grasshill Causeway72 viewsA selection of D3's, a D4 and a couple of Defenders on Grasshill Causeway the highest greenlane in the UK
|
|
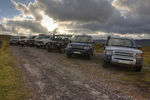
On Grasshill Causeway 319 viewsA selection of D3's, a D4 and a couple of Defenders on Grasshill Causeway the highest greenlane in the UK
|
|
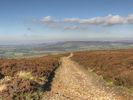
Rudland Rigg49 viewsThe view from the top of Rudland Rigg looking out towards Roseberry Topping and the coast.
|
|
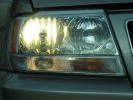
halogen bulb - some overspill but as its one third as bright this is not seen as glare. but add 100w bulbs and you will get glare94 views
|
|
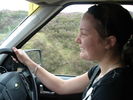
amy one life adventure96 views
|
|
load bed with hatch (hatch lid not in phone)138 views
|
|

10 viewsClone Back
|
|
Holes drilled and spacers positioned for the latch plate279 views
|
|

Area of the new housing expansion south of Swindon.144 viewsFlood plains will be flood plains - insurance anyone? Oh sorry forgot; all top 8 insurance companies refused to insure a house in this area, so the developers are going ahead building anyway...
|
|
Nearly done, just need the number plate plinth to tidy it up972 views
|
|
It's done!1103 views
|
|
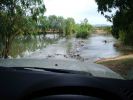
D3 in the Mary River Flood plains47 viewsIn this part of the world, on the flood plains out to Kakadu, you never get out to wade a creek first as the theory says you should. If the water isn\'t clear, like it was on this causeway, and it is this wide, you either wait for someone else who is braver than you to cross first, or you turn around and go home. These rivers are full of estuarine (salt-water) crocodiles, and they are starting to reach 7 metres in size in some still rare instances. However, seeing as a 2.5m crocodile can kill a grown man,
|
|

On top at last351 viewsPhoto at the sumit of Arigna mountains, as part of one of the stages in the 2009 4x4challenge in aid of Temple St childrens hospital. Tough gettin there especially as we towed a Deafner90 up behind us that had bursted an expansion bottle. But the D3 powered on up regardless.
|
|
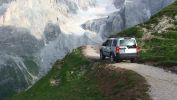
Rientro dopo inversione59 views
|
|

52 viewsFront suspension rebuilt in 2009 with reconditioned steering rack, new bushes etc..
|
|

Wildfires 2011 TX190 viewsTaken from cell phone, while evacuated.
|
|
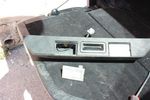
34 viewsRemoved one light from tailgate handle
|
|
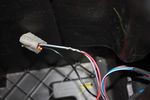
109 viewsThis is the plug for the accessory socket at the rear of the cubby box. On commercial D3 such as this one, there is no accessory socket so this plug is unused. I tapped into the 12V wire as an ignition feed. This will feed a relay coil which opens up power from the aux battery. Like this I can still retro fit and make use of the accessory socket later on.
|
|
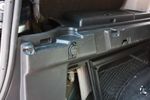
91 views12V socket done. This is permanently powered by the Aux battery. Another one was done on the other side, though that one required drilling the hole with a 29mm hole saw as there wasn't an unused hole on that side.
|
|
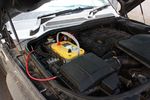
124 viewsOptima Yellow Top in battery box. This is the version with side terminals so there will be some modifications to be done to fit
|
|
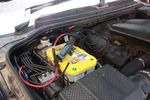
131 viewsAll done. Added some cable sleeving to avoid cables rubbing against battery clamp
|
|
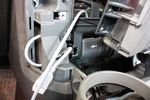
62 viewsCutout done, all that's left is to stuff the socket into the cutout
|
|
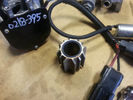
Compressore 739 viewsQui si vede bene la macchia di ossido dove sicuramente la guarnizione trafila.
|
|

Discovery 5 anyone?120 viewsDiscovery 5 mock up based on 2011 Ford Explorer
|
|
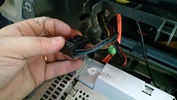
which one should i cut???20 views
|
|
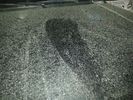
one day pollution16 views
|
|
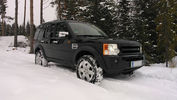
Winter waxing done203 views
|
|
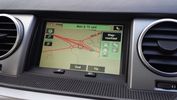
Proof of updated map data23 viewsPostal code CH4 0FB
Showing roundabouts where on current LR DVD are none.
|
|
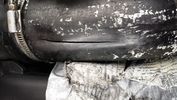
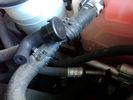
Thread upload132 viewsSplit after removing duck tape. I think the split got longer whilst waiting for new silicone hose's to arrive.
|
|
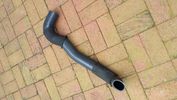
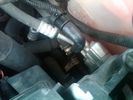
Thread upload126 viewsNew silicone hose with original sleeves refitted.
|
|
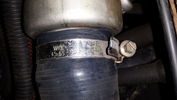
33 viewsNearside hose replaced with silicone type
|
|
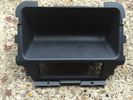
Rear Console trim which i replaced with one with heated rear seats.11 views
|
|
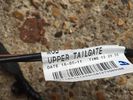
Upper Tailgate Loom (no Camera) BH22-14A583-AA7 viewsOne Pin loose on grey plug
|
|
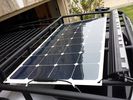
solar roof install444 viewsMore or less wrapped up my solar installation today. I added a Grape Solar Flex 100W panel, it's adequate to keep the vehicle topped off with the Fridge running, and Ham, but it could lose some ground if transmitting depending on how much, 2 would be awesome. One is enough, but barely. I am quite impressed with the Grape Solar flex panel version 2.0.
https://www.facebook.com/DifferentialPartsUS
|
|
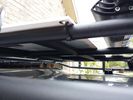
solar panel install356 viewsAt least at this point, I mounted it by using Clear Silicone RTV. This stuff is kind of like glue, but can be removed. If it doesn't hold up after curing and driving, I'll remove it and come up with another plan. I used heavy cable ties on the 4 grommets, in case it lets loose, it won't take out my wiring and the car behind me. 2 Panels are dandy like this, but I don't want to permanently block the roof space. Grape Solar to power my snomaster fridge
|
|
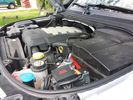
Winch Power upgrade318 viewsUsing 2 warn kits, and removing one of the wires to use on another project. The purpose was to replace the power and ground wire. I used Warn kits, which are 4/0 Welding cable. The original red #4 warped from getting a little too worn. The 2nd
Battery #1 Deka 9A94 AGM Intimidator, Battery #2 Deka 9A47 AGM Intimidator WARN 36080 28" Quick Connect Cable X 2, WARN 26405 Quick Connect Cable 7' X 2, WARN 15901 Black Cable X 1 -- winch control 72" X 1 https://www.facebook.com/DifferentialPartsUS
|
|

Thread upload16 viewsImage uploaded in thread 130435
|
|

new silicone intercooler hose vs old one9 views
|
|
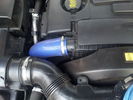
intercooler hose upgrade job done9 views
|
|

Thread upload13 viewsImage uploaded in new thread
|
|
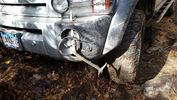
Thread upload26 viewsOne in a million shot. This happened while wheeling.
|
|

egg phone18 views
|
|
Thread upload8 viewsImage uploaded in thread 5
|
|

Thread upload4 viewsImage uploaded in new thread
|
|
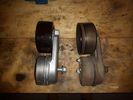
Tensioner 323 views
|
|
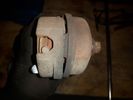
Tensioner 223 views
|
|
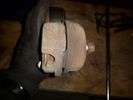
Tensioner 123 views
|
|

3D Printed Samsung Galaxy S5 Phone Mount21 viewsDesigned to fit a Brodit Clip Mount (in this case one for an Isuzu DMAX)
|
|

3D Printed Samsung Galaxy S5 Phone Mount24 views
|
|

8 views
|
|

10 views
|
|

12 views
|
|

18 views
|
|
12 views
|
|
15 views
|
|
Thread upload10 viewsImage uploaded in thread 153537
|
|

5 viewselaborazione scarichi aspirazione rifacimento frizione più robusta distribuzione egr killer centralina remapping
|
|

Front Differential Description and Operation1543 viewsThe 4 page pdf describes of the operation of the front differential plus displays an exploded view of the front differential.
The fill plug is item 36 and the drain plug, item 8.
It is suggested one first unscrew the fill plug before unscrewing the drain plug - and it might take two different wrench sizes, hence get this detail sorted out before any oil drains out.
|
|
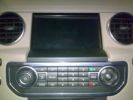
INSTALLAZIONE COMPLETA95 views
|
|
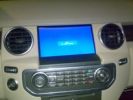
INSTALLAZIONE COMPLETA ED ACCESO116 views
|
|
This road isnt on a bus route!124 viewsWent to see how my new house is looking in Czech Republic, this is one of two roads out of the village
|
|

On Solar245 viewsOn Solar, Snomaster Fridge, Ham Radio and 100W Grape Solar panel, Deka 9A94R Intimidator AGM. I can supply the Stainless Snowmaster Fridges. Other components if you need help.
|
|
113 views
|
|

balistol37 viewsbirth in a field anyone
|
|
ADATTATORE CORRENTE PC IN POSIZIONE82 views
|
|
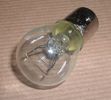
Land Rover Stop Tail Light dual filament bulb nominal 12 volt 21 / 5 watt filaments1427 viewsThis is the Land Rover part number 264590 dual filament bulb, (P21/5), that inserts into the upper two tail lamp receptacles. In the upper one, both filaments function, in the lower one, only the 5 watt tail light filament functions.
I regard it as not a good practice to routinely switch bulbs when the tail light filament, (5 watt), burns out on the lower bulb. The broken filament can jiggle over onto the brake light filament, (21 watt), and short the circuit to ground or something else not predicable.
There are also arguments to say that quality control is better on the Land Rover marketed bulbs than say far east sourced bulbs. Filament construction, and hence resistance can vary and mislead the current sensing circuits monitoring the signal light systems. Also when the bulbs are properly installed, all filaments should be standing vertically and not at any slope.
These are the sort of obscure circumstances that can lead to false trouble messages on the display, dropping to the stops, and subsequent concerns - all over a tail/signal light bulb.
For example, the filament life of both the tail light and the brake light filaments in the P21/5 bulb is significantly less than the USA common 1157 dual filament bulb, (1000/250 vs 5000/1200 hours); brightness in the P21/5 is a bit more, (3cp/35cp vs 3cp/32cp where cp is candle power), but current consumption is oddly less, (0.44a/1.86a vs 0.59a/2.10a where a is amps). It is the quest for efficiency vs maintenance trade off.
|
|
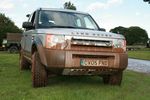
Stoneleigh show54 views
|
|
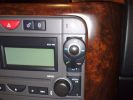
position of buttons for Parrot phone102 viewsthis can be put basically anywhere as it connect via bluetooth to the rest of the system. It is self powered (lithiam battery in it) so just stick it anywhere with no requirements for finding a live wire etc
|
|
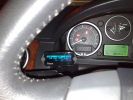
Parrot phone MK6100107 views
|
|

3 GPS/Telephone Pre drilled Holes60 views
|
|
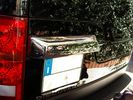
Dettaglio maniglia portellone30 views
|
|

9 viewsClone
|
|

Engine Accessory Drive Description and Operation882 viewsThis 2 page pdf shows both belts for the 4.4L petrol V8; the primary serpentine belt, (the long one), and the shorter secondary that drives only the radiator cooling fan.
The various accessory pulleys the two belts are each associated with are numbered and an included table describes each.
When replacing belts and pulleys, count the number of grooves on both your old items and your new replacement parts. It has been known for an pulley with the wrong number of grooves to come with a replacement part or the replacement belt has the incorrect number of grooves; hence make certain the groove count on the new parts are the same as the removed items.
|
|

3 Point Hitch on Series 90152 viewsUsually one sees the Series units with just a conventional field plow hooked to a drawbar hitch, tractor style. This jpg however is the full meal deal - a 3 point hitch, probably off a Fordson tractor, in the long tradition of Ford/Land Rover cooperation.
|
|
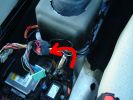
4 phone cadle loom routing51 views
|
|

Air Conditioner Specifications 4.4L V81569 viewsThis 2 page pdf is just the specifications for the AC system. The refrigerant type is R134A.
Note that when topping the system up, it can be a good idea to include some of that ultra violet light dye that will glow to show leaks and loose fitting.
|
|

Air Conditioning and Heater Control Components2425 viewsThis is a 21 page pdf that really explains how the air system is supposed to work. Discussed are the exterior ambient air sensor, where and how it operates; the interior temperature sensor as well as humidity sensor.
|
|

Entertainment System Wiring Diagrams2331 viewsThe 12 page pdf has the wiring diagrams for the low and high line "radio" and various components such as the amplifier, phone modules,NAV display, antennas and satellite radio and TV.
|
|

GPS NAV system components and operation999 viewsThis 16 page pdf describes the operation of the GPS navigation system and provides pin outs and equipment layouts. The GPS antenna amp and location is also shown.
|
|
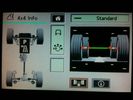
4x4 Info on MY0542 viewsPicture taken of 4x4 info screen on my 2005HSE with no known software updates done.
|
|
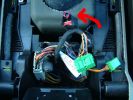
5 phone cradle loom42 views
|
|
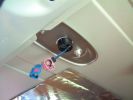
5 GPS Connectors GPS blue and Telephone burgandy72 views
|
|
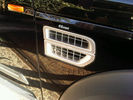
Dettaglio griglia aspirazione28 views
|
|
Thread upload175 viewsImage uploaded in new thread
|
|

iPhone 5S4 views
|
|

Thread upload1 viewsImage uploaded in thread 156005
|
|

Thread upload11 viewsImage uploaded in new thread
|
|
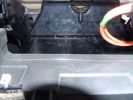
6 close view of where the pocket is bonede to bottom of dash58 views
|
|
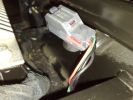
6 ICE Loom - Voice / Telephone & speed pule connector65 views
|
|
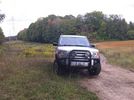
Ooops, found the mountain bike trail. KW Hydrocut16 viewswe were out one day and suddenly I seemed to recognize the power lines, and the fact that the mountain bike trail runs alongside the lines.
This is obviously a wide section of trail, but it's still the KW Hydrocut mountain bike trail.
|
|

123 views
|
|

FOLKESTONE DOCK CRANES AFTER 94 views
|
|
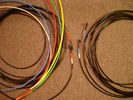
6mm PA12 grade nylon tubing with heat shrink applied 543 viewsShows some of the 6mm air line with heat shrink applied to one end of tubing. Shrink will be applied to the other end once field cut to length. These four tubes, each about 20 ft (6m) long, feed to the rear. Re the front air lines, (not shown), four additional lengths, each about 10 ft (3m) long, are required plus one more 3 metre length for compressor air. The 6mm tubing is a Nylon product specified as PA12. There is also a very similar Transport grade PA11 material, however it seems that PA12 is the more common Transport grade now in use. Also the applicable DIN standard seems to be both DIN 73378 and DIN 74324 for the nylon tubing. The working pressure of the 6mm tubing is about 27 Bar and bursting 82 Bar @ 20C. This is for the 1mm nominal wall thickness material, (4mm ID, 6mm OD).
|
|
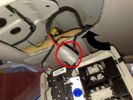
7 Voice / Telephone Mic Cable - pre fitted in roof70 views
|
|
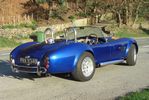
Replica AC Cobra 4276 viewsSelf design & build cobra 427 in a small house garage over a 4 year period. 515bhp & 3mpg if you push hard with the right foot. Track days were the most fun I've had with clothes on. Sadly she's gone to make way for the more sedate "E" type.
|
|
Thread upload41 viewsImage uploaded in thread 102519
|
|
8 Where Voice / Telephone Mic goes65 views
|
|
2015 Tdci (last one now gone)11 views
|
|
9 Voice Telephone Mic Fitted64 views
|
|

Tools from dealer110 viewsThis is a cel pic of the tools from the dealer for install and removal of control arm bushings. minus one broken tool.
|
|
TOMB RAIDER BONETTI103 views
|
|

22 views
|
|
20 viewsThis is the access hole, one on either side.
|
|

Thread upload10 viewsImage uploaded in thread 124080
|
|

AC Control Components49 views
|
|

Add A Circuit Littelfuse Data sheet2278 viewsThe switch connects to what Littelfuse brand calls an Add-A-Circuit model FMH200BP which is an adapter that plugs in place of a Mini fuse and then has space for two Mini fuses, (original and a second one). In this install, only the original 5 amp fuse was used - adapter was so as to route power from fuse box thru fuse, then rocker switch, and then back to fuse box.
Before you install the Add A Circuit for this application, take an ohm meter and trace out the circuit path of the four slots that fuses could insert into. The path is more complicated than one might first think. As such, the orientation of the fuse holder in the socket matters for this application - that is for a circuit diverter, rather than accessory adder.
|
|

Land Rover Aerial Fin images for both Glass and Metal Roof Disco3 / LR3863 viewsAs well as the two different fins, this pdf also shows the plastic blanking plate for glass roof vehicles where no fin is installed.
The glass roof fin is secured by two security screws from the top into a plastic frangible glue on gasket. The hope is that when struck, the fin will shear off and not crack the glass roof. Re the metal roof design, the fin is secured from underneath via two nuts.
The pdf also shows the various electrical bits related to the antennas. In the UK, the fin would house not only a cell phone antenna but the TV and satellite radio antenna electronics as well; in the States, the Sirius sat radio antenna and a G type cell phone antenna if the phone kit was installed would reside within the fin. The SAT NAV GPS antenna is located within the High Mount Brake Light plastic mounted to the upper rear hatch.
|
|

Fin cell phone aerial drawing190 viewsThe factory aerial for the factory NAV / GPS on my 2005 HSE is within the high mounted stop light lens at the top of the upper hatch door. I do not have the factory installed phone kit, and as such, do not have the fin installed; instead there is just a plastic blanking insert to fill the cell phone aerial wiring hole in the metal portion of the roof; hence this requirement for an "external" cell antenna. For those that do have the fin on their glass roof, the fin is screwed on to a glued on plastic gasket, (sort of), and not bolted thru as per the metal roof 3's.
|
|

Almost a Bridge10 viewsAnother bridge this one we had to rent the branches and use our sand ladders
|
|
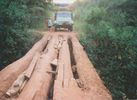
Africa 1991 Overland trip 20 viewsMe driving, one of many Doggy Bridges, Proper off-roading
|
|
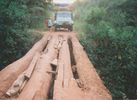
Almost a Bridge12 viewsOne of the many unusual Bridges we had to cross
|
|
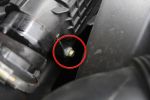
Air Box Lower Securing Bolt1072 viewsThis bolt must be undone in order to remove the air box. It is long and tricky to get out and could be dropped easily.
|
|
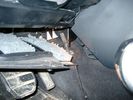
Air Conditioner Drain Hose on Drivers Side (LHD)2296 viewsThe corrugated rubber bit above and to the right of the gas pedal is the drain hose that goes down thru the carpet and floor sheet metal.
While it is bit hard to figure out from the jpg above, there is a rubber "strap" attached to the top of the corrugated hose that one uses to pull on to drag the hose up back around the black plastic heater "pan" drain. The same drain hose arrangement is on the other side as well.
One could I suppose run a plastic snap tie around the vertical pull strap if one was concerned about the hose slipping off again. See also the other jpg sketch which is from the Land Rover manual.
|
|
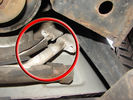
Air Conditioning Pipes (File 1)983 viewsIt\'s the smaller of the 2 pipes that is leaking. Both pipes are encased full length in the foam sleeve. You can see where the support bracket has \'crushed\' the sleeve. The bracket is what holed the small pipe. There is a bracket at each end and one in the middle. You need to remove the suspension reservoir to get to the centre bracket. Be aware that the bolts securing the brackets may be corroded and are likely to shear off on removal!
|
|
64 views
|
|

Thread upload7 viewsImage uploaded in thread 208940
|
|

FOR SALE - ONE OFF Land Rover Disco 3 37 viewsOne of a kind Landrover Discovery TDV6 HSE LUX Model 5 door automatic 4x4 diesel evo blue. Upgrades: sidesteps, roof rails, privacy glass, front and rear heated seats/elec seats, landrover tv and headphones, 7 seater black leather, piano black dash/steering wheel, built in fridge, 6 disc changer, sat nav and bluetooth, harman kardon premium entertainment pack, by-xenon adaptive headlights , cruise control and front and rear park distance control, panoramic electric glass roof, 22inch alloy wheels, body kit
|
|
winters kiss169 views
|
|

159 views
|
|

47 views
|
|
Last picture of my "old" previous Disco - wood223 viewsHope I won\'t miss the wood in the new one ;-)
|
|
60 viewsOne bolt is visible at the front, but the other two are down the left hand side and best accessed by removing the small plastic guard behind the bumper. I also removed the small metal radiator guard between the bumper and the main sump guard (but that was mostly to retrieve the spanner I dropped!). The only issue with removing the plastic guard is the stupid plastic clips that hold it on may need to be replaced.
|
|

176 viewsThis photo was "Autostitched" from 7 individual ones.
|
|
albero di trasmissione anteriore a doppia crociera15 views
|
|
880 views
|
|

Apple-iPad-iPhone-iBoard-iMate-Evolution.jpg54 views
|
|

18 views
|
|

Thread upload4 viewsImage uploaded in thread 186336
|
|
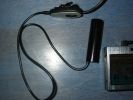
The cam with microphone/control buttons180 views
|
|
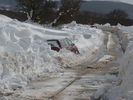
Anyone lost there car22 views
|
|

207 views
|
|

One for the weekend!77 views
|
|

Studded AT2\'s. 5 new waiting in garage, and one additional spare already used two seasons.51 views
|
|
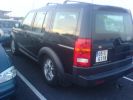
Got back to the airport after a few days in London to This!!!281 viewsThis is one of the many reasons we sold our first D3........
|
|

Riparazione attuatore rotante volante - Steering rotary coupling repairing22 viewsCome riparare l'attuatore rotante del volante quando si accende la spia dell'airbag.
How to repair the steering rotary coupling when airbag warning light turns on.
|
|
My other 4x4447 viewsI'd sell my soul before I'd sell this one!
|
|
![Filename=august_08_145[1] [].jpg
Filesize=151KB
Dimensions=1200x900
Date added=15.Jan 2009 august_08_145[1] [].jpg](albums/userpics/11603/thumb_august_08_145%5B1%5D%20%5B%5D.jpg)
EGR\'S GONE IN THE FRENCH PYRANEES154 views
|
|

Thread upload2 viewsImage uploaded in thread 198799
|
|

Thread upload2 viewsImage uploaded in thread 198799
|
|
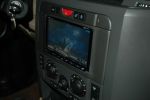
1160 viewsPioneer Nav Unit
|
|
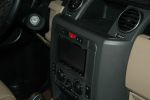
807 viewsPioneer AVIC-Z1
|
|

Frame Jacking Points showing where holes are located.1088 viewsThe four points marked with the arrows show where the holes in the underside of the frame are located such than one could insert a trolley jack pin type lifting adapter, (or as designed), the official LR scissors jack.
|
|
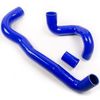
Thread upload12 viewsImage uploaded in new thread
|
|

The babies, Seren & Llwyd.. \'Psssst, did you hear the one about....?\'141 views
|
|
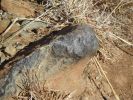
Bad Rock61 viewsbenign looking rock that punctured the sidewall of my new General Grabber AT2 (500km done on tyre)
|
|

got one shot on 4x5 transparency film. then it was gone.142 views
|
|

Caterpillar Battery Size cross reference chart and battery profiles including post layout752 viewsThis pdf has a dimension, (metric and inches), cross reference chart plus another sheet that provides BCI and DIN cross reference numbers and shows post locations plus bottom ridge tie down locations, (or the lack of).
This data was for me, hard to find, and helps one in selecting a suitable physical size of Aux battery for the space available.
|
|
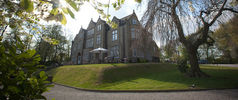
Woodlands Hotel6 viewsGreen Oval Garage would like to say thank you to the Woodlands Hotel in Leeds for allowing us the use of their beautiful grounds for all our future photos shoots.
Woodlands is one of the finest luxury hotels in Leeds. This boutique hotel is set in beautiful landscaped grounds on the outskirts of Leeds city centre, just 2 minutes drive from junction 27 of the M62 motorway, with 23 individually designed bedrooms and an award winning restaurant. Packed with character, this lovingly restored hotel is only three miles from the vibrant, cosmopolitan city of Leeds with superb nightlife and unrivalled shopping.
Woodlands also offers a stylish and contemporary functions venue for all kinds of social and business events. Our three stunning event spaces are suitable for everything from wedding ceremonies and receptions, to corporate meetings and events. The permanent marquee, attached to the hotel, can accommodate up to 150 for dining and 200 for evening parties and receptions, making it one of the most elegant settings for a wedding venue in the Leeds area.
For more information or to make a booking, please contact us on enquire@woodlandsleeds.com or 0113 2381 488
|
|
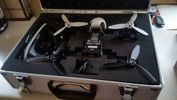
Parrot Bebop 2 Drone in case32 views£30 maplin case for Parrot Bebop 2 and Sky Controller 2
|
|
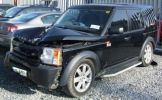
Bent Black Betty228 viewshard to believe that in this condition she\'s a write off, what got her was the cost of tricknology repairs, seatbelt pretensioners, airbags etc etc, & declining values, repair estimates €12500, value €13000. a no brainer really
Note TASTEFULL G4 sticker
|
|
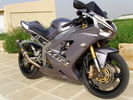
New Bike42 viewsGot bored not having my D3 with me so I went made one day and bought this!
|
|
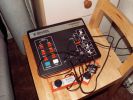
Latest ebay purchase a genuine 1977 Binatone Mk4 Games Console178 views
|
|
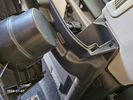
Bin Cover removed showing forward release clips that clip into the two rectangular slots.10 viewsOne has to pull up on the Bin Cover to unlatch the two metal clips, hence why release of the C pillar cover makes the bin cover removal and reinstall easier.
|
|

10 views
|
|
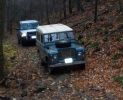
One of the trails at George Washington National Forest - Harrisonburg, VA139 views
|
|

Buckingham Blue D3 Screen Saver206 views49 frame (8 base frame) animated 100x46 pixel image in size cut from the Discovery 3 Accessory Builder screen - modelled after my D3 - running on my phone!
|
|

BMW E36 M3 Evolution10 views
|
|

Thread upload9 viewsImage uploaded in new thread
|
|

11 views
|
|

crankshaft bolt24 viewsBolt on left is new one for upgraded oil pump casing. Bolt on right is what came out. Notice damaged end and shortness of bolt. Inside of crank was inspected wirh borescope and threads etc all ok. New bolt goes in and out ok. Few filings inside but otherwise clear. Not sure why old bolt ended up like that.
|
|
94 views
|
|

Black Deposits to interior of Brake Light Switch2860 viewsThere are two contacts, one on each side of the vertical plunger under the copper metal. The set of normally open contacts on the left side that carries the power for the brake light filaments, (15 amp fuse F15P), is apparently not heavy enough as the contacts deteriorate and generate the black residue.
The set of normally closed contacts on the other side appear to be sized OK. There is not as much current, (5 amp fuse F66P), flowing thru the contacts to the ABS module, however the contacts are likely adversely affected by the black residue produced by the other deteriorating set of contacts.
One presumes/hopes that the newer replacement switch now has contacts heavy enough to carry the brake light power. It would be ideal if the ABS set of contacts were sealed from the brake light contacts to prevent contamination of the normally closed set of contacts.
|
|

Brake Light Switch, Find, Remove, and Install Instructions 7852 viewsThis is a two page doc outlining where to find the brake light switch, how to remove it, and then install the new one.
Note, do not move the brake pedal when removing or installing the switch. Let the brake pedal hang where it wants to. The switch design is actually cunning, and as such is supposed to make the removal and install fool proof. Hence if you think too much about it, you can wreck the new switch.
If you want to inspect the interior of the switch, wait until you have removed the old switch. You can then just unsnap the blue from the white to get it apart. Inside, the switch is quite simple, (no circuit boards), but it will probably show black dust from failing contacts.
I think the reason the switch fails is that the Normally Open, (NO), contacts of the brake light contacts were made too light to carry the current load for make and break of the tail light filaments. I also think the black dust created then fouls the Normally Closed, (NC), second set of contacts for the ABS circuit. As such, the Normally Closed contacts become intermittent in operation and display as a fluctuating open and closed circuit condition to the ABS system when the ABS should be seeing a steady closed circuit. Hopefully the replacement switch contacts are more robust and may be as I recently replaced my switch again just as a matter of maintenance. While in a redesign, ideally the NC contacts should be sealed or at least separated from the NO contacts, when I inspected the removed switch, this time there was no black dust present.
Probably the removed switch will have a Land Rover oval logo moulded into it, the new one, FOMOCO.
|
|
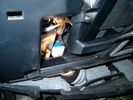
Brake Switch Visible thru Opening4973 viewsThe blue and white bit is the switch; the sort of gold appearing box,(it is really black), you will not see in your 3 as it is a Smooth Talker brand amplifier for my Blackberry phone antenna. This install is detailed in the SmoothTalker phone antenna section of my gallery.
One way to remove and install the switch is to lower the "horizontal" panel above the brake pedal as shown where the flashlight head is located. To actually remove the switch, you slide your hand thru the gap and rotate the switch clockwise 1/4 turn while watching thru the rectangular opening. Installation of the new switch is the reverse of above - 1/4 turn counterclockwise.
Before you remove the switch, note its orientation - horizontal with electrical wires to the left. That is the way it should look after replacement as well.
The second time I replaced the switch, I did it all thru the rectangular opening and did not remove the horizontal panel - that is experience helping out.
The knee kick you have to remove regardless. It is sort of hinged at the bottom so you just pull at the top and sort of rotate the knee panel and then pull upwards for two plastic "fingers" to clear the slots they reside in.
|
|

Black Deposits on Brake Light Switch Plunger2757 viewsThis jpg I got off another forum and is typical of what one will see when one opens up the removed brake light switch. The black powder is residue from arcing of one of the pair of contacts within.
Hopefully the newer switches with the FOMOCO logo moulded into the plastic are improved from the Land Rover logo marked early units, however I doubt it.
The Ford part number is SW-6572 and/or 7E5Z-13480-A as used on the 2006 to 2009 Ford Fusion's and Mercury Milan's; the Land Rover part number is XKB500110. Cost of switch could be about twenty five dollars. A previous LR part number for the switch was XKB500030, so hopefully the newer LR part number, XKB500110, reflects some improvement in reliability.
It is possible that the new switches are better as I installed a replacement 72,000 km, (45,000 miles) later, at 195,000 km (121,000 miles). When I took the removed switch apart to inspect, it was clean inside. There was no black dust - the switch looked like new, hence they must be improved now.
|
|
Breather line with factory cap cut off.2319 viewsIf you expand the jpg by clicking on it, in the bottom right corner if you look closely, one can see the black plastic factory vent tubing with the OEM cap cut off.
Note the tubing is cut at a 45 degree angle facing to the rear. Also shown in the top right is the cut off portion sitting on the coolant water hose and on the top left also sitting on the coolant hose, the new to be installed Gore manufactured replacement breather cap.
|
|
Breather Cap Installed2006 viewsThe black L shaped tube is is the Gore manufactured, (the Gore-Tex people), LR4 Breather Valve installed in an LR3. Naturally the installation looks similar to what one sees on an LR4 or RRS as the Gore breather valve is now OEM for new production.
The part number of this upgraded front differential breather valve is LR019450 and costs about thirty dollars.
|
|
New Breather Cap installed.1709 viewsThis shows the new Gore brand angled breather cap installed. The cap points rearward to the firewall. Also shown is the cut off piece.
The new Gore breather cap is what one now sees on the LR4 and RR Sport.
|
|
Vertical Breather Hose before cutting off OEM cap.1778 viewsThis shows the plastic vertical breather tubing and OEM cap prior to being cut off. The tubing is located on the driver side at the front near the radiator. One cuts about 3/4" to 1" off from the top. The TSB says 20mm.
I tried blowing thru the cut off piece and was not very successful. The cap seemed plugged. I am beginning to think that there was a very good reason for Land Rovers's Technical Service Bulletin, (TSB).
|
|
8 views
|
|
Thread upload13 viewsImage uploaded in thread 124861
|
|
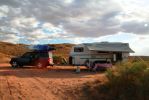
Christmas on the beach Pilbara Western Australia269 viewsNoone for bloody miles an miles!
|
|

bullet proof case39 views
|
|
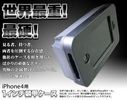
bullet proof phone case34 views
|
|
D3 Side Step Repairs147 viewsThe old rivet ends which I removed from the trim. I took one rubber end off the trim and let them all out by shaking it to save them rattling around inside the trim for years to come.
|
|

73 viewsCam Belt Tensioner
|
|

Thread upload5 viewsImage uploaded in thread 198799
|
|

Cambelt tensioner mount 200430 views
|
|
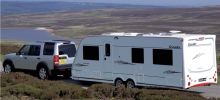
Elddis Crusader Storm256 viewsNot our actual caravan (or car) but very similar! We have a Superstorm which doesn\'t have a fixed bed at the rear like this one does.
|
|

Thread upload9 viewsImage uploaded in new thread
|
|

84 viewsDescrizione struttura tenda (catalogo Conver mod. Orion4) da montare sul carrello per uso 4 persone
|
|

95 viewsOne of the caves I hiked up to.
|
|

Unico neo della serata73 viewsIl menù stampato con scritto "Escursione in Jeep"!!!
A noi!!!
:|
|
|
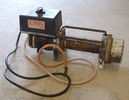
Champion C9000G winch15 viewsBrought this on a whim for a tenner.
What have I done?
|
|

Thread upload17 viewsImage uploaded in thread 124868
|
|

16 views
|
|

104 views
|
|
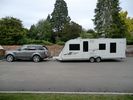
10 RRS & 10 Elddis Crusader Cyclone32 views
|
|
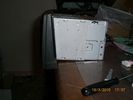
This show that the angel of the radio body is diffrent from the original, hence shall some plasic be removed - I used a dremmel and removed 7 mm of the horizontal bar inside 160 views
|
|
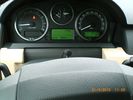
I placed the mic for the hand free at the steering colum - easy install and seems to work fine139 views
|
|
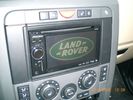
Job done - after adding nice start screen :-)237 viewsPinoeer AVIC-F910BT installation
|
|
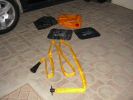
The kit as supplied180 viewsContains carry bag, 2 protector mats, exhaust jack and 7m reinfoced woven hose with bayonet connector to bag (inc non-return valve) and rubber cone for exhaust fitting
|
|
Auxiliary power sockets - TracTronics, Australia382 viewsA complete kit including two outlets, wiring etc connected to auxiliary Optima Blue top battery using their very effective SC40 split charge relay. One outlet between rear and front seats, and 2nd alongside loadspace 12v outlet, enables fridge to run when engine is not running, without affecting start capacity or vehicle functions.
|
|
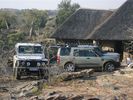
2 x D3\'s and one 90 in Botswana65 views
|
|

Not a pretty picture93 viewsWell, there had to be one of the beaming owner in the album somewhere.
|
|
Squirting some silicone spray onto the lever275 views
|
|
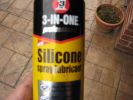
Silicone spray 212 views
|
|
67 views
|
|
133 views
|
|
107 views
|
|
105 views
|
|

Phone cradle photos74 views
|
|
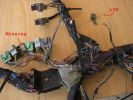
example problems113 viewsInspection showed another Cut Airbag connector, a Missing connector and a few rogue wires at the bottom, the silver one marked Lin, is for the LIN BUS and is supposed to be like that though
|
|
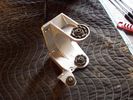
Air Compressor mounting bracket new907 viewsFound this jpg on a forum - thought it was good and is what one breaks when one jacks on the plastic air compressor cover.
|
|

210 views
|
|

Cooling system hoses - 4.4L petrol V81108 viewsThese are the cooling system hoses on the 4.4L petrol V8. The little odd shaped bleeder hose, (LR006158), shown in the top right hand corner can give problems. There is a plastic tee with a threaded air bleeder outlet located in the middle of the hose. The plastic tee can or will fail due to I guess heat distress.
A BIC pen can serve as a field fix, however for your parts kit, a nominal 3/8" ID hose size brass hose barb inline connector plus a couple of hose clamps is suggested. Better yet is a threaded hose barb brass coupling or a tee and bleeder valve to allow bleeding of the line. Land Rover now makes the plastic bleeder valve that breaks available as a separate part, # LR027661, where 0 is a zero. As such, one can now purchase that part only for addition to your field fix parts kit.
|
|

Mengel Pass103 viewsOne of the "rocky" sections.
|
|
Phones, Public Toilets & Showers at Innamincka82 views
|
|
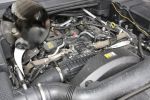
Engine Cover Removed901 viewsView of the engine before blanking off the EGRs. The inset sort of shows one of the EGR valve/pipe flange securing bolts. The EGR valves are not easy to get at!
|
|
Lonely Disco3 amongst the tricked up 90s and Disco 1s at Cowm90 views
|
|

ruining someones day15 views
|
|
bluetooth phone cradle base68 views
|
|
Phone Cradle16 viewsPhone Cradle
|
|
Thread upload18 viewsImage uploaded in thread 148911
|
|
Thread upload16 viewsImage uploaded in new thread
|
|
Thread upload16 viewsImage uploaded in new thread
|
|
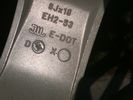
E-DOT and Japan wheel acceptance marking on ten spoke wheels.335 viewsThese are the E-DOT and Japanese wheel acceptance markings on the inside of one of the ten spokes of the 8J x 18" wheel, Land Rover part number ALY72190U or RRC500250xxx where xxx is the colour number, in this case, MNH for Sparkle Silver. There are similar markings on all Cromodora wheels for the 3.
|
|
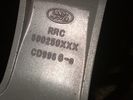
Part number moulded into spoke of 18" ten spoke. 322 viewsThis part number, RRC500250XXX is moulded into the backside of one of the spokes of the ten spoke 18" wheel. An alternate part number is ALY72190U or ALY72190U85 which relates to year and finish.
Another number is RRC500250MNH where MNH is also the finish, probably Sparkle Silver.
|
|

Thread upload10 viewsImage uploaded in new thread
|
|

Thread upload6 viewsImage uploaded in new thread
|
|
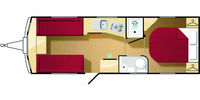
Layout39 views
|
|

Thread upload6 viewsImage uploaded in thread 132535
|
|

at least you are not alone biskit60 views
|
|
![Filename=D3 dopo Luni 02 - 01 gen 2008 - 02 [1280x768].JPG
Filesize=95KB
Dimensions=1024x768
Date added=01.Feb 2008 D3 dopo Luni 02 - 01 gen 2008 - 02 [1280x768].JPG](albums/userpics/12685/thumb_D3%20dopo%20Luni%2002%20-%2001%20gen%202008%20-%2002%20%5B1280x768%5D.JPG)
Italy Blera-Luni sul Mignone 153 views
|
|
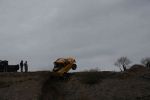
V8 4.6 71 viewsD3 completed a down run & not to be out done 90 completed an up run in grand style
|
|

Anyone we know ?190 views
|
|
Top of Putwell Hill, one of the best view points in the Peak District262 views
|
|
304 views
|
|
272 views
|
|
261 views
|
|
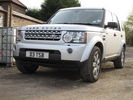
311 views
|
|
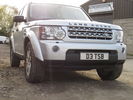
287 views
|
|
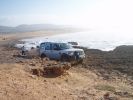
My D3 in Morocco before I bought it!238 viewsOne careful owner, LRE!
|
|
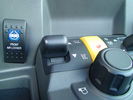
ARB Front Locker in Disco3111 viewsA bit of a challenge for the installer since it was the first they had done but all done and nice and tidy.
|
|
ARB Front Locker in Disco3117 viewsA bit of a challenge for the installer since it was the first they had done but all done and nice and tidy.
|
|

With tints done17 views
|
|

D3_CCF_phone_settings29 views
|
|

Attaching one of the hog rings43 views
|
|

156 views
|
|

New D4 & my one of my other toys111 views
|
|

D/3/4 wheel stud aligner11 viewsPDF drawing of dimensions to manufacture your own.
Alternatively, I can do it for you.
( One for Defender coming shortly)
Suggestions welcome.
|
|
D4 Bluetooth AH42 10F845 AA module connected to 12VDC and MOST1210 viewsThis jpg shows the MOST bus connected to the AH42 10F845 AA module used in the D4 as well as +12VDC power from F58P connected. The power is split with a Y harness as the IHU (radio) for some reason required +12VDC power to the C2115-10 "mute" pin to keep the radio/CD audio from muting all the time.
With power on the pin, the radio audio does mute as it should when the cell phone rings and the hands free connects. The brown conductor feeds to C2115-10 and the blue to the module.
The module tucks up and hides behind the grey plastic section covering the forward portion of the passenger side tranny hump for left hand drive vehicles; for RHD, it would be located on the left side.
The pairing code is 2121 with this setup and not 1234 or 0000.
|
|
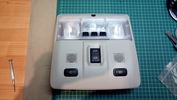
Roof console with mounted switches148 viewsOne switch is for switching the R-750 spot lamps, the other is for additional external lighting using a second Relay kit provided by OEM Plus.
|
|

Thread upload4 viewsImage uploaded in thread 161272
|
|
94 viewsWasn't sure I'd make this one. Had to break out the tape measure to make sure my tire would bridge the gap.
|
|
101 viewsIf you leave a D3 in the water for too long, all the panels disolve and you find one of these underneath!
|
|

Defender in the Fog, another day on the job.459 viewsThis is another normal work day for a Defender - actually the jpg is from a Land Rover advertising shot, but it may just not be a set up one. I think it is an actual working Defender. Note the visible front tow hook and how the hi lift is just rope tied on; also the normal stock headlights and I guess dual spare tyres - just another day on the job.
|
|

Older Cell Phone handset holder operation and components849 viewsThis 8 page pdf explains the operation of the older Cell phone handset holder and shows the various components as related to the radio and phone buttons etc.
|
|

415-03 Audio System - Low and High Line Radios934 viewsThis 8 page pdf shows both the low and high line radios and their various components.
|
|

419-08 Low and High line radio systems components and operation838 viewsThis 15 page pdf displays the radio components including pinouts for both the low and high line head units and the two Harman Kardon amplifiers including the Logic 7 amp. The steering wheel controls for both the radio and phone system are also outlined along with mention of the Sirius satellite radio feature.
|
|

Diesel - Ethanol co-fuel Paper114 viewsInteresting read - one local authority (Redland Shire Council) has 180 vehicles on trial and is pleased with the results; more power, engines run cooler; lower emissions including reduced smoke and it is a renewable resource to boot!
|
|

Heike, a whire german Shephed Dog - Honest...113 views
|
|
Bridestone AT tyres199 views
|
|
Bridgestone AT214 views
|
|
Bridgestone AT194 views
|
|
224 viewsTyre cleanrances with Bridgestone 265/65/70 -17 AT
|
|
Bridgestone AT236 views
|
|
Bridgestone AT201 views
|
|

NEW REG PLATES29 viewsHi Guys,
I would like to buy these plates. they dont seem to sell them in the shop. Does anyone have any problem with me using the disco3.co.uk on the bottom of the plates. id rather do this as i do not want to add any stickers to my car.
d
|
|

the ole 96 disco on one of several 4000 mile road trips. In Colorado here with a another Land Rover behind176 views
|
|

One D3, 2 days old98 viewsOur first trip out ..... Sunday Lunch (well you\'ve got to run it in gently, haven\'t you!).
|
|
Wobbly Wheels now GONE282 viewsSent Back.
|
|

218 views
|
|

FIle con tracce GPS105 viewsFile compresso con le tracce GPS del tour Disco3Romagna 2009.
Istruzioni per l\'uso.
1) Verificare di avere installato Google Earth
2) Scaricare e decomprimere il file
3) Aprire il file cliccandoci sopra: si apre Google Earth con le tracce visibili.
E\' possible fare il tour automatico (Google Earth vi fa vedere il giro (che è stato diviso sui due giorni in vista aerea) oppure semplicemente guardare le zone che più vi interessano dall\'alto.
|
|

CALENDAR ENTRY315 viewsCALENDAR ENTRY
Blue Stone Lake, West Virginia, USA
|
|

CALENDAR ENTRY297 viewsCALENDAR ENTRY
Blue Ridge Land Rover Club
Blue Stone Lake, West Virginia, USA
|
|

CALENDAR ENTRY282 viewsCALENDAR ENTRY
Blue Ridge Land Rover Club
Bluestone Lake Reservoir, West Virginia, USA
|
|
Thread upload24 viewsImage uploaded in thread 163428
|
|
Thread upload13 viewsImage uploaded in thread 91468
|
|

Thread upload5 viewsImage uploaded in thread 91468
|
|

Thread upload9 viewsImage uploaded in thread 91468
|
|
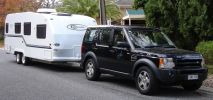
The Test Rig273 viewsDiscovery TDV6 SE - Adriatic Blue, Alpaca
Caravan - Future System Full Fibreglass (one piece) 21ft (6.10m)internal length
|
|

Italian Maintenance Check Sheet251 viewsLRE008ITA (2)
DISCOVERY 3 SCHEDA DI CONTROLLO MANUTENZIONE (TUTTI I MODELLI INGHILTERRA & EUROPA)
|
|

Italian Maintenance Check Sheet228 viewsLRE011ITA (2)
DISCOVERY 3 SCHEDA DI CONTROLLO MANUTENZIONE (TUTTI I MODELLI PER CONDIZIONI GRAVOSE)
|
|

Italian Maintenance Check Sheet138 viewsJLR 11 81 14_7E (7)
DISCOVERY 3 SCHEDA DI CONTROLLO MANUTENZIONE (TUTTI I MODELLI RESTO DEL MONDO)
|
|
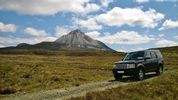
Discovery & Mount Errigal in County Donegal68 views
|
|
Thread upload6 viewsImage uploaded in thread 157398
|
|
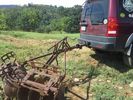
LR3 to plow your garden297 viewsI found this jpg where a current LR owner is using his LR3 for a similar purpose as the original Series units were designed to do - that is serve as a tractor for plowing a field or I suppose a garden.
In this case, I note the hitch is one of those that attach to the factory tow loop, (Rhino Hitch), rather than the factory product that inserts from the bottom and hangs down - (like a plow), but all the time. One of the other jpg's in this album shows the two factory variations plus a third jpg shows a closeup of the Rhino Hitch.
|
|
Thread upload21 viewsImage uploaded in thread 153623
|
|

17 views
|
|

Thread upload14 viewsImage uploaded in thread 159579
|
|
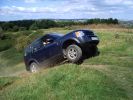
Dom, this is how its done!403 views
|
|
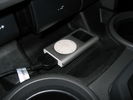
76 views
|
|

37 views
|
|
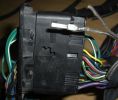
New Speaker Cables.111 viewsThis is the door connector, Main loom to Right, Door side to the left. to the top of the connectors you can see green and Green white wires which are the speaker ones. The door wiring is premium and has two pairs, the main loom was a 1 pair high line, so i am adding the pair you see (one already pinned up) to upgrade the loom to premium.
|
|

BUCYRUS117 viewsActually been in one of these monsters at Allerton ByWater open cast before it shut
Stefan Frankowiak and Darren Axe and Martin Roberts
|
|

Thread upload3 viewsImage uploaded in thread 159579
|
|

Thread upload6 viewsImage uploaded in thread 184656
|
|
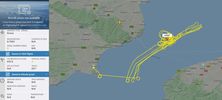
Thread upload4 viewsImage uploaded in thread 142922
|
|

Thread upload17 viewsImage uploaded in thread 142922
|
|
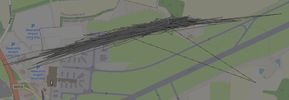
Thread upload7 viewsImage uploaded in thread 142922
|
|

Thread upload3 viewsImage uploaded in thread 142922
|
|

Thread upload3 viewsImage uploaded in thread 175266
|
|

9 views
|
|

Thread upload5 viewsImage uploaded in thread 149690
|
|

Drug dealers to the rescue264 viewsD3\'s will never live this one down!
|
|
Top of Twin Cone175 views
|
|
Twin Cone177 views
|
|
Twin Cone201 views
|
|
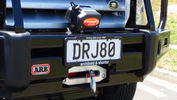
KingOne 12000lb Winch126 views12000 Winch in ARB Bar
|
|
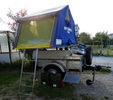
103 viewscarrello in configurazione per uso a due persone
|
|

RLD Mantec clone104 views
|
|
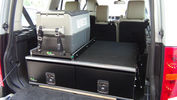
Ironman Drawers and Fridge Slide112 viewsI hate kitsets, over 100 bolts to assemble this unit and lost gallons of sweat, must have read the instructions a hundred times or more but final product does not look so bad. A few bolts hanging out the sides of both slide and drawers that may catch things so time will tell if I made the correct purchase.
Maybe one day I will make some side wings to cover the sides properly.
|
|
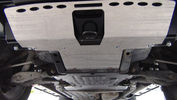
GOE Bash Plates119 viewsGreen Oval Experience Bash Plates. Front, Transmission and Compressor.
Might have to mod the front one a bit to let air into the trans cooler, it sits over the outside of the ARB bar which has vents for the cooler. If I cut slots in the Allow Plate to match those might do the trick.
I added a rear bolt to the Compressor Plate as it looked like it could get hooked on something and tear off. Two bolts onto the slider and two up onto the chassis now.
|
|

A long, dusty and steep track - let my son drive up this one95 views
|
|
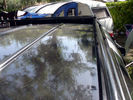
Portapacchi, pavimento calpestabile; ha anche funzione di doppio tetto, utile nel parcheggi assolati50 views
|
|

Lead Car Entering the Finish116 views7 May 2007 - My D3 on duty as lead car in shinfield 10K road race. what a nightmare driving at low speed in the rain. Clock was mounted on standard crossbars. connection to additional batteries in boot cable thru side window. There is a small offroad section (actually an un-made road) Oaklands Road, Shinfield, Reading (suggest anyone test driving in the Reading area take this road)
|
|
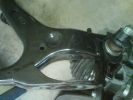
Wishbone196 views
|
|
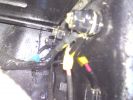
Use one of the spare earth points154 views
|
|

568 viewsMy father's last wish was to ride in my car one last time, and as such I believe him to be the first person to be carried to his funeral in a Disco 3.
My father's coffin was 6'5" and he was safely carried in the back of my Disco, and for once didn't complain about my driving. Air suspension helped enormously, being set to off-road height, to ease getting him in and out safely.
|
|
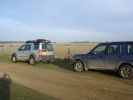
Shift them stones will yer, it\'s ruining the shot...291 views
|
|
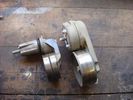
aux belt roller + tensioner53 views
|
|
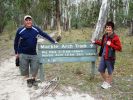
Jonesy63 (Robert) and Leonie120 views
|
|

Entry to another cave in the limestone57 views
|
|
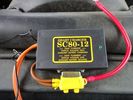
63 viewsI have no idea what's in there, or what it does, but with just one green light to tell me everything is OK it's speaking my language.
|
|
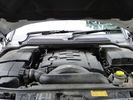
58 viewsThe after shot - no one will ever know.....
|
|

Papa King shows us why you never travel alone198 viewsAll of a sudden the sand became spongy, and Kingsley\'s vehicle just sunk in up to the chassis. Took the guys quite a while to dig and winch it out.
|
|
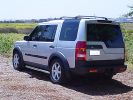
One of my pride and joy\'s181 views
|
|

One of my pride and joy\'s171 views
|
|
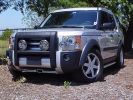
One of my pride and joy\'s171 views
|
|
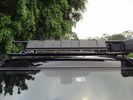
Wind Deflector for Rack15 viewsRecognise this part? Its the lower front recovery point cover. Installed upside down to silence the wind "drone" on the roof rack - works a treat!
|
|
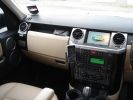
All done ... nice contrast id say :)220 views
|
|
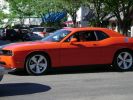
I want one of those63 views
|
|

Spot the imposter366 viewsAt Folkestone Channel Tunnel holding area, DISCO3 does Disney, January 2006
|
|
| 1434 files on 4 page(s) |
 |
1 |  |
 |
 |
|