| Search results - "of" |

39 views
|
|
Thread upload5 viewsImage uploaded in new thread
|
|
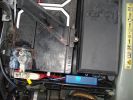
138 viewsThe weatherproof junction box fits neatly down the front of the battery, all contained inside the battery box.
|
|
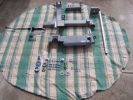
The full complement of bits and pieces, major parts back from the powder coaters, all bolts nuts washers replaced with stainless steel241 views
|
|

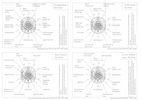
0000 LR Bluetooth dealer Kit install instructions1608 viewsThis 17 page pdf is mostly a series of pictures showing how to install the original Land Rover dealer installed Bluetooth kit for circa 2005 / 2006 three's. Also included are three wiring diagrams sheets related to the pairing code 0000 Bluetooth install.
This pdf is useful if you are now removing the 0000 kit to install the optical 2121 MOST D4 module, an easier install than the 0000 kit ever was.
|
|
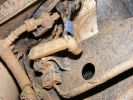
651 viewsNote blue rubber collar to hold lower part of control rod in arm.
|
|
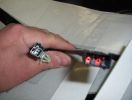
heated seat (base) wiring411 viewsThe Small connector takes the plug from the seat back pad, the larger connector (with red) is fitted into the multiplug casing uder the seat - the male side of this is already pre-wired.
|
|

remove relay 7 - pair of plyers is proberly easiest 862 views
|
|
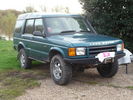
51 viewsD44 front winch bumper. Ali washer bottle. D44 rear h/d bumper. centre diff lock. 235x85x16 pirelli muds. OME +2" springs & shocks. front diff guard. side tree bars. wired for roof CB. Aux fuse block. safari snorkel. extended wading tubes. the list goes on...
|
|
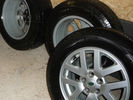
a bit of curbing?35 views
|
|

Thread upload22 viewsImage uploaded in thread 169011
|
|

Bit fell off113 views
|
|
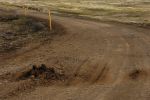
Main road to Isafjörður in the northwest fjords of Iceland112 views
|
|
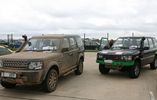
Silverstone Media Day85 viewsTook 3 cars for display .... a RRR members off-road modified RR p38a, unusual as it has the 2.8L version of the 300tdi fitted.
|
|
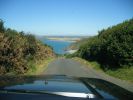
1 in 3 lane south of Widemouth Bay103 views
|
|

Offroad Training in Linthe, Germany.208 views9 Cars: Suzuki Jimny; Touareg V10 Diesel no difflock; Touareg V6 Diesel rear difflock; Disco 1; Disco 2; Disco 3; RR ´05; RR ´06; Q7.
|
|
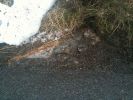
The offending stone166 views
|
|
Thread upload24 viewsImage uploaded in thread 171337
|
|
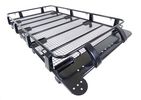
Thread upload10 viewsImage uploaded in thread 171337
|
|
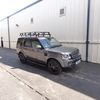
Thread upload10 viewsImage uploaded in thread 171337
|
|
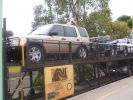
01 D3 on Train183 viewsEasiest method of crossing 2300 km of Nullabor Desert - on the Indian Pacific train. D3 with trailer - effectively have 5 spare tyres if it really gets desperate!
|
|
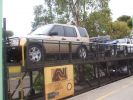
01 Start of Xmas 07 trip across the Australian Nullabor243 viewsThis is the preferred method of travelling 2500km of Nullabor desert when time is short (the Indian Pacific train). Next stop is Adelaide.
|
|
Welcome around where we live, in the French Basque Country, south west of France.580 viewsright by the spanish border.
|
|
Two Discos at Northcott Mouth - neither of them mine102 views
|
|
167 viewsthis is Albert 15 years old, showing the virtues of travelling club class, in the rear of a disco 3
|
|
Not much of green118 views
|
|
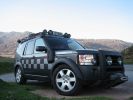
CALENDAR ENTRY 20091191 viewsBonatti grey TDV6 S, ambulance conversion, MTR's, winch, RAI, safety devices roof rack, rear ladder, bash plate, warn lighting, LED lighting throughout.
Owned by me, Rich Bell, Director of Extreme Medical Ltd, providers of medical support to Land Rover events.
|
|
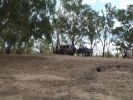
02 On banks of Darling River, Back of Bourke158 views"Back of Bourke" is the typical definition of the start of the Australian Outback. This was after crossing the Darling River "back of Bourke" on 8 Jan 08. We were the first vehicle to start driving after floods had closed (first time in 8 yrs there was any water in the river).
|
|
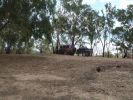
02 Last Photo before the little wheel problem saga222 viewsThis is my D3 with trailer on the banks of the Darling River, literally "back of Bourke" (the regional definition of the start of the Australian Outback). We were the first vehicle in a week to try and drive this route from Bourke to Wilcannia on the account of floods (first water in 7 years). Little did we know that 3 hours later there\'d be a bit of a wheel and tyre problem appearing...
|
|
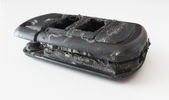
Tagliare lungo il perimetro della chiave - Cut along the key perimeter17 viewsI gusci sono saldati ad ultrasuoni. Con il disco tagliare lungo il perimetro della chiave in corrispondenza della giunta: lo spessore è di circa mm.3. Io non sono andato fino in fondo per evitare di danneggiare qualcosa, una volta inciso il solco per mm.2,7 ho fatto leva col cacciavite e ho strappato il materiale restante.
The body is ultrasonically welded. With the disc cut along the perimeter of the key in correspondence of the joint: the thickness is approximately 3mm. I have not gone all the way down
|
|
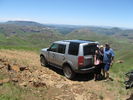
Bastervoetpad pass 25/12/20153 viewsPart of 8 passes route Northern Eastern Cape near Rhodes/Ugie
|
|

Removal of the trim around the pedals285 views
|
|
Snow34 viewsBut not much of it
|
|
One of my favourite views!43 views
|
|
Gaydon 2010 from the top of the bank60 views
|
|
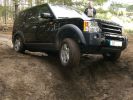
249 viewsMy baby showing off it´s air suspension :)
|
|
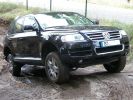
241 viewsThis Toureg is stuck - doesn´t look like it. After 8 hours of driving everyone agreed that with the big 10cyl. diesel engine you should probably oder the rear difflock as well... In this picture the rear left anf front right wheels have no grip, esp or whatever just doesn´t do it.
|
|

Silverstone Classic Media Day177 viewsAttended the media day for the Silverstone Classic, took 3 cars to display & tell 300 journalists what we do at the show.
David Coultard was one of the drivers who were taking the journalists around the track.
|
|
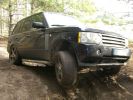
228 viewsRR ´06, 20" alloys, still better than any SUV you can think of. Actually, it went up, down and through everything.
|
|
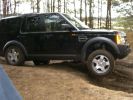
241 viewsIt simply is a true offroad car. Great balance, easy to drive, i love it!
|
|
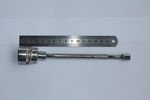
161 viewsOriginal adapter for D3 with thanks to the clever members of the forum
|
|
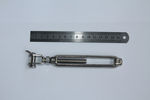
126 viewsHalf of the fork or jaw of the bottle screw
|
|
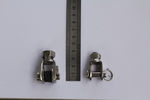
122 viewsshows the height of both adapters
|
|
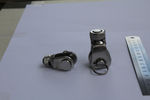
114 viewsboth adapter the larger one needed a bit chopped off the botom and the washers to fit
|
|
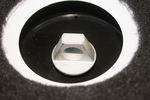
180 viewsThe offending adapter in the D4 courtesy of the bright young designers, who modified it from the perfectly acceptable hex nut
|
|
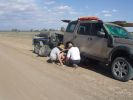
03 First bit of tyre/wheel trouble245 viewsIn the outback a tyre suddenly blew. "No worries" we thought, as we had 3 spares (+ two more if we abandoned the trailer), 150l of water, 3 days of food, and an EPIRB if things got really bad. At the time I didn\'t fully appreciate the fact that my index got a blister from the burning heat of one of the wheel nuts. It was 45 deg C at the time, so everything was hot.
|
|
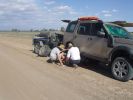
03 The first bit of tyre/wheel problem251 viewsSomewhere in the Australian outback on a 45 deg C day in Jan 08, a D3 had a bit of a flat tyre problem. "No worries, mate" st we had 3 spares (plus 2 more if we abandon the trailer), 150l of water, 4 days of food, and an EPIRB if things really go crook. The first clue that this was not a "normal" flat was when I handled a wheel nut and ended up with a blister from a burning hot nut (the ambient wasn\'t THAT hot).
|
|

Tagliare per eliminare parte del coperchio - Cut to remove part of the cover14 viewsE' meglio prima levare il circuito stampato e poi la lama della chiave, per evitare di danneggiarlo. Tagliare sopra il tasto superiore per rimuovere solo la parte con i tasti.
Is better to remove the printed board first then the key, to prevent damage. Cut over the top button to remove only the part with the buttons.
|
|

Looks nice with the roof down!69 views
|
|

153 viewsBought Landmark alloys for Discovery 4 ,look great but makes calipers and discs look rubbish.Had centres of discs painted black and got calipers professionally painted ,what a difference.
|
|

Thread upload8 viewsImage uploaded in new thread
|
|
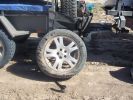
04 Damaged Tyre301 viewsYes, there\'s no doubt that this was a flat tyre. The ultra hot wheel nuts, look of the flat (note in a later photo that the back of the tyre appeared okay) and increased fuel consumption should have been a clue, but it was 45 deg C, and we had been doing about 105 km/hr on a dirt road for hours, so we just assumed it was a flat = WRONGO!
|
|

Estrarre il circuito stampato con la batteria - Exctact the printed board with the battery18 viewsRimossa la parte superiore del contenitore, estrarre il circuito stampato sollevandolo leggermente dalla parte della batteria.
Removed the top of the box, pull out the printed circuit board slightly lifting from the battery side.
|
|
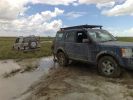
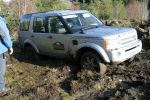
really sticky mud173 viewsCan\'t really see it in the pic, but off the road the mud was treacherous
|
|
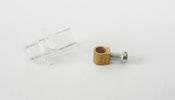
Morsetto - Clamp33 viewsHo smontato il morsetto, il diametro del foro è esattamente quello di quello che rimane del particolare che si è rotto.
I removed the clamp, the hole diameter it's the same of the detail that is broken.
|
|
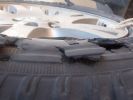
05 No doubt the tyre is flat275 viewsThis is the view of the flat tyre. Again, didn\'t think it anything more than a "normal" explosive blowout, as the tyre was about 90% worn, we were heavily loaded, it was 45 deg C, and driving 105 km/ho on a rough dirt road in the outback.
|
|

Chiave aperta12 viewsUna volta estratto il circuito stampato, facendo leva col cacciavite sulla parte rimasta attaccata ho prelevato la lama della chiave da inserire nel box nuovo.
Once you remove the printed circuit board, leveraging with the screwdriver on the part remained attached, I picked up the blade of the key to be inserted in the new box.
|
|

2349 views
|
|

2465 views
|
|

2319 views
|
|
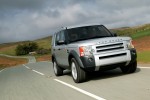
2530 views
|
|
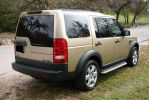
View of right side167 views
|
|

Morsetto - Clamp42 viewsIl morsetto è della misura esatta della sede dell'attuatore.
The clamp is the same size of the actuator slot.
|
|

Various Shackles281 viewsPictures of two,three and four part bow and 'D' shackles
|
|
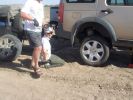
06 Spare tyre on and still suffering from hot wheel nuts296 viewsManaged to get ultra hot wheel nuts back on the spare (using the original 19" D3 wheel, vs the 19" RRS wider wheel which blew - shown in left of photo). Pity we didn\'t note that the disk brake was EXTREMELY hot at this time.
|
|

remains of tensioner bolt25 views
|
|
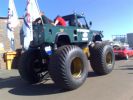
The biggest Defender in the world?164 viewsSeen at Zwartkops raceway a couple of weeks ago
|
|
The Office133 views
|
|

07 Back side of failed tyre340 viewsThis is the back of the blown tyre. It looks like any other worn tyre which has run a bit while flat. Note that we were running on wider 19" RRS wheels (have 4 19" MTRs + 1 old A/T on the original 5 wheels). Also have a rear-mount spare tyre holder which is really convenient with the wider rim and the fact that the tyre was still hot (it had some melted rubber on the other side!!)
|
|
kitchenette it is.912 viewsEjoying Baguette, Saucison sec and of course Fois Gras.
|
|
239 viewsoff road stand - hoogste stand van de vering
|
|
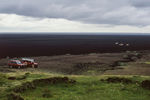
A green haven in a vast expanse of lava21 viewsThis was a great place fore some mid day leg stretcher and lunch
|
|
Thread upload19 viewsImage uploaded in thread 99451
|
|
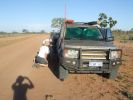
08 D3 stranded with a seized smoking wheel315 viewsAbout 1 hr after replacing the blown tyre, strange noises emanated from the stability control system and speed dropped off. Then I looked in the rear view mirror, and noted a cloud of dust along with a whiff of black smoke. This led to a very quick stop (no traffic on this route for over a week, so no worries about having to signal exiting the road). Took a look and WOW. The right rear wheel was glowing a dull red colour, and burning rubber smoke was wafting from the red glow over the fuel lines.
|
|

233 views
|
|

NEW FORM OF PARKING 87 views
|
|
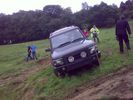
"Hold on lads..., I\'ve got an idea..."54 viewsThis angle tells you some of what could have been a bit of a tumble...
|
|
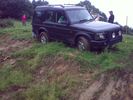
Almost a roll, but not quite...55 viewsI\'d \'launched\' myself at a 6ft hill and got to the top- but at an angle- the offside rear gripped and pulled us around to the right- perilously close to the edge... time for spare undies I think...
|
|
This years gutless car of the year is...66 views
|
|
Freelander trying hard.107 viewsStill not stuck but getting there. In the end pulled it out with a Defender. Picture taken at Offroad-Training in Linthe/Germany
|
|
Still trying to prove it can hold up104 viewsFreelander not stuck - yet :)Picture taken at Offroad-Training in Linthe/Germany
|
|
Silverstone Media Day87 viewsTook 3 cars for display .... a RRR members genuine 2005 RRS G4 & another members off-road modified RR p38a
|
|
Same holes as the disco, took a picture from the right side. Picture taken at Offroad-Training in Linthe/Germany112 views
|
|
Not stuck - only got out to take a picture :) Picture taken at Offroad-Training in Linthe/Germany142 views
|
|
611 viewsTDV6 HSE Slindon Safari, Chichester. Private Off Road Day, May 2009.
|
|

09 Starting to remove the seized brake assembly296 viewsBy this time we\'d poured about 8l of water on the dull-red glowing and burning wheel assembly (too close to 140l of 98 octane petrol). Sudden cooling cracked the disk brake which showed mangled park brake parts. How to remove a brake disk without the right star fitting? First remove the caliper then get a sledge hammer?!!
|
|
COVER SHOT FOR TOTAL OFF ROAD114 viewsG WAGEN AXELS FITTED WITH HYDRAULIC FRONT + REAR DIFF LOCKS + EXTREAM SUSPENSION SYSTEM FRONT + REAR WARN WINCHES.
|
|
Receiver for toy rack39 viewsSensor bar was made of same heavy tube that the carrier was made from allowing a small 1 1/4" receiver to be placed on it for a multitude of toy racks of my choice. Rack adjust in and out of receiver.
|
|

Plenty of water crossings..125 views
|
|
Thread upload5 viewsImage uploaded in new thread
|
|

Part of the Metal framework.142 views
|
|

Ready for the off at Tixover65 views
|
|

Cooper Zeon LTZ 285 60 18 #298 views
|
|

The s2a could not make this one - too deep.446 viewsGot towed through with a dead engine by a Tdi Defender - Betsy is petrol and needed a gallon of WD40 to get going after this!
|
|

10 Cracked smoking parking brake drum338 viewsNote the crack in the face of the brake. This showed mangled parking brake springs and other bits. Also a bit of melted rubber was drooling out of the crack. Started to remove the brake caliper and enjoying the flies in 45 deg C heat. Ah, the wonderful Aussie climate in January.
|
|
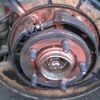
close up view of of rear hub assembly85 views
|
|
SR switched off87 viewsSR40 lightbar
|
|

Thread upload10 viewsImage uploaded in new thread
|
|
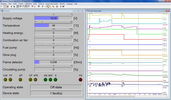
9 views
|
|
_DSC0185170 viewsCoffee break II
|
|

Plastic cover off235 views
|
|

Olga57 viewsCome on, its my day off!
|
|
Compressor cover damage755 viewsAnother shot of the hole in the plastic cover
|
|
Compressor original cover656 viewsThe rock punctured straight through the plastic cover, snapped the soft compressor bracket and tore open one of the loom plugs.
|
|
Start of Round 2187 viewsLined up with some of the Class B entries
|
|
Round 2 start193 viewsSome of the Class C and D cars
|
|
Tyre hill 2260 viewsNot so lucky - Jeep got stuck on top of the mound
|
|
off-camber hill351 viewsAnd no, I wasn\'t hanging my arm out to balance the car - I was stopped at this point waiting for the Jeep in front to try and finish. It was a pretty steep off-camber slope!
|
|
bit of water70 viewsdidnt think it was so deep. I got my feet a little wet. Car is still running and it also survived this and is still in use now. Bet a Disco 3/4 wouldn't work after this.
|
|

The official Morocco 2007 Disco3.co.uk attire130 views
|
|
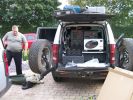
Offroad essentials...169 views
|
|
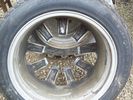
rear view 28 viewsrear view of 20" wheel which "broke" whilst driving
|
|

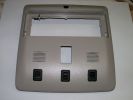
243 viewsThe roof panel (inside) with the internal bracket
|
|

148 viewsThe roof panel (inside)
|
|

132 viewsThe roof panel
|
|
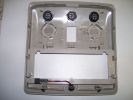
160 viewsRoof panel with the new switches
|
|
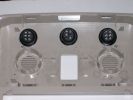
197 viewsSwitches installed in the roof panel
|
|
177 viewsSwitches in the roof panel
|
|
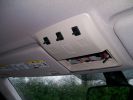
239 viewsPreview of the panel with the switches
|
|
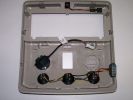
206 viewsRoof panel with wired switches and PTI microphone
|
|
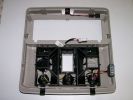
206 viewsRoof panel with switches, PTI microphone and bracket
|
|
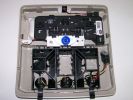
222 viewsThe complete roof panel reassembled
|
|
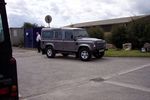
New Defender35 viewsTrade in of old Defender 90 and New Defender 110
Stratstone Pickering - Very friendly, good deal, but....
Same old Stratstone - not complete when collected.
|
|
73 viewsMiddle of everywhere?
|
|
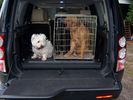
Sliding floor dogs in28 views45% of full size
|
|
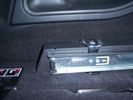
Close up of side runner, showing load hooks countersunk into runner .24 views50%
|
|
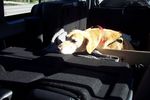
New Defender & Dog43 viewsOur dog relaxing in the back of the Defender.
|
|
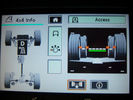
Offroad screen running behind tv59 views
|
|
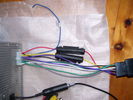
Rear of DD kit71 views
|
|
201 viewsRemoval of Intercooler hose, don't forget to plug the hole, don't want anything to fall in there
|
|
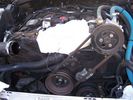
221 viewsRemove the air intake shuttle cut off valve, covering hole with rag
|
|
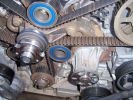
239 viewsPictures of front of engine while doing a timing belt change
|
|
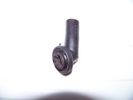
sunroof drain fitting63 views
|
|
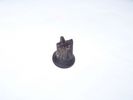
sunroof drain grommet - piece that broke off61 views
|
|
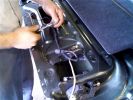
Putting all the bits back in52 viewsNotice the rope (Kevlar) coming out of the actuator box on the right side.
|
|

Thread upload20 viewsImage uploaded in thread 32988
|
|
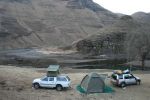
Camping at the top end of Katse Dam144 views
|
|
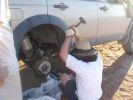
11 Lesson in removing a jammed brake assembly in the Outback378 viewsSpent the next 4 hours doing this to my D3. Gave the photos to Land Rover dealer and they did not think this constituted abuse of the vehicle. I thought that was charitable, but if we hadn\'t done this, the tow back to civilisation would have been even longer.
|
|
_DSC0187188 viewsCoffee break
|
|
110 at Carinya Escapes ,Flinders ranges295 viewsDefender 110 Extreme,Long Range fuel tank,under floor water tanks, HF radio,GKN Overdrive,Swingaway Spare Carrier,70 litre Freezer,30 litre Fridge,Roof top Camper,Cruise Control,
|
|
Extreme medics 110232 viewsFull Ambulance spec with extrem offroad cabability, 110 v8
|
|
Inside view of camera70 views
|
|
Outside view of camera65 views
|
|

pic of lock and key50 views
|
|
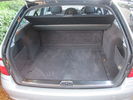
Mercedes E320 Boot19 viewsPlease note, any marks are just the pile of the carpet.
|
|
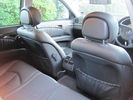
Mercedes E320 Back of Front Seats25 views
|
|
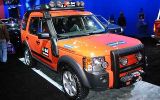
Offical G4701 views
|
|
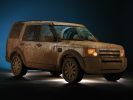
Muddy LR3 at US SUV of the Year Awards3659 views
|
|
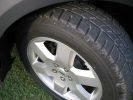
Wheel350 viewsDetail of the Pirelli Scorpion zero on 19" rim.
|
|
_DSC2048209 viewsTake off!
|
|

12 Half way through removing a jammed disk brake in the Outback296 viewsThis was just before breaking the sledge hammer. Note we luckily carried a spare hammer. Ended up using (or breaking) every tool we had on this little repair job. Bed sheets are a good way of gathering the bits to show for the inevitable warranty claim.
|
|

Nice drops on the western faces of dunes75 views
|
|

Radio location539 viewsMy remote head UHF CB mounted on the front of the ashtray, ham HF/VHF/UHF remote head radio mounted on a block in the coin tray and my GPS on a turned wooden block in the cup holder. Both radios are under tha driver and passenger seat and the antenna for the GPS is suction mounted inside the windscreen.
|
|
Antenna Mount462 viewsBracket mounted using existing holes behind the grill. The design of this bracket is listed elsewhere.
|
|

12S plug from eBay and Ctek lead (provided with MXS-10) - before cutting the ring terminals off.28 views
|
|

Thread upload36 viewsImage uploaded in thread 120468
|
|
Permanent 12V supply271 viewsPhoto taken of TFC\'s D3 showing where you can take a permanent +12V supply, from the main fuse board behind the glove box.
|
|
303 viewsImage of the 13 pin electric Layout
|
|
13 How to care for tools303 viewsWhat happened to the sledge hammer after 2 hours of beating my seized and cracked disk/park brake assembly to bits. Now down to 1 hammer remaining. At least by this time it was getting cooler (down to 40 deg C)
|
|
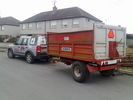
honestly officer....if it was overloaded, it would be sitting on the rear axel ??? heh heh79 viewsfunny how some cops will accept what their eyes tell must be the truth, a trailer load of logs home ....easy peasy, hahahahaha
|
|
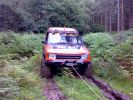
93 viewsJUST WINCHING A JEEP OUT OF A BOG
|
|
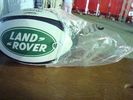
Rugby ball prize16 viewsWon this at the Dubai 7's in 2010. The LR stand had a competition. You had to push a LR4 over a something like an uphill speedbump. A modified bullbar resembling a scrumming machine allowed 3 people to touch, engage and push the beast over the bump. Me and my 2 kids - with a little bit of help, managed it and for our trouble got this ball !!!
|
|
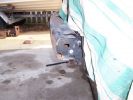
Trimmed RH end of inner bar269 views
|
|
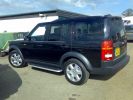
D3 TDV6 HSE101 viewsFirst picturer of my Disco at Mallory Park Race Circiut during a test day for our Racing Bike ;-) I Love It..
|
|

Thread upload134 viewsImage uploaded in thread 92365
Chinese garbage knock off stolen from ARB / Rigid
|
|

15 First sign of bits of parking brake failure336 viewsNote the complete lack of pad from the parking brake. Not only was there no composite brake material left, but the drum was somewhat twisted and connecting bits all smashed. Also a small drip of melted rubber from wheel bearing parts....
|
|
Cruising North of Alice Springs236 views
|
|
47 views
|
|
39 views
|
|
38 views
|
|
37 views
|
|
Border Rover in Boughrood,what can i say,It was an Amazing Weekend.51 views
|
|
Off road at night92 views
|
|
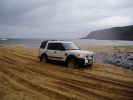
Trial Harbour soft sand410 views
|
|
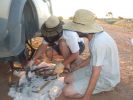
16 All the remains of a D3\'s parking brake373 viewsAfter 4 hours of hammering, finally removed the disk/park brake drum, and nearly all the parking brake bits fell to the ground. Cut rhe remaining brake cable loose as it was wrapped around the hub and a bit melted. Also having 2 jacks + 2 jack stands will support 4 hrs of hammering on the side of my D3.
|
|
Ready for off at Yarwell73 views
|
|
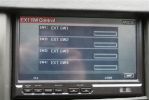
17298 viewsYou can add relay switches to the controller to turn on & off from the touch screen...pretty cool.
|
|
P15TOF148 views
|
|
2010 Purchase of 2005 model G436 views
|
|
The obstacle...14 viewsThis what we had to push. You cannot believe how heavy this is. It looked easy, but let me tell you, I have seen many groups of 3 young tough guys curse and sweat...
|
|
18 Brake "repairs" finished at sunset296 viewsWe just finished the repair at sunset and were driving slowly with 3 brakes. Oddly the D3 didn\'t behave any differently at 50 km/hr than it did normally. We had 4 instances of hitting the (3) skids for kangaroos before arriving in Wilcannia 3 hrs later. The brake light warning was making very distinctive noises and flashing randomly, though.
|
|
Suspension dragster mode442 viewsAfter I succesfully changed my wintertyres to summertyres, I found out that the front suspension was on access level and rear at off-road. Situation cleared after I switched engine on.
|
|

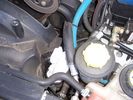
Whatissit139 viewsPicture of a thing in the engine bay, just to the left of the coolant bottle and just behind the edge of the radiator.
|
|
back of the light165 views
|
|

18 inch wheels44 views
|
|

Ready to winch a friends disco 4 194 viewsback of the picture you can just see another freinds (luvbus) disco 3 acting as balast to stop the disco 4 pulling me down hill
|
|

Thread upload10 viewsImage uploaded in new thread
|
|
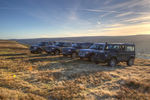
On the top of Fremington Edge above Reeth in North yorkshire43 views
|
|
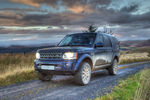
D4 HSE on top of Ogre Hill in Northumberland184 viewsD4 HSE on top of Ogre Hill in Northumberland with the Scottish hills in the background
|
|
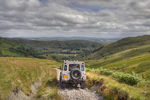
The view from the top of Breasthigh Road34 views
|
|
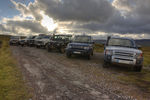
On Grasshill Causeway71 viewsA selection of D3's, a D4 and a couple of Defenders on Grasshill Causeway the highest greenlane in the UK
|
|
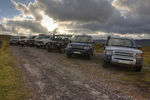
On Grasshill Causeway 319 viewsA selection of D3's, a D4 and a couple of Defenders on Grasshill Causeway the highest greenlane in the UK
|
|
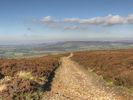
Rudland Rigg49 viewsThe view from the top of Rudland Rigg looking out towards Roseberry Topping and the coast.
|
|
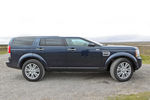
D4 Roofchop73 views
|
|
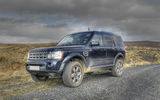
D4 HSE on top of Ogre Hill on the Scottish Border208 views
|
|
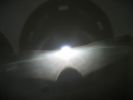
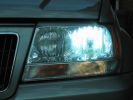
This is a H7R bulb fitted into the same headlight - look at cut off and no glare115 viewsPerfect like OEM what more can i say
|
|
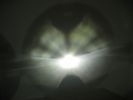
This is a normal H7 HID bulb installed in a BMW headlight to show glare above cut off line99 viewsThis is what the light pattern is that causes glare in most retofit applications including some projector lights. this is in fact a projector headlight on a BMW but the old projectors were only actually half projectors and half reflective bowls. the beam pattern should be clean cut like this ___/
|
|
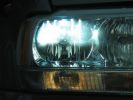
H7R Headlight retrofit H7R HIDS4U notice no light in bottome half of the bowl98 viewsThis is how a retofit HID should look in a reflector headlight
|
|
Standard hid bulb - light everywhere and glare caused by light in bottom of bowl95 viewsWhilst the beam pattern is ok the problm is that with 300% more light the spillage into the bottom of the reflector bowl is seen as glare by other motorists. it also is the reason the overhead motorway signs are lit up so well be bad retrofit xenons
|
|
Thread upload7 viewsImage uploaded in new thread
|
|
0 viewsMy 1st Land Rover 4x4 Off Roader
|
|

1 General Information, Identification Codes and Jacking and Lifting26 viewsPart 1 of Discovery 3/4 Workshop Manual - General Information, Identification Codes and Jacking and Lifting
|
|

Thread upload22 viewsImage uploaded in thread 96341
|
|
Thread upload11 viewsImage uploaded in thread 96341
|
|
start of climb136 views
|
|
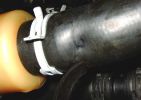
Damage to hose from tip of support bracket249 views
|
|
2 Nokia - Location of Nokia Module on trim71 views
|
|
Thread upload4 viewsImage uploaded in thread 194158
|
|
Wondering what to do next.....coffee!!199 views
|
|

Cooper Zeon LTZ 285 60 18111 views
|
|
Offroad in Estland110 views
|
|
profile75 views
|
|
Area of the new housing expansion south of Swindon.144 viewsFlood plains will be flood plains - insurance anyone? Oh sorry forgot; all top 8 insurance companies refused to insure a house in this area, so the developers are going ahead building anyway...
|
|
76 views
|
|
D3 in Litchfield National Park, on another part of the Reynolds Track51 viewsAnother shot of the flood plains and the magnetic trmite mounds.
|
|
D3 in the Mary River Flood plains47 viewsIn this part of the world, on the flood plains out to Kakadu, you never get out to wade a creek first as the theory says you should. If the water isn\'t clear, like it was on this causeway, and it is this wide, you either wait for someone else who is braver than you to cross first, or you turn around and go home. These rivers are full of estuarine (salt-water) crocodiles, and they are starting to reach 7 metres in size in some still rare instances. However, seeing as a 2.5m crocodile can kill a grown man,
|
|
D3 in the Mary River Flood plains50 viewsFamily was down South with the In-laws, so I went for a drive on Boxing Day - which is the monsoon time, or \'The Wet\'. Was doing a test run with the off-raod trailer in preparation for the trip I was planning to the Kimberley six months later. Couldn\'t quite make it out of the creek, so a self-recovery was in order. Good thing it all worked, as I didn\'t see another car in over four hours. They were too smart to drive down the track I was on!
|
|
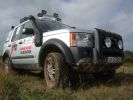
Back of bumper shows pre-fitted fog lamp brackets987 views
|
|
quarry section of challenge85 views
|
|

On top at last351 viewsPhoto at the sumit of Arigna mountains, as part of one of the stages in the 2009 4x4challenge in aid of Temple St childrens hospital. Tough gettin there especially as we towed a Deafner90 up behind us that had bursted an expansion bottle. But the D3 powered on up regardless.
|
|
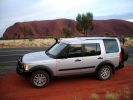
D3 in the Red Centre52 viewsParked opposite Uluru, or Ayres Rock, in April 2009. This is autumn in this part of the world, and the desert is getting cold over night, so there is a brisk wind blowing at sunrise.
|
|
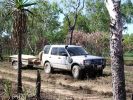
D3 in Kakadu National Park, on the track into the Alligator Billabong47 viewsThis whle area is down on the flood-plain, so in the Wet it is all under a few inches of water. In the dry it has a hard but brittle surface, which is then chewed up in many places by the feral animals with hard hoofs such as buffalo, pigs and horses. This then turns the track into a big dust bowl which is primarily bull-dust - a soft fine powder like talcum powder, which can be many feet deep, and gets into everything. The cover on the trailer is actually black.
|
|
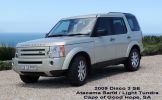
2009 Disco 3 SE Cape of Good Hope , SA76 views
|
|
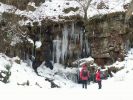
Frozen water fall (sort of) in Goyt Valley68 views
|
|

2010 D4 Official Release Notes158 views
|
|
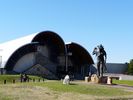
The Stockmans Hall of Fame - Longreach QLD24 views
|
|
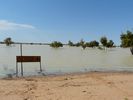
We drove this track in 2008 - East side of 'Big Red' Simpson Desert23 views
|
|
Green desert to East of 'Big Red' - Simpson Desert23 views
|
|
Thousands od Sea Birds Thousands of Km from Ocean - Innamincka28 views
|
|
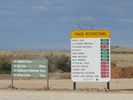
Southern end of Strzelecki Track - Lyndhurst SA24 views
|
|

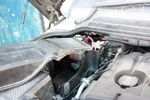
120 viewsTraxide brain mounted. It's mounted slightly tilted towards the front of the engine bay so as to give as much space as possible to the brake vacuum pipe behind it.
|
|
114 viewsBattery to battery cable in place along edge of engine bay
|
|
120 viewsModified aux battery box cover with shape of battery to battery cable. I also removed the tab which was fouling my traxide brain mounting bolts.
|
|
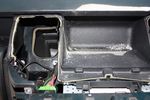
85 viewsDrilling a hole in the rear part of the floor of the dash pocket for the cables to go through
|
|
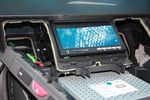
108 viewsTest fitting the screen. The bottom edge of the rear cover of the screen has been already dremeled off in this pic, notable as the circuit board can be seen.
|
|
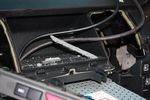
94 viewsCutting a trench in the dash pocket floor to wedge the bottom edge of the screen into
|
|

97 viewsOut at the C pillar. From here wires were threaded through the rear seatbelt anchor point into the commercial box, which is the hub of all the wiring and CarPC installation
|
|
109 viewsThis is the plug for the accessory socket at the rear of the cubby box. On commercial D3 such as this one, there is no accessory socket so this plug is unused. I tapped into the 12V wire as an ignition feed. This will feed a relay coil which opens up power from the aux battery. Like this I can still retro fit and make use of the accessory socket later on.
|
|
99 viewsAll 4 switches in place.
Driver's side switches are:
. Parking sensors master switch
. Reverse camera off/on/reverse-tiggered
Passenger side switches are:
. CarPC off/on/ignition-triggered
. 12V Regulator off/on/ignition-triggered
|
|
80 viewsCarPC closed and ready for mounting. Note the modification to the rear of the case to allow extra USB sockets attached to the motherboard pins.
|
|
97 viewsDeciding on a layout for the electrical stuff. Bottom right of pic is a fusebox which will take the input power from the traxide kit, then relay box and 12V regulator, ignition busbar and homemade regulated 12V busbar. Big black box is the CarPC
|
|

68 viewsJungle of wires coming out of the cubby box
|
|

91 viewsBattery clamp needs to be modified due to the mouldings on the battery top to the side terminals. All that is needed is to cut off the bit as seen.
|
|

79 viewsExtra USB sockets mounted to front of commercial box, just behind cubby box
|
|

roof rails 33 views
|
|
![Filename=2012-03-22_16_30_11[1].jpg
Filesize=234KB
Dimensions=1706x1280
Date added=23.Mar 2012 2012-03-22_16_30_11[1].jpg](albums/userpics/20728/thumb_2012-03-22_16_30_11%5B1%5D.jpg)
Roof Rail Broken 232 views
|
|
![Filename=2012-03-22_16_31_35[1].jpg
Filesize=175KB
Dimensions=1706x1280
Date added=23.Mar 2012 2012-03-22_16_31_35[1].jpg](albums/userpics/20728/thumb_2012-03-22_16_31_35%5B1%5D.jpg)
Roof Rail Broken28 views
|
|

+7,5 cm + 5 cm offroad ANITAS height controller by mdm4x4.com metro49 views
|
|
+7,5 cm + 5 cm offroad ANITAS height controller by mdm4x4.com 256 views
|
|
+7,5 cm + 5 cm offroad ANITAS height controller by mdm4x4.com63 views
|
|
Controller +7,5 cm + 5 cm offroad ANITAS height controller by mdm4x4.com64 views
|
|
Isle of Skye23 views
|
|
Verniciatura roof rack32 views
|
|

waterproof connector for connecting camera on trailer 52 views
|
|
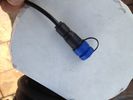
waterproof connector for connecting camera on trailer 48 views
|
|

waterproof connector for connecting camera on trailer 50 views
|
|
148 viewsDetail of d3wing cut to fit d4 lights and bumper
|
|
dont stand out sunroof22 views
|
|
off highway roads get worse20 views
|
|
14 viewsOffroad height but with the big tyres.
|
|
Roof Control panel25 viewsWell.. In reality it does not look as bad.. ;)
|
|
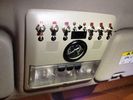
Roof Control Panel33 viewsThe "clean" side
|
|
roof bars14 views
|
|
ta-dah! the final result36 viewscomplete GPS satNav system, with iGO software and ALL maps from europe 2012, including POIs speedcams, and personalized land rover skins
|
|

Freelander headrest 31 viewsremoval of the screen from a freelander headrest
|
|
My MSV2156 viewsNeed more help to get the most out of this tool.
So far used for fault code reading, 4x4 display, suspension tight setting before wheel alignment,
|
|

Opaque switch cover119 viewsKR switch on:off:on used for front and rear spots - but LEDs not visible with coloured switch cover!
(Located in sunroof switch position)
|
|

KR switch with drilled holes118 viewsResults of drilling holes in opaque switch to see LEDs. Simple ideas can be the best - thanks Dad!
|
|
slightlyoffroad16 viewsNear Malvern
|
|
My Landy at 25th birthday of Discovery8 views
|
|

25th Birthday of Discovery6 views
|
|
Bit of polishing required, but good day out!129 views
|
|

Spot of greenlaning in the Kent countryside!89 views
|
|
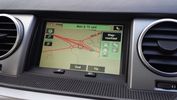
Proof of updated map data23 viewsPostal code CH4 0FB
Showing roundabouts where on current LR DVD are none.
|
|
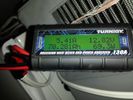
battery consumtion356 views24 hour power usage of an Engel 32L + NL 72L at 1c & -18c freezer in 80-92 degree heat in the shade. That's about 70amp hours.
|
|
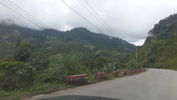
R318 views295km of winding roads
|
|
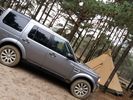
Jänschwalde offroad0 viewsTenTipi safir9 with stove
|
|
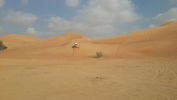
offroading dune bash15 views
|
|
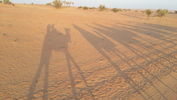
offroad camel trophy19 views
|
|
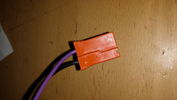
Side view of connector12 views
|
|
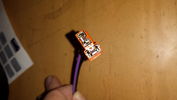
End of connector8 views
|
|
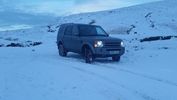
Gospel Pass Jan 2015146 viewsThe Gospel Pass (Welsh: Bwlch yr Efengyl) is the highest road pass in Wales. It is at the head of the Vale of Ewyas in the Black Mountains of southeast Wales.[1] The narrow mountain road climbs steeply from Hay-on-Wye to a height of 549 metres (1,801 ft) [2] above sea level, squeezing between the mountains of Twmpa to the west and Hay Bluff to the east, before dropping down into the valley to the south on its way to Llanthony Priory, Llanfihangel Crucorney and Abergavenny.
|
|
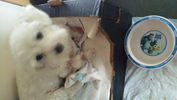
missy home 210 viewsmissy home from vets after week of investigation - treatment
|
|
missy home 113 viewsmissy home from vets after week of investigation - treatment
|
|
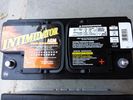
Deka 9A49 AGM Intimidator327 viewsThe Deka 9A49 AGM Intimidator makes an excellent primary battery alternative to the factory or Interstate. Made in US of premium quality. This is an excellent match with the Traxide system w/another Deka or Yellow Top optima.
This will behave properly in your D3/4 LR3 with slightly less wear and tear on your alternator.
|
|
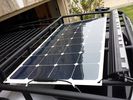
solar roof install444 viewsMore or less wrapped up my solar installation today. I added a Grape Solar Flex 100W panel, it's adequate to keep the vehicle topped off with the Fridge running, and Ham, but it could lose some ground if transmitting depending on how much, 2 would be awesome. One is enough, but barely. I am quite impressed with the Grape Solar flex panel version 2.0.
https://www.facebook.com/DifferentialPartsUS
|
|
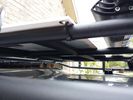
solar panel install355 viewsAt least at this point, I mounted it by using Clear Silicone RTV. This stuff is kind of like glue, but can be removed. If it doesn't hold up after curing and driving, I'll remove it and come up with another plan. I used heavy cable ties on the 4 grommets, in case it lets loose, it won't take out my wiring and the car behind me. 2 Panels are dandy like this, but I don't want to permanently block the roof space. Grape Solar to power my snomaster fridge
|
|
low profile solar panel211 viewsThe low profile solar panel, can be seen here, as the fine white line under the light bar. The way it's laid out, the panel should generate decent power between 10am and 4pm depending on the time of year, from the sides or front, with no shadows. Grape Solar 100W flex panel.
https://www.facebook.com/DifferentialPartsUS
|
|
Traxide USI-160 Install515 viewsOverview picture of Traxide USI-160 upgrade install. This was an upgrade from the SC80 which performed flawlessly. The USI-160 had two relays and can deliver more amperage. As a result, the wiring was upgraded to 4/0 Welding Cable (warn) and heat shielding was added. The unit performs flawlessly to support 2 HAM Radios, Fridge, etc. Like me https://www.facebook.com/DifferentialPartsUS
|
|
Winch Power upgrade318 viewsUsing 2 warn kits, and removing one of the wires to use on another project. The purpose was to replace the power and ground wire. I used Warn kits, which are 4/0 Welding cable. The original red #4 warped from getting a little too worn. The 2nd
Battery #1 Deka 9A94 AGM Intimidator, Battery #2 Deka 9A47 AGM Intimidator WARN 36080 28" Quick Connect Cable X 2, WARN 26405 Quick Connect Cable 7' X 2, WARN 15901 Black Cable X 1 -- winch control 72" X 1 https://www.facebook.com/DifferentialPartsUS
|
|
Off road hight 245 views
|
|
Off road hight 31 views
|
|
Wiring341 viewsThis is the final wiring configuration. It shows the dual battery wiring, 75A wiring run to the boot, the winch and in the lower right you can see a few turns of coax with a snap on ferrite near the base of a VHF Antenna.
|
|
gauged head 15 viewsresult of bending down to pick up LTO tape for robot library and standing backup with door open (
|
|

offending part head caught 12 viewsoffending part head caught when standing back up from picking up dropped LTO tape
|
|
End of the runway :-(15 views
|
|
Thread upload22 viewsImage uploaded in thread 172661
|
|
Thread upload26 viewsImage uploaded in thread 172661
|
|

Thread upload22 viewsImage uploaded in thread 184721
|
|

Thread upload22 viewsImage uploaded in thread 184721
|
|

Thread upload22 viewsImage uploaded in thread 184721
|
|
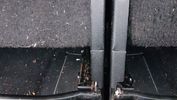
RAW jack4 viewsCasing just catches the inner legs of the seat backs.
|
|

Injector leak off pipes4 views
|
|

Front Differential Description and Operation1543 viewsThe 4 page pdf describes of the operation of the front differential plus displays an exploded view of the front differential.
The fill plug is item 36 and the drain plug, item 8.
It is suggested one first unscrew the fill plug before unscrewing the drain plug - and it might take two different wrench sizes, hence get this detail sorted out before any oil drains out.
|
|

Anti Lock and Traction Control description and operation.1986 viewsNote on page 6 of this 17 page pdf the significance of the Steering Angle sensor mounted on the steering wheel shaft. The paragraph regarding the plausibility check as related to the brake pedal being not depressed is why the clean operation of the second set of contacts on the brake switch matters so much.
|
|
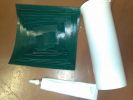
Contents of repair kit154 views
|
|

Near the lost city of Uber18 viewsIn the empty qualter
|
|

Steering Column detailing Steering Angle Sensor1496 viewsItem 2 in the picture on page 1 of the 9 page pdf shows the location of the steering wheel sensor. Page 5 of the pdf has a paragraph describing the operation of the sensor. When the steering wheel does not point the same direction as the real wheels, then the computers can put the 3 into safe mode and down goes the suspension. See also the 17 page pdf on the Anti Lock and Traction Control pdf.
|
|

Thread upload7 viewsImage uploaded in thread 167409
|
|

C0506R61 viewsDescription: ABS module
Location: Rear of engine compartment - driver side
|
|
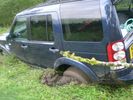
The stuck D4 55 viewsThe problems of going first
|
|
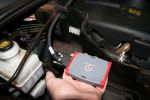
TT Box Size125 viewsSize of the new TT box shown in my hand
|
|

Wating for the proffessionals!44 views
|
|
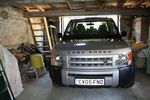
Using Mums garage to keep sun off sleeping daughter.... fit wise a bit tight 65 views
|
|
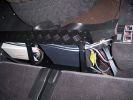
HF radio on RH side Inverter on LH. Frame is fitted behind second row of seats. (I have removed 3rd row as they will never be used)310 views
|
|
Unused clip slot to the front of the airfiler housing102 views
|
|
Possible Location for wireless remote box situated to the front of the airfilter housing112 views
|
|
The proffessionals at work or is it play!56 views
|
|
This road isnt on a bus route!124 viewsWent to see how my new house is looking in Czech Republic, this is one of two roads out of the village
|
|
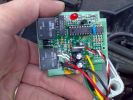
Front of Superwinch Remote Circuit93 views
|
|
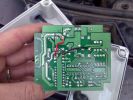
Rear of Superwinch Remote Circuit Board85 views
|
|
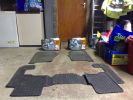
Lights and mats286 viewsD3 headlights and a set of mats
|
|

Test25 views
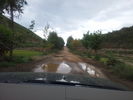
|
|
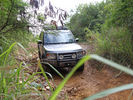
Hunting289 viewsCALENDAR 2011 ENTRY
This is in Puerto Rico. Easy local trail. Point of view of an iguana :-)
|
|
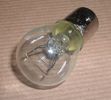
Land Rover Stop Tail Light dual filament bulb nominal 12 volt 21 / 5 watt filaments1427 viewsThis is the Land Rover part number 264590 dual filament bulb, (P21/5), that inserts into the upper two tail lamp receptacles. In the upper one, both filaments function, in the lower one, only the 5 watt tail light filament functions.
I regard it as not a good practice to routinely switch bulbs when the tail light filament, (5 watt), burns out on the lower bulb. The broken filament can jiggle over onto the brake light filament, (21 watt), and short the circuit to ground or something else not predicable.
There are also arguments to say that quality control is better on the Land Rover marketed bulbs than say far east sourced bulbs. Filament construction, and hence resistance can vary and mislead the current sensing circuits monitoring the signal light systems. Also when the bulbs are properly installed, all filaments should be standing vertically and not at any slope.
These are the sort of obscure circumstances that can lead to false trouble messages on the display, dropping to the stops, and subsequent concerns - all over a tail/signal light bulb.
For example, the filament life of both the tail light and the brake light filaments in the P21/5 bulb is significantly less than the USA common 1157 dual filament bulb, (1000/250 vs 5000/1200 hours); brightness in the P21/5 is a bit more, (3cp/35cp vs 3cp/32cp where cp is candle power), but current consumption is oddly less, (0.44a/1.86a vs 0.59a/2.10a where a is amps). It is the quest for efficiency vs maintenance trade off.
|
|
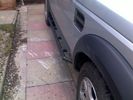
My new slider/steps - sideview offside264 views
|
|

Off road map in Garmin navigator253 views
|
|
We could not shake him off,and he loved it141 views
|
|
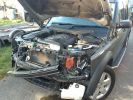
Old bumper off119 views
|
|
Charge Air Pipe - turbo end.101 viewsThe maint manual identifies releasing the pipe hose clip in the center of the photo. Pity who ever built this engine Put the hose in such a position that access to it was near impossible. I released the other clip at the turbo end of the flexi hose. Easy to get to but a right git to release the hose of the turbo.
|
|

Air con pipe65 viewsIts the brown pipe in the center of the photo. To remove this first you need to remove the "charge air cooler inlet hose" to allow access to the air con pipe securing fixings. But with the "charge air cooler inlet hose" disconnected it can\'t be removed from the veh because the air con pipe is in the way???
|
|
position of buttons for Parrot phone102 viewsthis can be put basically anywhere as it connect via bluetooth to the rest of the system. It is self powered (lithiam battery in it) so just stick it anywhere with no requirements for finding a live wire etc
|
|
trying all settings but still no sucess even with DSC off281 views
|
|
S2a Roof Off5 views
|
|
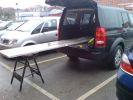
292 viewsNeeded 1.8m of worktop but had to buy 3m length. Took B&D workmate with me and cut it down to size in the car park! Notice how the workmate is exactly level with D3 in normal height!
|
|
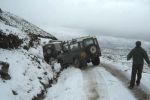
2 90's off at Lochearnhead208 viewsGuess this was why we turned round.
Photo pinched from SLROC website!
|
|
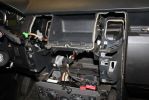
02279 viewsDash center console off and factory head unit out. LR clips suck.
|
|
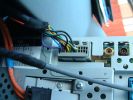
3 Dash Loom Rear of Display56 views
|
|
Off with the taillights240 views
|
|

Filter attached to bottom of pump83 views
|
|

Cooper Zeon LTZ 285 60 18110 views
|
|

roof rails 1108 views
|
|

ZF 6HP26 Transmission Cooling System Description and Operation2936 viewsThe five page pdf details the operation of the cooling system as related to cooling engine oil, transmission oil and providing hot water to the cabin heating system.
|
|

Engine Accessory Drive Description and Operation882 viewsThis 2 page pdf shows both belts for the 4.4L petrol V8; the primary serpentine belt, (the long one), and the shorter secondary that drives only the radiator cooling fan.
The various accessory pulleys the two belts are each associated with are numbered and an included table describes each.
When replacing belts and pulleys, count the number of grooves on both your old items and your new replacement parts. It has been known for an pulley with the wrong number of grooves to come with a replacement part or the replacement belt has the incorrect number of grooves; hence make certain the groove count on the new parts are the same as the removed items.
|
|

36 views
|
|
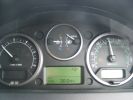
30mpg after 170miles of A & B roads436 views
|
|
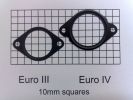
Photo of Euro III and Euro IV plates to show difference127 views
|
|
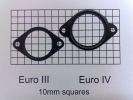
Photo of Euro III and Euro IV plates to show difference145 views
|
|
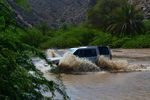
Carwash19 viewsThis seems a long time ago - down on the east coast of Oman
|
|
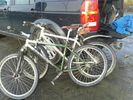
What 4x4's are for ...150 viewsThrowing a bunch of kit in back of an taking it places.
|
|
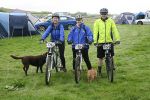
The rest of the team!67 views
|
|
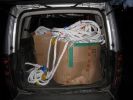
A load of old rope75 views210Kg of recovery ropes (38 ropes)
|
|
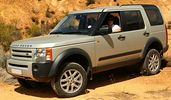
There she is!5 views2008 TDV6 SE on Du Toitskloof Mountains
|
|

Thread upload1 viewsImage uploaded in new thread
|
|
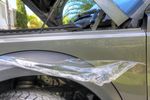
Taking damaged wrap off...192 viewsOnly because of the REAL damage to the car....
|
|

Leaning163 viewsThis is an example of the leaning against the mud walls.
|
|

Mud walls157 viewsMost of the trip!
|
|

Billing Off-Road Course Water Splash43 viewsLottie\'s first off-road experience at the Billing off-road course with MikeS providing some vital guidance!
|
|

Thread upload17 viewsImage uploaded in thread 32988
|
|

3 Point Hitch on Series 90152 viewsUsually one sees the Series units with just a conventional field plow hooked to a drawbar hitch, tractor style. This jpg however is the full meal deal - a 3 point hitch, probably off a Fordson tractor, in the long tradition of Ford/Land Rover cooperation.
|
|
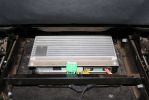
03285 viewsStock amp, underneath passenger front seat. In order to integrate the factory head unit with the V1000 we had to go through the stock amp. This is because of the MOST (fiber optic) connection between the two.
|
|
4 Where to cut soft dash55 views
|
|
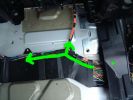
4 ICE Loom - routing of cable behind drivers seat58 views
|
|
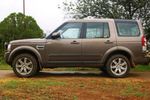
Normal height at off-road height (+50mm approx)201 views
|
|
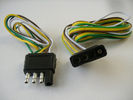
4 pin NAS flat connector from NAS small trailer382 viewsThe connector with the three exposed pins is the end that would commonly be located at the trailer hitch end, (front), of a small NAS lightweight trailer that has no electric brakes. This plug would connect into the flat 4 pin connector at the rear of the 3.
Note the order of the pin functions and wire colours: White is ground; the next pin is for tail/marker lights using the Brown wire; the Yellow conductor is for the left turn signal, and the far pin uses the Green conductor for the right turn signal.
There is no separate brake light conductor as NAS spec vehicles most often combine the brake and signal light functions to the same bulb filament rather separate filaments in different bulbs. The LR factory harness resolves that design difference.
Fortunately, the Land Rover NAS assembly pin order for the 4 pin flat plug maintains the above described conventions.
|
|
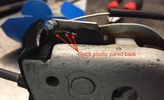
Close-up of lock showing emergency cable and pared back plastic tab141 views
|
|

41 views
|
|

50 views
|
|
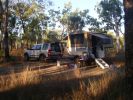
Kangaroo Creek - Savannah Way east of Borroloola118 views
|
|

Air Distribution and Filtering Systems2083 viewsThis is 3 page pdf with coloured drawings of the air distribution ducting for the front air system.
Also included is a sketch of the pollen filter location within the front heater ducting. Note that two types of filters are available: a) the cheaper dust/pollen filter and b), the activated carbon filter that removes smells from the air. Installing the more expensive activated carbon filter means you never smell a cattle truck or chicken farm again. It really works.
|
|

Front Heater Doors Description and Operation1396 viewsThis 6 page pdf shows with coloured drawings the air flow thru the front heater as well as discusses the operation of the various air flow doors.
|
|

Air Conditioner Specifications 4.4L V81569 viewsThis 2 page pdf is just the specifications for the AC system. The refrigerant type is R134A.
Note that when topping the system up, it can be a good idea to include some of that ultra violet light dye that will glow to show leaks and loose fitting.
|
|

Alternator and Regulator Wiring Diagrams, TDV6 and petrol V8 and V61989 viewsThis is a three page pdf that shows the alternator and regulator wiring for the petrol V6, petrol V8 and TDV6. The pdf can be either printed or by right clicking on the displayed pdf, rotated as required for viewing.
Of interest is that the regulator gets its instructions primarily from the Engine Control Module (ECM) and only secondarily from the vehicles electrical buss. The conductor from the battery thru the 5 amp fuse F20E is to provide initial power to excite the alternator at startup and then secondarily, to instruct it if the PWM signals were not available. Primary instructions to and from the ECM are thru the two other conductors via a digital like Pulse Width Modulated (PWM) signal.
If F20E, the 5 amp engine compartment fuse box fuse is blown, the red alternator light on the dash will be illuminated. This means that the alternator could be OK, but if the F20E fuse is blown, no electricity will be generated. Hence check the F20E fuse if you get a red ALT light or some indication of the alternator not working.
Regarding operation of the red ALT light on the dash, it is not the regulator within the alternator that tells the red light to illuminate, or not, but instead the ECM. This is the reason the red light does not function in the same manner as with older vehicles. With the 3, sometimes you have illumination and sometimes not depending upon what the ECM is thinking. What this means is that you can have an alternator that is failing but the red light does not illuminate as the ECM is compensating for reduced alternator output - maybe by draining the battery and or cutting back on vehicle electrical loads such as shutting off or cycling the radio amplifier or heated seats.
|
|

Alarm System description and Operation1052 viewsThis 9 page pdf explains in detail how the anti-thief, (alarm), system is supposed to operate. The system uses the door ajar switches to provide alarm system signals; as such there are few separate contacts related to the alarm system only.
Page 6 of 9 is of particular interest as it describes the trigger log that is accessible with the dealer T4.
|
|

GPS NAV system components and operation999 viewsThis 16 page pdf describes the operation of the GPS navigation system and provides pin outs and equipment layouts. The GPS antenna amp and location is also shown.
|
|

47 views
|
|
OFF CAMPING!63 views
|
|
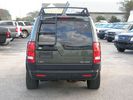
Rear ladder with expedition roof and taillight guards58 views
|
|

TWOR 0754 views©theworldoffroad
|
|

TWOR 0550 views©theworldoffroad
|
|

TWOR 0347 views©theworldoffroad
|
|

TWOR 0141 views©theworldoffroad
|
|
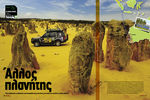
TWOR 0640 views©theworldoffroad
|
|

TWOR 0445 views©theworldoffroad
|
|
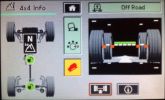
spare screen 4x4 info91 views
|
|
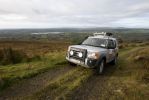
asscent to the top of Arigna mountain65 views
|
|
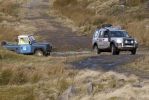
58 viewsColdweathers, classic 90 blew up its expansion bottle, he was glad of the ride to the top but funnily enuf didnt want a tow to the bottom, some say it may have been due to the fact that his 90 looked like it had been taken jet sking on the back of a D3
|
|
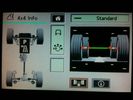
4x4 Info on MY0541 viewsPicture taken of 4x4 info screen on my 2005HSE with no known software updates done.
|
|
Thread upload37 viewsImage uploaded in thread 102519
|
|
5 Where bottom of pocket attaches to dash55 views
|
|
5 ICE Loom - Location of pre fitted Voice / Speed pulse connector67 views
|
|
Off-road height + 50mm270 views
|
|
Roof Rail Screw Receptor Bung Removal37 viewsRoof Rail Screw Receptor Bung Removal
|
|

Wipers, Front and Rear, plus Washers description and operation.818 viewsThis 17 page pdf describes how the wipers, front and rear, plus the washers are intended to operate. Also described is how the rain sensor is designed to function along with a table of the wiper delay timing parameters.
|
|

Roof6 views
|
|
H4H 4x4 European Rally 2012 - Belguim Mud!8 viewsOff roading day during the first week of the rally 2012.
|
|

Even in Oman they have water splashes!104 viewsThe sheer joy of driving through fresh water in a mountain wadi. Rare enough to find running water when it isn\'t raining, but to drive through too is a real bonus for us Middle Eastern ex-pat drivers!
|
|

Matzker photo showing their car using 25mm wheel spacers. Thus the outboard look of tires.406 views
|
|

My Working Girls24 viewsLast day of the season 2012 picking up.
|
|
6 close view of where the pocket is bonede to bottom of dash58 views
|
|
| 3774 files on 10 page(s) |
 |
1 |  |
 |
 |
 |
 |
 |
 |
 |
 |
|