| Search results - "nl" |
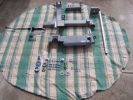
The full complement of bits and pieces, major parts back from the powder coaters, all bolts nuts washers replaced with stainless steel240 views
|
|

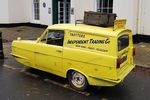
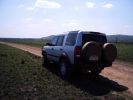
A look alike G4 from 2008 120 viewsA look alike G4 from 2008 (for sale in Holland)
http://autoscout24.nl/Details.aspx?id=vnyzslgvfoja
|
|
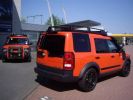
A look alike G4 from 2008108 viewsA look alike G4 from 2008 (for sale in Holland)
http://autoscout24.nl/Details.aspx?id=vnyzslgvfoja
|
|
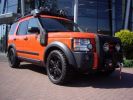
A look alike G4 from 2008117 viewsA look alike G4 from 2008
http://autoscout24.nl/Details.aspx?id=vnyzslgvfoja
|
|
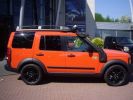
A look alike G4 form 2008128 viewsA look alike G4 from 2008 (for sale in Holland)
http://autoscout24.nl/Details.aspx?id=vnyzslgvfoja
|
|
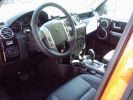
A look alike G4 from 2008116 viewsA look alike G4 from 2008 (for sale in Holland)
http://autoscout24.nl/Details.aspx?id=vnyzslgvfoja
|
|
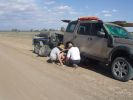
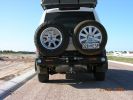
03 First bit of tyre/wheel trouble243 viewsIn the outback a tyre suddenly blew. "No worries" we thought, as we had 3 spares (+ two more if we abandoned the trailer), 150l of water, 3 days of food, and an EPIRB if things got really bad. At the time I didn\'t fully appreciate the fact that my index got a blister from the burning heat of one of the wheel nuts. It was 45 deg C at the time, so everything was hot.
|
|

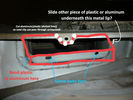
Tagliare per eliminare parte del coperchio - Cut to remove part of the cover14 viewsE' meglio prima levare il circuito stampato e poi la lama della chiave, per evitare di danneggiarlo. Tagliare sopra il tasto superiore per rimuovere solo la parte con i tasti.
Is better to remove the printed board first then the key, to prevent damage. Cut over the top button to remove only the part with the buttons.
|
|

Eindreid brú18 viewsMost bridges is only one car wide.
|
|
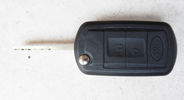
Chiave finita - Finished key14 viewsHo iserito il tutto nel nel nuovo contenitore pagato €4,00, ho incollato con la colla cianoacrilica, ne basta poca, e questo è il risultato.
I put all in the new container paid € 4.00, I glued with super glue, it only takes a little, and this is the result.
|
|
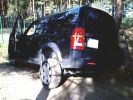
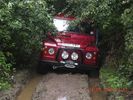
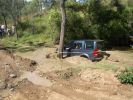
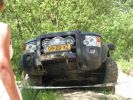
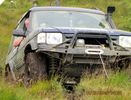
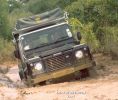
Not stuck - only got out to take a picture :) Picture taken at Offroad-Training in Linthe/Germany140 views
|
|
![Filename=0_90895_892fd502_L[1].jpg
Filesize=53KB
Dimensions=500x306
Date added=05.Nov 2013 0_90895_892fd502_L[1].jpg](albums/userpics/38239/thumb_0_90895_892fd502_L%5B1%5D.jpg)
only leds14 views
|
|
Thread upload1 viewsImage uploaded in thread 186251
|
|

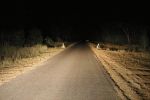
Standard Vehicle Low Beam Lights Only (Bi-Xeons)32 views
|
|

15 First sign of bits of parking brake failure335 viewsNote the complete lack of pad from the parking brake. Not only was there no composite brake material left, but the drum was somewhat twisted and connecting bits all smashed. Also a small drip of melted rubber from wheel bearing parts....
|
|
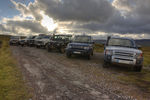
On Grasshill Causeway69 viewsA selection of D3's, a D4 and a couple of Defenders on Grasshill Causeway the highest greenlane in the UK
|
|
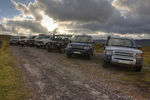
On Grasshill Causeway 319 viewsA selection of D3's, a D4 and a couple of Defenders on Grasshill Causeway the highest greenlane in the UK
|
|
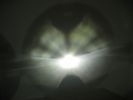
This is a normal H7 HID bulb installed in a BMW headlight to show glare above cut off line96 viewsThis is what the light pattern is that causes glare in most retofit applications including some projector lights. this is in fact a projector headlight on a BMW but the old projectors were only actually half projectors and half reflective bowls. the beam pattern should be clean cut like this ___/
|
|
This is the Standard Hi-Beam only (Bi-Xeons)31 views
|
|

Local WA newspaper article on D3 Theft168 viewsThe article is info by police public affairs. They wanted something to keep people locking doors and taking care during the holiday period. There are also TV public service announcements on air in WA featuring my wife confessing to leaving 1 door unlocked leading to the theft.
|
|

Spot of greenlaning in the Kent countryside!88 views
|
|
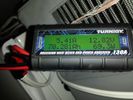
battery consumtion348 views24 hour power usage of an Engel 32L + NL 72L at 1c & -18c freezer in 80-92 degree heat in the shade. That's about 70amp hours.
|
|
Thread upload0 viewsImage uploaded in thread 207334
|
|

Thread upload16 viewsImage uploaded in thread 171455
|
|

On Solar237 viewsOn Solar, Snomaster Fridge, Ham Radio and 100W Grape Solar panel, Deka 9A94R Intimidator AGM. I can supply the Stainless Snowmaster Fridges. Other components if you need help.
|
|
108 views
|
|
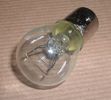
Land Rover Stop Tail Light dual filament bulb nominal 12 volt 21 / 5 watt filaments1412 viewsThis is the Land Rover part number 264590 dual filament bulb, (P21/5), that inserts into the upper two tail lamp receptacles. In the upper one, both filaments function, in the lower one, only the 5 watt tail light filament functions.
I regard it as not a good practice to routinely switch bulbs when the tail light filament, (5 watt), burns out on the lower bulb. The broken filament can jiggle over onto the brake light filament, (21 watt), and short the circuit to ground or something else not predicable.
There are also arguments to say that quality control is better on the Land Rover marketed bulbs than say far east sourced bulbs. Filament construction, and hence resistance can vary and mislead the current sensing circuits monitoring the signal light systems. Also when the bulbs are properly installed, all filaments should be standing vertically and not at any slope.
These are the sort of obscure circumstances that can lead to false trouble messages on the display, dropping to the stops, and subsequent concerns - all over a tail/signal light bulb.
For example, the filament life of both the tail light and the brake light filaments in the P21/5 bulb is significantly less than the USA common 1157 dual filament bulb, (1000/250 vs 5000/1200 hours); brightness in the P21/5 is a bit more, (3cp/35cp vs 3cp/32cp where cp is candle power), but current consumption is oddly less, (0.44a/1.86a vs 0.59a/2.10a where a is amps). It is the quest for efficiency vs maintenance trade off.
|
|
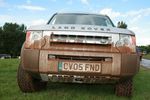
Stonleigh52 views
|
|

27 views
|
|
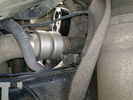
Charge Air Inlet hose - front mounting bkt86 views
|
|
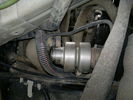
Charge Air Inlet hose67 views
|
|

Air con pipe65 viewsIts the brown pipe in the center of the photo. To remove this first you need to remove the "charge air cooler inlet hose" to allow access to the air con pipe securing fixings. But with the "charge air cooler inlet hose" disconnected it can\'t be removed from the veh because the air con pipe is in the way???
|
|
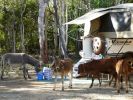
Camp visitors - Charnley River Station106 views
|
|

Engine Accessory Drive Description and Operation872 viewsThis 2 page pdf shows both belts for the 4.4L petrol V8; the primary serpentine belt, (the long one), and the shorter secondary that drives only the radiator cooling fan.
The various accessory pulleys the two belts are each associated with are numbered and an included table describes each.
When replacing belts and pulleys, count the number of grooves on both your old items and your new replacement parts. It has been known for an pulley with the wrong number of grooves to come with a replacement part or the replacement belt has the incorrect number of grooves; hence make certain the groove count on the new parts are the same as the removed items.
|
|

Frank Hann Boab - Charnley River Station, Gibb River Road99 views
|
|

Thread upload3 viewsImage uploaded in new thread
|
|
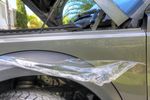
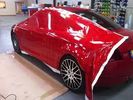
Taking damaged wrap off...192 viewsOnly because of the REAL damage to the car....
|
|
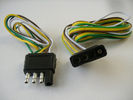
4 pin NAS flat connector from NAS small trailer377 viewsThe connector with the three exposed pins is the end that would commonly be located at the trailer hitch end, (front), of a small NAS lightweight trailer that has no electric brakes. This plug would connect into the flat 4 pin connector at the rear of the 3.
Note the order of the pin functions and wire colours: White is ground; the next pin is for tail/marker lights using the Brown wire; the Yellow conductor is for the left turn signal, and the far pin uses the Green conductor for the right turn signal.
There is no separate brake light conductor as NAS spec vehicles most often combine the brake and signal light functions to the same bulb filament rather separate filaments in different bulbs. The LR factory harness resolves that design difference.
Fortunately, the Land Rover NAS assembly pin order for the 4 pin flat plug maintains the above described conventions.
|
|

Alternator and Regulator Wiring Diagrams, TDV6 and petrol V8 and V61973 viewsThis is a three page pdf that shows the alternator and regulator wiring for the petrol V6, petrol V8 and TDV6. The pdf can be either printed or by right clicking on the displayed pdf, rotated as required for viewing.
Of interest is that the regulator gets its instructions primarily from the Engine Control Module (ECM) and only secondarily from the vehicles electrical buss. The conductor from the battery thru the 5 amp fuse F20E is to provide initial power to excite the alternator at startup and then secondarily, to instruct it if the PWM signals were not available. Primary instructions to and from the ECM are thru the two other conductors via a digital like Pulse Width Modulated (PWM) signal.
If F20E, the 5 amp engine compartment fuse box fuse is blown, the red alternator light on the dash will be illuminated. This means that the alternator could be OK, but if the F20E fuse is blown, no electricity will be generated. Hence check the F20E fuse if you get a red ALT light or some indication of the alternator not working.
Regarding operation of the red ALT light on the dash, it is not the regulator within the alternator that tells the red light to illuminate, or not, but instead the ECM. This is the reason the red light does not function in the same manner as with older vehicles. With the 3, sometimes you have illumination and sometimes not depending upon what the ECM is thinking. What this means is that you can have an alternator that is failing but the red light does not illuminate as the ECM is compensating for reduced alternator output - maybe by draining the battery and or cutting back on vehicle electrical loads such as shutting off or cycling the radio amplifier or heated seats.
|
|

Thread upload23 viewsImage uploaded in thread 188003
|
|

Alarm System description and Operation1039 viewsThis 9 page pdf explains in detail how the anti-thief, (alarm), system is supposed to operate. The system uses the door ajar switches to provide alarm system signals; as such there are few separate contacts related to the alarm system only.
Page 6 of 9 is of particular interest as it describes the trigger log that is accessible with the dealer T4.
|
|
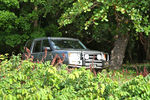
279 viewsCALENDAR 2011 ENTRY
This is in Puerto Rico. LR3 parked in the shade while we hang-out at a secluded beach that can only be accessed in 4x4.
|
|
Ooops, found the mountain bike trail. KW Hydrocut15 viewswe were out one day and suddenly I seemed to recognize the power lines, and the fact that the mountain bike trail runs alongside the lines.
This is obviously a wide section of trail, but it's still the KW Hydrocut mountain bike trail.
|
|
3 views
|
|
EGR Blanking212 viewsBlanking plates cut from stainless steel plate.
|
|

124 viewsThis is the installation guide from the manufacturer
|
|

3 views
|
|
Genlabs 225 views
|
|

Add A Circuit Littelfuse Data sheet2264 viewsThe switch connects to what Littelfuse brand calls an Add-A-Circuit model FMH200BP which is an adapter that plugs in place of a Mini fuse and then has space for two Mini fuses, (original and a second one). In this install, only the original 5 amp fuse was used - adapter was so as to route power from fuse box thru fuse, then rocker switch, and then back to fuse box.
Before you install the Add A Circuit for this application, take an ohm meter and trace out the circuit path of the four slots that fuses could insert into. The path is more complicated than one might first think. As such, the orientation of the fuse holder in the socket matters for this application - that is for a circuit diverter, rather than accessory adder.
|
|

Thread upload11 viewsImage uploaded in new thread
|
|

Land Rover Aerial Fin images for both Glass and Metal Roof Disco3 / LR3850 viewsAs well as the two different fins, this pdf also shows the plastic blanking plate for glass roof vehicles where no fin is installed.
The glass roof fin is secured by two security screws from the top into a plastic frangible glue on gasket. The hope is that when struck, the fin will shear off and not crack the glass roof. Re the metal roof design, the fin is secured from underneath via two nuts.
The pdf also shows the various electrical bits related to the antennas. In the UK, the fin would house not only a cell phone antenna but the TV and satellite radio antenna electronics as well; in the States, the Sirius sat radio antenna and a G type cell phone antenna if the phone kit was installed would reside within the fin. The SAT NAV GPS antenna is located within the High Mount Brake Light plastic mounted to the upper rear hatch.
|
|
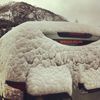
alps D3 2013294 viewsonly for forums members,please!!!
|
|
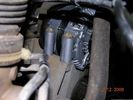
58 viewsOne bolt is visible at the front, but the other two are down the left hand side and best accessed by removing the small plastic guard behind the bumper. I also removed the small metal radiator guard between the bumper and the main sump guard (but that was mostly to retrieve the spanner I dropped!). The only issue with removing the plastic guard is the stupid plastic clips that hold it on may need to be replaced.
|
|
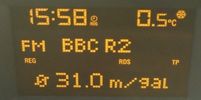
Astra 1.6 fuel consumption29 viewsFuel consumption of a 1.6 petrol Astra after a return trip from Aberdeen to Peterhead.
And yes I know i am sad listening to radio 2, but it was the only station I could understand up there.
|
|

Our Trip Apr-Aug 2008132 viewsGosford to: Broken Hill, Innamincka, Birdsville, Alice Springs, Bungle Bungle NP, Broome, Gibb River Rd to Mitchell Falls and then Kunnunurra, Darwin (for tail gate Repair), Normanton (via Roper Bar, Borroloola, Lawn Hill, Burketown), Townsville, down coast to Noosa then inland to home. TRACK TRACE BY TRACKRANGER SOFTWARE ON ASUS UMPC.
|
|
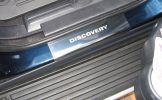
Stainless rear sill covers371 views
|
|

Thread upload7 viewsImage uploaded in new thread
|
|
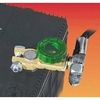
Battery Disconnect Wirthco 20308 Knob Top Post 889 viewsThis is a battery post style disconnect, usually for the negative terminal. There is a hole drilled in the round end off the battery so that flat terminal can be attached as well as the normal battery post terminal. I did not use this hookup arrangement, however I show it for information only.
|
|
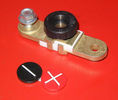
Battery Disconnect side post with + & - caps, top view616 viewsThis disconnect is designed for side post batteries. It can be used on either the + or - terminals. It can also be installed at the "other" end of the battery cable as well. In my install of the Aux battery, I installed this on the negative ground cable where the cable attaches to the body sheet metal. I have never used it but it seemed like a good idea at the time. The main battery hookup is pure stock.
For the hot side of the Aux battery, an Anderson PowerPole was used inline for the cable between the Aux and connecting to the spare bolt hole at the + post of the Main battery cable.
|
|
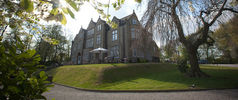
Woodlands Hotel5 viewsGreen Oval Garage would like to say thank you to the Woodlands Hotel in Leeds for allowing us the use of their beautiful grounds for all our future photos shoots.
Woodlands is one of the finest luxury hotels in Leeds. This boutique hotel is set in beautiful landscaped grounds on the outskirts of Leeds city centre, just 2 minutes drive from junction 27 of the M62 motorway, with 23 individually designed bedrooms and an award winning restaurant. Packed with character, this lovingly restored hotel is only three miles from the vibrant, cosmopolitan city of Leeds with superb nightlife and unrivalled shopping.
Woodlands also offers a stylish and contemporary functions venue for all kinds of social and business events. Our three stunning event spaces are suitable for everything from wedding ceremonies and receptions, to corporate meetings and events. The permanent marquee, attached to the hotel, can accommodate up to 150 for dining and 200 for evening parties and receptions, making it one of the most elegant settings for a wedding venue in the Leeds area.
For more information or to make a booking, please contact us on enquire@woodlandsleeds.com or 0113 2381 488
|
|
Thread upload18 viewsImage uploaded in thread 116743
|
|

285 viewsMake sure you have the sound on....
|
|
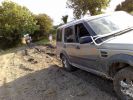
Mud at Last201 views
|
|
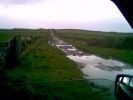
Black Lane, Mellor Moor167 viewsLooking at tread marks, appears to be only tractors that come up here of recent - until me!
|
|
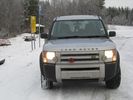
A short stop before entering Finland. October 201029 views
|
|
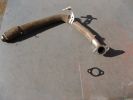
EGR Blanking202 viewsBlanking plates cut from stainless steel plate.
|
|
D3 Side Step Repairs185 viewsThere are about 10 rivets to drill out. I also increased the hole size to 5.5mm as I will be using larger rivets to hold the trim back in place. 5.5mm is the larger rivet size commonly available at motor factors etc.
|
|
Thread upload18 viewsImage uploaded in thread 110937
|
|

Can Bus10 views0s - Start of trace
5s - unlock 1
10s - ignition on (In-I-II)
30s - ignition off (II-I-Out)
Non accurate timings - +/- ~2s.
|
|
92 views4x4's only on this rough trip.
|
|

BKS WHEN ONLY THE BEST WILL DO99 views
|
|
All at sea in an LR3103 viewsThe ferry from the mainland to Mazira Island was packed to the gunnels with vehicles. My LR3 was last on and they left the bow doors partially open for 14 lonnnnng sea miles across the Arabian Gulf!
|
|
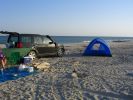
Campsite on Mazirah208 viewsA fabulous deserted sandy beach that runs for miles on the east coast of Mazirah Island, off the Omani mainland , views across the Arabian Gulf, and turtles and hatched terrapins.
|
|
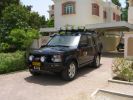
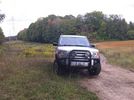
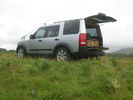
RHS view371 viewsSHows the Front Runner (SA) slimline windcheetah rack which is immensely strong. Takes my 110kg (oh gawd, I must get back on the diet and exercise regime) tramping over it when loading/unloading gear without a problem. Fittings are simply fixed or removed, and IMO very well designed and made. IPF 800 series driving and spots fitted to the front of the rack. IPF cam/reversing fitted each side and to rear of rack for negotiating rocky wadis at night. The G4 stickers were bought off E-bay as a set.
|
|
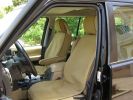
\'Escape\' canvas seat covers269 viewsFull set of these well made SA seat covers fitted to protect the Alpaca leather from constant exposure to Middle EAst sunlight and sand. They fit well, and to date have proved very durable. They include headrest and arm rest covers too.
|
|
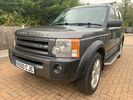
Thread upload1 viewsImage uploaded in thread 126959
|
|

Thread upload1 viewsImage uploaded in thread 126959
|
|

COMM FAILURE in the Faultmate FCR77 viewsThis is ONLY shown if either you have a communication error or in most cases you dont have fitted on your car the module you are trying to communicate with.
|
|

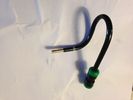
Cooling system hoses - 4.4L petrol V81098 viewsThese are the cooling system hoses on the 4.4L petrol V8. The little odd shaped bleeder hose, (LR006158), shown in the top right hand corner can give problems. There is a plastic tee with a threaded air bleeder outlet located in the middle of the hose. The plastic tee can or will fail due to I guess heat distress.
A BIC pen can serve as a field fix, however for your parts kit, a nominal 3/8" ID hose size brass hose barb inline connector plus a couple of hose clamps is suggested. Better yet is a threaded hose barb brass coupling or a tee and bleeder valve to allow bleeding of the line. Land Rover now makes the plastic bleeder valve that breaks available as a separate part, # LR027661, where 0 is a zero. As such, one can now purchase that part only for addition to your field fix parts kit.
|
|
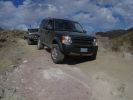
Mengel Pass152 viewsThe only Mantec skidplate in the US!
|
|
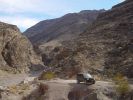
Titus Canyon119 viewsAn open section of canyon. Some sections were only wide enough for the D3 to fit through.
|
|
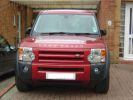
Rimini Red - Decision made437 viewsSo excited, hence camera wobble!!, having a differnt colour at last after only 7 Silver Discos
|
|
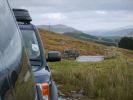
Calendar 2008 Entry531 viewsLooking back down Scotlands only \'greenlane\'
|
|

Not much left of bonnet!278 viewsCrash in a Renault Scenic
Head on colition with a Nissan Terrano he lost control came over the central reservation & ended coming at us sideways!
We hit him in the back wheel arch & spun him around so he then hit my drivers side, I walked away having a air bag wife had broken solder coursed by the seat belt, but it did save her life!
Our car was trashed but it did its gob (was only 2 weeks old!) the bonnet tacking lots of energy out of the collision & the inertia staying relatively in tacked.
|
|
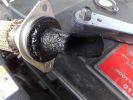
Grim EGR Inlet135 views
|
|

The only RRS there278 views
|
|
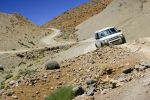
451 viewsMore photos coming soon. 7000 km with NO problem. Only took a 6th spare wheel, a tool box, air compressor, window shades. What a great Disco !
PS: note that my disco has manualy inflatable air sping in addition of the standar terrain response.
|
|
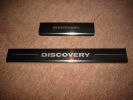
242 viewsStainless steel sill protector plates. Comes as a set of four.
|
|
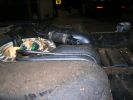
97 viewsRodent? Damage to the elbow on the D3 tank. The same elbow on all cars and only on D3\'s
|
|

D3 strangely now only just Cool237 views
|
|
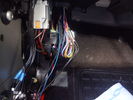
Tap in to C2443 pin 3162 viewsC2443 pin 3 provides easy access to the high beam signal from MY14 onward. My13 and earlier the signal has to be taken from C583 Pin 34 (CJB)
|
|
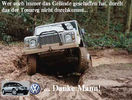
Whoever created this place, the Touareg can't drive through... Thanks man!59 views
|
|
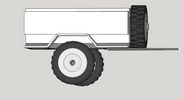
Thread upload8 viewsImage uploaded in thread 126243
|
|
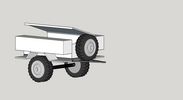
Thread upload11 viewsImage uploaded in thread 126243
|
|

3 views
|
|

Deka Battery Dimension Data613 viewsThe battery size that I installed for my auxiliary was a BCI 40R battery as it was for me the easiest to fit and was also a cranking battery. The case profile was such that no tie down fins were located on either bottom end, (sides yes), and length wise, it was only about 11" (290 mm) long. As such, I did not have to grind the nibs at the front bottom of the plastic surround.
I did however raise the bottom of the battery above the angled nibs as I set the battery on a 1" (25mm) high plastic spacer. The total height, (battery plus spacer), was about 8" (200mm) so the battery top still fit under the Land Rover factory cover.
For the Aux battery, when I replaced the 40R, I installed an Interstate BCI 47 which is similar in size to a DIN H5. I was therefore able to eliminate the vertical spacer as the Group 47/H5 is the same height as the DIN H7/H8 stock LR spec starting battery. As such, the standard battery tie down bolts can be used without modification. The Group 47 battery is 9 11/16" long x 6 7/8" wide x 7 1/2" (190mm) high.
|
|

Thread upload10 viewsImage uploaded in new thread
|
|

Off Road Day at Henly in Arden486 views
|
|

Video showing TR working to counter wheelspin570 viewsTaken at off road day in Henley In Adren Warwickshire, a good fun day out.
|
|

Stainless Steel Radio & Heater Control Covers110 views
|
|
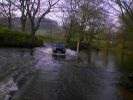
Me fording in Grosmont377 viewsMe have a splash in aford at grosmont north yorkshire was only 18 inches deep nothing big.
|
|
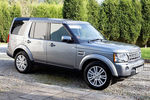
Orkney Grey in the sun35 viewsOrkney Grey XS in the sunlight
|
|
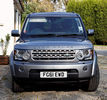
2012 XS34 viewsOrkney Grey in the sunlight
|
|
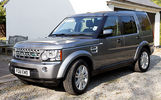
2012 XS32 viewsOrkney Grey in the sunlight
|
|

98 viewsSORRY FOR THE LEVEL.....but
In the world there are only 2 OFF ROAD VEHICLE: the old italian Fiat Campagnola and new Land Rover Discovery3..
The 1st is dead, the 2nd is sold...Why the best have a problems?
|
|
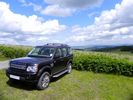
Disco 4 in mid Wales305 viewsDisco 4 (MY11) in Bournville. Taken in the sun as otherwise it mainly looks black!
|
|

Thread upload23 viewsImage uploaded in thread 158244
|
|

Sheigra in North West Scotland with the Td5100 views
|
|

D380 views
|
|

D382 views
|
|

Ground anchor73 views
|
|
4 views
|
|

Thread upload6 viewsImage uploaded in thread 159579
|
|
Thread upload8 viewsImage uploaded in new thread
|
|

Thread upload4 viewsImage uploaded in thread 163635
|
|

Thread upload9 viewsImage uploaded in new thread
|
|

Thread upload1 viewsImage uploaded in thread 183644
|
|

Thread upload3 viewsImage uploaded in thread 187407
|
|

Thread upload3 viewsImage uploaded in new thread
|
|

Thread upload7 viewsImage uploaded in thread 112071
|
|

31 views
|
|

35 views
|
|

Thread upload2 viewsImage uploaded in thread 198490
|
|

Thread upload23 viewsImage uploaded in new thread
|
|

Thread upload11 viewsImage uploaded in thread 112377
|
|

Thread upload11 viewsImage uploaded in thread 117278
|
|

Thread upload6 viewsImage uploaded in new thread
|
|

3 views
|
|

Thread upload6 viewsImage uploaded in thread 150402
|
|

Thread upload10 viewsImage uploaded in thread 150967
|
|

Thread upload3 viewsImage uploaded in thread 151759
|
|

Thread upload15 viewsImage uploaded in thread 154363
|
|

Thread upload10 viewsImage uploaded in thread 108346
|
|

Thread upload12 viewsImage uploaded in thread 156730
|
|

9 views
|
|

Thread upload0 viewsImage uploaded in thread 159005
|
|

Thread upload10 viewsImage uploaded in thread 158579
|
|

Thread upload15 viewsImage uploaded in thread 163633
|
|

Thread upload13 viewsImage uploaded in thread 164331
|
|

Thread upload12 viewsImage uploaded in thread 147165
|
|

Thread upload15 viewsImage uploaded in new thread
|
|

Thread upload9 viewsImage uploaded in thread 174703
|
|

Thread upload6 viewsImage uploaded in thread 177086
|
|

Thread upload18 viewsImage uploaded in thread 174456
|
|

Thread upload1 viewsImage uploaded in thread 181637
|
|

Thread upload3 viewsImage uploaded in thread 190595
|
|

Thread upload37 viewsImage uploaded in thread 172661
|
|

Thread upload2 viewsImage uploaded in new thread
|
|

11 views
|
|

Thread upload7 viewsImage uploaded in thread 136178
|
|

Thread upload3 viewsImage uploaded in thread 159579
|
|
Thread upload3 viewsImage uploaded in new thread
|
|
Thread upload5 viewsImage uploaded in thread 181818
|
|
Thread upload8 viewsImage uploaded in thread 199452
|
|

Thread upload0 viewsImage uploaded in thread 201028
|
|
Thread upload1 viewsImage uploaded in new thread
|
|

Thread upload1 viewsImage uploaded in new thread
|
|

Thread upload0 viewsImage uploaded in new thread
|
|

Thread upload11 viewsImage uploaded in thread 134548
|
|
Thread upload13 viewsImage uploaded in thread 120289
|
|

Thread upload19 viewsImage uploaded in thread 124308
|
|

Thread upload11 viewsImage uploaded in thread 125477
|
|

Thread upload4 viewsImage uploaded in thread 172661
|
|

Thread upload2 viewsImage uploaded in thread 159005
|
|

Thread upload8 viewsImage uploaded in new thread
|
|

Thread upload4 viewsImage uploaded in thread 190982
|
|
Thread upload3 viewsImage uploaded in thread 192679
|
|
Thread upload9 viewsImage uploaded in thread 193790
|
|
Thread upload7 viewsImage uploaded in thread 193790
|
|
Thread upload6 viewsImage uploaded in thread 193790
|
|

Thread upload7 viewsImage uploaded in thread 193790
|
|
Thread upload2 viewsImage uploaded in thread 159005
|
|

Thread upload36 viewsImage uploaded in thread 172661
|
|

Thread upload8 viewsImage uploaded in new thread
|
|
Thread upload9 viewsImage uploaded in thread 193790
|
|
Thread upload6 viewsImage uploaded in thread 193790
|
|
Thread upload6 viewsImage uploaded in thread 193790
|
|

Thread upload12 viewsImage uploaded in new thread
|
|

Thread upload10 viewsImage uploaded in new thread
|
|

Thread upload36 viewsImage uploaded in thread 172661
|
|

Thread upload8 viewsImage uploaded in thread 194230
|
|
Thread upload11 viewsImage uploaded in thread 75599
|
|
Thread upload17 viewsImage uploaded in thread 84039
|
|

Thread upload10 viewsImage uploaded in new thread
|
|

Thread upload9 viewsImage uploaded in thread 120502
|
|

Thread upload15 viewsImage uploaded in thread 103886
|
|
Thread upload11 viewsImage uploaded in new thread
|
|

Thread upload9 viewsImage uploaded in thread 193790
|
|

Thread upload19 viewsImage uploaded in thread 129629
|
|

Thread upload7 viewsImage uploaded in thread 193790
|
|

Thread upload18 viewsImage uploaded in thread 127692
|
|

Thread upload1 viewsImage uploaded in thread 184588
|
|

Thread upload2 viewsImage uploaded in new thread
|
|

3 views
|
|

Thread upload10 viewsImage uploaded in thread 120289
|
|

Thread upload4 viewsImage uploaded in new thread
|
|

Thread upload9 viewsImage uploaded in thread 126072
|
|

Thread upload18 viewsImage uploaded in new thread
|
|
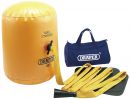
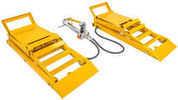
Draper air jack254 viewsDraper air jack, stock no. 61432, part no. AJ3 at http://www.drapertools-online.com/b2c/b2citmdsp.pgm?pp_skmno=61432
|
|

Driving 101 - a humourous PowerPoint Presentation file144 viewsItalian and humourous. Turn the sound on and have a quiet chuckle at the show. Only let the children watch if they are able to accept animated violence (some life forms were injured or killed in the making of this animation!!).
|
|
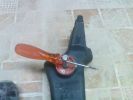
Put the screw driver into the hole then pull and turn to unlock159 views
|
|
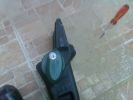
Now you can unlock the tow bar without a key170 views
|
|
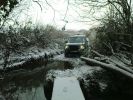
greenlane96 views
|
|

Greenlaning in North Yorkshire / Co Durham287 views
|
|
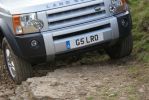
Greenlaning in North Yorkshire / Co Durham302 views
|
|
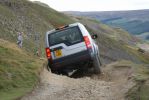
Greenlaning in North Yorkshire / Co Durham325 viewsMy fav pic, you never know until you try!
|
|

Calendar 2011263 viewsGreenlaning in the North Yorkshire Moors
|
|
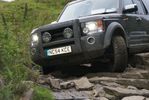
Calendar 2011301 viewsChris d3, Greenlaning in the North Yorkshire Moors
|
|
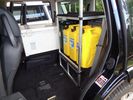
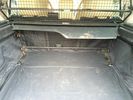
2nd Row seats out and fridge and jerries "in"21 viewsA false floor was made out of ply to support the freezer and 5 x water jerries. I used 3 x fuel jerries for photographic purposes only.
|
|

Disco 3 not available, so had to tolerate this awful £60k RRS instead :-o235 viewsOnly the half-day introduction course, but Geordie was an excellent tutor and we had an amazing time.
|
|
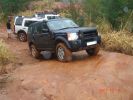
The "alternative route"156 viewsThis was the start of the rocky bit that cut out the snotty slopes. Wasn\'t the way to go unless you quit
|
|
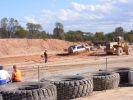
Remember - it only comes half way up the ducks....55 views
|
|
210 viewsThe Toyota hits the end of pit 2, but now only has 2WD drive and pulls out.
|
|
219 viewsWe made it through!! Only the second car to do it! And the only one stock standard!!
|
|
207 viewsLining up for the last two runs - only one make of vehicle left in the comp!
|
|
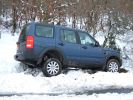
Down ditch but only front wheel!402 views
|
|
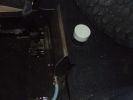
Internal 40 Litre water tank - top view of left side of tank105 viewsShows my spare tyre, but also bright white protective cap of top fill point and vent. Blue hose is water dispensing point. Note seat bracket bolt secures tank to D3. Similar bolt point on other side. Only these two bolts secure the tank and it is very secure.
|
|
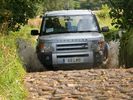
Greenlaning Yorkshire Dales National Park233 views
|
|
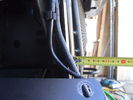
Left side (looking forward) of radiator after grill and bumpers removed.101 viewsTape measure is shown for illustration of dimensions only.
|
|
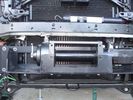
Close-up front view of partially-installed winch120 viewsNote that the sheet-metal flange just above the winch had to be notched to allow winch controller to be actuated. Also this same bracket had to be bent upwards to allow the winch hydraulic:electic solenoid to fit without rubbing. The nut on the upper-left bolt (the one with a very faint circle around it) stripped on re-installation, so the tray and winch pulling load is held only by the threads on 7 bolts....
|
|
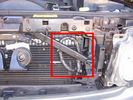
Installed winch electrical wires146 viewsWires which only power the solenoid are inside spiral wrap. They are also connected inside the wrap at the high point of the loop. Cable tied into place to prevent vibration rubbing.
|
|
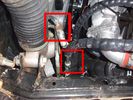
View of both hose connections to power steering system149 viewsBoth connections are shown. My friendly Qantas hydraulic hose expert cut off the elbow and modified it so I can re-install it to the PS rack before warranty work (and certainly before the vehicle is lifted off the body!!).
|
|
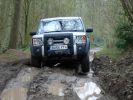
what?? only 3 wheels ??213 views
|
|
36 viewsMy trusty Defender 90. Only gets used for 6 months of the year, little light green laning.
|
|
Unloading the fishing gear62 views
|
|
after market winch mount available in carbon steel or stainless177 views
|
|
the only car on the street getting out!!46 views
|
|
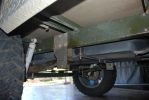
136 viewsraised susspension - this i bought from the factory, so I assume you could order a trailer with this fitted. only necessary if you are fitting big tyres like I have. the axle is a standard alco axle which I ordered from alco with blank hubs. hubs were machined to accept LR studs. Wheel centres had to be slightly machined to fit over bearing caps
|
|
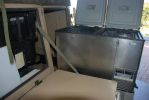
116 viewsthis shows the fridge on the 2 x 180kg sliders. i had to slightly modify the door opening to fir the fridge hinges thru. I just gently bent it, and fitted additional seals, hence it can easily be returned to standard. having the fridge in the kitchen is a major bonus, plus the back door of the trailer is now used for easy access to the cavernous interior, whereas prior to this youhad only access thru the front doors, which are only 500mm wide
|
|

Only ski resort in Southern Africa in 201231 views
|
|
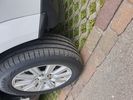
Thread upload14 viewsImage uploaded in thread 188252
|
|
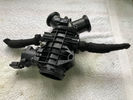
Thread upload0 viewsImage uploaded in new thread
|
|

Emergency unlocking42 views
|
|

Thread upload2 viewsImage uploaded in thread 182159
|
|

Thread upload17 viewsImage uploaded in thread 170233
|
|
Thread upload17 viewsImage uploaded in thread 170233
|
|

YIW500200 Coverage172 views
|
|
Thread upload7 viewsImage uploaded in new thread
|
|

Thread upload5 viewsImage uploaded in thread 137807
|
|
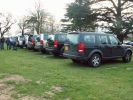
First seven arrivals at South East Pub Meet in Cobham227 viewsOnly neo\'s D2 was out of place at this point - more than made up for my the lovely burble of his V8
|
|

Time For a Brew159 views
|
|

Thread upload1 viewsImage uploaded in thread 192813
|
|
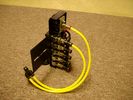
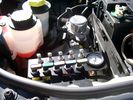
FASKIT on end view 859 viewsEnd and rear view of the FASKIT. Yellow lines are as shipped for hooking to the air supply; one line to valve/filler and other is to gauge. I will modify the arrangement to delete one of the yellow lines such that gauge line plugs into where the second yellow line is right now,(will be only one yellow tube), and then the air source line will plug into the port controlled by the valve, (hidden in this view but visible in other view). When white valve is in the ON position, gauge will read air source pressure, and be available to supply air to any of the selected four air springs. When valve is closed, the gauge will show individual air pressure in each of the air springs when a jumper is run between the gauge Schrader valve and the appropriate air spring Schrader valve.
|
|
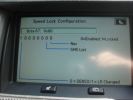
speed lock config - unlocked227 views
|
|
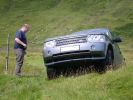
129 views
|
|
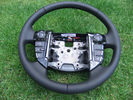
Thread upload25 viewsImage uploaded in new thread
|
|

154 views
|
|

Wiring Diagram Fog Lamps76 viewsR130 is the (R5 relay under the hood) The wire is blue grey that is hot when the high beams are on and opens the relay contact that turns off power to the fog lamps. North America Only
|
|
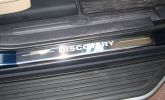
Stainless front sill covers375 views
|
|
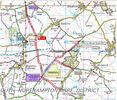
Adstone Greenlanes42 views
|
|
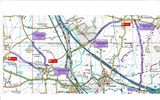
48 views
|
|
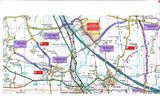
41 views
|
|

112 views
|
|
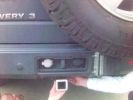
387 viewsconcept for Hayman Reese tow bar - bolts on inside bumper channel - need to remove bumper to fit - won\'t work with tyre underneath - concept only - but will be building prototype week of 9/7.
|
|
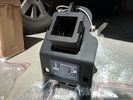
Rhino Tow Loop Hitch263 viewsThis is a receiver end view of the Rhino Hitch that ties to the factory tow loop. In addition to improved strength, it does not reduce ground clearance as does the factory style when installed.
Land Rover in early advertising videos when the 3 first came out showed the D3 hanging from a crane via the frame. The intent was to show how strong the frame is and by inference, the rear tow loop, specifically noted as being good for 6 tonne. The video ends before anything dropped or was lowered back to the ground, so one of course does not know for certain. The Rhino Hitch design however picks up on the apparent evidence of strength and certainly the additional clearance.
|
|
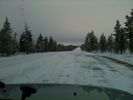
Heading North in Finland. October 201032 views
|
|
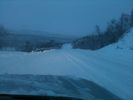
Heading North in Finland. October 201034 views
|
|

John O\'Groats - Think I was the only one there, other than a few locals ..156 views
|
|

Thread upload3 viewsImage uploaded in new thread
|
|

Stainless Steel Accessory Instructions354 views
|
|

Thread upload5 viewsImage uploaded in thread 135897
|
|

64 viewsAdded a lead coming from the 12V outlet in the front console. That one is activated only when the ignition is set to I. So that's actually what is referred to as accessories in the manual of the radio. The OEM connector for the head unit did not have any similar lead. The yellow is permanent 12V, the red (on the converting OEM 2 ISO) is the accessories 12V.
|
|

60 viewsNormal usage, only the radio's on and controlling the connected iPod.
|
|
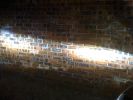
No Spots Main Beam only104 views
|
|

Spots only93 views
|
|

Stanley4 viewsStanley at Whitstable flats
|
|
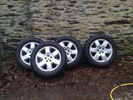
set of four land rover 19" 6 spoke alloys with wrangler MTR's as per G4 spec29 viewsFor sale the set of four tyres and wheels . tyres are new having only traveled 2000 miles
|
|
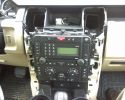
After removal of H-panel95 viewsCrikey, you have to pull HARD to remove this trim!!! Broke one clip and only lost half of it. Fit back with 3 clips ok. Yet to drive it to see if it rattles.
|
|

Inlet & exhaust gaskets0 views
|
|

Inlet & exhaust gasket2 views
|
|

Inline power meter16 views
|
|

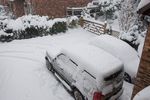
only full size pic with all the kit but covered in snow6 views
|
|
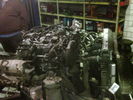
Blown Turbo126 viewsThe Turbo blew on this D3 with only 30,000k Its a 2007 model and the easiest way to get at the engine was to remove the body which is attached to the body by 10 bolts
|
|
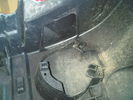
Hole Marked on Bumper Only to be Drilled & Cut118 views
|
|
air inlet113 views
|
|
air inlet 214 views
|
|
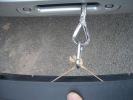
1735 viewsIndustrial elastic a stanless clip and a winch mount the number plate back in place
|
|
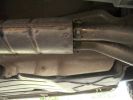
New stainless mid box538 views
|
|
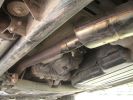
Stainles joins after the cat's626 views
|
|
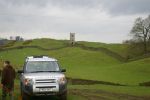
It\'s only damp....36 views
|
|
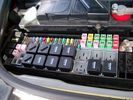
Picture of the engine compartment fuse panel5752 viewsEngine compartment fuse panel located near the battery. This is where F3E, (5 amp), F26E, (20 amp), Fuseable link 10E, (60 amp) and Relay 7E, the now upgraded 70 amp air compressor motor relay, part number YWB500220, (E is for Engine compartment fuse box), are all located. Fuse F35P, (5 amp), is inside the Passenger compartment behind the lower glove box door.
To keep the suspension from going down to the stops when driving, (or parked), it appears that it is only really necessary to remove F26E to depower the exhaust valve and generally keep all the valve block solenoid valves in a closed position trapping whatever air is within the air springs. F3E gets its power thru F26E, so when F26E is removed, the F3E circuit is automatically de-powered. F35P is more interesting in that battery power goes thru the ignition switch and F35P and then into the air suspension control unit. Apparently however, if F26E is removed, removing the F35P is not needed even when the engine is running.
With all fuses still in, if you have a problem, in practice, ideally, the compressor still works and will raise the 3 to an appropriate height. If so, one can then shut the engine off and allow the computers to go to sleep and then you remove the fuse(s). In actual practice, it seems that one need only pull the F26E fuse and can do so with the engine running. All the same, one might consider that the 3 is first a mobile computer, and secondly a 4x4. Computers prefer to go to sleep before the plug is pulled on them, however given that F26E circuit is always alive, then the computer never sleeps. With the fuse(s) pulled, and if you are still up, you can now be a 4x4 instead of a low rider. The whole purpose of the fuse pulling exercise is to depower the one and only system exhaust valve that is physically located within the compressor unit, (to keep it from opening), and secondarily to keep closed the four air spring solenoids within the block valves. This also shuts the air compressor down and stops the air compressor from making air even if the compressor is still good. That is why you initially need the fuse(s) in to allow the compressor to make air if it can.
|
|
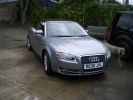
If only the sun would shine then it would be worth the extra £10k!!51 views
|
|
Buckingham Blue goes through260 viewsRutted track to left of shot is where my car went rather than through the water. Mine still is only a few months old - maybe in 6 months or so I will try but at least I know that because other D3s did it on the day, I can when I am game enough!!
|
|
Brand new blinking Discovery358 viewsDad is very happy with his new car, but mine daughter is more than proud and wil make a blinking picture. This is the first and only day to have a blinking Discoevery3.
Rene@LR3.nl
|
|
Blinking new Discovery3 just from the dealer, made by Sanne (10 years) , CALENDAR ENTRY 2009622 viewsHere the first picture from the brand new blining D3 made by sanne, 10 years old. CALENDAR ENTRY 2009
|
|
Inlet grill removed126 views
|
|
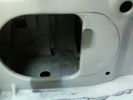
Marked inner guard with template to enlarge hole in channel154 views
|
|
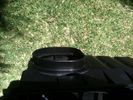
Half way finished cutting aibox inlet with Dremel - as it was too large to fit the 83mm flexible hose onto it.161 views
|
|
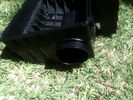
Airbox showing inner inlet tube poking through189 views
|
|
Looking down at jubilee clamp holding flexible hose to airbox inlet.183 views
|
|

460 viewsPrevious installation.
Only my GPS, Mobile and MP3 changer in the back (controller seen on later pictures)
|
|
461 viewsFirst step in the journey, installed USB ports.
At the time I installed these, the goal was to use them in combination with the car-computer that resided in the back.
In the meanwhile, I dismantled the car-computer and nearly everything that was connected to it (touchscreen front, Wifi, DVB-T ...).
I kept the USB outlets in the front and turned them into charger for the appliances missus brings with her when we're on holiday. Mainly her iPod and smartphone ...
|
|
20 years LRCH Axel-nl121 views
|
|
LRCH 20 years AXEL-NL106 views
|
|
Glen Nevis253 viewsOn our tour of the Highlands and the Isle of Skye we ended up on a road that didn't seem to be on the map. It took us right up through Glen Nevis and then just carried on and on to the Falls of Steil (apologies if spelt incorrectly). The falls were amazing and were only about 1KM walk from where we ended up parking the Disco.
|
|
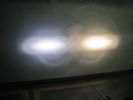
H7 Upgrade ABD vs philips standard main beam only HIDS4U84 views
|
|
Only way across "The Plateau"59 views
|
|

Frontrunner Sump Guard Fitted9 viewsSGLD009
https://www.frontrunneroutfitters.com/en/be/protection-equipment/under-vehicle-protection/land-rover-discovery-2014-present-sump-guard-4-5mm-3cr12-stainless-steel-front-runner.html
|
|
AMK compressor inlet pipe with brass fitting partially inserted16 views
|
|
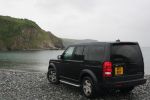
DISCO 3 Porthallow Beach Cornwall 13 Aug 07 - CALENDAR 2008 ENTRY742 viewsCALENDAR 2008 ENTRY. Picture of my Disco 3 on the beach at Porthallow in Cornwall.
Picture taken in the height of the british summer on the 13th August 07 at approx 2:30 in the afternoon! (notice the hint of sarcasm there as even at that time of the day I had my lights on!).
Getting the car from where we were staying on to that beach was quite an entertaining drive, with the roads (more like lanes) only being just wide enough to fit the car through.
Hope you like it!
|
|

This is where my iPod will live, unless I need to take it out to add songs or update playlists.491 viewsI installed a rubber grommit between the cable and the hole to keep it from rubbing on the sharp plastic.
|
|
He's out there somewhere...137 viewsHobgoblin - vainly searching for the D3 skipper who chose to go down with his ship...
|
|
Salinas248 viewsCALENDAR ENTRY
This is in Puerto Rico, USA.
A rocky trail to a camping area on top of a mountain. 4x4\'s only.
|
|

UHF Antenna Mount384 viewsView from underside of bonnet. The lower half of the mount is folded from stainless steel and bolted through an exisitng oval shaped hole in the bonnet. This hole is throught the heavy steel plate that the bonnet hinges bolt to - not just the aluminium panel. A specially machined rectangular nut was made to pass through the oval hole, rotate 90 degrees and then stopped from turning by a slight shoulder on the nut.
|
|
Flamingo camp www.aasafaris.com195 viewsAmazing lodge in the middle of nowhere on the Atlantic ocean. I can certainly recommend it. The pub is great, as are the hosts
|
|
Starter only needs to be moved out of the way12 views
|
|
egr inlet51 views
|
|

Inlet38 views
|
|
incredible65 viewsonly 8,7 lt/100km
|
|
34 views
|
|

55 views
|
|
7 views
|
|
8 views
|
|
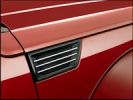
2007 Dodge Nitro - where did they get that design cue from?253 views
|
|

2007 Dodge Nitro243 views
|
|
Subwoofer Install271 viewsThe stock sub has 2 sets of wires running to it. Both of these wires lead back to the stock amp.
The new sub only needs two wires - a positive and a ground. So, we just cut the stock wiring harness off the wires in the tail gate and wired them together. On the other end of these wires, we did the same thing.
|
|
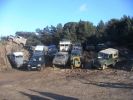
Landies galore , but no Disco3 at this stage.246 viewsRNLI Offroad Club outing.
|
|

wheels86 viewsD4 with pirelli ATRs
|
|

wheels72 views4 19inch MTRs
|
|

Thread upload2 viewsImage uploaded in thread 179302
|
|
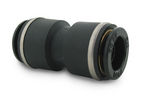
John Guest DOT all plastic fitting714 viewsThis is a picture of the John Guest DOT all plastic union. If you look closely, you can see the DOT imprinted in raised letters on the end of the fitting. This is of a 1/4" connector rather than the 6mm that the 3 requires.
The picture is similar to the air suspension pneumatic fitting union that Land Rover sells as replacement part # STC8580. This is for 6mm OD tubing size. The STC8580 comes with what are called "Collets" at each end that cover up the press to release feature underneath. See the John Guest web site www.johnguest.com under the Pneumatics section and also in Downloads for their catalog for install and remove instructions.
The actual "air brake spec" fitting that Land Rover provides has an interior 4mm OD ferrule that slips inside the 4mm ID of the nominal 6mm tubing. I have not yet been able to obtain the John Guest part number for the LR fitting, only the LR part number. This part number was generated for the RR Classic air systems.
|
|

John Guest (LR part # STC8580) push in straight 6mm tubing to tubing connector727 viewsThis picture is similar to the air suspension pneumatic fitting union that Land Rover sells as replacement part # STC8580. This is a 6mm OD tubing size push in to install straight tubing to tubing fitting. The STC8580 comes with what are called "Collets" at each end that cover up the press to release feature underneath. See the John Guest web site www.johnguest.com under the Pneumatics section and also in Downloads for their catalog for install and remove instructions.
The actual fitting that Land Rover provides has an interior 4mm OD ferrule that slips inside the 4mm ID of the nominal 6mm tubing. Hence the fitting depicted and part number are not actually correct. I have not yet been able to obtain the John Guest part number for the LR fitting.
The fittings that show in this doc are what I call food service fittings rather than transportation or Air Brake fittings. The part LR sells, (STC8580), is the Air Brake type for transportation.
|
|
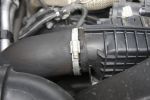
Air Box Jubilee Clip730 viewsLoosen to allow air inlet pipe to be removed from the air box
|
|

Happy Campers43 views
|
|

Foxwing and RV546 views
|
|

52 views
|
|

Driffield Weekend47 views
|
|

Foxwing and OZtent RV555 views
|
|
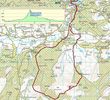
The only way is up ! are you sure about this !26 views
|
|
Thread upload2 viewsImage uploaded in thread 189350
|
|

73 views
|
|
![Filename=kit616-rear-lower-arms-with-fitting-kits-discovery-3-4-air-suspension-only-1108062-p[ekm]270x210[ekm].jpg
Filesize=18KB
Dimensions=270x210
Date added=13.Jun 2019 kit616-rear-lower-arms-with-fitting-kits-discovery-3-4-air-suspension-only-1108062-p[ekm]270x210[ekm].jpg](albums/userpics/33392/thumb_kit616-rear-lower-arms-with-fitting-kits-discovery-3-4-air-suspension-only-1108062-p%5Bekm%5D270x210%5Bekm%5D.jpg)
Thread upload1 viewsImage uploaded in new thread
|
|
51 views
|
|
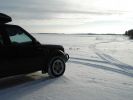
Lake driving in Finland360 views
|
|
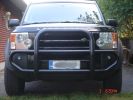
Installed nudge bar today322 views I was quite easy and quick to make. Took only 2 hours, easy job.
|
|
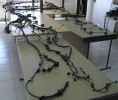
Looms laid out119 viewsview of both a d3 and sport loom from rear left quarter, the single tailgate sport is slightly to the left of the split D3. This was the only real area of difference.
|
|

These icons only stay on for 5 secs1090 views
|
|
LROI stonleigh show104 views
|
|

Air Suspension System Parts, Layout, and Operation7017 viewsThis 22 page pdf gives a pretty good description of how the system is supposed to work, plus shows the various parts and the electrical including fuses and relays etc. Of the files here, this is the most useful.
As with all the pdf's here, you can download and print it out.
|
|

Thread upload6 viewsImage uploaded in thread 136028
|
|

Fixing method10 viewsStainless Jubilee clip to mount electrics box to winch post
|
|
D3 in Litchfield National Park, on the Reynolds Track44 viewsThis track takes you through the bottom half og the Litcfield National Park, and because the track has some deep creek crossings it keeps the numbers down, seeing as it is only 90 minutes out of Darwin. It is a flood plain between two long ranges and has numerous \'Magnetic termite\' Mounds.
|
|

LR Electric Trailer Brake C2590 Female Connector598 viewsThis female connector, C2590, located up above and near the brake pedal is for the Trailer Electric Brake Controller hookup.
The Black wire in the bottom right is pin #3, the ground. The Blue wire to the left is pin #6, the Trailer Brake Controller output going to the rear trailer socket.
The White #4 wire is the 30 amp fusible link, (Link 6E in the engine compartment junction box), for the Brake Controller 12VDC power feed from the battery. Note that this would make a pretty good power source for CB radios and the like if no electric trailer brakes were required.
Pin #5 is a Green wire from the stop lamp switch, (the control input for the Brake Controller).
This plug is standard on all NAS (LR3) vehicles, but unlikely to be found on the D3 spec units.
|
|
![Filename=lr023964-dunlop-compressor-to-replace-pre-2010-hitachi-only-gb-made-1068977-p[ekm]169x170[ekm].jpg
Filesize=8KB
Dimensions=169x170
Date added=09.Nov 2018 lr023964-dunlop-compressor-to-replace-pre-2010-hitachi-only-gb-made-1068977-p[ekm]169x170[ekm].jpg](albums/userpics/33392/thumb_lr023964-dunlop-compressor-to-replace-pre-2010-hitachi-only-gb-made-1068977-p%5Bekm%5D169x170%5Bekm%5D.jpg)
Thread upload1 viewsImage uploaded in new thread
|
|

Thread upload2 viewsImage uploaded in new thread
|
|

LR3 Air Conditioner Drain Tubes behind centre console2091 viewsThis shows the two air conditioner drain tubes located left and right under the radio stack.
The tube on the left side, (steering wheel side, LHD), disattached itself and the carpet on the floor under the gas pedal etc became soaked. I think rain water from outside that comes in the outside cowl vents also exits via the tubes as I first noticed the carpet was wet after parking outside during a big rain storm.
It was relatively easy to slide up and reattach the rubber hose that runs from the rectangular shaped plastic discharge hole(s) of the heater "pan" down along the transmission hump area and thru the floor pan. There is a hose on each side of the transmission hump, but only one hose had let go on my 3. The rubber hoses just slide over the rectangular plastic openings of the two heater housing drain outlets.
To get at each drain hose, remove the vertical sort of triangle carpeted piece below each side of the radio stack. The triangles of carpet will just pull away as each is held on with those metal U clips Land Rover so likes. Dislodge each triangle at least sufficiently to get ones hand in to slide the rubber hose back on.
You will rarely see AC water on the ground as the front drains pour onto a metal underside protection skid plate and the rear drain onto the top of the left rear muffler.
|
|
Boot lighting panel, wiring side up 279 viewsThis shows the back side of the plastic cover panel on which the two LED lights are mounted.
Also of note is the SPST rocker switch to switch the new lights off independent of the the Land Rover W5W light.
The new light pair will only power up if the Land Rover light is powered and hence dims and automatically goes off along with the Land Rover light.
The Black wire is ground, the Purple wire is +12VDC.
|
|
Compressor Exhaust and Inlet 1532 viewsThe two temporary black plugs cover off the 8mm and 10mm push fit lines to the air inlet and exhaust lines. Also visible is the worn threaded stud that I think was the initial failure mode.
|
|
View of mounted panel from front left side872 viewsNote that all valve handles are shown in the OFF position, (the trouble position). In this case, the air that is in the air springs, (if any), is trapped in there - that is the valve blocks cannot vent whatever air is already in the air springs as the air lines between the springs and respective valve blocks are closed off by the FASKIT valves. In operation, there may be only trouble with one air spring, (perhaps a wheel height sensor), and as such, only one valve would need to be closed. If there was complete air compressor failure, then all valves would be closed and then as required, each spring could be manually filled from an outside clean dry oil free air source.
|
|
kaymay rear bumper/tire carrier493 viewsthis is on delivery to me.... ;) . it went on easily but i will have it modified to place right wheel more toward middle like disco II. i will only ever use the laft side for jerry can or something, not another tire. i don't like how right tire totally blocks main lamp.
|
|
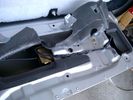
Dust seal cut; note electrical conductors right under dust seal 1616 viewsShows what is underneath when the dust seal is cut. Note the electrical conductors.
I used a box knife to cut the plastic and it was at first easy; then I seemed to hit something and fortunately I stopped - it was the wires - lots of them stuck right to underside of the sticky seal material.
Also shown are the two 8mm nuts in slots that you only have to loosen to release the gold actuator assembly.
|
|
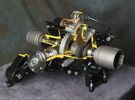
Rear Differential cutaway with E-Locker 1199 viewsThis jpg is from the link below.
There are another ten or so cutaways plus a whole file group showing a 2005 LR3 sectioned for the 2005 Chicago Auto show. Each jpg has an enlarge function to the bottom right of a main picture.
On one jpg you can see right into the stepper motor.
http://www.cutawaycreations.com/cutaways.php?project=land-rover-electronic-rear-differential#/IMAGES/car4/images/image1.jpg
Both the front and rear differentials are manufactured by Dana Spicer in the UK. Dana calls them a Clamshell design.
|
|

LR3 Electrochromatic Interior Rear View Mirror wiring diagram.847 viewsIt seems that there are two fuses, F69P and F5P that provide power for the interior rear view mirror. Ten amp F5P is a feed off the reverse gear relay and inhibits auto dimming when reverse is selected. Five amp F69P provides power to the auto dimming circuits and the garage door opener function if optioned.
The pdf can be downloaded and printed out. For on screen viewing, right click on the pdf and select the Rotate Clockwise button.
|
|

Underhood Fuse and Relay Box drawing 3041 viewsShows the various fuse and relay locations. Fuse 3E, (5 amp), and Fuse 26E, (20 amp), as well as upgraded 70 amp Relay 7, part number YWB500220, locations are displayed. Relay 7 sends battery power to the compressor from the 60 amp fusible link called up as 10E. Fuse 26E is what provides full time always on battery power to the air suspension ECU and hence powers the auto level wakeup when the vehicle is shut down and say parked for the night. Removing F26E is the primary method to disable the air suspension system; Removing F35P is more if you want to experiment with it from inside.
I found it useful when I had a suspension problem, (actually a wheel alignment problem picked up by the steering wheel angle sensor), that only showed itself on the highway but allowed for no trouble light driving in the city. This was because in the city, the steering wheel was always in motion and rarely was the vehicle driven in a near straight line for very much distance.
|
|
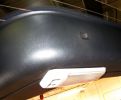
rear hatch light and door release switch389 viewswe\'ll ad a switch "guard" to protect from accidental gear shift popping button. light is slider 3 way so unlikely to be turned on by accident but will be nice down light when hatch is opened out.
|
|

solo steep gravel stop = park brake plus reverse on shifter332 viewsso our disco II\'s locked all 4 wheels with brake but now the modern lr3 slides away with only the park brake!!!! 1. put auto shifter in reverse (low gear) with foot on brake, 2. apply park brake, 3. get out and snap photo incase something fails and it slides away ;)
I reversed up the hill from this position, system decided to engage extended heigh mode for some reason trying to gain traction on loose surface.
|
|

Air Suspension Wiring Sheets3026 viewsThese two sheets show the wiring and fuses related to the operation of the air suspension system. Fuses F3E, F26E, and F35P are shown as well as the interior up down switch and the wheel height sensors.
As with all pdf's, you can rotate them to view plus download and or print out as you wish.
|
|

Excel file for Rotors and Brake Pads part numbers for 4.4L V8 petrol LR3765 viewsComparing the cost of the various brands of brake parts is time consuming. Once you have your parts costs, this little spreadsheet will make collating the info easier.
I did not make any provision for labour costs, but the file can be downloaded and then modified. You can change Dollars to Euros or Pounds or whatever and insert lines for labour costs as desired.
Do not pay too much attention to the $ numbers as they are a mix of US and CDN, and from differing time frames, (prior to Spring 2011) . Also the brake part numbers are for my 2005 North America spec LR3 with the petrol 4.4L V8; diesel powered and supercharged 3's may have different part numbers
|
|

Door Lock Wiring Diagrams1717 viewsNear the bottom of this 5 page pdf on page 224 are shown the pushbuttons and locking mechanisms for the rear hatch and tail gate.
The pdf will open vertically but you can download and print it out or just rotate the image clockwise by right clicking on your screen and selecting the "Rotate Clockwise" button.
|
|

Power Door Lock wiring diagrams523 viewsI thought I would include this 5 page power door lock wiring diagram pdf here as well.
When the pdf loads, if the views are vertical, it may be that you can right click on your mouse and a box will come up that will allow you to rotate the views clockwise so that the sheets are horizontal. Alternatively you can download the file and print each sheet yourself.
|
|

Power Door Lock Wiring689 viewsAbove is a 5 page, (pages 222 to 226), pdf wiring diagram for the power door locks for the LR3.
You can download and print as required. For on screen reading, use the right click rotate feature.
Additional pdf's regarding Locks can be found within the Gallery under the Power Windows and Door Lock Circuits heading.
|
|

Power and Heated Seats Electrical Schematic973 viewsThis 6 page pdf shows the wiring for the power adjustment of the front seats and seat heating for all the seats.
Re seat movement or the lack of, not only are there four related fuses, two 30 amp and two 5 amp, (one of each per seat), there are are two separate ground wires, perhaps of more significance than the power, if all movement on either side quits.
|
|

Fuel Tank Internals, Description and Operation 804 viewsThis 10 page pdf shows views of the fuel tank internals, what the various pieces do and describes how the fuel storage system is supposed to operate.
As usual, you can download it, save, and print as required.
|
|

ZF 6HP26 transmission fluid drain and refill procedure4012 viewsThis is the Land Rover instruction pdf and I note they have it right - that is remove the filler plug first, then the drain plug. Also before you attempt that, not only do you need oil, but also new fill and drain plugs as the sealing washers are deemed single use only.
|
|
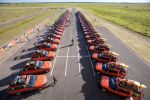
416 viewsThis was only half the fleet..(South America), same again in Thailand!
|
|

Compare LR lettering101 viewsWhat happens when you let the dealer 'fix' the problem of deterioration of the bonnet badge lettering. Compare the left with the right side (LAND cf. ROVER). Only one side was 'fixed' under warranty.
|
|

Thread upload14 viewsImage uploaded in new thread
|
|

Lug Nut part number RRD500290 outline sketch538 viewsThis single sheet pdf provides dimensions of the LR part number RRD500290 lug nut on vehicles from MY 2005 to 2008, (up to VIN 8A450459). From VIN 8A450460, the part number is RRD500590.
Visually, there is no apparent difference between the two part numbers. The dimensions appear identical as well. The shape, size, and profile of the Stainless Steel "hat" appears identical.
There are I presume differences in metallurgy to reduce corrosion and swelling of the hat or perhaps better sealing between the inside surface of the hat and the steel of the lug nut body. The reality is the differences are not immediately obvious however.
A 22 mm six point half inch or larger socket drive fits over the lug nuts. I use a nominal 36" long breaker bar with the 22mm socket - any shorter bar, best you be in shape. Depending upon your source, for both alloy and steel wheels, the lug nut torque value appears to be 103 lbf ft, (140 Nm); others suggest first tighten to 96 and then finish at 110 lbf ft, (130 and 150 Nm).
|
|
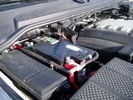
Main starting battery showing 1/2" hole drilled for power cable egress905 viewsView of OEM battery in Left Hand Drive LR3. This is supposed to be a Battery Group BCI 49 or H8 sized battery but in reality is the slightly shorter BCI 94R or H7 battery that fits easier lengthwise, (12 3/8" vs 14").
Note the 10mm hole drilled in plastic of surround to allow for entry of main power cable that runs between batteries. The cable bolts to a spare 6mm threaded hole in the OEM battery cable end; the light gauge wire runs to the front of vehicle to a connector for the CTEK MULTI US 3300 charger. Coloured felts, (red and green), are a material treated to reduce battery post corrosion. The OEM battery ground cable is only about a foot long and runs to an 8mm stud located on the inner fender just to the rear of the fuse case.
|
|

39 views
|
|

Australia Compared185 viewsJust so that others get some idea of the magnitude of the Canning Stock Route (see RichardK's gallery). It is 2000 kilometres on unsealed roads. On top of that is the journey on the sealed roads from and to home. Japan is only a couple of thousand kilometres from top to bottom.
|
|
159 views
|
|
55 viewsStanley Park Vancouver
|
|
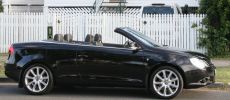
My Mid-life Crisis98 viewsVW Eos - TDI with DSG. The D3 is still with us, now only a "pampered" toy.
|
|

Milestone - 200k km19 viewsMight be 200 000 km but its only 58 000 on the new engine...
|
|
front playing video from ipod135 views
|
|
its only a graze62 views
|
|
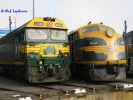
130 views
|
|

dutch D3 Prices90 viewsPrice list
|
|

Only hills here are man made!56 views
|
|
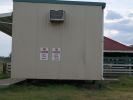
Parking Near Saleyards at Warwick154 viewsPrompted by the photo of generous parking at Walmart (USA), see how we do it in Australia. Trick, your vehicle must be narrower than about 100mm or a 2 dimensional facsimile only.
|
|

Northern Lights Winnatts Pass20 views
|
|

Northern Lights Winnatts Pass25 views
|
|

Thread upload3 viewsImage uploaded in new thread
|
|

29 views
|
|
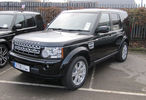
New Discovery 4 SDV6 at dealership awaiting collection77 views
|
|

only Frozen horses17 views
|
|

NAV-TV OPV-2LR 93 views
|
|

8 views
|
|

P013-Russia Only - Recall Campaign announce66 views
|
|
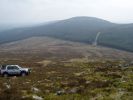
CALENDAR 2008 ENTRY663 viewsStopped around 550M ASL after driving straight up the side of a mountain in Ireland. Only the presence of many big rocks and no spotter prevented me from getting to the top. Try to spot the Disco 1 in the distance!
|
|
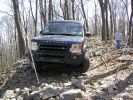
start of the day416 viewsVery nice selection of Rovers attended the trials. I had the only LR3. The had two classifications, short wheel base (under 100 inches) and Long Wheel base (over 100). LR3 was classified in the long.
|
|
some of the gates were very narrow429 viewsThe LR3's tight turning radius was a great help. You are only allowed one shunt (backup) per course section, so it is best to save it for when you really need it. I was very impressed with how slowly the LR3 can walk over the rocks, I had it set to rock crawl, and used either 1st or 2nd gear, depending on the terrain and size of rocks. mostly used 2nd, it give better throttle control.
|
|
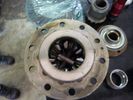
gears1212 viewsNice Gear set, most diffs only have 2
|
|
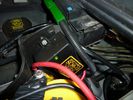
Traxide SC80-LR mounted591 viewsA close up showing the angle, mounting bolt. Only a single top bolt can be used, there are metal lines behind the lower bolt hole.
|
|
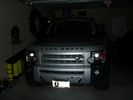
D44 Winch stainless fairlead654 viewsThe completed D44 winch installation, including the stainless fairlead. A stainless trim plate, and NA license plate holder is on the way.
|
|
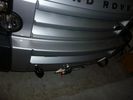
D44 Winch stainless fairlead487 viewsTop view showing the neat and tidy fit and finish, no knee bumpers here.
|
|
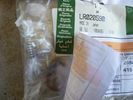
LR020590 KIT - COMPRESSOR 1475 viewsThere are 4 main parts you can get besides a whole compressor. This is the one with only a spring, o-ring and rubber valve.
YWB500220 electrical, fuse & relay, relay ENGINE COMPARTMENT, 70 amp 1
LR020590 KIT - COMPRESSOR 1
JPO500010 KIT - COMPRESSOR 1
VUB504700 - Dehydrator PARTS
|
|
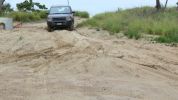
Fingal Road - Northern end184 viewsOnly sand driving we did was on this well packed and still damp sand leading to the sand pumping station (used for erosion control). Didn't even need to select Sand mode from the terrain tamer although I did put it in Extended Mode just in case.
|
|
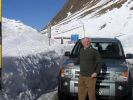
94 viewsLukmanierpass / Passo del Lucomagno - only about 10 metres of wind-blown snow on road
|
|
| 481 files on 2 page(s) |
 |
1 |  |
|