| Search results - "mount" |
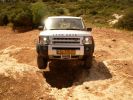
Jerusalem's mountains83 views
|
|
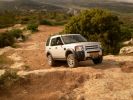
Jerusalem mountains77 views
|
|
384 views
|
|
369 views
|
|
369 views
|
|
368 views
|
|
369 views
|
|
366 views
|
|
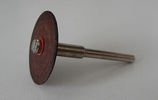
Disco abrasivo - Abrasive disc20 viewsDeclino ogni responsabilità per i danni che eventualmente farete direttamente o indirettamente seguendo questi consigli.
Per aprire la chiave ho usato un disco abrasivo da modellismo montato su un minitrapano. Deve giare velocemente.
Decline all responsibility for any damage that may directly or indirectly do by following these tips.
To open the key I used an abrasive disc mounted on a mini-drill. It must turn quickly.
|
|
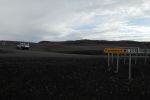
On to the F208 mountain road123 views
|
|
367 views
|
|
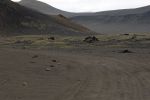
Bumpy mountain road154 views
|
|
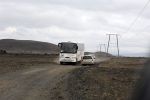
Rush hour in the mountain175 views
|
|
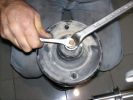
378 views
|
|
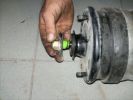
371 views
|
|
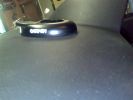
Garmin GPS mount without GPS bracket248 views
|
|
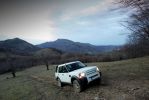
up, up, up the basque country mountains684 viewsup, up, up the basque country mountains
|
|

07 Back side of failed tyre340 viewsThis is the back of the blown tyre. It looks like any other worn tyre which has run a bit while flat. Note that we were running on wider 19" RRS wheels (have 4 19" MTRs + 1 old A/T on the original 5 wheels). Also have a rear-mount spare tyre holder which is really convenient with the wider rim and the fact that the tyre was still hot (it had some melted rubber on the other side!!)
|
|
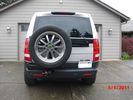
Highlift mount added27 viewsHighlift mounted in this position allows for any length with out overhead clearance issues if stood upright
|
|
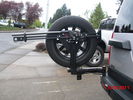
highlift and new sensor wire loom30 viewsNew wire loom added to protect sensor wires and keep things sanitary looking
. Highlift jack mount arms added and gas strut
|
|
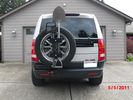
New mods for carrier. Backup sensor moved to the tire carrier. Toy rack and highlift mounts.38 viewsSon wanted all the toys on the carrier. I just wanted easy removal for a good clean look.
|
|
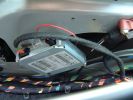
1 TMC - mounting TMC Module93 views
|
|
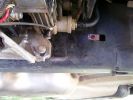
Repositioned compressor bracket737 viewsThe bracket was snapped in two, so I had it re-welded and slotted out the mounting holes so that it could be positioned 10mm higher (no longer protrudes under the chassis rail)
|
|

Radio location539 viewsMy remote head UHF CB mounted on the front of the ashtray, ham HF/VHF/UHF remote head radio mounted on a block in the coin tray and my GPS on a turned wooden block in the cup holder. Both radios are under tha driver and passenger seat and the antenna for the GPS is suction mounted inside the windscreen.
|
|
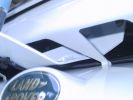
Antenna Mount462 viewsBracket mounted using existing holes behind the grill. The design of this bracket is listed elsewhere.
|
|
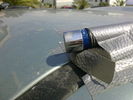
sophisticate ant-shake camera mounting3144 views
|
|
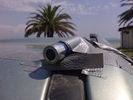
sophisticate ant-shake camera mounting2143 views
|
|
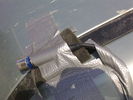
sophisticate ant-shake camera mounting1134 views
|
|
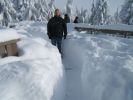
61 viewsTaken on Grouse Mountain
|
|
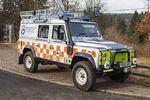
Northumberland National Park Mountain Rescue Team Land Rover Defender 11024 views
|
|
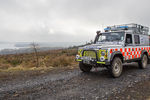
The Northumberland National Park Mountain Rescue Team Land Rover13 views
|
|
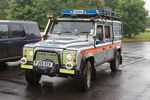
Northumberland National Park Mountain Rescue Team Vehicle13 views
|
|
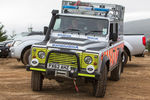
Northumberland National Park Mountain Rescue Team Land Rover20 views
|
|

On top at last351 viewsPhoto at the sumit of Arigna mountains, as part of one of the stages in the 2009 4x4challenge in aid of Temple St childrens hospital. Tough gettin there especially as we towed a Deafner90 up behind us that had bursted an expansion bottle. But the D3 powered on up regardless.
|
|
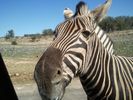
Hartmann's Mountain Zebra, (Equus Zebra Hartmannae)52 views
|
|
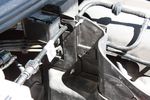
110 viewsBolts through the plastic box. These function as studs for the traxide brain to be mounted to.
|
|

121 viewsTraxide brain mounted. It's mounted slightly tilted towards the front of the engine bay so as to give as much space as possible to the brake vacuum pipe behind it.
|
|

99 viewsCircuit breaker mounting location. Mounted with industrial velcro
|
|
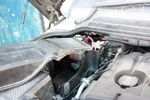
120 viewsModified aux battery box cover with shape of battery to battery cable. I also removed the tab which was fouling my traxide brain mounting bolts.
|
|
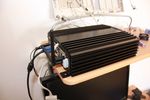
80 viewsCarPC closed and ready for mounting. Note the modification to the rear of the case to allow extra USB sockets attached to the motherboard pins.
|
|

79 viewsExtra USB sockets mounted to front of commercial box, just behind cubby box
|
|
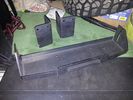
Hidden winch mounting plate discovery 3 4 RRS Mudtech4x4.com120 views
|
|
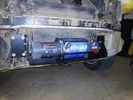
Hidden winch mounting plate discovery 3 4 RRS Mudtech4x4.com187 views
|
|
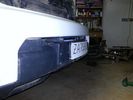
Hidden winch mounting plate discovery 3 4 RRS Mudtech4x4.com181 views
|
|
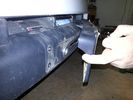
Hidden winch mounting plate discovery 3 4 RRS Mudtech4x4.com198 views
|
|
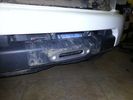
Hidden winch mounting plate discovery 3 4 RRS Mudtech4x4.com191 views
|
|
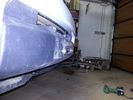
Hidden winch mounting plate discovery 3 4 RRS Mudtech4x4.com168 views
|
|
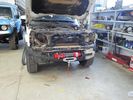
Hidden winch 12000 Disco 4154 viewsHidden winch mounting on a Discovery 4 3.0 TDV6 using Mudtech4x4 plate and 12000xc dual speed ALANWINCH
|
|
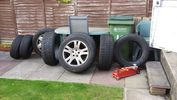
wheel mountain laid out flat36 views
|
|
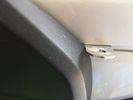
284 viewsLabtronx Aerial mount http://www.labtronx.com.au/
|
|
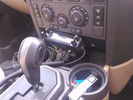
27 viewsFT8900 on RAM mount
|
|
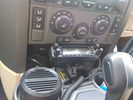
22 viewsFT8900 on RAM mount
|
|
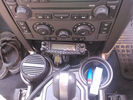
26 viewsFT8900 on RAM mount
|
|
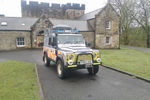
The Northumberland National Park Mountain Rescue Team Land Rover13 viewsDelta Defender
|
|
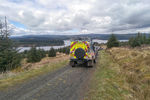
The Northumberland National Park Mountain Rescue Team14 viewsDelta Defender
|
|

The Northumberland National Park Mountain Rescue Team15 viewsDelta Defender
|
|
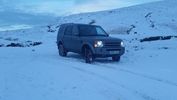
Gospel Pass Jan 2015146 viewsThe Gospel Pass (Welsh: Bwlch yr Efengyl) is the highest road pass in Wales. It is at the head of the Vale of Ewyas in the Black Mountains of southeast Wales.[1] The narrow mountain road climbs steeply from Hay-on-Wye to a height of 549 metres (1,801 ft) [2] above sea level, squeezing between the mountains of Twmpa to the west and Hay Bluff to the east, before dropping down into the valley to the south on its way to Llanthony Priory, Llanfihangel Crucorney and Abergavenny.
|
|
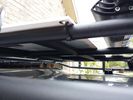
solar panel install356 viewsAt least at this point, I mounted it by using Clear Silicone RTV. This stuff is kind of like glue, but can be removed. If it doesn't hold up after curing and driving, I'll remove it and come up with another plan. I used heavy cable ties on the 4 grommets, in case it lets loose, it won't take out my wiring and the car behind me. 2 Panels are dandy like this, but I don't want to permanently block the roof space. Grape Solar to power my snomaster fridge
|
|
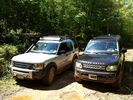
discrete winch mount415 viewsThe D44 winch mount on the trails. Like it on Facebook https://www.facebook.com/DifferentialPartsUS
|
|

3D Printed Samsung Galaxy S5 Phone Mount21 viewsDesigned to fit a Brodit Clip Mount (in this case one for an Isuzu DMAX)
|
|

3D Printed Samsung Galaxy S5 Phone Mount24 views
|
|

RLD CB Aerial Mount6 views
|
|

Anti Lock and Traction Control description and operation.1986 viewsNote on page 6 of this 17 page pdf the significance of the Steering Angle sensor mounted on the steering wheel shaft. The paragraph regarding the plausibility check as related to the brake pedal being not depressed is why the clean operation of the second set of contacts on the brake switch matters so much.
|
|
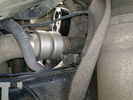
Charge Air Inlet hose - front mounting bkt86 views
|
|
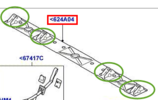
Thread upload24 viewsImage uploaded in thread 138841
|
|
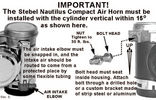
35horn61 views
|
|
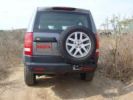
Rasta 4x4 Swing away spare wheel mount115 views
|
|
There she is!5 views2008 TDV6 SE on Du Toitskloof Mountains
|
|
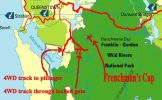
Mount McCall 4wd track155 views
|
|
asscent to the top of Arigna mountain65 views
|
|

Even in Oman they have water splashes!104 viewsThe sheer joy of driving through fresh water in a mountain wadi. Rare enough to find running water when it isn\'t raining, but to drive through too is a real bonus for us Middle Eastern ex-pat drivers!
|
|
Beechcraft Barons Stuffed and Mounted214 viewsThe desert does strange things to men....
|
|
Ooops, found the mountain bike trail. KW Hydrocut16 viewswe were out one day and suddenly I seemed to recognize the power lines, and the fact that the mountain bike trail runs alongside the lines.
This is obviously a wide section of trail, but it's still the KW Hydrocut mountain bike trail.
|
|
mount skene 09100 views
|
|
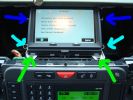
7 Dash SCREEN82 views
|
|

abar mounting plates - revision A170 views
|
|
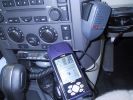
UHF CB374 viewsGME TX3400 UHF CB remote head mounted on the front of the ashtray.
A piece of wood was turned to fit the cup holder to mount the GPS
|
|
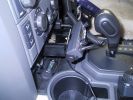
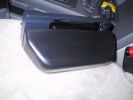
UHF CB439 viewsThe remote head of the GME TX3400 was mounted on the front of the ashtray after unclipping the ashtray facia. The head is very light, double sided tape was used plus 1 screw to hold it.
|
|
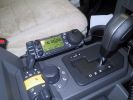
Ham Radio454 viewsThe remote head of the Icom IC706 mounted on a block of wood shaped to fit the coin holder. This is an HF, VHF and UHV transceiver.
|
|
Ham Radio448 viewsThe remote head of an Icom IC706 was mounted on a piece of wood shaped to fit into the coin holder. This is quite a tight fit and does not shake loose. The radio is mounted under the driver seat.
|
|

Antenna Mount447 viewsA light dual band VHF/UHF antenna mounted on an 3mm x 25 alloy bracket
|
|
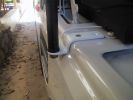
Antenna Bracket388 viewsThis was bent from a piece of 3mm x 25mm alloy flat bar. I used automotive grade double sided tape and two screws to fasten it. I have a dual band VHF/UHF antenna on this bracket
|
|
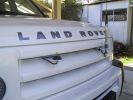
Antenna mount456 viewsBrackets fastened behind the grill using existing holes
|
|

Land Rover Aerial Fin images for both Glass and Metal Roof Disco3 / LR3863 viewsAs well as the two different fins, this pdf also shows the plastic blanking plate for glass roof vehicles where no fin is installed.
The glass roof fin is secured by two security screws from the top into a plastic frangible glue on gasket. The hope is that when struck, the fin will shear off and not crack the glass roof. Re the metal roof design, the fin is secured from underneath via two nuts.
The pdf also shows the various electrical bits related to the antennas. In the UK, the fin would house not only a cell phone antenna but the TV and satellite radio antenna electronics as well; in the States, the Sirius sat radio antenna and a G type cell phone antenna if the phone kit was installed would reside within the fin. The SAT NAV GPS antenna is located within the High Mount Brake Light plastic mounted to the upper rear hatch.
|
|

Fin cell phone aerial drawing190 viewsThe factory aerial for the factory NAV / GPS on my 2005 HSE is within the high mounted stop light lens at the top of the upper hatch door. I do not have the factory installed phone kit, and as such, do not have the fin installed; instead there is just a plastic blanking insert to fill the cell phone aerial wiring hole in the metal portion of the roof; hence this requirement for an "external" cell antenna. For those that do have the fin on their glass roof, the fin is screwed on to a glued on plastic gasket, (sort of), and not bolted thru as per the metal roof 3's.
|
|
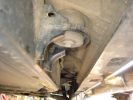
drill 1 hole for rear mounting 145 views
|
|
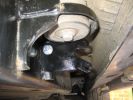
home made bracket for rear mounting147 views
|
|

Thread upload1 viewsImage uploaded in thread 198799
|
|

Thread upload2 viewsImage uploaded in thread 198799
|
|
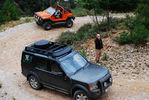
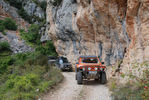
Andora mountain trail62 views
|
|
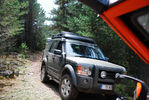
Andora mountain trail56 views
|
|
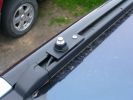
Andora mountain trail58 views
|
|
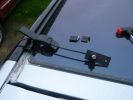
Aerial Mount Cabling121 views
|
|
Aerial Mount cabling130 views
|
|
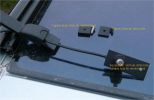
Ant Mount91 views
|
|
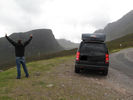
145 viewsApplecross mountains
|
|
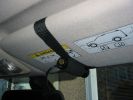
Cam mounted on sun-visor243 viewsI usually place something in between the sun-visor and the roof lining to give the cam a better angle. At Boughrood it was a roll of PVC tape. For Boughrood I also placed a small cardboard box between the cam and the sun-visor to bring the cam away from the dirty section of windscreen.
|
|
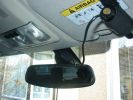
Cam mounted, cable tucked behind mirror (cool Disco3 sticker shot in the mirror)272 views
|
|
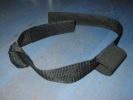
Velcro strap mount172 views
|
|
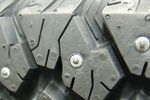
Studs mounted to AT243 views
|
|
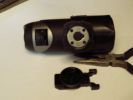
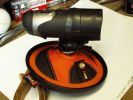
Standard Oregon AT2000 Mount - totally non-standard and useless70 views
|
|
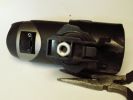
Modified Oregon AT2000 Mount - now with captive nut for a standard camera mount82 views
|
|
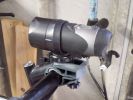
Modified Oregon AT2000 Mount - screwed onto Monsterpod75 views
|
|
Modified Oregon AT2000 Mount - still mountable on original fittings82 views
|
|
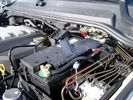
BCI Group 40R Deka 640RMF battery showing vent hose run forward to windshield washer reservoir area 1430 viewsRecessed post "Euro profile" battery to "match" OEM and stock Land Rover bracket; note that the Traxide SC80-LR module is mounted at an angle to allow for the main cable to sit under the cover so cover still closes.
The battery is a nominal 7", (180mm), high, but sits on a 1" battery spacer set under to raise the bottom front end of the battery such that the approx 11", (290 mm), length of the BCI 40R battery rises above the angled plastic nibs at the forward end bottom of the case front; hence sufficient space, (1/4", 5mm) remains at the brake reservoir end.
Also the 40R battery does not have hold down "flanges" on each end; on the sides yes, but not the ends so no additional length is required.
When I had to replace the 40R, this time I installed the shorter, (9.625"), taller, (7.5") Interstate BCI 47 / DIN H5 battery which eliminated the spacer on the bottom and better fit the stock LR tie down bolt lengths. Deka also has a BCI 47 / DIN H5 that would work fine as well.
|
|
1074 views
|
|

Thread upload2 viewsImage uploaded in thread 198799
|
|
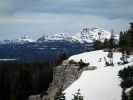
125 viewsThe view from Bald Mountain Overlook. Snow on the road prevented us from going further.
|
|

LR driving lamps mounted on A Bar95 views
|
|

battery mounting and cables50 views
|
|
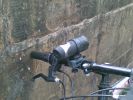
Another mounted camera - my Oregon ActionCam 200075 views
|
|
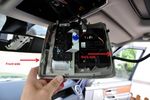
Roof panel dismount66 views
|
|
billy 2004117 views
|
|

Thread upload19 viewsImage uploaded in new thread
|
|

75 viewsThe Smaller Nashers in their SIB which is inflated with an Electric pump mounted in the RIB. Great as a Taxi to and from the beach and for them (and me) to tear about in.
|
|
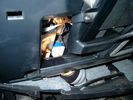
Smooth Talker Amplifier Box mounted below near steering column.179 viewsThe gold look box due to the lighting, (actually black), is the antenna amplifier located near the steering column. It can be put anyway but this seemed an OK location as I ran the antenna connector cable rearward from here to the back corner of the 3 and then up to the underside of the roof glass at the rear. The blue/white thing is the brake light switch that often must be replaced. See the Brake Light Switch file within this Gallery regarding the switch replacement.
|
|
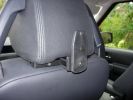
Brodit headrest screen mount292 views
|
|
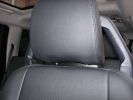
Brodit headrest screen mount253 views
|
|
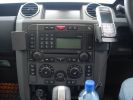
Brodit centre console mounts371 views
|
|

Mounting brackets attached51 views
|
|
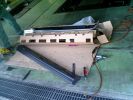
sidestep87 viewsmounting the sidestep
|
|
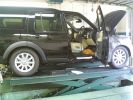
89 views
|
|

Me on the K5 launching over the "Mountain" at Cadwell64 views
|
|

72 views
|
|

Cam mount163 views
|
|
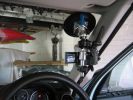
Hauge Camcorder Suction Mount SM1232 views
|
|
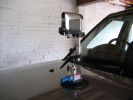
New Toy195 viewsHauge Camcorder Suction Mount SM1
|
|

Cambelt tensioner mount 200430 views
|
|
52 views
|
|
58 views
|
|

Thread upload20 viewsImage uploaded in thread 100667
|
|

Thread upload5 viewsImage uploaded in new thread
|
|

Thread upload2 viewsImage uploaded in new thread
|
|
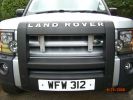
Brackets fitted to underside of A bar using mounting bracket holes.252 views
|
|
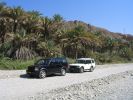
LRs stick together129 viewsA date plantation alongside a wadi in the Western Hajar mountains of Oman. My mate\'s Disco 2 in company. Cracking drive on this day some 100km off-raod through wadis and mountain graded roads. Sheer, unadulterated pleasure.
|
|
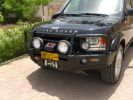
Front end327 viewsARB deluxe winch bar is very well made. Still allows Mantec sump guard to be used. Warn M8000 winch fitted - (wish I could\'ve found an M15000!) and IPF 900XS Extreme Series mounted with light stays to grille. Fog lights work fine with the replacement bumper, and indicators in bumpoer are effective too.
|
|
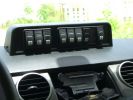
Mud UK switch binnacle453 viewsToo many switches for the roof mounted console, so this binnacle from Mud UK (desigend for the Defender) is an almost perfect match for the leather finished dash in the LR3. Switches, connectors etc bought from them too. From L - R switch functions are:
LH side mounted rack lamps
Driving lamps rack mounted
Spot lamps rack mounted
Bumper mounted driving lamps
RH side mounted rack lamps
Warn winch isolator
Rear mounted rack lamps (reversing)
Telescopic work lamp (fitted behind RH spare wheel)
|
|

high mounted rev cam20 views
|
|
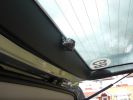
High level camera mounting on inside of tailgate trim53 views
|
|
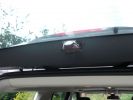
Rev Cam Mounting45 views
|
|

Mounted in 12v socket from driver\'s side43 views
|
|
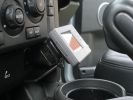
Dash Mounting from passenger side44 views
|
|
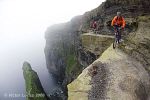
AND YOU THOUGHT YOU LIKED MOUNTAIN BIKING141 views
|
|

GoldCruise CM25 stalk mounted cruise controller387 views
|
|
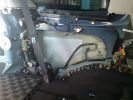
Thomas compressor159 viewsCompressor mounted ontop of the rear wheel arch behind the plastics.
|
|
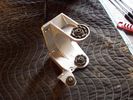
Air Compressor mounting bracket new907 viewsFound this jpg on a forum - thought it was good and is what one breaks when one jacks on the plastic air compressor cover.
|
|

Thread upload4 viewsImage uploaded in thread 199871
|
|
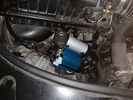
Thread upload6 viewsImage uploaded in thread 40682
|
|

Thread upload4 viewsImage uploaded in thread 199871
|
|

Thread upload4 viewsImage uploaded in thread 199871
|
|

View from the mountain top of north Corsica43 views
|
|
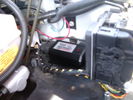
CounterAct Power Supply mounted 246 viewsPicture is blurred, however power supply is 3M two sided tape to the flat black plastic of the second battery compartment just under the antilock brake pipes to the fender side of the brake fluid reservoir. The white wire to the left rear coupler pad runs thru the firewall hole near the steering column. The blue wire to the right front coupler runs across and above the engine following the other wiring looms that cross the vehicle.
|
|
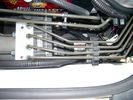
CounterAct Power supply mounted under brake lines.194 viewsThis top view shows where I located the power supply. It is attached with 3M sticky to the black plastic surface that is located under the brake lines.
When the system is operating properly, the red LED pulses about twice per second.
Some users claim they can hear a very slight hum or whine coming from the unit. My unit seems silent.
|
|
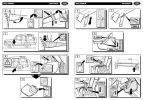
184 views
|
|
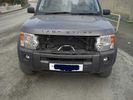
Thread upload3 viewsImage uploaded in thread 187954
|
|
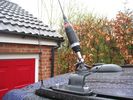
D3 with Radar sensor temporarily mounted61 views
|
|
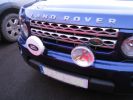
CB & PMR Aerials on D4 with RLD CB Aerial mount202 views
|
|

20 viewsCourtesy of: Interactive Land Rover MENA
24 April
Back in the city – after a wild set of adventures in destinations from mountains to deserts, cities to nomad camps, the Land Rover Journey of Discovery heads through urban Beijing at journey’s end.
|
|
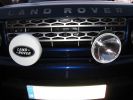
D4 Spots Bumper Mounted (1)398 views
|
|
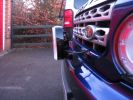
D4 Spots Bumper Mounted (2)343 views
|
|
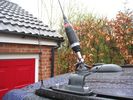
D4 Spots Bumper Mounted (3)410 views
|
|
RLD CB Aerial Mount 1196 views
|
|

Power distribution board mounted in the boot15 views
|
|

Power distribution board mounted in the boot 218 views
|
|
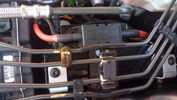
100A fuse mounted in secondary battery compartment15 views
|
|
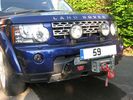
D4 LR Winch Mount & Bumper Mounted Spots506 views
|
|
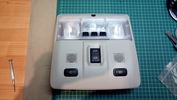
Roof console with mounted switches148 viewsOne switch is for switching the R-750 spot lamps, the other is for additional external lighting using a second Relay kit provided by OEM Plus.
|
|
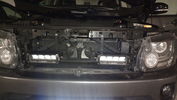
Mounted lamps136 views
|
|
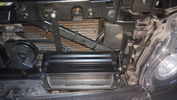
Lamp mounting details129 views
|
|
Lamp mounting details135 viewsTwo holes have to be drilled into the frame to fasten the brackets
|
|
Lamps mounted157 views
|
|
Electronic Relay156 viewsRelay mounted to mounting frame of the brake pedal
|
|
Fuse mounted in secondary battery box111 views
|
|
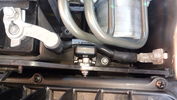
Fuse mounted in secondary battery box95 views
|
|

71 views
|
|
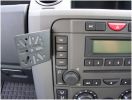
Dashmount for RHD D379 views
|
|
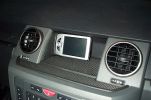
Mitac Mio 168 PDA403 viewsPDA with built in satellite reciever mounted into cradle mounted on "l" bracket to avoid drilling the side of recess.
|
|
Thread upload14 viewsImage uploaded in thread 116207
|
|
ipod detail159 viewsipod mounted without lr´s ipod kit. A cable cames from HK back aux input.
|
|
Thread upload5 viewsImage uploaded in thread 80785
|
|
Thread upload3 viewsImage uploaded in new thread
|
|
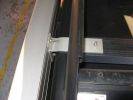
Awning182 viewsMounting slots for awning
|
|
Awning157 viewsMounting bracket
|
|
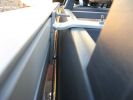
Awning184 viewsSide view of mounting bracket, made of 6mm x 50mm ali flat bar.
|
|
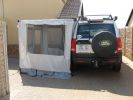
Awning248 viewsI have dual mounted awnings which can convert to tents if required. The outer side walls are an off the shelf purchase, but
the inner ( vehicle side )have to be made to spec.
|
|
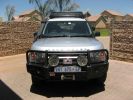
259 viewsARB bull bar, Hella 2000 series spots, Warn winch & Hella low profile rr mounted spots, expedition rr & Howling moon awning.
|
|
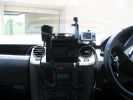
369 viewsHome made console, GPS in clip off mount, 29Mg radio,dual battery moniter,long rang tank gauge & elecric switches.A clip out removable console with no screws.PS also a camera mount.
|
|
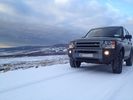
Snow150 viewsSnowy day in March in the Dublin/Wicklow mountains
|
|
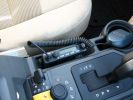
UHF Radio488 viewsGME TX3400 head mounted in console
|
|
Mountain Rescue\'s 11089 views
|
|
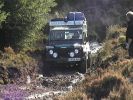
Mountain Rescue's 11084 views
|
|
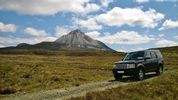
Discovery & Mount Errigal in County Donegal68 views
|
|

Side mount antenna23 views
|
|
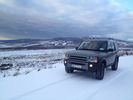
Snow178 viewsSnowy day in March in the Dublin/Wicklow mountains
|
|
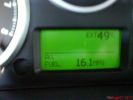
Hotter than a hot thing - 49 deg c in the mountains101 views
|
|
Looking back along the mountain track89 views
|
|
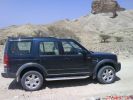
On the way to find the \'lost pools\' in the mountains101 views
|
|

Lead Car Entering the Finish116 views7 May 2007 - My D3 on duty as lead car in shinfield 10K road race. what a nightmare driving at low speed in the rain. Clock was mounted on standard crossbars. connection to additional batteries in boot cable thru side window. There is a small offroad section (actually an un-made road) Oaklands Road, Shinfield, Reading (suggest anyone test driving in the Reading area take this road)
|
|
spot light mounting bracket150 views
|
|
The camp site - from a short distance up the Dampier Mountain Fire Trail.78 viewsThere is a silver D3 in the photo - belonging to eran48.
|
|

Big Kev, and IanR/Anne coming down Dampier Mountain FT77 views
|
|

Big Kev and trailer - coming up Dampier Mountain FT in mist75 views
|
|
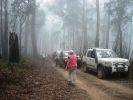
Regrouping on the Dampier Mountain Fire Trail102 views
|
|

Going down a steep section of the Dampier Mountain FT81 views
|
|

Heading home - on the Dampier Mountain Fire Trail81 views
|
|

62 viewsYou can see how the spot to mount the control box has the long flat section to the left - so I mounted the box upside down to allow the 2-sided tape to stick to this bit.
|
|
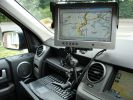
Solo screen mount489 viewsNote that the mounting bracket doubles as a screen mask
Mount is Manfrotto \'super clamp\' & arm
|
|
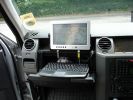
Navigator display mount456 viewsKeyboard is optional, all functions including alphanumric input can be carried out from the touchscreen
|
|
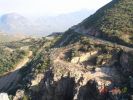
The pass at Mount Leba. Unbelievably beautiful, and the road is perfect144 views
|
|
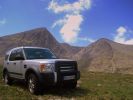
Disco3 at Carantouhill CALENDAR ENTRY 2009441 viewsCarantouhill, Irelands highest peak. a group of us set off in my disco 3 and friends defender 90. it was a nice trek to the base, with a small river crossing and some big rocks to navigate around. we camped out and climbed the mountain the next day. summer of 2008.
|
|
Blue Mountains National Park137 views
|
|
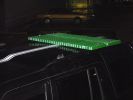
94 viewsNew bridging ramps mounted on the roof
|
|
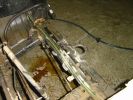
Recovery hook113 viewsMakes it clear how the front recovery hook is mounted into the chassis
|
|
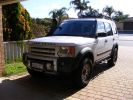
425 viewsRemoved the ARB bull-bar and refitted the original front bib (but now with two additional recovery points fitted to the modified ARB mounting brackets).
|
|
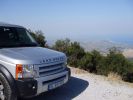
View from mount Olympus161 views
|
|
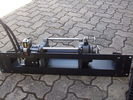
Hidden winch mount with winch in place124 viewsHydraulic hoses are now installed. Note notch for hydraulic:electric solenoid to fit in mount.
|
|
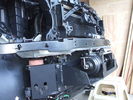
Front-right view (looking forward) of partially installed winch and mount124 viewsThe closest bracket, with three rubber grommets, is the air bag sensor. Before beginning any of this work, be sure to disconnect battery and discharge any remaining electrical power. I didn't want to accidently drop this assembly and cause the airbags to deploy.
|
|
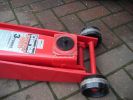
chassis mount169 views
|
|
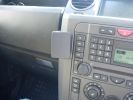
Brodit dash mount370 viewsBrodit ProClip 653573
|
|
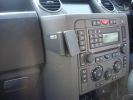
Brodit dash mount431 viewsBrodit ProClip 653573
|
|
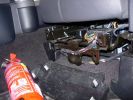
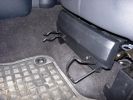
Mounting a non-LR fire extinguisher535 viewsShowing the plastic cover removed. I will make up a metal plate or bar so that the extinguisher frame can be mounted directly to this framework under the seat.
|
|
Mounting a non-LR fire extinguisher426 views
|
|
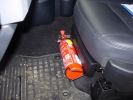
Mounting a non-LR fire extinguisher410 viewsSimply fixed it to the plastic cover for now, but will remove cover and mount further back later - just need to make up a metal plate first.
|
|
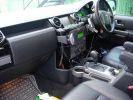
Piano black dash kit and Brodit proclip mounts683 views
|
|
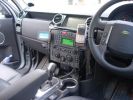
Piano black dash kit and Brodit proclip mounts588 views
|
|
Piano black dash kit and Brodit proclip mounts612 views
|
|
midland 42 mount2111 views
|
|
Midalnd 42 mount 1132 views
|
|
Iceland Mountain Stream77 views
|
|
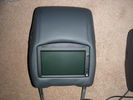
Screen mounted in D3 (Premium leather) headrest56 views
|
|
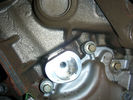
Front Belt Tensioner Mounting118 viewsCam Belt replacement Front
|
|
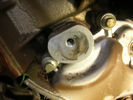
Front Belt Tensioner Mounting103 viewsCam Belt Tensioner
|
|
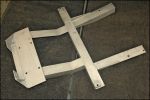
after market winch mount available in carbon steel or stainless177 views
|
|
Tonka at work228 viewsTrip over to the mountain pass to the cabin with a load of timber,
|
|
£895 for 12000lbs winch and mount202 views
|
|
calendar entry 2009528 viewsHigh in the Iceland Interior June 2008 - F88 to Askjar Volcanoe - The mountain is called the "Queen of the Mountains - Herðubreið" Car is G4 Challenge Event Car from 2006 - Team Germany / Spain - Stage 3/4 Bolivia
|
|
190 viewsGetting closer to the finished product. The steel tube in the middle reaches up to the body mounts on the frame.
|
|
Top of roof mount antenna327 views
|
|
Underside f roof mount antenna344 views
|
|
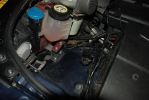
143 viewsbracket installed into existing mounting holes for coolant reservoir
|
|

Dampier Mountain F/T47 views
|
|
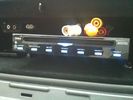
DVD Player63 viewsVeba DVD Player fitted into top glove box, AUX in for connection of Ipod, Games COnsoles etc. Remote control with sensor mounted by rear view mirror.
|
|

roof mounted DVD/TV419 views
|
|
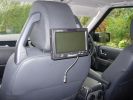
DVD screen on Brodit headrest mount371 views
|
|

Thread upload16 viewsImage uploaded in new thread
|
|

Thread upload18 viewsImage uploaded in new thread
|
|

81 views
|
|
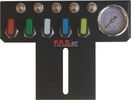
FASKIT air panel unmounted842 viewsThis is the manual air valve panel that is mounted in the "empty" space where the FBH normally resides. The gauge reads to a maximum of 25 Bar. The air tank relief valve is set just over 16.5 Bar (240 psig); the front air springs run maybe 9 Bar, (130 psig) and the rear, somewhat less, perhaps between 5 and 8 Bar. (70 to 115 psig). Max theoretical air spring pressure at full compression due to a big bump and full gross is approximately 27 Bar (390 psig).
|
|

Magic Mountain50 views
|
|
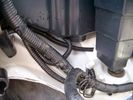
Front Coupler pad to right front under air filter housing 156 viewsThe brighter white "square" behind the black air cleaner drain is the Coupler Pad location I chose for the right front corner. The 1/4", (5mm), black wiring loom carries a single blue colour conductor between the power supply and pad.
A second coupler pad, (white conductor), is located near the left rear tail light. The mounting location is accessible from the rear compartment access "door" where the trailer hitch wiring attaches to the factory loom.
|
|

mist on the mountain105 views
|
|
Thread upload1 viewsImage uploaded in thread 175564
|
|
guilin19 views
|
|
Thread upload41 viewsImage uploaded in thread 77665
|
|

GX107 and Webasto 1533 timer mounted in engine bay7 views
|
|
Near Mount Hotham.31 views
|
|
The Mount Hotham ski resort area.30 views
|
|

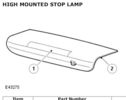
high level brake light removal544 views
|
|

High Mounted Stoplamp Removal.pdf448 views
|
|

Thread upload1 viewsImage uploaded in thread 195748
|
|
Thread upload0 viewsImage uploaded in thread 195748
|
|
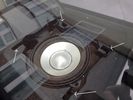
Speaker grill mount holes6 views
|
|

Thread upload1 viewsImage uploaded in thread 204567
|
|
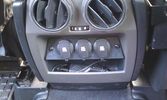
12V outlets for the 2nd row13 viewsI used a part of the old front (which was broke) to cut out a 'mount' for three 12V outlets for the second row.
The outer outlets are switched on whenever the ignition is on as I used the connector that originally was out there.
The middle outlet is connected to the auxiliary battery and is switched on/off through a rocker switch in the central console. (other picture)
This middle one is going to be used for our small fridge that usually resides just there when we're on holiday.
|
|
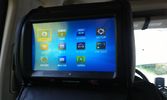
One of the multimedia headrests14 viewsI used to have seperate touchscreens mounted on the headrests.
I now went to the xtrons 9" headrests which gives the children the possibility to
- view whatever movie they want to
- listen to whatever music they want to
- play whatever 32native game they want to (although I'm not quite happy with those)
and they can do this no matter what the other one is doing :)
|
|
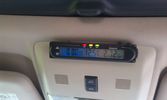
Battery check display15 viewsI mounted a digital battery display in order to see the voltage on the auxiliary battery.
There's also a thermometer which gives the inner and outer (via a side switch) values.
The display is switched on/off via another rocker switch.
|
|
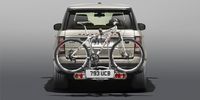
Thule 2 bike rack12 viewsTow bar mounted bike rack - genuine Land Rover
|
|
sticks28 viewsif you prop up the mountain with a stick it represents a person with illness. the stick should bring them strength as it holds up a mountain
|
|
mountains getting closer22 views
|
|
Maplins mount working just fine with my ActionCam84 views
|
|

GoPro Black mount23 views
|
|
Revised Mounting27 views
|
|

15 viewsMount Suliven
|
|
Mounting shovel on rear.21 views
|
|

Mounting shovel on rear.29 views
|
|
Aerials 0298 viewsRoof mounted fixed and temporary aerials
|
|

Aerials 01101 viewsRoof mounted fixed and temporary aerials
|
|

FT-8900 radio body mount97 viewsYaesu FT-8900 mounted on access door. Multi-way socket on front.
|
|
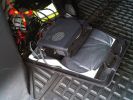
FT-8900 mount97 viewsFt-8900 radio body mounted in luggage area
|
|
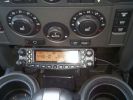
FT-8900 radio head mount96 viewsFT-8900 radio head mounted on ashtray. Extension speaker below.
|
|
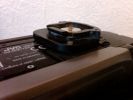
tripod mount on camera88 views
|
|

1521 viewsPicture showing two sub bass units and the computer mounted on a board in the newley aquired space.
|
|
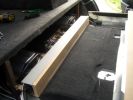
1492 viewsComputer and sub bass mounting board pusshed back into place
|
|
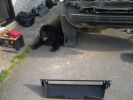
1554 viewsThis is a shot of the Hidden winch mounting, The dog is holding the car Up !!
|
|
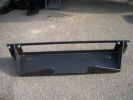
1518 viewsHere is a close up shot of the winch mounting bracket
|
|
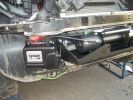
1868 viewsWinch control pack mounted, ready to wire now.
|
|
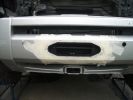
1731 viewsThe bumper cover marked up and cut to mount the hawser flush with the front.
|
|
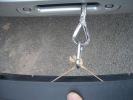
1735 viewsIndustrial elastic a stanless clip and a winch mount the number plate back in place
|
|
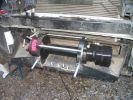
The Winch in its mount598 views
|
|
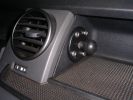
Ram mount for ASUS R2H UMPC183 views
|
|
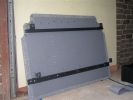
Underneath platform - bolts to seat mounts. T-nuts to through bolt fittings176 views
|
|
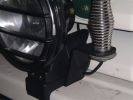
UHF antenna mounted to bracket fixed to driving light mount174 views
|
|

Camera Mount128 views
|
|
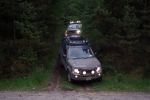
103 viewsBarry G and Discowex emerge from Ballyhouras Mountain/May 2008
|
|
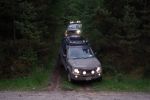
2009 calendar entry567 viewsBarry G and Discowex emerge from Ballyhouras Mountain Cork Ireland/Irish offroad day.
|
|

Split Charge diode mounted on a D4.90 views
|
|
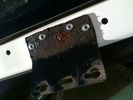
A pillar mount pop-rivetted in place and form-a-gasket used to seal underneath162 views
|
|

A pillar mount installed166 views
|
|
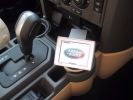
Garmin Nuvi Mount252 views
|
|
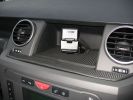
garmin sat nav mount bracket150 views
|
|
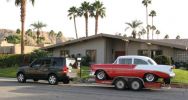
Towing my 56 Chevy264 viewsI towed my Classic Chevy about 650 miles from Palm Springs to Reno, including over the Sierra Nevada mountain pass (7,085 feet (2160 meters)) and the LR3 pulled very well.
|
|
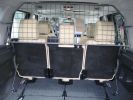
Paddock dog guard view from rear283 viewsInstalled; can see the mounting points
|
|
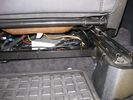
AV switch mounted beneath the front passenger seat62 views
|
|
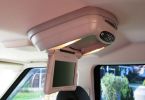
Rosen A7 Roof mount DVD - pretty tidy me thinks, for an amateur686 views
|
|
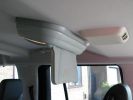
Rosen A7 Roof mount DVD in D3521 views
|
|
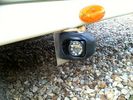
Side mounted camera50 views
|
|
Sunday, December 4th, 2011 at 7a.m. in Amboseli National Park, Kenya (East Africa)227 viewsThe top of Mt. Kilimanjaro showed it self for 15 minutes in the morning and my buddy snapped this picture of me and my Disco 3 from a Defender while on a morning game drive
|
|
RLD CB Mount39 views
|
|
Laerdal to Aurlandsvangen mountain crossing, Norway 2009260 viewsCalendar 2010
|
|
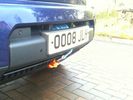
Redg plate mounting127 viewsThe original redg plate mounting was modified. An L-shaped piece of plastic now sticks out rearward from the top of the mounting and this hooks over the back of the top edge of the bumper cover. Then 2 spring clips hold the bottom edge of the mounting in place. Proximity sensor and surround camera seen unaffected.
|
|
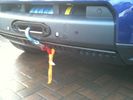
Recessed Hawse 143 viewsI had the hawse powder coated black which was not necessary in the end as it is normally hidden behind the number plate. The cutout of the hole in the bumper cover could have been a bit tidier, but again, it is usually hidden when winch not in use. Note the two clip receivers which hold redg plate mounting in situe.
|
|

342 viewsCALENDAR 2011
Norway mountains in January
|
|
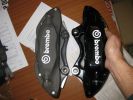
Brembos - FFRR vs RRS 01131 viewsHaving acquired the wrong calipers and discs initially, I purchased the correct RRS kit from TLO. Useful picture - the light grey calipers show that the FFRR has a smaller offset mounting point and smaller diameter threaded holes. The glossy calipers are for RRS and fit D3 perfectly with correct offset and M15 mounting holes.
|
|
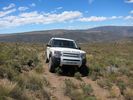
on the mountain15 views
|
|
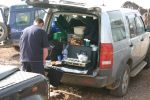
Atlas Mountains ..........and the kitchen sink47 views
|
|
Atlas Mountains ..........and the kitchen sink709 viewsCalendar 2008 entry
|
|
tomtom910 mount354 views
|
|
Centre console in black62 viewsnew mount installed for tom tom, thanks to Brucey for the use of his skills
|
|
New Shovel Mount26 views
|
|
New Shovel Mount23 views
|
|
New Shovel Mount25 views
|
|
Here\'s a view of the Drive+Play "brain" which I mounted in the empty space in front of the gear selector.650 viewsI ran the power and audio cables to the rear of the center console in order to tap into the 12 volt power and "Aux" adapter. When you're sitting in the back seat, you don't see any cables whatsoever. My entire goal was to make it look as factory original as possible.
|
|
Swaziland Mountains72 views
|
|
Swaziland Mountains75 views
|
|
Swaziland Mountains73 views
|
|
Salinas252 viewsCALENDAR ENTRY
This is in Puerto Rico, USA.
A rocky trail to a camping area on top of a mountain. 4x4\'s only.
|
|
Bieszczady, the West Carpatian Mountains, Poland84 viewsmid 2014
|
|
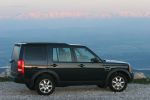
Sunset on the Alps136 viewsOn top of my local mountain with the Swiss Alps bathed in a setting sun 80km to the south.
|
|
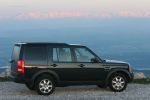
CALENDAR 2008 ENTRY - Sunset over the Alps770 viewsCALENDAR 2008 ENTRY
Drove to the top of my local mountain so "the airliner" could pose for a couple of pics with the sunset drenched Swiss Alps in the background, 80km to the south.
|
|
Bieszczady, the West Carpatian Mountains, Poland81 viewsmid 2014
|
|
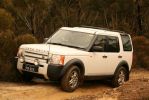
Blue Mountains Drive401 views
|
|
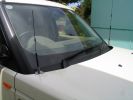
UHF Antenna Mount361 viewsView of both antennas (UHF & Mobile Phone)
|
|

UHF Antenna Mount384 viewsView from underside of bonnet. The lower half of the mount is folded from stainless steel and bolted through an exisitng oval shaped hole in the bonnet. This hole is throught the heavy steel plate that the bonnet hinges bolt to - not just the aluminium panel. A specially machined rectangular nut was made to pass through the oval hole, rotate 90 degrees and then stopped from turning by a slight shoulder on the nut.
|
|

UHF Antenna Mount323 viewsWith Bonnet open. Note antenna finishes parallel with windscreen when bonnet is open
|
|

Mobile Phone antenna mount344 viewsView of mount with bonnet open - note stick on patch to protect plastic panel at base of windscreen
|
|

New pump showing reinforced casting of the tensioner mount13 views
|
|

New pump showing reinforced casting of the tensioner mount10 views
|
|
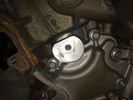
Old pump design has a weak point on the tensioner mount11 views
|
|
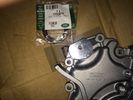
New pump design has the reinforced casting for the tensioner mount11 views
|
|
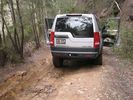
Blue Mountains fun71 views
|
|

Bulgarian Mountains37 views
|
|
161 views
|
|

iPad holder17 viewsHow to mount/ demount the iPad holder.
|
|

7 views
|
|

ipod mounting224 views
|
|

Base mounted on Expo Rack lined with non slip mat 73 views
|
|

Jeep Commander, Rocky Mountain National Park, Colorado156 viewsA 5.7 litre V8 330bhp POS!
When you plant the throttle, engine noise just gets louder, nothing else happens!
|
|

Thread upload2 viewsImage uploaded in thread 40682
|
|

Thread upload18 viewsImage uploaded in new thread
|
|

Thread upload7 viewsImage uploaded in thread 175095
|
|

Thread upload3 viewsImage uploaded in thread 202444
|
|

LA501-016 - Technical Bulletin - Tailgate Support Mounting84 views
|
|
Thread upload3 viewsImage uploaded in new thread
|
|
Thread upload10 viewsImage uploaded in new thread
|
|
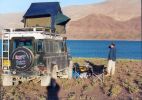
134 viewssomewhere in the high atlas mountains april 2001
|
|
Leather phone mount from avrmobiles.co.uk484 views
|
|
mountain has lifting eye18 views
|
|
87 views
|
|

Fixing method13 viewsStainless Jubilee clip to mount electrics box to winch post
|
|

50 views
|
|
On top of Mount Buller.39 views
|
|
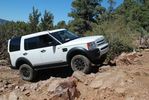
Gold Mountain Trail52 views
|
|
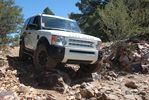
Gold Mountain Trail43 views
|
|
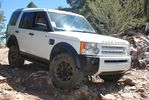
Gold Mountain Trail46 views
|
|
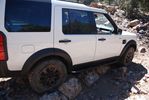
Gold Mountain Trail53 views
|
|
348 viewsAntenna Mount
|
|
327 viewsAntenna mount.
|
|
335 viewsHere is the antenna mount on the roof rack. The black aluminum bar is custom made to hold the antenna mount.
|
|
Air Suspension ECU Fuse 35P cut off switch.3820 viewsThis shows the SPST rocker switch mounted in the blank plate installed in lieu of a manual passenger side air bag shut down switch - now automatic via passenger seat pressure switch. Fuse 35P (5 amps) is located in the interior fuse box behind the lower glove box and protects the ignition power supply to the Air Suspension ECU. When the SPST switch is moved to the OFF position, the RAISE /LOWER switch on the centre console is not powered, and hence does not function. As such, some signals from the wheel height sensors and CPU are ignored. By itself however, removing F35P will probably not stop the 3 from self dropping, particularly after the engine is turned off.
Fuse F3E, (5 amps), located in the engine bay fuse box by the starting battery protects the circuit that provides feedback to the Air System ECU indicating that the Compressor Relay has successfully operated and that the Air Compressor is or should be operational, can also be removed, (but is probably not totally necessary), as it gets its power thru F26E. Hence Fuse F26E, (20 amp), also located in the engine compartment fuse box is the fuse that must be removed. This fuse protects the circuit that provides full time battery power to the Air System ECU. When in place, current thru the fuse powers the periodic re-levelling action, (usually lowering a bit with that brief air release noise), that often occurs when the vehicle is parked and the engine is off.
Removing F26E fuse will stop the auto levelling action and also inhibit any other down to the stops signals, (engine running or not). When F26E is removed, no power can flow thru to F3E, hence removing F3E is more for insurance than an absolute requirement. The same with F35P, removing F26E removes primary full time power from the Air Suspension ECU, and hence removing the F35P fuse should not really be required either as long as F26E has been removed.
|
|
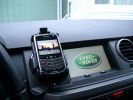
BlackBerry Tour 9630 mounted on air vent265 viewsThe antenna amplifier is mounted lower near the steering column. The amplifier box is painted black but looks sort of gold coloured due to the lighting in the other jpg showing the amp located under/near the steering column.
|
|
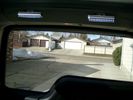
Boot lighting, looking to rear - hatch closed 542 viewsView shows the lights mounted in the rear on an early spring day.
In operation, the lights are tilted so that they shine downwards. The lights are mounted high enough up that one cannot see the LEDs from the front thru the rear view mirror; also the LEDs are so directional, that no light is thrown on the side glass.
Each assembly contains 15 LEDs, however the reflector is such that the LEDs appear to double.
|
|
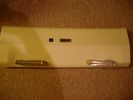
Boot lighting panel, finish side up 309 viewsThe above jpg shows the two 15 LED light assemblies as well as the SPST rocker switch mounted beside the W5W Land Rover supplied light.
The reality is that with the recent development of LED lighting that can replace a W5W T10 bulb, one can almost achieve the same results just by installing a LED bulb within the factory light.
|
|
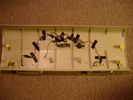
Boot lighting panel, wiring side up 281 viewsThis shows the back side of the plastic cover panel on which the two LED lights are mounted.
Also of note is the SPST rocker switch to switch the new lights off independent of the the Land Rover W5W light.
The new light pair will only power up if the Land Rover light is powered and hence dims and automatically goes off along with the Land Rover light.
The Black wire is ground, the Purple wire is +12VDC.
|
|
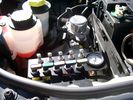
View of mounted panel from front left side877 viewsNote that all valve handles are shown in the OFF position, (the trouble position). In this case, the air that is in the air springs, (if any), is trapped in there - that is the valve blocks cannot vent whatever air is already in the air springs as the air lines between the springs and respective valve blocks are closed off by the FASKIT valves. In operation, there may be only trouble with one air spring, (perhaps a wheel height sensor), and as such, only one valve would need to be closed. If there was complete air compressor failure, then all valves would be closed and then as required, each spring could be manually filled from an outside clean dry oil free air source.
|
|
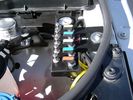
View of mounted panel from front left corner737 viewsI drilled a hole for the supplied 6 mm tie down toggle bolt in a flat portion of the wing on which the panel sits. I inserted a 50 mm flat rubber washer between the wing metal surface and the underside of the black painted panel plate; also a 40 mm flat rubber washer between the supplied fender washer and the metal plate - just seemed like a good idea so surfaces mate well even if wing metal not completely flat.
|
|
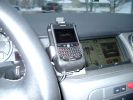
Blackberry Tour mounted on air vent showing default analogue clock 213 viewsA characteristic of the Blackberry is that when charging, the display can default to an analogue clock. Hence when the unit sits in the holder, the phone is being charged and the analogue clock displays. When the phone rings, the clock disappears and the call id displays.
|
|

Wheel cut thru definitions and specs898 viewsNote the location of REAR SPACING and also OFFSET; probably two of the most important dimensions and not always understood as related to wheel size and relationship to the brake components.
For the 3, Rear Spacing is approximately 6.5 inches or 165 mm for a nominal 8" rim. Offset is 53P or 53mm Positive, which means the distance from the machined hub flat mounting surface to the rim's true centreline is 53 mm in the outboard direction. (The rim illustrated has a negative offset.)
As Positive offset increases, this means the wheel wraps around the disc brake mechanism more deeply, and hence the more the wheel would cover the brake parts. This is why most 18" wheels will not fit with the larger Brembo "supercharged engine" brake calipers.
Pitch circle diameter is 120mm; Pattern is 5 lug, and the tyre load rating is 112 with a recommended tyre speed rating of H or higher along with the XL load rating. For the 3, the stock tyre diameter is about 30 inches. The 255/60/18 or 255/55/19 OEM tyre outside diameter is 30.04 inches; Wheel lug torque is from 130 to 150 Nm or 96 to 110 lbf-ft and the lug nut hex socket size is 22mm.
Max Load High Speed Driving Tyre pressures are Front, 33 psig, (230 Kpa) and Rear, 42 psig, (290 Kpa).
The OEM rims are rated at 940 kgs, the highest that LR makes, hence while rims from other Land Rover products may physically fit, the odds are they are under rated in a weight sense.
|
|
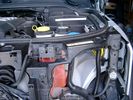
Wiring (tubing) loom at left headlight showing FASKIT panel 584 viewsThis shows the wiring (tubing) loom and FASKIT panel mounted to left wing. The loom moves a a couple of inches (50mm) towards the bottle once the headlight is put back in as there is not enough free space for the loom as located. The FASKIT panel is just visible at the top left corner of the picture.
|
|
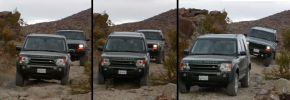
Smooth off road ride!399 viewsThis was the first time I took my LR3 off-road. I traded my Jeep Wrangler for this vehicle so I was used to heading into the rugged mountains. I was very amazed (as were my friends in their Jeeps) just how level the LR3 remained as I navigated over various dips and mounds. You can see the Cherokee behind me couldn't say the same.
|
|
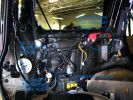
a few items being built in behind cover panel.442 viewsred inverter will have fluch mount plugs, air outloet will be flush, guage with window in lower pop-panel and switches and fuses for all rear items behind popout panel.
12v sockets being added as well, high and low.
|
|

LR3 and 4 NAS hitch receiver original and newer third generation.773 viewsThe picture shows the original 2005 model "plow" for the LR3 and the newer shorter hitch receiver introduced with the LR4. Either receiver can be used on the LR3/D3; they are interchangeable.
The part number of the newer third generation short style is LR019990 replacing previous long type part number KNB500080. There were two versions of the longer one, KNB500080 with the orange key, apparently a better locking setup. The first generation, KNB500023, with a black key was less than perfection.
The green lock assembly with orange key, part number KNW500010, shown on the shorter hitch, can be purchased separately should a key be lost.
Regardless of receiver model, the receiver will accept nominal NAS 2" tongue on which may be mounted the appropriate ball size.
|
|

Horn Wiring Circuit LR3578 viewsThe is the wiring diagram for the dual horn circuit.
The Horn Relay, (R133), is not a big black thing hidden somewhere but instead what is called a FET, (and it is hidden)!
This is a Field Effect Transistor that is built into the circuit board that is mounted to the back of the fuse box that is located behind the lower glove box door on the passenger side of the 3. The related 15 amp fuse, 12P, is mounted in this fuse box and is often called F12P, where F is for fuse, and P is for Passenger compartment.
This is to help differentiate from another fuse and relay box, (the usual kind), that is located beside the starting battery in the Engine compartment. FxxE is often used in the naming of those fuses.
|
|
![Filename=LR3_Radio_Removal[1].pdf
Filesize=190KB
Dimensions=320x240
Date added=04.Feb 2014 LR3_Radio_Removal[1].pdf](images/thumb_pdf.jpg)
Radio Removal from Radio Stack571 viewsThis shows how to remove the radio from the stack. Basically you remove the H surround first and then at least loosen all the Torx 20 screws left and right sides from the top down starting at the narrow unit that the four way flasher/locking buttons are mounted on.
The units kind of interlock, hence some movement of each is required to remove the radio by itself. I find it best to take out the four way flasher/locking buttons assembly first as that allows access to the fibre optic cable connector into the back of the radio head without too much tugging.
|
|

Thread upload6 viewsImage uploaded in thread 155707
|
|

Thread upload6 viewsImage uploaded in thread 155707
|
|
300 views
|
|

Non-Powerfold Mirror Mount31 views
|
|

Non-Powerfold Mirror Mount31 views
|
|

Non-Powerfold Mirror Mount28 views
|
|

Tuscany 200424 views
|
|
Thread upload1 viewsImage uploaded in new thread
|
|
Thread upload3 viewsImage uploaded in new thread
|
|
Thread upload3 viewsImage uploaded in new thread
|
|

Thread upload4 viewsImage uploaded in new thread
|
|
Thread upload2 viewsImage uploaded in new thread
|
|
Thread upload0 viewsImage uploaded in new thread
|
|

Thread upload6 viewsImage uploaded in new thread
|
|
Thread upload20 viewsImage uploaded in new thread
|
|
427 views
|
|
362 views
|
|
| 552 files on 2 page(s) |
 |
1 |  |
|