| Search results - "lift" |

Lining Up Before the Event371 views10 trucks in all - 2 Heavily modded D2s, modded 03 D2, 90' RRC, lifted P38 on ATs, my LR3, modded D1, an older CJ, a Rubi that joined, and a Series III!
|
|

29 viewsdisco 3 with 4 facelift
|
|

Estrarre il circuito stampato con la batteria - Exctact the printed board with the battery18 viewsRimossa la parte superiore del contenitore, estrarre il circuito stampato sollevandolo leggermente dalla parte della batteria.
Removed the top of the box, pull out the printed circuit board slightly lifting from the battery side.
|
|
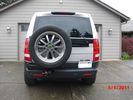
Highlift mount added27 viewsHighlift mounted in this position allows for any length with out overhead clearance issues if stood upright
|
|
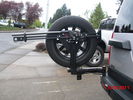
highlift and new sensor wire loom30 viewsNew wire loom added to protect sensor wires and keep things sanitary looking
. Highlift jack mount arms added and gas strut
|
|
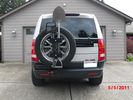
New mods for carrier. Backup sensor moved to the tire carrier. Toy rack and highlift mounts.38 viewsSon wanted all the toys on the carrier. I just wanted easy removal for a good clean look.
|
|
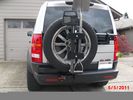
This is how to make it all work. Backup sensor on carrier43 viewsHighlift, ax and shovel. Yes they are matching colors. What else?
|
|
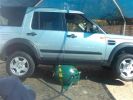
Lifts the D3 with ease "Duck, Barry! "220 views
|
|
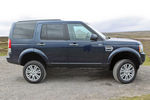
Lifted D450 views
|
|

1 General Information, Identification Codes and Jacking and Lifting24 viewsPart 1 of Discovery 3/4 Workshop Manual - General Information, Identification Codes and Jacking and Lifting
|
|

Trolley Jack Premier 2ton Long Reach Super Rocket Lift Sealey 2000LQ111 views
|
|
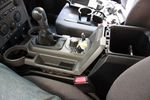
90 viewsLifted floor console upper panel to enable cubby box removal
|
|
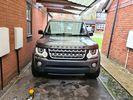
4 views4.5 facelift
|
|
5mm Allen key showing the gap - can lift vertically to go flush111 views
|
|

Screws to open to lift air filter lid118 views
|
|

Lift air filter lid114 views
|
|
12 views
|
|
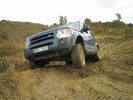
Wheel Lift133 views
|
|

Frame Jacking Points showing where holes are located.1078 viewsThe four points marked with the arrows show where the holes in the underside of the frame are located such than one could insert a trolley jack pin type lifting adapter, (or as designed), the official LR scissors jack.
|
|

Mvubu in Botswana 2014118 viewsMvubu 2014 Discovery 4 TDV6 XS, Corris Grey.Snorkel, OL Bull Bar, Winch,OME Heavy Duty Coil Springs,Light Guards,17" Black Wheels,Cooper ST max,Dual Battery+Inverter,Drawer Storage,FR Rear Ladder,Hannibal Roof Rack,80L Excel Long Range Fuel Tank,HiLift Jack Points,75L Water Tank.
|
|
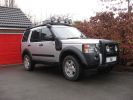
King Spring Lifted D3 Coiler395 views
|
|

Stick an LRX/F2 front end on a D3 and this is what you get...179 views
|
|
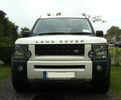
Final D3 FaceLift98 views
|
|
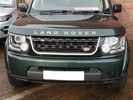
Thread upload1 viewsImage uploaded in new thread
|
|

Thread upload1 viewsImage uploaded in thread 191615
|
|
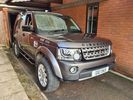
Thread upload2 viewsImage uploaded in thread 191615
|
|

Defender in the Fog, another day on the job.456 viewsThis is another normal work day for a Defender - actually the jpg is from a Land Rover advertising shot, but it may just not be a set up one. I think it is an actual working Defender. Note the visible front tow hook and how the hi lift is just rope tied on; also the normal stock headlights and I guess dual spare tyres - just another day on the job.
|
|
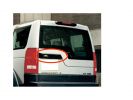
Liftgate Exterior Trim46 views
|
|
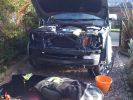
273 viewsgot the front all off ready t put the new bumper
|
|

256 viewspulled off the factory plastic and found 2 6inch cracks in the drivers side top in front of head light
|
|
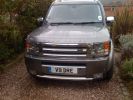
275 viewsfinally got it on
|
|
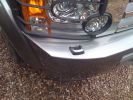
252 viewsthe bit in question
|
|
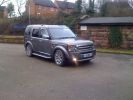
293 views
|
|
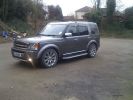
307 views
|
|
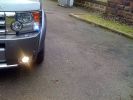
243 views
|
|

27 views
|
|

Thread upload8 viewsImage uploaded in thread 176264
|
|

Thread upload8 viewsImage uploaded in new thread
|
|
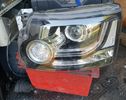
Thread upload8 viewsImage uploaded in new thread
|
|
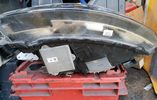
Thread upload8 viewsImage uploaded in new thread
|
|
Thread upload15 viewsImage uploaded in new thread
|
|
with hi-lift23 views
|
|
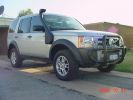
King Springs Lift330 viewsSpring Lift and Safari snorkel fitted
|
|
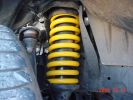
King Springs Lift239 viewsFront Spring
|
|
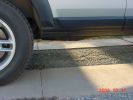
King Springs Lift216 viewsRear underbody Clearance
|
|
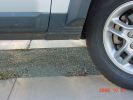
King Springs Lift203 viewsFront underbody clearance
|
|
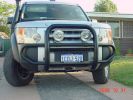
214 views
|
|
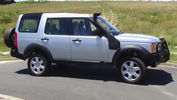
Disco3 with Llams set to +50mm and Offroad set148 viewsApprox 90mm lift
|
|
Disco3 With Llams set to +50 and normal road height144 viewsAbout 50mm Lift for use with Mud Tyres
|
|
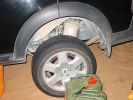
Off the ground143 viewsCar is on a desert sand sideslipe towards the camera - worst combination I could think of. Fully inflated, jack lifts the rear off by about 25mm, with suspension in extended mode.
|
|
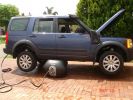
Found a good spot to lift both wheels198 views
|
|
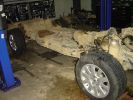
Chassis172 viewsChassis with body lifted off, and engine out
|
|
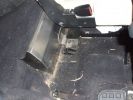
Internal water tank right side view160 viewsShows right front side of tank, with RH seat lifted. Note seat bolt is used to also hold the tank secure. This is a 5-seat D3, which has a cover over what is normally the 3rd row footrest. This is where the water tank is located.
|
|
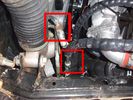
View of both hose connections to power steering system149 viewsBoth connections are shown. My friendly Qantas hydraulic hose expert cut off the elbow and modified it so I can re-install it to the PS rack before warranty work (and certainly before the vehicle is lifted off the body!!).
|
|
Thread upload15 viewsImage uploaded in thread 179750
|
|
Thread upload17 viewsImage uploaded in thread 179750
|
|
77 views
|
|

12 views
|
|

Thread upload0 viewsImage uploaded in thread 189220
|
|

Thread upload26 viewsImage uploaded in thread 115982
|
|
Thread upload1 viewsImage uploaded in new thread
|
|
Thread upload0 viewsImage uploaded in new thread
|
|
Thread upload0 viewsImage uploaded in thread 198328
|
|
Thread upload4 viewsImage uploaded in thread 177300
|
|

Fluid, Filter/Pan Combo removal and install5947 viewsThese are the LR instructions re removal and install of the plastic pan/filter combo for the ZF 6HP26X transmission on the 4.4L petrol V8 LR3.
The instructions tend to ignore the reason you have to lift the right hand side of the engine about 40 mm. This is because of a frame cross member that interferes with dropping down of the plastic pan. The real problem is a vertical "oil filter spout" that rises out of the filter/pan combo up into the transmission. The spout is the suction pipe for filtered transmission oil back up into the tranny.
On the metal pan versions, the filter is separate from the pan, hence the filter remains with the tranny when the metal pan is dropped. The filter is then removed or installed independent of the metal pan, hence with the metal pan, there is no need to lift the engine.
If one is removing the plastic pan so as to install the metal pan, then some do not lift the engine but just drop the plastic pan enough to gain access to saw off the vertical plastic spout - it is a one time procedure.
Be aware however that the metal pan uses a flat gasket and the plastic pan uses a O ring like perimeter gasket that sits in a half round groove in the tranny casing. Also the metal pan uses 21 shorter torx M6x22.5 metric cap screws for the perimeter bolts. The plastic pan uses longer M6x28.5 torx metric cap screws.
|
|
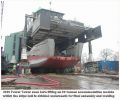
Messing with boats112 viewsShows our 300t capacity Lift System holding up an 80 tonnes module as the hull is winched underneath for final lowering and welding together.
|
|
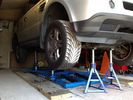
Scissor lift & axle stands107 views
|
|
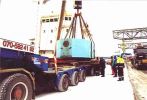
90 tonnes Press from somewhere to somewhere else !!!91 viewsCannot say too much about this as i will have to kill everyone !!!
The Heavylift Ship is fitted with a single 300t derrick,
|
|

37 views
|
|

Before lifting44 views
|
|

New toys - 2" lift Lovells Gas Legend - (+100kg springs)49 views
|
|

Fuel pressure at startup1 viewsFuel pressure starts at about 0.3 bar when ignition is on and lift pump is priming - then it goes off the scale - engine starts but it is not as smooth as normal
|
|

In the chairlift company car-park153 views
|
|
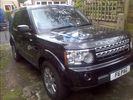
my 55 plate SE with D4 face lift179 views
|
|
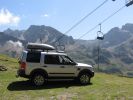
Why take the lift when you have a Landrover49 viewsHolidays in France high up in the Pyrenees we decided to drive up to the top of the Pic du Midi at an altitude of 2877m instead of taking the £60-00 cable car. Just don't look down. What a Day!
|
|
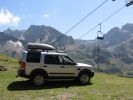
Why take the lift when you have a Landrover232 viewsHolidays in France high up in the Pyrenees we decided to drive up to the top of the Pic du Midi at an altitude of 2877m instead of taking the £60-00 cable car. Just don\'t look down. What a Day!
|
|
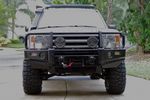
Offroad mode (with lift)....528 viewsJust need some mud to eat....
|
|

22 views1000T crane had just been used to lift a rail bridge in
|
|
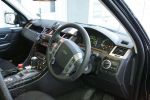
spy shots140 views
|
|

49 views
|
|
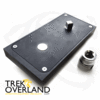
Thread upload4 viewsImage uploaded in new thread
|
|
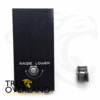
Thread upload4 viewsImage uploaded in new thread
|
|
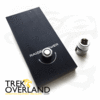
Thread upload4 viewsImage uploaded in new thread
|
|
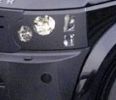
2010 D3 from http://www.caradvice.com.au/19546/2009-land-rover-discovery-facelift-spied/204 views
|
|

spy shot146 views
|
|

2010 LED?2184 views
|
|
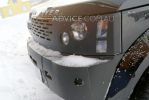
front10193 views
|
|

178 views
|
|

Thread upload0 viewsImage uploaded in thread 158284
|
|

Thread upload15 viewsImage uploaded in thread 140221
|
|
159 views
|
|
305 views
|
|
116 views
|
|

Land rovers version4099 views
|
|

Tailgate latch DIY info.322 views
|
|

mountain has lifting eye17 views
|
|

Thread upload11 viewsImage uploaded in thread 181270
|
|

187 views
|
|
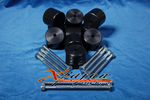
lift kit26 viewssadly not for disco
|
|
Thread upload0 viewsImage uploaded in thread 198435
|
|
31 views
|
|
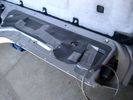
Dust Seal duct taped back together 2256 viewsThis shows the dust seal duct taped back together; also the surplus wire rope exiting from the actuator area prior to being cut to length.
I do not think the sticky plastic membrane is a dust seal, but more of a cable protector to cover up the wiring bundle that is effectively sticking to the underside of the flexible membrane.
|
|
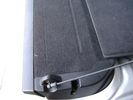
Flexible wire rope fishing leader 0.032" diameter exiting carpet 1930 viewsThis is all you see of the completed mod.
The short little angled "line" about an inch long that looks like a piece of debris and is located a few inches "above" the support cable is actually the wire rope release cable exiting from under the carpeted lift gate cover.
I drilled a very small hole in the carpet and pushed the 0.032" diameter release wire thru and then slipped the loose end under the black plastic.
To release with the lift gate etc closed, from the inside, just pull the loose end free from under the black plastic and gently pull wire about 5mm, (1/4"), and the upper door catch should release. You will have to manually push the upper door out wards to actually effect opening, but you will already be inside the rear cargo area so that part is easy to do.
The assumption is that the lower door latch still works electrically and hence, the lower lift gate half will open as normal by pressing the usual button on the top left of the lower door half.
|
|

Carpet Panel Removed showing Bass Speaker and Dust Shield 1721 viewsSomething is wrong with the orientation, however this shows what you see when the carpet is removed.
The dust shield, (under which the actuator is located), in the picture is as yet uncut. The white bit is the underside of the plastic lower lift gate carpeted cover panel.
The round thing is the woofer speaker for the Harmon Kardon radio. When the radio is working, one can see the speaker moving, but not much bass sound actually seems to emanate from the speaker.
|
|
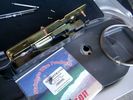
0.032" OD metal fishing leader and lead fishing weight clamped to existing wire rope 2103 viewsI used a size #0 lead fishing weight as a clamp to attach the 0.032" diameter flexible wire rope fishing leader to the release cable.
The pictured weight is the smaller #00 weight, however it did not work very well so reinstalled with the larger #0 size. I clamped to the cable as what breaks is the L retainer that is hidden in the actuator and holds the cable. When the L breaks, it lets go of the cable so you hear the clicking but there is no opening action.
Clamping on to the cable is an attempt to resolve that reality; also if the actuator electrically fails, the release mod should still do the task. Note in the picture the two Torx T15 screws that hold the gold plate to the plastic case and also the two 8mm cap screws that have to be loosened to remove the actuator from inside the door.
|
|
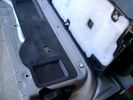
Carpeted cover removed showing uncut dust seal and underside of carpeted cover. 1616 viewsNote that there are all sorts of electrical wires sticking to the underside of the dust shield - so be very careful when you cut thru the shield.
I used a box knife very slowly and was surprised at how many conductors there were running just under the shield membrane.
|
|
Dust seal cut; note electrical conductors right under dust seal 1615 viewsShows what is underneath when the dust seal is cut. Note the electrical conductors.
I used a box knife to cut the plastic and it was at first easy; then I seemed to hit something and fortunately I stopped - it was the wires - lots of them stuck right to underside of the sticky seal material.
Also shown are the two 8mm nuts in slots that you only have to loosen to release the gold actuator assembly.
|
|
Dust seal rolled back showing electrical conductors 1646 viewsNote power conductors just under the dust seal which makes cutting the seal more interesting.
Also shown are the two 8mm nuts located in slots. One must loosen each nut to effect removal of the actuator. This will then reveal two T15 Torx screws that one must completely un-thread to remove the top gold plate from the actuator assembly.
|
|
288 views
|
|
lifted with shortened "arms"287 views
|
|

LTB00191 - Technical Bulletin - Liftgate Latch Diagnostics132 views
|
|

Thread upload5 viewsImage uploaded in thread 157772
|
|

Fuel pressure at startup1 viewsFuel pressure starts at about 0.3 bar when ignition is on and lift pump is priming - then it goes off the scale - engine starts but it is not as smooth as normal
|
|

90 tonnes Transformer - Tooley Street84 viewsOur 300t Lift System with a 90 tonnes transformer hanging from it just before lowering 9 metres into a basement.
|
|
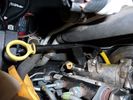
D3 MY2009 Dipstick8 viewsTwo brackets on the dipstick tube obstruct the LH EGR valve and its cooler. They must be separated in situ (Torx30 x 2) before lifting them out.
|
|
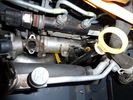
D3 MY2009 Dipstick9 viewsTwo brackets on the dipstick tube obstruct the LH EGR valve and its cooler. They must be separated in situ (Torx30 x 2) before lifting them out.
|
|
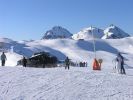
Panorama-Alm and 2000er lift104 views
|
|
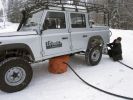
363 viewsDefender on Easylift
|
|
Spare wheel mechanism access without the need to lift rear seats75 views
|
|
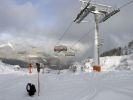
New 8-seat chairlift on the Kammerkör run221 views
|
|
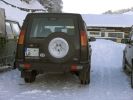
Disco in car-park at the Kammerkör chairlift231 views
|
|
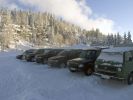
Disco in car-park at the Kammerkör chairlift267 views
|
|

Need extra lift32 viewsWho says nobody uses the yellow page directories anymore. Proof they still get used!
|
|

My Packed LR Expedition Roof Rack38 viewsShovel, 60" Hi-Lift Extreme, (2) 5 Gallon Jerry Cans in a Front Runner dual can holder, TRED 4x4 Recovery boards, and my spare 275/65/18 Goodyear MTR/Kevlar on a t-bolt mount. Almost everything is locked down except the shovel, and now the TRED's until I find a good way to mount them.
|
|

Hi-Lift Extreme 60" Jack34 views
|
|
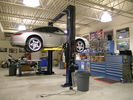
Thread upload8 viewsImage uploaded in thread 123846
|
|

Clarke CTJ3000QL and Threaded Saddle61 viewsWith the saddle withdrawn (after removeal of grub screw) it has a 25/26mm internal thread diameter - thus by my reckoning an adaptor lug should be 25mm diamater
|
|
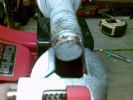
58 views
|
|
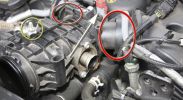
Lifting the EGR Butterfly Housing1008 viewsRemove the bolt circled in yellow. The housing can then be lifted carefully from the front. The \'Y\' shaped duct at the back will swivel at the points circled in red. Be careful of the connector at the back (arrowed) - I snapped the lugs that held it to something back there by pulling the housing up too far!
|
|

Lift Rods4 views
|
|

150t Air Seperation column South Africa95 viewsShows us lifting a 150 tonnes 50 metres long, Air Separation Column in South Africa, we were responsible from UK manufacturer up to installed onto foundations in SA.
|
|
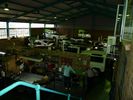
shop floor119 viewsLift area shop floor
|
|
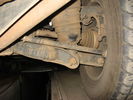
RR ( std super exteneded mode ) new off road height @ 100mm lift.97 views
|
|
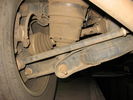
LR ( std super exteneded mode ) new off road height @ 100mm lift.88 views
|
|
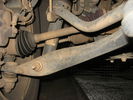
LF ( std super exteneded mode ) new off road height @ 100mm lift.91 views
|
|
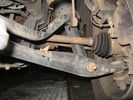
RF ( std super exteneded mode ) new off road height @ 100mm lift.81 views
|
|

Thread upload2 viewsImage uploaded in new thread
|
|
Thread upload27 viewsImage uploaded in thread 92518
|
|

The Disco 3 the day I bought it71 viewsSince then here's what's been done
1) New slotted and dimpled EBC rotors and Pads
2) Rover Specialties rock sliders
3) Clear color side markers
4) Front & Rear LR lamp guards
5) Rebuilt both of my Non working Key FOBS by replacing batteries. - I can't believe I didn't even check these when I bought the vehicle.
6) Changed the LR3 emblem to Discovery 3
7) Terrafirma Front Skid Plate
8) Tactical 4x4 Gas Tank Guard
9) ASFIR Rear Diff Guard
10) Here are the things now mounted on Roof Rack
- Full size 18" MTR/Kevlar
- (2) 5 Gallon Jerry Cans mounted in Front Runner holder
- 60" Hi-Lift X-treme Jack
- Shovel
- Magnetic CB Antennae
|
|
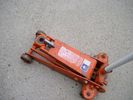
Trolley Jack Adapter817 viewsThis shows my 2.5 long ton, (2,540 kg, 5,600 pounds), trolley jack with the pin adapter that slots up into the round holes on the underside of the frame.
Use of the adapter when lifting by the left rear wheel ensures that I will not be jacking on the air compressor support; on the other three corners, it is much safer than merely jacking directly on the nearly flat narrow underside of the frame rail.
|
|
36 views
|
|
32 views
|
|

uplifting2.jpg47 views
|
|
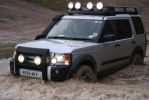
Taking a dip949 viewsCALENDAR ENTRY 2009. First off-road trip with new King Spring lift fitted to the coiler. Taken 12t Jan 08 in Whitecliff Quarry, near Coleford in the Forest of Dean.
|
|

"Want a lift?"153 views
|
|
Thread upload4 viewsImage uploaded in thread 145247
|
|

Glass lifting handle and Manfrotto Super Clamp35 views
|
|
|
|
|