| Search results - "lamps" |
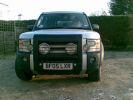
A frame with driving lamps133 views
|
|
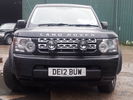
Driving Lamps with home made bracket55 views
|
|

Exterior Lighting (Fog Lamps - Non NAS)13 viewsWiring diagram for non-NAS fog lamps
|
|

Thread upload2 viewsImage uploaded in thread 141879
|
|

LR driving lamps mounted on A Bar95 views
|
|
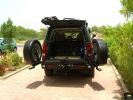
Rear end open330 viewsEccentric latch clamps for wheel carriers are very strong. No rattles on graded roads. Canvas seat covers from \'Escape\' in SA on rear jump seats can be seen, and Front Runner Wolfpack storage boxes - great for toolkit, winch and recovery straps etc.
|
|
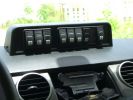
Mud UK switch binnacle453 viewsToo many switches for the roof mounted console, so this binnacle from Mud UK (desigend for the Defender) is an almost perfect match for the leather finished dash in the LR3. Switches, connectors etc bought from them too. From L - R switch functions are:
LH side mounted rack lamps
Driving lamps rack mounted
Spot lamps rack mounted
Bumper mounted driving lamps
RH side mounted rack lamps
Warn winch isolator
Rear mounted rack lamps (reversing)
Telescopic work lamp (fitted behind RH spare wheel)
|
|

Cooling system hoses - 4.4L petrol V81109 viewsThese are the cooling system hoses on the 4.4L petrol V8. The little odd shaped bleeder hose, (LR006158), shown in the top right hand corner can give problems. There is a plastic tee with a threaded air bleeder outlet located in the middle of the hose. The plastic tee can or will fail due to I guess heat distress.
A BIC pen can serve as a field fix, however for your parts kit, a nominal 3/8" ID hose size brass hose barb inline connector plus a couple of hose clamps is suggested. Better yet is a threaded hose barb brass coupling or a tee and bleeder valve to allow bleeding of the line. Land Rover now makes the plastic bleeder valve that breaks available as a separate part, # LR027661, where 0 is a zero. As such, one can now purchase that part only for addition to your field fix parts kit.
|
|
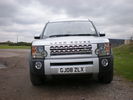
d/4 front grille conversion/ foglamps and chrome bezzells(courtesy of nismo)336 views
|
|
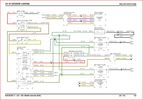
Thread upload19 viewsImage uploaded in thread 162372
|
|

D4 A Bar, driving lamps and lamp guards159 views
|
|
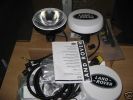
Discovery 4 Driving Lamps Kit - VPLAV0019365 views
|
|

D4 with RR Headlamps33 views
|
|
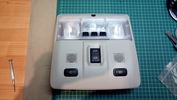
Roof console with mounted switches149 viewsOne switch is for switching the R-750 spot lamps, the other is for additional external lighting using a second Relay kit provided by OEM Plus.
|
|
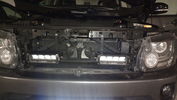
Mounted lamps137 views
|
|
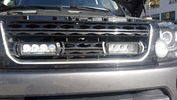
Lamps mounted158 views
|
|

Thread upload18 viewsImage uploaded in thread 147705
|
|

Thread upload12 viewsImage uploaded in thread 128311
|
|
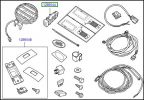
125 views
|
|
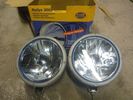
clearout driving lights1 views
|
|

Driving Lamps - Fitting75 views
|
|
Spyder LEDs with fog lamps on166 views
|
|

Wiring Diagram Fog Lamps76 viewsR130 is the (R5 relay under the hood) The wire is blue grey that is hot when the high beams are on and opens the relay contact that turns off power to the fog lamps. North America Only
|
|

Official instructions on how to remove the bumper908 viewsWhen removing the front bumper - you start with the front grill, then the headlamps, then the wheelarch trims, then the bumper...
|
|

Official instructions on how to remove the wheel arch trims624 viewsWhen removing the front bumper - you start with the front grill, then the headlamps, then the wheelarch trims...
|
|
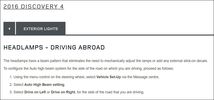
Thread upload4 viewsImage uploaded in thread 204301
|
|
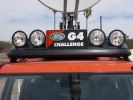
Hella 4000 Compact Xenon Lamps215 views
|
|
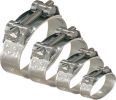
CLAMPS94 views
|
|
Full Fat RR with rack and lamps crossing A4 in Kensington218 views
|
|
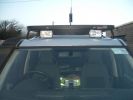
PIAA 40 series Driving lights fitted with HID lamps534 views
|
|
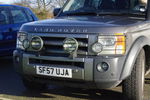
Front driving lamps24 viewsI think they spoil the looks and they are badly corroded inside.
|
|
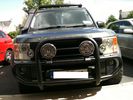
Nudge Bar & Lamps fitted93 views
|
|
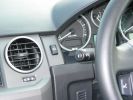
Spot / Driving Lamps Switch382 views
|
|
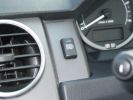
Spot / Driving Lamps Switch440 views
|
|

Front with Winch, A-Bar, Front LIght Guards and Driving Lamps59 views
|
|
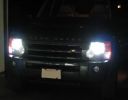
Now the small marker lights have the same bright white/blue color as the headlamps.352 views
|
|
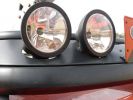
Hella Compact 4000 HID193 views
|
|

20 views
|
|

Thread upload8 viewsImage uploaded in thread 133767
|
|

Thread upload0 viewsImage uploaded in new thread
|
|

Thread upload8 viewsImage uploaded in thread 133767
|
|
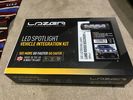
Thread upload5 viewsImage uploaded in thread 166460
|
|
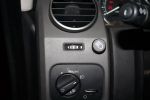
Switch for Hella 4000 Compacts303 viewsDriving lamps are integrated with the high-beams or can be overriden with this switch.
|
|

NAS 7 Pin Round Socket + 4 Pin Flat Socket oriented as installed.752 viewsThis is the layout you see when you look into the NAS Land Rover sockets as installed at the rear of the LR3/4. The flat 4 pin socket is located under the round socket.
Wiring order is relative to the slot on the round socket, and hence the same as the other jpg where the slot is shown at the top.
The CJB monitors the front and rear turn signal lamps and can detect if more than four lamps are fitted, (the side turn signal lamps are not monitored). This is another reason for using genuine LR bulbs as off shore bulbs can have varied and out of spec resistance values.
When a trailer is detected, the trailer warning indicator in the instrument cluster is supposed to flash green in synchronization with the turn signal indicators.
If one or more of the turn signal lamps on the vehicle or the trailer are defective, the trailer warning indicator will cease to flash any longer. This is to alert the driver to probably bulb failure.
If the trailer has LED lamps installed, and no LED adapter circuitry is used, most likely the trailer will not be sensed and systems such as the backup sensors will not be disabled.
|
|

lr3-kaymar-closed with 20"405 viewsthe kaymar carrier, designed to allow two tires, sets them both a bit outboard, thus blocking the lamp. that\'s when I realized why they put the fully functional lamps in the bumper (functions: running, brakes, signals, hazard)
I plan to re-weld the locating section more towards the middle of the rear similar to Disco II orrientation.
|
|

Going in to get A bar and driving lamps fitted139 views
|
|
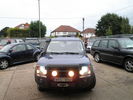
After Work at Challenger 4x418 viewsAdded Hidden Winch Soft bar, Driving Lamps and Raised Air Intake,
Made by Challenger 4x4 in Tongham.
|
|
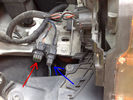
Front PDC Connector106 viewsred pdc
blue lamps
|
|

18 views
|
|

15 views
|
|
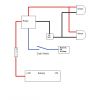
Spot or Driving Lamp Wiring Diagram312 viewsFor wiring non-LR lamps
|
|
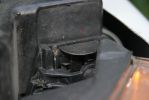
Headlamp fixed361 views
|
|

Tekonsha Ford Brake Controller Adapter part number 3035-P275 viewsThis is the adapter cable between the Brake Controller and the existing C2590 female plug located near the brake pedal on NAS spec LR3's. The flat 4 pin plug of the adapter cable connects to the Controller; the rectangular 6 hole male plug to C2590.
There are only four conductors in the adapter cable, but one will see five pins within the Land Rover C2590 plug. The #2 pin is not required for the NAS setup. #2 pin is the circuit between the head lamp switch and vehicle side running lamps required in the civilized world.
The single pin at the bottom in the picture is #3 and on the Land Rover, a Black wire tied to ground. The other pin at the bottom and across to the left is #6, and Blue on the Land Rover. This is the Brake Controller output to the trailer socket at the rear.
#4 is the pin at the top left, and is a White coloured wire from the battery. Pin #5 is from the stop light switch, and is Green on the Land Rover.
Note that the adapter cable colours do not necessarily follow all the above referenced Land Rover colours.
|
|
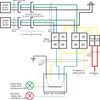
45 views
|
|
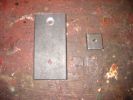
109 views
|
|
114 views
|
|
114 views
|
|
140 views
|
|
183 views
|
|
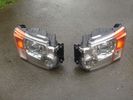
Thread upload12 viewsImage uploaded in new thread
|
|

XQB500080 Driving Lamps14 views
|
|
|
|
|
|
|