| Search results - "front" |
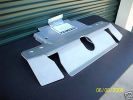
73 views
|
|
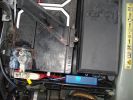
139 viewsThe weatherproof junction box fits neatly down the front of the battery, all contained inside the battery box.
|
|
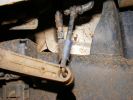
720 viewsFront height sensor - original is behind sensor arm, the new one is in the foreground.
|
|
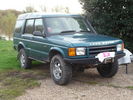
51 viewsD44 front winch bumper. Ali washer bottle. D44 rear h/d bumper. centre diff lock. 235x85x16 pirelli muds. OME +2" springs & shocks. front diff guard. side tree bars. wired for roof CB. Aux fuse block. safari snorkel. extended wading tubes. the list goes on...
|
|
4 views
|
|
5 views
|
|

3 views
|
|
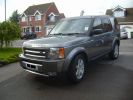
Disco 3 TDV6 GSLE75 viewsLimited Edition. Parking sensors front & rear, Full body skirts with chrome trim fog lights, Twin chrome tail pipes,
|
|

Front / Standard Links / Standard Height.348 views
|
|
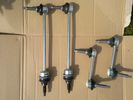
front and rear17 views
|
|

Front83 views
|
|
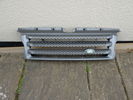
rrs grill front6 views
|
|
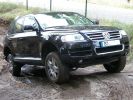
241 viewsThis Toureg is stuck - doesn´t look like it. After 8 hours of driving everyone agreed that with the big 10cyl. diesel engine you should probably oder the rear difflock as well... In this picture the rear left anf front right wheels have no grip, esp or whatever just doesn´t do it.
|
|
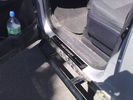
Black chrome - Front door78 views
|
|
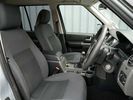
Front seats71 views
|
|

22 views
|
|
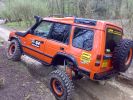
COVER SHOT FOR TOTAL OFF ROAD114 viewsG WAGEN AXELS FITTED WITH HYDRAULIC FRONT + REAR DIFF LOCKS + EXTREAM SUSPENSION SYSTEM FRONT + REAR WARN WINCHES.
|
|
Thread upload22 viewsImage uploaded in new thread
|
|

D3 Brembo Front and Rear Brake Upgrade pg1324 views
|
|

9 viewsClone Front
|
|
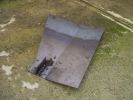
Steel compressor plate684 viewsIgnore my crappy welding attempts - I got a friend to finally weld the locator tab on the front!
|
|
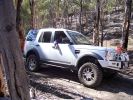
off-camber hill352 viewsAnd no, I wasn\'t hanging my arm out to balance the car - I was stopped at this point waiting for the Jeep in front to try and finish. It was a pretty steep off-camber slope!
|
|
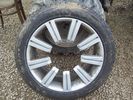
Front View35 viewsShowing the wheel which failed whilst driving.
|
|
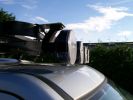
264 viewsOriginal Frontrunner brackets, but installed upside down to reduce the total height
|
|
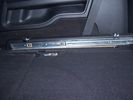
Side runner in position showing front lower than rear.33 views45%
|
|
![Filename=100_2686[1].JPG
Filesize=322KB
Dimensions=1280x960
Date added=31.May 2014 100_2686[1].JPG](albums/userpics/22146/thumb_100_2686%5B1%5D.JPG)
Front caliper21 views
|
|
![Filename=100_2687[1].JPG
Filesize=341KB
Dimensions=1280x960
Date added=31.May 2014 100_2687[1].JPG](albums/userpics/22146/thumb_100_2687%5B1%5D.JPG)
Front caliper25 views
|
|
![Filename=100_2690[1].JPG
Filesize=367KB
Dimensions=1280x960
Date added=31.May 2014 100_2690[1].JPG](albums/userpics/22146/thumb_100_2690%5B1%5D.JPG)
Front caliper carrier20 views
|
|
![Filename=100_2778[1].JPG
Filesize=186KB
Dimensions=1280x960
Date added=13.Oct 2014 100_2778[1].JPG](albums/userpics/22146/thumb_100_2778%5B1%5D.JPG)
29 viewsfront cam fitted
|
|
![Filename=100_2781[1].JPG
Filesize=252KB
Dimensions=1280x960
Date added=13.Oct 2014 100_2781[1].JPG](albums/userpics/22146/thumb_100_2781%5B1%5D.JPG)
front cam close up26 views
|
|
![Filename=100_2784[1].JPG
Filesize=155KB
Dimensions=1280x960
Date added=13.Oct 2014 100_2784[1].JPG](albums/userpics/22146/thumb_100_2784%5B1%5D.JPG)
28 viewsfront cam
|
|
![Filename=100_2785[1].JPG
Filesize=115KB
Dimensions=1280x960
Date added=13.Oct 2014 100_2785[1].JPG](albums/userpics/22146/thumb_100_2785%5B1%5D.JPG)
24 viewsfront cam with swivel head
|
|
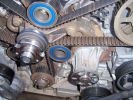
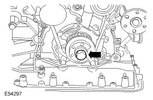
239 viewsPictures of front of engine while doing a timing belt change
|
|
Thread upload322 viewsImage uploaded in thread 102519
|
|
FSfront200 views
|
|
Clear Front129 views
|
|
Mercedes E320 Back of Front Seats25 views
|
|

Mercedes E320 Front Cockpit17 views
|
|
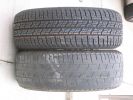
New vs. 15000 Km wear on the front left wheel480 views
|
|

Radio location539 viewsMy remote head UHF CB mounted on the front of the ashtray, ham HF/VHF/UHF remote head radio mounted on a block in the coin tray and my GPS on a turned wooden block in the cup holder. Both radios are under tha driver and passenger seat and the antenna for the GPS is suction mounted inside the windscreen.
|
|
Circuit diags front page93 views
|
|

Thread upload14 viewsImage uploaded in thread 117412
|
|
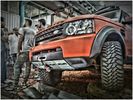
New front skid plate Mudtech4x4.com31 viewsNew front skid plate Mudtech4x4.com
|
|

Cabling on Front Runner forSpots199 views
|
|
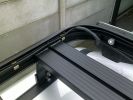
Cabling Front Runner Spots229 viewsThanks to Ifor Williams clips ;)
|
|

Broken front mud flap106 views
|
|
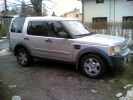
Suspension dragster mode442 viewsAfter I succesfully changed my wintertyres to summertyres, I found out that the front suspension was on access level and rear at off-road. Situation cleared after I switched engine on.
|
|
Front Corner22 views
|
|
Front Middle21 views
|
|
Front Middle19 views
|
|
90 front63 views
|
|
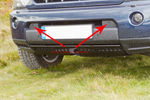
Front Camera Locations48 views
|
|
Thread upload8 viewsImage uploaded in new thread
|
|

D3 Brembo Front and Rear Brake Upgrade pg2324 views
|
|
Front Headrest View98 views
|
|
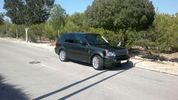
Colour Coded Front View30 views
|
|

se front55 views
|
|

Thread upload14 viewsImage uploaded in thread 94828
|
|
Thread upload9 viewsImage uploaded in new thread
|
|
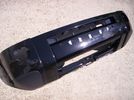
Front Bumper47 views
|
|

52 viewsFront suspension rebuilt in 2009 with reconditioned steering rack, new bushes etc..
|
|
Beachfront Camping - Elim Beach Cape York23 views
|
|

122 viewsTraxide brain mounted. It's mounted slightly tilted towards the front of the engine bay so as to give as much space as possible to the brake vacuum pipe behind it.
|
|

79 viewsExtra USB sockets mounted to front of commercial box, just behind cubby box
|
|
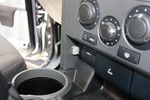
86 viewsAll back in place. Front USB socket final result.
|
|
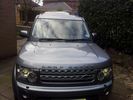
D4 12MY Front 2282 views
|
|
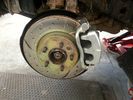
Front caliper on D4 to fit 17" rims136 views
|
|
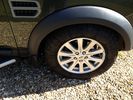
New front mud flaps, thanks to Slimer!176 views
|
|
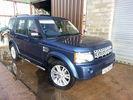
my d3139 viewsMy d3 with d4 front.
|
|
fronts a good un18 views
|
|

147 views
|
|

Opaque switch cover119 viewsKR switch on:off:on used for front and rear spots - but LEDs not visible with coloured switch cover!
(Located in sunroof switch position)
|
|
Thread upload13 viewsImage uploaded in thread 147037
|
|
Thread upload8 viewsImage uploaded in thread 172661
|
|
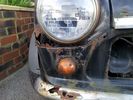
Austin Mini - front end4 views
|
|

Thread upload19 viewsImage uploaded in thread 152884
|
|

Thread upload18 viewsImage uploaded in thread 152884
|
|

Thread upload22 viewsImage uploaded in thread 152884
|
|
Thread upload14 viewsImage uploaded in thread 128561
|
|
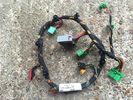
Front Console Wiring Loom AH32-14B079-BC Pic 39 views
|
|
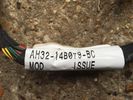
Front Console Wiring Loom AH32-14B079-BC Pic 27 views
|
|
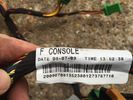
Front Console Wiring Loom AH32-14B079-BC6 views
|
|
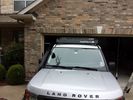
low profile solar panel211 viewsThe low profile solar panel, can be seen here, as the fine white line under the light bar. The way it's laid out, the panel should generate decent power between 10am and 4pm depending on the time of year, from the sides or front, with no shadows. Grape Solar 100W flex panel.
https://www.facebook.com/DifferentialPartsUS
|
|

Front end9 views
|
|

Front end9 views
|
|

Thread upload14 viewsImage uploaded in thread 128561
|
|
Thread upload10 viewsImage uploaded in thread 135884
|
|

Thread upload11 viewsImage uploaded in thread 135884
|
|
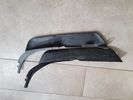
Front Defelctors4 views
|
|

Front Seat Trim9 views
|
|

Front Caliper Slide Pins12 views
|
|
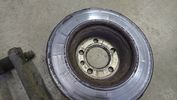
Thread upload10 viewsImage uploaded in thread 163538
|
|
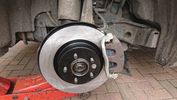
Thread upload14 viewsImage uploaded in thread 174389
|
|

Front Differential Description and Operation1543 viewsThe 4 page pdf describes of the operation of the front differential plus displays an exploded view of the front differential.
The fill plug is item 36 and the drain plug, item 8.
It is suggested one first unscrew the fill plug before unscrewing the drain plug - and it might take two different wrench sizes, hence get this detail sorted out before any oil drains out.
|
|
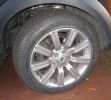
20\'s with 265/50 Yokohams481 views
|
|

PDC Front and Rear40 views
|
|
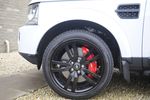
Brembo front brakes on D415 views
|
|
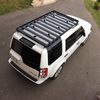
Front runner6 views
|
|
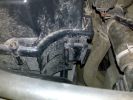
Unused clip slot to the front of the airfiler housing102 views
|
|
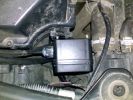
Possible Location for wireless remote box situated to the front of the airfilter housing113 views
|
|
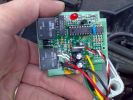
Front of Superwinch Remote Circuit93 views
|
|
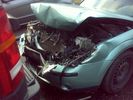
Mondeo front189 views
|
|

265/50x20 fronts436 views
|
|

Thread upload57 viewsImage uploaded in new thread
|
|

Thread upload53 viewsImage uploaded in thread 102519
|
|
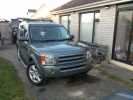
New front bumper with headlamp washers, fogs and PDC complete110 views
|
|
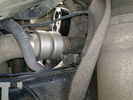
Charge Air Inlet hose - front mounting bkt86 views
|
|
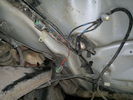
Front wheel sensor cables108 views
|
|

Thread upload0 viewsImage uploaded in thread 5
|
|

Thread upload14 viewsImage uploaded in new thread
|
|
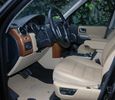
Front seats24 views
|
|

D3 Brembo Front and Rear Brake Upgrade pg3282 views
|
|
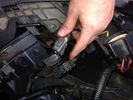
Thread upload48 viewsImage uploaded in thread 102519
|
|
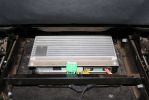
03285 viewsStock amp, underneath passenger front seat. In order to integrate the factory head unit with the V1000 we had to go through the stock amp. This is because of the MOST (fiber optic) connection between the two.
|
|
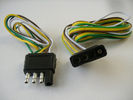
4 pin NAS flat connector from NAS small trailer382 viewsThe connector with the three exposed pins is the end that would commonly be located at the trailer hitch end, (front), of a small NAS lightweight trailer that has no electric brakes. This plug would connect into the flat 4 pin connector at the rear of the 3.
Note the order of the pin functions and wire colours: White is ground; the next pin is for tail/marker lights using the Brown wire; the Yellow conductor is for the left turn signal, and the far pin uses the Green conductor for the right turn signal.
There is no separate brake light conductor as NAS spec vehicles most often combine the brake and signal light functions to the same bulb filament rather separate filaments in different bulbs. The LR factory harness resolves that design difference.
Fortunately, the Land Rover NAS assembly pin order for the 4 pin flat plug maintains the above described conventions.
|
|

D3 Brembo Front and Rear Brake Upgrade pg4329 views
|
|

Air Distribution and Filtering Systems2084 viewsThis is 3 page pdf with coloured drawings of the air distribution ducting for the front air system.
Also included is a sketch of the pollen filter location within the front heater ducting. Note that two types of filters are available: a) the cheaper dust/pollen filter and b), the activated carbon filter that removes smells from the air. Installing the more expensive activated carbon filter means you never smell a cattle truck or chicken farm again. It really works.
|
|

Front Heater Doors Description and Operation1396 viewsThis 6 page pdf shows with coloured drawings the air flow thru the front heater as well as discusses the operation of the various air flow doors.
|
|

Rear Area Climate Control System1161 viewsThis 14 page pdf describes how the rear heating AC system is supposed to operate in conjunction with the front system.
The air transfer ducts are shown as coloured sketches as is the air flow within the rear blower setup.
|
|
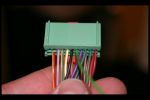
Heated Seat connections in front footwells 3189 views
|
|
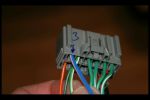
Heated Seat connections in front footwells 2183 views
|
|
Front shot 55 views
|
|
Front Rebuilt209 views
|
|

D3 Brembo Front and Rear Brake Upgrade pg5260 views
|
|

Front Door Trim Panel169 views
|
|

Wipers, Front and Rear, plus Washers description and operation.818 viewsThis 17 page pdf describes how the wipers, front and rear, plus the washers are intended to operate. Also described is how the rain sensor is designed to function along with a table of the wiper delay timing parameters.
|
|
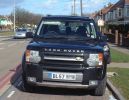
186 views
|
|

Front Door Card24 views
|
|
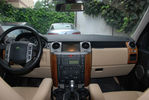
Front seats22 views
|
|
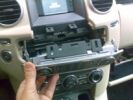
FRONTALE RADIO SMONTATO120 views
|
|
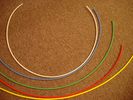
6mm Heat Shrink colours 362 viewsI decided to colour code the tubing so I used 6mm electrical heat shrink.
As there is no apparent colour coding re the 3, I tried to emulate the P38 coding; #1 LR red, #2 RR blue, #3 LF yellow, and #4 RF green. This was not doable as both left side air springs have green coloured tubing coming off the top of the front and rear air springs. I therefore arbitrarily chose the Left Rear to be red; Left Front green; Right Front yellow; Right Rear blue; and for the air compressor supply line, White coloured heat shrink. Since two new lines tie into each air spring line, I made the line between the air spring and the FASKIT, a single solid colour, and the line from the FASKIT to the valve block, White, plus the related appropriate solid colour.
|
|
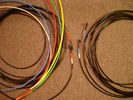
6mm PA12 grade nylon tubing with heat shrink applied 544 viewsShows some of the 6mm air line with heat shrink applied to one end of tubing. Shrink will be applied to the other end once field cut to length. These four tubes, each about 20 ft (6m) long, feed to the rear. Re the front air lines, (not shown), four additional lengths, each about 10 ft (3m) long, are required plus one more 3 metre length for compressor air. The 6mm tubing is a Nylon product specified as PA12. There is also a very similar Transport grade PA11 material, however it seems that PA12 is the more common Transport grade now in use. Also the applicable DIN standard seems to be both DIN 73378 and DIN 74324 for the nylon tubing. The working pressure of the 6mm tubing is about 27 Bar and bursting 82 Bar @ 20C. This is for the 1mm nominal wall thickness material, (4mm ID, 6mm OD).
|
|
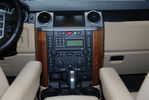
Centre console.43 views
|
|
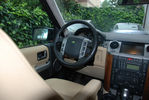
Drivers side21 views
|
|
16 views
|
|
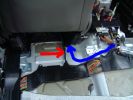
9 ICE Loom - routing behind passenger front seat for DVD Nav79 views
|
|
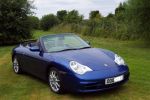
911 front97 views
|
|

D3 and D4 a-arm guards (front & rear)96 views
|
|
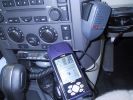
UHF CB374 viewsGME TX3400 UHF CB remote head mounted on the front of the ashtray.
A piece of wood was turned to fit the cup holder to mount the GPS
|
|
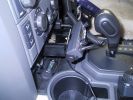
UHF CB439 viewsThe remote head of the GME TX3400 was mounted on the front of the ashtray after unclipping the ashtray facia. The head is very light, double sided tape was used plus 1 screw to hold it.
|
|
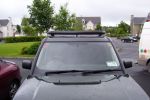
Front view of rack and aerial185 views
|
|

Thread upload5 viewsImage uploaded in thread 203155
|
|
Thread upload0 viewsImage uploaded in new thread
|
|

Afternoon treat - a Clare Valley Frontignac191 views
|
|
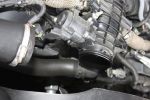
Air Box Removed1058 viewsView showing air box removed from front of EGR butterfly valve housing
|
|
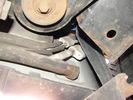
Air Conditioning Pipes (file 2)808 viewsShows location of front-to-rear air con pipes behind NS front wheel. You can just see the Vredestein tyre. The pipe connectors are tucked in behind the wheel arch inner cover. This has to be partially removed for access to bolts holding pipes together.
|
|
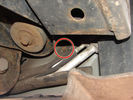
Air Conditioning Pipes188 viewsFront-to-rear aircon HP and LP pipes. The circled bit shows where the bolt securing the support bracket (removed)has sheared off
|
|
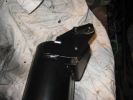
original front bracket144 views
|
|
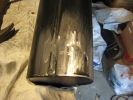
old front bracket cut off148 views
|
|
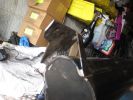
new front bracket 151 views
|
|
drill 2 holes for fixing front of airtank153 views
|
|
new front bracket painted146 views
|
|
front of tank fitted 147 views
|
|
Thread upload12 viewsImage uploaded in new thread
|
|
Front6 views
|
|
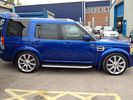
FOR SALE - ONE OFF Land Rover Disco 3 37 viewsOne of a kind Landrover Discovery TDV6 HSE LUX Model 5 door automatic 4x4 diesel evo blue. Upgrades: sidesteps, roof rails, privacy glass, front and rear heated seats/elec seats, landrover tv and headphones, 7 seater black leather, piano black dash/steering wheel, built in fridge, 6 disc changer, sat nav and bluetooth, harman kardon premium entertainment pack, by-xenon adaptive headlights , cruise control and front and rear park distance control, panoramic electric glass roof, 22inch alloy wheels, body kit
|
|
60 viewsOne bolt is visible at the front, but the other two are down the left hand side and best accessed by removing the small plastic guard behind the bumper. I also removed the small metal radiator guard between the bumper and the main sump guard (but that was mostly to retrieve the spanner I dropped!). The only issue with removing the plastic guard is the stupid plastic clips that hold it on may need to be replaced.
|
|

Thread upload0 viewsImage uploaded in new thread
|
|
51 views
|
|

51 views
|
|
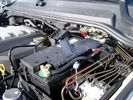
BCI Group 40R Deka 640RMF battery showing vent hose run forward to windshield washer reservoir area 1430 viewsRecessed post "Euro profile" battery to "match" OEM and stock Land Rover bracket; note that the Traxide SC80-LR module is mounted at an angle to allow for the main cable to sit under the cover so cover still closes.
The battery is a nominal 7", (180mm), high, but sits on a 1" battery spacer set under to raise the bottom front end of the battery such that the approx 11", (290 mm), length of the BCI 40R battery rises above the angled plastic nibs at the forward end bottom of the case front; hence sufficient space, (1/4", 5mm) remains at the brake reservoir end.
Also the 40R battery does not have hold down "flanges" on each end; on the sides yes, but not the ends so no additional length is required.
When I had to replace the 40R, this time I installed the shorter, (9.625"), taller, (7.5") Interstate BCI 47 / DIN H5 battery which eliminated the spacer on the bottom and better fit the stock LR tie down bolt lengths. Deka also has a BCI 47 / DIN H5 that would work fine as well.
|
|
LR Aux Panel (front)68 viewsLR rear aux panel
|
|
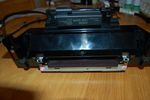
Back up battrey on Front of DVD Player78 views
|
|
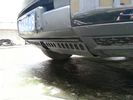
damage to front32 viewsho hum..need a bigger guard
|
|
You know this is going to hurt......100 views
|
|
81 views
|
|
8 views
|
|

BMW Sensor Fit D3 fron24 views
|
|
Discovery ES Premium30 views
|
|
Thread upload9 viewsImage uploaded in thread 175019
|
|

OLD VERSION - Bodsy's Brake Bible v 1.611172 viewsUSE Version 1.6a
Clarified EPB shoe instructions & corrected references to other sections. Added paypal donations information (requested by users of the guide.) Internationalised wheel location references by removing UK based reference to OS/NS, replaced with physical Front Left or Front Right descriptions.
|
|
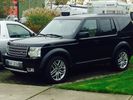
Bodykit front / Evoque 20" Wheels79 views
|
|

Bolt holding exhaust silencer behind the front wheel26 views
|
|
front18 views
|
|
197 views
|
|
Thread upload21 viewsImage uploaded in thread 77665
|
|
Brake Kit Front14 views
|
|
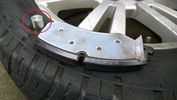
Front Brake Pad31 views
|
|
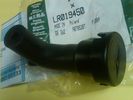
Breather Cap part # LR0194501541 viewsThis is the replacement breather cap as manufactured by the Gore Tex people, (Gore), for the engine compartment end of the front differential breather line.
You can with some difficulty, both blow and suck thru the breather filter material. The Gore Tex filter material has what are called hydrophobic and oleophobic properties. This means the filter material keeps oil in and water out, while at the same time, allowing air pressure to slowly equalize, (air permeable). Additionally, the transfer of dust, salt, and road debris is inhibited.
|
|
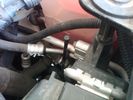
Breather Cap Installed2008 viewsThe black L shaped tube is is the Gore manufactured, (the Gore-Tex people), LR4 Breather Valve installed in an LR3. Naturally the installation looks similar to what one sees on an LR4 or RRS as the Gore breather valve is now OEM for new production.
The part number of this upgraded front differential breather valve is LR019450 and costs about thirty dollars.
|
|
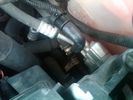
Vertical Breather Hose before cutting off OEM cap.1779 viewsThis shows the plastic vertical breather tubing and OEM cap prior to being cut off. The tubing is located on the driver side at the front near the radiator. One cuts about 3/4" to 1" off from the top. The TSB says 20mm.
I tried blowing thru the cut off piece and was not very successful. The cap seemed plugged. I am beginning to think that there was a very good reason for Land Rovers's Technical Service Bulletin, (TSB).
|
|
31 views
|
|

bumper front 2119 views
|
|

bumper front118 views
|
|
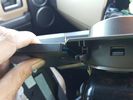
Edge of H Trim filed to allow screen to rest flush on front5 views
|
|
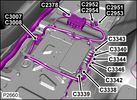
Camera Control Module D451 viewsHarness connection detail, camera module, located beneath L/H passenger side front seat UK D4 spec 2012.
|
|
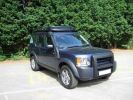
D3 View 2147 views
|
|
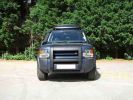
D3 View 1189 views
|
|
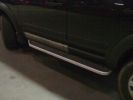
D3 Side Step Repairs165 viewsFinished job all I need to do now is wash it all off. I had already replaced the front door trim using new trim fixers and as you can see it was still dirty.
|
|

Thread upload13 viewsImage uploaded in thread 188611
|
|

Thread upload9 viewsImage uploaded in thread 188611
|
|

475 viewsSide steps, light guards, rubbing strips, roof bars, privacy front and rear
|
|

Thread upload11 viewsImage uploaded in thread 146850
|
|
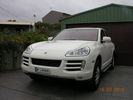
89 views
|
|
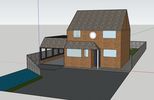
Thread upload5 viewsImage uploaded in thread 203496
|
|
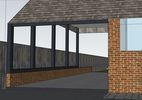
Thread upload3 viewsImage uploaded in thread 203496
|
|

Thread upload4 viewsImage uploaded in thread 203496
|
|
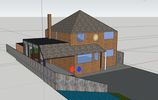
Thread upload5 viewsImage uploaded in thread 205984
|
|
Thread upload6 viewsImage uploaded in thread 207262
|
|
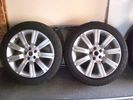
Front23 views
|
|
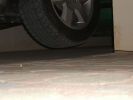
Front wheel off 80% inflation173 views80% inflated and both front and rear wheels are off with suspension in extended mode
|
|
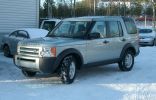
front view in Finnish winter438 views
|
|
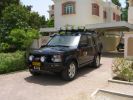
RHS view372 viewsSHows the Front Runner (SA) slimline windcheetah rack which is immensely strong. Takes my 110kg (oh gawd, I must get back on the diet and exercise regime) tramping over it when loading/unloading gear without a problem. Fittings are simply fixed or removed, and IMO very well designed and made. IPF 800 series driving and spots fitted to the front of the rack. IPF cam/reversing fitted each side and to rear of rack for negotiating rocky wadis at night. The G4 stickers were bought off E-bay as a set.
|
|
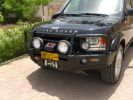
Front end327 viewsARB deluxe winch bar is very well made. Still allows Mantec sump guard to be used. Warn M8000 winch fitted - (wish I could\'ve found an M15000!) and IPF 900XS Extreme Series mounted with light stays to grille. Fog lights work fine with the replacement bumper, and indicators in bumpoer are effective too.
|
|
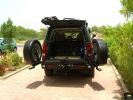
Rear end open330 viewsEccentric latch clamps for wheel carriers are very strong. No rattles on graded roads. Canvas seat covers from \'Escape\' in SA on rear jump seats can be seen, and Front Runner Wolfpack storage boxes - great for toolkit, winch and recovery straps etc.
|
|
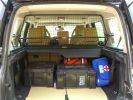
Load space369 viewsShows the SA Front Runner Wolfpack stacking plastic storage boxes that I keep laod straps etc in and the 2nd is tool kit, spare belts, jerry can funnel and tools, plus airline and tyre inflator/deflaotr for ARB on-board compressor, HD jump leads. ARB Winch pack (Orange)with strops, snatch blocks, shackles, gloves, and 2 ARB recovery dampers. Really great 4x4 1st Aid kit from Outdoors warehouse in SA. LRs own loadspace guard - not the best design if you want to store a long load. Mods to be carried out!
|
|
Auxiliary power sockets - TracTronics, Australia383 viewsA complete kit including two outlets, wiring etc connected to auxiliary Optima Blue top battery using their very effective SC40 split charge relay. One outlet between rear and front seats, and 2nd alongside loadspace 12v outlet, enables fridge to run when engine is not running, without affecting start capacity or vehicle functions.
|
|
Escape seat covers rear254 viewsJust shwing the good fit of these canvas seat covers made in South Africa. The whole set for a 7 seat HSE £542 with air freight as unaccompanied baggage (inside 5 Front Runner Wolf pack boxes) costing and additional £150 - still a bargain out here!
|
|
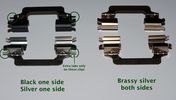
Front brake clips23 views
|
|
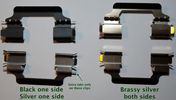
Front brake clips21 views
|
|

Come scambiare il pannello frontale dell_HEVAC81 views
|
|

75 viewsComing down from the summit seconds before blowing out the front passenger-side tire.
|
|
18 views
|
|
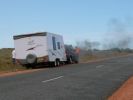
It started in the front - Sept 2008 near Coral Bay WA162 views
|
|
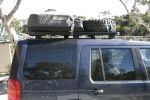
34 Length Frontrunner Roofrack148 views
|
|
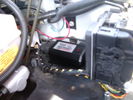
CounterAct Power Supply mounted 247 viewsPicture is blurred, however power supply is 3M two sided tape to the flat black plastic of the second battery compartment just under the antilock brake pipes to the fender side of the brake fluid reservoir. The white wire to the left rear coupler pad runs thru the firewall hole near the steering column. The blue wire to the right front coupler runs across and above the engine following the other wiring looms that cross the vehicle.
|
|

Front Footwell Panel99 views
|
|
Front damage221 views
|
|

Thread upload2 viewsImage uploaded in thread 198799
|
|
Thread upload7 viewsImage uploaded in new thread
|
|

Thread upload2 viewsImage uploaded in thread 198799
|
|
Thread upload3 viewsImage uploaded in new thread
|
|

Thread upload4 viewsImage uploaded in new thread
|
|

Thread upload10 viewsImage uploaded in new thread
|
|
Mom\'s first day in her discoveryII - I miss it already205 views
|
|
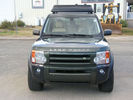
Narpy's Grill Mod41 views
|
|

181119 viewsif it had a P infront of the code it would be Four-wheel drive low ratio - short circuit to ground
|
|
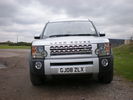
d/4 front grille conversion/ foglamps and chrome bezzells(courtesy of nismo)336 views
|
|
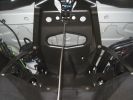
95 viewsSpare wheel well looking towards front of car.
|
|
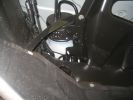
86 viewsCloseup of the cylinder/reservoir on front LHS of spare wheel well.
|
|
260 views
|
|
250 views
|
|

Thread upload14 viewsImage uploaded in thread 195443
|
|
ARB Front Locker in Disco3111 viewsA bit of a challenge for the installer since it was the first they had done but all done and nice and tidy.
|
|
ARB Front Locker in Disco3117 viewsA bit of a challenge for the installer since it was the first they had done but all done and nice and tidy.
|
|
fit to park out front now, put Aston in hayshed92 views
|
|
Fit to park out front now80 views
|
|
Stick an LRX/F2 front end on a D3 and this is what you get...182 views
|
|
574 views
|
|
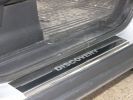
242 views
|
|
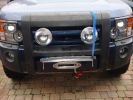
flap up177 views
|
|
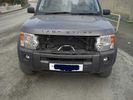
D3 with Radar sensor temporarily mounted61 views
|
|
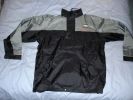
My jacket317 views
|
|

Propshaft Support - Front view46 viewsNote the quality Sikaflex instead of the pathetic fragile rubber. :-)
|
|
246 views
|
|
Thread upload5 viewsImage uploaded in thread 183959
|
|

Thread upload5 viewsImage uploaded in new thread
|
|

Thread upload3 viewsImage uploaded in new thread
|
|
Thread upload2 viewsImage uploaded in thread 183467
|
|

Thread upload7 viewsImage uploaded in new thread
|
|
Thread upload1 viewsImage uploaded in new thread
|
|

Thread upload2 viewsImage uploaded in new thread
|
|
16 views
|
|
19 views
|
|

Thread upload4 viewsImage uploaded in thread 176545
|
|
Thread upload6 viewsImage uploaded in thread 176545
|
|
Thread upload11 viewsImage uploaded in thread 171595
|
|
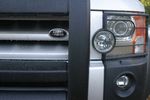
Front badge close up83 views
|
|
42 views
|
|
76 views
|
|
Thread upload7 viewsImage uploaded in new thread
|
|

D3 XS in Burrs Country Park52 views
|
|

D3 XS Wedding59 views
|
|
Thread upload17 viewsImage uploaded in thread 47890
|
|

Thread upload12 viewsImage uploaded in new thread
|
|
Thread upload7 viewsImage uploaded in thread 176545
|
|

Thread upload0 viewsImage uploaded in new thread
|
|

Thread upload8 viewsImage uploaded in new thread
|
|

Thread upload7 viewsImage uploaded in new thread
|
|

Thread upload6 viewsImage uploaded in new thread
|
|

Thread upload8 viewsImage uploaded in new thread
|
|

Thread upload7 viewsImage uploaded in new thread
|
|

Part 1 of the LF Inset in Grill Installation224 viewsDetailes of the Grill preparation as well as the modifications needed to the front end.
|
|

Thread upload5 viewsImage uploaded in thread 183467
|
|

Thread upload3 viewsImage uploaded in thread 183467
|
|
Thread upload4 viewsImage uploaded in thread 183467
|
|

Thread upload1 viewsImage uploaded in thread 183467
|
|

Front seat lower cover removal replacement43 views
|
|

Front and Side Clips - Seat Base39 views
|
|

Seat Base cover front and side clips released44 views
|
|
front again21 views
|
|

167 views
|
|
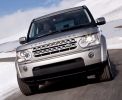
Discovery 4 From Press Release112 views
|
|

11 views
|
|
204 views
|
|
144 views
|
|
Thread upload14 viewsImage uploaded in thread 158066
|
|
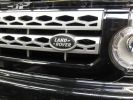
New black badge for Discovery 4 front grill136 views
|
|
Thread upload12 viewsImage uploaded in new thread
|
|
Thread upload8 viewsImage uploaded in new thread
|
|
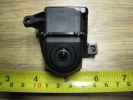
D4 Rear camera front view148 viewsUsed on surround camera system.
|
|
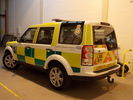
D4 Being Prepped for LAS26 viewsThis is a Disco 4 (unknown spec) being prepped up at my workplace for the LAS, having new comms kit put in and stuff. What you can't see from this angle is that the front grille and headlights have been taken out.
|
|

Thread upload11 viewsImage uploaded in thread 107103
|
|

Thread upload6 viewsImage uploaded in thread 178113
|
|
18 views
|
|
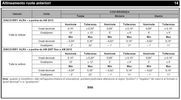
Thread upload7 viewsImage uploaded in thread 178113
|
|

Thread upload6 viewsImage uploaded in thread 178113
|
|
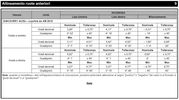
Thread upload6 viewsImage uploaded in thread 178113
|
|
Thread upload8 viewsImage uploaded in thread 178113
|
|
Thread upload15 viewsImage uploaded in thread 156159
|
|
63 views
|
|
71 views
|
|
47 views
|
|
Thread upload6 viewsImage uploaded in new thread
|
|

Frontale D4 201422 views
|
|
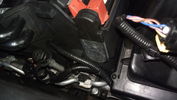
Cable routed from secondary battery box to front grille115 views
|
|

Thread upload2 viewsImage uploaded in new thread
|
|

Thread upload4 viewsImage uploaded in new thread
|
|

Thread upload13 viewsImage uploaded in thread 110057
|
|

Defender in the Fog, another day on the job.459 viewsThis is another normal work day for a Defender - actually the jpg is from a Land Rover advertising shot, but it may just not be a set up one. I think it is an actual working Defender. Note the visible front tow hook and how the hi lift is just rope tied on; also the normal stock headlights and I guess dual spare tyres - just another day on the job.
|
|

Deka Battery Dimension Data615 viewsThe battery size that I installed for my auxiliary was a BCI 40R battery as it was for me the easiest to fit and was also a cranking battery. The case profile was such that no tie down fins were located on either bottom end, (sides yes), and length wise, it was only about 11" (290 mm) long. As such, I did not have to grind the nibs at the front bottom of the plastic surround.
I did however raise the bottom of the battery above the angled nibs as I set the battery on a 1" (25mm) high plastic spacer. The total height, (battery plus spacer), was about 8" (200mm) so the battery top still fit under the Land Rover factory cover.
For the Aux battery, when I replaced the 40R, I installed an Interstate BCI 47 which is similar in size to a DIN H5. I was therefore able to eliminate the vertical spacer as the Group 47/H5 is the same height as the DIN H7/H8 stock LR spec starting battery. As such, the standard battery tie down bolts can be used without modification. The Group 47 battery is 9 11/16" long x 6 7/8" wide x 7 1/2" (190mm) high.
|
|
21 views
|
|

Thread upload8 viewsImage uploaded in new thread
|
|

Thread upload10 viewsImage uploaded in new thread
|
|

Diff Kit78 viewsAll you need to change the oil in your front diff.....
|
|
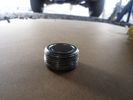
Front Diff Oil Plug 70k After76 views
|
|
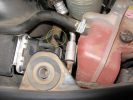
174 viewsFront diff breather
|
|
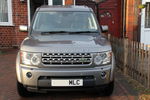
Disco 4 Front and Centre70 views
|
|
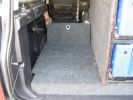
Inner lid261 viewsStorage compartment, front, under subframe.
|
|
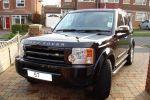
103 views
|
|
front distance20 views
|
|
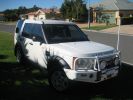
332 views
|
|

176 viewssealant used for sticking resistor to rear light and spot fixing the D4 front grill this stuff is superb but needs 24 hrs to cure
|
|
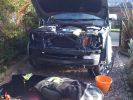
273 viewsgot the front all off ready t put the new bumper
|
|

256 viewspulled off the factory plastic and found 2 6inch cracks in the drivers side top in front of head light
|
|
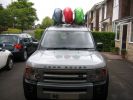
Front View294 views
|
|
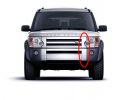
65 views
|
|
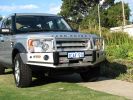
ARB Bar Front507 views
|
|
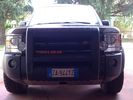
disco3-front-sticker57 views
|
|
108 views
|
|
104 views
|
|
81 views
|
|

New LED DRLs118 views
|
|

Thread upload9 viewsImage uploaded in new thread
|
|
Thread upload13 viewsImage uploaded in thread 168419
|
|

Thread upload33 viewsImage uploaded in thread 133490
|
|
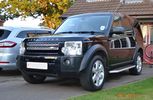
20 views
|
|

Thread upload12 viewsImage uploaded in new thread
|
|

Thread upload11 viewsImage uploaded in new thread
|
|

D2166 views
|
|
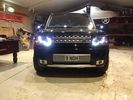
118 views
|
|
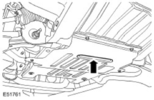
Front Jacking71 views
|
|
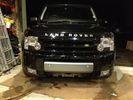
New front end98 views
|
|

Thread upload9 viewsImage uploaded in new thread
|
|
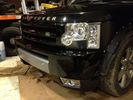
Corner87 views
|
|
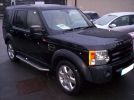
Other front view148 views
|
|
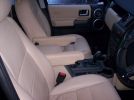
Interior from front162 views
|
|
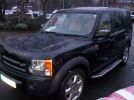
Front view140 views
|
|
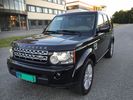
9 views
|
|

Thread upload55 viewsImage uploaded in thread 175673
|
|
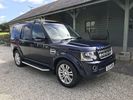
Thread upload70 viewsImage uploaded in thread 175673
|
|
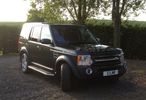
Thread upload22 viewsImage uploaded in thread 118864
|
|
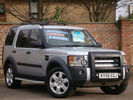
Thread upload4 viewsImage uploaded in thread 144251
|
|

Thread upload5 viewsImage uploaded in thread 209269
|
|
Thread upload36 viewsImage uploaded in thread 125313
|
|
Thread upload90 viewsImage uploaded in thread 171927
|
|

Thread upload4 viewsImage uploaded in new thread
|
|

Thread upload5 viewsImage uploaded in new thread
|
|
Thread upload11 viewsImage uploaded in thread 130190
|
|

Thread upload0 viewsImage uploaded in thread 5
|
|
Thread upload0 viewsImage uploaded in new thread
|
|

Thread upload3 viewsImage uploaded in new thread
|
|
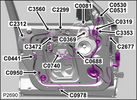
Front passenger side door speakers78 views
|
|
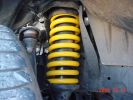
King Springs Lift240 viewsFront Spring
|
|
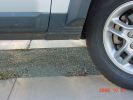
King Springs Lift205 viewsFront underbody clearance
|
|
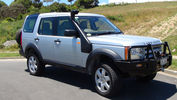
Disco 3 - 21 December 2012165 viewsJust back from having Front & Rear Bar, Compressor and Snorkel fitted.
|
|
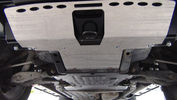
GOE Bash Plates119 viewsGreen Oval Experience Bash Plates. Front, Transmission and Compressor.
Might have to mod the front one a bit to let air into the trans cooler, it sits over the outside of the ARB bar which has vents for the cooler. If I cut slots in the Allow Plate to match those might do the trick.
I added a rear bolt to the Compressor Plate as it looked like it could get hooked on something and tear off. Two bolts onto the slider and two up onto the chassis now.
|
|
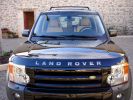
Front end649 views
|
|
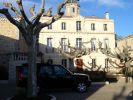
D3 in front of St. Rose539 views
|
|
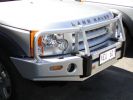
ARB Bull Bar Installation, Front side view. Colour coded to Vehicle.297 views
|
|
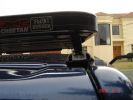
detail of Front Runner track292 views
|
|
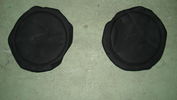
Cover for front lights68 views
|
|
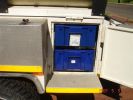
Front sliding drawer set186 views
|
|
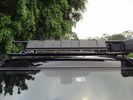
Wind Deflector for Rack15 viewsRecognise this part? Its the lower front recovery point cover. Installed upside down to silence the wind "drone" on the roof rack - works a treat!
|
|
Front Black & Silver LR logo249 views
|
|
NSF ARB Bush (as viewed from front)15 views
|
|
86 viewsNew look front
|
|
GL Front63 views
|
|
view of winch behind bumper with front plate cover on.220 views
|
|
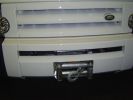
Showing neat winch set up. Front cover removed251 views
|
|
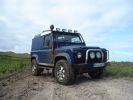
defender 90 td598 viewsmtr\'s snorkel, roll cage, rear lsd, winch bumper front and rear
|
|
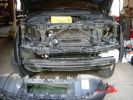
Must remove the lights and front bumber first361 views
|
|
Drilled 56 mm hole to the front bumber308 views
|
|
Drilled 56 mm hole to the front bumber301 views
|
|
Recovery hook113 viewsMakes it clear how the front recovery hook is mounted into the chassis
|
|

Front Seats19 views
|
|

front grills, windows, roof blues284 views
|
|
leaking front diff126 views
|
|
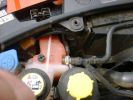
Front diff breather136 views
|
|

The out-back is actualy out-front58 views
|
|
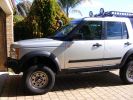
413 viewsLower front bib is removable via two bolts, for increased approach angle
|
|
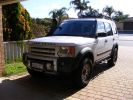
425 viewsRemoved the ARB bull-bar and refitted the original front bib (but now with two additional recovery points fitted to the modified ARB mounting brackets).
|
|
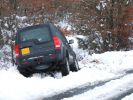
Yup, Im Stuck492 viewsIt does not look too bad, but the front pass wheel is in the ditch (no contact) the other fron wheel is on mud, the pass rear weel is in an \'ice pack\' and the other rear wheel is at full extension and not gripping.....
|
|
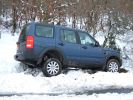
Down ditch but only front wheel!402 views
|
|
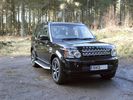
HSE Lux Front16 views
|
|
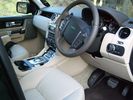
HSE Lux Int Front13 views
|
|
front264 views
|
|
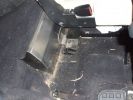
Internal water tank right side view162 viewsShows right front side of tank, with RH seat lifted. Note seat bolt is used to also hold the tank secure. This is a 5-seat D3, which has a cover over what is normally the 3rd row footrest. This is where the water tank is located.
|
|

849 viewsD3 doing it's job rather well ! 17m from front to back! Belize green
|
|
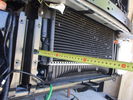
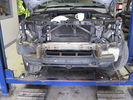
Front view of radiator after removal of grill, fenders, and bumper119 views
|
|
| 1280 files on 4 page(s) |
 |
1 |  |
 |
 |
|