| Search results - "down" |
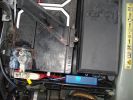
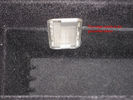
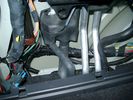
138 viewsThe weatherproof junction box fits neatly down the front of the battery, all contained inside the battery box.
|
|
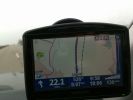
How fast?231 viewsI was driving along the Autobahn, glanced down at the speedo which was showing 140 mph, the Tomtom was telling the truth at 132 mph, but by the time I had switched the phone to camera I had dropped 2 mph, didnt try and do it again as there was no need.
|
|

tree down!12 views
|
|
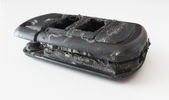
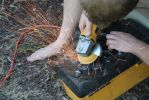
Tagliare lungo il perimetro della chiave - Cut along the key perimeter17 viewsI gusci sono saldati ad ultrasuoni. Con il disco tagliare lungo il perimetro della chiave in corrispondenza della giunta: lo spessore è di circa mm.3. Io non sono andato fino in fondo per evitare di danneggiare qualcosa, una volta inciso il solco per mm.2,7 ho fatto leva col cacciavite e ho strappato il materiale restante.
The body is ultrasonically welded. With the disc cut along the perimeter of the key in correspondence of the joint: the thickness is approximately 3mm. I have not gone all the way down
|
|
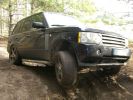
228 viewsRR ´06, 20" alloys, still better than any SUV you can think of. Actually, it went up, down and through everything.
|
|
116 viewsFinal placement after 3rd row seats closed down
|
|

Looks nice with the roof down!69 views
|
|

DickieDisco trying to decide if this is a better way down...48 views
|
|
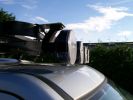
264 viewsOriginal Frontrunner brackets, but installed upside down to reduce the total height
|
|
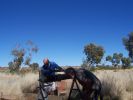
Ahh.... Yes there IS water down there217 views
|
|
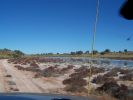
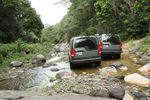
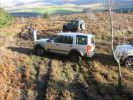
Savoury Creek, crossed it further down where there was minimal water204 views
|
|

10forcash new D3 going down the production line.308 views
|
|

up date 10forcash new D3 going down the production line.351 views
|
|

Thread upload10 viewsImage uploaded in thread 195046
|
|
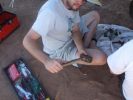
13 How to care for tools303 viewsWhat happened to the sledge hammer after 2 hours of beating my seized and cracked disk/park brake assembly to bits. Now down to 1 hammer remaining. At least by this time it was getting cooler (down to 40 deg C)
|
|
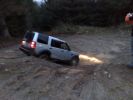
Down she goes114 views
|
|

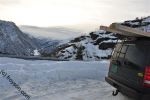
Decending into the clouds - 1860 going down187 views
|
|

Range Rover upside down on D3 event day 18th September423 views
|
|

Ready to winch a friends disco 4 194 viewsback of the picture you can just see another freinds (luvbus) disco 3 acting as balast to stop the disco 4 pulling me down hill
|
|
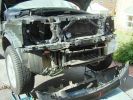
Stripped down ready to start1014 views
|
|
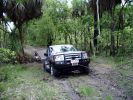
D3 in the Mary River Flood plains50 viewsFamily was down South with the In-laws, so I went for a drive on Boxing Day - which is the monsoon time, or \'The Wet\'. Was doing a test run with the off-raod trailer in preparation for the trip I was planning to the Kimberley six months later. Couldn\'t quite make it out of the creek, so a self-recovery was in order. Good thing it all worked, as I didn\'t see another car in over four hours. They were too smart to drive down the track I was on!
|
|
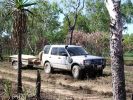
D3 in Kakadu National Park, on the track into the Alligator Billabong47 viewsThis whle area is down on the flood-plain, so in the Wet it is all under a few inches of water. In the dry it has a hard but brittle surface, which is then chewed up in many places by the feral animals with hard hoofs such as buffalo, pigs and horses. This then turns the track into a big dust bowl which is primarily bull-dust - a soft fine powder like talcum powder, which can be many feet deep, and gets into everything. The cover on the trailer is actually black.
|
|
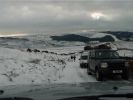
Letting a D3 pass in the Goyt Valley66 viewsStopped to let a D3 and his van-in-distress pass on the main slope down to the reservoirs in the Goyt Valley
|
|
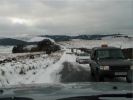
Waiting for a D1 to pass in the Goyt Valley67 viewsStopped to let a D1 and his vectra-in-distress pass on the main slope down to the reservoirs in the Goyt Valley
|
|
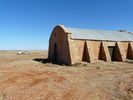
This was Australia's largest Shearing Shed - Cordillo Downs SA26 views
|
|
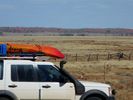
Cordillo Downs Road between Birdsville and Innamincka36 views
|
|

23 viewsDown the C pillar
|
|
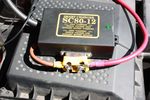
130 viewsTraxide SC80 brain modified. Cut the studs down to the nuts and removed the rubber cover. Had to do this as otherwise it wouldn't fit comfortably and would squash the brake vacuum pipe
|
|
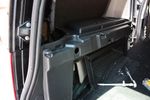
79 viewsHole for 12V accessory socket. This hole has a blanking plate on it on Commercial D3s. It just needed to be filed down in some areas to fit the socket I bought.
|
|
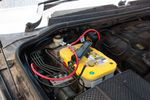
131 viewsBattery clamped down, terminals and cables attached
|
|

Tree down16 views
|
|
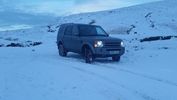
Gospel Pass Jan 2015146 viewsThe Gospel Pass (Welsh: Bwlch yr Efengyl) is the highest road pass in Wales. It is at the head of the Vale of Ewyas in the Black Mountains of southeast Wales.[1] The narrow mountain road climbs steeply from Hay-on-Wye to a height of 549 metres (1,801 ft) [2] above sea level, squeezing between the mountains of Twmpa to the west and Hay Bluff to the east, before dropping down into the valley to the south on its way to Llanthony Priory, Llanfihangel Crucorney and Abergavenny.
|
|

gauged head 15 viewsresult of bending down to pick up LTO tape for robot library and standing backup with door open (
|
|

Steering Column detailing Steering Angle Sensor1496 viewsItem 2 in the picture on page 1 of the 9 page pdf shows the location of the steering wheel sensor. Page 5 of the pdf has a paragraph describing the operation of the sensor. When the steering wheel does not point the same direction as the real wheels, then the computers can put the 3 into safe mode and down goes the suspension. See also the 17 page pdf on the Anti Lock and Traction Control pdf.
|
|

The sun goes down on Bungle Bungle Range81 views
|
|
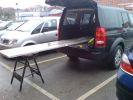
292 viewsNeeded 1.8m of worktop but had to buy 3m length. Took B&D workmate with me and cut it down to size in the car park! Notice how the workmate is exactly level with D3 in normal height!
|
|

Carwash20 viewsThis seems a long time ago - down on the east coast of Oman
|
|
Nose Down74 views
|
|
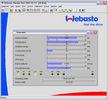
7 FBH Burn Out Shut Down62 views
|
|
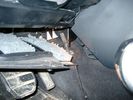
Air Conditioner Drain Hose on Drivers Side (LHD)2296 viewsThe corrugated rubber bit above and to the right of the gas pedal is the drain hose that goes down thru the carpet and floor sheet metal.
While it is bit hard to figure out from the jpg above, there is a rubber "strap" attached to the top of the corrugated hose that one uses to pull on to drag the hose up back around the black plastic heater "pan" drain. The same drain hose arrangement is on the other side as well.
One could I suppose run a plastic snap tie around the vertical pull strap if one was concerned about the hose slipping off again. See also the other jpg sketch which is from the Land Rover manual.
|
|
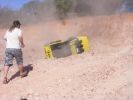
240 viewsOoops!! Tonka lost power and rolled back down onto his side
|
|
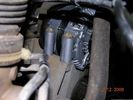
60 viewsOne bolt is visible at the front, but the other two are down the left hand side and best accessed by removing the small plastic guard behind the bumper. I also removed the small metal radiator guard between the bumper and the main sump guard (but that was mostly to retrieve the spanner I dropped!). The only issue with removing the plastic guard is the stupid plastic clips that hold it on may need to be replaced.
|
|

Alternator female plug looking down into top373 viewsThis shows the plug connected to the alternator wiring harness looking down into the top of the plug.
The cavity marked 1 is the AS or BATT SENSE and the wire colour most likely has Brown/Green on it.
The cavity marked 2 is the RC or ALT CON and the wire colour most likely has Red/White on it.
The cavity marked 3 is the L1 or ALT MON and the wire colour likely has Green/White on it.
I say "most likely" as the wire colours are not always the same on all vehicles.
Also the terminal 1 conductor destination is more likely C0570-175 rather than per the jpg.
The #3 pin is located closest to the big B+ terminal.
|
|
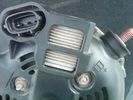
Alternator Plug and B+ terminal918 viewsPictured is the rear of the older Land Rover part # YLE500190 alternator showing the shiny cooling fin of the Regitar VRH2005-142 regulator under.
The first pin in the far left side of the connector is numbered #1 in the LR electrical wiring diagrams and is Battery Voltage Sensing (BVS); the middle pin, #2 receives a Pulse Width Modulated (PWM) signal from the Engine Control Module (ECM), and the right pin, #3 carries a PWM signal back to the ECM. Terminal Pin #2 on the LR wiring diagrams is called Alternator Control or ALT CON; Pin #3 per LR is called Alternator Monitoring or ALT MON.
Pin #1 is similar to what in older designs used to be called A or Batt, but is now called by Denso, S, AS, or Alternator Sensing for this design. Pin #1 also provides power to excite the alternator at startup until the PWM instructions over ride the battery voltage info. Land Rover calls the electronics under the pins a Smart Regulator, ironic, as it has to follow orders from the ECM rather than give the orders - new age thinking I guess. This is different from older design internal regulators that look at just the battery or the electrical buss voltage and then decides itself what to do.
It is almost like we are back to the external regulator designs of old, except that the ECM may decide that instead of telling the alternator to make more power, to load shed, and hence shut down the heated windscreen, seats, or whatever other electrical loads it decides are appropriate. My view is that the "smarts" are in the ECM and that the "regulator" should be regarded if not dumb, then as being a slave to the ECM.
|
|
Low down218 views
|
|

Our Trip Apr-Aug 2008135 viewsGosford to: Broken Hill, Innamincka, Birdsville, Alice Springs, Bungle Bungle NP, Broome, Gibb River Rd to Mitchell Falls and then Kunnunurra, Darwin (for tail gate Repair), Normanton (via Roper Bar, Borroloola, Lawn Hill, Burketown), Townsville, down coast to Noosa then inland to home. TRACK TRACE BY TRACKRANGER SOFTWARE ON ASUS UMPC.
|
|
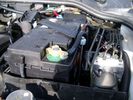
Aux Battery showing ground cable bolt "upside" down 1577 viewsIn order to obtain sufficient height clearance to get the plastic cover back on, I had to install the ground cable to the underside of the battery post connector.
Note the battery vent hose, (approx 5 ft required) is run down into where the windshield washer fluid container is located. There is not much electrical or metal in that area to be corroded by battery gas plus the open end of the vent hose tends to be protected from dirt and stays clean as well.
|
|
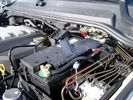
BCI Group 40R Deka 640RMF battery showing vent hose run forward to windshield washer reservoir area 1430 viewsRecessed post "Euro profile" battery to "match" OEM and stock Land Rover bracket; note that the Traxide SC80-LR module is mounted at an angle to allow for the main cable to sit under the cover so cover still closes.
The battery is a nominal 7", (180mm), high, but sits on a 1" battery spacer set under to raise the bottom front end of the battery such that the approx 11", (290 mm), length of the BCI 40R battery rises above the angled plastic nibs at the forward end bottom of the case front; hence sufficient space, (1/4", 5mm) remains at the brake reservoir end.
Also the 40R battery does not have hold down "flanges" on each end; on the sides yes, but not the ends so no additional length is required.
When I had to replace the 40R, this time I installed the shorter, (9.625"), taller, (7.5") Interstate BCI 47 / DIN H5 battery which eliminated the spacer on the bottom and better fit the stock LR tie down bolt lengths. Deka also has a BCI 47 / DIN H5 that would work fine as well.
|
|

Caterpillar Battery Size cross reference chart and battery profiles including post layout752 viewsThis pdf has a dimension, (metric and inches), cross reference chart plus another sheet that provides BCI and DIN cross reference numbers and shows post locations plus bottom ridge tie down locations, (or the lack of).
This data was for me, hard to find, and helps one in selecting a suitable physical size of Aux battery for the space available.
|
|
Thread upload2 viewsImage uploaded in new thread
|
|
44 views
|
|
Grommit21 viewsIs this a free grommit low down and on the LHS of the brake servo?
|
|
30 viewscable car up...tabogin down..fun
|
|

133 views
|
|

Thread upload6 viewsImage uploaded in thread 141729
|
|
Thread upload20 viewsImage uploaded in thread 110937
|
|
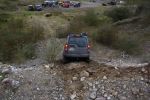
DiscoWex comitted to going down74 views
|
|

Thread upload20 viewsImage uploaded in thread 110380
|
|
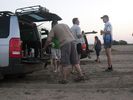
Sundowners from the portable bar (D3) in the Shashi River60 views
|
|
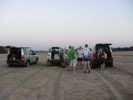
Sundowners in Shashi River69 views3 Countries in 1 picture, Left is Zimbabwe, Right is Botswana and on the horizon is South Africa
|
|

2006 Ducati 749r - first time touching down, 3rd day track riding, didn't know enough to be scared160 views
|
|
51 views
|
|

75 viewsComing down from the summit seconds before blowing out the front passenger-side tire.
|
|

the road between home and work292 viewsthe day before returning from work, I got stuck here in the middle of the snow storm. The plow didn\'t pass yet and wind was blowing snow everywere. Since then I always carry during winter a survival pack consisting of warm coat,cap, warm, high boots and gloves.
It is no fun recovering a car stuck in the snow and sliding down from the road when moving in nothing more than a business outfit (no gloves, city shoes, no coat) with a snowy wind blowing 100km/h..... .
|
|
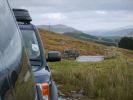
Calendar 2008 Entry531 viewsLooking back down Scotlands only \'greenlane\'
|
|

136 views
|
|

282 viewsCradle in place. Press marked lever down to release the cradle.
|
|

Crow Rash on bonnet120 viewsThis seems to be down to crows hopping around on the bonnet
|
|

camera59 views
|
|
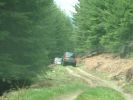
Down in the woods283 views
|
|

it could go down and up here...... but i wont try58 views
|
|
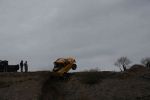
V8 4.6 71 viewsD3 completed a down run & not to be out done 90 completed an up run in grand style
|
|

Right down to the Merzouga Dunes.472 views
|
|

Disco 3 traffic jam713 viewsCalender 2008 entry.
The first Melbourne Disco 3 owner\'s day trip.
Travelling down Donald Track toward the Big River area (Victoria, Australia).
|
|

Deka Battery Dimension Data615 viewsThe battery size that I installed for my auxiliary was a BCI 40R battery as it was for me the easiest to fit and was also a cranking battery. The case profile was such that no tie down fins were located on either bottom end, (sides yes), and length wise, it was only about 11" (290 mm) long. As such, I did not have to grind the nibs at the front bottom of the plastic surround.
I did however raise the bottom of the battery above the angled nibs as I set the battery on a 1" (25mm) high plastic spacer. The total height, (battery plus spacer), was about 8" (200mm) so the battery top still fit under the Land Rover factory cover.
For the Aux battery, when I replaced the 40R, I installed an Interstate BCI 47 which is similar in size to a DIN H5. I was therefore able to eliminate the vertical spacer as the Group 47/H5 is the same height as the DIN H7/H8 stock LR spec starting battery. As such, the standard battery tie down bolts can be used without modification. The Group 47 battery is 9 11/16" long x 6 7/8" wide x 7 1/2" (190mm) high.
|
|

Downhill descent control trials81 views
|
|

Over the top performance350 viewsDropping down over a 50ft loose gravel drop, aprox 80 degree slope, in Quarry day, ireland event#8
|
|
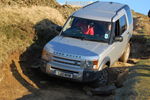
98 viewsMe & family on the way down Rouch Clough
|
|
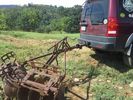
LR3 to plow your garden297 viewsI found this jpg where a current LR owner is using his LR3 for a similar purpose as the original Series units were designed to do - that is serve as a tractor for plowing a field or I suppose a garden.
In this case, I note the hitch is one of those that attach to the factory tow loop, (Rhino Hitch), rather than the factory product that inserts from the bottom and hangs down - (like a plow), but all the time. One of the other jpg's in this album shows the two factory variations plus a third jpg shows a closeup of the Rhino Hitch.
|
|

58 views
|
|

51 views
|
|

Thread upload12 viewsImage uploaded in thread 167839
|
|
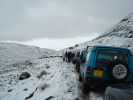
Coming back down121 viewsReturning after aborting the run.
|
|

Sheigra in North West Scotland with the Td5103 views
|
|

D387 views
|
|

D385 views
|
|

Ground anchor74 views
|
|
5 views
|
|

Thread upload6 viewsImage uploaded in thread 159579
|
|
Thread upload8 viewsImage uploaded in new thread
|
|

Thread upload4 viewsImage uploaded in thread 163635
|
|

Thread upload13 viewsImage uploaded in new thread
|
|

Thread upload1 viewsImage uploaded in thread 183644
|
|

Thread upload3 viewsImage uploaded in thread 187407
|
|

Thread upload4 viewsImage uploaded in new thread
|
|

Thread upload10 viewsImage uploaded in thread 112071
|
|

32 views
|
|

35 views
|
|

Thread upload5 viewsImage uploaded in thread 198490
|
|

Thread upload25 viewsImage uploaded in new thread
|
|

Thread upload13 viewsImage uploaded in thread 112377
|
|

Thread upload14 viewsImage uploaded in thread 117278
|
|

Thread upload6 viewsImage uploaded in new thread
|
|

4 views
|
|

Thread upload6 viewsImage uploaded in thread 150402
|
|

Thread upload11 viewsImage uploaded in thread 150967
|
|

Thread upload5 viewsImage uploaded in thread 151759
|
|

Thread upload17 viewsImage uploaded in thread 154363
|
|

Thread upload10 viewsImage uploaded in thread 108346
|
|

Thread upload13 viewsImage uploaded in thread 156730
|
|

13 views
|
|

Thread upload1 viewsImage uploaded in thread 159005
|
|

Thread upload11 viewsImage uploaded in thread 158579
|
|

Thread upload19 viewsImage uploaded in thread 163633
|
|

Thread upload15 viewsImage uploaded in thread 164331
|
|

Thread upload15 viewsImage uploaded in thread 147165
|
|

Thread upload15 viewsImage uploaded in new thread
|
|

Thread upload10 viewsImage uploaded in thread 174703
|
|

Thread upload7 viewsImage uploaded in thread 177086
|
|

Thread upload18 viewsImage uploaded in thread 174456
|
|

Thread upload1 viewsImage uploaded in thread 181637
|
|

Thread upload4 viewsImage uploaded in thread 190595
|
|

Thread upload44 viewsImage uploaded in thread 172661
|
|

Thread upload3 viewsImage uploaded in new thread
|
|

14 views
|
|

Thread upload7 viewsImage uploaded in thread 136178
|
|

Thread upload4 viewsImage uploaded in thread 159579
|
|

Thread upload3 viewsImage uploaded in new thread
|
|

Thread upload5 viewsImage uploaded in thread 181818
|
|
Thread upload14 viewsImage uploaded in thread 199452
|
|

Thread upload2 viewsImage uploaded in thread 201028
|
|
Thread upload1 viewsImage uploaded in new thread
|
|

Thread upload1 viewsImage uploaded in new thread
|
|

Thread upload0 viewsImage uploaded in new thread
|
|

Thread upload12 viewsImage uploaded in thread 134548
|
|
Thread upload13 viewsImage uploaded in thread 120289
|
|

Thread upload23 viewsImage uploaded in thread 124308
|
|

Thread upload11 viewsImage uploaded in thread 125477
|
|

Thread upload4 viewsImage uploaded in thread 172661
|
|

Thread upload2 viewsImage uploaded in thread 159005
|
|

Thread upload12 viewsImage uploaded in new thread
|
|

Thread upload5 viewsImage uploaded in thread 190982
|
|

Thread upload5 viewsImage uploaded in thread 192679
|
|
Thread upload12 viewsImage uploaded in thread 193790
|
|

Thread upload7 viewsImage uploaded in thread 193790
|
|
Thread upload6 viewsImage uploaded in thread 193790
|
|

Thread upload7 viewsImage uploaded in thread 193790
|
|
Thread upload2 viewsImage uploaded in thread 159005
|
|

Thread upload43 viewsImage uploaded in thread 172661
|
|

Thread upload10 viewsImage uploaded in new thread
|
|

Thread upload11 viewsImage uploaded in thread 193790
|
|

Thread upload7 viewsImage uploaded in thread 193790
|
|

Thread upload9 viewsImage uploaded in thread 193790
|
|

Thread upload13 viewsImage uploaded in new thread
|
|

Thread upload14 viewsImage uploaded in new thread
|
|

Thread upload43 viewsImage uploaded in thread 172661
|
|

Thread upload10 viewsImage uploaded in thread 194230
|
|
Thread upload11 viewsImage uploaded in thread 75599
|
|
Thread upload21 viewsImage uploaded in thread 84039
|
|

Thread upload11 viewsImage uploaded in new thread
|
|

Thread upload10 viewsImage uploaded in thread 120502
|
|

Thread upload16 viewsImage uploaded in thread 103886
|
|
Thread upload11 viewsImage uploaded in new thread
|
|

Thread upload11 viewsImage uploaded in thread 193790
|
|

Thread upload20 viewsImage uploaded in thread 129629
|
|

Thread upload10 viewsImage uploaded in thread 193790
|
|

Thread upload22 viewsImage uploaded in thread 127692
|
|

Thread upload3 viewsImage uploaded in thread 184588
|
|

Thread upload6 viewsImage uploaded in new thread
|
|

4 views
|
|

Thread upload13 viewsImage uploaded in thread 120289
|
|

Thread upload6 viewsImage uploaded in new thread
|
|

Thread upload10 viewsImage uploaded in thread 126072
|
|

Thread upload21 viewsImage uploaded in new thread
|
|

15 views
|
|

Thread upload6 viewsImage uploaded in thread 177883
|
|

Thread upload10 viewsImage uploaded in thread 177883
|
|

Thread upload10 viewsImage uploaded in thread 177883
|
|
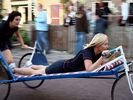
Downsized175 views
|
|
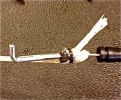
Pull cord as a backup63 viewsI added a pull cord so I would not kept caught with a broken release on the tailgate again. Think about a flat tyre if that happens to you.
|
|
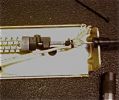
Actuator box underside 63 viewsUsed a clove hitch with plastic zip tie with 1/8" Kevlar rope
|
|
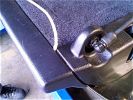
Pull cord 45 viewsFinished job.
Cheers
|
|

Thread upload7 viewsImage uploaded in thread 209282
|
|

Thread upload7 viewsImage uploaded in thread 209282
|
|

Drug dealers to the rescue264 viewsD3\'s will never live this one down!
|
|
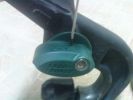
knock the locking pin downside with a small screwdriver170 views
|
|
long way down232 views
|
|

Yer name's not down, yer not commin in...271 views
|
|

Big Kev, and IanR/Anne coming down Dampier Mountain FT77 views
|
|
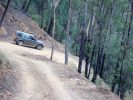
Disco Driver (Justin) and Emily - heading down the Dampier FT97 views
|
|

Going down a steep section of the Dampier Mountain FT81 views
|
|

62 viewsYou can see how the spot to mount the control box has the long flat section to the left - so I mounted the box upside down to allow the 2-sided tape to stick to this bit.
|
|
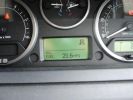
Ahem1062 viewsDid manage 42.1 mpg on the way back to dropping it off, down a hill!
|
|
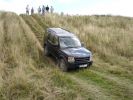
Marc downhill, much steeper than it looks402 views
|
|
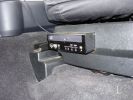
Base unit458 viewsFixed to seat base so it moves with the seat, two power supplies are needed to start up and shut down with the vehicle
|
|
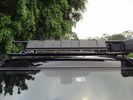
Wind Deflector for Rack15 viewsRecognise this part? Its the lower front recovery point cover. Installed upside down to silence the wind "drone" on the roof rack - works a treat!
|
|
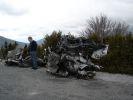
Destroyed D3156 viewsAll that is left of a D3 after plunging down the Verdun Gorge in the South of France.
|
|
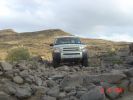
Coming back down from beggining of Baboons91 views
|
|
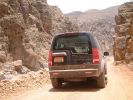
Down from the top following the track along the bottom of the wadi138 views
|
|
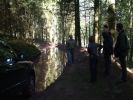
If you go down inn the woods today......55 views
|
|

The Road I came up.333 viewsThis is the road which caused my problem, drove up it, not realising there was a T junction which I had to turn right, turned, but could not get myself to get off the brakes and accellarate, so went straight on down a ditch!
|
|

Down ditch but only front wheel!402 views
|
|
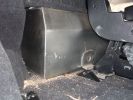
Right side floor-level view of water tank.151 viewsShows tie-down bolt (one of 2 securing the tank). Also note small void on side, which permits tank area to dry out if accidentally overfilled.
|
|
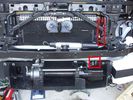
Installed winch with hydraulic hoses178 viewsThe hydraulic hoses are stiff, so I had to run them up the side of the radiator (can just see inside red boxes) to near the top of the radiator, then back down inside the engine compartment, then underneath the engine (behind the radiator) to the D4's power steering rack, where the hoses become metal. This hose routing may not be possible if the fuel-burning heater is in place (we don't have those in Aust and the space allowed room for my hands to bend and run the hoses without kinking).
|
|
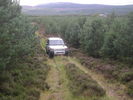
Making our way down to the river59 views
|
|
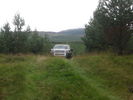
On our way down to the river Spey53 views
|
|
Looking down teigdalen161 views
|
|
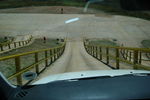
38 viewsDown a 35% slope - we weren't allowed on the 45% slope. The centre Land Rover SA use is a military version of MIRA. There were some pretty strange things hurtling around the oval track while we were there.
|
|
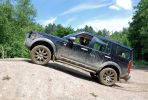
415 viewsCALENDAR ENTRY
Taken at Tong in June 2008
Climbing the crest before plummeting down \'the hill\'
|
|
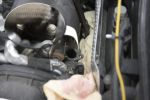
EGR Valve/Pipe Flange895 viewsThe bolts in the inset are the ones to be removed. Note the rag stuffed down beside the EGR to prevent dropped bolts or gaskets disappearing for ever. Don\'t forget to take the rag out if you don\'t want your D3 to go up in flames next time you use it!
|
|
faultmate EAS 1 side down other117 views
|
|

faultmate EAS near side down112 views
|
|

Artic Frost HSE - First Day - South Downs506 views
|
|

G4 wading down the high street203 viewsTaken by a passer-by as I was enroute to an emergency - just luck that I found the shots.
|
|

Fluid, Filter/Pan Combo removal and install5979 viewsThese are the LR instructions re removal and install of the plastic pan/filter combo for the ZF 6HP26X transmission on the 4.4L petrol V8 LR3.
The instructions tend to ignore the reason you have to lift the right hand side of the engine about 40 mm. This is because of a frame cross member that interferes with dropping down of the plastic pan. The real problem is a vertical "oil filter spout" that rises out of the filter/pan combo up into the transmission. The spout is the suction pipe for filtered transmission oil back up into the tranny.
On the metal pan versions, the filter is separate from the pan, hence the filter remains with the tranny when the metal pan is dropped. The filter is then removed or installed independent of the metal pan, hence with the metal pan, there is no need to lift the engine.
If one is removing the plastic pan so as to install the metal pan, then some do not lift the engine but just drop the plastic pan enough to gain access to saw off the vertical plastic spout - it is a one time procedure.
Be aware however that the metal pan uses a flat gasket and the plastic pan uses a O ring like perimeter gasket that sits in a half round groove in the tranny casing. Also the metal pan uses 21 shorter torx M6x22.5 metric cap screws for the perimeter bolts. The plastic pan uses longer M6x28.5 torx metric cap screws.
|
|

Down ...35 views
|
|

Thread upload15 viewsImage uploaded in thread 171455
|
|

Highland 4WD Club Run 2009. 18 miles on offroad tracks continuously. (special permission granted from landowners)66 views
|
|
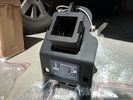
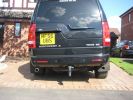
Rhino Tow Loop Hitch269 viewsThis is a receiver end view of the Rhino Hitch that ties to the factory tow loop. In addition to improved strength, it does not reduce ground clearance as does the factory style when installed.
Land Rover in early advertising videos when the 3 first came out showed the D3 hanging from a crane via the frame. The intent was to show how strong the frame is and by inference, the rear tow loop, specifically noted as being good for 6 tonne. The video ends before anything dropped or was lowered back to the ground, so one of course does not know for certain. The Rhino Hitch design however picks up on the apparent evidence of strength and certainly the additional clearance.
|
|

Loooooong view down the road .....147 views
|
|

Upside down censored58 views
|
|
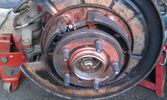
Drivers side rear wheel assembly sripped down83 views
|
|
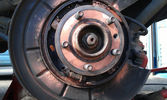
rear wheel hub assembly stripped down passenger side 200580 views
|
|

Underside of the ciruit board127 viewsThis looks more of a mess than needed to be. The Maplins guy tried to be helpful when I bought the relays, he wrote down the switching COM/NO/NC, it was actually NC/COM/NO. Some scratching of head when it didn't work then worked out what happened when I looked on the manufacturers website at the data sheet...lesson of the day check the data sheet!
|
|

South Downs Snow13 views
|
|

25 views
|
|

new bridge27 viewsthe old fell down after earthquake did not use it as not on GPS..
|
|

collecting wood30 viewslocals cant cut down trees (finally linked to landslides) so the wade into this fast flowwing river to collect drift wood. water is very fast flowing and muddy and has logs floating down
|
|
don\'t fancy this chasing me down....................108 views
|
|
End of the line at Ras Al Khaimar72 viewsI am led to believe that this example was left overnight on the beach broken down - by morning the natives had stripped every last piece of usefull equipment out of it, engine and all and dragged it across the creek back to their village
|
|
It was very icy down here.365 views
|
|
"Discovery" down_328 views
|
|
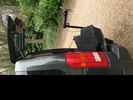
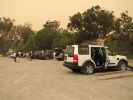
"4x4" with lower tailgate down32 views
|
|

Oops16 viewsThat's why it stopped moving forwards and started moving down!
|
|

777 viewsShows the newly aquired space with the lid down, this will be covered with the right carpet as soon as i get my hands on some
|
|
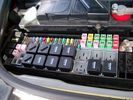
Picture of the engine compartment fuse panel5779 viewsEngine compartment fuse panel located near the battery. This is where F3E, (5 amp), F26E, (20 amp), Fuseable link 10E, (60 amp) and Relay 7E, the now upgraded 70 amp air compressor motor relay, part number YWB500220, (E is for Engine compartment fuse box), are all located. Fuse F35P, (5 amp), is inside the Passenger compartment behind the lower glove box door.
To keep the suspension from going down to the stops when driving, (or parked), it appears that it is only really necessary to remove F26E to depower the exhaust valve and generally keep all the valve block solenoid valves in a closed position trapping whatever air is within the air springs. F3E gets its power thru F26E, so when F26E is removed, the F3E circuit is automatically de-powered. F35P is more interesting in that battery power goes thru the ignition switch and F35P and then into the air suspension control unit. Apparently however, if F26E is removed, removing the F35P is not needed even when the engine is running.
With all fuses still in, if you have a problem, in practice, ideally, the compressor still works and will raise the 3 to an appropriate height. If so, one can then shut the engine off and allow the computers to go to sleep and then you remove the fuse(s). In actual practice, it seems that one need only pull the F26E fuse and can do so with the engine running. All the same, one might consider that the 3 is first a mobile computer, and secondly a 4x4. Computers prefer to go to sleep before the plug is pulled on them, however given that F26E circuit is always alive, then the computer never sleeps. With the fuse(s) pulled, and if you are still up, you can now be a 4x4 instead of a low rider. The whole purpose of the fuse pulling exercise is to depower the one and only system exhaust valve that is physically located within the compressor unit, (to keep it from opening), and secondarily to keep closed the four air spring solenoids within the block valves. This also shuts the air compressor down and stops the air compressor from making air even if the compressor is still good. That is why you initially need the fuse(s) in to allow the compressor to make air if it can.
|
|

133 views
|
|

Run!! Newbie coming down!93 views
|
|
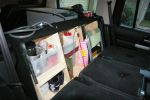
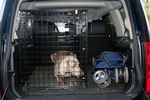
View with all 3 seats folded down87 views
|
|
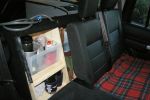
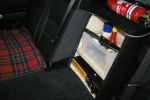
Access Shot with 1 seat down64 views
|
|
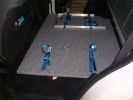
View from passenger side with 1 seat down68 views
|
|

Fields of Sturts Desert Pea116 viewsNear Roxby Downs.
|
|
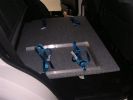
Passengers side - tie downs for hand winch193 views
|
|
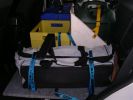
Drivers side - tiedown straps for tub168 views
|
|

Drawer frame tied down to 4 OE points187 views
|
|
Handwinch lashed to platform (weight down low) 183 views
|
|
room to lay down71 views
|
|

ditch it77 viewsjust another view of the ditch. i had a worry on as i came skating down the hill backwards with no means to do anything
|
|

In the ditch80 viewsCar slid back down the hill on snow 35ft before i managed to bury it in the ditch
|
|

Disco near Maria Alm 21.12.200989 viewsDisco I spotted driving down the track from the Bärmooshütte near Maria Alm while I was in the Aberg gondola.
|
|
Looking down at jubilee clamp holding flexible hose to airbox inlet.184 views
|
|

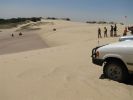
Stockton dunes, NSW Australia - you can drive up or down this in a D3183 views
|
|
86 viewsSouth Downs in June 2011
|
|

PP002 12V135 views Brad Harris Socket
Hella Socket Cigarette
Lighter Socket
Battery Level Meter
External Terminals for Battery Charger or Solar Panel
ON/OFF isolator tie down strap excludes Battery
Built in fuses
https://www.facebook.com/snomasterusa
|
|
Air Down47 views
|
|
Further down than it looks42 views
|
|
front down46 views
|
|
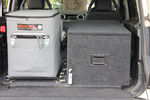
56 viewsengel fridge and cargo drawer rear of the D3.
Base board is MDF, think this may be called ply elsewhere covered with marin carpet on both sides and screwed through the 4x tie down holes with M10 bolts
|
|
Twins283 viewsCALENDAR 2011
After comming down a nasty rock trail, we found the place we were looking for... This is in Puerto Rico. My LR3 was 3 weeks old! (got permission form the other owner to publish foto), feel free to edit foto.
|
|
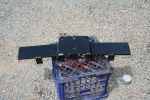
D3 towbar491 viewsUpside down looking at brackets from front
|
|
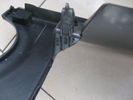
95 viewsbottom lug inside upside down round & round we go view
|
|

Northampton Services AA breakdown61 viewsAll the warning lights and messages, total loss of power (though engine still running).
|
|
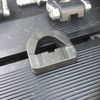
Cargo tie-down13 views
|
|

Starvation lake, BC, Canada26 viewsHeading down to lake
|
|
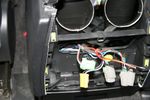
Power supply coming out from center consul, going down carpet split.62 views
|
|
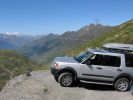
Col de la Tourmalet France 200952 viewsHolidays in France high up in the Pyrenees we decided to drive up to the top of the Pic du Midi at an altitude of 2877m instead of taking the £60-00 cable car. Just don\'t look down. What a Day!
|
|
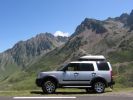
222 viewsHolidays in France high up in the Pyrenees we decided to drive up to the top of the Pic du Midi at an altitude of 2877m instead of taking the £60-00 cable car. Just don\'t look down. What a Day!
|
|
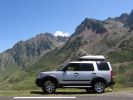
59 viewsHolidays in France high up in the Pyrenees we decided to drive up to the top of the Pic du Midi at an altitude of 2877m instead of taking the £60-00 cable car. Just don\'t look down. What a Day!
|
|
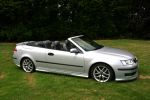
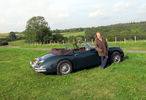
Saab - Roof Down239 views
|
|
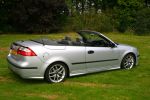
Saab - Roof Down36 views
|
|
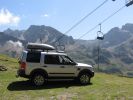
Why take the lift when you have a Landrover49 viewsHolidays in France high up in the Pyrenees we decided to drive up to the top of the Pic du Midi at an altitude of 2877m instead of taking the £60-00 cable car. Just don't look down. What a Day!
|
|
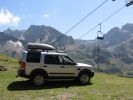
Why take the lift when you have a Landrover233 viewsHolidays in France high up in the Pyrenees we decided to drive up to the top of the Pic du Midi at an altitude of 2877m instead of taking the £60-00 cable car. Just don\'t look down. What a Day!
|
|

Water coming down loom behind door card23 views
|
|
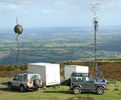
A view from the top104 viewsLooking down on my Disco and friends Defender. Photo taken from the top of Brown Clee Hill.
|
|
He's out there somewhere...141 viewsHobgoblin - vainly searching for the D3 skipper who chose to go down with his ship...
|
|
About to drop down one leg of the \'loop\'140 views
|
|
Img 683 viewsBefore fitting the lights into the car. Grind down the small ridge. This insures for a better fitting.
|
|
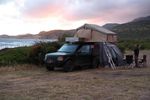
sundowner50 views
|
|
Subwoofer Install238 viewsGrinding & sanding down the waffle ridges gave about 1/4" more room for the new sub.
|
|
Subwoofer Install247 viewsThe waffle cover all grinded & sanded down.
|
|
Subwoofer Install244 viewsAfter grinding & sanding it down, painted it black.
|
|

Interstate Battery Dimension sheet640 viewsThis sheet is hard to find - the sheet is not on the Interstate corporate web site but some dealer web sites display it. The pdf shows most of their available batteries including the H7 and H8 sizes that are the LR North America replacement batteries for the main starting battery. These batteries are of the Land Rover desired "shallow" cycle high discharge current Maintenance Free, (Ca Ca), internal construction, (not AGM, but instead, Wet Flooded Lead Acid with battery "caps" and Ca grid separators).
For the AUX battery , the H6, (BCI Group 48), is probably similar in dimensions to the Varta E12V75N that is popular in Australia. For that battery to fit in the second battery compartment, you must grind out the angled nibs on the inside front bottom of the LR black plastic surround, something I did wish to do and hence installed a Group 40R on a spacer. Alternately, one can choose an Interstate BCI Group 47 which is similar to a DIN H5 for the AUX location. I did this when I had to replace my 40R. No vertical spacer is required and the stock battery tie down bolts and clamp work well.
|
|

Thread upload4 viewsImage uploaded in thread 194430
|
|

faulty radio ..shutting down before the required voltage160 views
|
|
Defender 200 Tdi221 views Annie is waiting for it to cool down a bit. Note the Codan HF autotune antenna.
|
|

wheels88 viewsD4 with pirelli ATRs
|
|

wheels75 views4 19inch MTRs
|
|
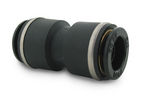
John Guest DOT all plastic fitting717 viewsThis is a picture of the John Guest DOT all plastic union. If you look closely, you can see the DOT imprinted in raised letters on the end of the fitting. This is of a 1/4" connector rather than the 6mm that the 3 requires.
The picture is similar to the air suspension pneumatic fitting union that Land Rover sells as replacement part # STC8580. This is for 6mm OD tubing size. The STC8580 comes with what are called "Collets" at each end that cover up the press to release feature underneath. See the John Guest web site www.johnguest.com under the Pneumatics section and also in Downloads for their catalog for install and remove instructions.
The actual "air brake spec" fitting that Land Rover provides has an interior 4mm OD ferrule that slips inside the 4mm ID of the nominal 6mm tubing. I have not yet been able to obtain the John Guest part number for the LR fitting, only the LR part number. This part number was generated for the RR Classic air systems.
|
|

John Guest (LR part # STC8580) push in straight 6mm tubing to tubing connector730 viewsThis picture is similar to the air suspension pneumatic fitting union that Land Rover sells as replacement part # STC8580. This is a 6mm OD tubing size push in to install straight tubing to tubing fitting. The STC8580 comes with what are called "Collets" at each end that cover up the press to release feature underneath. See the John Guest web site www.johnguest.com under the Pneumatics section and also in Downloads for their catalog for install and remove instructions.
The actual fitting that Land Rover provides has an interior 4mm OD ferrule that slips inside the 4mm ID of the nominal 6mm tubing. Hence the fitting depicted and part number are not actually correct. I have not yet been able to obtain the John Guest part number for the LR fitting.
The fittings that show in this doc are what I call food service fittings rather than transportation or Air Brake fittings. The part LR sells, (STC8580), is the Air Brake type for transportation.
|
|

Happy Campers44 views
|
|

Foxwing and RV549 views
|
|

53 views
|
|

Driffield Weekend51 views
|
|

Foxwing and OZtent RV557 views
|
|

Knockhill Scotland278 viewsFavourite past time, hunting down cars on track. As seen from inside a 350z.
Although the D3 is a change of pace, ever so slightly!!
|
|

Bogged down in Sahara Desert99 viewsAttempt to drive up the camel\'s hump resulted in this. Did not engage the cactus and the A/C was on.
|
|
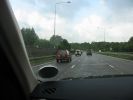
The journey down277 views
|
|

Air Suspension System Parts, Layout, and Operation7062 viewsThis 22 page pdf gives a pretty good description of how the system is supposed to work, plus shows the various parts and the electrical including fuses and relays etc. Of the files here, this is the most useful.
As with all the pdf's here, you can download and print it out.
|
|
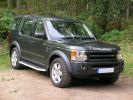
If you go down to the woods today ...225 viewsStill shiny!
|
|
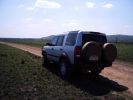
D3 in Litchfield National Park, on the Reynolds Track44 viewsThis track takes you through the bottom half og the Litcfield National Park, and because the track has some deep creek crossings it keeps the numbers down, seeing as it is only 90 minutes out of Darwin. It is a flood plain between two long ranges and has numerous \'Magnetic termite\' Mounds.
|
|

LLumar "windscreen" clear Infra Red reduction side window film930 viewsThis is a data sheet on the LLumar brand of what they call Windscreen Film; It is almost clear, (has a bit of a blue tint), and reduces both the Ultra Violet fading and sun burn rays which most all films do as that is easy, plus more significantly, the Infra Red heat rays. That is rare as it is not so easy or cheap to do.
AIR80BLSRHPR (blue) is what the IR rejection film is listed as in the brochure that I used. http://www.llumar.com/en/AutoWindscreen.aspx
I had it applied to the front side windows as well as the front sun roof. One can feel the difference when the sun is low and streaming thru the side glass or high and coming thru the sun roof. Rolling a side window down is the simplest test of effectiveness re the rejection of the heat energy.
|
|

Thread upload10 viewsImage uploaded in thread 187407
|
|

Thread upload4 viewsImage uploaded in thread 187407
|
|

Thread upload4 viewsImage uploaded in new thread
|
|

look down23 views
|
|

It peeing down81 views
|
|
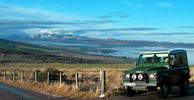
It\'s Where We Live. Down in the valley..70 viewsMoniack Mhor on the Kiltarlity to Abriachan road, Inverness-hire, looking due west.
|
|
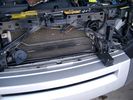
19mm wiring loom in trough behind bumper and in front of rad792 viewsThe 19mm wiring loom is large enough that a maximum of six 6mm air lines can be fished thru as required. The loom runs from the FASKIT panel located in the engine compartment behind the left front headlight, down and across in front of the rad and then down to the front axle valve block located behind and below the right fog light.
|
|
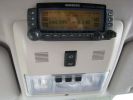
388 viewsCompleted Install of Control Panel. Wiring goes up into headliner, over curtain airbag on left hand side, and down the B pillar.
|
|

LR3 Air Conditioner Drain Tubes behind centre console2131 viewsThis shows the two air conditioner drain tubes located left and right under the radio stack.
The tube on the left side, (steering wheel side, LHD), disattached itself and the carpet on the floor under the gas pedal etc became soaked. I think rain water from outside that comes in the outside cowl vents also exits via the tubes as I first noticed the carpet was wet after parking outside during a big rain storm.
It was relatively easy to slide up and reattach the rubber hose that runs from the rectangular shaped plastic discharge hole(s) of the heater "pan" down along the transmission hump area and thru the floor pan. There is a hose on each side of the transmission hump, but only one hose had let go on my 3. The rubber hoses just slide over the rectangular plastic openings of the two heater housing drain outlets.
To get at each drain hose, remove the vertical sort of triangle carpeted piece below each side of the radio stack. The triangles of carpet will just pull away as each is held on with those metal U clips Land Rover so likes. Dislodge each triangle at least sufficiently to get ones hand in to slide the rubber hose back on.
You will rarely see AC water on the ground as the front drains pour onto a metal underside protection skid plate and the rear drain onto the top of the left rear muffler.
|
|
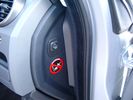
Air Suspension ECU Fuse 35P cut off switch.3820 viewsThis shows the SPST rocker switch mounted in the blank plate installed in lieu of a manual passenger side air bag shut down switch - now automatic via passenger seat pressure switch. Fuse 35P (5 amps) is located in the interior fuse box behind the lower glove box and protects the ignition power supply to the Air Suspension ECU. When the SPST switch is moved to the OFF position, the RAISE /LOWER switch on the centre console is not powered, and hence does not function. As such, some signals from the wheel height sensors and CPU are ignored. By itself however, removing F35P will probably not stop the 3 from self dropping, particularly after the engine is turned off.
Fuse F3E, (5 amps), located in the engine bay fuse box by the starting battery protects the circuit that provides feedback to the Air System ECU indicating that the Compressor Relay has successfully operated and that the Air Compressor is or should be operational, can also be removed, (but is probably not totally necessary), as it gets its power thru F26E. Hence Fuse F26E, (20 amp), also located in the engine compartment fuse box is the fuse that must be removed. This fuse protects the circuit that provides full time battery power to the Air System ECU. When in place, current thru the fuse powers the periodic re-levelling action, (usually lowering a bit with that brief air release noise), that often occurs when the vehicle is parked and the engine is off.
Removing F26E fuse will stop the auto levelling action and also inhibit any other down to the stops signals, (engine running or not). When F26E is removed, no power can flow thru to F3E, hence removing F3E is more for insurance than an absolute requirement. The same with F35P, removing F26E removes primary full time power from the Air Suspension ECU, and hence removing the F35P fuse should not really be required either as long as F26E has been removed.
|
|
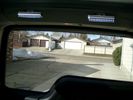
Boot lighting, looking to rear - hatch closed 542 viewsView shows the lights mounted in the rear on an early spring day.
In operation, the lights are tilted so that they shine downwards. The lights are mounted high enough up that one cannot see the LEDs from the front thru the rear view mirror; also the LEDs are so directional, that no light is thrown on the side glass.
Each assembly contains 15 LEDs, however the reflector is such that the LEDs appear to double.
|
|
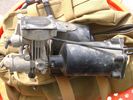
Compressor Air Drier 2044 viewsA view of the air drier - the black round thing to the right of the actual compressor cylinder head.
The general feeling is that the air dryer is responsible for most of the compressor problems now and that replacement of either the assembly or just the beads inside will probably revive one's compressor. In reality, the beads may have for the most part broken down and turned to dust plugging the internal filters. Hence replacement of the complete dryer unit has some merit.
The part number for the dryer assemble complete with the desiccant is VUB504700.
|
|
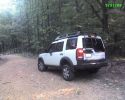
offroad 98 views
|
|
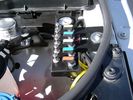
View of mounted panel from front left corner737 viewsI drilled a hole for the supplied 6 mm tie down toggle bolt in a flat portion of the wing on which the panel sits. I inserted a 50 mm flat rubber washer between the wing metal surface and the underside of the black painted panel plate; also a 40 mm flat rubber washer between the supplied fender washer and the metal plate - just seemed like a good idea so surfaces mate well even if wing metal not completely flat.
|
|
Empty space in NAS LR3 for location of FASKIT panel599 viewsThe empty space is available as the North America Spec gasoline engine LR3's do not have the Fuel Burning Heater installed. The air lines from the four air springs and the air tank will appear to rise up from under the headlight assembly. The lines to the front block valve assembly located behind the front right fog light will sort of run within the bumper across the front of the radiator down into behind the righthand fog light. The rear lines somewhat follow the path of the existing air feed line from the front valve assembly to compressor. Rather than be located between the left front fender liner and left metal wing however, the four lines will feed thru the empty wing space inside and above the wheel well arch and exit down by the left front mud flap. From there, the lines run along the left frame member above the air tank and then parallel the frame over top the compressor to the top of the rear left air spring where the rear air block valve assembly is located.
|
|

LR3 Electrochromatic Interior Rear View Mirror wiring diagram.852 viewsIt seems that there are two fuses, F69P and F5P that provide power for the interior rear view mirror. Ten amp F5P is a feed off the reverse gear relay and inhibits auto dimming when reverse is selected. Five amp F69P provides power to the auto dimming circuits and the garage door opener function if optioned.
The pdf can be downloaded and printed out. For on screen viewing, right click on the pdf and select the Rotate Clockwise button.
|
|

Underhood Fuse and Relay Box drawing 3054 viewsShows the various fuse and relay locations. Fuse 3E, (5 amp), and Fuse 26E, (20 amp), as well as upgraded 70 amp Relay 7, part number YWB500220, locations are displayed. Relay 7 sends battery power to the compressor from the 60 amp fusible link called up as 10E. Fuse 26E is what provides full time always on battery power to the air suspension ECU and hence powers the auto level wakeup when the vehicle is shut down and say parked for the night. Removing F26E is the primary method to disable the air suspension system; Removing F35P is more if you want to experiment with it from inside.
I found it useful when I had a suspension problem, (actually a wheel alignment problem picked up by the steering wheel angle sensor), that only showed itself on the highway but allowed for no trouble light driving in the city. This was because in the city, the steering wheel was always in motion and rarely was the vehicle driven in a near straight line for very much distance.
|
|
Wire (tubing) loom on right to down into bumper 464 viewsThis shows the 19mm loom in the trough between the bumper and the rad as it drops down into the right fog light area.
|
|
rear hatch light and door release switch390 viewswe\'ll ad a switch "guard" to protect from accidental gear shift popping button. light is slider 3 way so unlikely to be turned on by accident but will be nice down light when hatch is opened out.
|
|

solo steep gravel stop = park brake plus reverse on shifter333 viewsso our disco II\'s locked all 4 wheels with brake but now the modern lr3 slides away with only the park brake!!!! 1. put auto shifter in reverse (low gear) with foot on brake, 2. apply park brake, 3. get out and snap photo incase something fails and it slides away ;)
I reversed up the hill from this position, system decided to engage extended heigh mode for some reason trying to gain traction on loose surface.
|
|

Air Suspension Wiring Sheets3037 viewsThese two sheets show the wiring and fuses related to the operation of the air suspension system. Fuses F3E, F26E, and F35P are shown as well as the interior up down switch and the wheel height sensors.
As with all pdf's, you can rotate them to view plus download and or print out as you wish.
|
|

My Son and I down in Liwa16 views
|
|

Excel file for Rotors and Brake Pads part numbers for 4.4L V8 petrol LR3768 viewsComparing the cost of the various brands of brake parts is time consuming. Once you have your parts costs, this little spreadsheet will make collating the info easier.
I did not make any provision for labour costs, but the file can be downloaded and then modified. You can change Dollars to Euros or Pounds or whatever and insert lines for labour costs as desired.
Do not pay too much attention to the $ numbers as they are a mix of US and CDN, and from differing time frames, (prior to Spring 2011) . Also the brake part numbers are for my 2005 North America spec LR3 with the petrol 4.4L V8; diesel powered and supercharged 3's may have different part numbers
|
|

Land Rover Brake Light switch XKB5001102699 viewsThis is what the switch looks like when removed from the parts box. Note that the plunger is recessed back into the body and when installing, the process of rotating the switch body 1/4 turn anticlockwise releases the plunger so it pops longer and engages the brake pedal. If you look down on the plunger you can see curved slots where the rotation takes place.
Do not try to rotate the new one - play with the one you remove. Also do not press on the brake pedal when removing or installing as you will damage the plunger - this is one of the reasons the plunger is retracted into the body for installation. It is also for this reason that if you try to confirm the operation of the switch contacts with an ohm meter by pressing the plunger, the switch will appear not to function as one might anticipate. Have faith, the switch will however, once installed and the plunger is in full motion.
|
|

Door Lock Wiring Diagrams1730 viewsNear the bottom of this 5 page pdf on page 224 are shown the pushbuttons and locking mechanisms for the rear hatch and tail gate.
The pdf will open vertically but you can download and print it out or just rotate the image clockwise by right clicking on your screen and selecting the "Rotate Clockwise" button.
|
|

Power Door Lock wiring diagrams530 viewsI thought I would include this 5 page power door lock wiring diagram pdf here as well.
When the pdf loads, if the views are vertical, it may be that you can right click on your mouse and a box will come up that will allow you to rotate the views clockwise so that the sheets are horizontal. Alternatively you can download the file and print each sheet yourself.
|
|

Power Door Lock Wiring694 viewsAbove is a 5 page, (pages 222 to 226), pdf wiring diagram for the power door locks for the LR3.
You can download and print as required. For on screen reading, use the right click rotate feature.
Additional pdf's regarding Locks can be found within the Gallery under the Power Windows and Door Lock Circuits heading.
|
|

Fuel Tank Internals, Description and Operation 809 viewsThis 10 page pdf shows views of the fuel tank internals, what the various pieces do and describes how the fuel storage system is supposed to operate.
As usual, you can download it, save, and print as required.
|
|
![Filename=LR3_Radio_Removal[1].pdf
Filesize=190KB
Dimensions=320x240
Date added=04.Feb 2014 LR3_Radio_Removal[1].pdf](images/thumb_pdf.jpg)
Radio Removal from Radio Stack571 viewsThis shows how to remove the radio from the stack. Basically you remove the H surround first and then at least loosen all the Torx 20 screws left and right sides from the top down starting at the narrow unit that the four way flasher/locking buttons are mounted on.
The units kind of interlock, hence some movement of each is required to remove the radio by itself. I find it best to take out the four way flasher/locking buttons assembly first as that allows access to the fibre optic cable connector into the back of the radio head without too much tugging.
|
|

Stop Light Lamp Circuit pdf2491 viewsThis pdf shows the brake light circuit for the NAS LR3.
Note that power for the brake light bulbs can come either thru the brake light switch power feed /contacts plus also from the Hill Decent Control, (HDC), system relay located within the Central Junction Box, (CJB) - yes two separate sources of power for the brake light bulbs. This would tend to explain how a brake light circuit concern shows up as a hill decent fault message; also why lesser vehicles without hill decent braking mechanisms, (HDC), never display this sort problem when a brake light bulb or switch acts up. You never have a problem related to a system that does not exist.
Additional evidence of the relationship of the HDC and the tail light circuit is demonstrated by when the HDC actually acts to slow the 3 down, the brake lights automatically illuminate even if the slowing action was merely retarding the engine speed or shifting to a lower gear, (in other words, no foot on the brake pedal).
There is also a tie in to the Cruise Control and hence a failing brake light switch can affect cruise operation or just create false Cruise Control messages. To further complicate the issue, while there are no messages generated, operation of the radiator electro viscous fan can also be negatively affected by the fouled set of secondary contacts within the brake light switch. This is all because the NC contacts within the brake switch send misleading messages to the ECU.
While the ground wire design is similar to other vehicles, note the grounds for the brake light filament and the reverse light filament are common on each side. That means that if one has a non functioning brake light on one side, the reverse light may not also work or that some problem with the reverse lights could back feed into the brake lights. This situation while unusual, can result when grounds are corroded probably due to swimming in rivers and creeks or just routine driving in a marine environment.
|
|

LR asisst297 viewsIf my D3 breaks down I expect nothing better than this from LR asisst. Passengers stay in the car of course LOL
|
|

142 views
|
|
Upside Down Mantec Logo421 views
|
|
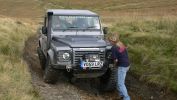
Marie 1152 views
|
|

63 viewsDowntown Vancouver
|
|
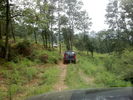
if you go down to the woods today..56 views
|
|
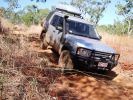
D3 in the Kimberley - on the track to Port Warrender45 viewsBeyond the track to the Mitchell Falls is the very rough track down to the coast and Port Warrender
|
|
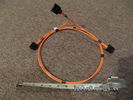
Fibre Optic MOST cable between components.560 viewsThis is a typical section of Plastic Optical Fiber (POF) optic cable with the orange coloured cladding covering the perimeter of the light transparent core. This is used as the MOST (Media Oriented Systems Transport) data transmission medium.
Note that each MOST 1355426 optical connector holds a pair of light conductor cables, one transmitting optical signal in, and the second, optical signal out. When connected to the other cables and devices, the cables form a continuous loop.
The light signal within the cable is red colour as one might expect. One break or disconnect anywhere along the loop shuts down signal transmission to all the connected components.
|
|

Thread upload19 viewsImage uploaded in thread 92518
|
|

new wild friend16 viewstwo wild pigeons kept coming to the garden, putting food down allowed us to get close for the photo.
|
|
174 views
|
|

Secondhand Minilites?202 viewsI wish that these were available for the Discovery 3 in 8x17 or 18" sizes.
Lots of secondhand tyres and rims stacked around tyre and motor car dealers yards everywhere we went in Japan from Hokkaido right down to Kyushu.
|
|
Calendar entry 1238 viewsAugust in New Zealand. Driving back down from the Tukino ski field on Mount Ruapehu.
|
|

Calendar 2010237 viewsAugust in New Zealand. Driving back down from the Tukino ski field on Mount Ruapehu.
|
|

Slowly walking the LR3493 viewsJust went through gate 3, used hill decent to slowly walk the LR3 down this steeper section of the hill.
|
|

Sir Tiffy P G Pearce-Smith UK 204 viewsThe League of Venturers Search and Rescue is a charitable group from the UK that works with youth in the UK to give them rescue training, and life experiences. Read more or sponsor them at the link to their web site below.
They go on overseas expeditions, and practice daily breakdown training (grin). Spotted in Marble Falls Texas, USA.
http://www.vsar.org.uk/content/Activities/content/Overseas_Exhibitions.html
|
|

black bear75 viewschased black bear down in West Virginia, US and shot a picture. Near Route 40
|
|
close up of 1 1/4" access hole493 viewsView of the 1.25" inch access hole. You can reach your finger or a screwdriver in this hole to move the lever up or down. It will be fitted with a rubber plug when not in use (and when found).
|
|
cross view showing access hole505 viewsCross view of the 1.25" inch access hole. You can reach your finger or a screwdriver in this hole to move the lever up or down. It will be fitted with a rubber plug when not in use (and when found)
|
|
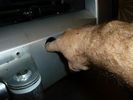
1 1/4" access hole for lever459 viewsAction view of the 1.25" inch access hole. You can reach your finger or a screwdriver in this hole to move the lever up or down. It will be fitted with a rubber plug when not in use (and when found)
|
|
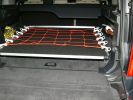
Sliding floor - closed position515 viewsMaterials: 17mm formply, ex 1000mm piano hinge, 2x Haefele 160 kg sliders, timber brackets for the floor to connect the sliders, aluminium angle for leading edge, 50x3mm aluminium flat drilled for the tie-down net connectors, 2x galv iron flat folded to form angle brackets (to secure sliding loadspace to floor), 1 square metre of black carpet to match the back of the seats.
|
|

The Low Down206 views
|
|
AIS Down209 views
|
|
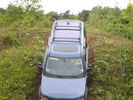
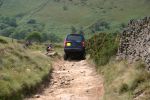
Downhill15 viewsAvon dasset Quarry Sept 2011 going Down
|
|
peaks weekend369 viewsDown he goes!!!!!
|
|
calendar entry853 viewscalendar entry: Extended mode - having just recovered from an almost sideways slide down the dune, Perron Dunes, nr St Helens, Tasmania.
|
|
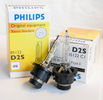
Philips D2S 85122 C1 Xenon 4300K projector HID bulb962 viewsThis is the 4300K OEM bulb in our HID Xenon projector headlights. People who design illumination systems regard the 4300K colour as a good compromise to provide what is called definition. This is effectively the ability to actually determine what an object being illuminated probably is. The more blue colour bulbs, say 5000K and greater, result in a reduction in the ability to distinguish detail, (regardless of brightness), of the object being illuminated. Effectively, you can see the object but you cannot quite figure out what it is. This is because the more blue frequencies means there are fewer other frequencies of light that allow our eyes to actually discern what an object really is.
The 4300K colour temperature applies to clear air conditions; for rain, dust, snow, fog, etc, then a yellow 2500K colour temperature is preferable. 2500K provides more contrast and there is less back splash of light off the air particles. In blowing snow, this means less sparkle back. Flat top cut off of the light beam, (which is the pattern our projector lights have), is important to reducing back splash - hence you do do not want roof mounted lighting for adverse conditions - as low down as possible is preferable, (which is why fog lights generally sit low.)
|
|
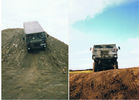
down we go24 views
|
|

My Packed LR Expedition Roof Rack39 viewsShovel, 60" Hi-Lift Extreme, (2) 5 Gallon Jerry Cans in a Front Runner dual can holder, TRED 4x4 Recovery boards, and my spare 275/65/18 Goodyear MTR/Kevlar on a t-bolt mount. Almost everything is locked down except the shovel, and now the TRED's until I find a good way to mount them.
|
|

Down from the hill461 viewsSmall hill too... The idea was to have some fun and not to break anything...
|
|
If you go down in the woods today - take one of these with you :-)67 views
|
|
278 viewsA mess of cables. You can see the HD Radio antenna adapter coming out into the slot for the IHU. You can also see, if you look very closely, the original diversity antenna connector plugged into another adapter to go down to the HD radio unit.
|
|
Airing down Cape Arid NP190 views
|
|
Thread upload13 viewsImage uploaded in new thread
|
|

Intercooler tube - split32 viewsLoss of power, black smoke on kick-down?
Don't let them replace your turbo!
|
|

Pollen Filter Replacement in HVAC System506 viewsThe attached single page doc includes links to pictures of the procedure to replace the "air" filter behind the passenger side glove box related to the Heater AC system.
Part numbers are provided for both Land Rover and Mann filters, both the activated carbon type and the non charcoal filters.
|
|
D3 in the Kimberley - at Port Warrender44 viewsAfter taking 90 minutes to travel the last 6 km, we arrived at Port Warrender, part of the pristine wilderness known as the Kimberley Coast. The only people down here are mad scientists looking for spiders and rocks - and mad keen 4WD\'ers.
|
|
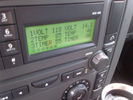
Voltage Display Page Radio Head Unit 118 14.2840 viewsThis shows the voltage/temperature/timer display page within the 6CD-465 radio head. There is a second file within this album, a doc file, that outlines the procedure to access the diagnostics.
The 14.1 volts number was the approximate vehicle system voltage with the engine running; the 118 number infers 11.8 volts which is the low power infotainment system shutdown cutoff voltage. The factory default setting is 135 or about 13.5 volts. By holding the keypad 1 button down, the 3 digit volts numbers will decrease 001 at a time until the keypad 1 button is released. Decreasing the number from 135 to some lower number should increase the time the system will remain on with the engine off.
The TEMP numbers refer to Fuel Burning Heater, (FBH), temperature values. 85 is apparently a high limit and 46 was the number when the jpg was taken. This number varies and given that there is no diesel fueled FBH in our NAS petrol engine vehicles, what the value refers to is unclear. The TIMER numbers also relate to the diesel fuel burning engine heater and perhaps make more sense being 00.
|
|
Ray descends the cliff - really!!606 views
|
|
Ray drops down654 views
|
|

Thread upload5 viewsImage uploaded in thread 159579
|
|
Rear coupler pad located near rear left tail light 144 viewsThe rear coupler pad is not visible as it is located "below and behind", so to speak. Follow the loop of black plastic wire loom from right to left as the loop of loom covering the white conductor wire drops down "behind" to the flat metal surface the pad is glued to. The pad is attached to the flat metal surface via a 3M sticky on the backside of the coupler pad.
|
|
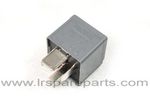
Air Compressor 70 amp replacement relay1393 viewsThere is a software update, 09 April 2010, LTB00270, for the compressor which reduces the shut down pressure to about 205 psig (14 bar). The update is usually done when changing to a new compressor and also includes replacing the R7 relay in the engine compartment fuse box, 07 DEC 2010 LTB00331.
The newer grey case coloured relay, part # YWB500220, shows to be rated at 70 amps, (the relay, not the compressor), however the previous black case coloured relay also indicates 70 amps.
Both the new and replaced relay show on their wiring diagrams to have a parallel voltage spike resistor, (probably 560 ohms), across the coil terminals, #1 and #2. This means one does not just replace the relay with any four prong 70 amp ISO sized relay that one happens upon.
One presumes the grey relay is either upgraded or just being installed for good measure. The relay is common on Ford Fiesta for the seat heater relay, Ford part number 5M5T 14B 192 EA; also Volvo, part number 30765034. The Tyco part number moulded on the grey body is V23136-J4-X62.
|
|
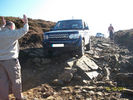
Back end of a group of three headed down road opposite Roych Clough82 views
|
|

Pattern for Expo Roof Rack Floor Sheet397 viewsI used a 3mm sheet of Aluminium - with 150mm wide Grip Tape to do the Chevron Patter to make it a bit safer. Note the sheet is 1610mm long, 1100mm wide at the front and 1060mm wide at the back. I drilled 3 rows of 5x 12mm holes - one row down the centre and one either side 30mm in from the edge. The hole centres being at 31mm from the front edge, next 420mm from 1st hole centre, the 375mm from 2nd hole, 372mm from 3rd hole, 375mm from 4th hole, leave 31mm to the back edge. Edited May 2008: I've subsequently cut the sheet in half lengthways to make removal and fitting easier as I found the sheet increasing noise and reduces MPG considerably.
|
|

Traffic Jam at Roych231 viewsGroup 1 set off half an hour after Group 2 and yet still arrived at the Roych before Group 2, who arrived just as Group 1 were sizing up the obstacle - thus causing a traffic jam of 7 D3\'s (Gareth has already gone down). Some lame excuse about HAVING to go to the pub because they had no packed lunch... yeah right!
|
|
Land Rover Discovery 4 HSE descends Rudland Rigg88 viewsLand Rover Discovery 4 HSE descends Rudland Rigg. George (GSLRO) watches me down the steps on Rudland Rigg
|
|
Rear view - roof down13 views
|
|
Side view - roof down15 views
|
|
Front view - roof down14 views
|
|
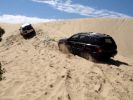
Sliding down a sand dune109 views
|
|
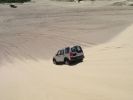
Stockton Beach, Australia - going down a sand dune121 views
|
|
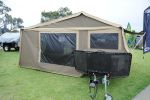
MTC Extreme Expedition 12 Camper Trailer116 views
|
|
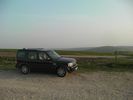
Sunset on the South Downs143 views
|
|
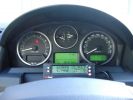
ScanGauge II on steering column of LR3800 viewsMAP is Manifold Absolute Pressure, what I call Vacuum.
The volts is I think the battery charging voltage as it moves around from about 12.4 when shut down to 13.5 when the batteries seems charged; 14.9 is about as high as I have seen it display.
You also have RPM, speed in MPH or KPH, coolant temperature and a bunch of other readings including sort of instantaneous fuel in a variety of units.
Also under some conditions, the ScanGauge will reset the MIL light as well. The background colour of the display can be changed to many different colours. I have it set to match the LR green.
|
|

ScanGauge II Manual 341 viewsThese are the setup instructions etc for the ScanGauge II version 5.1 There are newer versions that can be downloaded from the website www.scangauge.com as the software is subject to update; also the ScanGauge unit you purchase can later be sent in for updates as you might wish.
|
|
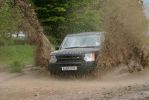
Splash Down430 views
|
|
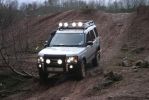
Half Way Down192 views
|
|

Network 131 viewsDownload
|
|

55 views
|
|

Hundreds protest about global warming87 views
|
|

DC100 Sketch64 views
|
|

Mexican food24 views
|
|

Thread upload15 viewsImage uploaded in thread 64159
|
|

D4 MPG Mar 1342 views
|
|

DC100 Sketch60 views
|
|

43 views
|
|

52 views
|
|

47 views
|
|
| 443 files on 2 page(s) |
 |
1 |  |
|