| Search results - "come" |

Welcome around where we live, in the French Basque Country, south west of France.571 viewsright by the spanish border.
|
|
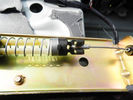
Lavoro finito - Finished work38 viewsEcco come appare a lavoro finito
Here is how it looks, finished the job
|
|

110 views
|
|

Olga57 viewsCome on, its my day off!
|
|

Finito - At the end47 viewsEcco come appare la sponda a lavoro finito.
Here is how is the job ended.
|
|
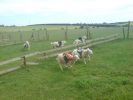
Come-on Nemo!104 views
|
|
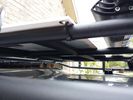
solar panel install347 viewsAt least at this point, I mounted it by using Clear Silicone RTV. This stuff is kind of like glue, but can be removed. If it doesn't hold up after curing and driving, I'll remove it and come up with another plan. I used heavy cable ties on the 4 grommets, in case it lets loose, it won't take out my wiring and the car behind me. 2 Panels are dandy like this, but I don't want to permanently block the roof space. Grape Solar to power my snomaster fridge
|
|

Engine Accessory Drive Description and Operation872 viewsThis 2 page pdf shows both belts for the 4.4L petrol V8; the primary serpentine belt, (the long one), and the shorter secondary that drives only the radiator cooling fan.
The various accessory pulleys the two belts are each associated with are numbered and an included table describes each.
When replacing belts and pulleys, count the number of grooves on both your old items and your new replacement parts. It has been known for an pulley with the wrong number of grooves to come with a replacement part or the replacement belt has the incorrect number of grooves; hence make certain the groove count on the new parts are the same as the removed items.
|
|
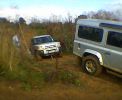
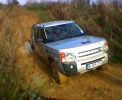
Defender comes to the rescue again!332 views
|
|
Come on pull!334 views
|
|
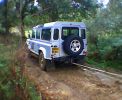
Defender comes to the rescue317 views
|
|

Riparazione attuatore rotante volante - Steering rotary coupling repairing21 viewsCome riparare l'attuatore rotante del volante quando si accende la spia dell'airbag.
How to repair the steering rotary coupling when airbag warning light turns on.
|
|
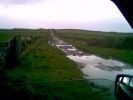
Black Lane, Mellor Moor167 viewsLooking at tread marks, appears to be only tractors that come up here of recent - until me!
|
|

Brake Light Switch, Find, Remove, and Install Instructions 7778 viewsThis is a two page doc outlining where to find the brake light switch, how to remove it, and then install the new one.
Note, do not move the brake pedal when removing or installing the switch. Let the brake pedal hang where it wants to. The switch design is actually cunning, and as such is supposed to make the removal and install fool proof. Hence if you think too much about it, you can wreck the new switch.
If you want to inspect the interior of the switch, wait until you have removed the old switch. You can then just unsnap the blue from the white to get it apart. Inside, the switch is quite simple, (no circuit boards), but it will probably show black dust from failing contacts.
I think the reason the switch fails is that the Normally Open, (NO), contacts of the brake light contacts were made too light to carry the current load for make and break of the tail light filaments. I also think the black dust created then fouls the Normally Closed, (NC), second set of contacts for the ABS circuit. As such, the Normally Closed contacts become intermittent in operation and display as a fluctuating open and closed circuit condition to the ABS system when the ABS should be seeing a steady closed circuit. Hopefully the replacement switch contacts are more robust and may be as I recently replaced my switch again just as a matter of maintenance. While in a redesign, ideally the NC contacts should be sealed or at least separated from the NO contacts, when I inspected the removed switch, this time there was no black dust present.
Probably the removed switch will have a Land Rover oval logo moulded into it, the new one, FOMOCO.
|
|
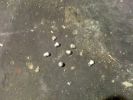
D3 Side Step Repairs145 viewsThe old rivet ends which I removed from the trim. I took one rubber end off the trim and let them all out by shaking it to save them rattling around inside the trim for years to come.
|
|
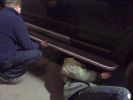
D3 Side Step Repairs168 viewsNearly finished - just the last two rivets to put in. We used a very basic and cheap hand rivet gun which can be bought in places like Halfords for about £10.00 and usually come with a supply of rivets to do the job.
|
|
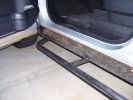
Sill protectors 2735 viewsThe side protection bar comes out a good 170mm. Prevents side panel damage and car-park knocks! Still deciding whether to fit the chequerplate tops, as originally designed.
|
|
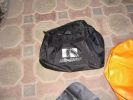
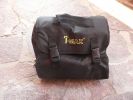
The bag all the kit comes in161 viewsDM Exhaust jack carry bag
|
|

Come scambiare il pannello frontale dell_HEVAC72 views
|
|
Thread upload5 viewsImage uploaded in new thread
|
|
Thread upload11 viewsImage uploaded in thread 163880
|
|

Thread upload1 viewsImage uploaded in thread 142922
|
|

Thread upload9 viewsImage uploaded in thread 120160
|
|

3 views
|
|
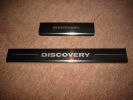
242 viewsStainless steel sill protector plates. Comes as a set of four.
|
|

D/3/4 wheel stud aligner11 viewsPDF drawing of dimensions to manufacture your own.
Alternatively, I can do it for you.
( One for Defender coming shortly)
Suggestions welcome.
|
|
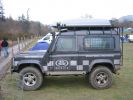
extreme medics rapid response 90222 viewsdoesnt come any guccier than that !!
|
|
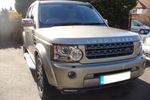
The new member of the family comes home170 views
|
|

Look out here I come!!56 views
|
|
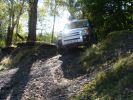
Here she comes53 views
|
|
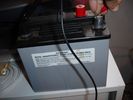
Revived old battery (complements of the XS3600) comes in handy for power-testing56 views
|
|
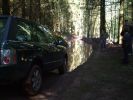
Remember - it only comes half way up the ducks....55 views
|
|
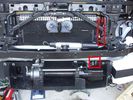
Installed winch with hydraulic hoses175 viewsThe hydraulic hoses are stiff, so I had to run them up the side of the radiator (can just see inside red boxes) to near the top of the radiator, then back down inside the engine compartment, then underneath the engine (behind the radiator) to the D4's power steering rack, where the hoses become metal. This hose routing may not be possible if the fuel-burning heater is in place (we don't have those in Aust and the space allowed room for my hands to bend and run the hoses without kinking).
|
|
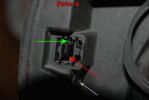
Foto 4 - Rimozione particolare rotto156 viewsUn'alternativa per rimuovere il pezzo rotto (indicato dalla freccia rossa), anzich� smontare tutto il portello si pu� intervenire inserendo un cacciavite piatto come indicato dalla freccia verde, al fine di sollevare la linguetta indicata dalla freccia verde della foto 5. Questa linguetta sblocca il perno del particolare rotto indicato dalla freccia verde della foto 1.
Ogni lavoro � fatto a rischio e pericolo di chi lo fa, non mi assumo alcuna responsabilit� per eventuali danni causati a persone o cose
|
|
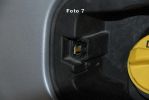
Foto 7 - Particolare montato163 viewsEcco come si presenta il particolare riparato e montato.
|
|

LED Mirror Covers64 viewsLED Indicators & Welcome Lights in the Mirrors
|
|

25 views
|
|

Gore Tex Oleophobic Membrane Vents70 viewsThese is a link to a Gore website that explains how the Gore Tex material within the breather cap allow pressure to escape (but retains the oil) and allows moisture free air to come back in but excludes free water.
|
|

Perma-Grin233 viewsComes as standard on the Discovery 3
|
|
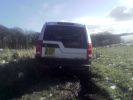
Well stuck out comes the superwinch!306 views
|
|
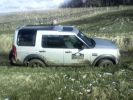
Well stuck out comes the superwinch!470 views
|
|

just messing about with photoshop - not sure if to revert to plain black grille - comments welcome!232 views
|
|
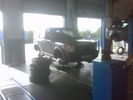
All four wheels off223 viewsHopefully the closest I\'ll come to the whole body off!
Note: Those aren\'t my new tyres.
|
|
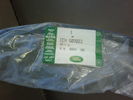
part number25 viewssunroof pipe and elbow comes together
|
|

Welcome to London.....228 views
|
|

Discovery 4 DRL Land Rover Fitted112 viewsThese are the official Land Rover Fitted Daytime Running Lights. They are very good with a sharp clear light. They are on all the time but as soon as the normal lights come on they switch off. These were fitted to my car by Land Rover when I picked it up.
|
|

Discovery 4 DRL 116 viewsThe photo shows the Land Rover Discovery 4 fitted with the Land Rover Daytime Running Lights. These were fitted by Land Rover when I got the car. The are on when the lights are not. As soon as the main lights come on the DRL's switch off.
|
|
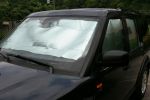
Windscreen Blind169 viewsThe windscreen is particularly hard to come up with an accurate shaped template to make a proper made to measure blind. I gave up.
Here is a make shift arrangement on the inside but I discovered it did little to reflect the heat as once the heat came through the glass it was already inside the car. Doh! Stretching it across the outside of the screen had a much better effect.
|
|

Old black stuff comes out13 views
|
|
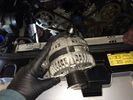
Alternator needs to come out16 views
|
|
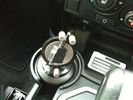
Ipod Lead73 viewsIpod Integration kit - lead comes out of dash at bottom of console.
|
|
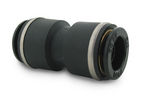
John Guest DOT all plastic fitting714 viewsThis is a picture of the John Guest DOT all plastic union. If you look closely, you can see the DOT imprinted in raised letters on the end of the fitting. This is of a 1/4" connector rather than the 6mm that the 3 requires.
The picture is similar to the air suspension pneumatic fitting union that Land Rover sells as replacement part # STC8580. This is for 6mm OD tubing size. The STC8580 comes with what are called "Collets" at each end that cover up the press to release feature underneath. See the John Guest web site www.johnguest.com under the Pneumatics section and also in Downloads for their catalog for install and remove instructions.
The actual "air brake spec" fitting that Land Rover provides has an interior 4mm OD ferrule that slips inside the 4mm ID of the nominal 6mm tubing. I have not yet been able to obtain the John Guest part number for the LR fitting, only the LR part number. This part number was generated for the RR Classic air systems.
|
|

John Guest (LR part # STC8580) push in straight 6mm tubing to tubing connector727 viewsThis picture is similar to the air suspension pneumatic fitting union that Land Rover sells as replacement part # STC8580. This is a 6mm OD tubing size push in to install straight tubing to tubing fitting. The STC8580 comes with what are called "Collets" at each end that cover up the press to release feature underneath. See the John Guest web site www.johnguest.com under the Pneumatics section and also in Downloads for their catalog for install and remove instructions.
The actual fitting that Land Rover provides has an interior 4mm OD ferrule that slips inside the 4mm ID of the nominal 6mm tubing. Hence the fitting depicted and part number are not actually correct. I have not yet been able to obtain the John Guest part number for the LR fitting.
The fittings that show in this doc are what I call food service fittings rather than transportation or Air Brake fittings. The part LR sells, (STC8580), is the Air Brake type for transportation.
|
|

Thermostat Housing LR005631527 viewsWhen the time comes to install a new thermostat, consider installing the whole housing instead.
Advantages are the thermostat is correctly installed, (not as simple as it should be); you get all new plastic and that is important, plus a new coolant temperature sensor and also a new heater coolant bypass valve, the secret part no one realizes is also within.
The cost of the whole assembly is not much more than the cost of a factory thermostat and the effort to replace all is not as difficult as it might seem.
|
|

LR3 Air Conditioner Drain Tubes behind centre console2091 viewsThis shows the two air conditioner drain tubes located left and right under the radio stack.
The tube on the left side, (steering wheel side, LHD), disattached itself and the carpet on the floor under the gas pedal etc became soaked. I think rain water from outside that comes in the outside cowl vents also exits via the tubes as I first noticed the carpet was wet after parking outside during a big rain storm.
It was relatively easy to slide up and reattach the rubber hose that runs from the rectangular shaped plastic discharge hole(s) of the heater "pan" down along the transmission hump area and thru the floor pan. There is a hose on each side of the transmission hump, but only one hose had let go on my 3. The rubber hoses just slide over the rectangular plastic openings of the two heater housing drain outlets.
To get at each drain hose, remove the vertical sort of triangle carpeted piece below each side of the radio stack. The triangles of carpet will just pull away as each is held on with those metal U clips Land Rover so likes. Dislodge each triangle at least sufficiently to get ones hand in to slide the rubber hose back on.
You will rarely see AC water on the ground as the front drains pour onto a metal underside protection skid plate and the rear drain onto the top of the left rear muffler.
|
|

LR3 Brake Wear Sensor Wiring1490 viewsThis 1 page wiring diagram pdf shows that both the front and rear brake pad wear sensors are part of a closed series circuit to ground.
In operation, when all is good, the series circuit is grounded and the amber brake wear warning indicator on the instrument panel is not illuminated.
When the pads on one wheel, either the left front, or right rear, become too worn, the respective sensor is "cut" which results in an open circuit condition. This causes the dash brake wear indicator to illuminate.
The circuit is like the old style Christmas light strings where one burned out bulb caused the whole string to go out.
A quick field fix to get the dash light to extinguish in lieu of replacing the sensor and pads etc is to disconnect the brake pad wear sensor and short across the two open conductors of the vehicle side connector plug. This of course means you now have a normal vehicle, one of the thousands that do not feature brake pad wear information systems.
|
|

Power Door Lock wiring diagrams523 viewsI thought I would include this 5 page power door lock wiring diagram pdf here as well.
When the pdf loads, if the views are vertical, it may be that you can right click on your mouse and a box will come up that will allow you to rotate the views clockwise so that the sheets are horizontal. Alternatively you can download the file and print each sheet yourself.
|
|

Stop Light Lamp Circuit pdf2461 viewsThis pdf shows the brake light circuit for the NAS LR3.
Note that power for the brake light bulbs can come either thru the brake light switch power feed /contacts plus also from the Hill Decent Control, (HDC), system relay located within the Central Junction Box, (CJB) - yes two separate sources of power for the brake light bulbs. This would tend to explain how a brake light circuit concern shows up as a hill decent fault message; also why lesser vehicles without hill decent braking mechanisms, (HDC), never display this sort problem when a brake light bulb or switch acts up. You never have a problem related to a system that does not exist.
Additional evidence of the relationship of the HDC and the tail light circuit is demonstrated by when the HDC actually acts to slow the 3 down, the brake lights automatically illuminate even if the slowing action was merely retarding the engine speed or shifting to a lower gear, (in other words, no foot on the brake pedal).
There is also a tie in to the Cruise Control and hence a failing brake light switch can affect cruise operation or just create false Cruise Control messages. To further complicate the issue, while there are no messages generated, operation of the radiator electro viscous fan can also be negatively affected by the fouled set of secondary contacts within the brake light switch. This is all because the NC contacts within the brake switch send misleading messages to the ECU.
While the ground wire design is similar to other vehicles, note the grounds for the brake light filament and the reverse light filament are common on each side. That means that if one has a non functioning brake light on one side, the reverse light may not also work or that some problem with the reverse lights could back feed into the brake lights. This situation while unusual, can result when grounds are corroded probably due to swimming in rivers and creeks or just routine driving in a marine environment.
|
|
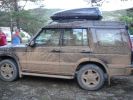
disco2 france aug 2006 disco3 to come!196 views
|
|

Thread upload8 viewsImage uploaded in thread 137658
|
|
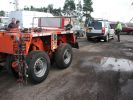
50t capacity trailer for D3 !!!80 viewsD3 comes in handy for splitting away 2 axles of a larger modular hydraulic heavy haulage trailer, just delivered an 80t transformer for me into Scotland, and we shortened the trailer for the journey back to Italy.
|
|

Toyota IST - almost a Love Child of MB Parents173 viewsDiscovered that this is a Toyota Ist; it comes with a 1.3 or 1.5 litre engine with the 1.5 also available in 4WD. It seems to be a popular car for customising in Japan as there are a number of sites devoted to that.
|
|
Come si riceve121 views
|
|

MAP sensor 44k miles, EGR valves not blanked160 viewsUsed Miller's Sport 4 then whatever it has become, for last 22k
|
|
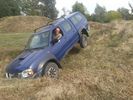
usata come apripista per il un raduno di fama mondiale!!!!!!29 views
|
|

Thread upload1 viewsImage uploaded in thread 187749
|
|

Welsh Camping64 views
|
|
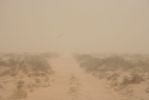
2009 - Rig Road - Blowing Sand81 viewsAt this rate the Rig Road will become sand like the other E-W tracks.
|
|

Trim in Middle of Row 3 Seats 41 viewsThis trim has become loose and needs the right fixing
|
|
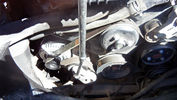
64 viewsThis is easy to remove. You will notice the tensioner at the bottom left near the alternator. There is a sqaure slot on the tensioner into which fits a 3/8" square drive. Just turn anti-clockwise and the tensioner is moved away to slacken the belt and off it comes.
|
|
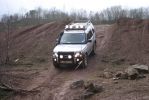
Here we come193 views
|
|

SignUp64 viewsCome aggiungere l\'opzione per le iscrizioni
|
|
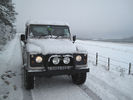
Mid October 2009. Worse was yet to come! About 2 miles from home on the Foxhole to Abriachan Road.76 views
|
|
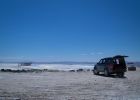
183 viewsMy dog didn't like the salt, smell, heat, glare, etc. He's a mountain dog. He basically plopped down in the shade of the D3 and waited for us to come to our senses and leave.
|
|
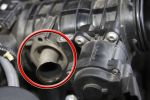
Stub Pipe833 viewsRemove these and fit the blanking plates. Make sure the seal comes out too!
|
|
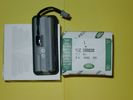
Upper Hatch Release Switch LR Part Number YUZ500020672 viewsThis is the Range Rover Sport switch, Land Rover part number YUZ500020, as it comes out of the box. Note the JAE, (Japanese Aviation Electronics), male wiring connector installed on the end of the power lead.
The rubber cover of the switch is sealed to the plastic body of the switch whereas in the previous switch design, there was no sealing. Also the replaced switch was hard wired into the same harness as the license plate lights - no JAE connector in other words.
|
|
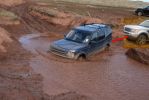
I had a dream last night - VA comes to Scotland.....485 views
|
|

The welcome sight of the 1st Hotel After the Desert 101 views
|
|

Vehicle Maintenance Log for LR3/4 D3/4 or other1127 viewsThis is a Excel file that you can download and then modify to suit. It is very simple, but allows me to keep track of most maintenance and fixes etc on my LR3. All columns and rows and boxes can be edited.
I did not erase any data in the various boxes so you could see how I am using it - again not very fancy but it works for me. Under the brakes column, one will see f6 r5 which is how I keep track of the condition of the brake pads. The dealer records the pad thickness at each oil change so that is where the numbers come from.
f is for Front Pads, 6 is for 6mm; r is for Rear pads, 5 is for 5 mm. New pads are about 10 mm; replacement is at 3 mm or less. The amber coloured brake wear dash warning light should come on at about 2 mm.
|
|
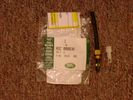
Voss System 203 connector 6 mm for valve blocks 900 viewsThis is Land Rover part number RQC000030, the Voss fitting for the axle valve blocks. I think it is a Voss System 203 6mm fitting, Voss part number 5 2 03 11 01 00.
The parts bag comes with the white plug inserted in the brass threaded bit with what is called the brass cutting ring placed on the tip of the white plastic plug. The idea is that one screws, (M10 x 1 thread), the brass insert into the appropriate hole with the white plug still in the brass insert. Once the brass is tight, (12 mm wrench), then the white plug is pulled from the assembly leaving the cutting ring down inside and under. One then pushes in the 6 mm tube end about 20 mm or so and the tube slides down thru the brass cutting ring, (2 internal sloped one way cutting ridges). When the tube is in far enough, one pulls upwards a bit and the ring cuts into the plastic such that the tube will not pull out. To remove tube, one unscrews the brass nut and all comes out, sort of like I have shown with the short piece of 6mm tubing. The white plug is a throwaway item upon install of the tubing.
|
|

Welcome to Wales30 views
|
|

welcome137 views
|
|

63 views
|
|
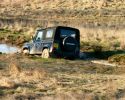
Will it come out? Of course it will.273 views
|
|

Thread upload1 viewsImage uploaded in thread 174456
|
|

Thread upload0 viewsImage uploaded in thread 174456
|
|
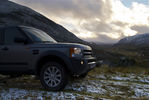
Glenshee - Scotland.507 viewsA quick trip up to Glenshee for some hill walking and were luck enough to spot the first snow of the season. Stunning views all around. Even bumped into a guy who had lost his trained Peregrine Falcon that hadn't come back. I don't blame the Falcon to flying off in scenery like this!!.....
|
|
|
|
|