| Search results - "black" |
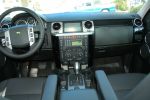
Piano Black150 views
|
|
370 views
|
|
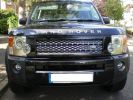
Supercharged Black125 views
|
|
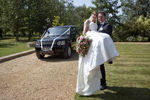
Got Married!241 viewsOccasionally the car does get a clean/polish, this was a special occasion :-)
|
|
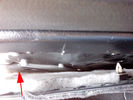
Riparazione attuatore sponda posteriore - Tailgate actuator repair38 viewsL'attuatore si trova dietro la pellicola nera incollata alla carrozzeria che va strappata.
The actuator is located behind the black film glued to the body must be torn.
|
|
443 views
|
|

Silverstone Classic Media Day177 viewsAttended the media day for the Silverstone Classic, took 3 cars to display & tell 300 journalists what we do at the show.
David Coultard was one of the drivers who were taking the journalists around the track.
|
|
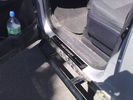
Black chrome - Front door78 views
|
|
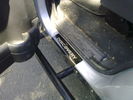
Black chrome - Rear door74 views
|
|

153 viewsBought Landmark alloys for Discovery 4 ,look great but makes calipers and discs look rubbish.Had centres of discs painted black and got calipers professionally painted ,what a difference.
|
|

Benone beach217 views
|
|
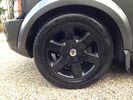
19" Black HSE Alloys/Tyres59 views
|
|

dalyan24 viewsblack&white
|
|

252 viewsSilverstone weekend again. My other club (RRR Ltd) do courtesy rides to raise money for charity plus we all enjoy ourselves. After 7 Range Rovers this is my first Discovery.
|
|
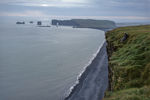
Watching puffins at VÃk20 viewsGreen cliffs with the black lava sand beach as backdrop.
|
|
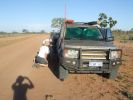
08 D3 stranded with a seized smoking wheel315 viewsAbout 1 hr after replacing the blown tyre, strange noises emanated from the stability control system and speed dropped off. Then I looked in the rear view mirror, and noted a cloud of dust along with a whiff of black smoke. This led to a very quick stop (no traffic on this route for over a week, so no worries about having to signal exiting the road). Took a look and WOW. The right rear wheel was glowing a dull red colour, and burning rubber smoke was wafting from the red glow over the fuel lines.
|
|

arch83 views
|
|
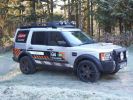
Rally Wales 2008 200 views2009 G4 now with black RRS wheels lightforce lights and strobe lights in bumper and rear lights
|
|
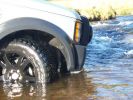
Black RRS Wheels about to go deep138 views
|
|
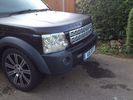
D3 Java black with D4 type grille170 views
|
|
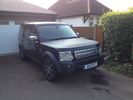
D3 July 2014189 viewsD4 Grille, wheels and de-tangoed lights
|
|
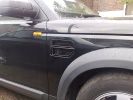
Black Vent84 views
|
|

2nd Dan Black Belt31 views
|
|
151 views
|
|

Land Rover Club jacket 2014139 views
|
|
D4 Landmark81 views
|
|
D4 Landmark92 views
|
|
D4 Landmark74 views
|
|
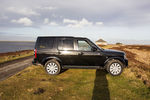
D4 Landmark82 views
|
|
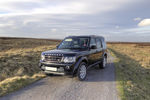
D4 Landmark73 views
|
|
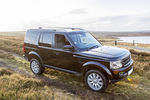
D4 Landmark78 views
|
|
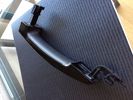
Java Black Door Handle50 views
|
|

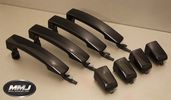
Single Piece Door Handle and Two 2 Piece Door Handle258 views
|
|
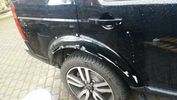
before94 views
|
|

Inside the kickpanel4297 viewsRed = Left Channel
Blue = Right Channel
Black = Screen
|
|
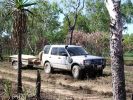
D3 in Kakadu National Park, on the track into the Alligator Billabong47 viewsThis whle area is down on the flood-plain, so in the Wet it is all under a few inches of water. In the dry it has a hard but brittle surface, which is then chewed up in many places by the feral animals with hard hoofs such as buffalo, pigs and horses. This then turns the track into a big dust bowl which is primarily bull-dust - a soft fine powder like talcum powder, which can be many feet deep, and gets into everything. The cover on the trailer is actually black.
|
|
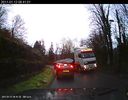
Blackvue image169 views
|
|
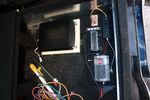
97 viewsDeciding on a layout for the electrical stuff. Bottom right of pic is a fusebox which will take the input power from the traxide kit, then relay box and 12V regulator, ignition busbar and homemade regulated 12V busbar. Big black box is the CarPC
|
|
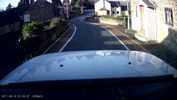
BlackVue DR40032 viewsA still from the first clip (before the date was set), good picture quality.
|
|
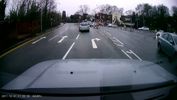
Blackvue - First Red Light Victim - 161 views
|
|
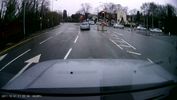
Blackvue - First Red Light Victim - 270 views
|
|

195 views
|
|
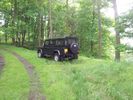
118 views
|
|
126 views
|
|
217 views
|
|
216 views
|
|
253 views
|
|
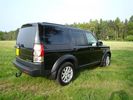
243 views
|
|
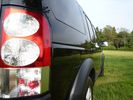
174 views
|
|
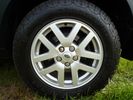
164 views
|
|
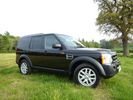
187 views
|
|
153 views
|
|
149 views
|
|
139 views
|
|
249 views
|
|
218 views
|
|
206 views
|
|
178 views
|
|
206 views
|
|
194 views
|
|
164 views
|
|
160 views
|
|
169 views
|
|
152 views
|
|
142 views
|
|
186 views
|
|
188 views
|
|
143 views
|
|
182 views
|
|
163 views
|
|
152 views
|
|
152 views
|
|
144 views
|
|

134 views
|
|
137 views
|
|
127 views
|
|
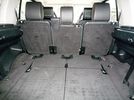
121 views
|
|
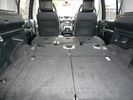
192 views
|
|
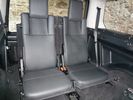
128 views
|
|
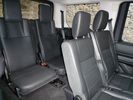
140 views
|
|
127 views
|
|
128 views
|
|
135 views
|
|
black on black59 views
|
|
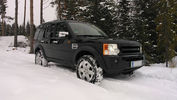
Winter waxing done203 views
|
|
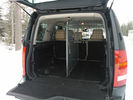
TravAll Dog guard installed and waiting for passengers165 views
|
|

147 views
|
|

225 viewsBlack & Silver Badge
|
|
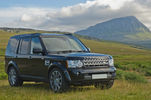
113 views
|
|
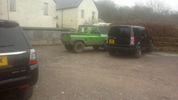
Shouldn't every pub car park look like this108 views@ The Carew Arms Crowcombe Somerset
|
|
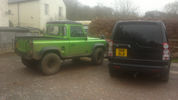
Shouldn't every pub car park look like this!107 views@ The Carew Arms Crowcombe Somerset
|
|
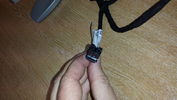
black plug for rear heated seat12 views
|
|
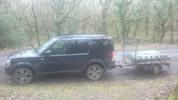
106 viewsQuantock Hills Somerset
|
|
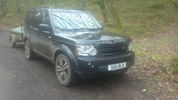
115 viewsQuantock Hills Somerset
|
|
Thread upload for towbar electrics cover mod110 viewsImage uploaded in new thread
|
|
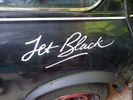
Austin Mini - Jet Black4 views
|
|
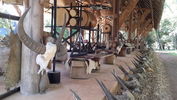
black house (temple)16 viewsanother art folly
|
|
Thread upload0 viewsImage uploaded in new thread
|
|
Thread upload5 viewsImage uploaded in new thread
|
|
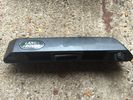
Rear Door handle in Metalic black from 2013-2013 D4 Camera model not same as my 20119 views
|
|
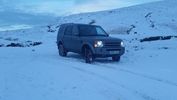
Gospel Pass Jan 2015146 viewsThe Gospel Pass (Welsh: Bwlch yr Efengyl) is the highest road pass in Wales. It is at the head of the Vale of Ewyas in the Black Mountains of southeast Wales.[1] The narrow mountain road climbs steeply from Hay-on-Wye to a height of 549 metres (1,801 ft) [2] above sea level, squeezing between the mountains of Twmpa to the west and Hay Bluff to the east, before dropping down into the valley to the south on its way to Llanthony Priory, Llanfihangel Crucorney and Abergavenny.
|
|
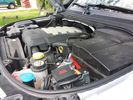
Winch Power upgrade318 viewsUsing 2 warn kits, and removing one of the wires to use on another project. The purpose was to replace the power and ground wire. I used Warn kits, which are 4/0 Welding cable. The original red #4 warped from getting a little too worn. The 2nd
Battery #1 Deka 9A94 AGM Intimidator, Battery #2 Deka 9A47 AGM Intimidator WARN 36080 28" Quick Connect Cable X 2, WARN 26405 Quick Connect Cable 7' X 2, WARN 15901 Black Cable X 1 -- winch control 72" X 1 https://www.facebook.com/DifferentialPartsUS
|
|
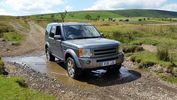
Black Yatt134 views
|
|
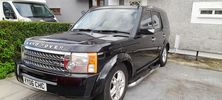
this is mine5 views
|
|

The reason we have a Discovery161 views
|
|
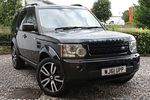
104 viewsMatford Exeter
|
|
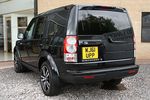
133 viewsMatford Exeter
|
|
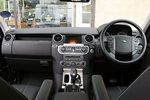
113 viewsMatford Exeter
|
|
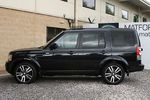
Thread upload118 viewsImage uploaded in thread 5
Matford Exeter
|
|
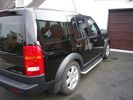
compound polish 27/02/2013153 views
|
|
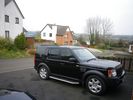
150 views
|
|
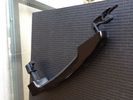
Java Black Door Handle50 views
|
|
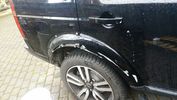
before185 views
|
|
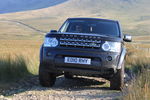
76 viewsOld Coach Road - Cumbria
|
|
36 views
|
|

D3 HSE43 viewsJava Black
|
|
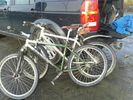
What 4x4's are for ...150 viewsThrowing a bunch of kit in back of an taking it places.
|
|
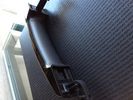
Java Black Door Handle46 views
|
|
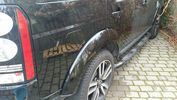
after92 views
|
|

89 viewsOld Coach Road - Cumbria
|
|

154 viewsAlmond/Arabica trim
|
|

133 viewsAlmond/Arabica trim
|
|

147 views
|
|
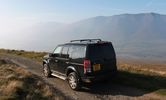
88 viewsOld Coach Road - Cumbria
|
|

Sensor-Height-Rear-LH74 viewsDescription: Sensor-Height-Rear-LH
Location: Below LH rear wheelarch
Part No.: YPC909530 Colour: BLACK Cavities: 3WY
Harness: CHASSIS HARNESS
|
|
171 views
|
|

Connector: C2101104 viewsDescription: Rear control valve
Location: Below LH rear wheel arch
Part No.: YPC800230
Colour: BLACK
Cavities: 6WY
|
|
219 views
|
|
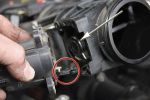
Removing the EGR Butterfly Valve Actuator1538 viewsRemove the 4 TORX screws to remove the actuator. The small black link (circled) connects the actuator drive arm with the butterfly valve spindle (arrowed). The spindle can now be very carefully levered out using a screwdriver inserted beneath the arrowed bit in the photo. A bit scary to do as it takes a fair bit of pressure before the spindle will free itself from the butterfly. Once it starts moving though, it gets easier to pull out.
|
|
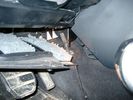
Air Conditioner Drain Hose on Drivers Side (LHD)2296 viewsThe corrugated rubber bit above and to the right of the gas pedal is the drain hose that goes down thru the carpet and floor sheet metal.
While it is bit hard to figure out from the jpg above, there is a rubber "strap" attached to the top of the corrugated hose that one uses to pull on to drag the hose up back around the black plastic heater "pan" drain. The same drain hose arrangement is on the other side as well.
One could I suppose run a plastic snap tie around the vertical pull strap if one was concerned about the hose slipping off again. See also the other jpg sketch which is from the Land Rover manual.
|
|

Thread upload7 viewsImage uploaded in thread 40682
|
|
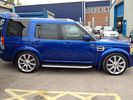
FOR SALE - ONE OFF Land Rover Disco 3 37 viewsOne of a kind Landrover Discovery TDV6 HSE LUX Model 5 door automatic 4x4 diesel evo blue. Upgrades: sidesteps, roof rails, privacy glass, front and rear heated seats/elec seats, landrover tv and headphones, 7 seater black leather, piano black dash/steering wheel, built in fridge, 6 disc changer, sat nav and bluetooth, harman kardon premium entertainment pack, by-xenon adaptive headlights , cruise control and front and rear park distance control, panoramic electric glass roof, 22inch alloy wheels, body kit
|
|
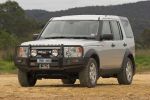
604 views
|
|

A Pillar Black Plastic cover install pdf - new type.1038 viewsThis 3 page LR pdf explains how to install the newer A pillar plastic covers and avoid instant water leakage as a result of the new design.
|
|
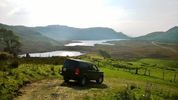
67 views
|
|
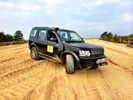
Radio duty at Bovington camp for the BCCC115 views
|
|

Thread upload10 viewsImage uploaded in new thread
|
|
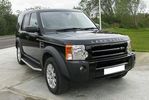
Beluga Black59 views
|
|
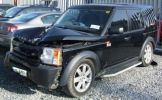
Bent Black Betty228 viewshard to believe that in this condition she\'s a write off, what got her was the cost of tricknology repairs, seatbelt pretensioners, airbags etc etc, & declining values, repair estimates €12500, value €13000. a no brainer really
Note TASTEFULL G4 sticker
|
|
46 views
|
|
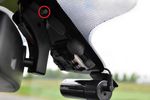
Fit cable to Blackvue78 views
|
|
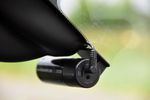
Blackvue67 views
|
|
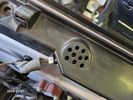
Buzzer located under black plastic cover.12 viewsThe white electrical connector clicks into the buzzer housing that is shown protruding from under the black plastic cover. There is a little tab on the white plastic that has to be squeezed to release the connector. In other words, do not pull on the two conductors.
|
|
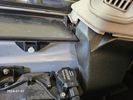
White plastic pin that has to be partly removed to assist in release of buzzer cover.10 viewsThe white coloured plastic pin is located near the C pillar and has to be partly pulled out to release the black plastic buzzer cover.
|
|
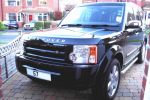
Black Supercharged Badge100 viewsGreat tip drilling from the back and you won\\\'t damage the lip that the badge is recessed in
|
|
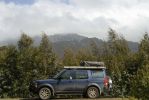
Black Bluff and a great drive134 views
|
|
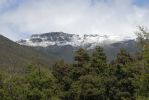
January 2nd Mid Summer Tasmania92 views
|
|

34 views
|
|
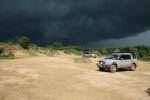
270 views
|
|
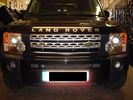
D4 style D3 grill - all in black106 views
|
|
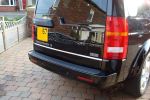
TDV6 lettering removed, LR Supercharged Badge fitted135 views
|
|
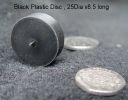
260 views
|
|
152 views
|
|

147 views
|
|
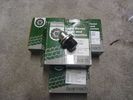
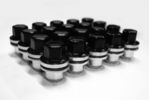
clearout black wheel nuts3 views
|
|
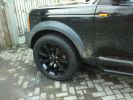
256 views
|
|

251 views
|
|
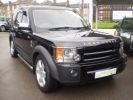
Our new D3159 views
|
|

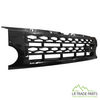
Black grille in place9 views
|
|
Thread upload12 viewsImage uploaded in thread 194137
|
|
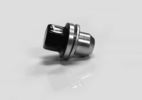
Thread upload9 viewsImage uploaded in new thread
|
|
Thread upload10 viewsImage uploaded in new thread
|
|
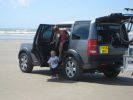
200 views
|
|
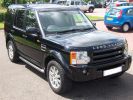
black colour coding258 views
|
|

109 views
|
|

75 views
|
|

101 views
|
|

Thread upload10 viewsImage uploaded in thread 117862
|
|
Thread upload4 viewsImage uploaded in new thread
|
|

Thread upload2 viewsImage uploaded in new thread
|
|

Thread upload11 viewsImage uploaded in new thread
|
|
89 views
|
|
92 views
|
|

Thread upload6 viewsImage uploaded in new thread
|
|
93 views
|
|
111 views
|
|

Thread upload6 viewsImage uploaded in thread 159579
|
|
80 views
|
|
Thread upload8 viewsImage uploaded in thread 164288
|
|

Thread upload11 viewsImage uploaded in thread 164288
|
|
Thread upload15 viewsImage uploaded in thread 116743
|
|
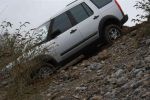
DiscoBlitzen comitted67 views
|
|
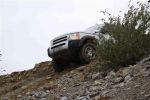
DiscoBlitzen\'s first day out63 views
|
|

Thread upload15 viewsImage uploaded in new thread
|
|
16 views
|
|
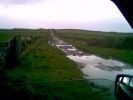
Black Lane, Mellor Moor171 viewsLooking at tread marks, appears to be only tractors that come up here of recent - until me!
|
|
Thread upload6 viewsImage uploaded in thread 150734
|
|

99 views
|
|

103 views
|
|

86 views
|
|
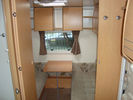
27 viewsthis converts to my sons bedroom and the door shuts across so we dont disturb him at night
|
|
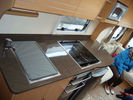
23 viewswhist we was looking round glossop caravans.
|
|
21 views
|
|
20 views
|
|
17 views
|
|
23 views
|
|
21 views
|
|
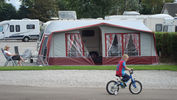
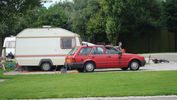
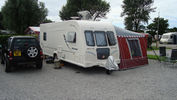
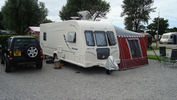
13 viewsa few pics of my tincan and old freelander, also a 1980's ford escort and caravan i saw in blackpool , and a huge motorhome parked near us in chester.
|
|
22 views
|
|
139 views
|
|
First Outing towing4 viewsMy d3
|
|
Thread upload13 viewsImage uploaded in thread 139580
|
|
Thread upload16 viewsImage uploaded in thread 139580
|
|
Thread upload12 viewsImage uploaded in thread 139580
|
|
Thread upload11 viewsImage uploaded in thread 139580
|
|
Thread upload15 viewsImage uploaded in thread 139580
|
|
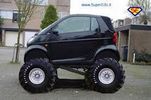
Thread upload14 viewsImage uploaded in thread 143264
|
|

151 views
|
|

152 views
|
|

135 views
|
|

132 views
|
|

126 views
|
|

blackvue settings30 views
|
|

Blackvue39 views
|
|
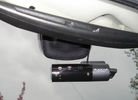
71 views
|
|
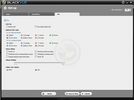
Blackvue HD options50 views
|
|
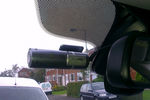
Blackvue Position29 views
|
|
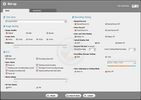
14 views
|
|

Thread upload7 viewsImage uploaded in thread 165753
|
|

58 views
|
|

BV reflection issue27 views
|
|
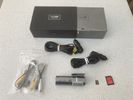
9 views
|
|
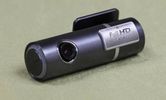
hids4u blackvue hd unit black box153 views
|
|
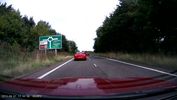
34 views
|
|
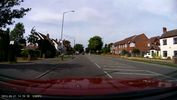
31 views
|
|
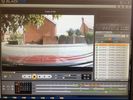
Blackvue23 views
|
|

Blackvue view43 views
|
|
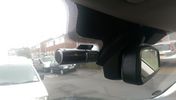
Thread upload13 viewsImage uploaded in thread 120945
|
|
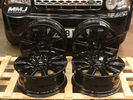
Thread upload6 viewsImage uploaded in new thread
|
|

Thread upload7 viewsImage uploaded in new thread
|
|

Thread upload6 viewsImage uploaded in new thread
|
|
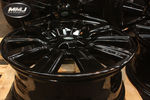
Thread upload6 viewsImage uploaded in new thread
|
|
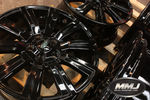
Thread upload7 viewsImage uploaded in new thread
|
|
Thread upload9 viewsImage uploaded in thread 139920
|
|

Thread upload9 viewsImage uploaded in new thread
|
|

36 views
|
|

Thread upload8 viewsImage uploaded in new thread
|
|

Thread upload10 viewsImage uploaded in thread 153670
|
|

Thread upload2 viewsImage uploaded in thread 159579
|
|

Thread upload8 viewsImage uploaded in new thread
|
|
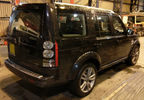
Thread upload10 viewsImage uploaded in new thread
|
|
Thread upload7 viewsImage uploaded in new thread
|
|
Thread upload8 viewsImage uploaded in new thread
|
|

Thread upload2 viewsImage uploaded in thread 205260
|
|
81 views
|
|
8 views
|
|
Thread upload24 viewsImage uploaded in new thread
|
|
Thread upload25 viewsImage uploaded in new thread
|
|

Thread upload7 viewsImage uploaded in new thread
|
|
35 views
|
|

Thread upload10 viewsImage uploaded in thread 159579
|
|
7 views
|
|
5 views
|
|
Thread upload41 viewsImage uploaded in new thread
|
|
Thread upload42 viewsImage uploaded in new thread
|
|
Thread upload39 viewsImage uploaded in new thread
|
|

Thread upload4 viewsImage uploaded in thread 202765
|
|

Thread upload2 viewsImage uploaded in thread 205656
|
|
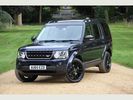
12 views
|
|

Thread upload20 viewsImage uploaded in thread 101626
|
|

Black Pudding16 views
|
|
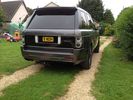
87 views
|
|
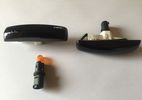
For Sale4 viewsBlack Side Repeaters
|
|
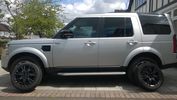
Thread upload11 viewsImage uploaded in thread 159295
|
|
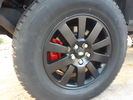
Thread upload5 viewsImage uploaded in new thread
|
|
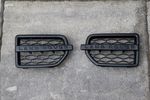
7 views
|
|

10 views
|
|
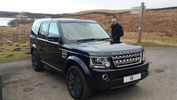
Black alloys9 views
|
|
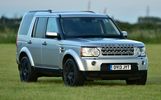
Thread upload9 viewsImage uploaded in new thread
|
|
Thread upload8 viewsImage uploaded in thread 154947
|
|
Thread upload0 viewsImage uploaded in new thread
|
|
Thread upload20 viewsImage uploaded in new thread
|
|
Thread upload2 viewsImage uploaded in new thread
|
|
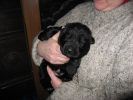
Bojangles - Black GSD124 views
|
|

Black Deposits to interior of Brake Light Switch2860 viewsThere are two contacts, one on each side of the vertical plunger under the copper metal. The set of normally open contacts on the left side that carries the power for the brake light filaments, (15 amp fuse F15P), is apparently not heavy enough as the contacts deteriorate and generate the black residue.
The set of normally closed contacts on the other side appear to be sized OK. There is not as much current, (5 amp fuse F66P), flowing thru the contacts to the ABS module, however the contacts are likely adversely affected by the black residue produced by the other deteriorating set of contacts.
One presumes/hopes that the newer replacement switch now has contacts heavy enough to carry the brake light power. It would be ideal if the ABS set of contacts were sealed from the brake light contacts to prevent contamination of the normally closed set of contacts.
|
|

Brake Light Switch, Find, Remove, and Install Instructions 7851 viewsThis is a two page doc outlining where to find the brake light switch, how to remove it, and then install the new one.
Note, do not move the brake pedal when removing or installing the switch. Let the brake pedal hang where it wants to. The switch design is actually cunning, and as such is supposed to make the removal and install fool proof. Hence if you think too much about it, you can wreck the new switch.
If you want to inspect the interior of the switch, wait until you have removed the old switch. You can then just unsnap the blue from the white to get it apart. Inside, the switch is quite simple, (no circuit boards), but it will probably show black dust from failing contacts.
I think the reason the switch fails is that the Normally Open, (NO), contacts of the brake light contacts were made too light to carry the current load for make and break of the tail light filaments. I also think the black dust created then fouls the Normally Closed, (NC), second set of contacts for the ABS circuit. As such, the Normally Closed contacts become intermittent in operation and display as a fluctuating open and closed circuit condition to the ABS system when the ABS should be seeing a steady closed circuit. Hopefully the replacement switch contacts are more robust and may be as I recently replaced my switch again just as a matter of maintenance. While in a redesign, ideally the NC contacts should be sealed or at least separated from the NO contacts, when I inspected the removed switch, this time there was no black dust present.
Probably the removed switch will have a Land Rover oval logo moulded into it, the new one, FOMOCO.
|
|
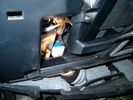
Brake Switch Visible thru Opening4973 viewsThe blue and white bit is the switch; the sort of gold appearing box,(it is really black), you will not see in your 3 as it is a Smooth Talker brand amplifier for my Blackberry phone antenna. This install is detailed in the SmoothTalker phone antenna section of my gallery.
One way to remove and install the switch is to lower the "horizontal" panel above the brake pedal as shown where the flashlight head is located. To actually remove the switch, you slide your hand thru the gap and rotate the switch clockwise 1/4 turn while watching thru the rectangular opening. Installation of the new switch is the reverse of above - 1/4 turn counterclockwise.
Before you remove the switch, note its orientation - horizontal with electrical wires to the left. That is the way it should look after replacement as well.
The second time I replaced the switch, I did it all thru the rectangular opening and did not remove the horizontal panel - that is experience helping out.
The knee kick you have to remove regardless. It is sort of hinged at the bottom so you just pull at the top and sort of rotate the knee panel and then pull upwards for two plastic "fingers" to clear the slots they reside in.
|
|
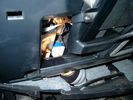
Smooth Talker Amplifier Box mounted below near steering column.179 viewsThe gold look box due to the lighting, (actually black), is the antenna amplifier located near the steering column. It can be put anyway but this seemed an OK location as I ran the antenna connector cable rearward from here to the back corner of the 3 and then up to the underside of the roof glass at the rear. The blue/white thing is the brake light switch that often must be replaced. See the Brake Light Switch file within this Gallery regarding the switch replacement.
|
|

Black Deposits on Brake Light Switch Plunger2757 viewsThis jpg I got off another forum and is typical of what one will see when one opens up the removed brake light switch. The black powder is residue from arcing of one of the pair of contacts within.
Hopefully the newer switches with the FOMOCO logo moulded into the plastic are improved from the Land Rover logo marked early units, however I doubt it.
The Ford part number is SW-6572 and/or 7E5Z-13480-A as used on the 2006 to 2009 Ford Fusion's and Mercury Milan's; the Land Rover part number is XKB500110. Cost of switch could be about twenty five dollars. A previous LR part number for the switch was XKB500030, so hopefully the newer LR part number, XKB500110, reflects some improvement in reliability.
It is possible that the new switches are better as I installed a replacement 72,000 km, (45,000 miles) later, at 195,000 km (121,000 miles). When I took the removed switch apart to inspect, it was clean inside. There was no black dust - the switch looked like new, hence they must be improved now.
|
|
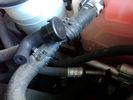
Breather line with factory cap cut off.2319 viewsIf you expand the jpg by clicking on it, in the bottom right corner if you look closely, one can see the black plastic factory vent tubing with the OEM cap cut off.
Note the tubing is cut at a 45 degree angle facing to the rear. Also shown in the top right is the cut off portion sitting on the coolant water hose and on the top left also sitting on the coolant hose, the new to be installed Gore manufactured replacement breather cap.
|
|
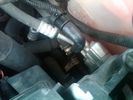
Breather Cap Installed2006 viewsThe black L shaped tube is is the Gore manufactured, (the Gore-Tex people), LR4 Breather Valve installed in an LR3. Naturally the installation looks similar to what one sees on an LR4 or RRS as the Gore breather valve is now OEM for new production.
The part number of this upgraded front differential breather valve is LR019450 and costs about thirty dollars.
|
|
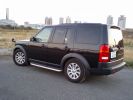
2007 HSE Java Black87 views
|
|

Thread upload22 viewsImage uploaded in thread 92518
|
|

Thread upload26 viewsImage uploaded in thread 92518
|
|
Thread upload3 viewsImage uploaded in thread 192845
|
|

changed car icon to black d3 147 views
|
|
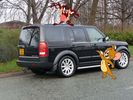
Discovery 3 TDV6 2.7 HSE250 viewsJust traded in for Discovery 4 SDV6 3.0 HSE (Feb 2012)3rd Landrover
|
|

Mvubu in Botswana 2014119 viewsMvubu 2014 Discovery 4 TDV6 XS, Corris Grey.Snorkel, OL Bull Bar, Winch,OME Heavy Duty Coil Springs,Light Guards,17" Black Wheels,Cooper ST max,Dual Battery+Inverter,Drawer Storage,FR Rear Ladder,Hannibal Roof Rack,80L Excel Long Range Fuel Tank,HiLift Jack Points,75L Water Tank.
|
|

11 views
|
|
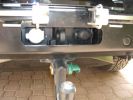
LR towing electrics pack 12N/12S313 viewsThe LR trailer electrics fitted before the Kaymar bumper and spare wheel carriers required no modifications are perfectly accessible. Good strong recovery point between the sockets too. The swing awau wheel carrier securing latches can be seen quite clearly here. Long Ranger tank (painted black) nestles where orignal spare was fitted.
|
|
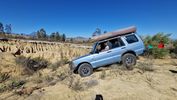
Thread upload11 viewsImage uploaded in new thread
|
|
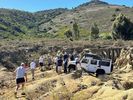
Thread upload9 viewsImage uploaded in new thread
|
|
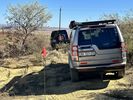
Thread upload8 viewsImage uploaded in new thread
|
|
Thread upload9 viewsImage uploaded in new thread
|
|

Thread upload7 viewsImage uploaded in new thread
|
|

Thread upload8 viewsImage uploaded in new thread
|
|
Thread upload8 viewsImage uploaded in new thread
|
|

TDV8 to Date249 views2007 (57) TDV8 HSE
Mods:
BAS mapped.. oh yeah..
Colour coordinated lower sills,Java handles, supercharger vents and grill
Hawke smoked repeaters
Halo style HD LED rings in headlights
22" supercharger style diamond cut alloys
2011 LED rear lights
|
|

Discovery 3 AC Repair136 views
|
|
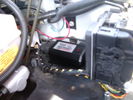
CounterAct Power Supply mounted 246 viewsPicture is blurred, however power supply is 3M two sided tape to the flat black plastic of the second battery compartment just under the antilock brake pipes to the fender side of the brake fluid reservoir. The white wire to the left rear coupler pad runs thru the firewall hole near the steering column. The blue wire to the right front coupler runs across and above the engine following the other wiring looms that cross the vehicle.
|
|
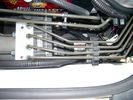
CounterAct Power supply mounted under brake lines.194 viewsThis top view shows where I located the power supply. It is attached with 3M sticky to the black plastic surface that is located under the brake lines.
When the system is operating properly, the red LED pulses about twice per second.
Some users claim they can hear a very slight hum or whine coming from the unit. My unit seems silent.
|
|

121 viewsAvatar
|
|
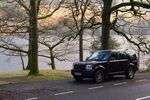
195 viewsParked up on Ullswater shore
|
|
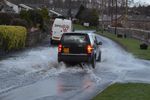
200 viewsmessing around in a small flood in Greystoke
|
|

179 viewsweeeeeeeeeeeeeeeeeeeeeeee
|
|

C pillar cover removed to facilitate removal of bin cover.9 viewsNote the "ribbon" behind the top left corner of the C pillar cover. This is something to do with the curtain air bags, hence do not mess with it. I dislodged the cover to make it easier to pull up and extract the black plastic bin moulding. It is not necessary to totally remove it and would be what I call a big deal - seat belt, air vent and ducting as well as that curtain concern.
|
|
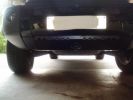
Black powder coated rayplate71 views
|
|
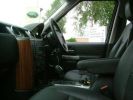
Interior124 viewsThat wood trim is going - to be replaced by piano black before I pick it up
|
|

Instructions on the NEW black badge bits in PDF format397 views
|
|

Info on how to change the green & gold ovals to silver & black586 views
|
|

D3 Grille Black16 views
|
|

181 views
|
|
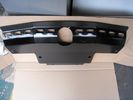
Thread upload19 viewsImage uploaded in new thread
|
|

144 views
|
|
Thread upload0 viewsImage uploaded in new thread
|
|
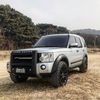
D4 - PNC15159 views
|
|

64 views
|
|
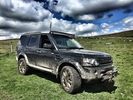
D4 Mantec Matt Black Finish210 views
|
|
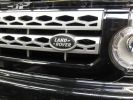
New black badge for Discovery 4 front grill135 views
|
|

Blackbox-Soloutions Faultmate MSV2 Discovery 4 fuel burning heater test options.154 views
|
|
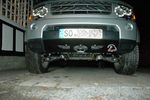
Rasta Sumpguard Discovey 4 LR4 black84 views
|
|
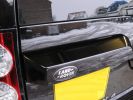
D4 rear handle black badge156 views
|
|
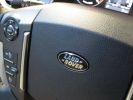
Steering wheel black badge146 views
|
|
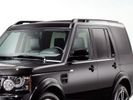
D4 long black roof rails47 views
|
|
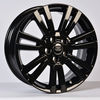
Thread upload10 viewsImage uploaded in new thread
|
|
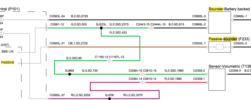
D4 Alarm OB Passive17 views
|
|
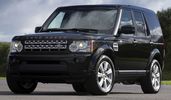
Thread upload7 viewsImage uploaded in new thread
|
|

51 views
|
|
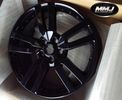
Thread upload10 viewsImage uploaded in new thread
|
|
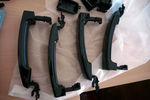
D4 Santorini Handles142 views
|
|
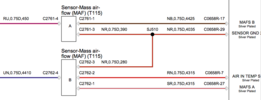
D4_MAF_A_SR_Grey_Red_-_MAF_B_NB_Brown_Black33 views
|
|
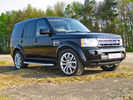
52 views
|
|
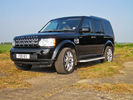
45 views
|
|
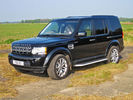
48 views
|
|
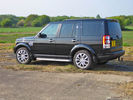
49 views
|
|
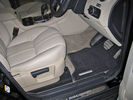
44 views
|
|
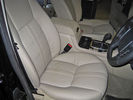
43 views
|
|
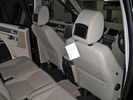
55 views
|
|
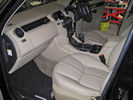
51 views
|
|
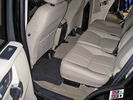
42 views
|
|
42 views
|
|
74 views
|
|
57 views
|
|
55 views
|
|
45 views
|
|
47 views
|
|
52 views
|
|
41 views
|
|
49 views
|
|
131 views
|
|
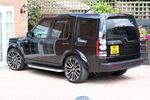
Disco looking clean!129 views
|
|
Discovery 3 HSE162 views
|
|
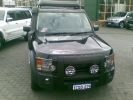
Black Disco 3 c259 views
|
|
104 views
|
|
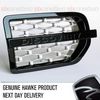
Thread upload20 viewsImage uploaded in thread 128730
|
|
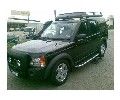
Black Disco 3 b238 views
|
|
HSE TDV6 JAVA BLACK111 views
|
|

54 views
|
|
226 views
|
|
Alluminium grille & Black badge426 views
|
|
Black Disco 3234 views
|
|
69 views
|
|
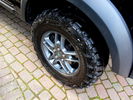
Thread upload16 viewsImage uploaded in thread 159648
|
|

Passenger side seat....108 viewsBlack leather stiched in silver...
|
|
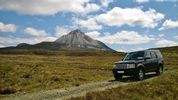
Discovery & Mount Errigal in County Donegal68 views
|
|

Thread upload96 viewsImage uploaded in thread 121218
|
|
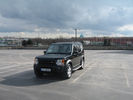
Disco @ Trafford Centre206 views
|
|

184 views
|
|
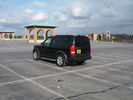
Disco @ Trafford Centre226 views
|
|

137 views
|
|
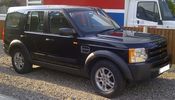
81 views
|
|

Thread upload8 viewsImage uploaded in new thread
|
|
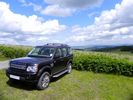
Disco 4 in mid Wales306 viewsDisco 4 (MY11) in Bournville. Taken in the sun as otherwise it mainly looks black!
|
|
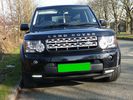
Disco 4 HDI DRL130 viewsDRL Lams fitted to D4
|
|
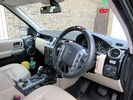
Arrival in Black17 views
|
|
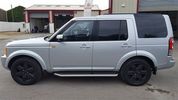
Thread upload3 viewsImage uploaded in thread 192847
|
|
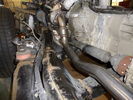
163 viewsDe-cat pipe
|
|

BlackVue problem - manufacturer response34 views
|
|

piano black 447 views
|
|
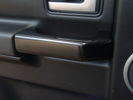
piano black 343 views
|
|

piano black 253 views
|
|

piano black 164 views
|
|
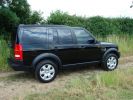
BLACK BEAUTY212 views
|
|
BLACK BADGE\'S204 views
|
|
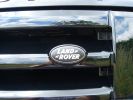
BLACK BADGE\'S228 viewsCHANGE THE GREEN AND GOLD BADGE\'S TO THE VERY NICE BLACK AND SILVER , LOOK VERY GOOD ON THE MOTOR.
|
|
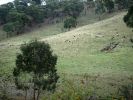
Goats - used to wipe out blackberry bushes61 views
|
|
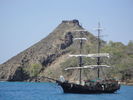
Pigeon Island, St. Lucuia, with \'The Black Pearl\' from Pirates of The Carribean in the foreground.48 views
|
|
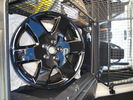
Back In Black52 views
|
|

Rear ladder showing black & silver LR logo216 views
|
|
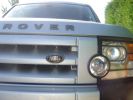
Front Black & Silver LR logo249 views
|
|

Beige sets the black off .... 185 views
|
|
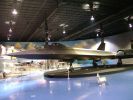
SR71 Blackbird at the Kalamazoo Air Zoo67 views
|
|
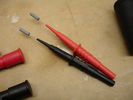
Black and Red Backprobes30 views
|
|
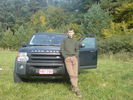
Land rover G4 disco B.Z314 views
|
|
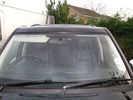
RRS 2010 Seats & Blackvue 307 views
|
|
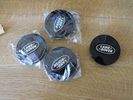
Black Centre Caps21 views
|
|
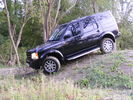
In search of fun174 views
|
|
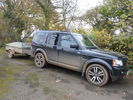
98 viewsKilve Somerset
|
|
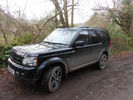
104 viewsHolford Somerset
|
|
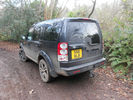
102 viewsHolford Somerset
|
|
|
|