| Search results - "Yellow" |
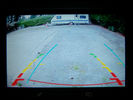
Red and yellow lines on fixed on the camera, blue lines gvif and adjustable78 views
|
|

Optima Yellow - with split charge72 views
|
|
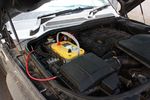
125 viewsOptima Yellow Top in battery box. This is the version with side terminals so there will be some modifications to be done to fit
|
|
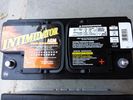
Deka 9A49 AGM Intimidator327 viewsThe Deka 9A49 AGM Intimidator makes an excellent primary battery alternative to the factory or Interstate. Made in US of premium quality. This is an excellent match with the Traxide system w/another Deka or Yellow Top optima.
This will behave properly in your D3/4 LR3 with slightly less wear and tear on your alternator.
|
|

2 chocolate pups and my 11 year old yellow Labs192 views
|
|
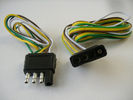
4 pin NAS flat connector from NAS small trailer382 viewsThe connector with the three exposed pins is the end that would commonly be located at the trailer hitch end, (front), of a small NAS lightweight trailer that has no electric brakes. This plug would connect into the flat 4 pin connector at the rear of the 3.
Note the order of the pin functions and wire colours: White is ground; the next pin is for tail/marker lights using the Brown wire; the Yellow conductor is for the left turn signal, and the far pin uses the Green conductor for the right turn signal.
There is no separate brake light conductor as NAS spec vehicles most often combine the brake and signal light functions to the same bulb filament rather separate filaments in different bulbs. The LR factory harness resolves that design difference.
Fortunately, the Land Rover NAS assembly pin order for the 4 pin flat plug maintains the above described conventions.
|
|
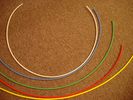
6mm Heat Shrink colours 362 viewsI decided to colour code the tubing so I used 6mm electrical heat shrink.
As there is no apparent colour coding re the 3, I tried to emulate the P38 coding; #1 LR red, #2 RR blue, #3 LF yellow, and #4 RF green. This was not doable as both left side air springs have green coloured tubing coming off the top of the front and rear air springs. I therefore arbitrarily chose the Left Rear to be red; Left Front green; Right Front yellow; Right Rear blue; and for the air compressor supply line, White coloured heat shrink. Since two new lines tie into each air spring line, I made the line between the air spring and the FASKIT, a single solid colour, and the line from the FASKIT to the valve block, White, plus the related appropriate solid colour.
|
|
Thread upload15 viewsImage uploaded in thread 55986
|
|
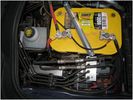
Optima Yellow top Battery in a D4266 views
|
|
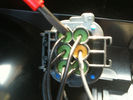
190 viewssignal wire pin 3 on rear of D4 rear light plug fit 6 ohm 50 watt resistor across here and common ground Pin 5 yellow terminal shown in next pic
|
|
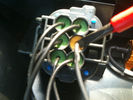
170 viewscommon groung wire pin 5 yellow on rear of d4 light plug
|
|

CALENDAR 2011402 viewsIn December 2009 we toured Botswana – first tour with the Disco, I had a yellow Defender previously. I rented a trailer, and the wheel bearing seized 1300km into the trip. This photo was taken while we waited for my friend to bring us a “fixed†hub. The elephant crossed the road less than 300 meters from us. Photo was taken 90Km from Nata
|
|

Old Yellow Sidelight91 views
|
|
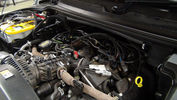
Dual Battery and ECU Chip175 viewsDual Barrery System by Traxide and Optima Yellow Top battey, Plus ECU Chip being fitted
|
|
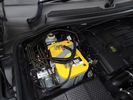
Optima Yellow Top16 viewsAGM auxiliary battery in second battery compartment
|
|

Spot the imposter366 viewsAt Folkestone Channel Tunnel holding area, DISCO3 does Disney, January 2006
|
|
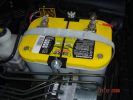
OptimaYellow Top Deep Cycle and Battery Tray194 views
|
|
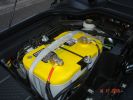
OptimaYellow Top Deep Cycle and Battery Tray171 views
|
|
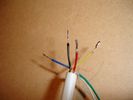
Timer wires tinned - yellow was re-done!48 views
|
|
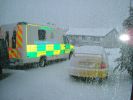
Company car left out in the cold (one on the left) Yellow pearl belongs to her indoors161 views
|
|
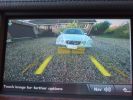
Getting Closer (yellow)292 views
|
|
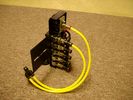
FASKIT on end view 864 viewsEnd and rear view of the FASKIT. Yellow lines are as shipped for hooking to the air supply; one line to valve/filler and other is to gauge. I will modify the arrangement to delete one of the yellow lines such that gauge line plugs into where the second yellow line is right now,(will be only one yellow tube), and then the air source line will plug into the port controlled by the valve, (hidden in this view but visible in other view). When white valve is in the ON position, gauge will read air source pressure, and be available to supply air to any of the selected four air springs. When valve is closed, the gauge will show individual air pressure in each of the air springs when a jumper is run between the gauge Schrader valve and the appropriate air spring Schrader valve.
|
|

Series LR at Oil Sands Plant in Northern Canada circa 1968747 viewsThis is an end of shift picture taken about 1968 at the Great Canadian Oil Sands (GCOS) plant while under construction in the Ft McMurray area of Northern Canada.
I was surprised to see the yellow coloured Series single cab hardtop pickup parked in about the centre of the picture. I would say it is one of the few on site as most vehicles were Chevrolet's, (as are the other three trucks elsewhere in the view). The yellow painted vehicles including the Land Rover are most likely Bechtel owned - not leased - yes, that long ago now.
|
|

Thread upload10 viewsImage uploaded in thread 201426
|
|
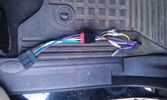
56 viewsThe OEM 2 ISO harness. Notice the red and yellow, which are important for my radio. Not having the red connected simply didn't activate the radio (so I wonder what the radio does with the permanent 12V)
|
|

64 viewsAdded a lead coming from the 12V outlet in the front console. That one is activated only when the ignition is set to I. So that's actually what is referred to as accessories in the manual of the radio. The OEM connector for the head unit did not have any similar lead. The yellow is permanent 12V, the red (on the converting OEM 2 ISO) is the accessories 12V.
|
|

Disc's,new carrier's and nice shiney Yellow stuff Pads23 views
|
|

ORACAL 970 - Sarffron Yellow Mat51 views
|
|

Front in Yellow and Black67 views
|
|

Back in Saffron Yellow Mat and Black Mat53 views
|
|

Side in Saffron Yellow Mat61 views
|
|
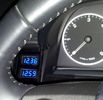
Battery meters26 viewsBattery meters - top for Main and bottom for Optima Yellow-top
|
|
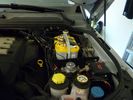
Yellow Top696 views
|
|
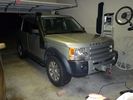
DIII LR3 1441 viewsFitted Accessories
Devon 44 hidden winch
Warn XD9000 with remote kit
Safari Snorkel
Rover Specialties Rock Sliders with side nerf bars.
Yellow Top 2nd Battery
Available from --
http://www.lucky8llc.com/Products.aspx?ProductID=7136
Traxide SC80-LR D3 Kit B -TPSE
Available from --
http://www.traxide.com.au/Traxide.html
|
|

2005 LR3168 viewsSafari Snorkel, D44 Discrete winch, Warn XD9000, Traxide SC80, Yellow Top, Tactical Rover Sliders, GNV Rods, Engel, KN Filter, 99% Royal Purple, ZF Metal Transmission pan, Tint.
|
|

CALENDAR 2011287 viewsTaken at the end of an extremely hot day in Morocco. Slimer, and Gareths vehicles. We stopped at an Auberge on the way to Zagora. The sky was an angry shade of yellow, and minutes later a spectacular storm raged. The owner of the auberge said it was the first rain in 3 months.
|
|
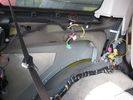
red is PDC sounder ...Yellow is PDC module 348 views
|
|
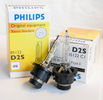
Philips D2S 85122 C1 Xenon 4300K projector HID bulb962 viewsThis is the 4300K OEM bulb in our HID Xenon projector headlights. People who design illumination systems regard the 4300K colour as a good compromise to provide what is called definition. This is effectively the ability to actually determine what an object being illuminated probably is. The more blue colour bulbs, say 5000K and greater, result in a reduction in the ability to distinguish detail, (regardless of brightness), of the object being illuminated. Effectively, you can see the object but you cannot quite figure out what it is. This is because the more blue frequencies means there are fewer other frequencies of light that allow our eyes to actually discern what an object really is.
The 4300K colour temperature applies to clear air conditions; for rain, dust, snow, fog, etc, then a yellow 2500K colour temperature is preferable. 2500K provides more contrast and there is less back splash of light off the air particles. In blowing snow, this means less sparkle back. Flat top cut off of the light beam, (which is the pattern our projector lights have), is important to reducing back splash - hence you do do not want roof mounted lighting for adverse conditions - as low down as possible is preferable, (which is why fog lights generally sit low.)
|
|

Need extra lift36 viewsWho says nobody uses the yellow page directories anymore. Proof they still get used!
|
|
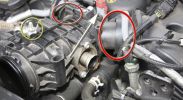
Lifting the EGR Butterfly Housing1021 viewsRemove the bolt circled in yellow. The housing can then be lifted carefully from the front. The \'Y\' shaped duct at the back will swivel at the points circled in red. Be careful of the connector at the back (arrowed) - I snapped the lugs that held it to something back there by pulling the housing up too far!
|
|
ciggy lighter with yellow connector386 views
|
|
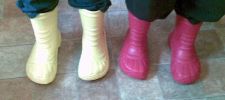
Yellow and Red Welly Crocs81 views
|
|
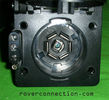
NAS 7 pin + NAS 4 pin Flat Trailer Socket308 viewsThis is the vehicle end of the NAS trailer harness that is located behind the removable plate centered within the rear bumper by the towing loop. Re the four pin flat connector, from the bottom, the exposed bare lower pin is the ground, usually the White wire on a NAS trailer. The next pin up is normally a Brown wire on a trailer and is for the Tail Lights. The third pin, normally a Yellow wire, is the left signal light; the top pin, normally a Green coloured wire, is the right signal light.
Re the round connector, from the notch in the plastic surround, clockwise, the first blade is ignition controlled +12VDC battery power, (only alive when engine running), and on the Land Rover factory harness is an Orange wire; on a NAS trailer, usually Red but perhaps a Black wire.
Next blade clockwise at 3:00 o'clock above, is the Right Turn signal light, a Green wire on the LR harness, and also on a NAS trailer.
At 5:00 o'clock, the next blade is for the Electric Brakes and is Blue on both the LR harness and on a NAS trailer.
The Ground wire is next, White on both the LR harness and on a trailer.
At 9:00 o'clock above, is the Left Turn signal, Yellow on both the LR harness and on a trailer.
The last blade to the left of the line up notch is the Tail Light circuit. On the LR harness, the wire colour is Brown with two White stripes and on a NAS trailer, Brown.
The centre pin is for the Reverse Back Up lights and is Black on the LR harness and often Purple on NAS trailer wiring but can be Black also.
Note that when the socket assembly is installed on the 3, the notch in the plastic surround is on the left - that is rotated 90 degrees anticlockwise to the picture above. In other words, When installed on the 3, the 4 pin flat connector lays horizontal and is located below the round socket.
|
|

Original side indicators33 views
|
|
Thread upload8 viewsImage uploaded in new thread
|
|

Mr yellow 20 views
|
|
15 views
|
|
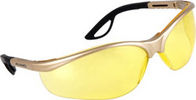
Yellow hi contrast safety specs55 views
|
|
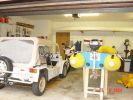
142 views1971 Mini Moke (4x4 Recovery vehicle & still loved)
|
|
Thread upload15 viewsImage uploaded in new thread
|
|

30 views
|
|
Yellow Top Model NUmber77 views
|
|
|
|