| Search results - "White" |
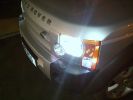
White side light bulbs and 3w 501\'s in the side marker58 views
|
|

dalyan24 viewsblack&white
|
|
426 views
|
|

110 S Explorer Pack White Icon11 views
|
|
57 views
|
|

Thread upload7 viewsImage uploaded in new thread
|
|
147 views
|
|

135 views
|
|
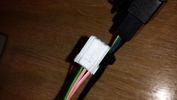
white plug for rear heated seat11 views
|
|
white temple15 views
|
|
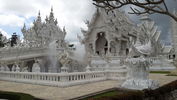
white temple215 views
|
|
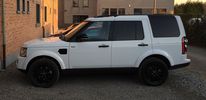
Disco 4 Fuji White8 views
|
|
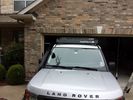
low profile solar panel211 viewsThe low profile solar panel, can be seen here, as the fine white line under the light bar. The way it's laid out, the panel should generate decent power between 10am and 4pm depending on the time of year, from the sides or front, with no shadows. Grape Solar 100W flex panel.
https://www.facebook.com/DifferentialPartsUS
|
|
White stuff 217 views
|
|
White stuff14 views
|
|
Thread upload4 viewsImage uploaded in thread 195195
|
|
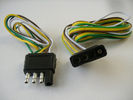
4 pin NAS flat connector from NAS small trailer382 viewsThe connector with the three exposed pins is the end that would commonly be located at the trailer hitch end, (front), of a small NAS lightweight trailer that has no electric brakes. This plug would connect into the flat 4 pin connector at the rear of the 3.
Note the order of the pin functions and wire colours: White is ground; the next pin is for tail/marker lights using the Brown wire; the Yellow conductor is for the left turn signal, and the far pin uses the Green conductor for the right turn signal.
There is no separate brake light conductor as NAS spec vehicles most often combine the brake and signal light functions to the same bulb filament rather separate filaments in different bulbs. The LR factory harness resolves that design difference.
Fortunately, the Land Rover NAS assembly pin order for the 4 pin flat plug maintains the above described conventions.
|
|
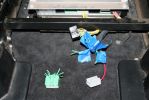
04278 viewsThe green wiring harness is the speaker outputs. Green is + and Green with white stripe is -. We tested all the wires with a 9V battery to figure out which went to what speakers then clearly labeled them as we did.
|
|
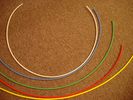
6mm Heat Shrink colours 362 viewsI decided to colour code the tubing so I used 6mm electrical heat shrink.
As there is no apparent colour coding re the 3, I tried to emulate the P38 coding; #1 LR red, #2 RR blue, #3 LF yellow, and #4 RF green. This was not doable as both left side air springs have green coloured tubing coming off the top of the front and rear air springs. I therefore arbitrarily chose the Left Rear to be red; Left Front green; Right Front yellow; Right Rear blue; and for the air compressor supply line, White coloured heat shrink. Since two new lines tie into each air spring line, I made the line between the air spring and the FASKIT, a single solid colour, and the line from the FASKIT to the valve block, White, plus the related appropriate solid colour.
|
|
Six White Muffins58 views
|
|
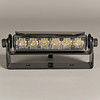
ghost lighting 106 viewsGhost marker lighting available in amber blue green white
|
|
155 views
|
|

Alaska White FL2239 viewsAlaska White Freelander 2 - pending a shot of a Disco 3 or 4!
|
|

Alternator female plug looking down into top373 viewsThis shows the plug connected to the alternator wiring harness looking down into the top of the plug.
The cavity marked 1 is the AS or BATT SENSE and the wire colour most likely has Brown/Green on it.
The cavity marked 2 is the RC or ALT CON and the wire colour most likely has Red/White on it.
The cavity marked 3 is the L1 or ALT MON and the wire colour likely has Green/White on it.
I say "most likely" as the wire colours are not always the same on all vehicles.
Also the terminal 1 conductor destination is more likely C0570-175 rather than per the jpg.
The #3 pin is located closest to the big B+ terminal.
|
|

Thread upload16 viewsImage uploaded in thread 161050
|
|
Thread upload1 viewsImage uploaded in new thread
|
|
46 views
|
|
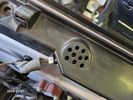
Buzzer located under black plastic cover.12 viewsThe white electrical connector clicks into the buzzer housing that is shown protruding from under the black plastic cover. There is a little tab on the white plastic that has to be squeezed to release the connector. In other words, do not pull on the two conductors.
|
|
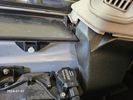
White plastic pin that has to be partly removed to assist in release of buzzer cover.11 viewsThe white coloured plastic pin is located near the C pillar and has to be partly pulled out to release the black plastic buzzer cover.
|
|

Brake Light Switch, Find, Remove, and Install Instructions 7852 viewsThis is a two page doc outlining where to find the brake light switch, how to remove it, and then install the new one.
Note, do not move the brake pedal when removing or installing the switch. Let the brake pedal hang where it wants to. The switch design is actually cunning, and as such is supposed to make the removal and install fool proof. Hence if you think too much about it, you can wreck the new switch.
If you want to inspect the interior of the switch, wait until you have removed the old switch. You can then just unsnap the blue from the white to get it apart. Inside, the switch is quite simple, (no circuit boards), but it will probably show black dust from failing contacts.
I think the reason the switch fails is that the Normally Open, (NO), contacts of the brake light contacts were made too light to carry the current load for make and break of the tail light filaments. I also think the black dust created then fouls the Normally Closed, (NC), second set of contacts for the ABS circuit. As such, the Normally Closed contacts become intermittent in operation and display as a fluctuating open and closed circuit condition to the ABS system when the ABS should be seeing a steady closed circuit. Hopefully the replacement switch contacts are more robust and may be as I recently replaced my switch again just as a matter of maintenance. While in a redesign, ideally the NC contacts should be sealed or at least separated from the NO contacts, when I inspected the removed switch, this time there was no black dust present.
Probably the removed switch will have a Land Rover oval logo moulded into it, the new one, FOMOCO.
|
|
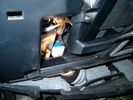
Brake Switch Visible thru Opening4973 viewsThe blue and white bit is the switch; the sort of gold appearing box,(it is really black), you will not see in your 3 as it is a Smooth Talker brand amplifier for my Blackberry phone antenna. This install is detailed in the SmoothTalker phone antenna section of my gallery.
One way to remove and install the switch is to lower the "horizontal" panel above the brake pedal as shown where the flashlight head is located. To actually remove the switch, you slide your hand thru the gap and rotate the switch clockwise 1/4 turn while watching thru the rectangular opening. Installation of the new switch is the reverse of above - 1/4 turn counterclockwise.
Before you remove the switch, note its orientation - horizontal with electrical wires to the left. That is the way it should look after replacement as well.
The second time I replaced the switch, I did it all thru the rectangular opening and did not remove the horizontal panel - that is experience helping out.
The knee kick you have to remove regardless. It is sort of hinged at the bottom so you just pull at the top and sort of rotate the knee panel and then pull upwards for two plastic "fingers" to clear the slots they reside in.
|
|
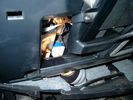
Smooth Talker Amplifier Box mounted below near steering column.179 viewsThe gold look box due to the lighting, (actually black), is the antenna amplifier located near the steering column. It can be put anyway but this seemed an OK location as I ran the antenna connector cable rearward from here to the back corner of the 3 and then up to the underside of the roof glass at the rear. The blue/white thing is the brake light switch that often must be replaced. See the Brake Light Switch file within this Gallery regarding the switch replacement.
|
|

Brickarms50 views
|
|
Power pickup from white towbar skt153 views
|
|
Power pickup from white towbar skt153 views
|
|
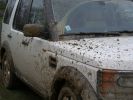
"Shiny" white car...277 views
|
|
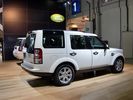
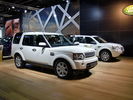
Alaska White Disco 4100 views
|
|
Alaska White Disco 499 views
|
|
White flap lever250 views
|
|
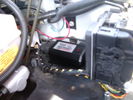
CounterAct Power Supply mounted 246 viewsPicture is blurred, however power supply is 3M two sided tape to the flat black plastic of the second battery compartment just under the antilock brake pipes to the fender side of the brake fluid reservoir. The white wire to the left rear coupler pad runs thru the firewall hole near the steering column. The blue wire to the right front coupler runs across and above the engine following the other wiring looms that cross the vehicle.
|
|
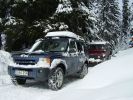
Whitelane532 views
|
|
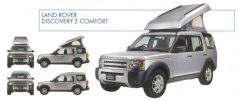
Land Rover Discovery 3 'Comfort' - Detailed views411 viewsCopied from Land Rover Magazine Number 40 (Japanese edition)
|
|
59 views
|
|
Thread upload3 viewsImage uploaded in thread 154079
|
|
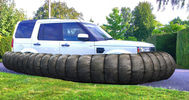
Hover D425 views
|
|
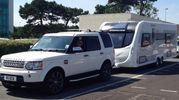
Camping Chanteloup213 views
|
|
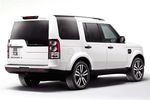
Thread upload6 viewsImage uploaded in thread 154079
|
|
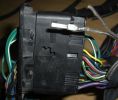
New Speaker Cables.111 viewsThis is the door connector, Main loom to Right, Door side to the left. to the top of the connectors you can see green and Green white wires which are the speaker ones. The door wiring is premium and has two pairs, the main loom was a 1 pair high line, so i am adding the pair you see (one already pinned up) to upgrade the loom to premium.
|
|
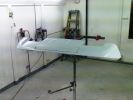
White base coat again94 views
|
|
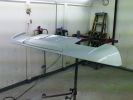
with white base coat96 views
|
|

white kite in flight36 views
|
|
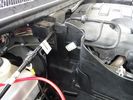
63 viewsThe spot where the isolator box goes had this small white clip. It looked like it was meant to hold something....so I removed it.
|
|
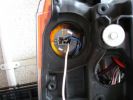
indicator lampholder, white wire connected to unused filament328 views
|
|
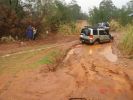
mud recovery220 viewsI think this is atacama in the poo. Heine is out of the picture to the extreme left. Note the white recovery rope stretching out of the frame
|
|
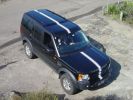
V3: White stripe232 views
|
|
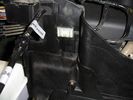
Twist the white plastic in either direction 45 degrees and pull - this is where the SC80 will go81 views
|
|
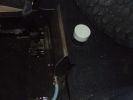
Internal 40 Litre water tank - top view of left side of tank106 viewsShows my spare tyre, but also bright white protective cap of top fill point and vent. Blue hose is water dispensing point. Note seat bracket bolt secures tank to D3. Similar bolt point on other side. Only these two bolts secure the tank and it is very secure.
|
|
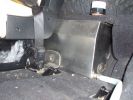
Left hand side of internal 40 Litre water tank161 viewsView from floor looking towards tank. Top white cover is 50mm plastic pipe cap. It protects the tank vent valve. Dispensing hose is at lower corner of tank
|
|
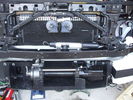
Front bumper view of semi-installed winch121 viewsNote the left-side (looking forward) bracket holding the white windscreen washer bottle.
|
|
124 views
|
|
119 views
|
|
113 views
|
|
104 views
|
|
103 views
|
|
97 views
|
|
84 views
|
|
100 views
|
|
102 views
|
|
101 views
|
|
99 views
|
|
whiteout at home264 views
|
|
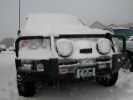
White blob309 views
|
|
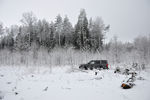
White forest11 views
|
|

109 views
|
|
Thread upload4 viewsImage uploaded in thread 186251
|
|
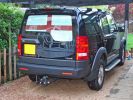
England sunshades - white and red emulsion291 views
|
|
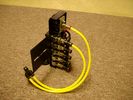
FASKIT on end view 864 viewsEnd and rear view of the FASKIT. Yellow lines are as shipped for hooking to the air supply; one line to valve/filler and other is to gauge. I will modify the arrangement to delete one of the yellow lines such that gauge line plugs into where the second yellow line is right now,(will be only one yellow tube), and then the air source line will plug into the port controlled by the valve, (hidden in this view but visible in other view). When white valve is in the ON position, gauge will read air source pressure, and be available to supply air to any of the selected four air springs. When valve is closed, the gauge will show individual air pressure in each of the air springs when a jumper is run between the gauge Schrader valve and the appropriate air spring Schrader valve.
|
|

Thread upload35 viewsImage uploaded in thread 191432
|
|
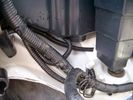
Front Coupler pad to right front under air filter housing 156 viewsThe brighter white "square" behind the black air cleaner drain is the Coupler Pad location I chose for the right front corner. The 1/4", (5mm), black wiring loom carries a single blue colour conductor between the power supply and pad.
A second coupler pad, (white conductor), is located near the left rear tail light. The mounting location is accessible from the rear compartment access "door" where the trailer hitch wiring attaches to the factory loom.
|
|
Thread upload13 viewsImage uploaded in thread 152884
|
|
Thread upload15 viewsImage uploaded in thread 152884
|
|
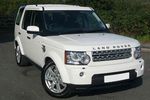
Fuji White387 views
|
|

341 views
|
|

363 views
|
|

333 views
|
|
Thread upload242 viewsImage uploaded in thread 3856
|
|

Whitefire Headphones14 views
|
|

The Hooligan!144 viewsBefore you ask, no she's not a husky - she's a White & Champagne German Shepherd Dog.
|
|

81 views
|
|
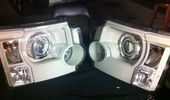
Finished project75 viewsScary start but the end result is AWESOME!!
|
|

Headlight mod82 viewsQuick preview of painted reflectors behind the lens
|
|

Headlight mod77 viewsNo turning back now..
|
|
White Background Fault Codes17 views
|
|
Searchable Live Date White Background13 views
|
|

Headlight mod79 viewsAlot of hours for alil prep work..
|
|

Headlight mod88 viewsAmber lens was quick to dissappear..
|
|

Headlight mod266 viewsHeadlight mod to my07 land rover discovery 3
|
|
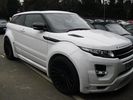
Evoque Revere219 views
|
|
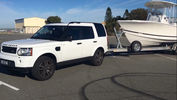
96 views
|
|

Calendar Entry 2011467 viewsMrH going through Wheelwash at Whitecliff Quarry March 2010
|
|

2005 HSE 4.4251 views
|
|

Training Exercise235 viewsVehicle introduced to residual EQ liquefaction silt
|
|
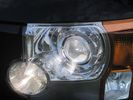
H7 white bulb hids4u88 views
|
|

46 views
|
|

55 views
|
|

Camping SAN YEN160 views
|
|

Camping Chanteloup154 views
|
|
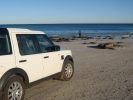
Cable Beach Broome, WA136 views7:00am Cable Beach
|
|
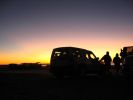
Sunset on Cable Beach, Broome, WA, Australia127 views
|
|
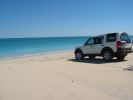
Northern end of Cable Beach, Broome, WA, Australia149 views
|
|

Cable Beach Broome, WA172 views
|
|

New to me MY11 Disco 428 viewsMy new to me Disco 4 in white, parked nex to the wife's FL2.
|
|
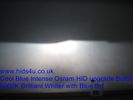
osram d1s d2s cool blue intense upgrade xenon bulb white from hids4u71 views
|
|
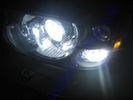
osram d1s cool blue intense upgrade xenon bulb white from hids4u94 viewsThese cool blue intense are 5000k and a whiter light than philips ultrablue and match the 5000k leds better. they are also the brightest hid bulbs we have tested
|
|
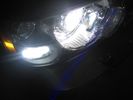
philips d1s ultrablue upgrade hid xenon bulbs hids4u79 viewsThese bulbs have a whiter light than standard and a blue coating gives a blue tint from a distance and at the edge of the light beam when parked against a wall.
|
|

White Gyr Saker39 views
|
|
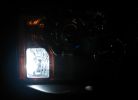
670 viewsUltrabrite led side light, Pleasant Blue/white light source
|
|
White Gyr Saker36 views
|
|

White Gyr Saker33 views
|
|
157 views
|
|
149 views
|
|
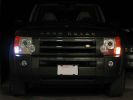
Comparison of the new white LED bulb and the existing incadescent bulb that I replaced.374 views
|
|
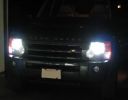
Now the small marker lights have the same bright white/blue color as the headlamps.352 views
|
|
151 views
|
|
137 views
|
|
131 views
|
|
147 views
|
|
White Timber Trail 0970 views
|
|
115 viewsRR
|
|
91 views
|
|

161 views
|
|
88 views
|
|
178 views
|
|

Whiteclay resort48 views
|
|
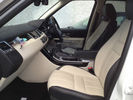
Autobiogrpahy white83 views
|
|
135 views
|
|
128 views
|
|
150 views
|
|
Thread upload8 viewsImage uploaded in thread 162365
|
|
Thread upload6 viewsImage uploaded in thread 162365
|
|

64 views
|
|

LR Electric Trailer Brake C2590 Female Connector606 viewsThis female connector, C2590, located up above and near the brake pedal is for the Trailer Electric Brake Controller hookup.
The Black wire in the bottom right is pin #3, the ground. The Blue wire to the left is pin #6, the Trailer Brake Controller output going to the rear trailer socket.
The White #4 wire is the 30 amp fusible link, (Link 6E in the engine compartment junction box), for the Brake Controller 12VDC power feed from the battery. Note that this would make a pretty good power source for CB radios and the like if no electric trailer brakes were required.
Pin #5 is a Green wire from the stop lamp switch, (the control input for the Brake Controller).
This plug is standard on all NAS (LR3) vehicles, but unlikely to be found on the D3 spec units.
|
|

Carpet Panel Removed showing Bass Speaker and Dust Shield 1733 viewsSomething is wrong with the orientation, however this shows what you see when the carpet is removed.
The dust shield, (under which the actuator is located), in the picture is as yet uncut. The white bit is the underside of the plastic lower lift gate carpeted cover panel.
The round thing is the woofer speaker for the Harmon Kardon radio. When the radio is working, one can see the speaker moving, but not much bass sound actually seems to emanate from the speaker.
|
|
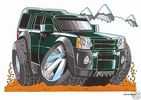
disco 3 koolart image on tea/coff mug £6.99 or on white heavy weight sublimation t shirt £10.99 personalised26 viewschange body work color for free...most colors available. t shirts in 5 sizes......
|
|

New Toy126 viewsFuji RRS2 Dynamic
|
|
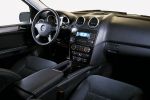
228 views
|
|
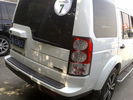
black and white special edition (aka landmark in uk)55 views
|
|
black and white special edition (aka landmark in uk)73 views
|
|
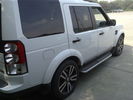
black and white special edition (aka landmark in uk)53 views
|
|
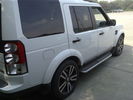
black and white special edition (aka landmark in uk)66 views
|
|

Chawton White663 views
|
|
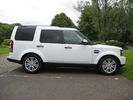
Fuji White419 views
|
|
Thread upload1 viewsImage uploaded in new thread
|
|
DOdgy D3 Decoration - Two White Stripes86 views
|
|

Thread upload3 viewsImage uploaded in thread 186251
|
|
Red mud on Chawton White162 views
|
|
235 viewsCalendar Entry 2010: White Horse Westbury, Wiltshire.
|
|
227 viewsCalendar Entry 2010: White Horse Westbury, Wiltshire. I know it does not have my number plate, but it is my fav pic!
|
|
New Hampshire89 viewsWhite Mountain National Forest
|
|

White Mountain National Forest89 viewsNear Woodstock, New Hampshire, USA
|
|
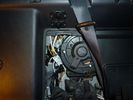
rear socket install1038 viewsShows to white cable run, cable routing, cable ties and socket placement. Rear sockets fitted. Note the white power cable, and cable tie location. The socket in this position are neatly back out of the way, but handy.
|
|
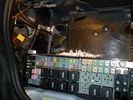
Battery Box Primary186 viewsThis visual is what is next to, behind and under your battery. It is important to note that the negative terminal which is prone to corrosion is in the rear, nearest to everything to maximize damage. The white powder pictured is baking soda. This is carefully used with a damp rag to neutralize any effect of battery acid (hydrochloric acid).
|
|
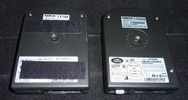
aftermarket and factory BT module56 viewsnotice the additional MOST connector (with white protective cap) for the factory install module
|
|
97 views
|
|
105 views
|
|
93 views
|
|
Lucy LandRover 4180 views
|
|
White outside and clear leather inside...513 views
|
|
My White LR3 - 2008 SE - PLANT THE FLAG!!!!!!!!59 viewsLR Dealership Wheels Event - The Plains, VA
|
|
1996 300TDi Defender 90131 viewsIts suposed to be my dads but...
|
|
Thread upload35 viewsImage uploaded in thread 88705
|
|
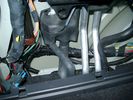
Rear coupler pad located near rear left tail light 144 viewsThe rear coupler pad is not visible as it is located "below and behind", so to speak. Follow the loop of black plastic wire loom from right to left as the loop of loom covering the white conductor wire drops down "behind" to the flat metal surface the pad is glued to. The pad is attached to the flat metal surface via a 3M sticky on the backside of the coupler pad.
|
|
415 views
|
|

Thread upload1 viewsImage uploaded in new thread
|
|

Thread upload1 viewsImage uploaded in new thread
|
|
Thread upload0 viewsImage uploaded in new thread
|
|
Thread upload1 viewsImage uploaded in new thread
|
|
Thread upload2 viewsImage uploaded in new thread
|
|
Thread upload5 viewsImage uploaded in new thread
|
|
Thread upload0 viewsImage uploaded in new thread
|
|
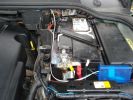
152 viewsI routed the white signal wire from the junction box which I positioned at the side of the battery, back and under the bonnet seal.
|
|

poppy14 views
|
|
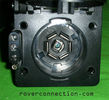
NAS 7 pin + NAS 4 pin Flat Trailer Socket308 viewsThis is the vehicle end of the NAS trailer harness that is located behind the removable plate centered within the rear bumper by the towing loop. Re the four pin flat connector, from the bottom, the exposed bare lower pin is the ground, usually the White wire on a NAS trailer. The next pin up is normally a Brown wire on a trailer and is for the Tail Lights. The third pin, normally a Yellow wire, is the left signal light; the top pin, normally a Green coloured wire, is the right signal light.
Re the round connector, from the notch in the plastic surround, clockwise, the first blade is ignition controlled +12VDC battery power, (only alive when engine running), and on the Land Rover factory harness is an Orange wire; on a NAS trailer, usually Red but perhaps a Black wire.
Next blade clockwise at 3:00 o'clock above, is the Right Turn signal light, a Green wire on the LR harness, and also on a NAS trailer.
At 5:00 o'clock, the next blade is for the Electric Brakes and is Blue on both the LR harness and on a NAS trailer.
The Ground wire is next, White on both the LR harness and on a trailer.
At 9:00 o'clock above, is the Left Turn signal, Yellow on both the LR harness and on a trailer.
The last blade to the left of the line up notch is the Tail Light circuit. On the LR harness, the wire colour is Brown with two White stripes and on a NAS trailer, Brown.
The centre pin is for the Reverse Back Up lights and is Black on the LR harness and often Purple on NAS trailer wiring but can be Black also.
Note that when the socket assembly is installed on the 3, the notch in the plastic surround is on the left - that is rotated 90 degrees anticlockwise to the picture above. In other words, When installed on the 3, the 4 pin flat connector lays horizontal and is located below the round socket.
|
|
Black & white23 views
|
|
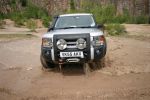
2010 Calendar Entry329 viewsWhitecliff Quarry Wheelwash July 2009 (Forest of Dean)
|
|
267 views
|
|

Tekonsha Ford Brake Controller Adapter part number 3035-P274 viewsThis is the adapter cable between the Brake Controller and the existing C2590 female plug located near the brake pedal on NAS spec LR3's. The flat 4 pin plug of the adapter cable connects to the Controller; the rectangular 6 hole male plug to C2590.
There are only four conductors in the adapter cable, but one will see five pins within the Land Rover C2590 plug. The #2 pin is not required for the NAS setup. #2 pin is the circuit between the head lamp switch and vehicle side running lamps required in the civilized world.
The single pin at the bottom in the picture is #3 and on the Land Rover, a Black wire tied to ground. The other pin at the bottom and across to the left is #6, and Blue on the Land Rover. This is the Brake Controller output to the trailer socket at the rear.
#4 is the pin at the top left, and is a White coloured wire from the battery. Pin #5 is from the stop light switch, and is Green on the Land Rover.
Note that the adapter cable colours do not necessarily follow all the above referenced Land Rover colours.
|
|
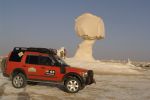
Egypt - White desert153 views
|
|
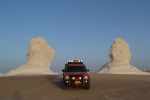
Egypt - White desert152 views
|
|
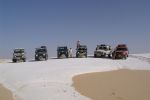
Egypt - White desert148 views
|
|

White Ensign50 views
|
|

12 views
|
|

VIn-Fuji Colour71 views2010 MY with Fuji white as the colour
|
|
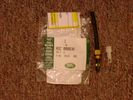
Voss System 203 connector 6 mm for valve blocks 905 viewsThis is Land Rover part number RQC000030, the Voss fitting for the axle valve blocks. I think it is a Voss System 203 6mm fitting, Voss part number 5 2 03 11 01 00.
The parts bag comes with the white plug inserted in the brass threaded bit with what is called the brass cutting ring placed on the tip of the white plastic plug. The idea is that one screws, (M10 x 1 thread), the brass insert into the appropriate hole with the white plug still in the brass insert. Once the brass is tight, (12 mm wrench), then the white plug is pulled from the assembly leaving the cutting ring down inside and under. One then pushes in the 6 mm tube end about 20 mm or so and the tube slides down thru the brass cutting ring, (2 internal sloped one way cutting ridges). When the tube is in far enough, one pulls upwards a bit and the ring cuts into the plastic such that the tube will not pull out. To remove tube, one unscrews the brass nut and all comes out, sort of like I have shown with the short piece of 6mm tubing. The white plug is a throwaway item upon install of the tubing.
|
|
White Kaymar Bar415 views
|
|

79 views
|
|

Land Rover Discovery 3 'Comfort'264 viewsCopied from the Land Rover Magazine Number 40 (Japanese edition)
|
|

70 views
|
|

71 views
|
|

57 views
|
|

54 views
|
|

317 views
|
|
![Filename=white sump plate [1600x1200].JPG
Filesize=2KB
Dimensions=75x56
Date added=08.Mar 2011 white sump plate [1600x1200].JPG](albums/userpics/13223/thumb_white%20sump%20plate%20%5B1600x1200%5D.JPG)
248 views
|
|
72 views
|
|
104 views
|
|
94 views
|
|
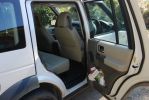
103 views
|
|
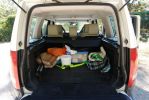
117 viewsrear view shows that Tundra colour does not extend into cargo area.
|
|
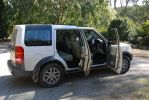
118 views
|
|

100 views
|
|
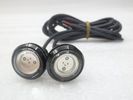
Thread upload8 viewsImage uploaded in thread 159603
|
|
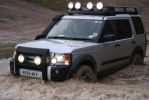
Taking a dip949 viewsCALENDAR ENTRY 2009. First off-road trip with new King Spring lift fitted to the coiler. Taken 12t Jan 08 in Whitecliff Quarry, near Coleford in the Forest of Dean.
|
|

50 views
|
|
Thread upload6 viewsImage uploaded in thread 142459
|
|

12 views
|
|
Thread upload9 viewsImage uploaded in new thread
|
|
MY OLD FRONTERA DURING AN EXERCISE142 views
|
|
Thread upload1 viewsImage uploaded in thread 5
|
|

Thread upload4 viewsImage uploaded in thread 189436
|
|

Thread upload9 viewsImage uploaded in thread 201166
|
|

Thread upload25 viewsImage uploaded in thread 103930
|
|

10 views
|
|
|
|
|
|