| Search results - "Uo" |

Thread upload9 viewsImage uploaded in thread 122888
|
|
24 views
|
|
![Filename=$(KGrHqUOKpwFHdm(DtpzBR4tOt6nUg~~60_14[1].jpg
Filesize=1KB
Dimensions=64x48
Date added=29.Jul 2013 $(KGrHqUOKpwFHdm(DtpzBR4tOt6nUg~~60_14[1].jpg](albums/userpics/18922/thumb_%24%28KGrHqUOKpwFHdm%28DtpzBR4tOt6nUg~~60_14%5B1%5D.jpg)
103 views
|
|
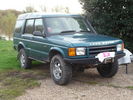
51 viewsD44 front winch bumper. Ali washer bottle. D44 rear h/d bumper. centre diff lock. 235x85x16 pirelli muds. OME +2" springs & shocks. front diff guard. side tree bars. wired for roof CB. Aux fuse block. safari snorkel. extended wading tubes. the list goes on...
|
|
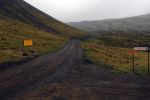
"Impassable" not for Discovery114 views
|
|
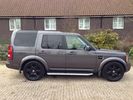
Disco 3 HSE in Bonatti Grey52 viewsPre the Disco 4 conversion and the 20" Landmark alloys
|
|
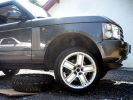
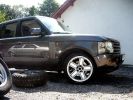
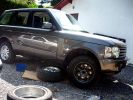
Flat 20"230 views
|
|
02 On banks of Darling River, Back of Bourke158 views"Back of Bourke" is the typical definition of the start of the Australian Outback. This was after crossing the Darling River "back of Bourke" on 8 Jan 08. We were the first vehicle to start driving after floods had closed (first time in 8 yrs there was any water in the river).
|
|
02 Last Photo before the little wheel problem saga222 viewsThis is my D3 with trailer on the banks of the Darling River, literally "back of Bourke" (the regional definition of the start of the Australian Outback). We were the first vehicle in a week to try and drive this route from Bourke to Wilcannia on the account of floods (first water in 7 years). Little did we know that 3 hours later there\'d be a bit of a wheel and tyre problem appearing...
|
|
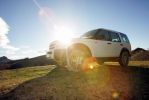
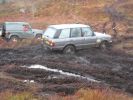
the D3, 17" with stock tyres, working very good in the mud ! Still estonished by this ...618 views
|
|
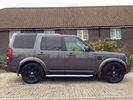
Disco 3 HSE in Bonatti Grey52 viewsPre the Disco 4 conversion and the 20" Landmark alloys
|
|

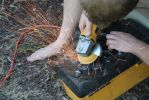
Tagliare lungo il perimetro della chiave - Cut along the key perimeter17 viewsI gusci sono saldati ad ultrasuoni. Con il disco tagliare lungo il perimetro della chiave in corrispondenza della giunta: lo spessore è di circa mm.3. Io non sono andato fino in fondo per evitare di danneggiare qualcosa, una volta inciso il solco per mm.2,7 ho fatto leva col cacciavite e ho strappato il materiale restante.
The body is ultrasonically welded. With the disc cut along the perimeter of the key in correspondence of the joint: the thickness is approximately 3mm. I have not gone all the way down
|
|

"Snow"44 views
|
|

More "Snow"38 views
|
|
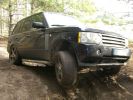
228 viewsRR ´06, 20" alloys, still better than any SUV you can think of. Actually, it went up, down and through everything.
|
|
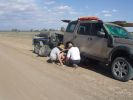
03 First bit of tyre/wheel trouble245 viewsIn the outback a tyre suddenly blew. "No worries" we thought, as we had 3 spares (+ two more if we abandoned the trailer), 150l of water, 3 days of food, and an EPIRB if things got really bad. At the time I didn\'t fully appreciate the fact that my index got a blister from the burning heat of one of the wheel nuts. It was 45 deg C at the time, so everything was hot.
|
|
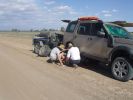
03 The first bit of tyre/wheel problem251 viewsSomewhere in the Australian outback on a 45 deg C day in Jan 08, a D3 had a bit of a flat tyre problem. "No worries, mate" st we had 3 spares (plus 2 more if we abandon the trailer), 150l of water, 4 days of food, and an EPIRB if things really go crook. The first clue that this was not a "normal" flat was when I handled a wheel nut and ended up with a blister from a burning hot nut (the ambient wasn\'t THAT hot).
|
|

Tagliare per eliminare parte del coperchio - Cut to remove part of the cover14 viewsE' meglio prima levare il circuito stampato e poi la lama della chiave, per evitare di danneggiarlo. Tagliare sopra il tasto superiore per rimuovere solo la parte con i tasti.
Is better to remove the printed board first then the key, to prevent damage. Cut over the top button to remove only the part with the buttons.
|
|
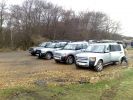
138 views
|
|
![Filename=0344559915002[1].jpg
Filesize=69KB
Dimensions=640x480
Date added=24.May 2018 0344559915002[1].jpg](albums/userpics/17641/thumb_0344559915002%5B1%5D.jpg)
20 viewsMy "old" HSE
|
|
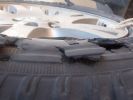
05 No doubt the tyre is flat275 viewsThis is the view of the flat tyre. Again, didn\'t think it anything more than a "normal" explosive blowout, as the tyre was about 90% worn, we were heavily loaded, it was 45 deg C, and driving 105 km/ho on a rough dirt road in the outback.
|
|
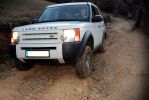
testing "cross axel"652 viewstesting "cross axel" with and without TR on
|
|
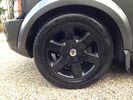
19" Black HSE Alloys/Tyres59 views
|
|

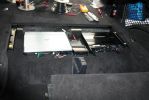
Chiave aperta12 viewsUna volta estratto il circuito stampato, facendo leva col cacciavite sulla parte rimasta attaccata ho prelevato la lama della chiave da inserire nel box nuovo.
Once you remove the printed circuit board, leveraging with the screwdriver on the part remained attached, I picked up the blade of the key to be inserted in the new box.
|
|
DIstanza tra la ruota e la sede del gancio traino37 views
|
|
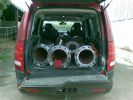
10" Pipe307 views
|
|
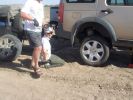
06 Spare tyre on and still suffering from hot wheel nuts296 viewsManaged to get ultra hot wheel nuts back on the spare (using the original 19" D3 wheel, vs the 19" RRS wider wheel which blew - shown in left of photo). Pity we didn\'t note that the disk brake was EXTREMELY hot at this time.
|
|
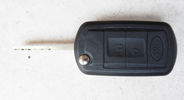
Chiave finita - Finished key18 viewsHo iserito il tutto nel nel nuovo contenitore pagato €4,00, ho incollato con la colla cianoacrilica, ne basta poca, e questo è il risultato.
I put all in the new container paid € 4.00, I glued with super glue, it only takes a little, and this is the result.
|
|

07 Back side of failed tyre340 viewsThis is the back of the blown tyre. It looks like any other worn tyre which has run a bit while flat. Note that we were running on wider 19" RRS wheels (have 4 19" MTRs + 1 old A/T on the original 5 wheels). Also have a rear-mount spare tyre holder which is really convenient with the wider rim and the fact that the tyre was still hot (it had some melted rubber on the other side!!)
|
|
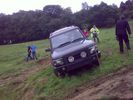
"Hold on lads..., I\'ve got an idea..."54 viewsThis angle tells you some of what could have been a bit of a tumble...
|
|
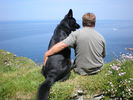
"thats my boy"tintagel castle 2009105 views
|
|
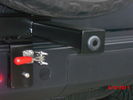
Sensor bar33 viewsSensor has been moved out to tire carrier where it should be. It does not pick up the tire anymore. "no faults".
|
|
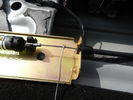
In caso di emergenza - For emergency48 viewsNel caso dovesse succedere nuovamente ho predisposto un cavetto da tirare.
If it were to happen again I have set up a cable to pull.
|
|
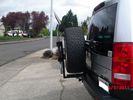
Receiver for toy rack39 viewsSensor bar was made of same heavy tube that the carrier was made from allowing a small 1 1/4" receiver to be placed on it for a multitude of toy racks of my choice. Rack adjust in and out of receiver.
|
|
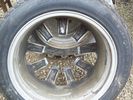
rear view 28 viewsrear view of 20" wheel which "broke" whilst driving
|
|
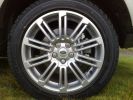
20"347 views20" 10 spoke bling
|
|
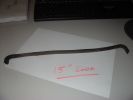
182 viewscame loose when washing car with power washer - its 15" long and hollow
|
|

Llamsrecovery mode installation53 viewsSpring lock inconspicuous
|
|

11 views
|
|
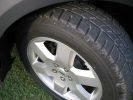
Wheel351 viewsDetail of the Pirelli Scorpion zero on 19" rim.
|
|
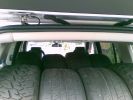
Thirteen Up92 views4 MTR\'s and 4 Sport 255/55 19\'s inside, One 18" Type 2 Mark 1 underneath and 4 18" Type 2 Mark 2\'s on the road
|
|
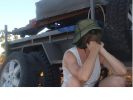
14 "Are we having fun yet?"349 viewsSWMBO is pondering why attempting to drive 3,900 kms across the outback on dirt roads is more fun than, say, spending New Years in Paris......
|
|
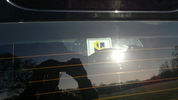
57 viewsSlight damage to rear window tint, the garage I bought it from "removed" the landrover garage sticker and damaged the tint!
|
|
17" Alloy85 views
|
|
D3 on FFRR Wheels302 views19" FFRR Vogue wheels on a D3
|
|
17" vs 19" wheel270 views
|
|
17" vs 19" wheel224 views
|
|
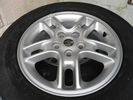
38 views17" alloy
|
|
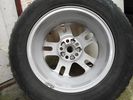
35 views17" alloy
|
|
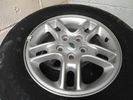
31 views17" alloy
|
|
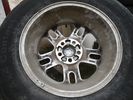
29 views17" alloy
|
|
27 views17" alloy
|
|

17" wheels30 views
|
|
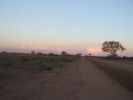
18 Brake "repairs" finished at sunset296 viewsWe just finished the repair at sunset and were driving slowly with 3 brakes. Oddly the D3 didn\'t behave any differently at 50 km/hr than it did normally. We had 4 instances of hitting the (3) skids for kangaroos before arriving in Wilcannia 3 hrs later. The brake light warning was making very distinctive noises and flashing randomly, though.
|
|
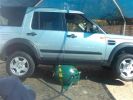
Lifts the D3 with ease "Duck, Barry! "225 views
|
|
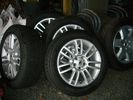
19" FFRR alloys60 views
|
|
Thr crowd, "frozen" in anticipation...46 views
|
|
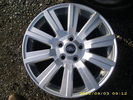
MY2012 19" D4 HSE Alloy Wheel34 views
|
|

Thread upload11 viewsImage uploaded in new thread
|
|
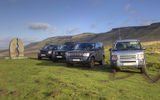
Green Lanning in Cumbria 2012 Calendar326 viewsTaken next to "The Watercut" on The Old Highway above Mallerstang in Cumbria
|
|
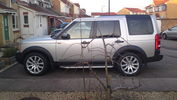
New 295/45R20 114V XL Hankook Ventus ST tyres fitted on 20" RRS Supercharged 20" Alloys123 views
|
|
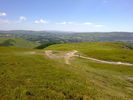
Look what we got up! Not bad in standard spec and 16", mixed, road tyres, I guess!43 views
|
|
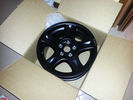
Cerchio lega 17x8" 69 views
|
|
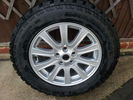
26 views10 Spoke 18" with 255/60/18 AT2
|
|
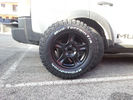
BF goodrich Mud-terain + ARcasting 17"x8"88 views
|
|
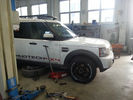
BF goodrich Mud-terain + ARcasting 17"x8" on Disco 4 3.0 TDV691 views
|
|
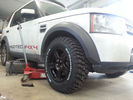
BF goodrich Mud-terain + ARcasting 17"x8" on Disco 4 3.0 TDV6126 views
|
|
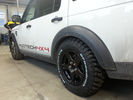
BF goodrich Mud-terain + ARcasting 17"x8" on Disco 4 3.0 TDV6117 views
|
|
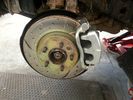
Front caliper on D4 to fit 17" rims136 views
|
|
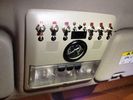
Roof Control Panel33 viewsThe "clean" side
|
|
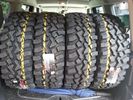
Tagom Tires Country Track 17"51 views
|
|
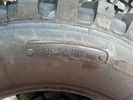
Tagom Tires Country Track 17" - Size28 views
|
|
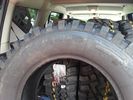
Tagom Tires Country Track 17" 31 views
|
|

Tagom Tires Country Track 17" - Inside28 views
|
|
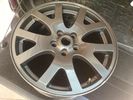
RRS 19" Antracite18 views
|
|
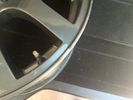
RRS 19" Antracite - Detail 318 views
|
|
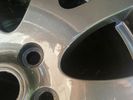
RRS 19" Antracite - Detail 215 views
|
|
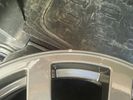
RRS 19" Antracite - Detail 114 views
|
|
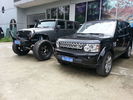
big jeep28 viewswent to collect my optima battery...this was in getting a new wing fitted
37" wheels are quite big...
|
|
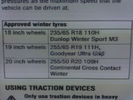
h rating tyres 19/20"21 viewsfound it at last. knew I had seen H rated in LR manual for 19/20"
|
|
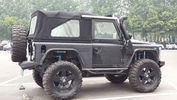
37"tyres16 views
|
|

rainbows20 viewswalked past this....side "vents"also tricolour.
|
|
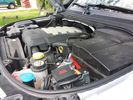
Winch Power upgrade318 viewsUsing 2 warn kits, and removing one of the wires to use on another project. The purpose was to replace the power and ground wire. I used Warn kits, which are 4/0 Welding cable. The original red #4 warped from getting a little too worn. The 2nd
Battery #1 Deka 9A94 AGM Intimidator, Battery #2 Deka 9A47 AGM Intimidator WARN 36080 28" Quick Connect Cable X 2, WARN 26405 Quick Connect Cable 7' X 2, WARN 15901 Black Cable X 1 -- winch control 72" X 1 https://www.facebook.com/DifferentialPartsUS
|
|
Rigid SR2 40" combo133 viewshttps://www.facebook.com/DifferentialPartsUS
|
|
XS 18" wheels109 views
|
|
Ruote LR023736 con Continental 265/50R2025 views
|
|

Ruote LR023736 con Continental 265/50R2034 views
|
|

Air con pipe65 viewsIts the brown pipe in the center of the photo. To remove this first you need to remove the "charge air cooler inlet hose" to allow access to the air con pipe securing fixings. But with the "charge air cooler inlet hose" disconnected it can\'t be removed from the veh because the air con pipe is in the way???
|
|
6" Ball Float Valve207 views
|
|
"Damage"104 views
|
|

Tenuous link to Disco3!68 views
|
|

20 viewsPermette di svitare i bulloni delle ruote, ma anche di altro, con rapidità e senza grosso sforzo.
Si collega alla batteria dell'auto e non necessita del motore acceso.
|
|
1 views
|
|

Entertainment System Wiring Diagrams2331 viewsThe 12 page pdf has the wiring diagrams for the low and high line "radio" and various components such as the amplifier, phone modules,NAV display, antennas and satellite radio and TV.
|
|
XS 18" wheels 2110 views
|
|
Dynamic Duo24 viewsHead to Head
|
|

Thread upload8 viewsImage uploaded in thread 159579
|
|
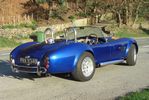
Replica AC Cobra 4276 viewsSelf design & build cobra 427 in a small house garage over a 4 year period. 515bhp & 3mpg if you push hard with the right foot. Track days were the most fun I've had with clothes on. Sadly she's gone to make way for the more sedate "E" type.
|
|

5 views
|
|

8 views
|
|

14 views
|
|

Thread upload13 viewsImage uploaded in thread 165406
|
|

200 views
|
|

Thread upload6 viewsImage uploaded in thread 147165
|
|
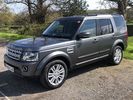
Thread upload4 viewsImage uploaded in new thread
|
|

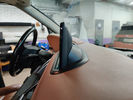
Fin cell phone aerial drawing190 viewsThe factory aerial for the factory NAV / GPS on my 2005 HSE is within the high mounted stop light lens at the top of the upper hatch door. I do not have the factory installed phone kit, and as such, do not have the fin installed; instead there is just a plastic blanking insert to fill the cell phone aerial wiring hole in the metal portion of the roof; hence this requirement for an "external" cell antenna. For those that do have the fin on their glass roof, the fin is screwed on to a glued on plastic gasket, (sort of), and not bolted thru as per the metal roof 3's.
|
|
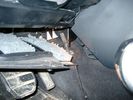
Air Conditioner Drain Hose on Drivers Side (LHD)2297 viewsThe corrugated rubber bit above and to the right of the gas pedal is the drain hose that goes down thru the carpet and floor sheet metal.
While it is bit hard to figure out from the jpg above, there is a rubber "strap" attached to the top of the corrugated hose that one uses to pull on to drag the hose up back around the black plastic heater "pan" drain. The same drain hose arrangement is on the other side as well.
One could I suppose run a plastic snap tie around the vertical pull strap if one was concerned about the hose slipping off again. See also the other jpg sketch which is from the Land Rover manual.
|
|

D4 20" Alloy84 views
|
|
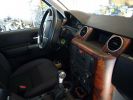
Last picture of my "old" previous Disco - wood223 viewsHope I won\'t miss the wood in the new one ;-)
|
|

Alternator female plug looking down into top373 viewsThis shows the plug connected to the alternator wiring harness looking down into the top of the plug.
The cavity marked 1 is the AS or BATT SENSE and the wire colour most likely has Brown/Green on it.
The cavity marked 2 is the RC or ALT CON and the wire colour most likely has Red/White on it.
The cavity marked 3 is the L1 or ALT MON and the wire colour likely has Green/White on it.
I say "most likely" as the wire colours are not always the same on all vehicles.
Also the terminal 1 conductor destination is more likely C0570-175 rather than per the jpg.
The #3 pin is located closest to the big B+ terminal.
|
|
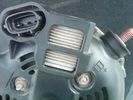
Alternator Plug and B+ terminal919 viewsPictured is the rear of the older Land Rover part # YLE500190 alternator showing the shiny cooling fin of the Regitar VRH2005-142 regulator under.
The first pin in the far left side of the connector is numbered #1 in the LR electrical wiring diagrams and is Battery Voltage Sensing (BVS); the middle pin, #2 receives a Pulse Width Modulated (PWM) signal from the Engine Control Module (ECM), and the right pin, #3 carries a PWM signal back to the ECM. Terminal Pin #2 on the LR wiring diagrams is called Alternator Control or ALT CON; Pin #3 per LR is called Alternator Monitoring or ALT MON.
Pin #1 is similar to what in older designs used to be called A or Batt, but is now called by Denso, S, AS, or Alternator Sensing for this design. Pin #1 also provides power to excite the alternator at startup until the PWM instructions over ride the battery voltage info. Land Rover calls the electronics under the pins a Smart Regulator, ironic, as it has to follow orders from the ECM rather than give the orders - new age thinking I guess. This is different from older design internal regulators that look at just the battery or the electrical buss voltage and then decides itself what to do.
It is almost like we are back to the external regulator designs of old, except that the ECM may decide that instead of telling the alternator to make more power, to load shed, and hence shut down the heated windscreen, seats, or whatever other electrical loads it decides are appropriate. My view is that the "smarts" are in the ECM and that the "regulator" should be regarded if not dumb, then as being a slave to the ECM.
|
|

176 viewsThis photo was "Autostitched" from 7 individual ones.
|
|
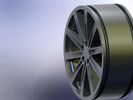
CAD render of a rim I created.71 viewsCAD render of a rim I created. Was supposed to look like the 18" style 2 rims.
|
|
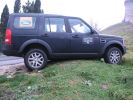
W le sospensioni ad aria! Modalità Fuoristrada92 viewsUna volta tanto per scendere ho dovuuto alzare il Disco, anzichè abbassarlo ad altezza accesso.
|
|
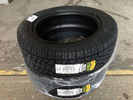
19" ATR's23 views
|
|
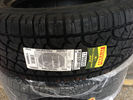
New 19" ATR18 views
|
|
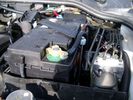
Aux Battery showing ground cable bolt "upside" down 1577 viewsIn order to obtain sufficient height clearance to get the plastic cover back on, I had to install the ground cable to the underside of the battery post connector.
Note the battery vent hose, (approx 5 ft required) is run down into where the windshield washer fluid container is located. There is not much electrical or metal in that area to be corroded by battery gas plus the open end of the vent hose tends to be protected from dirt and stays clean as well.
|
|
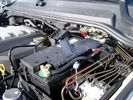
BCI Group 40R Deka 640RMF battery showing vent hose run forward to windshield washer reservoir area 1430 viewsRecessed post "Euro profile" battery to "match" OEM and stock Land Rover bracket; note that the Traxide SC80-LR module is mounted at an angle to allow for the main cable to sit under the cover so cover still closes.
The battery is a nominal 7", (180mm), high, but sits on a 1" battery spacer set under to raise the bottom front end of the battery such that the approx 11", (290 mm), length of the BCI 40R battery rises above the angled plastic nibs at the forward end bottom of the case front; hence sufficient space, (1/4", 5mm) remains at the brake reservoir end.
Also the 40R battery does not have hold down "flanges" on each end; on the sides yes, but not the ends so no additional length is required.
When I had to replace the 40R, this time I installed the shorter, (9.625"), taller, (7.5") Interstate BCI 47 / DIN H5 battery which eliminated the spacer on the bottom and better fit the stock LR tie down bolt lengths. Deka also has a BCI 47 / DIN H5 that would work fine as well.
|
|
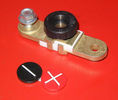
Battery Disconnect side post with + & - caps, top view617 viewsThis disconnect is designed for side post batteries. It can be used on either the + or - terminals. It can also be installed at the "other" end of the battery cable as well. In my install of the Aux battery, I installed this on the negative ground cable where the cable attaches to the body sheet metal. I have never used it but it seemed like a good idea at the time. The main battery hookup is pure stock.
For the hot side of the Aux battery, an Anderson PowerPole was used inline for the cable between the Aux and connecting to the spare bolt hole at the + post of the Main battery cable.
|
|

Bin cover removed to expose plastic moulding covering buzzer.10 viewsI guess this moulding is helping to retain the bin cover when in place rather than to "protect" the buzzer but that is also what it seems to do. In any case, unscrew the two large screws and lift moulding off exposing the buzzer.
|
|
Chrome1445 viewsCerberus 20" Chrome rims with Pirelli Scorpio Zero Asymetrico 295/40/20
|
|
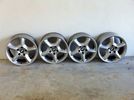
BMW X5 17" wheels52 views
|
|
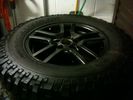
BMW X5 17" Wheel 79 viewsBMW X5 17" V-Spoke wheel with BFG MT 255/75 R17
|
|

Thread upload5 viewsImage uploaded in thread 201274
|
|

Bodykit front / Evoque 20" Wheels79 views
|
|
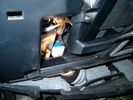
Brake Switch Visible thru Opening4975 viewsThe blue and white bit is the switch; the sort of gold appearing box,(it is really black), you will not see in your 3 as it is a Smooth Talker brand amplifier for my Blackberry phone antenna. This install is detailed in the SmoothTalker phone antenna section of my gallery.
One way to remove and install the switch is to lower the "horizontal" panel above the brake pedal as shown where the flashlight head is located. To actually remove the switch, you slide your hand thru the gap and rotate the switch clockwise 1/4 turn while watching thru the rectangular opening. Installation of the new switch is the reverse of above - 1/4 turn counterclockwise.
Before you remove the switch, note its orientation - horizontal with electrical wires to the left. That is the way it should look after replacement as well.
The second time I replaced the switch, I did it all thru the rectangular opening and did not remove the horizontal panel - that is experience helping out.
The knee kick you have to remove regardless. It is sort of hinged at the bottom so you just pull at the top and sort of rotate the knee panel and then pull upwards for two plastic "fingers" to clear the slots they reside in.
|
|
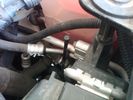
Vertical Breather Hose before cutting off OEM cap.1778 viewsThis shows the plastic vertical breather tubing and OEM cap prior to being cut off. The tubing is located on the driver side at the front near the radiator. One cuts about 3/4" to 1" off from the top. The TSB says 20mm.
I tried blowing thru the cut off piece and was not very successful. The cap seemed plugged. I am beginning to think that there was a very good reason for Land Rovers's Technical Service Bulletin, (TSB).
|
|

bulldocers 17" BMW wheels85 views
|
|

23 views
|
|

Thread upload8 viewsImage uploaded in thread 121867
|
|

Me on the K5 launching over the "Mountain" at Cadwell64 views
|
|
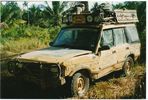
Camel Trophy 1996 Kalermantan 20 viewsAfter 3 weeks of " Camel Punishment " some looked a little better some were a lot worse, but the did all make it !
|
|
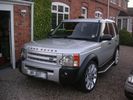
22" stormers102 views
|
|

car audio technics leaflet but they quote £600 or something, not the price on here238 views
|
|

Unico neo della serata73 viewsIl menù stampato con scritto "Escursione in Jeep"!!!
A noi!!!
:|
|
|

Central Door Locking Operation Description1458 viewsThis 17 page pdf explains how the door locks are supposed to operate. Note that on page 9/17, the explanation of the operation of the hood ajar switch is wrong. It operates similar to the door and tailgate ajar switches; that is when a "door" is closed, the switch is closed to maintain a ground back to the CJB. Opening the hood, door, or tailgate removes the ground breaking the circuit and hence allows for an alarm condition.
|
|

Mvubu in Botswana 2014119 viewsMvubu 2014 Discovery 4 TDV6 XS, Corris Grey.Snorkel, OL Bull Bar, Winch,OME Heavy Duty Coil Springs,Light Guards,17" Black Wheels,Cooper ST max,Dual Battery+Inverter,Drawer Storage,FR Rear Ladder,Hannibal Roof Rack,80L Excel Long Range Fuel Tank,HiLift Jack Points,75L Water Tank.
|
|

Thread upload6 viewsImage uploaded in thread 205652
|
|
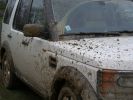
"Shiny" white car...277 views
|
|
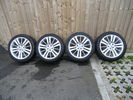
20" HSE Alloys FS10 views
|
|
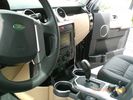
"H" panel after paint74 viewsPainted the vents and H panels and added some alu - nice change from the original look
|
|

TDV8 to Date249 views2007 (57) TDV8 HSE
Mods:
BAS mapped.. oh yeah..
Colour coordinated lower sills,Java handles, supercharger vents and grill
Hawke smoked repeaters
Halo style HD LED rings in headlights
22" supercharger style diamond cut alloys
2011 LED rear lights
|
|

Cooling system hoses - 4.4L petrol V81109 viewsThese are the cooling system hoses on the 4.4L petrol V8. The little odd shaped bleeder hose, (LR006158), shown in the top right hand corner can give problems. There is a plastic tee with a threaded air bleeder outlet located in the middle of the hose. The plastic tee can or will fail due to I guess heat distress.
A BIC pen can serve as a field fix, however for your parts kit, a nominal 3/8" ID hose size brass hose barb inline connector plus a couple of hose clamps is suggested. Better yet is a threaded hose barb brass coupling or a tee and bleeder valve to allow bleeding of the line. Land Rover now makes the plastic bleeder valve that breaks available as a separate part, # LR027661, where 0 is a zero. As such, one can now purchase that part only for addition to your field fix parts kit.
|
|
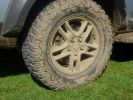
Cooper STT on 17" wheel259 views
|
|

Mengel Pass103 viewsOne of the "rocky" sections.
|
|

LOGO DISCORAGNO IN FORMATO cdr ( corel draw)75 viewsScarica e rinomina il file nome file originale.cdr, oppure elimina la parte finale ".pdf".
Visto che il prog non me lo faceva uppare ho rinominato pdf ed invece e cdr.
Ciao
|
|

"It's OK, we're still touching the bottom!"22 views
|
|
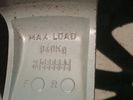
940 kg load marking on inside of spoke419 viewsThis is a typical 940 kg load marking on a Cromodora wheel rated for the 3. In this case, the wheel is the 6 spoke 19" wheel common to the HSE, LR Part # ALY72191U.
|
|
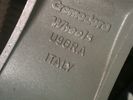
Cromodora brand marking on inside of spoke.326 viewsThis is the Cromodora brand marking on the inside of the 6 spoke 19" wheels, Land Rover part number ALY72191U. Similar brand markings are cast onto the inside surface of the spokes on all Land Rover Cromodora wheels.
|
|
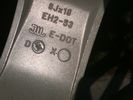
E-DOT and Japan wheel acceptance marking on ten spoke wheels.335 viewsThese are the E-DOT and Japanese wheel acceptance markings on the inside of one of the ten spokes of the 8J x 18" wheel, Land Rover part number ALY72190U or RRC500250xxx where xxx is the colour number, in this case, MNH for Sparkle Silver. There are similar markings on all Cromodora wheels for the 3.
|
|
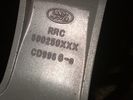
Part number moulded into spoke of 18" ten spoke. 322 viewsThis part number, RRC500250XXX is moulded into the backside of one of the spokes of the ten spoke 18" wheel. An alternate part number is ALY72190U or ALY72190U85 which relates to year and finish.
Another number is RRC500250MNH where MNH is also the finish, probably Sparkle Silver.
|
|

Bike on the trip, our "outrider".188 views
|
|

C pillar cover removed to facilitate removal of bin cover.9 viewsNote the "ribbon" behind the top left corner of the C pillar cover. This is something to do with the curtain air bags, hence do not mess with it. I dislodged the cover to make it easier to pull up and extract the black plastic bin moulding. It is not necessary to totally remove it and would be what I call a big deal - seat belt, air vent and ducting as well as that curtain concern.
|
|
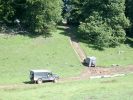
119 viewsD3matt's first go up that innocuous looking slope...
|
|
106 viewsD3matt's first go up that innocuous looking slope...(continued)
|
|
94 viewsD3matt's second go up that innocuous looking slope...
|
|

92 viewsD3matt's xxx go up that innocuous looking slope...!!!
is that Rob yawning?
|
|

my babay on 20" boots - 2975 views
|
|
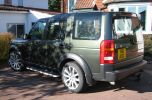
my baby on 20" boots815 views
|
|

D4 19" Alloy119 views
|
|
Thread upload1 viewsImage uploaded in thread 193544
|
|
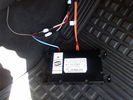
D4 Bluetooth AH42 10F845 AA module connected to 12VDC and MOST1210 viewsThis jpg shows the MOST bus connected to the AH42 10F845 AA module used in the D4 as well as +12VDC power from F58P connected. The power is split with a Y harness as the IHU (radio) for some reason required +12VDC power to the C2115-10 "mute" pin to keep the radio/CD audio from muting all the time.
With power on the pin, the radio audio does mute as it should when the cell phone rings and the hands free connects. The brown conductor feeds to C2115-10 and the blue to the module.
The module tucks up and hides behind the grey plastic section covering the forward portion of the passenger side tranny hump for left hand drive vehicles; for RHD, it would be located on the left side.
The pairing code is 2121 with this setup and not 1234 or 0000.
|
|

Disco3 17" alloys and Cooper S/T in LT245/70R17 on D431 views
|
|

Maintenance Check Sheet Arduous 3.0 TDV6 Models to 11MY Discovery 4 / LR424 viewsMaintenance Check Sheet Arduous 3.0 TDV6 Models to 11MY Discovery 4 / LR4
|
|
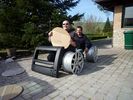
Discovery 5 preview131 viewsQui si vede Panoramix e Piadina sulla nuova D5!!!
Notare i cerchi con gomme super super ribassate (neanche le vedi dalla sottile spalla che hanno!)
|
|

next D5 muon engine159 views
|
|
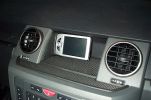
Mitac Mio 168 PDA403 viewsPDA with built in satellite reciever mounted into cradle mounted on "l" bracket to avoid drilling the side of recess.
|
|

Deka Battery Dimension Data615 viewsThe battery size that I installed for my auxiliary was a BCI 40R battery as it was for me the easiest to fit and was also a cranking battery. The case profile was such that no tie down fins were located on either bottom end, (sides yes), and length wise, it was only about 11" (290 mm) long. As such, I did not have to grind the nibs at the front bottom of the plastic surround.
I did however raise the bottom of the battery above the angled nibs as I set the battery on a 1" (25mm) high plastic spacer. The total height, (battery plus spacer), was about 8" (200mm) so the battery top still fit under the Land Rover factory cover.
For the Aux battery, when I replaced the 40R, I installed an Interstate BCI 47 which is similar in size to a DIN H5. I was therefore able to eliminate the vertical spacer as the Group 47/H5 is the same height as the DIN H7/H8 stock LR spec starting battery. As such, the standard battery tie down bolts can be used without modification. The Group 47 battery is 9 11/16" long x 6 7/8" wide x 7 1/2" (190mm) high.
|
|
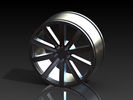
CAD render of a rim I created68 viewsCAD render of a rim I created. Was supposed to look like the 18" style 2 rims.
|
|
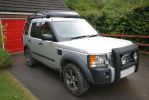
D3 - A few mods, A-bar & Lights, Expo Rack, 18" Wheels with AT2s630 views
|
|

RRS 19" Alloys41 viewsMy RRs 19" alloys
|
|
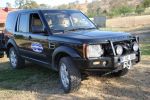
ARB bar and winch MTR 19"138 views
|
|

44 views18" Xs Wheels
|
|

il "MATTO" di Milano DOPO211 views
|
|
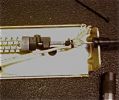
Actuator box underside 63 viewsUsed a clove hitch with plastic zip tie with 1/8" Kevlar rope
|
|
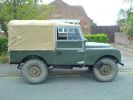
My series 1 86"112 views
|
|
Portapacchi, carenatura anteriore, buon disegno e facilità di montaggio; si utilizzano le guide ed i fori predisposti49 views
|
|
"Right turn Clyde" Nnoooooooo............. doh633 views
|
|
Tyre hill 3217 viewsC class V8 Disco made it through using the "grunt" approach
|
|

568 viewsMy father's last wish was to ride in my car one last time, and as such I believe him to be the first person to be carried to his funeral in a Disco 3.
My father's coffin was 6'5" and he was safely carried in the back of my Disco, and for once didn't complain about my driving. Air suspension helped enormously, being set to off-road height, to ease getting him in and out safely.
|
|
Bling Bling326 viewsOn the back of a lorry on the M6 services. Check out the 22" wheels!!
|
|
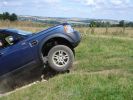
"Big air" award goes to Dom436 views
|
|
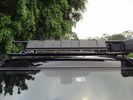
Wind Deflector for Rack15 viewsRecognise this part? Its the lower front recovery point cover. Installed upside down to silence the wind "drone" on the roof rack - works a treat!
|
|
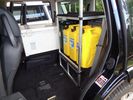
2nd Row seats out and fridge and jerries "in"21 viewsA false floor was made out of ply to support the freezer and 5 x water jerries. I used 3 x fuel jerries for photographic purposes only.
|
|
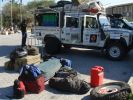
Babu - great guy from Mozambique who joined Kingsley\'s core team.158 views"How the heck am I gonna fit all that in there?!"
Packing all the kit in Ondangwa. Amazing what you can get into a Defender!
|
|

A school on the road to Chitado145 viewsThe "school" is built of sticks, and the kids sit on wooden logs!
The kids were still very proud of their school and really appreciated the stationery
|
|
Along the beach on the way to Tombua. The wreck in the background is "Consortium Alpha"160 viewsApparently this boat was wrecked on it's maiden voyage cos the prop got caught in the nets
|
|
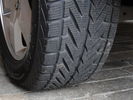
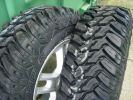
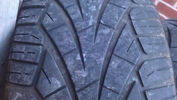
Winter tread close-uo68 views
|
|
At "Seven Gates"156 views
|
|
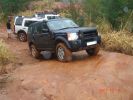
The "alternative route"161 viewsThis was the start of the rocky bit that cut out the snotty slopes. Wasn\'t the way to go unless you quit
|
|
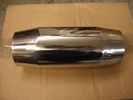
8 viewsWelded into a "replica race cat"
|
|
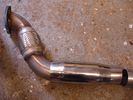
Adding a "Cat" to the decat pipe12 viewsReplica cat slipped over
|
|
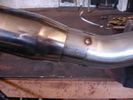
15 viewsPipe spot welded together and "Cat" slipped over to the joint
|
|
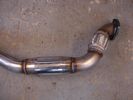
16 viewsPipe welded together encompassing the "Cat"
|
|
D3 SE 18"100 views
|
|
FFRR 19"110 views
|
|
Visconde de Mauá - Rio de Janeiro state132 viewsMy first 4x4 trip. Disco 3 said: "Very easy.."
|
|
Jimmy playing "hide the towbar"27 views
|
|
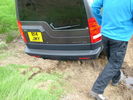
Jimmy playing "hide the towbar"25 views
|
|
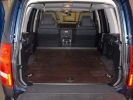
transit "eat your heartout"230 views
|
|
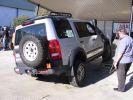
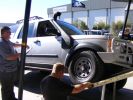
399 views"Extended profile" height - this is as far as it got!
|
|
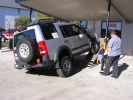
439 views"off-road" height - most wheel flex at this setting
|
|
378 views"off-road" height - measuring the RTI
|
|
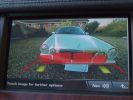
All red - 9" from bumper - continuous beep303 views
|
|
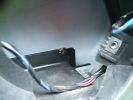
Overview423 viewsSharp edge of frame is dead centre of image.
Eroded "switched live" feed is blue wire high on the right
|
|
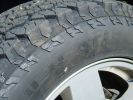
AT2 18"357 views
|
|

Monitor per retrocamera48 viewsNavigatore aftermarket con schermo da 6"
|
|
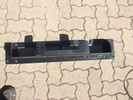
Top view of "Uncle Ray" discrete winch tray, after painting.106 viewsNote that towards the upper right there is a notch in the tray. This is needed for the specific winch's electric solenoid. The winch is a Mile Marker 12,000 lb hydraulic unit.
|
|
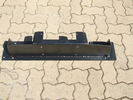
107 views"Uncle Ray" discrete winch tray, back and rear views. After painting.
|
|
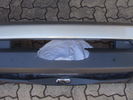
Front bumper with cutout for winch rope entry117 viewsBumper was initially cut "too small" with a low speed hand-held jig saw. It was then progressively filed to about the right size. Finally a very sharp box cutter was used to provide a smooth edge to the cut. This cutout is hidden behind the licence plate.
|
|
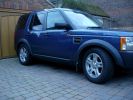
Range Rover 18" wheels131 viewsStandard RR 18" courtesy of Pilling LR.
|
|
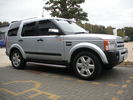
General AT 19"254 viewsLooking Good!
|
|
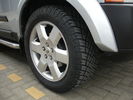
General AT 19"226 viewsget that tread!
|
|
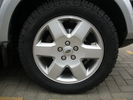
General AT 19"180 viewsside view
|
|
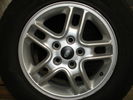
17" rim171 views1x with some kerbing, see close up photo for worst bit.
|
|
17" rim157 viewsclose up of kerbing on 1 rim
|
|
17" rims145 views3x in good condition, used so some minor paint chips, etc.
|
|

D3 loaded up for a wheel change272 viewsD3 loaded up with 17" wheels and 3-tonne jack for a wheel change when going off-road.
|
|
Cooper Discoverer STT tyre on 17" rim300 viewsNew Cooper Discoverer STT 246/70 R17 tyres. 80% off road, 20% on road.
|
|
Cooper Discoverer STT tyre on 17" rim282 viewsCooper Discoverer STT 246/70 R17
|
|
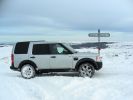
CALENDAR 2010315 viewsFebruary 2009. Glaisdale Rigg.
As it says on the sign, "2 miles from Lealholm, 7 miles from Rosedale!"
North York Moors.
|
|
CALENDAR 2010268 viewsFebruary 2009
"Going Home"
Danby Rigg,
North York Moors
|
|

CALENDAR 2010279 viewsFebruary 2009
"Deep Drifts"
Danby Rigg,
North York Moors
|
|
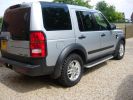
HSE with 17" alloys & Cooper STT mud tyres264 views
|
|

Playing in the "Yarwell Rain"1092 viewsCALENDAR 2008 ENTRY - Taken at the Disco3.co.uk Training/Playday at Yarwell in November 2006. Picture taken by D3Matt, D3 driven by DiscoStu
|
|

"Family"485 views
|
|

Cooper STT on 17" alloys for sale174 views
|
|
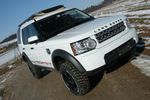
Disco 4 +5" with 17" BFG mud terrain61 views
|
|

Disco 4 +5" with 17" BFG mud terrain79 views
|
|
Disco 4 +5" with 17" BFG mud terrain71 views
|
|
17" Urban flip176 views
|
|
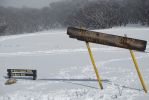
189 viewsMt Skene - 3 hours NE from Melbourne, Victoria. One of the few accessible but mostly snow-blocked alpine roads in Victoria\'s "high" country, that doesn\'t lead to a resort (and get cleared).
|
|
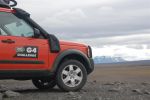
calendar entry 2009528 viewsHigh in the Iceland Interior June 2008 - F88 to Askjar Volcanoe - The mountain is called the "Queen of the Mountains - Herðubreið" Car is G4 Challenge Event Car from 2006 - Team Germany / Spain - Stage 3/4 Bolivia
|
|
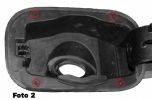
Foto 2115 viewsPer rimuovere in blocco il portello bisogna inserire un tondino del diametro di 2mm. circa nei fori indicati per abbassare le mollette che tengono la struttura alla carrozzeria Vedi foto 3.
Ogni lavoro � fatto a rischio e pericolo di chi lo fa, non mi assumo alcuna responsabilit� per eventuali danni causati a persone o cose.
|
|
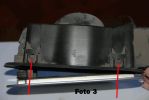
Foto 3 - Rimozione portello143 viewsInserire un tondino metallico di 2mm di diametro per abbassare le mollette che bloccano la struttura del portello.
Bisogna anche rimuovere il dispositivo della chiusura centralizzata indicata dalla freccia grigia della foto 4 premendo le 4 linguette con due pinze.
Ogni lavoro � fatto a rischio e pericolo di chi lo fa, non mi assumo alcuna responsabilit� per eventuali danni causati a persone o cose.
|
|
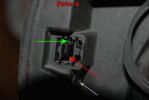
Foto 4 - Rimozione particolare rotto157 viewsUn'alternativa per rimuovere il pezzo rotto (indicato dalla freccia rossa), anzich� smontare tutto il portello si pu� intervenire inserendo un cacciavite piatto come indicato dalla freccia verde, al fine di sollevare la linguetta indicata dalla freccia verde della foto 5. Questa linguetta sblocca il perno del particolare rotto indicato dalla freccia verde della foto 1.
Ogni lavoro � fatto a rischio e pericolo di chi lo fa, non mi assumo alcuna responsabilit� per eventuali danni causati a persone o cose
|
|
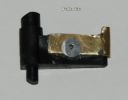
Foto 6c - particolare per riparato128 viewsParticolare con assemblata la lamella di ottone fissata con un rivetto di alluminio. Il rivetto � stato limato da entrambi i lati per permettere al dispositivo di spostarsi da destra a sinistra abbastanza per seguire il percorso all\'interno del portello. Il "dente" guida deve essre arrotondato al fine di agevolare il percorso.
|
|
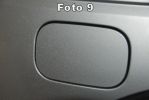
Foto 9 - Portello chiuso e riparato102 viewsIl portello � finalmente riparato. Personalmente ho impiegato circa 1,5 ore per terminare il lavoro, tenendo conto che non conoscendo il meccanismo ho smontato completamente il pezzo dall\'auto. Smontando solamente il pezzettino rotto ed avendo a disposizione l\'occorrente in non pi� di un\'ora il portello � riparato.
Ora tocca al posacenere che non si chiude pi�, il colmo � che non fumo e dal 2005 ad oggi l\'avr� aperto 5 volte!!
Saluti e buon lavoro (sempre a vostro rischio e pericolo).
|
|
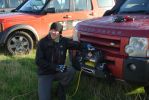
Ed saying "This is a winch"85 views
|
|
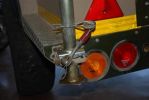
fitted stronger rear strut holders. not a great mod. the holes i drillled for the "R" clips are the best mod, as they stop the legs from sliding up under pressure. requires bracing inside to stop chassis bending103 views
|
|
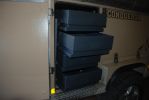
Fitted "echo" drawers in one of the front doors. an almost perfect fit, just a little sheetmetal work needed. the cho guys would probably vomit if they saw this107 views
|
|

Series 2 88"8 views
|
|

Thread upload2 viewsImage uploaded in thread 207282
|
|
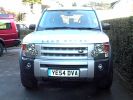
Meet "Arnie"711 viewsThe kids have named him Arnie - as in Schwarzenegger - because it looks 'mean' - a hint of the terminator there!.
|
|
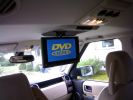
10.2" DVD player installed523 views
|
|
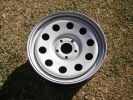
Dynamic 17" steel wheel for V6/TDV6 Disco3s79 views17"x7"; offset +30mm; weight 15.3kg.
|
|
Thread upload0 viewsImage uploaded in thread 196555
|
|
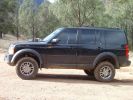
140 viewsMy car in "Extended" mode, due to bottoming a bit on an obstacle
|
|
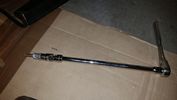
Thread upload18 viewsThis is how you reach that TOP BOLT holding your air compressor bracket on. 10" extension, swivel, and 10mm socket taped so it won't fall off while your feeding it through the air compressor maze.
|
|

Thread upload0 viewsImage uploaded in thread 165231
|
|
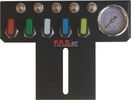
FASKIT air panel unmounted843 viewsThis is the manual air valve panel that is mounted in the "empty" space where the FBH normally resides. The gauge reads to a maximum of 25 Bar. The air tank relief valve is set just over 16.5 Bar (240 psig); the front air springs run maybe 9 Bar, (130 psig) and the rear, somewhat less, perhaps between 5 and 8 Bar. (70 to 115 psig). Max theoretical air spring pressure at full compression due to a big bump and full gross is approximately 27 Bar (390 psig).
|
|
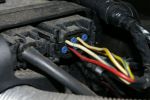
FBH connector on my 3 year old "S"150 viewsNote existing wire on 2nd row, pin 2.
|
|
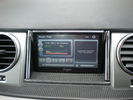
6" kogan system149 views
|
|
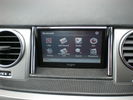
6" kogan gps/media/bluetooth system124 views
|
|
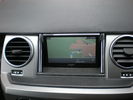
6" kogan system170 views
|
|
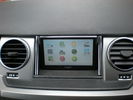
6" kogan system177 views
|
|

6" kogan gps151 views
|
|

Fluid, Filter/Pan Combo removal and install5980 viewsThese are the LR instructions re removal and install of the plastic pan/filter combo for the ZF 6HP26X transmission on the 4.4L petrol V8 LR3.
The instructions tend to ignore the reason you have to lift the right hand side of the engine about 40 mm. This is because of a frame cross member that interferes with dropping down of the plastic pan. The real problem is a vertical "oil filter spout" that rises out of the filter/pan combo up into the transmission. The spout is the suction pipe for filtered transmission oil back up into the tranny.
On the metal pan versions, the filter is separate from the pan, hence the filter remains with the tranny when the metal pan is dropped. The filter is then removed or installed independent of the metal pan, hence with the metal pan, there is no need to lift the engine.
If one is removing the plastic pan so as to install the metal pan, then some do not lift the engine but just drop the plastic pan enough to gain access to saw off the vertical plastic spout - it is a one time procedure.
Be aware however that the metal pan uses a flat gasket and the plastic pan uses a O ring like perimeter gasket that sits in a half round groove in the tranny casing. Also the metal pan uses 21 shorter torx M6x22.5 metric cap screws for the perimeter bolts. The plastic pan uses longer M6x28.5 torx metric cap screws.
|
|

Pausing for a tasting of "Lardo di Colonnata"86 views
|
|
31 viewsuna volta ho fatto fuoristrada...
|
|

Ruota di scorta78 views
|
|

Thread upload14 viewsImage uploaded in thread 151622
|
|
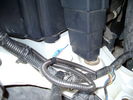
Front coupler pad to right front under air filter housing 159 viewsCoupler Pad is attached to the flat metal surface just behind the rectangular drain off of the air filter housing. The last 3 inches (75mm) of the 1/4" (5mm) black flex wiring loom was then threaded over the last bit of wiring. One of the other jpg's is less washed out and shows the coupler pad a bit better.
|
|
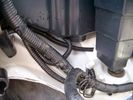
Front Coupler pad to right front under air filter housing 156 viewsThe brighter white "square" behind the black air cleaner drain is the Coupler Pad location I chose for the right front corner. The 1/4", (5mm), black wiring loom carries a single blue colour conductor between the power supply and pad.
A second coupler pad, (white conductor), is located near the left rear tail light. The mounting location is accessible from the rear compartment access "door" where the trailer hitch wiring attaches to the factory loom.
|
|
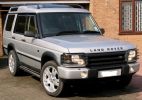
My TD5 with 19" RRS in Zambezi with Dastek/ITG/Allisport 197BHP285 views
|
|

7 Split Spoke wheels 19"35 views7 Split Spoke wheels 19"
|
|

412 viewsID of washer fuse and fuse "pincer" tool
|
|
New Generl Grabber AT2 255 60 R18"253 views
|
|
20" LR wheels for D3 and D410 views
|
|

223 viewsDesign of 18" rim to fit D4 3.0 ltr
|
|

191 viewsGMAX forged rim in 20" version
|
|
Thread upload0 viewsImage uploaded in thread 165231
|
|
The road to "Omeo".27 views
|
|

At "Dinner Plain" in the high country.29 views
|
|

Highland 4WD Club Run 2009. 18 miles on offroad tracks continuously. (special permission granted from landowners)66 views
|
|
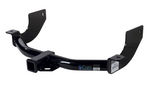
Curt Manufacturing brand hitch, assembled but not installed.290 viewsThe Curt Manufacturing hitch is an alternate to the Land Rover removable "plow" hitch. Once bolted in place, the Curt hitch is always there.
The Curt part number is 13456. It is a Class III hitch with a 2" square receiver and designed for a maximum 600 pound tongue weight.
The hitch hangs below the rear bumper but does not stick out past the bumper; also the "donut" spare tyre can still be installed / removed; am not so certain about a full sized fully inflated spare.
|
|
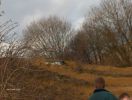
"Jerry" from Salvage Squad, watching his RR ( you can see the roof) ....251 views
|
|
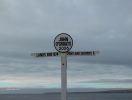
"The Icon". The man in the hut that does your sign ,, had gone home ..155 views
|
|
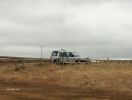
Any more "North" , and over she goes ...159 views
|
|

General AT169 views19" General AT with Pirelli Scorpion
|
|
18" Grabber AT208 views
|
|
18" Grabber AT pic2246 views
|
|
18" SCORPION SIDEWALL26 views
|
|
18" UHP29 views
|
|

18" UHP25 views
|
|

18" WRANGLER30 views
|
|

18" wrangler AW31 views
|
|
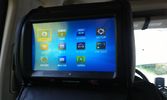
One of the multimedia headrests14 viewsI used to have seperate touchscreens mounted on the headrests.
I now went to the xtrons 9" headrests which gives the children the possibility to
- view whatever movie they want to
- listen to whatever music they want to
- play whatever 32native game they want to (although I'm not quite happy with those)
and they can do this no matter what the other one is doing :)
|
|
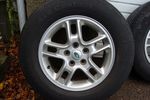
4 viewsWheel 17"
|
|

GanGuo yummy spicy food28 viewsjust enough for four people
|
|
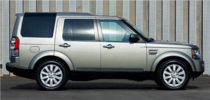
MY2012 HSE Standard 19" alloys108 viewsMY2012 HSE Standard 19" alloys
|
|

MY2012 20" alloy85 viewsMY2012 20" alloy
|
|
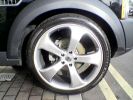
22" seen on a HSE at the dealership238 views
|
|
set of four land rover 19" 6 spoke alloys with wrangler MTR's as per G4 spec29 viewsFor sale the set of four tyres and wheels . tyres are new having only traveled 2000 miles
|
|

Unused Cooper ST on 17" Rim - 11mm tread65 views
|
|

Used Cooper ST on 17" Rim - 8mm tread70 views
|
|
Opposite Lock spare wheel carrier + Dynamic 4x4 steel 17" wheels745 views
|
|
18" tyre52 views
|
|
18" Tyre As48 views
|
|
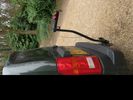
"Discovery" bar_126 views
|
|
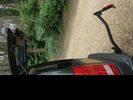
"Discovery" down_328 views
|
|
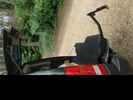
"Discovery" tailgate open_331 views
|
|

LP scoped 222 viewsBy connecting a Low Amps probe to the fuel pump's voltage supply wire, you can view the pump's current waveform on a digital storage oscilloscope (DSO). The scope pattern will reveal internal wear in the brushes and commutator that may not show up in a traditional pressure or volume test.
Observing the waveform will show if the pump's amp draw is normal for the application or is high or low, and if the pump is operating at normal speed or is running slow. Problems such as a bad spot on a commutator or a short or open in the armature also will be obvious in the waveform.
A "good" electric fuel pump waveform will generally seesaw back and forth with relative consistency and minimal variation between the highs and lows. A "bad" waveform will show large or irregular drops in the pattern, with large differences between the highs and lows.
|
|
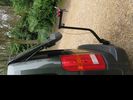
"4x4"" tailgate opens31 views
|
|
"4x4" with lower tailgate down32 views
|
|
D4 with 19" RRS HSE wheels on118 views
|
|

New 20" Supercharged alloys on General UHP 275/45/20 110 Load ratting200 views
|
|
D4 with 19" RRS HSE wheels on115 views
|
|
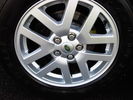
Wheels79 viewsAll 4 wheels in good order - would say "Perfect" but one of the 4 has an absolute minor scratch to it - which I had not noticed until I inspected them prior to sale. That minor not previously noted. Not bothered to take full size spare off to look at it, but as far as I am aware also in perfect condition.
|
|
Monitor 8" LCD in fase di montaggio96 views
|
|
Monitor 8" LCD installato105 views
|
|
19" Grabber AT295 views
|
|
19" Grabber AT's316 views
|
|
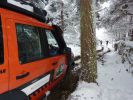
The "sucking" tree129 views
|
|
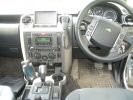
Gadgets841 viewsI Just love my "gagets"
|
|
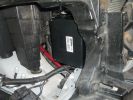
1634 viewspicture showing the location of the "Lodar" radio winch remote control box.
|
|
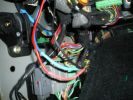
115 viewsHeat shrink tubing "fixed" in place
|
|
115 viewsHeat shrink tubing "fixed" in place
|
|
After ditch crossing awaiting driving instructors184 viewsTR mode Rock Crawl - nearside front wheel apparently got to about 1 metre free of ground when we started on the climb to this section but no photos - sorry.
|
|
Start of easy hill climb172 viewsTR mode Rock Crawl - although I did turn off Hill Descent as the other side was not too steep and she wanted to keep slowing dramatically which I didn't appreciate in convoy. (Where is my old Pajero that had the inclinometer?)
|
|
Rest stop after our first hill descent.191 viewsMode: TR Rock Crawl with HDC turned off as I found that the ABS kicked in too much. As we were in convoy I maintained a safe distance from car in front and just "feathered the brakes" as suggested by an instructor.
|
|
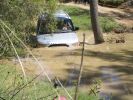
First D3 through the water crossing241 viewsThe instructor's Land Cruiser went through first to demonstrate:
- depth
- and technique
|
|
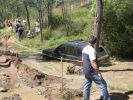
RRS has a dunk too!218 viewsChief instructor looks on...
|
|
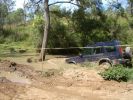
Disco has splash at the crossing204 views
|
|
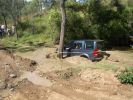
Buckingham Blue goes through262 viewsRutted track to left of shot is where my car went rather than through the water. Mine still is only a few months old - maybe in 6 months or so I will try but at least I know that because other D3s did it on the day, I can when I am game enough!!
|
|
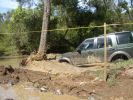
Last D3 through the deep crossing229 viewsThe water was stirred up by this time (didn't start off too clean due to heavy rains in the previous week) water was between 500 and 600mm deep depending on where the driver crossed. Away from the tree was slightly deeper but most drivers chose that line to be well clear of the tree.
|
|
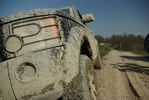
Panoramix (Italy) - D3 after "mud games" in Varano de Melegari334 views
|
|
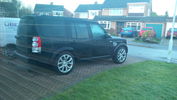
21" fit!!436 views21" RRS wheels on a Discovery 3.5
|
|
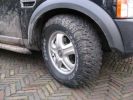
nice tyres, cooper stt 17"wheels125 views
|
|

Drilled first, then used cut off wheel on Dremel to "join the dots", then painted.152 views
|
|
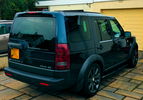
Almost there62 viewsA couple of other tweaks to add to the D Wagon and she will be as I want her. Still to match the side vent and Supercharger grill paint and considering a rear bumper valance and twin exhaust kit conversion. That should do the "Anti-Bling" nicely.
|
|
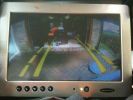
D4 Reverse camera view - shown on 10" screen39 views
|
|
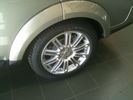
20" wheels116 views
|
|

508 viewsSetup finished, 7" touch screen, moved around the mobile and the GPS, added an antenna to the GPS for improved reception, since it (obviously) couldn't receive anything at its new position
|
|
3M "Thingies" x 2187 viewsI\'ve since stuck two together in-line but the method behind the madness is the same. The blinds now don\'t randomly BANG open.
|
|
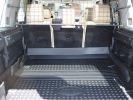
Paddock dog guard view from rear - with LR "high" mat fitted314 viewsYou can see that there was no cutting needed here - but the mat needs a good shove in!
|
|
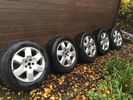
18" 6 spoke rims and tyres37 views
|
|
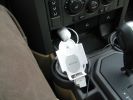
Set up in a cup holder...514 viewsRemember that my car is a LHD... There is a small suction cap to prevent the iPod from coming away to easily but it sildes "up" quite easily when you want to remove it... The Car charging adapter goes right behind in the provided outlet...
|
|
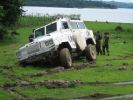
Deep mud 2338 viewsThe ground was quite muddy as all the water from uphill was going through there ont its way to the lake... So, "Of course, it was a good place to reverse !" ;-)
|
|
Potholes...327 views... And enthusiastic divers makes for a lot of "vibrations" which explains why I need a strong GPS holder...
|
|

New toys - 2" lift Lovells Gas Legend - (+100kg springs)51 views
|
|
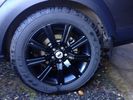
20" Stormer alloys 17 views
|
|
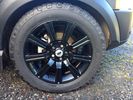
20" Stormer alloys14 views
|
|
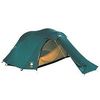
My 4 season "clamshell" tent.9 views
|
|
"Before" wheels21 views
|
|
"After" wheels21 views
|
|

Thread upload25 views8.5"x 18" RAID Mudtech black
BFGoodrich All Terrain T/A KO 265/65 R 18 122R
|
|
437 viewsFFRR 19" rims (2006 model) with Goodyear MT/Rs.
|
|
441 views2" receiver hitch plus jate ring for recovery.
|
|

A nice piece of kit...350 viewsOne piece of kit I bought for myself. A backpack big enough for one of those 17" MacBook Pro from Apple which does also possess some solar panels to recharge the batteries in my Treo, my BT GPS or iPod. Convenient for when I am NOT in the car... Here the background is an armored Toyota... No Landies around ! :-(
|
|
364 viewsDisco3 in the "elephant\'s footprints"
(photo by Kai Uwe Richter)
|
|
436 viewsDisco3 in the "elephant\'s footprints"
(photo by Kai Uwe Richter)
|
|
406 viewsDisco3 in the "elephant\'s footprints"
(photo by Kai Uwe Richter)
|
|
387 viewsDisco3 in the "elephant\'s footprints"
(photo by Kai Uwe Richter)
|
|
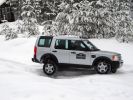
480 viewsDisco3 in the "elephant\'s footprints"
(photo by Kai Uwe Richter)
|
|
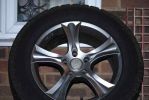
18" Eltex and AT2s 255/55/R18123 views
|
|
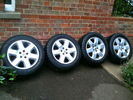
19" Wheels 423 views
|
|

19" Wheels 418 views
|
|

19" Wheels 313 views
|
|

19" Wheels 216 views
|
|

19" Wheels15 views
|
|

19" wheels tyres14 views
|
|

19" wheels tyres19 views
|
|

D4 20" 10 Spokes with LTZ's181 views
|
|
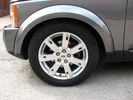
2009/10 Disco 19" alloy41 views
|
|
Only way across "The Plateau"64 views
|
|
"It's merely a flesh wound"30 views
|
|
30 viewsWheelbase 13.2" 4" ground clearance...
|
|

my new toy11 viewsdoes any one know the correct coluor of my D3
|
|
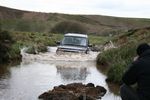
"Waterover"as described by 5 year old daughter283 viewsSmall run through Burn at Drumclog
|
|
18" RRS rims and Pirelli ATR109 views
|
|

20 viewsDigger after towing thru" snow storm
|
|
Here\'s a view of the Drive+Play "brain" which I mounted in the empty space in front of the gear selector.650 viewsI ran the power and audio cables to the rear of the center console in order to tap into the 12 volt power and "Aux" adapter. When you're sitting in the back seat, you don't see any cables whatsoever. My entire goal was to make it look as factory original as possible.
|
|
11 January 2009 - 1115 views"Open" area
|
|
11 January 2009 - 5126 viewsCrossing "open" area
|
|
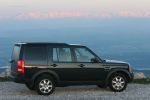
CALENDAR 2008 ENTRY - Sunset over the Alps770 viewsCALENDAR 2008 ENTRY
Drove to the top of my local mountain so "the airliner" could pose for a couple of pics with the sunset drenched Swiss Alps in the background, 80km to the south.
|
|
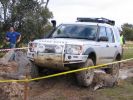
277 viewscar at "new" off-road height, to get over the log sections
|
|
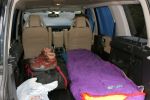
Plush interior for a "Tent"294 viewsThe inside of the tin tent, Note the blinds for the clear glass windows.
|
|
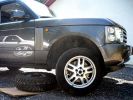
Factory 18" on Vogue, (5 plain round branches type on SE and HSE)255 views
|
|
20", not my type after all, but looks right245 views
|
|
oops not quite the 17" !248 views
|
|
Alright, now we\'re talking : 17" on FFRR321 views
|
|
Full Size (18") Spare31 views
|
|

124 viewsThe tom tom did say "in 350 yards turn left" ????
|
|
61 views
|
|
LR4 295/45/20 Proxes and Redbourne Baron 20"225 views
|
|
Subwoofer Install238 viewsGrinding & sanding down the waffle ridges gave about 1/4" more room for the new sub.
|
|
Subwoofer Install271 viewsMoved things around a bit in the "component compartment" to house the amp addition.
|
|

Interstate Battery Dimension sheet641 viewsThis sheet is hard to find - the sheet is not on the Interstate corporate web site but some dealer web sites display it. The pdf shows most of their available batteries including the H7 and H8 sizes that are the LR North America replacement batteries for the main starting battery. These batteries are of the Land Rover desired "shallow" cycle high discharge current Maintenance Free, (Ca Ca), internal construction, (not AGM, but instead, Wet Flooded Lead Acid with battery "caps" and Ca grid separators).
For the AUX battery , the H6, (BCI Group 48), is probably similar in dimensions to the Varta E12V75N that is popular in Australia. For that battery to fit in the second battery compartment, you must grind out the angled nibs on the inside front bottom of the LR black plastic surround, something I did wish to do and hence installed a Group 40R on a spacer. Alternately, one can choose an Interstate BCI Group 47 which is similar to a DIN H5 for the AUX location. I did this when I had to replace my 40R. No vertical spacer is required and the stock battery tie down bolts and clamp work well.
|
|
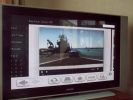
Top Gear (Rolls Royce Drophead Review) on BBC iPlayer on Wii on my 42" Flat Screen Telly124 views
|
|
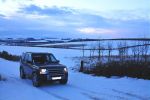
92 viewsNow got the 18" AT2\'s on - what a transformation!
|
|

Discovery 3 Maintenance Check Sheet (All Models Arduous) - miles154 viewsDiscovery 3 Maintenance Check Sheet (All Models Arduous) - miles
JLR 12 05 10_6E
|
|
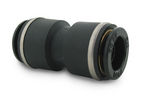
John Guest DOT all plastic fitting717 viewsThis is a picture of the John Guest DOT all plastic union. If you look closely, you can see the DOT imprinted in raised letters on the end of the fitting. This is of a 1/4" connector rather than the 6mm that the 3 requires.
The picture is similar to the air suspension pneumatic fitting union that Land Rover sells as replacement part # STC8580. This is for 6mm OD tubing size. The STC8580 comes with what are called "Collets" at each end that cover up the press to release feature underneath. See the John Guest web site www.johnguest.com under the Pneumatics section and also in Downloads for their catalog for install and remove instructions.
The actual "air brake spec" fitting that Land Rover provides has an interior 4mm OD ferrule that slips inside the 4mm ID of the nominal 6mm tubing. I have not yet been able to obtain the John Guest part number for the LR fitting, only the LR part number. This part number was generated for the RR Classic air systems.
|
|

John Guest (LR part # STC8580) push in straight 6mm tubing to tubing connector730 viewsThis picture is similar to the air suspension pneumatic fitting union that Land Rover sells as replacement part # STC8580. This is a 6mm OD tubing size push in to install straight tubing to tubing fitting. The STC8580 comes with what are called "Collets" at each end that cover up the press to release feature underneath. See the John Guest web site www.johnguest.com under the Pneumatics section and also in Downloads for their catalog for install and remove instructions.
The actual fitting that Land Rover provides has an interior 4mm OD ferrule that slips inside the 4mm ID of the nominal 6mm tubing. Hence the fitting depicted and part number are not actually correct. I have not yet been able to obtain the John Guest part number for the LR fitting.
The fittings that show in this doc are what I call food service fittings rather than transportation or Air Brake fittings. The part LR sells, (STC8580), is the Air Brake type for transportation.
|
|
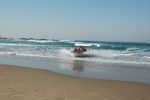
Beaching \'Free Spirit"274 views
|
|
44 views"CALENDAR 2010"
|
|
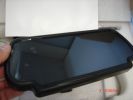
7" tft lcd display to replace rear mirror385 views one of my next projects
|
|
Pic by "X" for calendar....228 views
|
|

"CALENDAR 2010"145 viewsOn the way to the Lakes for some offroading on the ribble valley weekend
|
|

"CALENDAR 2010"135 viewsEnd of the ribble valley weekend. Borderrover,Bodsy,me(discojase)
|
|
| 643 files on 2 page(s) |
 |
1 |  |
|