| Search results - "Tim" |

Thread upload3 viewsImage uploaded in thread 201035
|
|

Thread upload21 viewsImage uploaded in thread 106767
|
|

RRSport Auto TDV6 0-100-0 times and G Forces156 viewsAir Temp 18, Dry conditions.
Best Acceleration G was .785 and decelleration G was 1.55
|
|
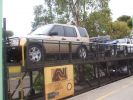
01 Start of Xmas 07 trip across the Australian Nullabor243 viewsThis is the preferred method of travelling 2500km of Nullabor desert when time is short (the Indian Pacific train). Next stop is Adelaide.
|
|
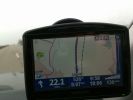
How fast?231 viewsI was driving along the Autobahn, glanced down at the speedo which was showing 140 mph, the Tomtom was telling the truth at 132 mph, but by the time I had switched the phone to camera I had dropped 2 mph, didnt try and do it again as there was no need.
|
|
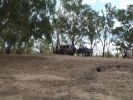
02 On banks of Darling River, Back of Bourke158 views"Back of Bourke" is the typical definition of the start of the Australian Outback. This was after crossing the Darling River "back of Bourke" on 8 Jan 08. We were the first vehicle to start driving after floods had closed (first time in 8 yrs there was any water in the river).
|
|
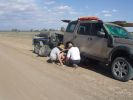
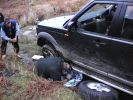
03 First bit of tyre/wheel trouble245 viewsIn the outback a tyre suddenly blew. "No worries" we thought, as we had 3 spares (+ two more if we abandoned the trailer), 150l of water, 3 days of food, and an EPIRB if things got really bad. At the time I didn\'t fully appreciate the fact that my index got a blister from the burning heat of one of the wheel nuts. It was 45 deg C at the time, so everything was hot.
|
|
Time To Change The Car16 views
|
|
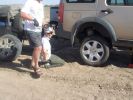
06 Spare tyre on and still suffering from hot wheel nuts296 viewsManaged to get ultra hot wheel nuts back on the spare (using the original 19" D3 wheel, vs the 19" RRS wider wheel which blew - shown in left of photo). Pity we didn\'t note that the disk brake was EXTREMELY hot at this time.
|
|

120 views
|
|

Almost a roll, but not quite...55 viewsI\'d \'launched\' myself at a 6ft hill and got to the top- but at an angle- the offside rear gripped and pulled us around to the right- perilously close to the edge... time for spare undies I think...
|
|

09 Starting to remove the seized brake assembly296 viewsBy this time we\'d poured about 8l of water on the dull-red glowing and burning wheel assembly (too close to 140l of 98 octane petrol). Sudden cooling cracked the disk brake which showed mangled park brake parts. How to remove a brake disk without the right star fitting? First remove the caliper then get a sledge hammer?!!
|
|
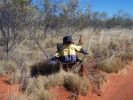
This guy has been waiting for a long time437 views
|
|
![Filename=100_2870[1].JPG
Filesize=279KB
Dimensions=1280x960
Date added=06.Nov 2014 100_2870[1].JPG](albums/userpics/22146/thumb_100_2870%5B1%5D.JPG)
Timer13 views
|
|
![Filename=100_2871[1].JPG
Filesize=240KB
Dimensions=1280x960
Date added=06.Nov 2014 100_2871[1].JPG](albums/userpics/22146/thumb_100_2871%5B1%5D.JPG)
Timer14 views
|
|
![Filename=100_2875[1].JPG
Filesize=240KB
Dimensions=1280x960
Date added=06.Nov 2014 100_2875[1].JPG](albums/userpics/22146/thumb_100_2875%5B1%5D.JPG)
Timer11 views
|
|
![Filename=100_2876[1].JPG
Filesize=257KB
Dimensions=1280x960
Date added=06.Nov 2014 100_2876[1].JPG](albums/userpics/22146/thumb_100_2876%5B1%5D.JPG)
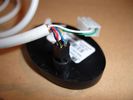
Oval timer11 views
|
|
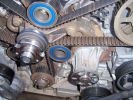
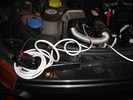
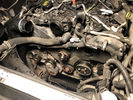
239 viewsPictures of front of engine while doing a timing belt change
|
|

Timed Climate Coolant Valve54 views
|
|

Thread upload3 viewsImage uploaded in thread 198799
|
|
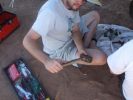
13 How to care for tools303 viewsWhat happened to the sledge hammer after 2 hours of beating my seized and cracked disk/park brake assembly to bits. Now down to 1 hammer remaining. At least by this time it was getting cooler (down to 40 deg C)
|
|

Recovery vehicle bogged for second time62 views
|
|

Virgin Snow134 viewsWent for a play in some new snow so I could practice and get my driving style right on close to zero friction surfces. Hard to tell from this photo, but car is parked on a 1:6 slope heading uphill, with hard packed ice under the fresh snow covering. I stopped here to practice my hill starts on ice...I was there for some time :)
|
|

15-20200928_Vigor166_DSL_Stats_G_fast_Showtime12 views
|
|

18 Brake "repairs" finished at sunset296 viewsWe just finished the repair at sunset and were driving slowly with 3 brakes. Oddly the D3 didn\'t behave any differently at 50 km/hr than it did normally. We had 4 instances of hitting the (3) skids for kangaroos before arriving in Wilcannia 3 hrs later. The brake light warning was making very distinctive noises and flashing randomly, though.
|
|
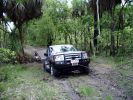
D3 in the Mary River Flood plains50 viewsFamily was down South with the In-laws, so I went for a drive on Boxing Day - which is the monsoon time, or \'The Wet\'. Was doing a test run with the off-raod trailer in preparation for the trip I was planning to the Kimberley six months later. Couldn\'t quite make it out of the creek, so a self-recovery was in order. Good thing it all worked, as I didn\'t see another car in over four hours. They were too smart to drive down the track I was on!
|
|

Optima Yellow - with split charge72 views
|
|
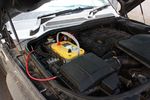
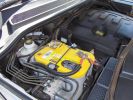
124 viewsOptima Yellow Top in battery box. This is the version with side terminals so there will be some modifications to be done to fit
|
|

Blackvue - First Red Light Victim - 161 views
|
|

Blackvue - First Red Light Victim - 270 views
|
|
time to go18 views
|
|

big jeep28 viewswent to collect my optima battery...this was in getting a new wing fitted
37" wheels are quite big...
|
|

14 viewsnight time shot
|
|
15 viewsNight time shot 3
|
|
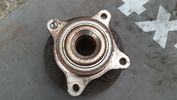
Old hub unit - Timken18 views
|
|
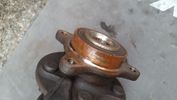
old hub unit rust - Timken24 views
|
|
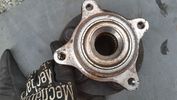
Old hub unit rear - Timken17 views
|
|
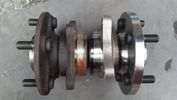
Old (Timken) vs New (Optimal)20 views
|
|
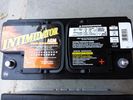
Deka 9A49 AGM Intimidator327 viewsThe Deka 9A49 AGM Intimidator makes an excellent primary battery alternative to the factory or Interstate. Made in US of premium quality. This is an excellent match with the Traxide system w/another Deka or Yellow Top optima.
This will behave properly in your D3/4 LR3 with slightly less wear and tear on your alternator.
|
|
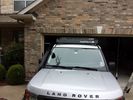
low profile solar panel211 viewsThe low profile solar panel, can be seen here, as the fine white line under the light bar. The way it's laid out, the panel should generate decent power between 10am and 4pm depending on the time of year, from the sides or front, with no shadows. Grape Solar 100W flex panel.
https://www.facebook.com/DifferentialPartsUS
|
|
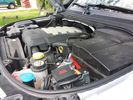
Winch Power upgrade318 viewsUsing 2 warn kits, and removing one of the wires to use on another project. The purpose was to replace the power and ground wire. I used Warn kits, which are 4/0 Welding cable. The original red #4 warped from getting a little too worn. The 2nd
Battery #1 Deka 9A94 AGM Intimidator, Battery #2 Deka 9A47 AGM Intimidator WARN 36080 28" Quick Connect Cable X 2, WARN 26405 Quick Connect Cable 7' X 2, WARN 15901 Black Cable X 1 -- winch control 72" X 1 https://www.facebook.com/DifferentialPartsUS
|
|
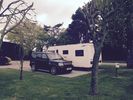
Lunar Ultima parked next to Disco 411 views2015 Lunar Ultima & Disco 4
|
|

Lunar Ultima hitched to Disco 411 viewsPulling away for another caravan adventure
|
|
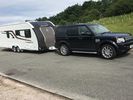
Swift 635 hitched to Disco 410 viewsSecond time out with new 2017 Swift Challenger 635 Hi-Style
|
|
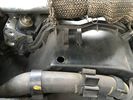
Monitoring hole.4 viewsHole for monitoring the timing belt.
|
|

On Solar245 viewsOn Solar, Snomaster Fridge, Ham Radio and 100W Grape Solar panel, Deka 9A94R Intimidator AGM. I can supply the Stainless Snowmaster Fridges. Other components if you need help.
|
|

Carwash20 viewsThis seems a long time ago - down on the east coast of Oman
|
|

Alternator and Regulator Wiring Diagrams, TDV6 and petrol V8 and V61989 viewsThis is a three page pdf that shows the alternator and regulator wiring for the petrol V6, petrol V8 and TDV6. The pdf can be either printed or by right clicking on the displayed pdf, rotated as required for viewing.
Of interest is that the regulator gets its instructions primarily from the Engine Control Module (ECM) and only secondarily from the vehicles electrical buss. The conductor from the battery thru the 5 amp fuse F20E is to provide initial power to excite the alternator at startup and then secondarily, to instruct it if the PWM signals were not available. Primary instructions to and from the ECM are thru the two other conductors via a digital like Pulse Width Modulated (PWM) signal.
If F20E, the 5 amp engine compartment fuse box fuse is blown, the red alternator light on the dash will be illuminated. This means that the alternator could be OK, but if the F20E fuse is blown, no electricity will be generated. Hence check the F20E fuse if you get a red ALT light or some indication of the alternator not working.
Regarding operation of the red ALT light on the dash, it is not the regulator within the alternator that tells the red light to illuminate, or not, but instead the ECM. This is the reason the red light does not function in the same manner as with older vehicles. With the 3, sometimes you have illumination and sometimes not depending upon what the ECM is thinking. What this means is that you can have an alternator that is failing but the red light does not illuminate as the ECM is compensating for reduced alternator output - maybe by draining the battery and or cutting back on vehicle electrical loads such as shutting off or cycling the radio amplifier or heated seats.
|
|

Quiet time86 views
|
|

Wipers, Front and Rear, plus Washers description and operation.818 viewsThis 17 page pdf describes how the wipers, front and rear, plus the washers are intended to operate. Also described is how the rain sensor is designed to function along with a table of the wiper delay timing parameters.
|
|

Optima Battery Specifications166 viewsOptima Battery Specifications
|
|

Land Rover Advert The Times 26th November 2005422 views
|
|
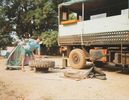
Puncture repair13 viewsI think in total we did this about 10 times, in 6 months, not a bad record, but not easy in the Bush !!
|
|
Lunchtime Lane201 viewsNot 200 yards from Manchester Airport can be found a little 1/2 mile lane - did it for the first time today - a few minutes fun in a dreary day
|
|

Thread upload13 viewsImage uploaded in thread 172749
|
|

Thread upload11 viewsImage uploaded in thread 189588
|
|

Astute254 views
|
|
stuck first time81 views
|
|
Dicky helping,second time74 views
|
|
Sometimes I love my job398 views
|
|
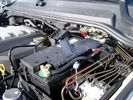
BCI Group 40R Deka 640RMF battery showing vent hose run forward to windshield washer reservoir area 1430 viewsRecessed post "Euro profile" battery to "match" OEM and stock Land Rover bracket; note that the Traxide SC80-LR module is mounted at an angle to allow for the main cable to sit under the cover so cover still closes.
The battery is a nominal 7", (180mm), high, but sits on a 1" battery spacer set under to raise the bottom front end of the battery such that the approx 11", (290 mm), length of the BCI 40R battery rises above the angled plastic nibs at the forward end bottom of the case front; hence sufficient space, (1/4", 5mm) remains at the brake reservoir end.
Also the 40R battery does not have hold down "flanges" on each end; on the sides yes, but not the ends so no additional length is required.
When I had to replace the 40R, this time I installed the shorter, (9.625"), taller, (7.5") Interstate BCI 47 / DIN H5 battery which eliminated the spacer on the bottom and better fit the stock LR tie down bolt lengths. Deka also has a BCI 47 / DIN H5 that would work fine as well.
|
|
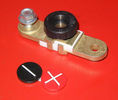
Battery Disconnect side post with + & - caps, top view617 viewsThis disconnect is designed for side post batteries. It can be used on either the + or - terminals. It can also be installed at the "other" end of the battery cable as well. In my install of the Aux battery, I installed this on the negative ground cable where the cable attaches to the body sheet metal. I have never used it but it seemed like a good idea at the time. The main battery hookup is pure stock.
For the hot side of the Aux battery, an Anderson PowerPole was used inline for the cable between the Aux and connecting to the spare bolt hole at the + post of the Main battery cable.
|
|
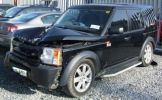
Bent Black Betty228 viewshard to believe that in this condition she\'s a write off, what got her was the cost of tricknology repairs, seatbelt pretensioners, airbags etc etc, & declining values, repair estimates €12500, value €13000. a no brainer really
Note TASTEFULL G4 sticker
|
|

Another lunchtime excursion194 views
|
|

a long long time ago72 views
|
|

billing 201418 views
|
|

Brake Light Switch, Find, Remove, and Install Instructions 7851 viewsThis is a two page doc outlining where to find the brake light switch, how to remove it, and then install the new one.
Note, do not move the brake pedal when removing or installing the switch. Let the brake pedal hang where it wants to. The switch design is actually cunning, and as such is supposed to make the removal and install fool proof. Hence if you think too much about it, you can wreck the new switch.
If you want to inspect the interior of the switch, wait until you have removed the old switch. You can then just unsnap the blue from the white to get it apart. Inside, the switch is quite simple, (no circuit boards), but it will probably show black dust from failing contacts.
I think the reason the switch fails is that the Normally Open, (NO), contacts of the brake light contacts were made too light to carry the current load for make and break of the tail light filaments. I also think the black dust created then fouls the Normally Closed, (NC), second set of contacts for the ABS circuit. As such, the Normally Closed contacts become intermittent in operation and display as a fluctuating open and closed circuit condition to the ABS system when the ABS should be seeing a steady closed circuit. Hopefully the replacement switch contacts are more robust and may be as I recently replaced my switch again just as a matter of maintenance. While in a redesign, ideally the NC contacts should be sealed or at least separated from the NO contacts, when I inspected the removed switch, this time there was no black dust present.
Probably the removed switch will have a Land Rover oval logo moulded into it, the new one, FOMOCO.
|
|
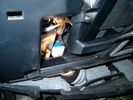
Brake Switch Visible thru Opening4973 viewsThe blue and white bit is the switch; the sort of gold appearing box,(it is really black), you will not see in your 3 as it is a Smooth Talker brand amplifier for my Blackberry phone antenna. This install is detailed in the SmoothTalker phone antenna section of my gallery.
One way to remove and install the switch is to lower the "horizontal" panel above the brake pedal as shown where the flashlight head is located. To actually remove the switch, you slide your hand thru the gap and rotate the switch clockwise 1/4 turn while watching thru the rectangular opening. Installation of the new switch is the reverse of above - 1/4 turn counterclockwise.
Before you remove the switch, note its orientation - horizontal with electrical wires to the left. That is the way it should look after replacement as well.
The second time I replaced the switch, I did it all thru the rectangular opening and did not remove the horizontal panel - that is experience helping out.
The knee kick you have to remove regardless. It is sort of hinged at the bottom so you just pull at the top and sort of rotate the knee panel and then pull upwards for two plastic "fingers" to clear the slots they reside in.
|
|
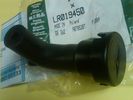
Breather Cap part # LR0194501540 viewsThis is the replacement breather cap as manufactured by the Gore Tex people, (Gore), for the engine compartment end of the front differential breather line.
You can with some difficulty, both blow and suck thru the breather filter material. The Gore Tex filter material has what are called hydrophobic and oleophobic properties. This means the filter material keeps oil in and water out, while at the same time, allowing air pressure to slowly equalize, (air permeable). Additionally, the transfer of dust, salt, and road debris is inhibited.
|
|
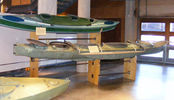
Mk10 Military Canoe31 viewsCurrently on loan to the National Maritime Museum
|
|

Can Bus14 views0s - Start of trace
5s - unlock 1
10s - ignition on (In-I-II)
30s - ignition off (II-I-Out)
Non accurate timings - +/- ~2s.
|
|

Thread upload11 viewsImage uploaded in thread 186201
|
|

Funny who you meet in the car park....227 viewsParked in a stupid place this lunchtime...
...and guess who parked next to me?
|
|

Thread upload22 viewsImage uploaded in thread 161370
|
|

Thread upload8 viewsImage uploaded in thread 187861
|
|

Thread upload4 viewsImage uploaded in thread 147133
|
|
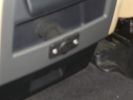
Auxiliary power sockets - TracTronics, Australia382 viewsA complete kit including two outlets, wiring etc connected to auxiliary Optima Blue top battery using their very effective SC40 split charge relay. One outlet between rear and front seats, and 2nd alongside loadspace 12v outlet, enables fridge to run when engine is not running, without affecting start capacity or vehicle functions.
|
|
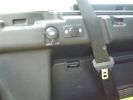
TracTronics loadspace power socket 382 viewsThe 2nd power socket fitted alongside the original in the loadspace runs off the auxiliary Optima Bluetop battery to run a fridge when engine is not running. No more starting worries!
|
|
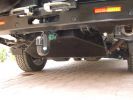
LongRanger auxiliary fuel tank357 viewsThe LR fuel tank imported from ARB in Australia with its 115 litre capacity has more than doubled the range of the car. This is important in the desert where fuel consumption increases at times to 10mpg or less. On a cruise on highways, the car now has a range approaching 850 miles. The tank fits neatly, has not affected handling in a detectable way apart from over speed humps, when a little more bounce from the rear suspension is detected! Suspension copes with the additonal loads without any problem.
|
|

Gold RRS79 viewsUltimate Bling mobile
|
|

2006 Ducati 749r - first time touching down, 3rd day track riding, didn't know enough to be scared160 views
|
|
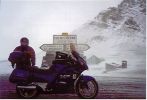
10,000ft up in the Alps!!! Honda Pan European Sept'01392 viewsThis was the first time I had ever fallen off a bike. Snow didn't help! Nothing hurt or damaged so we stopped to take a picture...
|
|

Thread upload12 viewsImage uploaded in new thread
|
|

ng on the drive after a legacy of 7 silver Discos478 viewsI\'ve had silver Discos so many times now the neighbours thought that this was a loaner
|
|

Time to set up the camp52 views
|
|

Bike on the trip, our "outrider".188 views
|
|

Taken from behind in the snow!!!321 viewsNot sure who bumped me..... but my car was being serviced at the time and this was a courtesy car!
|
|

20\'s - 2nd time around - 295/45 Grabbers this time623 views
|
|
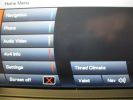
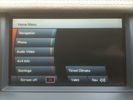
Main Navigation Menu showing 4x4 info and timed Climate173 views
|
|
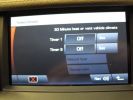
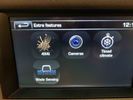
D4 Timed Climate170 views
|
|

88 views
|
|

D4 Gvif Unit Fitting28 viewsHow to fit Gvif unit to a D4 sat nav screen
|
|
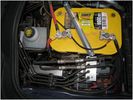
Optima Yellow top Battery in a D4266 views
|
|
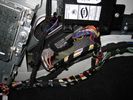
position of timed climate reciever 232 views
|
|
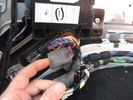
connector for timed climate reciever behind this foam 214 views
|
|
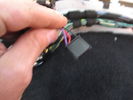
connector for timed climate reciever 186 views
|
|
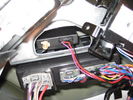
timed climate reciever fitted 228 views
|
|
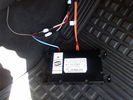
D4 Bluetooth AH42 10F845 AA module connected to 12VDC and MOST1210 viewsThis jpg shows the MOST bus connected to the AH42 10F845 AA module used in the D4 as well as +12VDC power from F58P connected. The power is split with a Y harness as the IHU (radio) for some reason required +12VDC power to the C2115-10 "mute" pin to keep the radio/CD audio from muting all the time.
With power on the pin, the radio audio does mute as it should when the cell phone rings and the hands free connects. The brown conductor feeds to C2115-10 and the blue to the module.
The module tucks up and hides behind the grey plastic section covering the forward portion of the passenger side tranny hump for left hand drive vehicles; for RHD, it would be located on the left side.
The pairing code is 2121 with this setup and not 1234 or 0000.
|
|

Thread upload16 viewsImage uploaded in thread 102957
|
|

Thread upload16 viewsImage uploaded in thread 102957
|
|
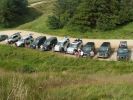
Derbyshire Bridge Line Up175 viewsTime for a brew at the end of an excellent day
|
|

Description and Operation - daytime running lights127 views
|
|
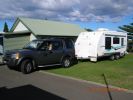
Another photo of the D3 & caravan outfit ... this time using the Mitchell Bros towbar and Hayman Reece WDH (May2008)126 views
|
|

Disco time...28 views
|
|

Discovery III Multimedia Installation v1.1164 views
|
|

Discovery III Multimedia Installation v1.2195 views
|
|

Donald outside of our holiday cottage, on the Isle of Wight168 viewsWe made the most of the early summer (March) and had a great time on the IoW!
|
|
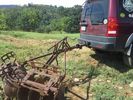
LR3 to plow your garden297 viewsI found this jpg where a current LR owner is using his LR3 for a similar purpose as the original Series units were designed to do - that is serve as a tractor for plowing a field or I suppose a garden.
In this case, I note the hitch is one of those that attach to the factory tow loop, (Rhino Hitch), rather than the factory product that inserts from the bottom and hangs down - (like a plow), but all the time. One of the other jpg's in this album shows the two factory variations plus a third jpg shows a closeup of the Rhino Hitch.
|
|
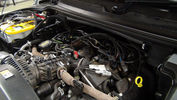
Dual Battery and ECU Chip175 viewsDual Barrery System by Traxide and Optima Yellow Top battey, Plus ECU Chip being fitted
|
|
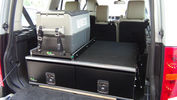
Ironman Drawers and Fridge Slide112 viewsI hate kitsets, over 100 bolts to assemble this unit and lost gallons of sweat, must have read the instructions a hundred times or more but final product does not look so bad. A few bolts hanging out the sides of both slide and drawers that may catch things so time will tell if I made the correct purchase.
Maybe one day I will make some side wings to cover the sides properly.
|
|

Lead Car Entering the Finish116 views7 May 2007 - My D3 on duty as lead car in shinfield 10K road race. what a nightmare driving at low speed in the rain. Clock was mounted on standard crossbars. connection to additional batteries in boot cable thru side window. There is a small offroad section (actually an un-made road) Oaklands Road, Shinfield, Reading (suggest anyone test driving in the Reading area take this road)
|
|
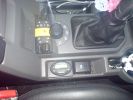
Webasco Timer133 views
|
|

568 viewsMy father's last wish was to ride in my car one last time, and as such I believe him to be the first person to be carried to his funeral in a Disco 3.
My father's coffin was 6'5" and he was safely carried in the back of my Disco, and for once didn't complain about my driving. Air suspension helped enormously, being set to off-road height, to ease getting him in and out safely.
|
|

Mollie on the beach for the first time.79 views
|
|

Lunchtime !291 views
|
|

Tim, DSL & Zaphod at Lochearnhead152 viewsOn the old railway line
|
|
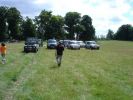
After lunch, time for more355 views
|
|
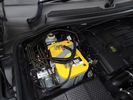
Optima Yellow Top16 viewsAGM auxiliary battery in second battery compartment
|
|

Disco 3 not available, so had to tolerate this awful £60k RRS instead :-o237 viewsOnly the half-day introduction course, but Geordie was an excellent tutor and we had an amazing time.
|
|
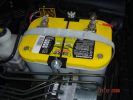
OptimaYellow Top Deep Cycle and Battery Tray194 views
|
|
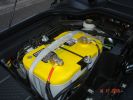
OptimaYellow Top Deep Cycle and Battery Tray171 views
|
|

Springtime with the D4!178 views
|
|
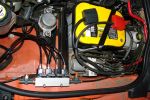
Optima + suspension controler535 views
|
|
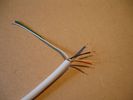
Lenght trimmed and timer ends stripped49 views
|
|
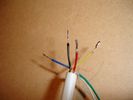
Timer wires tinned - yellow was re-done!48 views
|
|
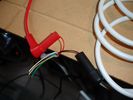
Quick rigging using multimeter wires to check power to the timer...57 views
|
|
Used the wire connector that came with the timer - no probs!69 views
|
|
Notice the flame - IT WORKED!!! first time too, lovely!98 views
|
|

The Missus attempting to get to Port Charlotte before closing time - Warp Factor 3, Mr Sulu !152 views
|
|
Ah, no kids this time???69 views
|
|
211 viewsMike racing into pit 3 - as we were now both making it all the way through, the winner would be judged on time.
|
|

Lunchtime66 views
|
|

Disco in winter time93 views
|
|

Disco in winter time99 views
|
|
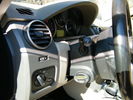
webasto timer66 viewswebasto timer
|
|
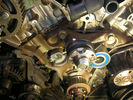
126 viewsEngine Timing
|
|
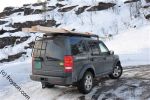
Tonka at work228 viewsTrip over to the mountain pass to the cabin with a load of timber,
|
|

calendar entry 2009541 viewsCrossing a river in Iceland June 2008 - some of the rivers have deep sticky black basalt sand on their edges and some times needs a running approach! Car is G4 Challenge Event Car from 2006 - Team Germany / Spain - Stage 3/4 Bolivia
|
|

calendar entry 2009525 viewsCrossing a river in Iceland June 2008 - some of the rivers have deep sticky black basalt sand on their edges and some times needs a running approach! Car is G4 Challenge Event Car from 2006 - Team Germany / Spain - Stage 3/4 Bolivia
|
|

calendar entry 2009522 viewsCrossing a river in Iceland June 2008 - some of the rivers have deep sticky black basalt sand on their edges and some times needs a running approach! Car is G4 Challenge Event Car from 2006 - Team Germany / Spain - Stage 3/4 Bolivia
|
|
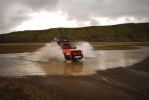
calendar entry 2009539 viewsCrossing a river in Iceland June 2008 - some of the rivers have deep sticky black basalt sand on their edges and some times needs a running approach! Car is G4 Challenge Event Car from 2006 - Team Germany / Spain - Stage 3/4 Bolivia
|
|

Extended Mode (For the 3rd time!)94 views
|
|
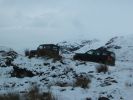
Tim towing DSL111 views
|
|
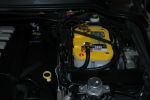
Dual Battery632 viewsOptima Battery and Surepower 1314
|
|
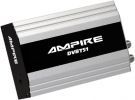
Multimedia in my D387 viewsSome pictures on how 12h of work made a difference to my D3
|
|
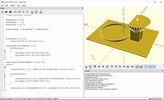
OpenSCAD Egg Timer Timelapse Reduction Rig27 views
|
|
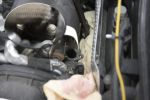
EGR Valve/Pipe Flange895 viewsThe bolts in the inset are the ones to be removed. Note the rag stuffed down beside the EGR to prevent dropped bolts or gaskets disappearing for ever. Don\'t forget to take the rag out if you don\'t want your D3 to go up in flames next time you use it!
|
|

9 views
|
|

When man meets elephant!141 views
|
|
208 views
|
|

CALENDAR 2008709 viewsin the middle of nowhere (just before Perito Moreno, this time the city)
|
|

CALENDAR 2008 ENTRY641 viewsGoing where? En route the Perito Moreno (this time the city)
|
|
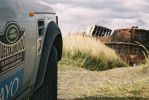
CALENDAR 2008 ENTRY633 viewsAnother ship wreck, this time in Chile
|
|
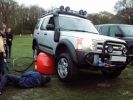
Slimer demonstrating his prowess with his airbag!266 viewsneo was inspecting the underside at the time - not sure why?
Allegedly a 4 ton airbag was needed since the boot was full (and I can confirm this) of crates of Desperado
|
|

Time For a Brew160 views
|
|
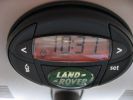
FBH Timer with LR Oval352 views
|
|

FBH Timer212 views
|
|

Fluid, Filter/Pan Combo removal and install5979 viewsThese are the LR instructions re removal and install of the plastic pan/filter combo for the ZF 6HP26X transmission on the 4.4L petrol V8 LR3.
The instructions tend to ignore the reason you have to lift the right hand side of the engine about 40 mm. This is because of a frame cross member that interferes with dropping down of the plastic pan. The real problem is a vertical "oil filter spout" that rises out of the filter/pan combo up into the transmission. The spout is the suction pipe for filtered transmission oil back up into the tranny.
On the metal pan versions, the filter is separate from the pan, hence the filter remains with the tranny when the metal pan is dropped. The filter is then removed or installed independent of the metal pan, hence with the metal pan, there is no need to lift the engine.
If one is removing the plastic pan so as to install the metal pan, then some do not lift the engine but just drop the plastic pan enough to gain access to saw off the vertical plastic spout - it is a one time procedure.
Be aware however that the metal pan uses a flat gasket and the plastic pan uses a O ring like perimeter gasket that sits in a half round groove in the tranny casing. Also the metal pan uses 21 shorter torx M6x22.5 metric cap screws for the perimeter bolts. The plastic pan uses longer M6x28.5 torx metric cap screws.
|
|

Thread upload1 viewsImage uploaded in thread 198799
|
|

Thread upload2 viewsImage uploaded in thread 198799
|
|

Thread upload1 viewsImage uploaded in thread 198799
|
|

Thread upload0 viewsImage uploaded in thread 198799
|
|

Ford Sounder 4L1Z-15K864 A that I installed.12 viewsThis is the Ford sounder, part number 4L1Z-15K864 that I purchased and installed in lieu of the official Land Rover sounder. Note the part number is what is printed on the box (and also my invoice) but the part number on the sounder body is a bit different. I think a new box/invoice related part number is created each time the price of a part is changed. Regardless the Ford sounder was about half the cost of the Land Rover part and sounds the same as the removed factory buzzer.
|
|

Thread upload20 viewsImage uploaded in thread 275
|
|

Thread upload13 viewsImage uploaded in thread 136379
|
|
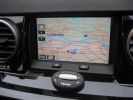
Webasto timer167 views
|
|
Thread upload14 viewsImage uploaded in thread 133797
|
|
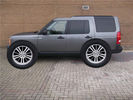
D3 with rrs wheels28 views
|
|

20" LR wheels for D3 and D410 views
|
|

38 views
|
|
Thread upload4 viewsImage uploaded in thread 139473
|
|
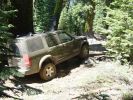
Heading up to Snake Lake150 viewsDidn't know we were actually going up to the lake. We were planning doing a loop without taking the spur to the lake. Turned around early due to time concerns. Difficulty (as rated by trail book): 8/10.
|
|

41 views
|
|

GX107 and Webasto 1533 timer mounted in engine bay7 views
|
|

69 views
|
|

Traxide SC80-12, D4 tray and Optima D34 installed43 views
|
|
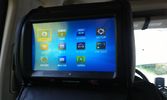
One of the multimedia headrests14 viewsI used to have seperate touchscreens mounted on the headrests.
I now went to the xtrons 9" headrests which gives the children the possibility to
- view whatever movie they want to
- listen to whatever music they want to
- play whatever 32native game they want to (although I'm not quite happy with those)
and they can do this no matter what the other one is doing :)
|
|
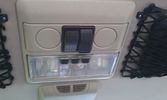
The on/off switches of the multimedia headrests17 viewsThese switches were installed to power on/off the previously installed gamecube and the screens attached to it.
When I removed the gamecube and lately the screens as well, I was clever enough (surprised as well) to leave the switches and all the wiring that I had running around.
They came in handy when I installed the multimedia headrests and are now adding an extra power on/off control of the screens.
|
|
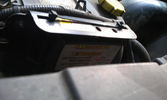
Solenoid not yet engaged18 viewsWith the engine running, the counter in the solenoid starts running and the green light blinks until the timer hits 5 minutes.
|
|

Cyc.202 viewsOne of My dogs. Cyclops. Yes he has two eyes. He is called Cyclops because He used to walk backwards, sometimes, when he was a pup & He is a monster.
|
|
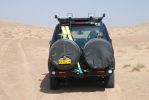
View the Nissans saw106 viewsRecovery strap pre-shackled to the rear recovery eye and secured with a bungey strap to the rear door ladder saves a lot of time when running against the clock - and having to recover a bogged in Nissan!
|
|

race to 096 viewsworring times
|
|
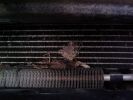
first victim615 views
|
|
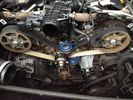
Timimg belt new26 views
|
|

16 viewsGot the necessary, now it's time to build it.....
|
|

Harvest Time33 views
|
|
Rivestimento mobile53 views
|
|
Rivestimento cassetto52 views
|
|
Oval Timer Installation45 views
|
|
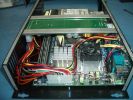
1313 viewsA view of the PC opened, the board at the top is the power supply with the start stop timing built in.
|
|

Switch is blue colour thing thru the rectangular opening.3177 viewsThe blue coloured plastic bit thru the rectangular opening is the brake light switch. The fist time, I found it easier remove the switch by dropping the horizontal plastic panel, (two screws), and then slipping my hand in and rotating the switch clockwise 1/4 turn. The second time, I was able to remove the switch thru the rectangular opening and did not need to remove the horizontal lower panel. Obviously, I had to remove the sloping knee pad panel, (note sort of hinged at the bottom so pull back from the top.)
Regardless, do not touch the brake pedal - just let it sit where it wants to. One has to first remove the angled knee pad panel that sits under the steering wheel. It can be pulled from the top corner at the door side. Pulling releases a pair of those U shaped metal clips that LR loves so dearly. You have to pull quite hard. The bottom is held by a couple of plastic fingers in a couple of slots so you pull at the top till the two clips release and then rotate the panel and pull upwards a bit.
To remove the switch, you rotate it clockwise and pull outwards. Rotating the switch clockwise automatically retracts the plunger back into the switch body away from the brake pedal arm.
Similarly when you install the new switch, the required 1/4 turn anti clockwise rotation action releases the plunger so it lays up against the brake pedal arm and at the same time, secures the switch in place.
To remove the electrical wires, the switch will drop below the horizontal pad and hang from the wires so unclipping the electrical connector plug is fairly easy to do.
|
|

CALENDAR 2010364 viewsCALANDER 2010. TAKEN AT BERKSHIRE 4X4 SHOW DOING TIME TRIALS 3RD PLACE
|
|
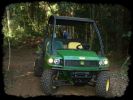
John Deere136 viewsFarm runabout (don't need a Disco all the time).
|
|
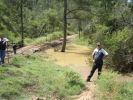
Chief instructor (left) and another instructor explaining water crossings204 viewsWhilst no one tested the waters this time (they did last week with another group) you can just see the stick floating in the water (near second instructor's right elbow). Satisfied that the rains hadn't changed the depth dramatically, they let us through - those that elected to take the water crossing of course.
|
|
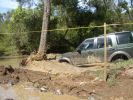
Last D3 through the deep crossing229 viewsThe water was stirred up by this time (didn't start off too clean due to heavy rains in the previous week) water was between 500 and 600mm deep depending on where the driver crossed. Away from the tree was slightly deeper but most drivers chose that line to be well clear of the tree.
|
|
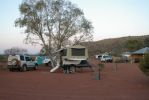
My Ive Station Sept 2007134 viewsUltimate Camper. Rear window of Disco protected with cardboard
|
|
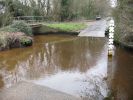
Lovelands Lane, Chobham, Not in flood this time!212 views
|
|

Holiday time!!45 views
|
|
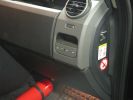
463 viewsFirst step in the journey, installed USB ports.
At the time I installed these, the goal was to use them in combination with the car-computer that resided in the back.
In the meanwhile, I dismantled the car-computer and nearly everything that was connected to it (touchscreen front, Wifi, DVB-T ...).
I kept the USB outlets in the front and turned them into charger for the appliances missus brings with her when we're on holiday. Mainly her iPod and smartphone ...
|
|

Oh... Nature320 viewsSome times one needs to stop and take a look!
|
|

Angus coastline22 viewsTrying out Disco for the first time offroad
|
|

Night time306 viewsThe pics says everything....
|
|

Yes, thats right, it started first time!30 views
|
|
Santa Claws event 2008 - prayer time116 views
|
|
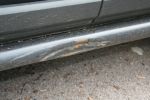
374 viewsEven more dented than other side. Will paint clean up & paint it some time.
|
|

Hidden Parking in France46 viewsThe Ultimate Undercover Disco
|
|

Discovery 4 DRL Land Rover Fitted112 viewsThese are the official Land Rover Fitted Daytime Running Lights. They are very good with a sharp clear light. They are on all the time but as soon as the normal lights come on they switch off. These were fitted to my car by Land Rover when I picked it up.
|
|

Discovery 4 DRL 117 viewsThe photo shows the Land Rover Discovery 4 fitted with the Land Rover Daytime Running Lights. These were fitted by Land Rover when I got the car. The are on when the lights are not. As soon as the main lights come on the DRL's switch off.
|
|
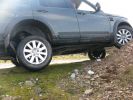
first time a wheel\'s been off the ground for this D3 i reckon252 views
|
|

sump guard bolts loose 2nd time41 viewsmore bolts left loose by the garage
|
|

Movember, punishment for not starting on time. Bye Bye beard.47 views
|
|

Jason getting x-axled for first time108 views
|
|

Hunt the skis188 viewsSpent about twenty minutes hunting for my skis here, after hitting a rock. Eventually found I'd been digging on the wrong track all the time!
|
|
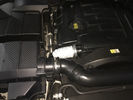
5 viewsBlown turbo hose causing the engine to cut out every time you try and over take or climb a hill. Have a new Samco kit to go on at some point.
My super bodge works a treat.
|
|
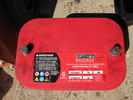
optima redtop61 views
|
|

New HSE LUX63 viewsMy new Discovery 4 HSE Luxury in the showroom at Hunters of Chester, this was taken earlier today before she went to the workshop to have the side steps fitted, collection is lunch time Friday...can't wait now.
|
|

Jan 6th 2010 - Time to get the scraper out39 views
|
|
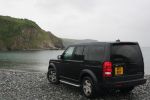
DISCO 3 Porthallow Beach Cornwall 13 Aug 07 - CALENDAR 2008 ENTRY744 viewsCALENDAR 2008 ENTRY. Picture of my Disco 3 on the beach at Porthallow in Cornwall.
Picture taken in the height of the british summer on the 13th August 07 at approx 2:30 in the afternoon! (notice the hint of sarcasm there as even at that time of the day I had my lights on!).
Getting the car from where we were staying on to that beach was quite an entertaining drive, with the roads (more like lanes) only being just wide enough to fit the car through.
Hope you like it!
|
|

At this point I was having a hard time getting up the hill, but was slowly managing.315 views
|
|

Daytime view of the Drive+Play unit.466 views
|
|
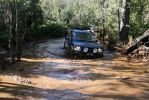
White Timber Trail 0970 views
|
|
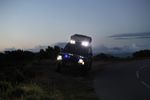
night time55 views
|
|

183 viewsShackle shoes anyone? Passing the time while men fix truck hehe.
|
|
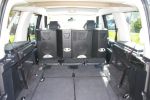
Ultimate ICE? 4 Martin F12s, each requires about 600w to drive properly.....265 views
|
|

Installing a Fuel Burning HeaterTimer Remote v1-0368 views
|
|

Installing a Fuel Burning HeaterTimer Remote v1-1.pdf421 views
|
|
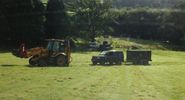
Work Stuff67 viewsEven Land Rovers need a hand sometimes
|
|
bed time!70 views
|
|

Knockhill Scotland278 viewsFavourite past time, hunting down cars on track. As seen from inside a 350z.
Although the D3 is a change of pace, ever so slightly!!
|
|
First time offroad.185 views
|
|

Time for breakfast295 views
|
|
Lake Coongey. The project vechle and Micheals mighty D3149 viewsStoped for lunch and to do some boating with the inflateable boat, kids paddled to the other side and after trying to call them back D2 was dispatched to the other side to bring them bach but by thr time D2 got to the other side they had paddled back, we thought if was funney but the D2 driver definitly did not, ha ha ha!
|
|

instructions for Webasto timer install203 views
|
|

Thread upload30 viewsImage uploaded in new thread
|
|

Thread upload8 viewsImage uploaded in new thread
|
|

Thermostat Housing LR005631538 viewsWhen the time comes to install a new thermostat, consider installing the whole housing instead.
Advantages are the thermostat is correctly installed, (not as simple as it should be); you get all new plastic and that is important, plus a new coolant temperature sensor and also a new heater coolant bypass valve, the secret part no one realizes is also within.
The cost of the whole assembly is not much more than the cost of a factory thermostat and the effort to replace all is not as difficult as it might seem.
|
|

led night time198 views
|
|

OSRAM DLR/FOGLIGHT Installation Manual30 views
|
|

Thread upload3 viewsImage uploaded in thread 207855
|
|

Thread upload7 viewsImage uploaded in thread 159579
|
|
Thread upload7 viewsImage uploaded in new thread
|
|
Thread upload6 viewsImage uploaded in new thread
|
|
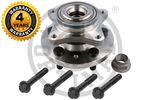
![Filename=lr014147-oem-timken-front-hub-bearing-lr048083-rfm500010-1081364-p[ekm]270x270[ekm].jpg
Filesize=7KB
Dimensions=270x270
Date added=18.Aug 2017 lr014147-oem-timken-front-hub-bearing-lr048083-rfm500010-1081364-p[ekm]270x270[ekm].jpg](albums/userpics/33392/thumb_lr014147-oem-timken-front-hub-bearing-lr048083-rfm500010-1081364-p%5Bekm%5D270x270%5Bekm%5D.jpg)
Thread upload9 viewsImage uploaded in new thread
|
|
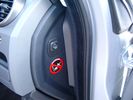
Air Suspension ECU Fuse 35P cut off switch.3820 viewsThis shows the SPST rocker switch mounted in the blank plate installed in lieu of a manual passenger side air bag shut down switch - now automatic via passenger seat pressure switch. Fuse 35P (5 amps) is located in the interior fuse box behind the lower glove box and protects the ignition power supply to the Air Suspension ECU. When the SPST switch is moved to the OFF position, the RAISE /LOWER switch on the centre console is not powered, and hence does not function. As such, some signals from the wheel height sensors and CPU are ignored. By itself however, removing F35P will probably not stop the 3 from self dropping, particularly after the engine is turned off.
Fuse F3E, (5 amps), located in the engine bay fuse box by the starting battery protects the circuit that provides feedback to the Air System ECU indicating that the Compressor Relay has successfully operated and that the Air Compressor is or should be operational, can also be removed, (but is probably not totally necessary), as it gets its power thru F26E. Hence Fuse F26E, (20 amp), also located in the engine compartment fuse box is the fuse that must be removed. This fuse protects the circuit that provides full time battery power to the Air System ECU. When in place, current thru the fuse powers the periodic re-levelling action, (usually lowering a bit with that brief air release noise), that often occurs when the vehicle is parked and the engine is off.
Removing F26E fuse will stop the auto levelling action and also inhibit any other down to the stops signals, (engine running or not). When F26E is removed, no power can flow thru to F3E, hence removing F3E is more for insurance than an absolute requirement. The same with F35P, removing F26E removes primary full time power from the Air Suspension ECU, and hence removing the F35P fuse should not really be required either as long as F26E has been removed.
|
|
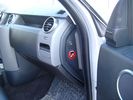
Air Suspension ECU Fuse 35P Shut Off Switch2635 viewsA more distant view of the shut off rocker switch in the ON position which is the normal position for when all is working as Land Rover intended.
Ideally, (but not totally necessary), the F35P circuit should be powered or de-energized after the various computers have gone to "sleep".
Similarly, removal of the F26E or F3E fuses is preferable after the computers have all gone to sleep but it appears that no real damage will be done if the fuses are removed while the system is energized. Pulling F26E is the main full time fuse that powers the air suspension computer. As such, once F26E is removed, pulling F3E is not really required.
Power for the compressor goes thru the 60 amp fusible link and relay, however control of the relay is via the air suspension computer so depowering the air suspension computer effectively depowers the air compressor and the internal exhaust valve relay/port.
|
|

Battery Maintainer pigtail sticking out of Grill726 viewsThis is all you see when everything is put back together - just the pigtail and Weather Pack blanking plug. Most often, I have it all tucked back behind the grill.
In winter, there may be a second cord hanging out as well - the 120 VAC power cord for the engine block heater, a tea kettle like element inserted in the engine block. NAS petrol V8's do not have the Fuel Burning Heater, (FBH), installed, but instead in cold area markets have the block heater element assembly available as a dealer installed option. There is an argument to say that the heating element is factory installed in all cold climate V8 gasoline engines, however the appropriate power cord is not. If true, this means that all one needs to purchase is the area specific power cord and plugging in / attachment to the engine block located block heater.
As such, you will often see a conventional 120VAC three prong power plug hanging loose out of the grill of most vehicles here in the wintertime. In summer, most drivers tuck the plug back behind the grill as it is no beauty mark.
|
|
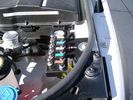
View from front left side looking towards rear aux battery compartment under cover 646 viewsAs there is no Fuel Burning Heater in the NAS V8 petrol vehicles, there is space available to install the FASKIT panel here. The piping is such that each air spring can be isolated from the air system and then filled one at a time manually via the Schrader valve. There are five Schrader valves and five shutoff valves. The fifth valve nearest the gauge controls air from the compressor, and can provide fill up air via a jumper fill line assuming the compressor is still operational.
|
|

Underhood Fuse and Relay Box drawing 3054 viewsShows the various fuse and relay locations. Fuse 3E, (5 amp), and Fuse 26E, (20 amp), as well as upgraded 70 amp Relay 7, part number YWB500220, locations are displayed. Relay 7 sends battery power to the compressor from the 60 amp fusible link called up as 10E. Fuse 26E is what provides full time always on battery power to the air suspension ECU and hence powers the auto level wakeup when the vehicle is shut down and say parked for the night. Removing F26E is the primary method to disable the air suspension system; Removing F35P is more if you want to experiment with it from inside.
I found it useful when I had a suspension problem, (actually a wheel alignment problem picked up by the steering wheel angle sensor), that only showed itself on the highway but allowed for no trouble light driving in the city. This was because in the city, the steering wheel was always in motion and rarely was the vehicle driven in a near straight line for very much distance.
|
|
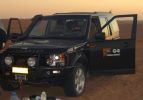
Brits and their tea!106 viewsWhenever there's a problem to solve - put the kettle on. After running out of fuel, 18km from the nearest balcktop and fuel station, 3 of the team's cars waited for the return of the other two with fuel. What does one do at times like these? Have a nice tidy up inside, dust off the sand and put the kettle on for a cuppa tea.
|
|
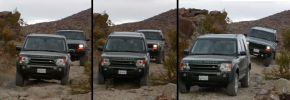
Smooth off road ride!399 viewsThis was the first time I took my LR3 off-road. I traded my Jeep Wrangler for this vehicle so I was used to heading into the rugged mountains. I was very amazed (as were my friends in their Jeeps) just how level the LR3 remained as I navigated over various dips and mounds. You can see the Cherokee behind me couldn't say the same.
|
|

LR3 TDV6 RRS TDV8 Engine Pre-heating Operating Instructions - Appendix343 viewsThis is the instructions you get with the LR original Webasto timer kit
|
|

Excel file for Rotors and Brake Pads part numbers for 4.4L V8 petrol LR3768 viewsComparing the cost of the various brands of brake parts is time consuming. Once you have your parts costs, this little spreadsheet will make collating the info easier.
I did not make any provision for labour costs, but the file can be downloaded and then modified. You can change Dollars to Euros or Pounds or whatever and insert lines for labour costs as desired.
Do not pay too much attention to the $ numbers as they are a mix of US and CDN, and from differing time frames, (prior to Spring 2011) . Also the brake part numbers are for my 2005 North America spec LR3 with the petrol 4.4L V8; diesel powered and supercharged 3's may have different part numbers
|
|

Thread upload14 viewsImage uploaded in thread 149931
|
|

LTB00091 - Technical Bulletin - Air Suspension Calibration Procedure and Labor Time Changes120 views
|
|

ultimate off roading54 views
|
|

Lunch Time152 views
|
|

Thread upload11 viewsImage uploaded in thread 132025
|
|
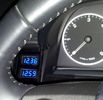
Battery meters25 viewsBattery meters - top for Main and bottom for Optima Yellow-top
|
|

showtime12 views
|
|
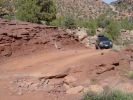
Rose Garden Hill111 viewsOn the way back from checking out Rose Garden Hill. We did not do the actual hill (maybe next time).
|
|
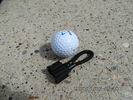
MOST fiber optic loop tool468 viewsThe looping tool in the jpg uses the Land Rover type plastic fiber optic cable with both ends feeding back into a female fiber optic connector that mates with the male fiber optic connectors on the Land Rover system.
The purpose of the loop is to allow one to disconnect MOST connected items such the BlueTooth module or the HK amplifier but allow the MOST system to still transmit signal from the head unit as the circuit would remain closed and hence complete. Of course with the Bluetooth module disconnected, there would be no Bluetooth available, however the radio and NAV would still function.
The looping tool allows one to troubleshoot the system by removing one component at at time from the MOST loop. In other words, what might appear to be a radio problem could be a Bluetooth problem - that sort of thing.
|
|

Bikes plus an engine= trouble83 views
|
|

429 viewsShallow mudhole on Timboon Track off Donnelly Track near Aberfeldy in High Country Victoria Aus. The photographer was the boss from home, so keep your comments civil please.
|
|
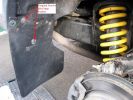
Fitting Land Rover Series 3 Rear Mud Flaps to a Disco 3/4 - A956 viewsUsed Original Screws plus two extras, Had to cut around exhaust. Once first done, laid them back to back and used first as a template to drill and cut second. Used a 5.5mm drill for the holes in the flap for the original screws and a 7mm drill to make the new holes in the plastic wheel-arch trim and lining to take the two-part trim clip (see my gallery for a picture of this style clip) - this photo of the new flap shows two screws but I modified that design to avoid using screws which corrode with time. Ignore the fact the pics are taken on a D3 Coiler, it makes no difference.
|
|

Thread upload16 viewsImage uploaded in new thread
|
|
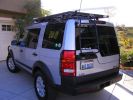
New kit fitted188 viewsSince I was able to pick-up a second hand Hannibal rack, I decided it was time to get the rear ladder fitted. Makes it a LOT easier to get stuff on and off the rack. And I am able to climb up there if needed.
|
|
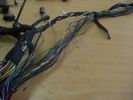
All wires done92 viewsAll the cut wires have been replaced now, almost time for the loom tape.
|
|

Thread upload10 viewsImage uploaded in thread 102957
|
|
this is not the best time to get stuck!158 views
|
|

Calendar Entry 09381 viewsCalendar Entry - First time I toll my D3 for a proper mud bath @ Whaddon
|
|
129 views
|
|
105 views
|
|
108 views
|
|
140 views
|
|

Thread upload24 viewsImage uploaded in thread 120773
|
|
Thread upload4 viewsImage uploaded in thread 178368
|
|
242 views
|
|
Dec 2010 Baviaans Crossing Eastern Cape34 views
|
|
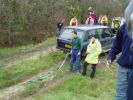
Time for a tow156 views
|
|

Time to go home179 views
|
|
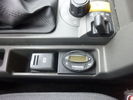
Webasto 1533 Timer85 views
|
|
Webasto 1533 Timer83 views
|
|
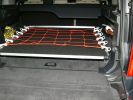
Sliding floor - closed position515 viewsMaterials: 17mm formply, ex 1000mm piano hinge, 2x Haefele 160 kg sliders, timber brackets for the floor to connect the sliders, aluminium angle for leading edge, 50x3mm aluminium flat drilled for the tie-down net connectors, 2x galv iron flat folded to form angle brackets (to secure sliding loadspace to floor), 1 square metre of black carpet to match the back of the seats.
|
|
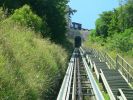
Ultima salita! ma verso il ristorante e con la teleferica a Castelbrando ;-)236 views
|
|
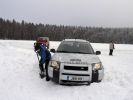
426 viewsDigging out the Freelander (the lady with the shovel is Minna Sillankorva, 10 times Finnish Ladies\' Rally Champion, and one of the instructors)
|
|

Paraurti Posteriore111 viewsSmontaggio del rivestimento del paraurti posteriore
|
|
Clock on summer time276 views
|
|
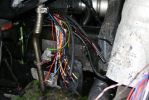
267 viewsthe repair involved stitching the loom together under the wing. i would have ordered a new one as they are not too expensive but colid not wait the 9 weeks delivery time so i used the front end of a loom from a breaker
|
|
Anyone can have puncture!638 viewsMust remember to take a proper jack next time.
|
|
Calendar 2010 My Favorite time of day236 viewsHolidays in France high up in the Pyrenees we decided to drive some of the mountain passes and get as high as we could. Fantastic roads that really demanded your full attention!
|
|
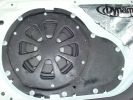
Pioneer TS-SW1041D 10" sub installed123 viewsAfter cutting off the factory sub mount studs, it took ages to bash the indents. To gain more space behind the driver - I changed the driver\'s side license plate from plastic push in lug - to stainless bolt with nyloc nut. Cr@ppy paint job in wrinkle-finish - all I had on hand at the time. Sealed and treated lower tailgate with Dynamat.
|
|

181 views
|
|
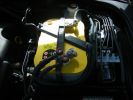
395 viewsThe OPTIMA aux battery
|
|
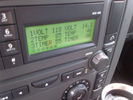
Voltage Display Page Radio Head Unit 118 14.2840 viewsThis shows the voltage/temperature/timer display page within the 6CD-465 radio head. There is a second file within this album, a doc file, that outlines the procedure to access the diagnostics.
The 14.1 volts number was the approximate vehicle system voltage with the engine running; the 118 number infers 11.8 volts which is the low power infotainment system shutdown cutoff voltage. The factory default setting is 135 or about 13.5 volts. By holding the keypad 1 button down, the 3 digit volts numbers will decrease 001 at a time until the keypad 1 button is released. Decreasing the number from 135 to some lower number should increase the time the system will remain on with the engine off.
The TEMP numbers refer to Fuel Burning Heater, (FBH), temperature values. 85 is apparently a high limit and 46 was the number when the jpg was taken. This number varies and given that there is no diesel fueled FBH in our NAS petrol engine vehicles, what the value refers to is unclear. The TIMER numbers also relate to the diesel fuel burning engine heater and perhaps make more sense being 00.
|
|

Thread upload22 viewsImage uploaded in thread 137355
|
|

Thread upload16 viewsImage uploaded in thread 137355
|
|

Thread upload15 viewsImage uploaded in thread 137355
|
|

Thread upload1 viewsImage uploaded in thread 203026
|
|
66 views
|
|
Thread upload3 viewsImage uploaded in thread 207855
|
|

92 viewsThe river next to the field of blue flowers. We ended up crossing this river dozens of times and eventually drove in it it for more than a mile.
|
|

Magnetic body protection 1146 viewsMagnetic body protection
|
|

Magnetic body protection131 viewsMagnetic body protection
|
|
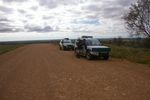
Time for a break on the Oodnadatta track67 views
|
|
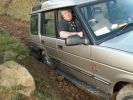
Roych Victim Number 2250 viewsA bust diff lock combined with side steps and road tyres makes for a stationary Disco 1 - took us an hour to get this over the big steps - and only then with a tow!
|
|

375 viewsTimboon track off Donnelly Creek Trk near Aberfledy
|
|

139 views
|
|

Thread upload14 viewsImage uploaded in thread 121178
|
|
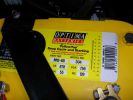
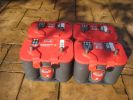
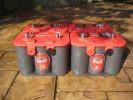
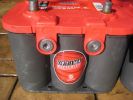
Optima Battery781 viewsBattery makers sheet for all you rivet counters out there.
|
|

Optima Battery91 views
|
|
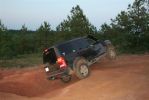
Wheely time!274 views
|
|

Time 132 views
|
|

Timing_kit_Sealey box56 views
|
|

Sealey timing kit_open_TDV653 views
|
|
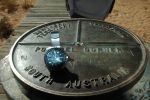
Poeppel Corner time on watch correct for South Australia time40 views
|
|
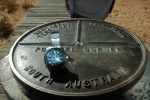
Simpson July 2007122 viewsPoeppel Corner watch on South Australia time
|
|

My old Seadoo RXT 291 viewsOn holiday with the ski's, St Tropez France.
My RXT on the left, supercharged & intercooled 1500cc rotax engine...aftermarket freeflow intake system by RIVA, SOLAS blueprinted prop, race sponsons, RIVA intake grate & opas system removed for less drag...estimated 230hp.
Proven 70mph (with GPS & Radar gun)
On the right is my best man's GTX Ltd. with 185hp and good for 60mph with a tail wind...
|
|

Thread upload23 viewsImage uploaded in thread 160605
|
|

48 viewsPlaytime
|
|

Lunch time today near me82 views
|
|

fist time off roading50 views
|
|

326 views
|
|
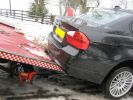
299 views
|
|

319 views
|
|

Tight Ar$es noses944 viewsCALENDAR 2008 ENTRY Tight Ar$es pause before sampling more of Salisbury Plain\'s finest mud.
|
|

Thread upload7 viewsImage uploaded in thread 162033
|
|

Timber!187 views
|
|
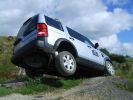
First time nearly airbourne195 views
|
|
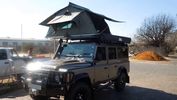
Thread upload0 viewsImage uploaded in new thread
|
|

Thread upload1 viewsImage uploaded in new thread
|
|

Thread upload1 viewsImage uploaded in new thread
|
|

Easy!208 viewsB-I-L\'s pride and joy being put though it\'s paces in advance of our African campaign. Huh some dream...Sometime maybe..twenty years hence when the kids have moved out.
|
|

First time off road127 viewsAt "The Gorge" near Grafton NSW, needed to use the sand setting to plow thru the riverbed.
|
|

Ultimate Phone119 views
|
|

Thread upload24 viewsImage uploaded in thread 169748
|
|

Thread upload7 viewsImage uploaded in thread 186201
|
|
36 views
|
|
25 views
|
|
89 views
|
|
80 views
|
|
92 views
|
|

250 views
|
|

301 views
|
|
Thread upload1 viewsImage uploaded in thread 205170
|
|
Thread upload34 viewsImage uploaded in new thread
|
|
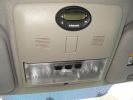
141 viewsGreat care should be taken when securing the timer to the light unit. Overtighten the screw and you will damage the LCD display of the timer.
|
|

timer27 views
|
|
audio Video68 views
|
|

40 views
|
|

14 views
|
|

Thread upload0 viewsImage uploaded in thread 200758
|
|

This is a picture of some peoples cars due to being lied to by people who do not understand what they are doing..43 viewsThis is a picture of some peoples cars due to being lied to by people who do not understand what they are doing.
|
|
Thread upload1 viewsImage uploaded in thread 198799
|
|
72 views
|
|
77 views
|
|
119 views
|
|

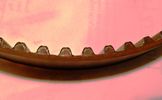
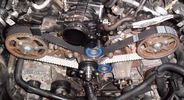
Timing Belt110 views
|
|

14 views
|
|
Thread upload13 viewsImage uploaded in thread 161357
|
|

Thread upload6 viewsImage uploaded in new thread
|
|
Thread upload9 viewsImage uploaded in thread 161357
|
|
Thread upload7 viewsImage uploaded in thread 202060
|
|

Thread upload13 viewsImage uploaded in thread 143255
|
|

Thread upload1 viewsImage uploaded in thread 198799
|
|

Thread upload1 viewsImage uploaded in thread 198799
|
|

Thread upload0 viewsImage uploaded in thread 198799
|
|
46 views
|
|
timemaster11 views
|
|
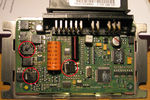
transfer case control module71 viewsPicture shows blown components of the Transfer Case control module after water ingress over time - with a healthy top up from over-enthusiastic lad with a high pressure water hose in the car wash!!!
|
|

Botswana188 viewsShort river bed time trail.
|
|

Some fun times were had - unfortunately no video :-(108 views
|
|

Thread upload11 viewsImage uploaded in new thread
|
|

Sankey trailer details9 views
|
|
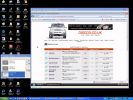
www.disco3.co.uk on Genuine Windows Vista Ultimate & IE7173 views
|
|

Vulcan times17 views
|
|

Vulcan times 217 views
|
|
234 views
|
|

Almost there121 viewsAlmost at the top and still scrambling to keep momentum to reach the top of this awkward dune. The tussock grass mounds can be seen in the foreground and on the plain below and almost always made it difficult to maintain all 4 wheels in contact with the ground at the same time as keeping sufficient momentum to reach the top. Challenging all the way!
|
|
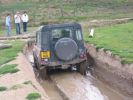
Tim in the Somme132 views
|
|

webasto oval timer instructions.pdf363 views
|
|

webasto oval timer instructions115 views
|
|
101 views
|
|
97 views
|
|
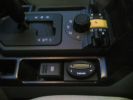
449 views
|
|
178 views
|
|
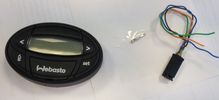
Webasto Oval Timer16 views
|
|
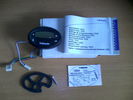
39 views
|
|

Thread upload18 viewsImage uploaded in thread 135908
|
|
![Filename=webasto_oval_timer_instructions[1].pdf
Filesize=111KB
Dimensions=320x240
Date added=19.Oct 2011 webasto_oval_timer_instructions[1].pdf](images/thumb_pdf.jpg)
210 views
|
|
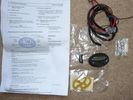
WebastoTimer86 views
|
|

Thread upload1 viewsImage uploaded in new thread
|
|
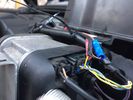
Thread upload1 viewsImage uploaded in new thread
|
|

Thread upload1 viewsImage uploaded in new thread
|
|

72 views
|
|
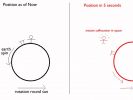
251 views
|
|
Thread upload15 viewsImage uploaded in thread 124032
|
|

ZF LifeguardFluid6 transmission oil.1397 viewsThis is an interesting pdf in that under the ZF 6HP26 six speed section, it provides the various automobile manufacturer part numbers for their version of the appropriate tranny oil, all of which seems to be the LifeguardFluid6 oil, ZF part number S671 090 255. Note the fine print and do not confuse it with the LifeguardFluid6 Plus oil for vehicles with the Torsen AWD setup such as the Audi Quattro, VW 4Motion vehicles and I think the BMW FF Range Rovers of an earlier time.
Also of interest at the bottom of the pdf is the recommendation for replacing the transmission oil "between 80,000 km and 120,000 km or 8 years, depending on the load." I also do not see any reference to "sealed for life" but almost as optimistic, "maintenance free" but with the proviso "intended for normal operating conditions". This would most typically be the Sandringham Castle Grounds in the UK rather than Cape York, QLD.
|
|

ZF 6HP26 Metal Pans, (top and bottom views), and separate Filter top and bottom views.1765 viewsThis single sheet pdf two views of the ZF metal pan for the 6HP26 transmission. The inside view shows the two magnets; the other is the bottom view. Also visible are the transmission bottom oil fill and oil drain holes that are sometimes utilized where access to the side fill is not possible. The ZF part number for the metal pan kit for our 6HP26X six speed is 1068_103_820_01 This includes the 21 shorter Torx screws, the metal pan gasket, and the separate oil filter as well as round filter seal. The ZF six speed LifeGuard6 transmission oil is extra.
|
|

Thread upload11 viewsImage uploaded in thread 193183
|
|

Thread upload1 viewsImage uploaded in thread 186251
|
|
|
|