| Search results - "TT" |

113 views
|
|

Thread upload4 viewsImage uploaded in new thread
|
|

Thread upload5 viewsImage uploaded in thread 173579
|
|

Thread upload3 viewsImage uploaded in thread 180713
|
|
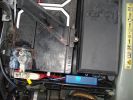
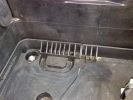
139 viewsThe weatherproof junction box fits neatly down the front of the battery, all contained inside the battery box.
|
|
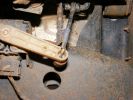
754 viewsNew control rod is carbonfibre/fibreglass hollow tube, with a rubber grommet fitted to one end (screwed and epoxy-ed) and steel rod bent into shape at the other (epoxy-ed).
|
|

Little dog challenging a little horse182 views
|
|
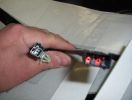
heated seat (base) wiring411 viewsThe Small connector takes the plug from the seat back pad, the larger connector (with red) is fitted into the multiplug casing uder the seat - the male side of this is already pre-wired.
|
|
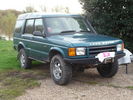
51 viewsD44 front winch bumper. Ali washer bottle. D44 rear h/d bumper. centre diff lock. 235x85x16 pirelli muds. OME +2" springs & shocks. front diff guard. side tree bars. wired for roof CB. Aux fuse block. safari snorkel. extended wading tubes. the list goes on...
|
|
460 views
|
|
4 views
|
|
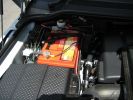
414 viewsDualBattery 80ampH
|
|
5 views
|
|
368 views
|
|

Silverstone Media Day86 viewsTook 3 cars for display .... a RRR members off-road modified RR p38a, unusual as it has the 2.8L version of the 300tdi fitted.
|
|
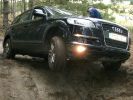
205 viewsQ7 working hard. note how little the suspensipon works. But - never got stuck!
|
|

Disco 3 HSE in Bonatti Grey52 viewsPre the Disco 4 conversion and the 20" Landmark alloys
|
|

Disco abrasivo - Abrasive disc20 viewsDeclino ogni responsabilità per i danni che eventualmente farete direttamente o indirettamente seguendo questi consigli.
Per aprire la chiave ho usato un disco abrasivo da modellismo montato su un minitrapano. Deve giare velocemente.
Decline all responsibility for any damage that may directly or indirectly do by following these tips.
To open the key I used an abrasive disc mounted on a mini-drill. It must turn quickly.
|
|
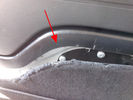
Rimozione pannello dalla sponda - Tailgate panel removing45 viewsPer togliere il pannello moquettato dalla sponda ho fatto leva con un cacciavite abbastanza grosso nel punto indicato, è stato veloce e non ho rovinato niente.
To remove the carpeted panel away from the tailgate I used a big enought screwdriver at the point indicated, it was fast and I have not ruined anything.
|
|

Surfer Disco at Northcott Mouth100 views
|
|

Two Discos at Northcott Mouth - neither of them mine102 views
|
|

A look alike G4 from 2008 121 viewsA look alike G4 from 2008 (for sale in Holland)
http://autoscout24.nl/Details.aspx?id=vnyzslgvfoja
|
|
A look alike G4 from 2008111 viewsA look alike G4 from 2008 (for sale in Holland)
http://autoscout24.nl/Details.aspx?id=vnyzslgvfoja
|
|
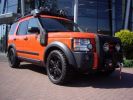
A look alike G4 from 2008119 viewsA look alike G4 from 2008
http://autoscout24.nl/Details.aspx?id=vnyzslgvfoja
|
|
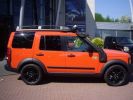
A look alike G4 form 2008128 viewsA look alike G4 from 2008 (for sale in Holland)
http://autoscout24.nl/Details.aspx?id=vnyzslgvfoja
|
|
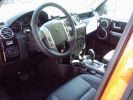
A look alike G4 from 2008117 viewsA look alike G4 from 2008 (for sale in Holland)
http://autoscout24.nl/Details.aspx?id=vnyzslgvfoja
|
|
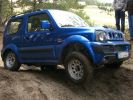
200 viewsSuzuki Jimny. Some holes were deep enough to swallow the little fella, but it got out as long as all wheels were on the ground. No difflocks or electronics in this one.
|
|
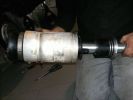
374 views
|
|
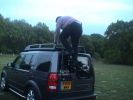
Told that I had to test the ladder, and there aint no better test than sticking me up there!184 views
|
|
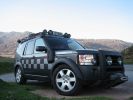
CALENDAR ENTRY 20091191 viewsBonatti grey TDV6 S, ambulance conversion, MTR's, winch, RAI, safety devices roof rack, rear ladder, bash plate, warn lighting, LED lighting throughout.
Owned by me, Rich Bell, Director of Extreme Medical Ltd, providers of medical support to Land Rover events.
|
|
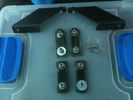
fittings for expo rack67 views
|
|

369 views
|
|

The old one, new one and the little one!73 views
|
|
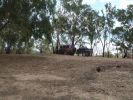
02 Last Photo before the little wheel problem saga222 viewsThis is my D3 with trailer on the banks of the Darling River, literally "back of Bourke" (the regional definition of the start of the Australian Outback). We were the first vehicle in a week to try and drive this route from Bourke to Wilcannia on the account of floods (first water in 7 years). Little did we know that 3 hours later there\'d be a bit of a wheel and tyre problem appearing...
|
|

Disco 3 HSE in Bonatti Grey52 viewsPre the Disco 4 conversion and the 20" Landmark alloys
|
|
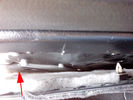
Riparazione attuatore sponda posteriore - Tailgate actuator repair38 viewsL'attuatore si trova dietro la pellicola nera incollata alla carrozzeria che va strappata.
The actuator is located behind the black film glued to the body must be torn.
|
|

Tagliare lungo il perimetro della chiave - Cut along the key perimeter17 viewsI gusci sono saldati ad ultrasuoni. Con il disco tagliare lungo il perimetro della chiave in corrispondenza della giunta: lo spessore è di circa mm.3. Io non sono andato fino in fondo per evitare di danneggiare qualcosa, una volta inciso il solco per mm.2,7 ho fatto leva col cacciavite e ho strappato il materiale restante.
The body is ultrasonically welded. With the disc cut along the perimeter of the key in correspondence of the joint: the thickness is approximately 3mm. I have not gone all the way down
|
|

Shame it\'s not video coz you would hear my tap dancing so much better193 views
|
|
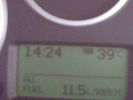
Getting hotter84 views
|
|

Silverstone Classic Media Day177 viewsAttended the media day for the Silverstone Classic, took 3 cars to display & tell 300 journalists what we do at the show.
David Coultard was one of the drivers who were taking the journalists around the track.
|
|
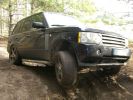
228 viewsRR ´06, 20" alloys, still better than any SUV you can think of. Actually, it went up, down and through everything.
|
|
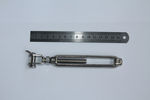
126 viewsHalf of the fork or jaw of the bottle screw
|
|

Tagliare per eliminare parte del coperchio - Cut to remove part of the cover14 viewsE' meglio prima levare il circuito stampato e poi la lama della chiave, per evitare di danneggiarlo. Tagliare sopra il tasto superiore per rimuovere solo la parte con i tasti.
Is better to remove the printed board first then the key, to prevent damage. Cut over the top button to remove only the part with the buttons.
|
|
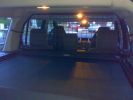
Fitted Dog Guard104 views
|
|

Morsetto - Clamp34 viewsPer la riparazione ho utilizzato un morsetto per fili elettrici.
To repair I used a clamp for electrical wires.
|
|

Estrarre il circuito stampato con la batteria - Exctact the printed board with the battery18 viewsRimossa la parte superiore del contenitore, estrarre il circuito stampato sollevandolo leggermente dalla parte della batteria.
Removed the top of the box, pull out the printed circuit board slightly lifting from the battery side.
|
|

16 views
|
|
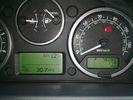
EGR blanked - new mpg!68 viewsAttained 30+mpg after EGR valves blanked by TFC
|
|
555 views
|
|
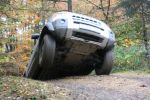
spiderbaby getting air209 views
|
|
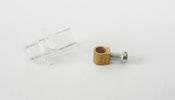
Morsetto - Clamp33 viewsHo smontato il morsetto, il diametro del foro è esattamente quello di quello che rimane del particolare che si è rotto.
I removed the clamp, the hole diameter it's the same of the detail that is broken.
|
|

Chiave aperta12 viewsUna volta estratto il circuito stampato, facendo leva col cacciavite sulla parte rimasta attaccata ho prelevato la lama della chiave da inserire nel box nuovo.
Once you remove the printed circuit board, leveraging with the screwdriver on the part remained attached, I picked up the blade of the key to be inserted in the new box.
|
|
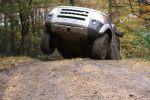
hobgoblin getting air174 views
|
|

Morsetto - Clamp42 viewsIl morsetto è della misura esatta della sede dell'attuatore.
The clamp is the same size of the actuator slot.
|
|
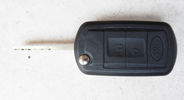
Chiave finita - Finished key18 viewsHo iserito il tutto nel nel nuovo contenitore pagato €4,00, ho incollato con la colla cianoacrilica, ne basta poca, e questo è il risultato.
I put all in the new container paid € 4.00, I glued with super glue, it only takes a little, and this is the result.
|
|

Morsetto - Clamp36 views
|
|
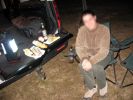
kitchenette it is.912 viewsEjoying Baguette, Saucison sec and of course Fois Gras.
|
|

Cavo nel morsetto - Cable in clamp48 viewsHo inserito il terminale rotto nel morsetto: bisogna sforzarlo molto e ho praticato una cava attraverso il foro della vite con una punta in modo che il terminale non possa scivolare.
I entered the terminal broke into the clamp: you have to force it a lot, and I practiced a quarry through the screw hole with a bit so that the terminal can not slip.
|
|
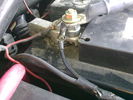
battery neg connection149 views
|
|

NICE LITTLE CHISEL SPEED72 views
|
|
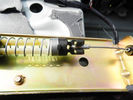
Lavoro finito - Finished work39 viewsEcco come appare a lavoro finito
Here is how it looks, finished the job
|
|
DickieDisco trying to decide if this is a better way down...48 views
|
|
Si taking a slightly wetter route...54 views
|
|
Freelander trying hard.107 viewsStill not stuck but getting there. In the end pulled it out with a Defender. Picture taken at Offroad-Training in Linthe/Germany
|
|

09 Starting to remove the seized brake assembly296 viewsBy this time we\'d poured about 8l of water on the dull-red glowing and burning wheel assembly (too close to 140l of 98 octane petrol). Sudden cooling cracked the disk brake which showed mangled park brake parts. How to remove a brake disk without the right star fitting? First remove the caliper then get a sledge hammer?!!
|
|
In caso di emergenza - For emergency48 viewsNel caso dovesse succedere nuovamente ho predisposto un cavetto da tirare.
If it were to happen again I have set up a cable to pull.
|
|
COVER SHOT FOR TOTAL OFF ROAD114 viewsG WAGEN AXELS FITTED WITH HYDRAULIC FRONT + REAR DIFF LOCKS + EXTREAM SUSPENSION SYSTEM FRONT + REAR WARN WINCHES.
|
|
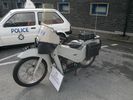
Velocette LE Leeds City Police34 views
|
|

Before fitting the OE display97 views
|
|
9 views
|
|
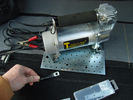
Compressore con base104 viewsIl materiale di partenza: compressore 12 volto senza base originale e con base fatta appositamente per il vano della 2° batteria del D3
|
|

Dettaglio TV Sony30 views
|
|
369 views
|
|

Bracket drilled and fitted218 views
|
|

Dettaglio LR329 views
|
|

Attuatore rimontato - Actuator reassembled40 viewsAttuatore rimontato col cavo di emergenza.
Actuator riassemble with emergency cable.
|
|
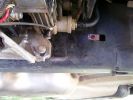
Repositioned compressor bracket738 viewsThe bracket was snapped in two, so I had it re-welded and slotted out the mounting holes so that it could be positioned 10mm higher (no longer protrudes under the chassis rail)
|
|
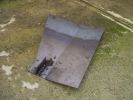
Steel compressor plate684 viewsIgnore my crappy welding attempts - I got a friend to finally weld the locator tab on the front!
|
|
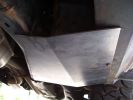
New compressor plate740 viewsFitted between the chassis rail and the new sill protector.
|
|
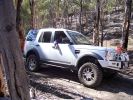
off-camber hill352 viewsAnd no, I wasn\'t hanging my arm out to balance the car - I was stopped at this point waiting for the Jeep in front to try and finish. It was a pretty steep off-camber slope!
|
|
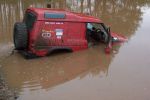
bit of water70 viewsdidnt think it was so deep. I got my feet a little wet. Car is still running and it also survived this and is still in use now. Bet a Disco 3/4 wouldn't work after this.
|
|

The official Morocco 2007 Disco3.co.uk attire130 views
|
|
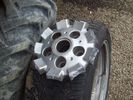
What was left26 viewsThe bitty which was left attached to the hub when the wheel failed whilst driving
|
|
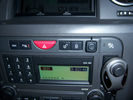
Input change button, rev camera cannot be overriden67 views
|
|
![Filename=100_2778[1].JPG
Filesize=186KB
Dimensions=1280x960
Date added=13.Oct 2014 100_2778[1].JPG](albums/userpics/22146/thumb_100_2778%5B1%5D.JPG)
29 viewsfront cam fitted
|
|
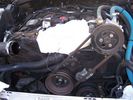
221 viewsRemove the air intake shuttle cut off valve, covering hole with rag
|
|
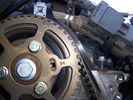
257 viewsLH camshaft after putting new belt on
|
|
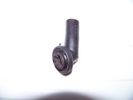
sunroof drain fitting63 views
|
|
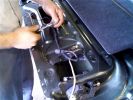
Putting all the bits back in52 viewsNotice the rope (Kevlar) coming out of the actuator box on the right side.
|
|
Yup, it was cold!! Water in kettle froze during the night..124 views
|
|
Thread upload322 viewsImage uploaded in thread 102519
|
|
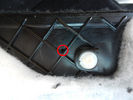
Foro pannello - Panel hole40 viewsHo forato il pannello moquettato per far passare il cavo di emergenza.
I drilled the carpeted panel to drive the emergency cable.
|
|
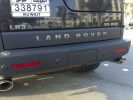
Larini Exhaust & LR letters378 views
|
|
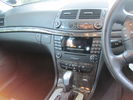
Mercedes E320 The Buttons!30 views
|
|

329 views
|
|

Yup, gotta do what a mans gotta do...146 views
|
|

Thread upload11 viewsImage uploaded in thread 192060
|
|

12 Half way through removing a jammed disk brake in the Outback296 viewsThis was just before breaking the sledge hammer. Note we luckily carried a spare hammer. Ended up using (or breaking) every tool we had on this little repair job. Bed sheets are a good way of gathering the bits to show for the inevitable warranty claim.
|
|

Finito - At the end47 viewsEcco come appare la sponda a lavoro finito.
Here is how is the job ended.
|
|

Walking out after getting bogged - half way!55 views
|
|
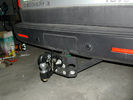
Gancio27 viewsGancio traino altezza variabile con attacco sfera e tipo ulpio
|
|
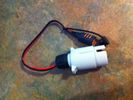
12S plug with Ctek lead attached29 views
|
|

12S plug from eBay and Ctek lead (provided with MXS-10) - before cutting the ring terminals off.28 views
|
|
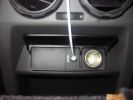
Centre console 12v & aux panel fitted281 views
|
|

12v Battery SoC Table89 views
|
|

Thread upload9 viewsImage uploaded in new thread
|
|
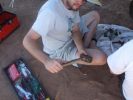
13 How to care for tools303 viewsWhat happened to the sledge hammer after 2 hours of beating my seized and cracked disk/park brake assembly to bits. Now down to 1 hammer remaining. At least by this time it was getting cooler (down to 40 deg C)
|
|

13 Pin Socket Towing Electrics Fitting Instructions224 views
|
|
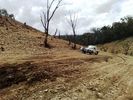
Recovery after getting bogged.54 views
|
|
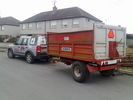
honestly officer....if it was overloaded, it would be sitting on the rear axel ??? heh heh79 viewsfunny how some cops will accept what their eyes tell must be the truth, a trailer load of logs home ....easy peasy, hahahahaha
|
|
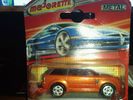
Majorette Range Stormer27 views
|
|
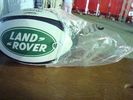
Rugby ball prize16 viewsWon this at the Dubai 7's in 2010. The LR stand had a competition. You had to push a LR4 over a something like an uphill speedbump. A modified bullbar resembling a scrumming machine allowed 3 people to touch, engage and push the beast over the bump. Me and my 2 kids - with a little bit of help, managed it and for our trouble got this ball !!!
|
|
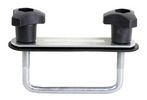
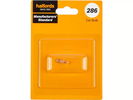
33 viewsHalfords fitting kit
|
|
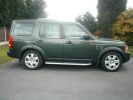
my new car282 views
|
|

14 "Are we having fun yet?"349 viewsSWMBO is pondering why attempting to drive 3,900 kms across the outback on dirt roads is more fun than, say, spending New Years in Paris......
|
|
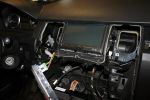
14320 viewsFitting the video screen.
|
|
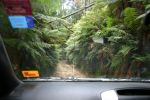
Bird River road - old railway cutting367 views
|
|

load retention rails fitting instructions38 views
|
|

Load retention system fitting instructions47 views
|
|
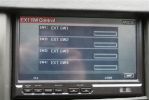
17298 viewsYou can add relay switches to the controller to turn on & off from the touch screen...pretty cool.
|
|

Thread upload0 viewsImage uploaded in new thread
|
|

18 Brake "repairs" finished at sunset296 viewsWe just finished the repair at sunset and were driving slowly with 3 brakes. Oddly the D3 didn\'t behave any differently at 50 km/hr than it did normally. We had 4 instances of hitting the (3) skids for kangaroos before arriving in Wilcannia 3 hrs later. The brake light warning was making very distinctive noises and flashing randomly, though.
|
|
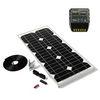
Thread upload9 viewsImage uploaded in new thread
|
|

Whatissit139 viewsPicture of a thing in the engine bay, just to the left of the coolant bottle and just behind the edge of the radiator.
|
|
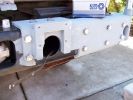
Fitting bolts, painful!!302 views
|
|

57 views
|
|
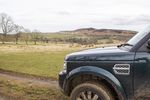
ATT Northumberland88 views
|
|
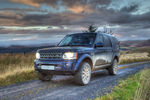
D4 HSE on top of Ogre Hill in Northumberland185 viewsD4 HSE on top of Ogre Hill in Northumberland with the Scottish hills in the background
|
|

ATT Northumberland20 views
|
|
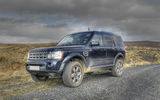
D4 HSE on top of Ogre Hill on the Scottish Border209 views
|
|
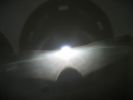
This is a H7R bulb fitted into the same headlight - look at cut off and no glare116 viewsPerfect like OEM what more can i say
|
|
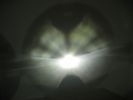
This is a normal H7 HID bulb installed in a BMW headlight to show glare above cut off line99 viewsThis is what the light pattern is that causes glare in most retofit applications including some projector lights. this is in fact a projector headlight on a BMW but the old projectors were only actually half projectors and half reflective bowls. the beam pattern should be clean cut like this ___/
|
|
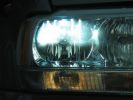
H7R Headlight retrofit H7R HIDS4U notice no light in bottome half of the bowl98 viewsThis is how a retofit HID should look in a reflector headlight
|
|
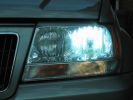
Standard hid bulb - light everywhere and glare caused by light in bottom of bowl96 viewsWhilst the beam pattern is ok the problm is that with 300% more light the spillage into the bottom of the reflector bowl is seen as glare by other motorists. it also is the reason the overhead motorway signs are lit up so well be bad retrofit xenons
|
|
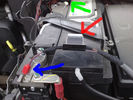
2 FBH Loom77 views
|
|
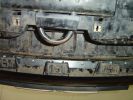
Rivetted in bracket, showing tabs that will be sandwiched by the plate95 views
|
|
336 views
|
|

INSERIRE UN ATTREZZO PER ALZARE E SGANCIARE117 views
|
|

Dettaglio interni cromati28 views
|
|

GREY MATTE WRAP3 views
|
|
New 295/45R20 114V XL Hankook Ventus ST tyres fitted on 20" RRS Supercharged 20" Alloys123 views
|
|
Tallangatta 2010111 views
|
|
Tallangatta 2010120 views
|
|

The BIG HILL, with BN at the bottom350 views
|
|

177 viewsFrom http://www.hankstruckpictures.com/pix/trucks/len_rogers/july7a/scania_143m.jpg
|
|
Rob attempts the ditch crossing394 views
|
|

Raised Air Intake Fitted357 views
|
|
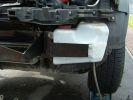
Washer Bottle Bracket878 views
|
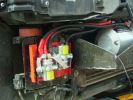
|
Solenoid pack fitted991 views
|
|
249 views
|
|
236 views
|
|

246 views
|
|
279 views
|
|
282 views
|
|
359 views
|
|
284 views
|
|
278 views
|
|
330 views
|
|
304 views
|
|
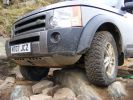
379 views
|
|
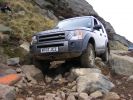
331 views
|
|
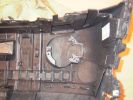
Back of bumper shows pre-fitted fog lamp brackets988 views
|
|
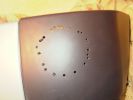
Drilled all round the marked pattern inside then used Dremel to cut out neatly813 views
|
|

On top at last351 viewsPhoto at the sumit of Arigna mountains, as part of one of the stages in the 2009 4x4challenge in aid of Temple St childrens hospital. Tough gettin there especially as we towed a Deafner90 up behind us that had bursted an expansion bottle. But the D3 powered on up regardless.
|
|
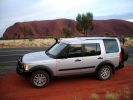
D3 in the Red Centre52 viewsParked opposite Uluru, or Ayres Rock, in April 2009. This is autumn in this part of the world, and the desert is getting cold over night, so there is a brisk wind blowing at sunrise.
|
|
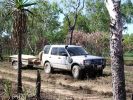
D3 in Kakadu National Park, on the track into the Alligator Billabong47 viewsThis whle area is down on the flood-plain, so in the Wet it is all under a few inches of water. In the dry it has a hard but brittle surface, which is then chewed up in many places by the feral animals with hard hoofs such as buffalo, pigs and horses. This then turns the track into a big dust bowl which is primarily bull-dust - a soft fine powder like talcum powder, which can be many feet deep, and gets into everything. The cover on the trailer is actually black.
|
|
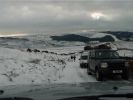
Letting a D3 pass in the Goyt Valley66 viewsStopped to let a D3 and his van-in-distress pass on the main slope down to the reservoirs in the Goyt Valley
|
|

Thread upload6 viewsImage uploaded in thread 180038
|
|
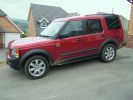
Rock Sliders Fitted311 views
|
|

MY2010 Key Buttons30 views
|
|
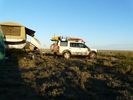
Camp between Hughenden and Muttaburra - QLD24 views
|
|
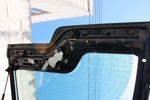
30 viewsBottom trim removed
|
|
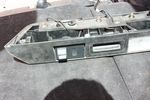
35 viewsFitted camera in tailgate handle
|
|
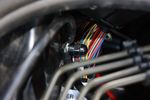
103 viewsEarth stud with earth cables attached
|
|
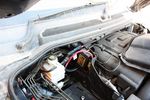
114 viewsBattery to battery cable in place along edge of engine bay
|
|
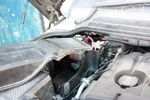
120 viewsModified aux battery box cover with shape of battery to battery cable. I also removed the tab which was fouling my traxide brain mounting bolts.
|
|
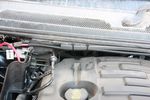
97 viewsBattery to battery cable tied to edge
|
|
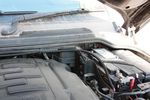
111 viewsBattery to battery cable in main battery box
|
|
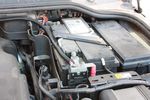
113 viewsBattery to battery cable attached to main battery
|
|
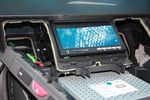
108 viewsTest fitting the screen. The bottom edge of the rear cover of the screen has been already dremeled off in this pic, notable as the circuit board can be seen.
|
|
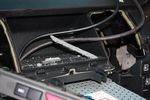
94 viewsCutting a trench in the dash pocket floor to wedge the bottom edge of the screen into
|
|
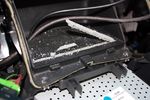
91 viewsCutting the trench in the dash pocket.
|
|
109 viewsThis is the plug for the accessory socket at the rear of the cubby box. On commercial D3 such as this one, there is no accessory socket so this plug is unused. I tapped into the 12V wire as an ignition feed. This will feed a relay coil which opens up power from the aux battery. Like this I can still retro fit and make use of the accessory socket later on.
|
|
72 viewsWiring for 12V socket attached to socket
|
|
91 views12V socket done. This is permanently powered by the Aux battery. Another one was done on the other side, though that one required drilling the hole with a 29mm hole saw as there wasn't an unused hole on that side.
|
|
81 viewsCarPC closed and ready for mounting. Note the modification to the rear of the case to allow extra USB sockets attached to the motherboard pins.
|
|
97 viewsDeciding on a layout for the electrical stuff. Bottom right of pic is a fusebox which will take the input power from the traxide kit, then relay box and 12V regulator, ignition busbar and homemade regulated 12V busbar. Big black box is the CarPC
|
|
78 viewsElectrical items fitted in place and wiring in progress
|
|
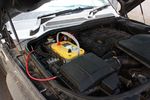
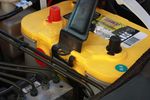
125 viewsOptima Yellow Top in battery box. This is the version with side terminals so there will be some modifications to be done to fit
|
|
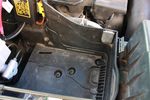
112 viewsDue to the side terminals protruding out the side and affecting the battery clamp, I found the battery will fit better if it could be pushed a few millimeters towards the engine. This lip will have to be removed.
|
|

91 viewsBattery clamp needs to be modified due to the mouldings on the battery top to the side terminals. All that is needed is to cut off the bit as seen.
|
|
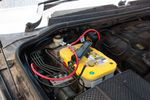
115 viewsModified battery clamp test fitting on battery.
|
|
131 viewsBattery clamped down, terminals and cables attached
|
|
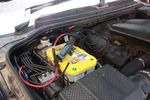
131 viewsAll done. Added some cable sleeving to avoid cables rubbing against battery clamp
|
|
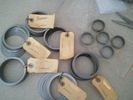
Custom Shim Assortment673 viewsMfd from https://www.facebook.com/DifferentialPartsUS
|
|
Battery226 viewsInterstate vs Deka = DEKA Do not buy interstate batteries.
|
|

these brands not permitted to park23 views
|
|
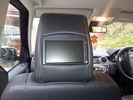
Disco 4 Fitment56 viewsFL2 screens fitted in D4 headreat
|
|
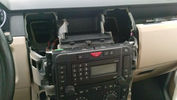
Yes, i am cutting the panel using a scissor...23 views
|
|
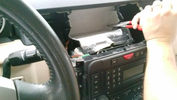
yes, i am cutting it...26 views
|
|
setting up the maps21 views
|
|
41 viewsA6 quattro up Hay Bluff
|
|
STT30 views
|
|
STT24 views
|
|
Western Diamondback Rattlesnake97 viewsAbout 4.5 Ft long
|
|
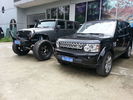
big jeep28 viewswent to collect my optima battery...this was in getting a new wing fitted
37" wheels are quite big...
|
|

Mum and the little munchkin :-)14 views
|
|

258 views
|
|
221 views
|
|

236 views
|
|

Rear Screen in headrest 21 viewsscreen fitted after cutting leather
|
|

Rear screens 22 viewsRear screens fitted
|
|

new screens fitted 27 viewsAfter installation
|
|
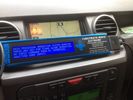
My MSV2156 viewsNeed more help to get the most out of this tool.
So far used for fault code reading, 4x4 display, suspension tight setting before wheel alignment,
|
|

Terratrip 202 V4 possible discrete location140 viewsAttached to ashtray - allowing removal / unplugging when not in use by pulling out the ashtray.
Terratrip is an odometer for use in rallies / raids - very popular with the French when used in conjunction with a roadbook. A mechanical backup in case GPS signal is lost on modern odometers like the Globe 800 I propose to use.
We'll see if there are reflection issues from the screen.
|
|
Thread upload7 viewsImage uploaded in thread 172661
|
|
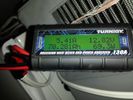
battery consumtion357 views24 hour power usage of an Engel 32L + NL 72L at 1c & -18c freezer in 80-92 degree heat in the shade. That's about 70amp hours.
|
|
odd trend22 viewsfitting tyre to a rim which is too wide
|
|
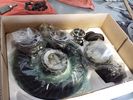
Locking Kit637 viewsready to install
Mfd from https://www.facebook.com/DifferentialPartsUS
|
|
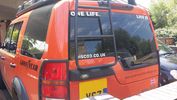
G4 Challenge110 viewsSpotted in Chelmsford Meadows Carpark 29th July
|
|
284 viewsLabtronx Aerial mount http://www.labtronx.com.au/
|
|
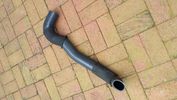
Thread upload127 viewsNew silicone hose with original sleeves refitted.
|
|
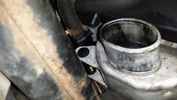
Thread upload124 viewsBottom end Passenger side after original LR hose removed
|
|

dotty16 views
|
|
forgotten20 views
|
|
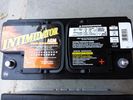
Deka 9A49 AGM Intimidator327 viewsThe Deka 9A49 AGM Intimidator makes an excellent primary battery alternative to the factory or Interstate. Made in US of premium quality. This is an excellent match with the Traxide system w/another Deka or Yellow Top optima.
This will behave properly in your D3/4 LR3 with slightly less wear and tear on your alternator.
|
|
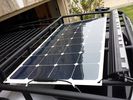
solar roof install444 viewsMore or less wrapped up my solar installation today. I added a Grape Solar Flex 100W panel, it's adequate to keep the vehicle topped off with the Fridge running, and Ham, but it could lose some ground if transmitting depending on how much, 2 would be awesome. One is enough, but barely. I am quite impressed with the Grape Solar flex panel version 2.0.
https://www.facebook.com/DifferentialPartsUS
|
|
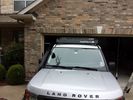
low profile solar panel211 viewsThe low profile solar panel, can be seen here, as the fine white line under the light bar. The way it's laid out, the panel should generate decent power between 10am and 4pm depending on the time of year, from the sides or front, with no shadows. Grape Solar 100W flex panel.
https://www.facebook.com/DifferentialPartsUS
|
|
Traxide USI-160 Install515 viewsOverview picture of Traxide USI-160 upgrade install. This was an upgrade from the SC80 which performed flawlessly. The USI-160 had two relays and can deliver more amperage. As a result, the wiring was upgraded to 4/0 Welding Cable (warn) and heat shielding was added. The unit performs flawlessly to support 2 HAM Radios, Fridge, etc. Like me https://www.facebook.com/DifferentialPartsUS
|
|
Winch Power upgrade318 viewsUsing 2 warn kits, and removing one of the wires to use on another project. The purpose was to replace the power and ground wire. I used Warn kits, which are 4/0 Welding cable. The original red #4 warped from getting a little too worn. The 2nd
Battery #1 Deka 9A94 AGM Intimidator, Battery #2 Deka 9A47 AGM Intimidator WARN 36080 28" Quick Connect Cable X 2, WARN 26405 Quick Connect Cable 7' X 2, WARN 15901 Black Cable X 1 -- winch control 72" X 1 https://www.facebook.com/DifferentialPartsUS
|
|
Rigid SR2 40" combo133 viewshttps://www.facebook.com/DifferentialPartsUS
|
|
discrete winch mount415 viewsThe D44 winch mount on the trails. Like it on Facebook https://www.facebook.com/DifferentialPartsUS
|
|
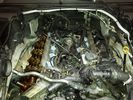
4.4 L Petrol Engine214 viewsIntake removed on V8 4.4L Petrol Engine to remove hose with T in it.
plse like my facebook page https://www.facebook.com/DifferentialPartsUS
|
|
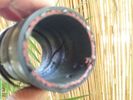
Split little intercooler hose 394 views
|
|
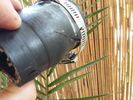
Split little intercooler hose 2107 views
|
|
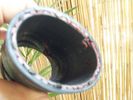
Split little intercooler hose 172 views
|
|
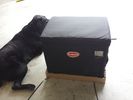
Snomaster 40L fridge/freezer141 viewsPO https://www.facebook.com/snomasterusa
|
|
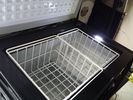
Snomaster 40L fridge/freezer158 viewsPO https://www.facebook.com/snomasterusa
|
|
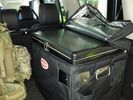
Snomaster 40L fridge/freezer184 viewsPO https://www.facebook.com/snomasterusa
|
|
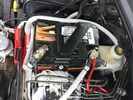
Wiring342 viewsThis is the final wiring configuration. It shows the dual battery wiring, 75A wiring run to the boot, the winch and in the lower right you can see a few turns of coax with a snap on ferrite near the base of a VHF Antenna.
|
|
Snomaster 40L fridge/freezer189 views(c) https://www.facebook.com/snomasterusa
|
|
Rhino Hitch205 viewsRhino hitch https://www.facebook.com/DifferentialPartsUS
|
|
Rhino Hitch229 viewsRhino Hitch https://www.facebook.com/DifferentialPartsUS
|
|
66L 172 views66L Fridge Freezer running in 90F heat. https://www.facebook.com/snomasterusa
|
|
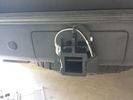
Rhino Hitch429 viewsCover fitted over the 75A Anderson plug with Rhino Hitch fitted which is a Class IV hitch. https://www.facebook.com/DifferentialPartsUS
Fits the Disco 3, Disco 4 and Range Rover Sport
|
|
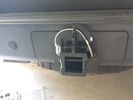
Rhino Hitch309 viewshttps://www.facebook.com/DifferentialPartsUS
|
|
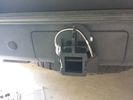
Rhino Hitch395 viewsMore info from https://www.facebook.com/DifferentialPartsUS
|
|
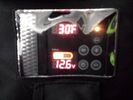
Snomaster 40L fridge/freezer225 views(c) https://www.facebook.com/snomasterusa
|
|
Black Yatt134 views
|
|
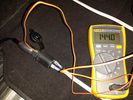
Marine Plug346 viewsRunning a cigarette plug rated at 15a with a plug rated at 20a drawing 5a at 12.8v will generate more heat than you want. Use Anderson or hardware.
|
|

Victory Cup Polo Match141 viewsVictory Cup Bi Plane Polo Match2 viewsLand Rover event at Victory Cup Polo match 10/17/15. http://victorycup.org/bootsandpearls/
VIP Section by Texas Rovers and Land Rover Austin http://texasrovers.org and http://landroveraustin.com/ https://www.facebook.com/DifferentialPartsUS https://www.facebook.com/snomasterusa
https://www.facebook.com/DifferentialPartsUS
|
|
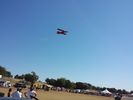
Victory Cup Bi Plane Polo Match121 viewsLand Rover event at Victory Cup Polo match 10/17/15. http://victorycup.org/bootsandpearls/
VIP Section by Texas Rovers and Land Rover Austin http://texasrovers.org and http://landroveraustin.com/ https://www.facebook.com/DifferentialPartsUS
https://www.facebook.com/DifferentialPartsUS
|
|
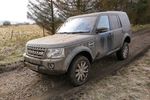
ATT Northumberland95 views
|
|

10 views
|
|
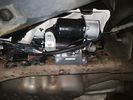
new hitachi air compressor fitted1 viewsImage uploaded in thread 177818
|
|
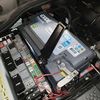
new battery, exide EA1000 / 100Ah/900A7 viewsImage uploaded in thread 177818
|
|

Thread upload3 viewsImage uploaded in thread 155907
|
|

Thread upload4 viewsImage uploaded in thread 155907
|
|

Openreach Test27 views
|
|
Thread upload3 viewsImage uploaded in thread 190198
|
|
Thread upload5 viewsImage uploaded in thread 126959
|
|
Thread upload6 viewsImage uploaded in thread 126959
|
|
Thread upload3 viewsImage uploaded in thread 126959
|
|

Anti Lock and Traction Control description and operation.1987 viewsNote on page 6 of this 17 page pdf the significance of the Steering Angle sensor mounted on the steering wheel shaft. The paragraph regarding the plausibility check as related to the brake pedal being not depressed is why the clean operation of the second set of contacts on the brake switch matters so much.
|
|
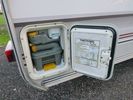
My Caravan For Sale104 views
|
|
Thread upload16 viewsImage uploaded in thread 149039
|
|
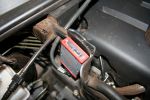
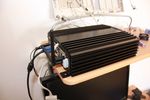
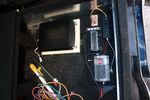
TT Box Location146 viewsSmall TT box, easy to fit on spare battery compartment
|
|
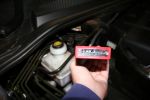
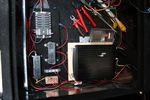
TT Box Jumpers134 viewsEasy to remove cover and setting the jumpers to either higher or lower settings
|
|
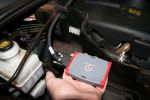
TT Box Size125 viewsSize of the new TT box shown in my hand
|
|
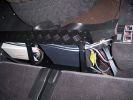
HF radio on RH side Inverter on LH. Frame is fitted behind second row of seats. (I have removed 3rd row as they will never be used)310 views
|
|
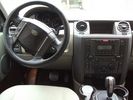
16 viewsnon è mia l'immagine ma riporta l'esatto cruscotto
|
|

Bedford CF V867 viewswith a very young me (19) in the bottom pic
|
|
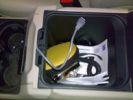
USB NEL CASSETTO CENTRALE83 views
|
|
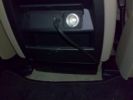
ATTACCO AUDIO81 views
|
|
ADATTATORE CARICA PC81 views
|
|
ADATTATORE CORRENTE PC IN POSIZIONE82 views
|
|
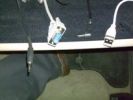
ATTACCHI UTILI NEL CASSETTO81 views
|
|
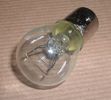
Land Rover Stop Tail Light dual filament bulb nominal 12 volt 21 / 5 watt filaments1427 viewsThis is the Land Rover part number 264590 dual filament bulb, (P21/5), that inserts into the upper two tail lamp receptacles. In the upper one, both filaments function, in the lower one, only the 5 watt tail light filament functions.
I regard it as not a good practice to routinely switch bulbs when the tail light filament, (5 watt), burns out on the lower bulb. The broken filament can jiggle over onto the brake light filament, (21 watt), and short the circuit to ground or something else not predicable.
There are also arguments to say that quality control is better on the Land Rover marketed bulbs than say far east sourced bulbs. Filament construction, and hence resistance can vary and mislead the current sensing circuits monitoring the signal light systems. Also when the bulbs are properly installed, all filaments should be standing vertically and not at any slope.
These are the sort of obscure circumstances that can lead to false trouble messages on the display, dropping to the stops, and subsequent concerns - all over a tail/signal light bulb.
For example, the filament life of both the tail light and the brake light filaments in the P21/5 bulb is significantly less than the USA common 1157 dual filament bulb, (1000/250 vs 5000/1200 hours); brightness in the P21/5 is a bit more, (3cp/35cp vs 3cp/32cp where cp is candle power), but current consumption is oddly less, (0.44a/1.86a vs 0.59a/2.10a where a is amps). It is the quest for efficiency vs maintenance trade off.
|
|

FTTC day 137 views
|
|
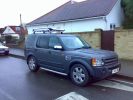
311 viewsThule Xpedition 821 Luggage Basket fitted to 861 Aerobars on 751 Feet with 3027 Fitting Kit. All in £360.00
|
|

312 viewsThule Xpedition 821 Luggage Basket fitted to 861 Aerobars on 751 Feet with 3027 Fitting Kit. All in £360.00
|
|

305 viewsThule Xpedition 821 Luggage Basket fitted to 861 Aerobars on 751 Feet with 3027 Fitting Kit. All in £360.00
|
|
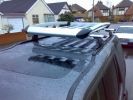
302 viewsThule Xpedition 821 Luggage Basket fitted to 861 Aerobars on 751 Feet with 3027 Fitting Kit. All in £360.00
|
|
Thread upload7 viewsImage uploaded in thread 121845
|
|

Thread upload3 viewsImage uploaded in thread 121845
|
|
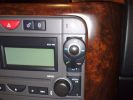
position of buttons for Parrot phone102 viewsthis can be put basically anywhere as it connect via bluetooth to the rest of the system. It is self powered (lithiam battery in it) so just stick it anywhere with no requirements for finding a live wire etc
|
|
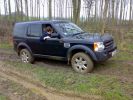
trying all settings but still no sucess even with DSC off281 views
|
|
Thread upload1 viewsImage uploaded in new thread
|
|
143 views
|
|

Thread upload0 viewsImage uploaded in new thread
|
|
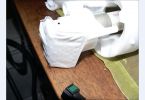
Filter attached to bottom of pump83 views
|
|

Dettaglio maniglia portellone30 views
|
|
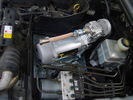
Compressore 12 volt 88 viewsEcco il compressore installato nel vano 2° batterie del Discovery3.
|
|
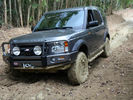
fun in the mud317 viewsCALENDAR ENTRY 2011
This is in Puerto Rico. The area is called \'cielito\' (little sky).
|
|
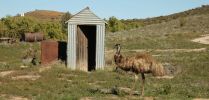
Flinders Ranges - When ya gotta go,....158 views
|
|
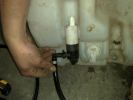
bottle with H/L washer pump and leveling sensor to the right - the space on the far right is for the w/screen pump87 views
|
|
Thread upload3 viewsImage uploaded in new thread
|
|

_DSC0211198 viewsD3Matt's water wings
|
|
33 Dash Loom39 views
|
|

sitting high20 views
|
|
Temporary Tailgate Latch149 viewsTailgate jammed shut in Keep River NP (no access due to cargo barrier) 1000 km trip to Darwin dealer. After 3 days opened up and attached string. 2 weeks in Kakadu and Litchfield then back to Darwin when parts arrived
|
|

Bonatti Grey grill for D36 views
|
|

20 viewsPermette di svitare i bulloni delle ruote, ma anche di altro, con rapidità e senza grosso sforzo.
Si collega alla batteria dell'auto e non necessita del motore acceso.
|
|

LR Dog Guard Fitting Instructions80 views
|
|

Billing Off-Road Course Water Splash43 viewsLottie\'s first off-road experience at the Billing off-road course with MikeS providing some vital guidance!
|
|
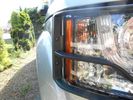
Replace the headlight and then fasten the light guard using the two allen bolts322 views
|
|
4 GPS Ant Fitted in Place58 views
|
|
piastra compressore86 viewsParticolare dei bulloni di fissaggio della piastra al piano di appoggio del vano batteria
|
|
GREY MATTE WRAP3 views
|
|

Air Distribution and Filtering Systems2084 viewsThis is 3 page pdf with coloured drawings of the air distribution ducting for the front air system.
Also included is a sketch of the pollen filter location within the front heater ducting. Note that two types of filters are available: a) the cheaper dust/pollen filter and b), the activated carbon filter that removes smells from the air. Installing the more expensive activated carbon filter means you never smell a cattle truck or chicken farm again. It really works.
|
|

Air Conditioner Specifications 4.4L V81570 viewsThis 2 page pdf is just the specifications for the AC system. The refrigerant type is R134A.
Note that when topping the system up, it can be a good idea to include some of that ultra violet light dye that will glow to show leaks and loose fitting.
|
|

Alternator and Regulator Wiring Diagrams, TDV6 and petrol V8 and V61989 viewsThis is a three page pdf that shows the alternator and regulator wiring for the petrol V6, petrol V8 and TDV6. The pdf can be either printed or by right clicking on the displayed pdf, rotated as required for viewing.
Of interest is that the regulator gets its instructions primarily from the Engine Control Module (ECM) and only secondarily from the vehicles electrical buss. The conductor from the battery thru the 5 amp fuse F20E is to provide initial power to excite the alternator at startup and then secondarily, to instruct it if the PWM signals were not available. Primary instructions to and from the ECM are thru the two other conductors via a digital like Pulse Width Modulated (PWM) signal.
If F20E, the 5 amp engine compartment fuse box fuse is blown, the red alternator light on the dash will be illuminated. This means that the alternator could be OK, but if the F20E fuse is blown, no electricity will be generated. Hence check the F20E fuse if you get a red ALT light or some indication of the alternator not working.
Regarding operation of the red ALT light on the dash, it is not the regulator within the alternator that tells the red light to illuminate, or not, but instead the ECM. This is the reason the red light does not function in the same manner as with older vehicles. With the 3, sometimes you have illumination and sometimes not depending upon what the ECM is thinking. What this means is that you can have an alternator that is failing but the red light does not illuminate as the ECM is compensating for reduced alternator output - maybe by draining the battery and or cutting back on vehicle electrical loads such as shutting off or cycling the radio amplifier or heated seats.
|
|
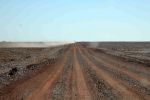
The Oodnadatta Track, in the Perdirka Desert189 views
|
|

60 viewsColdweathers, classic 90 blew up its expansion bottle, he was glad of the ride to the top but funnily enuf didnt want a tow to the bottom, some say it may have been due to the fact that his 90 looked like it had been taken jet sking on the back of a D3
|
|
Fit the 2nd lightguard and then replace the centre grille330 views
|
|
04278 viewsThe green wiring harness is the speaker outputs. Green is + and Green with white stripe is -. We tested all the wires with a 9V battery to figure out which went to what speakers then clearly labeled them as we did.
|
|
5 Where bottom of pocket attaches to dash55 views
|
|
5 ICE Loom - Location of pre fitted Voice / Speed pulse connector67 views
|
|

Getting over it325 views
|
|
Dettaglio griglia aspirazione28 views
|
|

D4/LR4 501-12-floor console upper panel install instructions / german language72 viewsD4/LR4 501-12-floor console upper panel install instructions / german language
|
|

Rear light guards fitting instructions56 views
|
|

H4h 4x4 European Rally.12 viewsGetting ready for the rally...
|
|
Thread upload9 viewsImage uploaded in thread 183986
|
|

Thread upload7 viewsImage uploaded in thread 194867
|
|
05270 viewsGetting all the wires ready to hack.
|
|
6 close view of where the pocket is bonede to bottom of dash58 views
|
|
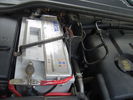
Cablaggio batteria88 viewsParticolare del cablaggio al polo positivo della batteria
|
|
Dettaglio maniglia portiera28 views
|
|
63 viewsDiffs getting a little workout
|
|

Mechanical Attention139 views
|
|

Thread upload7 viewsImage uploaded in thread 175193
|
|

Optima Battery Specifications167 viewsOptima Battery Specifications
|
|

Thread upload0 viewsImage uploaded in new thread
|
|

7 Dash Loom43 views
|
|
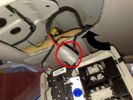
7 Voice / Telephone Mic Cable - pre fitted in roof70 views
|
|

Twin 7 Pin Socket Towing Electrics Fitting Instructions264 views
|
|

Thread upload11 viewsImage uploaded in thread 188531
|
|
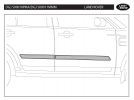
DGJ 500010PMA/DGJ 500011MMM73 viewsFITTING INSTRUCTION
Rubbing Strips
|
|

Otto 23 views
|
|

Thread upload4 viewsImage uploaded in thread 175193
|
|

Thread upload6 viewsImage uploaded in thread 148008
|
|

Start buttons2 views
|
|
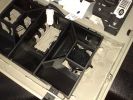
9 Voice Telephone Mic Fitted64 views
|
|

9-20200928_Vigor166_Setting_IP_Range14 views
|
|

Equippment attateched to player, nothing more30 views
|
|

Battery 25 views
|
|
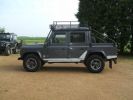
TOMB RAIDER BONETTI104 views
|
|

Thread upload45 viewsImage uploaded in thread 102519
|
|
65 viewshttp://www.disco3.co.uk/gallery/albums/edit/preview_9984c66c.JPG
|
|
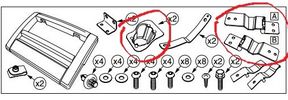
Thread upload9 viewsImage uploaded in thread 129546
|
|

35 views
|
|
Both L Brackets attached and bottom tabs slotted in H Trim5 views
|
|

A380160 viewsQANTAS staff pose with the very large A380 whilst it was in Brisbane having some promotional logos attached.
|
|
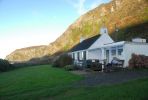
Morroch Cottage195 views
|
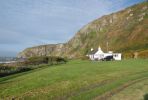
|
Morroch Cottage197 views
|
|

The Vale of Belvior and Nottingham in the background58 views
|
|

Thread upload9 viewsImage uploaded in thread 187407
|
|
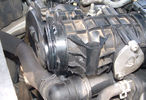
Airbox to EGR Butterfly Valve Housing Leak97 views
|
|
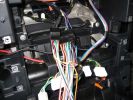
1274 views
|
|

Audio Connectivity Module fitting instructions748 views
|
|
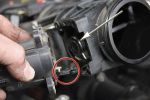
Removing the EGR Butterfly Valve Actuator1538 viewsRemove the 4 TORX screws to remove the actuator. The small black link (circled) connects the actuator drive arm with the butterfly valve spindle (arrowed). The spindle can now be very carefully levered out using a screwdriver inserted beneath the arrowed bit in the photo. A bit scary to do as it takes a fair bit of pressure before the spindle will free itself from the butterfly. Once it starts moving though, it gets easier to pull out.
|
|

Add A Circuit Littelfuse Data sheet2278 viewsThe switch connects to what Littelfuse brand calls an Add-A-Circuit model FMH200BP which is an adapter that plugs in place of a Mini fuse and then has space for two Mini fuses, (original and a second one). In this install, only the original 5 amp fuse was used - adapter was so as to route power from fuse box thru fuse, then rocker switch, and then back to fuse box.
Before you install the Add A Circuit for this application, take an ohm meter and trace out the circuit path of the four slots that fuses could insert into. The path is more complicated than one might first think. As such, the orientation of the fuse holder in the socket matters for this application - that is for a circuit diverter, rather than accessory adder.
|
|

AdesivoDefinitivo33 views
|
|

54 views
|
|

Thread upload16 viewsImage uploaded in new thread
|
|
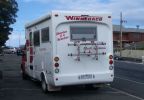
Adventure before Dementia124 viewsSpotted in Queenscliffe, Victoria (Sep 07)
|
|
Thread upload16 viewsImage uploaded in thread 152836
|
|
Air Box Removed1058 viewsView showing air box removed from front of EGR butterfly valve housing
|
|
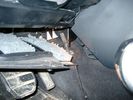
Air Conditioner Drain Hose on Drivers Side (LHD)2297 viewsThe corrugated rubber bit above and to the right of the gas pedal is the drain hose that goes down thru the carpet and floor sheet metal.
While it is bit hard to figure out from the jpg above, there is a rubber "strap" attached to the top of the corrugated hose that one uses to pull on to drag the hose up back around the black plastic heater "pan" drain. The same drain hose arrangement is on the other side as well.
One could I suppose run a plastic snap tie around the vertical pull strap if one was concerned about the hose slipping off again. See also the other jpg sketch which is from the Land Rover manual.
|
|
Lunchtime Lane201 viewsNot 200 yards from Manchester Airport can be found a little 1/2 mile lane - did it for the first time today - a few minutes fun in a dreary day
|
|
rear bracket fitted 160 views
|
|
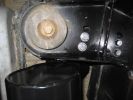
front of tank fitted 147 views
|
|
fitted ..tucked away 155 views
|
|
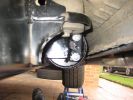
tank fitted to rear bracket196 views
|
|
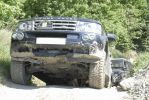
81 views
|
|
60 viewsOne bolt is visible at the front, but the other two are down the left hand side and best accessed by removing the small plastic guard behind the bumper. I also removed the small metal radiator guard between the bumper and the main sump guard (but that was mostly to retrieve the spanner I dropped!). The only issue with removing the plastic guard is the stupid plastic clips that hold it on may need to be replaced.
|
|

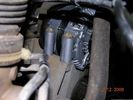
Alternator female plug looking down into top373 viewsThis shows the plug connected to the alternator wiring harness looking down into the top of the plug.
The cavity marked 1 is the AS or BATT SENSE and the wire colour most likely has Brown/Green on it.
The cavity marked 2 is the RC or ALT CON and the wire colour most likely has Red/White on it.
The cavity marked 3 is the L1 or ALT MON and the wire colour likely has Green/White on it.
I say "most likely" as the wire colours are not always the same on all vehicles.
Also the terminal 1 conductor destination is more likely C0570-175 rather than per the jpg.
The #3 pin is located closest to the big B+ terminal.
|
|
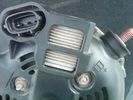
Alternator Plug and B+ terminal919 viewsPictured is the rear of the older Land Rover part # YLE500190 alternator showing the shiny cooling fin of the Regitar VRH2005-142 regulator under.
The first pin in the far left side of the connector is numbered #1 in the LR electrical wiring diagrams and is Battery Voltage Sensing (BVS); the middle pin, #2 receives a Pulse Width Modulated (PWM) signal from the Engine Control Module (ECM), and the right pin, #3 carries a PWM signal back to the ECM. Terminal Pin #2 on the LR wiring diagrams is called Alternator Control or ALT CON; Pin #3 per LR is called Alternator Monitoring or ALT MON.
Pin #1 is similar to what in older designs used to be called A or Batt, but is now called by Denso, S, AS, or Alternator Sensing for this design. Pin #1 also provides power to excite the alternator at startup until the PWM instructions over ride the battery voltage info. Land Rover calls the electronics under the pins a Smart Regulator, ironic, as it has to follow orders from the ECM rather than give the orders - new age thinking I guess. This is different from older design internal regulators that look at just the battery or the electrical buss voltage and then decides itself what to do.
It is almost like we are back to the external regulator designs of old, except that the ECM may decide that instead of telling the alternator to make more power, to load shed, and hence shut down the heated windscreen, seats, or whatever other electrical loads it decides are appropriate. My view is that the "smarts" are in the ECM and that the "regulator" should be regarded if not dumb, then as being a slave to the ECM.
|
|

AMK_Compressor_Fitting_LTB0042042 views
|
|

amps-acid-car-battery-soc-charge-voltage-3d26 views
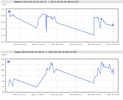
|
|

Thread upload15 viewsImage uploaded in thread 174456
|
|

18 views
|
|

IELTS test app31 viewsa little android app I wrote to help english learners planning to take the IELTS test
(some vocabulary in chinese)
|
|
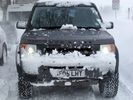
April showers280 views
|
|
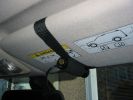
Cam mounted on sun-visor244 viewsI usually place something in between the sun-visor and the roof lining to give the cam a better angle. At Boughrood it was a roll of PVC tape. For Boughrood I also placed a small cardboard box between the cam and the sun-visor to bring the cam away from the dirty section of windscreen.
|
|
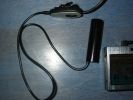
The cam with microphone/control buttons180 views
|
|

Thread upload13 viewsImage uploaded in new thread
|
|
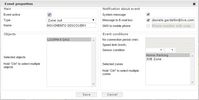
Thread upload11 viewsImage uploaded in new thread
|
|

64 views
|
|
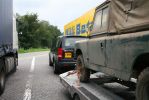
208 viewsin its usual state with a 5.6 m trailer weighing anything up to 3.5 tons. it is the best tow vehicle i have ever owned and eve better than my 130 land rover
|
|
Thread upload13 viewsImage uploaded in new thread
|
|

207 views
|
|
![Filename=Assisi 31-12-2008 01 - 01 gen 2009 - 01_M [1280x768].jpg
Filesize=80KB
Dimensions=1024x768
Date added=02.Jan 2009 Assisi 31-12-2008 01 - 01 gen 2009 - 01_M [1280x768].jpg](albums/userpics/12685/thumb_Assisi%2031-12-2008%2001%20-%2001%20gen%202009%20-%2001_M%20%5B1280x768%5D.jpg)
Sembra che nessuno sia in grado di mettere qui la propria auto a causa della presenza di un bel dosso!112 views
|
|
![Filename=Assisi 31-12-2008 03 - 01 gen 2009 - 03_M [1280x768].jpg
Filesize=134KB
Dimensions=1024x768
Date added=02.Jan 2009 Assisi 31-12-2008 03 - 01 gen 2009 - 03_M [1280x768].jpg](albums/userpics/12685/thumb_Assisi%2031-12-2008%2003%20-%2001%20gen%202009%20-%2003_M%20%5B1280x768%5D.jpg)
Il dosso....ma secondo voi quanto spazio c'era sotto?112 viewsLo vedrete nelle prossime foto....
|
|
Si vede sotto meglio che sul ponte.108 views
|
|
Mud at Mittagong189 views
|
|
Modified Oregon AT2000 Mount - still mountable on original fittings82 views
|
|

70 views
|
|

Thread upload19 viewsImage uploaded in new thread
|
|
| 2899 files on 8 page(s) |
 |
1 |  |
 |
 |
 |
 |
 |
 |
|