| Search results - "Spec" |
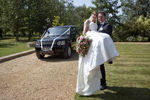
Got Married!241 viewsOccasionally the car does get a clean/polish, this was a special occasion :-)
|
|
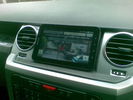
Samsung Galaxy Tab Sat Nav122 viewsVery nearly a very good fit for pauper-spec D3\'s - the Galaxy Tab running Google Map Navigation
|
|
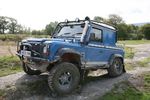
Truck Back 90 Challenge truck spec60 viewsSinusoidals at Ashford
|
|
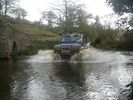
Truck Back 90 Challenge truck spec in the water53 views
|
|
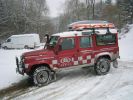
Extreme medics 110232 viewsFull Ambulance spec with extrem offroad cabability, 110 v8
|
|
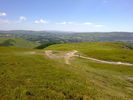
Look what we got up! Not bad in standard spec and 16", mixed, road tyres, I guess!43 views
|
|
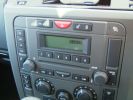
Base Spec Radio/CD2468 views
|
|

47 views
|
|

On top at last351 viewsPhoto at the sumit of Arigna mountains, as part of one of the stages in the 2009 4x4challenge in aid of Temple St childrens hospital. Tough gettin there especially as we towed a Deafner90 up behind us that had bursted an expansion bottle. But the D3 powered on up regardless.
|
|
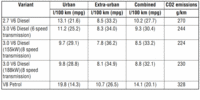
DISCO 2012MY79 views
|
|

Thread upload17 viewsImage uploaded in thread 110148
|
|

Thread upload12 viewsImage uploaded in thread 141887
|
|
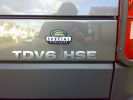
I knew it was special the moment I saw it.349 views
|
|
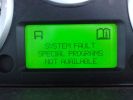
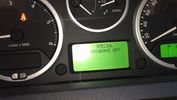
Special Programs Not Available231 views
|
|

Thread upload1 viewsImage uploaded in thread 186251
|
|
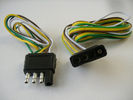
4 pin NAS flat connector from NAS small trailer382 viewsThe connector with the three exposed pins is the end that would commonly be located at the trailer hitch end, (front), of a small NAS lightweight trailer that has no electric brakes. This plug would connect into the flat 4 pin connector at the rear of the 3.
Note the order of the pin functions and wire colours: White is ground; the next pin is for tail/marker lights using the Brown wire; the Yellow conductor is for the left turn signal, and the far pin uses the Green conductor for the right turn signal.
There is no separate brake light conductor as NAS spec vehicles most often combine the brake and signal light functions to the same bulb filament rather separate filaments in different bulbs. The LR factory harness resolves that design difference.
Fortunately, the Land Rover NAS assembly pin order for the 4 pin flat plug maintains the above described conventions.
|
|

Air Conditioner Specifications 4.4L V81569 viewsThis 2 page pdf is just the specifications for the AC system. The refrigerant type is R134A.
Note that when topping the system up, it can be a good idea to include some of that ultra violet light dye that will glow to show leaks and loose fitting.
|
|

43 views
|
|
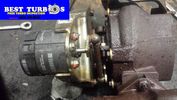
Thread upload175 viewsImage uploaded in new thread
|
|
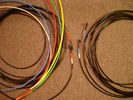
6mm PA12 grade nylon tubing with heat shrink applied 543 viewsShows some of the 6mm air line with heat shrink applied to one end of tubing. Shrink will be applied to the other end once field cut to length. These four tubes, each about 20 ft (6m) long, feed to the rear. Re the front air lines, (not shown), four additional lengths, each about 10 ft (3m) long, are required plus one more 3 metre length for compressor air. The 6mm tubing is a Nylon product specified as PA12. There is also a very similar Transport grade PA11 material, however it seems that PA12 is the more common Transport grade now in use. Also the applicable DIN standard seems to be both DIN 73378 and DIN 74324 for the nylon tubing. The working pressure of the 6mm tubing is about 27 Bar and bursting 82 Bar @ 20C. This is for the 1mm nominal wall thickness material, (4mm ID, 6mm OD).
|
|

Optima Battery Specifications166 viewsOptima Battery Specifications
|
|
Thread upload0 viewsImage uploaded in new thread
|
|

Thread upload0 viewsImage uploaded in new thread
|
|

133 views
|
|
Thread upload8 viewsImage uploaded in thread 166499
|
|

ARB bush rear special DIY tool25 views
|
|
Thread upload11 viewsImage uploaded in new thread
|
|

B1 oil spec4 views
|
|
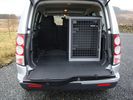
B24 TransK9 Dog Transit Box for Discovery 471 viewsThis box is designed specifically for the Discovery so that the 6th seat can also be used.
|
|

B3 oil spec7 views
|
|

Blade Fuse Specs Ohms57 views
|
|

Bluetooth Spec189 views
|
|

55 views
|
|

crankshaft bolt24 viewsBolt on left is new one for upgraded oil pump casing. Bolt on right is what came out. Notice damaged end and shortness of bolt. Inside of crank was inspected wirh borescope and threads etc all ok. New bolt goes in and out ok. Few filings inside but otherwise clear. Not sure why old bolt ended up like that.
|
|

Brake Light Switch, Find, Remove, and Install Instructions 7852 viewsThis is a two page doc outlining where to find the brake light switch, how to remove it, and then install the new one.
Note, do not move the brake pedal when removing or installing the switch. Let the brake pedal hang where it wants to. The switch design is actually cunning, and as such is supposed to make the removal and install fool proof. Hence if you think too much about it, you can wreck the new switch.
If you want to inspect the interior of the switch, wait until you have removed the old switch. You can then just unsnap the blue from the white to get it apart. Inside, the switch is quite simple, (no circuit boards), but it will probably show black dust from failing contacts.
I think the reason the switch fails is that the Normally Open, (NO), contacts of the brake light contacts were made too light to carry the current load for make and break of the tail light filaments. I also think the black dust created then fouls the Normally Closed, (NC), second set of contacts for the ABS circuit. As such, the Normally Closed contacts become intermittent in operation and display as a fluctuating open and closed circuit condition to the ABS system when the ABS should be seeing a steady closed circuit. Hopefully the replacement switch contacts are more robust and may be as I recently replaced my switch again just as a matter of maintenance. While in a redesign, ideally the NC contacts should be sealed or at least separated from the NO contacts, when I inspected the removed switch, this time there was no black dust present.
Probably the removed switch will have a Land Rover oval logo moulded into it, the new one, FOMOCO.
|
|

Black Deposits on Brake Light Switch Plunger2757 viewsThis jpg I got off another forum and is typical of what one will see when one opens up the removed brake light switch. The black powder is residue from arcing of one of the pair of contacts within.
Hopefully the newer switches with the FOMOCO logo moulded into the plastic are improved from the Land Rover logo marked early units, however I doubt it.
The Ford part number is SW-6572 and/or 7E5Z-13480-A as used on the 2006 to 2009 Ford Fusion's and Mercury Milan's; the Land Rover part number is XKB500110. Cost of switch could be about twenty five dollars. A previous LR part number for the switch was XKB500030, so hopefully the newer LR part number, XKB500110, reflects some improvement in reliability.
It is possible that the new switches are better as I installed a replacement 72,000 km, (45,000 miles) later, at 195,000 km (121,000 miles). When I took the removed switch apart to inspect, it was clean inside. There was no black dust - the switch looked like new, hence they must be improved now.
|
|

Thread upload12 viewsImage uploaded in thread 163880
|
|

Bryce Canyon, Utah149 viewsSpectacular! Much better than Grand Canyon IMO
|
|

155 views
|
|

C3 oil spec5 views
|
|
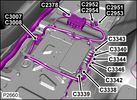
Camera Control Module D451 viewsHarness connection detail, camera module, located beneath L/H passenger side front seat UK D4 spec 2012.
|
|
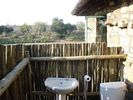
Bathroom No 237 viewsThe view from Bathroom No 2 is realy spectacular. The bathroom is in Botswana and the view is over the Limpopo River with South Africa in the back ground
|
|
Thread upload6 viewsImage uploaded in thread 127740
|
|
Thread upload12 viewsImage uploaded in thread 137794
|
|
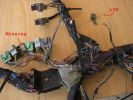
example problems113 viewsInspection showed another Cut Airbag connector, a Missing connector and a few rogue wires at the bottom, the silver one marked Lin, is for the LIN BUS and is supposed to be like that though
|
|
21 views
|
|

Countersunk Bolt Specification83 views
|
|
37 views
|
|

Commercial spec SATNAV !!!!185 views
|
|

doh believe it or not but i think i know what happend no special program selected50 views
|
|

Manifold absolute pressure sensor31 viewsCleaning the map sensor
|
|
D3 pack spot unsuspecting prey grazing peacefully on the plains85 views
|
|
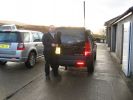
Ryan at Handover ....sun ordered specially!511 views
|
|

D4 Brochure110 views
|
|

D4 UK Product Brief59 views
|
|

Approved Vehicle Programme Multi-Point Inspection Check List Appendix26 viewsApproved Vehicle Programme Multi-Point Inspection Check List Appendix
|
|
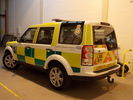
D4 Being Prepped for LAS26 viewsThis is a Disco 4 (unknown spec) being prepped up at my workplace for the LAS, having new comms kit put in and stuff. What you can't see from this angle is that the front grille and headlights have been taken out.
|
|

Thread upload10 viewsImage uploaded in new thread
|
|

Thread upload6 viewsImage uploaded in thread 189350
|
|

Deka Battery Dimension Data615 viewsThe battery size that I installed for my auxiliary was a BCI 40R battery as it was for me the easiest to fit and was also a cranking battery. The case profile was such that no tie down fins were located on either bottom end, (sides yes), and length wise, it was only about 11" (290 mm) long. As such, I did not have to grind the nibs at the front bottom of the plastic surround.
I did however raise the bottom of the battery above the angled nibs as I set the battery on a 1" (25mm) high plastic spacer. The total height, (battery plus spacer), was about 8" (200mm) so the battery top still fit under the Land Rover factory cover.
For the Aux battery, when I replaced the 40R, I installed an Interstate BCI 47 which is similar in size to a DIN H5. I was therefore able to eliminate the vertical spacer as the Group 47/H5 is the same height as the DIN H7/H8 stock LR spec starting battery. As such, the standard battery tie down bolts can be used without modification. The Group 47 battery is 9 11/16" long x 6 7/8" wide x 7 1/2" (190mm) high.
|
|
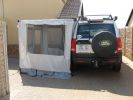
Awning248 viewsI have dual mounted awnings which can convert to tents if required. The outer side walls are an off the shelf purchase, but
the inner ( vehicle side )have to be made to spec.
|
|
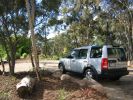
Discovery3 arrival236 views2006 spec TDV6 SE
|
|

D3 Torque specs59 viewsTorque specification for D3
|
|

D3 and Abbey Spectrum 6201133 viewsReally nice combination.
|
|

158 views
|
|

Official Disco 4 Specs and Options69 views
|
|

222 views
|
|

specification sdv6 tdv645 viewscontains gear ratios and outputs
|
|

MY12 Discovery 4 Product Brief167 viewsDetails of changes, upgrades etc for MY12
|
|

Oil Pressure Specs69 views
|
|

Disco 4 MY2012 spec and console images53 views
|
|
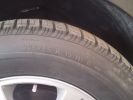
Tire specs.134 views
|
|
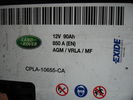
D4 Battery Specifications36 views
|
|
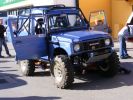
Spec\'d out Suzuki in Open Class153 views
|
|
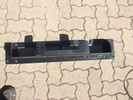
Top view of "Uncle Ray" discrete winch tray, after painting.106 viewsNote that towards the upper right there is a notch in the tray. This is needed for the specific winch's electric solenoid. The winch is a Mile Marker 12,000 lb hydraulic unit.
|
|
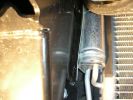
311 viewsLeft hand side impact absorber almost touching cooling system on NA spec truck. Absorber required modification.
|
|
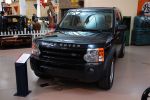
First Discovey 3 off the line (US Spec LR3)424 views
|
|

First Discovey 3 off the line (US Spec LR3)382 views
|
|
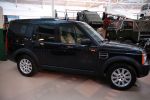
First Discovey 3 off the line (US Spec LR3)450 views
|
|
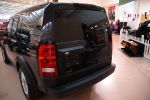
First Discovey 3 off the line (US Spec LR3)621 views
|
|
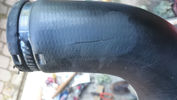
Intercooler hose - usual suspect20 views
|
|

South African Disco 3 2007 model (VIN 7A) EGR valve Right hand side.46 viewsIt is still an EU3 spec vehicle, so the EGRs can be blanked off successfully.
|
|
199 views
|
|
178 views
|
|
Thread upload12 viewsImage uploaded in thread 164212
|
|
Thread upload12 viewsImage uploaded in thread 77029
|
|
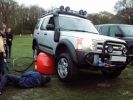
Slimer demonstrating his prowess with his airbag!266 viewsneo was inspecting the underside at the time - not sure why?
Allegedly a 4 ton airbag was needed since the boot was full (and I can confirm this) of crates of Desperado
|
|
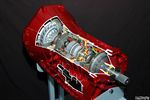
Ford 6R60 six speed cutaway showing torque converter.2198 viewsThis is a cutaway of the Ford 6R60 six speed which is a Ford license built version similar to our ZF 6HP26 six speed speced on early 3's.
The newer 3's and 4's have the ZF 6HP28. The Ford version is called the 6R80 and variations of it are used on the Raptor. As such, the Raptor metal pan can be installed on the 3's tranny but the deeper Ford Raptor pan does not have a drain plug.
|
|

FUSE SPECIFICATION CHART66 views
|
|

Oil specifications for land Rover models198 views
|
|

GVif Spec62 views
|
|

gvif manual rev 383 views
|
|

GVIF Setup Disco 3169 views
|
|

Highland 4WD Club Run 2009. 18 miles on offroad tracks continuously. (special permission granted from landowners)66 views
|
|
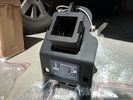
Rhino Tow Loop Hitch269 viewsThis is a receiver end view of the Rhino Hitch that ties to the factory tow loop. In addition to improved strength, it does not reduce ground clearance as does the factory style when installed.
Land Rover in early advertising videos when the 3 first came out showed the D3 hanging from a crane via the frame. The intent was to show how strong the frame is and by inference, the rear tow loop, specifically noted as being good for 6 tonne. The video ends before anything dropped or was lowered back to the ground, so one of course does not know for certain. The Rhino Hitch design however picks up on the apparent evidence of strength and certainly the additional clearance.
|
|
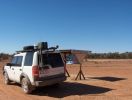
G4 Ladder Special Model109 views
|
|

preserved species27 viewscat anyone!!
|
|
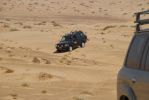
Over the sands97 viewsInitially tried the car with all up weight - full auxiliary (115L)and main (85L) fuel tanks, dual spare wheels, and roof rack. Car had a marked tendency to tail end slide when on side slopes, especially in soft - really soft sand.
|
|
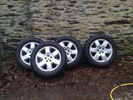
set of four land rover 19" 6 spoke alloys with wrangler MTR's as per G4 spec29 viewsFor sale the set of four tyres and wheels . tyres are new having only traveled 2000 miles
|
|
Wheel geometry218 viewsThe geometry on the left is the before, anything in red is out of spec, the settings on the right are afte the 4 wheel alignment was finished.
|
|
nearing completion 82 viewstruck cab
300 tdi - full intercooler - erg removed - fuel pump adjusted
roll cage to MSA spec
new Mantec bumper & 8274 winch
|
|

31 viewsCornish inspection team
|
|
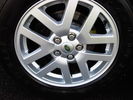
Wheels79 viewsAll 4 wheels in good order - would say "Perfect" but one of the 4 has an absolute minor scratch to it - which I had not noticed until I inspected them prior to sale. That minor not previously noted. Not bothered to take full size spare off to look at it, but as far as I am aware also in perfect condition.
|
|
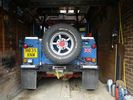
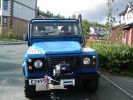
Truck Back 90 Challenge truck spec52 views
|
|
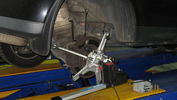
Bruce Davis Specialised Wheel Alignment Photo 280 viewsBruce claims that it is trial and error with standard wheel alignment equipment as you have to remove the wheel to make an adjustment and then recheck, a difficult task.
|
|

Loadspace72 viewsLoadspace showing the UK Commercial spec loaded arrangement.
|
|
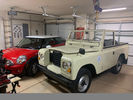
Series III and Mini Cooper1 views1981 Series III 88 Santana Especial and 2012 Mini Cooper.
|
|

Side Light - Old23 viewsOriginal LR spec side light
|
|
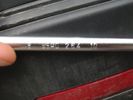
50 viewsspecial tool for sump plug
|
|
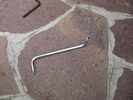
50 viewsspec tool and 8mm alle
|
|
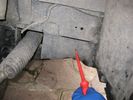
plastic inspection panel lower right weelarch47 views
|
|

UHF Antenna Mount384 viewsView from underside of bonnet. The lower half of the mount is folded from stainless steel and bolted through an exisitng oval shaped hole in the bonnet. This hole is throught the heavy steel plate that the bonnet hinges bolt to - not just the aluminium panel. A specially machined rectangular nut was made to pass through the oval hole, rotate 90 degrees and then stopped from turning by a slight shoulder on the nut.
|
|
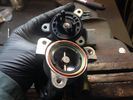
EGR replacement18 viewsOpening the actuator for inspection.
|
|

Wadding.... not their a speciality!28 views
|
|
139 views
|
|

Interstate Battery Dimension sheet641 viewsThis sheet is hard to find - the sheet is not on the Interstate corporate web site but some dealer web sites display it. The pdf shows most of their available batteries including the H7 and H8 sizes that are the LR North America replacement batteries for the main starting battery. These batteries are of the Land Rover desired "shallow" cycle high discharge current Maintenance Free, (Ca Ca), internal construction, (not AGM, but instead, Wet Flooded Lead Acid with battery "caps" and Ca grid separators).
For the AUX battery , the H6, (BCI Group 48), is probably similar in dimensions to the Varta E12V75N that is popular in Australia. For that battery to fit in the second battery compartment, you must grind out the angled nibs on the inside front bottom of the LR black plastic surround, something I did wish to do and hence installed a Group 40R on a spacer. Alternately, one can choose an Interstate BCI Group 47 which is similar to a DIN H5 for the AUX location. I did this when I had to replace my 40R. No vertical spacer is required and the stock battery tie down bolts and clamp work well.
|
|

iPod specs83 views
|
|
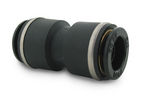
John Guest DOT all plastic fitting717 viewsThis is a picture of the John Guest DOT all plastic union. If you look closely, you can see the DOT imprinted in raised letters on the end of the fitting. This is of a 1/4" connector rather than the 6mm that the 3 requires.
The picture is similar to the air suspension pneumatic fitting union that Land Rover sells as replacement part # STC8580. This is for 6mm OD tubing size. The STC8580 comes with what are called "Collets" at each end that cover up the press to release feature underneath. See the John Guest web site www.johnguest.com under the Pneumatics section and also in Downloads for their catalog for install and remove instructions.
The actual "air brake spec" fitting that Land Rover provides has an interior 4mm OD ferrule that slips inside the 4mm ID of the nominal 6mm tubing. I have not yet been able to obtain the John Guest part number for the LR fitting, only the LR part number. This part number was generated for the RR Classic air systems.
|
|
67 views
|
|
71 views
|
|

16 views
|
|

LA100-002 - Technical_Bulletin - Lubricant and Fluid Specifications279 views
|
|

LA303-001 - Technical Bulletin - Cylinder Head Built to Supercharged Specification67 views
|
|
Thread upload27 viewsImage uploaded in thread 125438
|
|
Thread upload9 viewsImage uploaded in thread 130190
|
|
Thread upload11 viewsImage uploaded in thread 115982
|
|
Thread upload9 viewsImage uploaded in thread 130190
|
|
Thread upload5 viewsImage uploaded in thread 109499
|
|
Thread upload8 viewsImage uploaded in thread 77029
|
|
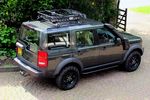
Thread upload8 viewsImage uploaded in thread 164768
|
|
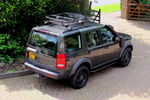
Thread upload6 viewsImage uploaded in thread 130190
|
|
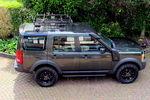
Thread upload9 viewsImage uploaded in thread 130190
|
|

Thread upload9 viewsImage uploaded in thread 162127
|
|
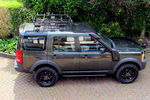
Thread upload8 viewsImage uploaded in thread 162127
|
|

Harness that connects inside left rear compartment.445 viewsThis is the harness section that connects behind the left rear interior access panel and exits thru the large grommeted hole to below/behind the left rear tail light.
Note the two rubber grommets on the harness as there is both an interior metal skin and an exterior metal skin behind the left tail light assembly.
The two light grey connectors plug into two existing connectors near the top of the rear left interior access panel. The two darker connectors plug into the second piece of harness.
There is no little separate fuse box either with the NAS spec harness. The fuse box is included with the UK 13 pin dual plug units. If there was a fuse box, it would be on this portion of the harness.
|
|

21 views
|
|

14 views
|
|
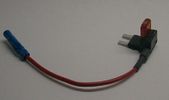
Littelfuse Mini Add-A-Circuit FMH200BP and OFH0200ZP1621 viewsFound this jpg somewhere on the forum - others are using them as it is a good way to tap the fuse box to add a fused circuit, or in this case, to modify a circuit to add a switch such that the fused circuit is switched. In my SmoothTalker gallery, there is a PDF from Littelfuse specifically related to this Add-A-Circuit device.
Before you install the Add A Circuit for any application, take an ohm meter and trace out the circuit path of the two pair of slots that fuses could insert into. The path is more complicated than one might first think. As such, the orientation of the fuse holder in the socket may matter depending upon the application. If the application is a circuit diverter, (as the F35 mode is), as opposed to a mere accessory adder, orientation matters.
|
|

LLumar "windscreen" clear Infra Red reduction side window film930 viewsThis is a data sheet on the LLumar brand of what they call Windscreen Film; It is almost clear, (has a bit of a blue tint), and reduces both the Ultra Violet fading and sun burn rays which most all films do as that is easy, plus more significantly, the Infra Red heat rays. That is rare as it is not so easy or cheap to do.
AIR80BLSRHPR (blue) is what the IR rejection film is listed as in the brochure that I used. http://www.llumar.com/en/AutoWindscreen.aspx
I had it applied to the front side windows as well as the front sun roof. One can feel the difference when the sun is low and streaming thru the side glass or high and coming thru the sun roof. Rolling a side window down is the simplest test of effectiveness re the rejection of the heat energy.
|
|

LLumar AIR80 Air Blue 78 windscreen film IR reduction metal oxide340 viewsThis pdf summarizes the characteristics of the various types of window glass film available from LLumar. www.llumar.com
I had the Air 80 metal oxide sort of clear film, (windshield film they call it), installed on the front driver and passenger side windows to reduce the Infra Red penetration and hence heating effect on the front occupants. The film is barely visible from either inside or outside, however there is a noticeable reduction in heat penetration when sitting inside. In short, my arm does not get cooked.
Cell phone and GPS etc seem unaffected by the metal oxide film.
I also had the film installed on the three sun roof portions as well.
|
|

LR Electric Trailer Brake C2590 Female Connector606 viewsThis female connector, C2590, located up above and near the brake pedal is for the Trailer Electric Brake Controller hookup.
The Black wire in the bottom right is pin #3, the ground. The Blue wire to the left is pin #6, the Trailer Brake Controller output going to the rear trailer socket.
The White #4 wire is the 30 amp fusible link, (Link 6E in the engine compartment junction box), for the Brake Controller 12VDC power feed from the battery. Note that this would make a pretty good power source for CB radios and the like if no electric trailer brakes were required.
Pin #5 is a Green wire from the stop lamp switch, (the control input for the Brake Controller).
This plug is standard on all NAS (LR3) vehicles, but unlikely to be found on the D3 spec units.
|
|
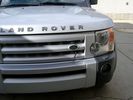
Battery Maintainer pigtail sticking out of Grill726 viewsThis is all you see when everything is put back together - just the pigtail and Weather Pack blanking plug. Most often, I have it all tucked back behind the grill.
In winter, there may be a second cord hanging out as well - the 120 VAC power cord for the engine block heater, a tea kettle like element inserted in the engine block. NAS petrol V8's do not have the Fuel Burning Heater, (FBH), installed, but instead in cold area markets have the block heater element assembly available as a dealer installed option. There is an argument to say that the heating element is factory installed in all cold climate V8 gasoline engines, however the appropriate power cord is not. If true, this means that all one needs to purchase is the area specific power cord and plugging in / attachment to the engine block located block heater.
As such, you will often see a conventional 120VAC three prong power plug hanging loose out of the grill of most vehicles here in the wintertime. In summer, most drivers tuck the plug back behind the grill as it is no beauty mark.
|
|
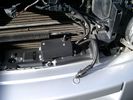
Battery Maintainer switch box and connector 722 viewsThe Hammond box contains a DPDT toggle switch with centre off. The Positive and Negative from each battery feeds to the switch. Depending on the setting of the toggle, (full left, full right,or centre off),the respective batteries connect into the pigtail that can stick out thru the grill when one wishes to connect the charger.
This allows one to charge each battery independently via a suitable battery maintainer. I use a CTEK unit that feeds a maximum of 3.3 amps at 14.4 or 14.7 VDC, depending upon setting. The wiring therefore allows for a slow recharge of either of the batteries separately if either one requires such.
|
|
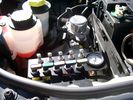
View of mounted panel from front left side877 viewsNote that all valve handles are shown in the OFF position, (the trouble position). In this case, the air that is in the air springs, (if any), is trapped in there - that is the valve blocks cannot vent whatever air is already in the air springs as the air lines between the springs and respective valve blocks are closed off by the FASKIT valves. In operation, there may be only trouble with one air spring, (perhaps a wheel height sensor), and as such, only one valve would need to be closed. If there was complete air compressor failure, then all valves would be closed and then as required, each spring could be manually filled from an outside clean dry oil free air source.
|
|
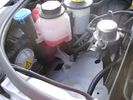
Empty space in NAS LR3 for location of FASKIT panel599 viewsThe empty space is available as the North America Spec gasoline engine LR3's do not have the Fuel Burning Heater installed. The air lines from the four air springs and the air tank will appear to rise up from under the headlight assembly. The lines to the front block valve assembly located behind the front right fog light will sort of run within the bumper across the front of the radiator down into behind the righthand fog light. The rear lines somewhat follow the path of the existing air feed line from the front valve assembly to compressor. Rather than be located between the left front fender liner and left metal wing however, the four lines will feed thru the empty wing space inside and above the wheel well arch and exit down by the left front mud flap. From there, the lines run along the left frame member above the air tank and then parallel the frame over top the compressor to the top of the rear left air spring where the rear air block valve assembly is located.
|
|

NAS 7 Pin Round Socket + 4 Pin Flat Socket oriented as installed.752 viewsThis is the layout you see when you look into the NAS Land Rover sockets as installed at the rear of the LR3/4. The flat 4 pin socket is located under the round socket.
Wiring order is relative to the slot on the round socket, and hence the same as the other jpg where the slot is shown at the top.
The CJB monitors the front and rear turn signal lamps and can detect if more than four lamps are fitted, (the side turn signal lamps are not monitored). This is another reason for using genuine LR bulbs as off shore bulbs can have varied and out of spec resistance values.
When a trailer is detected, the trailer warning indicator in the instrument cluster is supposed to flash green in synchronization with the turn signal indicators.
If one or more of the turn signal lamps on the vehicle or the trailer are defective, the trailer warning indicator will cease to flash any longer. This is to alert the driver to probably bulb failure.
If the trailer has LED lamps installed, and no LED adapter circuitry is used, most likely the trailer will not be sensed and systems such as the backup sensors will not be disabled.
|
|
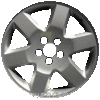
LR3 Sparkle Silver 6 spoke Wheel Cromodora of Italy 19 inch x 8 ALY72191U1108 viewsThese are the standard equipment 19" wheels on the 2005 LR3 HSE. The wheels are Made in Italy by the Cromodora company. Each are rated at 940 kg (2,072 pounds) and have an offset of 53 mm positive, (53P or +53).
I mention the 940 kg load rating as that is about the heaviest rating of any Land Rover product. The RRS and RRHSE both have lower ratings. What this means is that while a wheel from a Range Rover may physically fit, it probably does not have the brute strength of the factory spec Land Rover 3 wheel. There is no Land Rover product heavier than the 3, hence the 3 wheel design spec is the heaviest of the bunch.
|
|
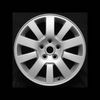
LR3 Sparkle Silver 10 spoke Wheel Cromodora of Italy 18 inch x 8 ALY72190U727 viewsThese wheels are factory standard on the 2005 LR3 SE and Made in Italy by the Cromodora company. Each wheel is rated at 940 kg (2,072 pounds) and has an offset of 53 mm positive, (53P or +53).
I mention the 940 kg load rating as that is about the heaviest rating of any Land Rover product. The RRS and RRHSE both have lower ratings. What this means is that while a wheel from a Range Rover may physically fit, it probably does not have the brute strength of the factory spec Land Rover 3 wheel. There is no Land Rover product heavier than the 3, hence the 3 wheel design spec is the heaviest of the bunch.
|
|

Wheel cut thru definitions and specs898 viewsNote the location of REAR SPACING and also OFFSET; probably two of the most important dimensions and not always understood as related to wheel size and relationship to the brake components.
For the 3, Rear Spacing is approximately 6.5 inches or 165 mm for a nominal 8" rim. Offset is 53P or 53mm Positive, which means the distance from the machined hub flat mounting surface to the rim's true centreline is 53 mm in the outboard direction. (The rim illustrated has a negative offset.)
As Positive offset increases, this means the wheel wraps around the disc brake mechanism more deeply, and hence the more the wheel would cover the brake parts. This is why most 18" wheels will not fit with the larger Brembo "supercharged engine" brake calipers.
Pitch circle diameter is 120mm; Pattern is 5 lug, and the tyre load rating is 112 with a recommended tyre speed rating of H or higher along with the XL load rating. For the 3, the stock tyre diameter is about 30 inches. The 255/60/18 or 255/55/19 OEM tyre outside diameter is 30.04 inches; Wheel lug torque is from 130 to 150 Nm or 96 to 110 lbf-ft and the lug nut hex socket size is 22mm.
Max Load High Speed Driving Tyre pressures are Front, 33 psig, (230 Kpa) and Rear, 42 psig, (290 Kpa).
The OEM rims are rated at 940 kgs, the highest that LR makes, hence while rims from other Land Rover products may physically fit, the odds are they are under rated in a weight sense.
|
|
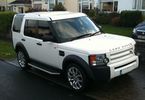
Current Motor150 views08 Land Rover Discovery 3 TDV6 2.7L 5 Seater Base Spec
|
|
![Filename=LR3_BMW_Ford_ZF_6HP26X-28X_Catalog_with_metal_pans_[1].pdf
Filesize=1194KB
Dimensions=320x240
Date added=26.May 2011 LR3_BMW_Ford_ZF_6HP26X-28X_Catalog_with_metal_pans_[1].pdf](images/thumb_pdf.jpg)
ZF 6HP26X and 6HP28X transmission parts showing various pans2814 viewsThis 42 page pdf is probably the most informative of all the material in this album. It is called a spare parts catalog but is much more than that. The material is specifically for the X variety of ZF six speed transmissions that are in the Land Rover 4WD / AWD models as well as BMW and Ford AWD vehicles.
|
|

Excel file for Rotors and Brake Pads part numbers for 4.4L V8 petrol LR3768 viewsComparing the cost of the various brands of brake parts is time consuming. Once you have your parts costs, this little spreadsheet will make collating the info easier.
I did not make any provision for labour costs, but the file can be downloaded and then modified. You can change Dollars to Euros or Pounds or whatever and insert lines for labour costs as desired.
Do not pay too much attention to the $ numbers as they are a mix of US and CDN, and from differing time frames, (prior to Spring 2011) . Also the brake part numbers are for my 2005 North America spec LR3 with the petrol 4.4L V8; diesel powered and supercharged 3's may have different part numbers
|
|

LR3 Brake Wear Sensor Wiring1517 viewsThis 1 page wiring diagram pdf shows that both the front and rear brake pad wear sensors are part of a closed series circuit to ground.
In operation, when all is good, the series circuit is grounded and the amber brake wear warning indicator on the instrument panel is not illuminated.
When the pads on one wheel, either the left front, or right rear, become too worn, the respective sensor is "cut" which results in an open circuit condition. This causes the dash brake wear indicator to illuminate.
The circuit is like the old style Christmas light strings where one burned out bulb caused the whole string to go out.
A quick field fix to get the dash light to extinguish in lieu of replacing the sensor and pads etc is to disconnect the brake pad wear sensor and short across the two open conductors of the vehicle side connector plug. This of course means you now have a normal vehicle, one of the thousands that do not feature brake pad wear information systems.
|
|

ZF 6HP26 Land Rover Transmission specs1677 viewsThis is just two sheets of paper with various numbers related to the 6HP26 such as oil capacity, gear ratios, and torque wrench settings for the fill and drain plugs.
You may note that LR calls this ZF transmission the 6HP26 whereas ZF calls out the LR3 transmission as the 6HP26X. Just what the differences are, I am not certain however the X refers to 4WD or AWD use as opposed to solely 2WD.
Zahnradfabrik is what ZF is short for and translated from German, roughly means Gear Factory.
|
|

Thread upload25 viewsImage uploaded in new thread
|
|

Maintenance Fluid Specifications for Legacy LR Vehicles174 viewsMaintenance Fluid Specifications for Legacy LR Vehicles1
|
|

Spec of the Millionth Discovery45 viewsSpec from TOPIX of the Millionth Discovery, the one used in the drive to Beijing. Whether it is actually the Millionth Discovery or not is open to further investigation!
|
|
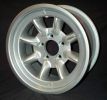
Minilites166 viewsNow if this wheel was available in 17-19" range wouldn't it complement the D3 especially if it had a nice Cooper STT tyre wrapped around it.
|
|
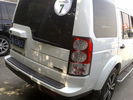
black and white special edition (aka landmark in uk)55 views
|
|
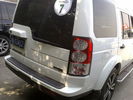
black and white special edition (aka landmark in uk)73 views
|
|
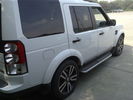
black and white special edition (aka landmark in uk)53 views
|
|
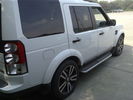
black and white special edition (aka landmark in uk)66 views
|
|

Aussie Spec Rear Mudflap367 views
|
|

Aussie Spec Rear Mudflap323 views
|
|
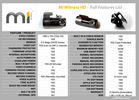
My Witness info47 viewsnew Mi witness
|
|
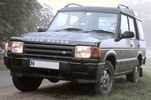
First Discovery10 viewsA battered-to-death-by-farmers and then brought-back-from-the-dead 300TDi Disco. When first seen the driver's seat was a plastic crate. Resprayed in Eastnor Green with replacement front seats and steering column controls that had been chewed off by farmer's dog. In many respects my best Land Rover buy ever!
|
|

89 viewsI clipped a wallaby\'s tail -on dusk and in rain. There was no apparent damage upon initial inspection - however the flood light surround trim must have fell out on the return trip home.
|
|

Thread upload21 viewsImage uploaded in thread 114045
|
|
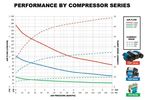
Thread upload2 viewsImage uploaded in thread 175866
|
|

Oil Specifications96 views
|
|

Mitsubishi Pajero - Sapporo, Hokkaido193 viewsNice looking with custom painted bumper and special grille. Much better looking than the Aussie VRX version which uses the same grille but with standard bumper and bulbous lights.
|
|
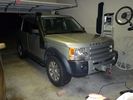
DIII LR3 1441 viewsFitted Accessories
Devon 44 hidden winch
Warn XD9000 with remote kit
Safari Snorkel
Rover Specialties Rock Sliders with side nerf bars.
Yellow Top 2nd Battery
Available from --
http://www.lucky8llc.com/Products.aspx?ProductID=7136
Traxide SC80-LR D3 Kit B -TPSE
Available from --
http://www.traxide.com.au/Traxide.html
|
|
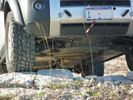
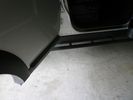
Rover Specialties Rock Sliders258 viewsRover Specialties Rock Sliders showing compressor protection
|
|
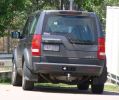
Spotted in FNQ212 viewsOne of about 10 D3s spotted whilst I was in NQ this last month.
Same basic spec and colour as mine - BUT also from the same dealer in Southport!
|
|
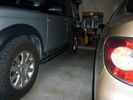
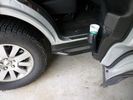
Rover Specialties Rock Sliders195 viewsRover Specialties Rock Sliders with nerf bars
|
|
Rover Specialties Rock Sliders161 viewsDIII Rock Sliders
|
|
Rover Specialties Rock Sliders184 viewsDIII Rock Sliders
|
|
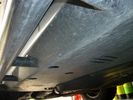
Rover Specialties Rock Sliders153 viewsDIII Rock Sliders
|
|
Rover Specialties Rock Sliders170 viewsDIII Rock Sliders
|
|
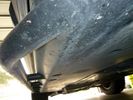
Rover Specialties Rock Sliders159 viewsDIII Rock Sliders
|
|
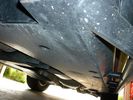
Rover Specialties Rock Sliders158 viewsDIII Rock Sliders
|
|
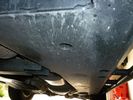
Rover Specialties Rock Sliders158 viewsDIII Rock Sliders
|
|
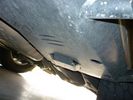
Rover Specialties Rock Sliders161 viewsDIII Rock Sliders
|
|
Rover Specialties Rock Sliders157 viewsDIII Rock Sliders
|
|

CALENDAR 2011286 viewsTaken at the end of an extremely hot day in Morocco. Slimer, and Gareths vehicles. We stopped at an Auberge on the way to Zagora. The sky was an angry shade of yellow, and minutes later a spectacular storm raged. The owner of the auberge said it was the first rain in 3 months.
|
|
Thread upload28 viewsImage uploaded in new thread
|
|

146 viewsmy best self indulgance after my D3
and shes a special limited edition aswell so never ever going to sell it
|
|
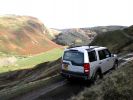
Spectacular scenery615 views
|
|
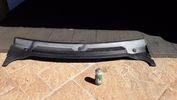
Windscreen plastic paint37 viewsFaded scuttle cover painted with http://www.rustoleum.com/product-catalog/consumer-brands/specialty/paint-for-plastic-spray
|
|

Transpo pdf explaining the operation of Ford PWM regulators624 viewsThe 4 page pdf produced by WAI-Transpo explains the operation of the Pulse Width Modulated regulators located within the alternators on our 3's. Of note, the pdf states that certain of the Ford PWM regulators do not meet Ford spec.
The pdf explains the function of all the terminals and the apparent advantages of the PWM style over previous designs. Note that Ford calls their "engine computer" a PCM, (Power Control Module), whereas Land Rover, an ECM, (Engine Control Module).
|
|

Replacing the blower motor578 viewsThis is a 6 page pdf with regards to replacing the HVAC blower fan and the associated fan speed module in a LHD North America spec LR3. The fan can be replaced from below and it is not necessary to pull the dash apart.
|
|
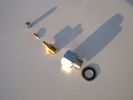
Reservoir Air In fittings exploded view 1892 viewsThis shows the fittings required for the mod. The reducer adaptor requires a 27mm socket and is M20 x 1.5 male thread x 1/4" NPT female. The 1/4" male NPT Schrader valve has the standard valve core removed and an AN/MIL spec aircraft oleo strut valve installed instead.
A standard automobile valve is rated at 200 psig, (14 bar); the air tank runs closer to 244 psig, (16.8 bar), with the relief valve set to open between 334 psig, (23 bar) and 370 psig (25.5 bar). The aircraft valve is rated at 2,000 psig, (138 bar).
|
|

Rosen A10 Manufacturer Installation Manual763 viewsThis is a 30 page pdf from Rosen that explains how to install the A10 unit. It is Generic in nature and hence carries detail not found in the LR specific install instructions. It also uses words and pictures instead of just pictures, hence can be a bit easier to figure out, particularily if you wish to take advantages of some of the hidden features not described in the LR material.
One of these features is how to hook up to a headrest display or I suppose even to the NAV in front.
|
|

Rosen Owners Manual893 viewsThis 28 page Owners Manual is the Rosen version written specifically for the A10 model DVD Video Game Entertainment System player that may in attached to the roof of your 3.
Discussed is how to use the remote control, the wireless headphones, the TV feature if installed, and how to change from 16:9 widescreen format back to the older 4:3 format.
|
|
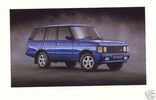
Special works RR Classic Vogue SE51 views
|
|
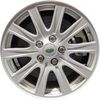
LR3 Silver 10 spoke grooved wheel Cromodora of Italy 18 inch x 8 ALY72201U85385 viewsThis is Land Rover part number RRC505360MNH or RRC505360XXX, a grooved ten spoke 18" wheel rated at 940 kg and found on circa 2006 RR Sports and some 2007 LR3's. An alternative part number is ALY72201U85.
This is an example of a wheel factory spec on the full frame older RRS that is also factory spec on the 3 or 4 and hence can be moved from the RRS to the 3 or 4. This is rare however. A factory spec wheel for a 3/4 can always go onto an older full frame RRS but not necessarily vice versa.
Just because a wheel is a 5 lug, 120mm bolt circle, +53 mm offset and made by Cromodora does not mean it has the required 940 km load rating. That also has to be confirmed by looking on the backside of one of the spokes for the moulded in load number in kg.
|
|

Thread upload3 viewsImage uploaded in thread 143032
|
|
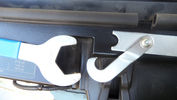
55 viewsspecial tool for fan removal.
36mm
|
|
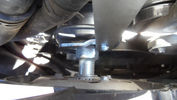
47 views'Special Tool' to hold the fan drive in place
|
|

180 viewsSpecification
|
|
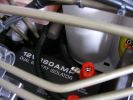
12v Isolator876 viewsEnsures that aux ery won\'t charge until the main batt is topped up and won\'t drain the main batt. I used the biggest I could find to take the load with no stress - especially the higher voltage on the landy. Came as a compete kit and works well.
|
|

38 views
|
|

39 views
|
|
Thread upload14 viewsImage uploaded in thread 43656
|
|
Thread upload15 viewsImage uploaded in thread 43656
|
|
Thread upload10 viewsImage uploaded in thread 43656
|
|
Thread upload5 viewsImage uploaded in thread 43656
|
|

37 views
|
|
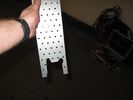
special tool for holding waterpump pulley :)74 views
|
|

12 views
|
|
Thread upload11 viewsImage uploaded in new thread
|
|
Thread upload0 viewsImage uploaded in new thread
|
|

Specifications.pdf189 views
|
|

119 viewsDescription & Operation of FBH
|
|

23 views
|
|

Manual gearbox specs22 views
|
|

80 views
|
|

Thread upload13 viewsImage uploaded in new thread
|
|

suspension specs420 views
|
|

183 views
|
|

Front Diff specs33 views
|
|

Thread upload3 viewsImage uploaded in thread 159579
|
|

Thread upload77 viewsImage uploaded in new thread
|
|

Thread upload5 viewsImage uploaded in thread 187861
|
|
184 views
|
|
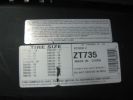
Snow Chain Specs - SuperT ZT73g 65 viewsSnow Chains that seem to fit a Land Rover LR3HSE
|
|

Tekonsha Ford Brake Controller Adapter part number 3035-P274 viewsThis is the adapter cable between the Brake Controller and the existing C2590 female plug located near the brake pedal on NAS spec LR3's. The flat 4 pin plug of the adapter cable connects to the Controller; the rectangular 6 hole male plug to C2590.
There are only four conductors in the adapter cable, but one will see five pins within the Land Rover C2590 plug. The #2 pin is not required for the NAS setup. #2 pin is the circuit between the head lamp switch and vehicle side running lamps required in the civilized world.
The single pin at the bottom in the picture is #3 and on the Land Rover, a Black wire tied to ground. The other pin at the bottom and across to the left is #6, and Blue on the Land Rover. This is the Brake Controller output to the trailer socket at the rear.
#4 is the pin at the top left, and is a White coloured wire from the battery. Pin #5 is from the stop light switch, and is Green on the Land Rover.
Note that the adapter cable colours do not necessarily follow all the above referenced Land Rover colours.
|
|

The Disco 3 the day I bought it73 viewsSince then here's what's been done
1) New slotted and dimpled EBC rotors and Pads
2) Rover Specialties rock sliders
3) Clear color side markers
4) Front & Rear LR lamp guards
5) Rebuilt both of my Non working Key FOBS by replacing batteries. - I can't believe I didn't even check these when I bought the vehicle.
6) Changed the LR3 emblem to Discovery 3
7) Terrafirma Front Skid Plate
8) Tactical 4x4 Gas Tank Guard
9) ASFIR Rear Diff Guard
10) Here are the things now mounted on Roof Rack
- Full size 18" MTR/Kevlar
- (2) 5 Gallon Jerry Cans mounted in Front Runner holder
- 60" Hi-Lift X-treme Jack
- Shovel
- Magnetic CB Antennae
|
|
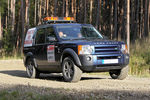
Land Rover Discovery 359 viewsLand Rover Discovery 3 used as spectator control vehicle on 2011 Trackrod Rally in Yorkshire
|
|
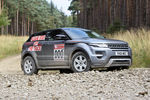
Range Rover Evoque 88 viewsRange Rover Evoque used as spectator control vehicle on 2011 Trackrod Rally in Yorkshire
|
|

Transfer Case Specifications.pdf600 views
|
|

transmission, transfer and differential oils specs, quantities and info121 viewstransmission, transfer and differential oils specs, quantities and info
|
|

Transmission Specifications.pdf707 views
|
|

Thread upload3 viewsImage uploaded in new thread
|
|

Racor filter spec sheet189 views
|
|

Racor filter spec sheet 2224 views
|
|

Tyre Ratings37 views
|
|
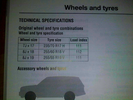
57 views
|
|

16 views
|
|
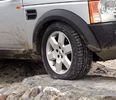
Thread upload3 viewsImage uploaded in new thread
|
|

Varta Battery Dimension chart570 viewsThis pdf provides Varta dimensions for among others, the E12V75N, (old DIN H6 or 85605 or BCI Group 48 size). This appears to be a deep cycle battery and the choice for many re the Aux battery install as long as you are willing to grind away the angled nibs at the bottom front of the battery surround. My choice was a shallow cycle battery intended for cold weather related engine starting rather than winch use.
Note the pdf Varta batteries are all deep cycle batteries suitable for running fridges, winches etc, rather than for engine starting and hence a good Aux battery if those are the intended uses rather than engine starting.
Varta now makes a Varta G14 with AGM technology and known as a Stop Start Plus battery. It is 95Ah, CCA of 850A; length 353mm; Width 175mm; Height 790mm and is specific for these newer stop start vehicles such as some D4's. For the 3's, one is still probably better off with an H8 sized battery but of the older Wet Flooded Lead Acid type and battery caps rather than a sealed AGM.
The Land Rover part number for the recommended battery is LR033179.
|
|

Voss B203 Fitting Install957 viewsNote on the first page, the reference to DIN 73378 and D74324 and also PA11 and PA12 material when referencing suitable spec nylon (polyamide) air line for motor vehicles. I think some of the 6mm fittings used on the 3 for the valve blocks are the System 203 type and called up as Land Rover part number RQC 000030. The Voss part number is I believe 5 2 03 11 01 00.
|
|
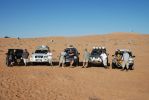
The team photo104 viewsTaken at the finish point - just 60 km from the nearest blacktop road! A Challenge indeed, especially as at this point fuel in 3 cars was close to the red line with 20 litres of reserve between all 5 cars!
|
|

Thread upload7 viewsImage uploaded in thread 162127
|
|
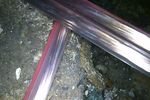
Amdeal 30ft / 10M USB Digital Microscope Cable Wire Endoscope Camera Video Recording Inspection Pipe Camera - Waterproof, 4 LED Lights27 viewsUnder XP system, can watch video directly without install software. By using our software, can take photo,record video, and save the video in the PC. Such USB microscope widely used to inspect tube, check the body, magnify stamps, coins, antiques, insects, electric circuits, machines, fabrics, food, decorations, etc. Please notice that the wire camera is designed for industrial use, not for medical use.
Camera: 1/6" VGA COMS
Pixel: VGA 300K
Resolution: 640x480,352X288,320X240,176X144,160X120
Capture Resolu
|
|
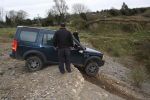
WillMyth goes for the unsuspecting grazing defenders below105 views
|
|
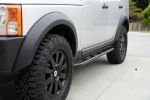
RS II Sliders129 viewsRover Specialties sliders installed (Off Roving)
type RS II slim line
|
|
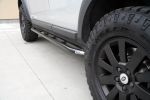
RS II slim line sliders119 viewsRover Specialties sliders installed RS II slim line (Off Roving)
|
|
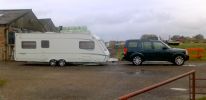
Abbey Spectrum 620 on the back of new XS522 views
|
|
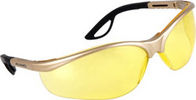
Yellow hi contrast safety specs55 views
|
|
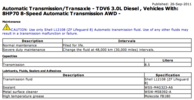
ZF8_Oil_Change_Specs40 views
|
|

Thread upload48 viewsImage uploaded in thread 141425
|
|
|
|