| Search results - "Removal" |
369 views
|
|
368 views
|
|
369 views
|
|
366 views
|
|

Tree removal207 views
|
|

Removal of the trim around the pedals285 views
|
|
372 views
|
|
352 views
|
|
348 views
|
|
358 views
|
|
356 views
|
|
379 views
|
|
386 views
|
|
378 views
|
|
370 views
|
|
409 views
|
|
410 views
|
|
383 views
|
|
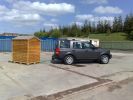
Shed Removal200 views
|
|

Climate control panel removal288 views
|
|
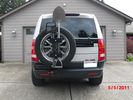
New mods for carrier. Backup sensor moved to the tire carrier. Toy rack and highlift mounts.38 viewsSon wanted all the toys on the carrier. I just wanted easy removal for a good clean look.
|
|
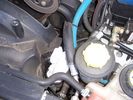
201 viewsRemoval of Intercooler hose, don't forget to plug the hole, don't want anything to fall in there
|
|

Floor console removal233 views
|
|

instrument panel console removal261 views
|
|

Floor console upper panel removal213 views
|
|
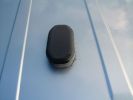
2 GPS Blank Removal62 views
|
|
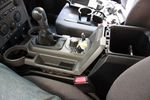
90 viewsLifted floor console upper panel to enable cubby box removal
|
|

Freelander headrest 31 viewsremoval of the screen from a freelander headrest
|
|

Terratrip 202 V4 possible discrete location140 viewsAttached to ashtray - allowing removal / unplugging when not in use by pulling out the ashtray.
Terratrip is an odometer for use in rallies / raids - very popular with the French when used in conjunction with a roadbook. A mechanical backup in case GPS signal is lost on modern odometers like the Globe 800 I propose to use.
We'll see if there are reflection issues from the screen.
|
|

Thread upload4 viewsImage uploaded in thread 166138
|
|

127 views3rd row seat removal
|
|

Thread upload7 viewsImage uploaded in thread 195195
|
|
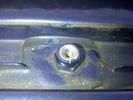
Roof Rail Screw Receptor Bung Removal37 viewsRoof Rail Screw Receptor Bung Removal
|
|

Tools from dealer110 viewsThis is a cel pic of the tools from the dealer for install and removal of control arm bushings. minus one broken tool.
|
|
Thread upload3 viewsImage uploaded in thread 154757
|
|
Thread upload3 viewsImage uploaded in thread 154757
|
|
Thread upload4 viewsImage uploaded in thread 154757
|
|
Thread upload4 viewsImage uploaded in thread 154757
|
|
Thread upload3 viewsImage uploaded in thread 154757
|
|
34 views
|
|
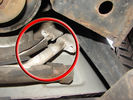
Air Conditioning Pipes (File 1)983 viewsIt\'s the smaller of the 2 pipes that is leaking. Both pipes are encased full length in the foam sleeve. You can see where the support bracket has \'crushed\' the sleeve. The bracket is what holed the small pipe. There is a bracket at each end and one in the middle. You need to remove the suspension reservoir to get to the centre bracket. Be aware that the bolts securing the brackets may be corroded and are likely to shear off on removal!
|
|

Arm Removal Tool - shows offset29 views
|
|
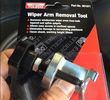
Arm Removal Tool28 views
|
|
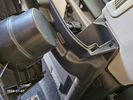
Bin Cover removed showing forward release clips that clip into the two rectangular slots.10 viewsOne has to pull up on the Bin Cover to unlatch the two metal clips, hence why release of the C pillar cover makes the bin cover removal and reinstall easier.
|
|
Thread upload16 viewsImage uploaded in thread 124306
|
|

76 views
|
|

61 views
|
|

66 views
|
|

Brake Light Switch, Find, Remove, and Install Instructions 7851 viewsThis is a two page doc outlining where to find the brake light switch, how to remove it, and then install the new one.
Note, do not move the brake pedal when removing or installing the switch. Let the brake pedal hang where it wants to. The switch design is actually cunning, and as such is supposed to make the removal and install fool proof. Hence if you think too much about it, you can wreck the new switch.
If you want to inspect the interior of the switch, wait until you have removed the old switch. You can then just unsnap the blue from the white to get it apart. Inside, the switch is quite simple, (no circuit boards), but it will probably show black dust from failing contacts.
I think the reason the switch fails is that the Normally Open, (NO), contacts of the brake light contacts were made too light to carry the current load for make and break of the tail light filaments. I also think the black dust created then fouls the Normally Closed, (NC), second set of contacts for the ABS circuit. As such, the Normally Closed contacts become intermittent in operation and display as a fluctuating open and closed circuit condition to the ABS system when the ABS should be seeing a steady closed circuit. Hopefully the replacement switch contacts are more robust and may be as I recently replaced my switch again just as a matter of maintenance. While in a redesign, ideally the NC contacts should be sealed or at least separated from the NO contacts, when I inspected the removed switch, this time there was no black dust present.
Probably the removed switch will have a Land Rover oval logo moulded into it, the new one, FOMOCO.
|
|

C Pillar Lower Trim Removal411 views
|
|
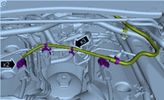
Thread upload3 viewsImage uploaded in thread 123654
|
|
68 views
|
|
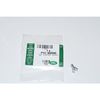
Clip Spring Metal FYC 500040 that holds LR together1747 viewsThe jpg is of the spring metal clip, Land Rover part number FYC 500040 that holds most of our 3 together - well at least most the interior trim parts.
If you are going to remove interior panels, you may as well stock up on a few for replacement as upon panel removal, the clips tend to spring away into deep never to be found voids within your 3.
|
|

Thread upload4 viewsImage uploaded in thread 208160
|
|

Thread upload4 viewsImage uploaded in thread 208160
|
|

compressor removal.pdf667 views
|
|

Cool Box Removal110 views
|
|

istruzioni cambio luce stop204 views
|
|

C pillar cover removed to facilitate removal of bin cover.9 viewsNote the "ribbon" behind the top left corner of the C pillar cover. This is something to do with the curtain air bags, hence do not mess with it. I dislodged the cover to make it easier to pull up and extract the black plastic bin moulding. It is not necessary to totally remove it and would be what I call a big deal - seat belt, air vent and ducting as well as that curtain concern.
|
|

87 views
|
|

64 views
|
|
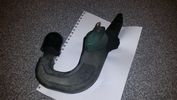
towbar5 views
|
|

Front seat lower cover removal replacement43 views
|
|

Lower Seat Cover and T40 Torx bit for seat base removal47 views
|
|

Rear side clip removal - seat base45 views
|
|

Removal of centre console items on my HSE299 views
|
|
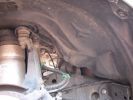
pull out the 3 clips circled in red300 views
|
|

Thread upload2 viewsImage uploaded in new thread
|
|

Thread upload10 viewsImage uploaded in thread 189350
|
|
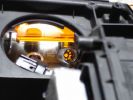
Lampholder with holes, prior to final removal289 views
|
|
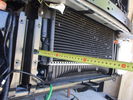
Front view of radiator after removal of grill, fenders, and bumper119 views
|
|

DVD Removal110 views
|
|

D pillar speaker cover removed to facilitate removal of the bin cover.11 viewsThe pipe thing exposed when the D pillar cover is removed is something to do with the side curtain air bags and hence is not to be disturbed - at least my me. Removal of the cover make lifting of the bin cover easier.
|
|

Front wheel arch molding removal5 views
|
|
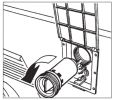
Water Filter256 viewsWater filter removal
|
|
tow bar removal33 views
|
|

Fluid, Filter/Pan Combo removal and install5979 viewsThese are the LR instructions re removal and install of the plastic pan/filter combo for the ZF 6HP26X transmission on the 4.4L petrol V8 LR3.
The instructions tend to ignore the reason you have to lift the right hand side of the engine about 40 mm. This is because of a frame cross member that interferes with dropping down of the plastic pan. The real problem is a vertical "oil filter spout" that rises out of the filter/pan combo up into the transmission. The spout is the suction pipe for filtered transmission oil back up into the tranny.
On the metal pan versions, the filter is separate from the pan, hence the filter remains with the tranny when the metal pan is dropped. The filter is then removed or installed independent of the metal pan, hence with the metal pan, there is no need to lift the engine.
If one is removing the plastic pan so as to install the metal pan, then some do not lift the engine but just drop the plastic pan enough to gain access to saw off the vertical plastic spout - it is a one time procedure.
Be aware however that the metal pan uses a flat gasket and the plastic pan uses a O ring like perimeter gasket that sits in a half round groove in the tranny casing. Also the metal pan uses 21 shorter torx M6x22.5 metric cap screws for the perimeter bolts. The plastic pan uses longer M6x28.5 torx metric cap screws.
|
|

Door Trim and Wing Mirror Removal and Replacement162 views
|
|

Front Fender Moulding Removal & Fitting.pdf314 views
|
|

Front Inner Sensor Removal314 views
|
|

Official instructions on how to remove the bumper908 viewsWhen removing the front bumper - you start with the front grill, then the headlamps, then the wheelarch trims, then the bumper...
|
|

Front Bumper Removal95 views
|
|

disco3.co.uk instructions for removing wheelarches (with photos)644 viewsCourtesy of a senior member of the site - detailed instructs for removing the wheelarch trims and front bumper - use in conjunction with the other 2 documents
|
|

Official instructions on how to remove the wheel arch trims624 viewsWhen removing the front bumper - you start with the front grill, then the headlamps, then the wheelarch trims...
|
|

Front Bumper Inner Bar Removal3 views
|
|

Front Bumper Cover Removal4 views
|
|

15 views
|
|

Front Center Console Removal22 views
|
|

10 views
|
|

PDC - Front Inner Sensor Removal12 views
|
|

120 viewsDescription & Operation FBH
|
|

fuel tank removal86 views
|
|

Generator_Removal.54 views
|
|

Headlamp assembly removal4 views
|
|

Headrest Removal26 views
|
|

high level brake light removal544 views
|
|

High Mounted Stoplamp Removal.pdf448 views
|
|

Side steps removal947 views
|
|

Ignition Coil-On-Plug Removal.pdf418 views
|
|

Pad wear sensor removal81 views
|
|
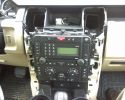
After removal of H-panel95 viewsCrikey, you have to pull HARD to remove this trim!!! Broke one clip and only lost half of it. Fit back with 3 clips ok. Yet to drive it to see if it rattles.
|
|
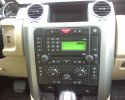
Before removal of H-panel73 views
|
|
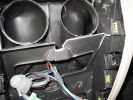
DVD Headrest Install Console Removal133 views
|
|
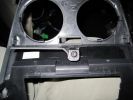
DVD Headrest Install Console Removal125 views
|
|
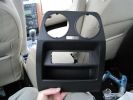
DVD Headrest Install Console Removal127 views
|
|
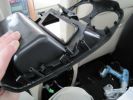
DVD Headrest Install Console Removal128 views
|
|
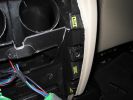
DVD Headrest Install Console Removal121 views
|
|
DVD Headrest Install Console Removal126 views
|
|
DVD Headrest Install Console Removal125 views
|
|
DVD Headrest Install Console Removal126 views
|
|
DVD Headrest Install Console Removal130 views
|
|
DVD Headrest Install Console Removal122 views
|
|
DVD Headrest Install Console Removal145 views
|
|

Captive nuts tend to let go on removal131 views
|
|
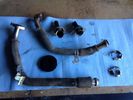
EGR removal7 views
|
|

Centre Console removal20 views
|
|
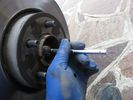
dont know how to call it removal (omocinetico)71 views
|
|
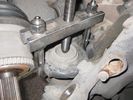
ball joint removal75 views
|
|
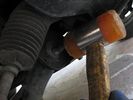
suspension arm bolt removal76 views
|
|
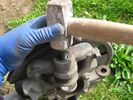
ball joint removal (from hub)82 views
|
|
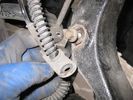
hose and so on removal70 views
|
|
manifold removal 246 views
|
|

manifold removal 145 views
|
|
Inner arch removal329 views
|
|
Inner arch removal342 views
|
|
Inner arch removal369 views
|
|
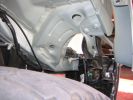
Inner arch removal355 views
|
|

Inner arch removal338 views
|
|
68 views
|
|

8 views
|
|

Manifold removal54 viewsManifold removal
|
|
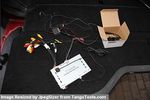
Everything thats included77 viewsCamera & GVIF and all cables after removal
|
|

LA501-010 Technical Bulletin - Removal of Transit Wiper Blades at Vehicle Preparation63 views
|
|
Thread upload4 viewsImage uploaded in new thread
|
|
Thread upload4 viewsImage uploaded in new thread
|
|
Thread upload4 viewsImage uploaded in new thread
|
|

LAND ROVER DISCOVERY 3 istruzioni rimozione pannello porta posteriore Rear Door Trim Panel Removal 7E0186 viewsLAND ROVER DISCOVERY 3 istruzioni rimozione pannello porta posteriore Rear Door Trim Panel Removal 7E0
|
|

LAND ROVER DISCOVERY 3 istruzioni rimozione pannello porta posteriore Rear Door Trim Panel Removal 7E0112 viewsLAND ROVER DISCOVERY 3 istruzioni rimozione pannello porta posteriore Rear Door Trim Panel Removal 7E0
|
|

LR Steering Wheel Removal62 views
|
|
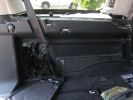
372 viewsHere is the left rear trim panel removed. GTR proved useful in the removal process! The cubby box snaps on to the top of the panel.
|
|
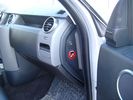
Air Suspension ECU Fuse 35P Shut Off Switch2635 viewsA more distant view of the shut off rocker switch in the ON position which is the normal position for when all is working as Land Rover intended.
Ideally, (but not totally necessary), the F35P circuit should be powered or de-energized after the various computers have gone to "sleep".
Similarly, removal of the F26E or F3E fuses is preferable after the computers have all gone to sleep but it appears that no real damage will be done if the fuses are removed while the system is energized. Pulling F26E is the main full time fuse that powers the air suspension computer. As such, once F26E is removed, pulling F3E is not really required.
Power for the compressor goes thru the 60 amp fusible link and relay, however control of the relay is via the air suspension computer so depowering the air suspension computer effectively depowers the air compressor and the internal exhaust valve relay/port.
|
|
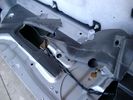
Dust seal rolled back showing electrical conductors 1658 viewsNote power conductors just under the dust seal which makes cutting the seal more interesting.
Also shown are the two 8mm nuts located in slots. One must loosen each nut to effect removal of the actuator. This will then reveal two T15 Torx screws that one must completely un-thread to remove the top gold plate from the actuator assembly.
|
|
![Filename=LR3_Radio_Removal[1].pdf
Filesize=190KB
Dimensions=320x240
Date added=04.Feb 2014 LR3_Radio_Removal[1].pdf](images/thumb_pdf.jpg)
Radio Removal from Radio Stack571 viewsThis shows how to remove the radio from the stack. Basically you remove the H surround first and then at least loosen all the Torx 20 screws left and right sides from the top down starting at the narrow unit that the four way flasher/locking buttons are mounted on.
The units kind of interlock, hence some movement of each is required to remove the radio by itself. I find it best to take out the four way flasher/locking buttons assembly first as that allows access to the fibre optic cable connector into the back of the radio head without too much tugging.
|
|
Thread upload6 viewsImage uploaded in thread 128326
|
|

Thread upload18 viewsImage uploaded in thread 189350
|
|

LTB00105 - Technical Bulletin - Steering Gear Removal and Installation66 views
|
|

LTB00118 - Technical Bulletin - Removal and install Front Lower Suspension Arm109 views
|
|

Oil pump removal32 views
|
|

Thread upload3 viewsImage uploaded in thread 198799
|
|
Thread upload0 viewsImage uploaded in new thread
|
|

PDC - Module Removal12 views
|
|

Thread upload16 viewsImage uploaded in thread 149479
|
|

PDC - Speaker Removal10 views
|
|
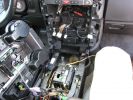
246 viewsProceeding with console removal.
|
|
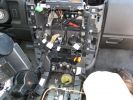
253 viewsProceeding with the console removal.
|
|

4 views
|
|

Rear bumper removal instructiohns114 views
|
|

Rear Bumper Removal - Full147 views
|
|

200 views
|
|

Rear Door Trim Panel Removal.pdf633 views
|
|

74 views
|
|

Rear Door Trim Panel Removal432 views
|
|

Rear Quarter Trim Panel Removal425 views
|
|

Rear quarter panel removal171 viewsThe left hand side has the PDC module amongst others in it.
The one for the bluetooth module is the drivers side pannel.
|
|

Rear Quarter Trim Panel Removal359 views
|
|

Rear Bumper Removal Instructions9 views
|
|

PDC - Rear Inner Sensor Removal9 views
|
|

Rear Quarter Trim panel21 views
|
|

24 views
|
|

113 viewsRear Quarter Panel Removal
|
|

Removal of C-Pillar Lower Trim86 views
|
|

602 views
|
|

Exhaust Manifold Removal - RHS 89 views
|
|
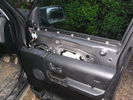
Door Card Removal27 views
|
|
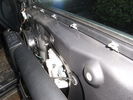
Door Card Removal - Top clips23 views
|
|

Pattern for Expo Roof Rack Floor Sheet397 viewsI used a 3mm sheet of Aluminium - with 150mm wide Grip Tape to do the Chevron Patter to make it a bit safer. Note the sheet is 1610mm long, 1100mm wide at the front and 1060mm wide at the back. I drilled 3 rows of 5x 12mm holes - one row down the centre and one either side 30mm in from the edge. The hole centres being at 31mm from the front edge, next 420mm from 1st hole centre, the 375mm from 2nd hole, 372mm from 3rd hole, 375mm from 4th hole, leave 31mm to the back edge. Edited May 2008: I've subsequently cut the sheet in half lengthways to make removal and fitting easier as I found the sheet increasing noise and reduces MPG considerably.
|
|
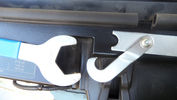
55 viewsspecial tool for fan removal.
36mm
|
|
32 viewsHess airbagTool headlamp removal
|
|
34 viewsHess airbagTool headlamp removal
|
|

Scuff Plate Trim Removal18 views
|
|

Page 1-41045 views
|
|

Page 5 - 8818 views
|
|

Page 9 - 12770 views
|
|

Spark Plugs Removal318 views
|
|

steering wheel removal.pdf544 views
|
|

steering_angle_sensor_removal98 viewssteering_angle_sensor_removal
|
|

Thread upload35 viewsImage uploaded in thread 106526
|
|
Releasing A-bar Strap319 views
|
|
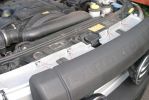
Front Grill Removal405 views
|
|
Front Grill Removal321 views
|
|
Headlamp Released314 views
|
|

Stihl Oil Pump Removal Tool ;-)33 views
|
|
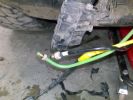
Suspension Valve Block & Wiring removed for Re-Routing141 views
|
|
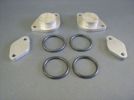
TDV6 EGR Removal kit184 views
|
|

Toe link removal and installation126 views
|
|

Airbag module removal tool diagram509 views
|
|

Airbag removal tool249 viewsMake something like this out of welding rod or coathanger
Picture courtesy of Alinton ( hope you dont mind ..if you do just say and i will remove )
|
|

20 views
|
|
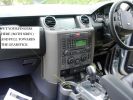
927 views
|
|
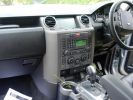
Dash trim removal581 viewsClips are at the bottom only, so pull (very hard) at the bottom and pull towards the gear lever.
|
|

208 views
|
|

Thread upload11 viewsImage uploaded in thread 140269
|
|
Thread upload2 viewsImage uploaded in thread 123654
|
|

Workshop Manual Rear Seats Cover Removal15 views
|
|

Electrical Connector Sleeve Replacement ZF 6HP26972 viewsThis 3 page pdf with pictures shows how to replace the sleeve that holds the multipin electrical connector that passes thru the transmission body to the Mechatronic unit.
The install of the sleeve is more difficult than the removal in that one must not rotate the sleeve as damage to the internal pins can result. The pan must be first removed to both remove and install the sleeve.
|
|

Mechatronic Sleeve Removal and Install Instructions1058 viewsThis 3 page pdf with pictures shows how to remove and install the Mechatronic sleeve that tends to leak tranny oil after about ten years. Even if not leaking, replacement when doing a pan/filter change at the ten year mark is suggested.
Note the 3mm or less requirement when sleeve installation is completed; also that rotation of the sleeve during the install procedure can do damage to some internal pins - hence do not rotate the sleeve when trying to insert it or in getting it to lock in place - not so easy it seems.
|
|
|
|
|
|