| Search results - "Port" |

RRSport Auto TDV6 0-100-0 times and G Forces156 viewsAir Temp 18, Dry conditions.
Best Acceleration G was .785 and decelleration G was 1.55
|
|

Thread upload5 viewsImage uploaded in new thread
|
|
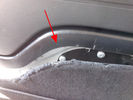
Rimozione pannello dalla sponda - Tailgate panel removing45 viewsPer togliere il pannello moquettato dalla sponda ho fatto leva con un cacciavite abbastanza grosso nel punto indicato, è stato veloce e non ho rovinato niente.
To remove the carpeted panel away from the tailgate I used a big enought screwdriver at the point indicated, it was fast and I have not ruined anything.
|
|
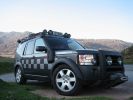
CALENDAR ENTRY 20091191 viewsBonatti grey TDV6 S, ambulance conversion, MTR's, winch, RAI, safety devices roof rack, rear ladder, bash plate, warn lighting, LED lighting throughout.
Owned by me, Rich Bell, Director of Extreme Medical Ltd, providers of medical support to Land Rover events.
|
|
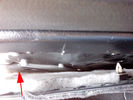
Riparazione attuatore sponda posteriore - Tailgate actuator repair38 viewsL'attuatore si trova dietro la pellicola nera incollata alla carrozzeria che va strappata.
The actuator is located behind the black film glued to the body must be torn.
|
|

Morsetto - Clamp34 viewsPer la riparazione ho utilizzato un morsetto per fili elettrici.
To repair I used a clamp for electrical wires.
|
|

16 views
|
|
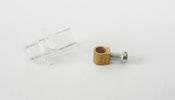
Morsetto - Clamp33 viewsHo smontato il morsetto, il diametro del foro è esattamente quello di quello che rimane del particolare che si è rotto.
I removed the clamp, the hole diameter it's the same of the detail that is broken.
|
|

Morsetto - Clamp42 viewsIl morsetto è della misura esatta della sede dell'attuatore.
The clamp is the same size of the actuator slot.
|
|

Morsetto - Clamp36 views
|
|
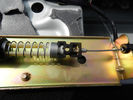
Cavo nel morsetto - Cable in clamp48 viewsHo inserito il terminale rotto nel morsetto: bisogna sforzarlo molto e ho praticato una cava attraverso il foro della vite con una punta in modo che il terminale non possa scivolare.
I entered the terminal broke into the clamp: you have to force it a lot, and I practiced a quarry through the screw hole with a bit so that the terminal can not slip.
|
|
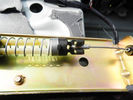
Lavoro finito - Finished work39 viewsEcco come appare a lavoro finito
Here is how it looks, finished the job
|
|
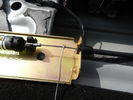
In caso di emergenza - For emergency48 viewsNel caso dovesse succedere nuovamente ho predisposto un cavetto da tirare.
If it were to happen again I have set up a cable to pull.
|
|
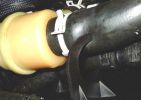
Hose displaced from support bracket318 views
|
|

LR In Portugal308 views
|
|

Attuatore rimontato - Actuator reassembled40 viewsAttuatore rimontato col cavo di emergenza.
Actuator riassemble with emergency cable.
|
|
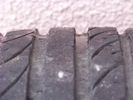
255/60/18 Bridgestone HP sport53 views
|
|

The Discovery Family33 viewsDiscovery 4 & Discovery Sport (My son soooo wants a Disco Sport!)
|
|
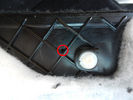
Foro pannello - Panel hole40 viewsHo forato il pannello moquettato per far passare il cavo di emergenza.
I drilled the carpeted panel to drive the emergency cable.
|
|

Finito - At the end47 viewsEcco come appare la sponda a lavoro finito.
Here is how is the job ended.
|
|
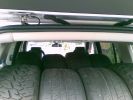
Thirteen Up92 views4 MTR\'s and 4 Sport 255/55 19\'s inside, One 18" Type 2 Mark 1 underneath and 4 18" Type 2 Mark 2\'s on the road
|
|
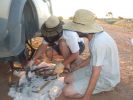
16 All the remains of a D3\'s parking brake373 viewsAfter 4 hours of hammering, finally removed the disk/park brake drum, and nearly all the parking brake bits fell to the ground. Cut rhe remaining brake cable loose as it was wrapped around the hub and a bit melted. Also having 2 jacks + 2 jack stands will support 4 hrs of hammering on the side of my D3.
|
|
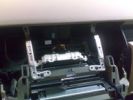
STAFFE DI SUPPORTO98 views
|
|
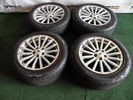
Thread upload7 viewsImage uploaded in new thread
|
|
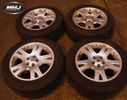
Thread upload9 viewsImage uploaded in new thread
|
|
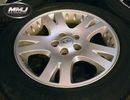
Thread upload12 viewsImage uploaded in new thread
|
|
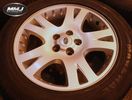
Thread upload10 viewsImage uploaded in new thread
|
|
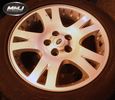
Thread upload11 viewsImage uploaded in new thread
|
|
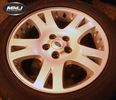
Thread upload11 viewsImage uploaded in new thread
|
|
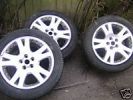
19\'\' wheels78 views
|
|
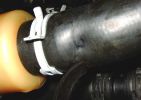
Damage to hose from tip of support bracket249 views
|
|

89 views
|
|
114 views
|
|
![Filename=2014-land-rover-range-rover-sport-spy-shots_100396530_l[1].jpg
Filesize=133KB
Dimensions=1024x609
Date added=20.Dec 2012 2014-land-rover-range-rover-sport-spy-shots_100396530_l[1].jpg](albums/userpics/28662/thumb_2014-land-rover-range-rover-sport-spy-shots_100396530_l%5B1%5D.jpg)
33 views
|
|

Thread upload18 viewsImage uploaded in thread 110148
|
|
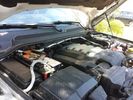
Traxide USI-160 Install515 viewsOverview picture of Traxide USI-160 upgrade install. This was an upgrade from the SC80 which performed flawlessly. The USI-160 had two relays and can deliver more amperage. As a result, the wiring was upgraded to 4/0 Welding Cable (warn) and heat shielding was added. The unit performs flawlessly to support 2 HAM Radios, Fridge, etc. Like me https://www.facebook.com/DifferentialPartsUS
|
|
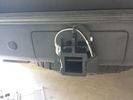
Rhino Hitch429 viewsCover fitted over the 75A Anderson plug with Rhino Hitch fitted which is a Class IV hitch. https://www.facebook.com/DifferentialPartsUS
Fits the Disco 3, Disco 4 and Range Rover Sport
|
|
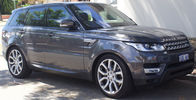
Thread upload5 viewsImage uploaded in thread 182161
|
|

Thread upload6 viewsImage uploaded in thread 199441
|
|

Green 2.5GbE35 views
|
|
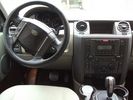
16 viewsnon è mia l'immagine ma riporta l'esatto cruscotto
|
|
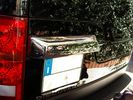
Dettaglio maniglia portellone30 views
|
|

Boat description13 views
|
|
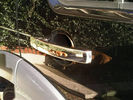
Dettaglio maniglia portiera28 views
|
|
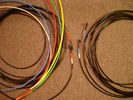
6mm PA12 grade nylon tubing with heat shrink applied 544 viewsShows some of the 6mm air line with heat shrink applied to one end of tubing. Shrink will be applied to the other end once field cut to length. These four tubes, each about 20 ft (6m) long, feed to the rear. Re the front air lines, (not shown), four additional lengths, each about 10 ft (3m) long, are required plus one more 3 metre length for compressor air. The 6mm tubing is a Nylon product specified as PA12. There is also a very similar Transport grade PA11 material, however it seems that PA12 is the more common Transport grade now in use. Also the applicable DIN standard seems to be both DIN 73378 and DIN 74324 for the nylon tubing. The working pressure of the 6mm tubing is about 27 Bar and bursting 82 Bar @ 20C. This is for the 1mm nominal wall thickness material, (4mm ID, 6mm OD).
|
|
16 views
|
|

169 viewsAcknowledgement to Sniffpetrol.com
|
|

Fin cell phone aerial drawing190 viewsThe factory aerial for the factory NAV / GPS on my 2005 HSE is within the high mounted stop light lens at the top of the upper hatch door. I do not have the factory installed phone kit, and as such, do not have the fin installed; instead there is just a plastic blanking insert to fill the cell phone aerial wiring hole in the metal portion of the roof; hence this requirement for an "external" cell antenna. For those that do have the fin on their glass roof, the fin is screwed on to a glued on plastic gasket, (sort of), and not bolted thru as per the metal roof 3's.
|
|
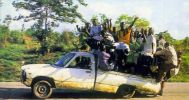
african transport133 views
|
|
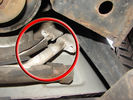
Air Conditioning Pipes (File 1)983 viewsIt\'s the smaller of the 2 pipes that is leaking. Both pipes are encased full length in the foam sleeve. You can see where the support bracket has \'crushed\' the sleeve. The bracket is what holed the small pipe. There is a bracket at each end and one in the middle. You need to remove the suspension reservoir to get to the centre bracket. Be aware that the bolts securing the brackets may be corroded and are likely to shear off on removal!
|
|
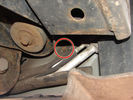
Air Conditioning Pipes188 viewsFront-to-rear aircon HP and LP pipes. The circled bit shows where the bolt securing the support bracket (removed)has sheared off
|
|
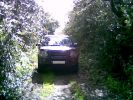
Lunchtime Lane201 viewsNot 200 yards from Manchester Airport can be found a little 1/2 mile lane - did it for the first time today - a few minutes fun in a dreary day
|
|

207 views
|
|

Fast Road65 views
|
|
Thread upload2 viewsImage uploaded in new thread
|
|

Thread upload4 viewsImage uploaded in new thread
|
|

ALMA CUSTOM VEHICLE FOR MOVING MASTS OVER DESERT92 views
|
|

my usual transport229 views
|
|

Ark Royal - Portsmouth71 views
|
|
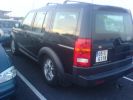
Got back to the airport after a few days in London to This!!!281 viewsThis is one of the many reasons we sold our first D3........
|
|

transport options 17 views
|
|
Thread upload12 viewsImage uploaded in new thread
|
|
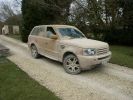
Spot the sport competition469 views
|
|
28 views
|
|

Thread upload10 viewsImage uploaded in thread 17923
|
|
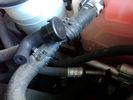
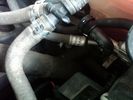
Breather line with factory cap cut off.2320 viewsIf you expand the jpg by clicking on it, in the bottom right corner if you look closely, one can see the black plastic factory vent tubing with the OEM cap cut off.
Note the tubing is cut at a 45 degree angle facing to the rear. Also shown in the top right is the cut off portion sitting on the coolant water hose and on the top left also sitting on the coolant hose, the new to be installed Gore manufactured replacement breather cap.
|
|
New Breather Cap installed.1710 viewsThis shows the new Gore brand angled breather cap installed. The cap points rearward to the firewall. Also shown is the cut off piece.
The new Gore breather cap is what one now sees on the LR4 and RR Sport.
|
|

Thread upload142 viewsImage uploaded in thread 174456
|
|
Thread upload0 viewsImage uploaded in thread 186484
|
|
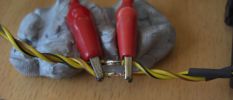
Can Pair Repair84 viewsThis is the high speed CAN bus Pair. By over twisting and keeping the repair short i will maintain the very important twist. Good soldering is a must it looks ropey in this shot but it is not, note the heat shrink pre placed on the wires to the right.
|
|

74 viewsMS excel sheet for monthly mileage report will give average fuel consumption.(most cells have formulas to help fill in from previous line)
on first sheet add details you want on monthly sheets. during use the data needed to be added is ending reading on clock, places visited (if you want).
how much fuel when you purchased it also fuel in tank at start and end of month
|
|
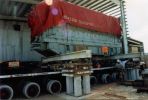
Grand Cayman97 viewsA 120tonnes Diesel Engine being skidded from road transport vehicle to final position in Grand Cayman,we were responsible from Stockport up to final job site,including al shipping and transportation.
|
|

Thread upload4 viewsImage uploaded in new thread
|
|

Thread upload12 viewsImage uploaded in new thread
|
|
Thread upload8 viewsImage uploaded in thread 203496
|
|
Thread upload4 viewsImage uploaded in thread 203496
|
|
Thread upload7 viewsImage uploaded in thread 205984
|
|
65 views
|
|
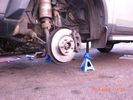
Securely supported on axle stands125 views
|
|
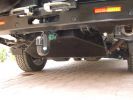
LongRanger auxiliary fuel tank358 viewsThe LR fuel tank imported from ARB in Australia with its 115 litre capacity has more than doubled the range of the car. This is important in the desert where fuel consumption increases at times to 10mpg or less. On a cruise on highways, the car now has a range approaching 850 miles. The tank fits neatly, has not affected handling in a detectable way apart from over speed humps, when a little more bounce from the rear suspension is detected! Suspension copes with the additonal loads without any problem.
|
|
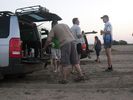
Sundowners from the portable bar (D3) in the Shashi River60 views
|
|

Portrait Of Crumble, her youngest horse, by Cath. See highlandpetportraits.co.uk for more70 views
|
|
![Filename=Cura_Ponte radio_Faggeta 12-2008 22 - 28 dic 2008 - 22_m [1024x768].jpg
Filesize=321KB
Dimensions=576x768
Date added=06.Jan 2009 Cura_Ponte radio_Faggeta 12-2008 22 - 28 dic 2008 - 22_m [1024x768].jpg](albums/userpics/12685/thumb_Cura_Ponte%20radio_Faggeta%2012-2008%2022%20-%2028%20dic%202008%20-%2022_m%20%5B1024x768%5D.jpg)
My Camera moount 292 viewsIl supporto per la fotocamera digitale
|
|
![Filename=Cura_Ponte radio_Faggeta 12-2008 24 - 28 dic 2008 - 24 [1280x768].JPG
Filesize=121KB
Dimensions=1024x768
Date added=06.Jan 2009 Cura_Ponte radio_Faggeta 12-2008 24 - 28 dic 2008 - 24 [1280x768].JPG](albums/userpics/12685/thumb_Cura_Ponte%20radio_Faggeta%2012-2008%2024%20-%2028%20dic%202008%20-%2024%20%5B1280x768%5D.JPG)
My Camera moount 1101 viewsIl supporto per la fotocamera digitale
|
|

Propshaft Support - Front view46 viewsNote the quality Sikaflex instead of the pathetic fragile rubber. :-)
|
|

Propshaft Support - Rear view38 views
|
|
Thread upload19 viewsImage uploaded in thread 104797
|
|
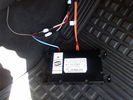
D4 Bluetooth AH42 10F845 AA module connected to 12VDC and MOST1210 viewsThis jpg shows the MOST bus connected to the AH42 10F845 AA module used in the D4 as well as +12VDC power from F58P connected. The power is split with a Y harness as the IHU (radio) for some reason required +12VDC power to the C2115-10 "mute" pin to keep the radio/CD audio from muting all the time.
With power on the pin, the radio audio does mute as it should when the cell phone rings and the hands free connects. The brown conductor feeds to C2115-10 and the blue to the module.
The module tucks up and hides behind the grey plastic section covering the forward portion of the passenger side tranny hump for left hand drive vehicles; for RHD, it would be located on the left side.
The pairing code is 2121 with this setup and not 1234 or 0000.
|
|
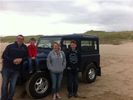
Portstewart D9015 views
|
|

Thread upload1 viewsImage uploaded in thread 176752
|
|

Discojock 159 viewsCairns Blue with Shadow Chrome Range Rover Sport Insert.
|
|
9 views
|
|

Thread upload29 viewsImage uploaded in thread 115495
|
|

Thread upload11 viewsImage uploaded in thread 146841
|
|

Thread upload19 viewsImage uploaded in thread 115495
|
|
16 views
|
|
Thread upload1 viewsImage uploaded in thread 188756
|
|
Thread upload22 viewsImage uploaded in thread 124908
|
|
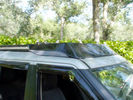
Portapacchi, carenatura anteriore, buon disegno e facilità di montaggio; si utilizzano le guide ed i fori predisposti49 views
|
|
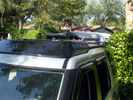
Portapacchi, estremamente basso il profilo, carenatura anteriore che riduce il rumore46 views
|
|
Portapacchi, pavimento calpestabile; ha anche funzione di doppio tetto, utile nel parcheggi assolati50 views
|
|
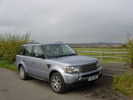
Range Rover Sport87 views
|
|
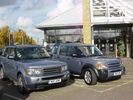
Sport to Disco85 views
|
|
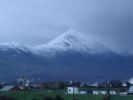
the reek westport ireland61 views
|
|
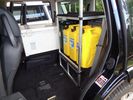
2nd Row seats out and fridge and jerries "in"21 viewsA false floor was made out of ply to support the freezer and 5 x water jerries. I used 3 x fuel jerries for photographic purposes only.
|
|
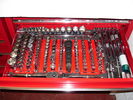
D3 Life Support 498 views
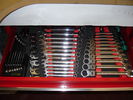
|
|
D3 Life Support 390 views
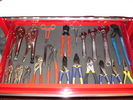
|
|
D3 Life Support 282 views
|
|
D3 Life Support 178 views
|
|
Dead engine135 viewsExhaust ports showing where leaked coolant has gone into the manifold and filled the turbo
|
|
The Missus attempting to get to Port Charlotte before closing time - Warp Factor 3, Mr Sulu !152 views
|
|

It was a bit rough here at Chapel Porth today301 views
|
|
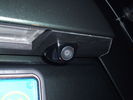
Retrocamera63 viewsRetrocamera installata nel porta luci della targa
|
|
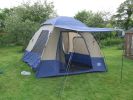
Sportz Full-Size 4x4 Tent148 views
|
|
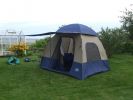
Sportz Full-Size 4x4 Tent156 views
|
|
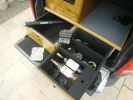
Fishing gear and other important items readied for Scotland90 views
|
|
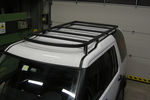
Portapacchi D4 49 views
|
|
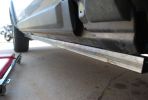
190 viewsSupport Channel bolted up to the door sill
|
|
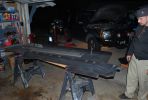
172 viewsFirst stab at the bottom plate welded to the support channel.
|
|
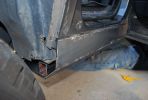
183 viewsRough fit showing the rear end with the support channel and slider plates.
|
|
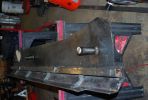
182 viewsAnother shot of the right slider. The center support channel has drainage channels welded in that match the locations of the drain holes on the sill frame.
|
|
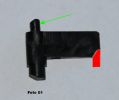
Foto 1 - particolare incriminato142 viewsIl problema del portello di rifornimento che non si chiude pi� � causato dalla rottura di un'appendice della linguetta che fa da guida al movimento (riprodotta in rosso). Un meccanismo simile al click delle penne biro. Un particolare del costo di qualche millesimo (valore della plastica) che in una macchina da �50.000,00 (per lo meno la mia) si sarebbe preferito in fusione di alluminio.
|
|
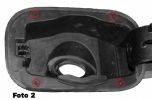
Foto 2115 viewsPer rimuovere in blocco il portello bisogna inserire un tondino del diametro di 2mm. circa nei fori indicati per abbassare le mollette che tengono la struttura alla carrozzeria Vedi foto 3.
Ogni lavoro � fatto a rischio e pericolo di chi lo fa, non mi assumo alcuna responsabilit� per eventuali danni causati a persone o cose.
|
|
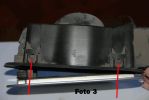
Foto 3 - Rimozione portello143 viewsInserire un tondino metallico di 2mm di diametro per abbassare le mollette che bloccano la struttura del portello.
Bisogna anche rimuovere il dispositivo della chiusura centralizzata indicata dalla freccia grigia della foto 4 premendo le 4 linguette con due pinze.
Ogni lavoro � fatto a rischio e pericolo di chi lo fa, non mi assumo alcuna responsabilit� per eventuali danni causati a persone o cose.
|
|
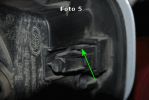
Foto 5 - molletta di ritegno particolare158 viewsLa freccia verde indica la molletta di plastica che tiene in sede il particolare rotto. Nella parte inferiore se ne trova un'altra che trattiene il perno inferiore pi� grosso.
Ogni lavoro � fatto a rischio e pericolo di chi lo fa, non mi assumo alcuna responsabilit� per eventuali danni causati a persone o cose.
|
|
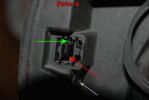
Foto 4 - Rimozione particolare rotto157 viewsUn'alternativa per rimuovere il pezzo rotto (indicato dalla freccia rossa), anzich� smontare tutto il portello si pu� intervenire inserendo un cacciavite piatto come indicato dalla freccia verde, al fine di sollevare la linguetta indicata dalla freccia verde della foto 5. Questa linguetta sblocca il perno del particolare rotto indicato dalla freccia verde della foto 1.
Ogni lavoro � fatto a rischio e pericolo di chi lo fa, non mi assumo alcuna responsabilit� per eventuali danni causati a persone o cose
|
|
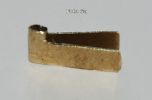
Foto 6a - particolare per riparazione117 viewsPersonalmente per riparare il sistema di chiusura del portello di rifornimento ho utilizzato una lamella di ottone di circa 3 decimi di spessore che ho sagomato attorno al particolare rotto e che ho fissato con un rivetto in alluminio. Vedi anche foto 6b e 6c.
|
|
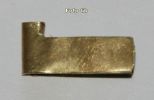
Foto 6b - particolare per riparazione112 viewsParticolare da montare sul pezzo rotto.
|
|
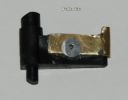
Foto 6c - particolare per riparato128 viewsParticolare con assemblata la lamella di ottone fissata con un rivetto di alluminio. Il rivetto � stato limato da entrambi i lati per permettere al dispositivo di spostarsi da destra a sinistra abbastanza per seguire il percorso all\'interno del portello. Il "dente" guida deve essre arrotondato al fine di agevolare il percorso.
|
|
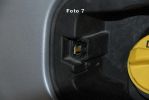
Foto 7 - Particolare montato165 viewsEcco come si presenta il particolare riparato e montato.
|
|
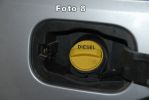
Foto 8 - Lavoro finito112 viewsLavoro finito.
|
|
Foto 9 - Portello chiuso e riparato102 viewsIl portello � finalmente riparato. Personalmente ho impiegato circa 1,5 ore per terminare il lavoro, tenendo conto che non conoscendo il meccanismo ho smontato completamente il pezzo dall\'auto. Smontando solamente il pezzettino rotto ed avendo a disposizione l\'occorrente in non pi� di un\'ora il portello � riparato.
Ora tocca al posacenere che non si chiude pi�, il colmo � che non fumo e dal 2005 ad oggi l\'avr� aperto 5 volte!!
Saluti e buon lavoro (sempre a vostro rischio e pericolo).
|
|

BT Infinity FTTC best-effort with QoS on upload and jumbo frames26 views
|
|

Disco Sport 511 wheel23 views
|
|

Thread upload0 viewsImage uploaded in thread 138955
|
|

e-20200928_Vigor166_Rear_Ports49 views
|
|

Thread upload2 viewsImage uploaded in thread 136043
|
|

Thread upload18 viewsImage uploaded in thread 166409
|
|
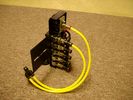
FASKIT on end view 864 viewsEnd and rear view of the FASKIT. Yellow lines are as shipped for hooking to the air supply; one line to valve/filler and other is to gauge. I will modify the arrangement to delete one of the yellow lines such that gauge line plugs into where the second yellow line is right now,(will be only one yellow tube), and then the air source line will plug into the port controlled by the valve, (hidden in this view but visible in other view). When white valve is in the ON position, gauge will read air source pressure, and be available to supply air to any of the selected four air springs. When valve is closed, the gauge will show individual air pressure in each of the air springs when a jumper is run between the gauge Schrader valve and the appropriate air spring Schrader valve.
|
|
Just arrived off the transporter172 views
|
|

Fiche_LandRover_Disco3-4 Outback Import74 views
|
|

Pass seat wiring108 viewsClose up showing the re worked Pass seat wiring on the D3 loom next to the sport one.
|
|

The full story how I fitted RSS seats in D3520 views
|
|
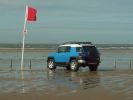
Toyota FJ Cruiser on Southport Beach114 views
|
|
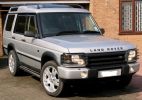
My TD5 with 19" RRS in Zambezi with Dastek/ITG/Allisport 197BHP285 views
|
|
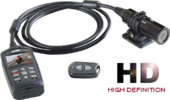
Professional HD Motorsport camera kit79 views
|
|

Tigger - Macmillan Cancer Support Decals69 views
|
|

Thread upload15 viewsImage uploaded in thread 125367
|
|

Thread upload2 viewsImage uploaded in thread 197502
|
|

Gore Tex data sheet on Breather Cap.784 viewsThis is a Gore data sheet on the air vent material that is within the breather cap. The filter material has both hydrophobic and oleophobic properties. That means it keeps water out and the differential oil in.
Also the membrane material is air permeable; that means air pressure is equalized between the interior of the differential and outside air. This is important when the 3 is flying at altitude in the back of a Hercules with the rear door open - that is the rear hatch of the Herc.
|
|

Thread upload12 viewsImage uploaded in thread 159579
|
|
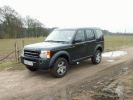
In the Goyt Valley again - at the Stockport end244 views
|
|
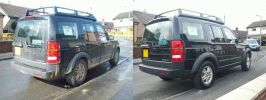
Guy Salmon Stockport Clean!175 views
|
|

Back of unit shows choice of port for best fit94 views
|
|

Thread upload0 viewsImage uploaded in thread 204567
|
|

Thread upload14 viewsImage uploaded in new thread
|
|

Thread upload14 viewsImage uploaded in thread 134091
|
|

IIDTool EAS Calibration Excel87 viewsThis is the spreadsheet I made using Numbers 3.1 on a Mac, exported as an Excel file.
I haven't tried it on anything other than Numbers though.
|
|

Thread upload1 viewsImage uploaded in thread 177417
|
|

Thread upload3 viewsImage uploaded in new thread
|
|
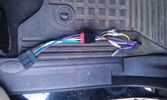
56 viewsThe OEM 2 ISO harness. Notice the red and yellow, which are important for my radio. Not having the red connected simply didn't activate the radio (so I wonder what the radio does with the permanent 12V)
|
|

35 viewsThe facia had some bits sticking out which fit quite nicely with the supplied double DIN support. As I was going to use the DIN supports supplied with either the radio and the CB, I needed to remove those bits sticking out. They made the DIN support bend as well.
|
|
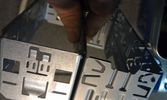
38 viewsWhen adding two single DIN supports together, you get quite a gap at the front.
This gap was way too much in my case, as it turned out that both supports started to bend when putting them both in the facia. Not that good, so I decided to cut off the upper part of the lower DIN support.
|
|
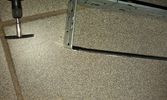
35 viewsThe result after the dremel hit the DIN support
|
|
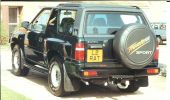
1994 Vauxhall Frontera, how they ever got away with calling it a \'Sport\'!119 views
|
|

Disco Sport25 views
|
|
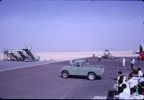
Dubai Airport 1966104 views
|
|
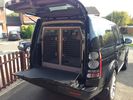
K98 viewsZac and Ollie's transport.
|
|
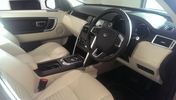
Discovery Sport9 viewsDS at Pentland pre-Christmas
|
|

D Sport42 views
|
|

FBH Life Support 122 views
|
|

FBH Life Support 226 views
|
|
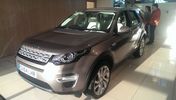
Discovery Sport7 views
|
|

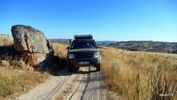
Trip5 viewsPortugal tracks
|
|

Discovery Sport7 views
|
|
Sunset12 viewsSunset at camp site .portugal trip.
|
|
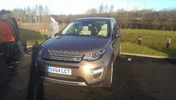
Discovery Sport7 views
|
|
14 viewsPortugal tracks
|
|
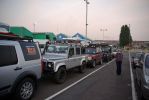
Queue before the ferry in Portsmouth143 views
|
|
Sottoporta treeslide62 views
|
|

Bolster and lumber support options153 views
|
|
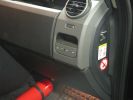
463 viewsFirst step in the journey, installed USB ports.
At the time I installed these, the goal was to use them in combination with the car-computer that resided in the back.
In the meanwhile, I dismantled the car-computer and nearly everything that was connected to it (touchscreen front, Wifi, DVB-T ...).
I kept the USB outlets in the front and turned them into charger for the appliances missus brings with her when we're on holiday. Mainly her iPod and smartphone ...
|
|

BD/C82D134 views66L Portable Fridge/Freezer
https://www.facebook.com/snomasterusa
|
|
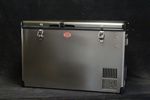
BD/C82D113 views66L Portable Fridge/Freezer
https://www.facebook.com/snomasterusa
|
|

BD/C82D120 views66L Portable Fridge/Freezer
https://www.facebook.com/snomasterusa
|
|

122 views72L Portable Fridge Freezer Controls
https://www.facebook.com/snomasterusa
|
|
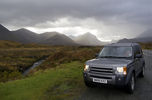
Isle of Skye229 viewsHaving just seen the view in my rear view mirror i thought i'd stop and get a photo of the Disco. This was about 15 minutes north of Portree on the Isle of Skye. A stunning place to visit. With the clouds in the distance just letting the sun peek through them i thought it was worth uploading. Hope you like it.
|
|

Floating Caravan - Gunwharf Quays, Portsmouth 64 viewsHalf term happy families....
|
|

33 viewsZermatt Silver with Silver Range Rover Sport insert.
|
|

42 viewsCairns Blue with Silver Range Rover Sport Insert.
|
|

30 viewsStornoway Grey with Shadow Chrome Range Rover Sport insert.
|
|
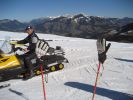
Alternative transport133 viewsView across the Brixental towards the Hohe Salve
|
|
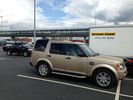
Manchester Airport127 views
|
|
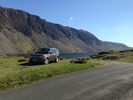
scafel pike 3108 viewsJust picked up my new car from Lakeland Land Rover & couldn't resist the opportunity to climb Scafel Pike
|
|
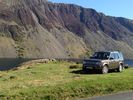
scafel pike 299 viewsJust picked up my new car from Lakeland Land Rover & couldn't resist the opportunity to climb Scafel Pike
|
|
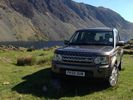
scafel pike 1100 viewsJust picked up my new car from Lakeland Land Rover & couldn't resist the opportunity to climb Scafel Pike
|
|
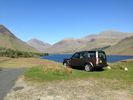
Helvelyn 117 viewsJust picked up my new car from Lakeland Land Rover & couldn't resist the opportunity to climb Scafel Pike
|
|

16 viewsilluminazione sotto porta con alogena di serie
|
|

17 viewsilluminazione sotto porta con led
|
|
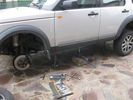
vista auto supportata45 views
|
|
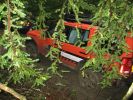
LRE Eastnor G4 D3582 viewsCALENDAR ENTRY
Photo taken during the LRW Show at Eastnor Castle, 6th June 2009.
The LR Experience G4 D3 was moving in to position to help out a stricken RR Sport that had gone off track and ended with its\' nose in the trees. A very impressive front (another LRE D3) and rear winching method to extract the RR Sport sideways followed.
|
|

22 viewsStornoway Grey with Shadow Chrome Range Rover Sport insert.
|
|

15 viewsJava Black with Silver Range Rover Sport insert.
|
|

Rimozione portaoggeti superiore71 views
|
|
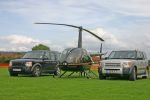
CALENDER ENTRY 2010269 viewsTaken at Nailsea flower show. I drove my disco there then Frapp took me to the airport to collect the helicopter. I flew the choper in and Frapp drove back there. Guess who arrived first!
|
|
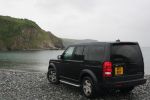
DISCO 3 Porthallow Beach Cornwall 13 Aug 07 - CALENDAR 2008 ENTRY744 viewsCALENDAR 2008 ENTRY. Picture of my Disco 3 on the beach at Porthallow in Cornwall.
Picture taken in the height of the british summer on the 13th August 07 at approx 2:30 in the afternoon! (notice the hint of sarcasm there as even at that time of the day I had my lights on!).
Getting the car from where we were staying on to that beach was quite an entertaining drive, with the roads (more like lanes) only being just wide enough to fit the car through.
Hope you like it!
|
|
Disco 3 Porthallow Beach Cornwall140 viewsTaken 13th August 07 approx 14:30.
|
|
Important to add the + 90 deg marked at 12 o'clock to assist11 views
|
|

188 viewsI want one of these portable blenders hehe!
|
|
DATI IMPORTATI89 views
|
|

21 views
|
|

shred n/s rear25 views
|
|

shred n/s r19 views
|
|
At the tire store295 views
|
|
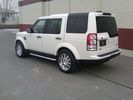
back and side292 views
|
|
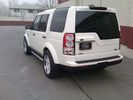
nice arse246 views
|
|
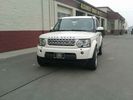
LR4 295/45/20 Proxes and Redbourne Baron 20"225 views
|
|
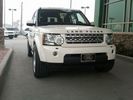
at LR dealer service area224 views
|
|
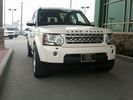
full frontal259 views
|
|
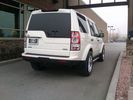
at lr dealer service ramp249 views
|
|

arse250 views
|
|
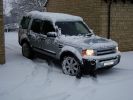
67 views
|
|
80 views
|
|
73 views
|
|
VA\'s89 views
|
|
VA\'s trim...... before!100 views
|
|
DaveT\'s93 views
|
|
Mine!89 views
|
|
buckingham\'s99 views
|
|
105 views
|
|
no.... you go in!98 views
|
|
110 views
|
|
115 views
|
|
120 views
|
|
Kids picture of motoer post-salisbury65 views
|
|

Thread upload2 viewsImage uploaded in new thread
|
|

Thread upload14 viewsImage uploaded in thread 147254
|
|

M42 J6 Airport turn202 viewsAll kitted up
|
|
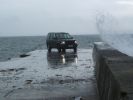
Stormy day in Islay505 viewsCALANDER ENTRY - Summer (?) holiday on Isle of Islay, Scotland. Good weather generally, but a storm came through mid-week. Car is parked at the end of the pier at Port Charlotte, looking towards Bowmore (!).
Sorry not much of a background or good light - but it was a storm. Oh and this is the highest res image I have, 5mp.
|
|
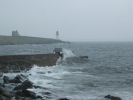
CALENDAR ENTRY - Islay 2008505 viewsSame as description for previous photo, with a bit more of a background. Looking towards Port Charlotte lighthouse. Sorry, number plate not visible, so probably inadmissible.
|
|

Thread upload15 viewsImage uploaded in new thread
|
|

Replacement switch from RRS installed on LR3864 viewsThe switch shown is LR part number YUZ500020, the upper rear hatch release switch that is found on the Range Rover Sport.
The switch body is the same switch as on the LR3 except that there is no wiring disconnect on the LR3. Hence when the switch corrodes and requires replacement, the LR solution is to purchase a new handle and license plate light assembly. I instead cut off the old switch and installed a JAE mating connector to the existing wiring and hence just plugged the RRS switch in.
The replacement RRS switch snaps into the same rectangular space in the same manner as the removed LR3 switch, the difference is the JAE male wiring connector.
|
|
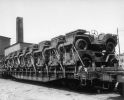
Willys Jeeps on transport87 views
|
|

John Guest (LR part # STC8580) push in straight 6mm tubing to tubing connector730 viewsThis picture is similar to the air suspension pneumatic fitting union that Land Rover sells as replacement part # STC8580. This is a 6mm OD tubing size push in to install straight tubing to tubing fitting. The STC8580 comes with what are called "Collets" at each end that cover up the press to release feature underneath. See the John Guest web site www.johnguest.com under the Pneumatics section and also in Downloads for their catalog for install and remove instructions.
The actual fitting that Land Rover provides has an interior 4mm OD ferrule that slips inside the 4mm ID of the nominal 6mm tubing. Hence the fitting depicted and part number are not actually correct. I have not yet been able to obtain the John Guest part number for the LR fitting.
The fittings that show in this doc are what I call food service fittings rather than transportation or Air Brake fittings. The part LR sells, (STC8580), is the Air Brake type for transportation.
|
|
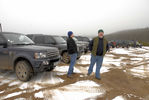
Sporting Fellows45 views
|
|

Thread upload16 viewsImage uploaded in new thread
|
|
![Filename=kit100c-castrol-mahle-service-kit-discovery-range-rover-sport-2_7-tdv6-to-vin-6a-2006-1240829-p[ekm]233x270[ekm].jpg
Filesize=28KB
Dimensions=233x270
Date added=01.Mar 2019 kit100c-castrol-mahle-service-kit-discovery-range-rover-sport-2_7-tdv6-to-vin-6a-2006-1240829-p[ekm]233x270[ekm].jpg](albums/userpics/33392/thumb_kit100c-castrol-mahle-service-kit-discovery-range-rover-sport-2_7-tdv6-to-vin-6a-2006-1240829-p%5Bekm%5D233x270%5Bekm%5D.jpg)
Thread upload7 viewsImage uploaded in new thread
|
|

Thread upload19 viewsImage uploaded in new thread
|
|

Thread upload7 viewsImage uploaded in thread 175095
|
|

Thread upload3 viewsImage uploaded in new thread
|
|

Thread upload6 viewsImage uploaded in thread 183644
|
|

LA501-016 - Technical Bulletin - Tailgate Support Mounting84 views
|
|
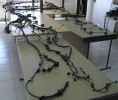
Looms laid out121 viewsview of both a d3 and sport loom from rear left quarter, the single tailgate sport is slightly to the left of the split D3. This was the only real area of difference.
|
|
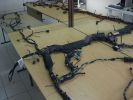
Wiring Laid out shown from other side121 viewsDamaged Disco 3 loom on bottom and new Sport one on top. This angle is as if you were looking at the drivers seat from the front (RHD). You can see the amp wiring centre shot and the rear door wiring to the left all duplicated.
|
|

porta strumenti33 views
|
|

Thread upload18 viewsImage uploaded in new thread
|
|
Thread upload10 viewsImage uploaded in new thread
|
|

Thread upload8 viewsImage uploaded in thread 145073
|
|

Upgrade manual FBH to parking heater38 viewsManual to upgrade FBH to full parking heater functionality
Translated in English from an official German language factory manual.
|
|
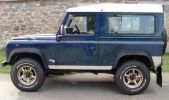
One of my 90 TD5\'s 92 viewsAbout 2003. Mach 5 wheels, Disco 2 final drive. Bought by Andy at Allisport.
|
|

Thread upload14 viewsImage uploaded in thread 55010
|
|

LAND ROVER DISCOVERY 3 istruzioni rimozione pannello porta posteriore Rear Door Trim Panel Removal 7E0186 viewsLAND ROVER DISCOVERY 3 istruzioni rimozione pannello porta posteriore Rear Door Trim Panel Removal 7E0
|
|

LAND ROVER DISCOVERY 3 istruzioni rimozione pannello porta posteriore Rear Door Trim Panel Removal 7E0112 viewsLAND ROVER DISCOVERY 3 istruzioni rimozione pannello porta posteriore Rear Door Trim Panel Removal 7E0
|
|

Thermostat Housing LR005631538 viewsWhen the time comes to install a new thermostat, consider installing the whole housing instead.
Advantages are the thermostat is correctly installed, (not as simple as it should be); you get all new plastic and that is important, plus a new coolant temperature sensor and also a new heater coolant bypass valve, the secret part no one realizes is also within.
The cost of the whole assembly is not much more than the cost of a factory thermostat and the effort to replace all is not as difficult as it might seem.
|
|

Harness that connects inside left rear compartment.445 viewsThis is the harness section that connects behind the left rear interior access panel and exits thru the large grommeted hole to below/behind the left rear tail light.
Note the two rubber grommets on the harness as there is both an interior metal skin and an exterior metal skin behind the left tail light assembly.
The two light grey connectors plug into two existing connectors near the top of the rear left interior access panel. The two darker connectors plug into the second piece of harness.
There is no little separate fuse box either with the NAS spec harness. The fuse box is included with the UK 13 pin dual plug units. If there was a fuse box, it would be on this portion of the harness.
|
|

50 views
|
|

49 views
|
|

52 views
|
|

47 views
|
|

43 views
|
|
Thread upload19 viewsImage uploaded in thread 108943
|
|

Thread upload16 viewsImage uploaded in thread 108943
|
|

DSL Packet Loss30 views
|
|

LLumar AIR80 Air Blue 78 windscreen film IR reduction metal oxide341 viewsThis pdf summarizes the characteristics of the various types of window glass film available from LLumar. www.llumar.com
I had the Air 80 metal oxide sort of clear film, (windshield film they call it), installed on the front driver and passenger side windows to reduce the Infra Red penetration and hence heating effect on the front occupants. The film is barely visible from either inside or outside, however there is a noticeable reduction in heat penetration when sitting inside. In short, my arm does not get cooked.
Cell phone and GPS etc seem unaffected by the metal oxide film.
I also had the film installed on the three sun roof portions as well.
|
|

EPB Failure Analysis472 viewsDocumented dissection of failed screaming EPB showing fundamental design flaw and use of inappropriate materials.
|
|
Thread upload0 viewsImage uploaded in thread 203557
|
|
Thread upload3 viewsImage uploaded in thread 206152
|
|
Air Suspension ECU Fuse 35P Shut Off Switch2635 viewsA more distant view of the shut off rocker switch in the ON position which is the normal position for when all is working as Land Rover intended.
Ideally, (but not totally necessary), the F35P circuit should be powered or de-energized after the various computers have gone to "sleep".
Similarly, removal of the F26E or F3E fuses is preferable after the computers have all gone to sleep but it appears that no real damage will be done if the fuses are removed while the system is energized. Pulling F26E is the main full time fuse that powers the air suspension computer. As such, once F26E is removed, pulling F3E is not really required.
Power for the compressor goes thru the 60 amp fusible link and relay, however control of the relay is via the air suspension computer so depowering the air suspension computer effectively depowers the air compressor and the internal exhaust valve relay/port.
|
|
View of mounted panel from front left corner737 viewsI drilled a hole for the supplied 6 mm tie down toggle bolt in a flat portion of the wing on which the panel sits. I inserted a 50 mm flat rubber washer between the wing metal surface and the underside of the black painted panel plate; also a 40 mm flat rubber washer between the supplied fender washer and the metal plate - just seemed like a good idea so surfaces mate well even if wing metal not completely flat.
|
|
Flexible wire rope fishing leader 0.032" diameter exiting carpet 1949 viewsThis is all you see of the completed mod.
The short little angled "line" about an inch long that looks like a piece of debris and is located a few inches "above" the support cable is actually the wire rope release cable exiting from under the carpeted lift gate cover.
I drilled a very small hole in the carpet and pushed the 0.032" diameter release wire thru and then slipped the loose end under the black plastic.
To release with the lift gate etc closed, from the inside, just pull the loose end free from under the black plastic and gently pull wire about 5mm, (1/4"), and the upper door catch should release. You will have to manually push the upper door out wards to actually effect opening, but you will already be inside the rear cargo area so that part is easy to do.
The assumption is that the lower door latch still works electrically and hence, the lower lift gate half will open as normal by pressing the usual button on the top left of the lower door half.
|
|

Wheel cut thru definitions and specs898 viewsNote the location of REAR SPACING and also OFFSET; probably two of the most important dimensions and not always understood as related to wheel size and relationship to the brake components.
For the 3, Rear Spacing is approximately 6.5 inches or 165 mm for a nominal 8" rim. Offset is 53P or 53mm Positive, which means the distance from the machined hub flat mounting surface to the rim's true centreline is 53 mm in the outboard direction. (The rim illustrated has a negative offset.)
As Positive offset increases, this means the wheel wraps around the disc brake mechanism more deeply, and hence the more the wheel would cover the brake parts. This is why most 18" wheels will not fit with the larger Brembo "supercharged engine" brake calipers.
Pitch circle diameter is 120mm; Pattern is 5 lug, and the tyre load rating is 112 with a recommended tyre speed rating of H or higher along with the XL load rating. For the 3, the stock tyre diameter is about 30 inches. The 255/60/18 or 255/55/19 OEM tyre outside diameter is 30.04 inches; Wheel lug torque is from 130 to 150 Nm or 96 to 110 lbf-ft and the lug nut hex socket size is 22mm.
Max Load High Speed Driving Tyre pressures are Front, 33 psig, (230 Kpa) and Rear, 42 psig, (290 Kpa).
The OEM rims are rated at 940 kgs, the highest that LR makes, hence while rims from other Land Rover products may physically fit, the odds are they are under rated in a weight sense.
|
|

LR3 Denso Alternator YLE500390 rear view709 viewsThis picture shows the rear of the YLE500390, the Land Rover part number for a newer design alternator utilizing the Transpo IN6349 regulator with the "hidden" cooling fins. Note the visual difference in the rear view of the next file jpg.
If the alternator is a rebuilt, (service exchange unit), but Land Rover supplied, then the part number is LR008860 or similar. (Note that 0 in LR0 is zero.)
Two Denso part numbers exist for the alternator as well, 4280003690 and 4280003691. The rating of the petrol V8 alternator is nominal 12 VDC and 150 amps. In normal day to day operation, they seem to run about 14VDC - usually between 13.9 and 14.1 volts at the OBD port.
For the petrol V6, the LR service exchange number is LR008862, and the 2.7TDV6 is LR008861.
The bridge rectifier within the alternator is a 12 diode avalanche type, 117mm diameter, as used in Nippondenso 120 to 160 amp alternators with the Hair Pin stator. It is similar to a Transpo INR421 which is rated for 120 to 150 amp alternators. That is probably our primary problem - the rectifier is just too light. Alternate part numbers for the bridge rectifier are Cargo 237607, Mobiltron RM-29 and AS ARC6021.
Re the B+ stud, the INR421 calls it up as an M8 x 1.25 x 30 mm long course threaded stud; some say 34 mm but that may be longer than desirable.
|
|

Dry fit - Mirror shell and support arm43 views
|
|

Outer Mirror Shell and support arm in place45 views
|
|

Door mirror - outer support arm43 views
|
|

Mirror pivot with outer support removed36 views
|
|

SDARS Satellite radio operating instructions 352 viewsThis is a 14 page pdf portion from the Owners Handbook with regard to operation of the satellite radio system operating on the Sirius channels.
|
|
Thread upload2 viewsImage uploaded in new thread
|
|
9 views
|
|
Thread upload0 viewsImage uploaded in new thread
|
|

1 sheet service record insert35 views
|
|

4 sheet service record insert36 views
|
|

LTB00046 - Technical Bulletin - Exterior Paint Defect Reporting57 views
|
|
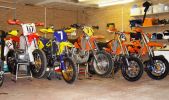
LTE Motorsport Supermoto Stable50 views
|
|

lumbar support72 views
|
|

Thread upload2 viewsImage uploaded in new thread
|
|

AUX power in rear of Disco103 viewsUsing hella aux power socket & cool magcode power port, also from hella,
|
|

Magcode power port93 viewsmagnetically held together, low profile internally and externally.
|
|
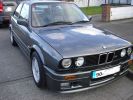
57 views325 sport 1990
|
|

Thread upload24 viewsImage uploaded in thread 170139
|
|
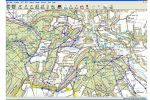
Way Finder Overlay Exporter example imported into Memory Map324 views
|
|

Thread upload23 viewsImage uploaded in thread 129356
|
|

27 views
|
|

16 views
|
|
where?20 views
|
|
where1?18 views
|
|
nice hat21 views
|
|
the gang19 views
|
|
dum dum14 views
|
|
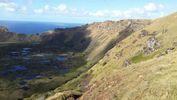
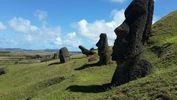
cratermass20 views
|
|
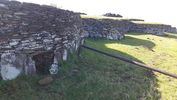
little house19 views
|
|
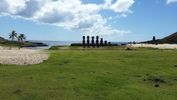
lifeguards on duty17 views
|
|

15 views
|
|

16 views
|
|

15 views
|
|
shawn20 views
|
|

jesus baptise11 views
|
|
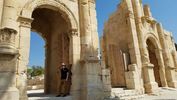
hadrians gate14 views
|
|
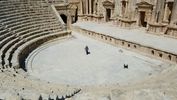
showtime12 views
|
|

map15 views
|
|

moses 15 views
|
|

15 views
|
|

14 views
|
|

12 views
|
|

14 views
|
|

16 views
|
|

15 views
|
|

13 views
|
|

wadi rum218 views
|
|

wadi rum13 views
|
|

little petra14 views
|
|
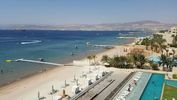
aqaba12 viewsred sea
|
|

bbq15 views
|
|

arab revolt14 views
|
|

18 views
|
|

15 views
|
|
12 views
|
|
15 views
|
|
12 views
|
|
13 views
|
|
17 views
|
|
16 views
|
|

12 views
|
|
13 views
|
|
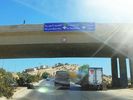
Syria border19 views
|
|
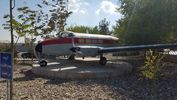
some plane16 views
|
|

Ajlun castle14 views
|
|

16 views
|
|

dead sea scroll17 views
|
|

17 views
|
|
13 views
|
|
18 views
|
|
15 views
|
|

19 views
|
|
18 views
|
|
18 views
|
|

12 views
|
|

15 views
|
|
13 views
|
|
3 views
|
|
2 views
|
|
3 views
|
|
3 views
|
|
3 views
|
|
26 views
|
|
27 views
|
|
26 views
|
|
26 views
|
|
27 views
|
|
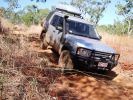
D3 in the Kimberley - on the track to Port Warrender45 viewsBeyond the track to the Mitchell Falls is the very rough track down to the coast and Port Warrender
|
|
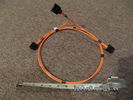
Fibre Optic MOST cable between components.560 viewsThis is a typical section of Plastic Optical Fiber (POF) optic cable with the orange coloured cladding covering the perimeter of the light transparent core. This is used as the MOST (Media Oriented Systems Transport) data transmission medium.
Note that each MOST 1355426 optical connector holds a pair of light conductor cables, one transmitting optical signal in, and the second, optical signal out. When connected to the other cables and devices, the cables form a continuous loop.
The light signal within the cable is red colour as one might expect. One break or disconnect anywhere along the loop shuts down signal transmission to all the connected components.
|
|
MTRs on Sport 19 inch wheels112 views
|
|
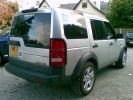
MTRs on Sport 19 inch wheels85 views
|
|
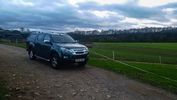
Isuzu DMAX Goyt Valley Stockport33 views
|
|
25 views
|
|

my new disco 377 viewsdoesn\'t look like much but it has just been delivered by the current lady owner who has traded it for a new R R sport. Will look a lot better once it has been valeted, serviced and mot\'d and then even better once i get my hands on it.
|
|
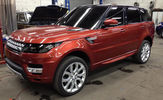
65 views
|
|
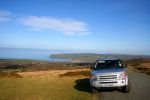
High above Newport Bay, Pembrokeshire, Wales - DG439 views
|
|

Thread upload13 viewsImage uploaded in thread 113126
|
|

47 views
|
|
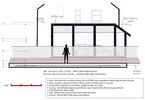
Thread upload3 viewsImage uploaded in thread 203496
|
|
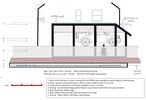
Thread upload10 viewsImage uploaded in thread 203496
|
|

75 views
|
|
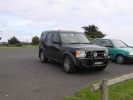
Trip to Tassie461 viewsAt Devonport
|
|
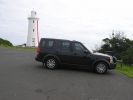
Trip to Tassie393 viewsAt Devonport
|
|
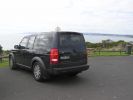
Trip to Tassie369 viewsAt Devonport
|
|
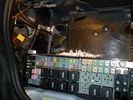
Battery Box Primary186 viewsThis visual is what is next to, behind and under your battery. It is important to note that the negative terminal which is prone to corrosion is in the rear, nearest to everything to maximize damage. The white powder pictured is baking soda. This is carefully used with a damp rag to neutralize any effect of battery acid (hydrochloric acid).
|
|
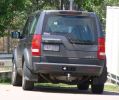
Spotted in FNQ212 viewsOne of about 10 D3s spotted whilst I was in NQ this last month.
Same basic spec and colour as mine - BUT also from the same dealer in Southport!
|
|
TDV8 HSE RRS147 viewsSporting her old 22" Overfinch Supersports
|
|
RoverSport245 views
|
|
Removed metal supports56 views
|
|
Brace, for additional support, from OEM's fixed to replacement mud flaps53 views
|
|
16 views
|
|
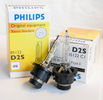
Philips D2S 85122 C1 Xenon 4300K projector HID bulb962 viewsThis is the 4300K OEM bulb in our HID Xenon projector headlights. People who design illumination systems regard the 4300K colour as a good compromise to provide what is called definition. This is effectively the ability to actually determine what an object being illuminated probably is. The more blue colour bulbs, say 5000K and greater, result in a reduction in the ability to distinguish detail, (regardless of brightness), of the object being illuminated. Effectively, you can see the object but you cannot quite figure out what it is. This is because the more blue frequencies means there are fewer other frequencies of light that allow our eyes to actually discern what an object really is.
The 4300K colour temperature applies to clear air conditions; for rain, dust, snow, fog, etc, then a yellow 2500K colour temperature is preferable. 2500K provides more contrast and there is less back splash of light off the air particles. In blowing snow, this means less sparkle back. Flat top cut off of the light beam, (which is the pattern our projector lights have), is important to reducing back splash - hence you do do not want roof mounted lighting for adverse conditions - as low down as possible is preferable, (which is why fog lights generally sit low.)
|
|

nice spare alloys for sale37 views
|
|

MAP sensor 44k miles, EGR valves not blanked164 viewsUsed Miller's Sport 4 then whatever it has become, for last 22k
|
|
209 viewsPort St. John's
|
|
The Sport boys and Martin256 views
|
|

Wheel DiametervDifference between 19" Sport Zero and 17" ST65 views
|
|
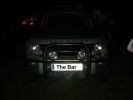
Slimers D3 in its most important role!183 views
|
|
| 520 files on 2 page(s) |
 |
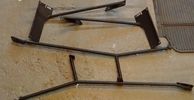
1 |  |
|