| Search results - "NC" |

Thread upload7 viewsImage uploaded in thread 143984
|
|
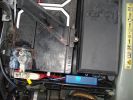
139 viewsThe weatherproof junction box fits neatly down the front of the battery, all contained inside the battery box.
|
|

0000 LR Bluetooth dealer Kit install instructions1610 viewsThis 17 page pdf is mostly a series of pictures showing how to install the original Land Rover dealer installed Bluetooth kit for circa 2005 / 2006 three's. Also included are three wiring diagrams sheets related to the pairing code 0000 Bluetooth install.
This pdf is useful if you are now removing the 0000 kit to install the optical 2121 MOST D4 module, an easier install than the 0000 kit ever was.
|
|
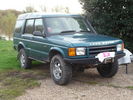
51 viewsD44 front winch bumper. Ali washer bottle. D44 rear h/d bumper. centre diff lock. 235x85x16 pirelli muds. OME +2" springs & shocks. front diff guard. side tree bars. wired for roof CB. Aux fuse block. safari snorkel. extended wading tubes. the list goes on...
|
|
Tirfor winch7 views
|
|
Road junction in Jökulsárglúfur National Park109 views
|
|
arromanches 6th june 0970 views
|
|
39 viewsincludes extensive Bramble Rash....
|
|

Welcome around where we live, in the French Basque Country, south west of France.580 viewsright by the spanish border.
|
|
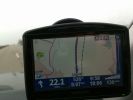
How fast?231 viewsI was driving along the Autobahn, glanced down at the speedo which was showing 140 mph, the Tomtom was telling the truth at 132 mph, but by the time I had switched the phone to camera I had dropped 2 mph, didnt try and do it again as there was no need.
|
|

Clearance to top arm - approx 10mm. Standard Links / Standard Height.200 views
|
|
arromanches 6th june 0978 views
|
|
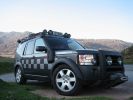
CALENDAR ENTRY 20091191 viewsBonatti grey TDV6 S, ambulance conversion, MTR's, winch, RAI, safety devices roof rack, rear ladder, bash plate, warn lighting, LED lighting throughout.
Owned by me, Rich Bell, Director of Extreme Medical Ltd, providers of medical support to Land Rover events.
|
|
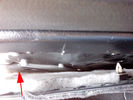
Riparazione attuatore sponda posteriore - Tailgate actuator repair38 viewsL'attuatore si trova dietro la pellicola nera incollata alla carrozzeria che va strappata.
The actuator is located behind the black film glued to the body must be torn.
|
|
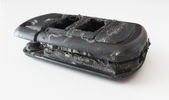
Tagliare lungo il perimetro della chiave - Cut along the key perimeter17 viewsI gusci sono saldati ad ultrasuoni. Con il disco tagliare lungo il perimetro della chiave in corrispondenza della giunta: lo spessore è di circa mm.3. Io non sono andato fino in fondo per evitare di danneggiare qualcosa, una volta inciso il solco per mm.2,7 ho fatto leva col cacciavite e ho strappato il materiale restante.
The body is ultrasonically welded. With the disc cut along the perimeter of the key in correspondence of the joint: the thickness is approximately 3mm. I have not gone all the way down
|
|

Shame it\'s not video coz you would hear my tap dancing so much better193 views
|
|

This is why the bus was canceled!39 views
|
|
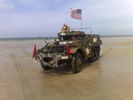
arromanches 6th june 0975 views
|
|
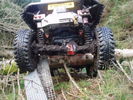
104 viewsmy winch challenge car.Phoenix challenge 2009 Scotland
|
|
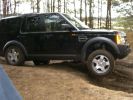
241 viewsIt simply is a true offroad car. Great balance, easy to drive, i love it!
|
|
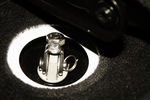
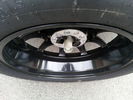
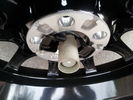
130 viewsspare wheel winch adater locked in position
|
|
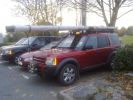
Skud launcher224 views
|
|
arromanches 6th june 0969 views
|
|

153 viewsBought Landmark alloys for Discovery 4 ,look great but makes calipers and discs look rubbish.Had centres of discs painted black and got calipers professionally painted ,what a difference.
|
|
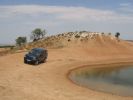
Medinaceli 2.159 viewsRuta de Medinaceli al Monasterio de Piedra.
From Medinaceli to Monasterio de Piedra, Soria and Zaragoza provinces in Spain.
|
|
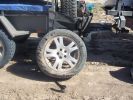
04 Damaged Tyre301 viewsYes, there\'s no doubt that this was a flat tyre. The ultra hot wheel nuts, look of the flat (note in a later photo that the back of the tyre appeared okay) and increased fuel consumption should have been a clue, but it was 45 deg C, and we had been doing about 105 km/hr on a dirt road for hours, so we just assumed it was a flat = WRONGO!
|
|
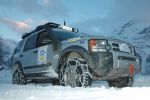
1475 viewsCALENDAR 2008 ENTRY
Taken at the 2006 Croisiere Blanche in the french alps 25th Jan 2006.
|
|

Chiave aperta12 viewsUna volta estratto il circuito stampato, facendo leva col cacciavite sulla parte rimasta attaccata ho prelevato la lama della chiave da inserire nel box nuovo.
Once you remove the printed circuit board, leveraging with the screwdriver on the part remained attached, I picked up the blade of the key to be inserted in the new box.
|
|
DIstanza tra la ruota e la sede del gancio traino37 views
|
|
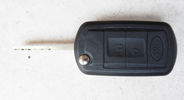
Chiave finita - Finished key18 viewsHo iserito il tutto nel nel nuovo contenitore pagato €4,00, ho incollato con la colla cianoacrilica, ne basta poca, e questo è il risultato.
I put all in the new container paid € 4.00, I glued with super glue, it only takes a little, and this is the result.
|
|
D3 T6 Distance302 views
|
|
the dot in the distance . . . . :-)75 views
|
|
Perfectly balanced!124 views
|
|
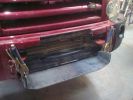
D3 Powerplant winch tray290 views
|
|
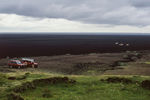
A green haven in a vast expanse of lava21 viewsThis was a great place fore some mid day leg stretcher and lunch
|
|
Blanche10 views
|
|
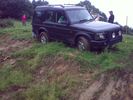
Almost a roll, but not quite...55 viewsI\'d \'launched\' myself at a 6ft hill and got to the top- but at an angle- the offside rear gripped and pulled us around to the right- perilously close to the edge... time for spare undies I think...
|
|
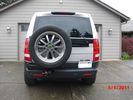
Highlift mount added27 viewsHighlift mounted in this position allows for any length with out overhead clearance issues if stood upright
|
|
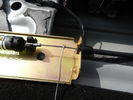
In caso di emergenza - For emergency48 viewsNel caso dovesse succedere nuovamente ho predisposto un cavetto da tirare.
If it were to happen again I have set up a cable to pull.
|
|
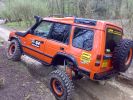
COVER SHOT FOR TOTAL OFF ROAD114 viewsG WAGEN AXELS FITTED WITH HYDRAULIC FRONT + REAR DIFF LOCKS + EXTREAM SUSPENSION SYSTEM FRONT + REAR WARN WINCHES.
|
|

Remembrance 2008104 views
|
|

Remembrance 2008107 views
|
|
Remembrance 2008127 views
|
|
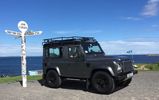
John o Groats NC 500 run8 views
|
|

Thread upload2 viewsImage uploaded in new thread
|
|

97 views
|
|
9 views
|
|
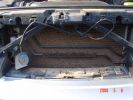
Removed Radiator Cover....wtf!!214 viewsThis gave me a few concerns
|
|

Cooper Creek - Innamincka81 views
|
|
Gredos 4.196 viewsRuta por el barranco de las 5 villas.
|
|
The 30n inch SR series bar illuminated68 views
|
|
SR 30 inch led lightbar58 views
|
|
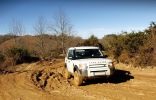
Riding around the local 4X4 speed track829 viewsthe 12 heures de St Pée are held here once a year.
|
|

SGANCIARE ACCENSIONE107 views
|
|

Attuatore rimontato - Actuator reassembled40 viewsAttuatore rimontato col cavo di emergenza.
Actuator riassemble with emergency cable.
|
|
![Filename=1004485_10200718663586516_104849493_n[1].jpg
Filesize=80KB
Dimensions=960x640
Date added=31.Jul 2013 1004485_10200718663586516_104849493_n[1].jpg](albums/userpics/35446/thumb_1004485_10200718663586516_104849493_n%5B1%5D.jpg)
33 viewsFrench recovery
|
|
damage to compressor cover758 viewsHit a rock in Harvey and lost the compressor function. Went straight through the original plastic cover.
|
|
Compressor original cover657 viewsThe rock punctured straight through the plastic cover, snapped the soft compressor bracket and tore open one of the loom plugs.
|
|
off-camber hill352 viewsAnd no, I wasn\'t hanging my arm out to balance the car - I was stopped at this point waiting for the Jeep in front to try and finish. It was a pretty steep off-camber slope!
|
|
Its - 3 c outside Llanchinda Farm Our B&B For Rally GB 99 views
|
|
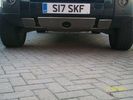
my new sump gaurd winch type 75 views
|
|

Bewdley Flood Defences162 views
|
|
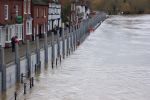
Bewdley Flood Defences152 views
|
|
In Some Circumstances !26 views
|
|
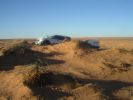
The French Line - Simpson Desert78 views
|
|
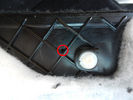
Foro pannello - Panel hole40 viewsHo forato il pannello moquettato per far passare il cavo di emergenza.
I drilled the carpeted panel to drive the emergency cable.
|
|
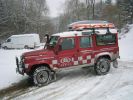
Extreme medics 110232 viewsFull Ambulance spec with extrem offroad cabability, 110 v8
|
|
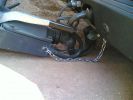
Towbar clearance358 views
|
|

Llamsrecovery mode installation53 viewsSpring lock inconspicuous
|
|
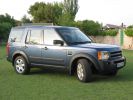
Discovery on the lawn447 viewsBrand new 2.7 TDV6 HSE posing at sunset. Cairns Blue, hence Blue.
|
|
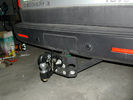
Gancio27 viewsGancio traino altezza variabile con attacco sfera e tipo ulpio
|
|
264 viewsland rover experience scotland
|
|
317 viewsland rover experience scotland
|
|
300 viewsland rover experience scotland
|
|
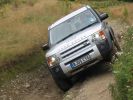
270 viewsland rover experience scotland
|
|

325 viewsland rover experience scotland
|
|

401 viewsland rover experience scotland
|
|
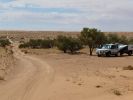
The French Line seems never ending82 views
|
|
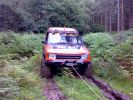
93 viewsJUST WINCHING A JEEP OUT OF A BOG
|
|
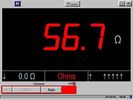
Resistance 6 & 1412 views
|
|
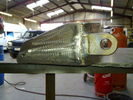
Discotech Power Plant Winch Tray 01149 views
|
|
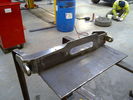
Discotech Power Plant Winch Tray 02157 views
|
|
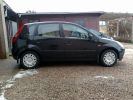
Fiesta once more!59 views
|
|
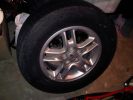
51 views
|
|
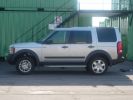
17" vs 19" wheel270 views
|
|
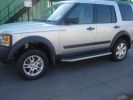
17" vs 19" wheel224 views
|
|
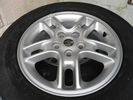
38 views17" alloy
|
|
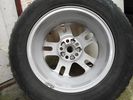
35 views17" alloy
|
|
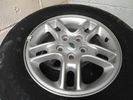
31 views17" alloy
|
|
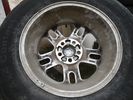
29 views17" alloy
|
|
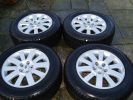
154 views
|
|

18 inch alloys42 views
|
|
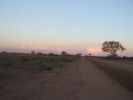
18 Brake "repairs" finished at sunset296 viewsWe just finished the repair at sunset and were driving slowly with 3 brakes. Oddly the D3 didn\'t behave any differently at 50 km/hr than it did normally. We had 4 instances of hitting the (3) skids for kangaroos before arriving in Wilcannia 3 hrs later. The brake light warning was making very distinctive noises and flashing randomly, though.
|
|

18 inch wheels44 views
|
|
Thread upload16 viewsImage uploaded in new thread
|
|
Uncle Ray\'s emporium and boudoir...38 views
|
|
22 views
|
|

Ready to winch a friends disco 4 194 viewsback of the picture you can just see another freinds (luvbus) disco 3 acting as balast to stop the disco 4 pulling me down hill
|
|

Thread upload10 viewsImage uploaded in new thread
|
|

Thread upload10 viewsImage uploaded in new thread
|
|

Thread upload4 viewsImage uploaded in new thread
|
|
Thread upload13 viewsImage uploaded in new thread
|
|

Thread upload2 viewsImage uploaded in thread 183097
|
|
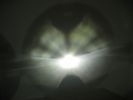
This is a normal H7 HID bulb installed in a BMW headlight to show glare above cut off line99 viewsThis is what the light pattern is that causes glare in most retofit applications including some projector lights. this is in fact a projector headlight on a BMW but the old projectors were only actually half projectors and half reflective bowls. the beam pattern should be clean cut like this ___/
|
|
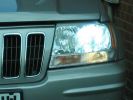
stand hid different distance - glare glare88 views
|
|
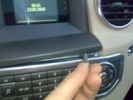
INSERIRE UN ATTREZZO PER ALZARE E SGANCIARE117 views
|
|

Coongie Lakes - near Innamincka73 views
|
|

Thread upload1 viewsImage uploaded in new thread
|
|
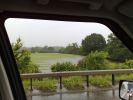
Area of the new housing expansion south of Swindon.144 viewsFlood plains will be flood plains - insurance anyone? Oh sorry forgot; all top 8 insurance companies refused to insure a house in this area, so the developers are going ahead building anyway...
|
|
Stripped down ready to start1014 views
|
|
Uncle Ray\'s Kit940 views
|
|
Perfect fit, using all existing bolt holes979 views
|
|
Compressor Valve Bracket910 views
|
|
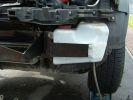
Washer Bottle Bracket879 views
|
|
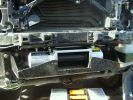
Checking for fit, free-spool lever needed to be modified1027 views
|
|
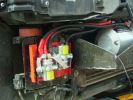
Solenoid pack fitted991 views
|
|
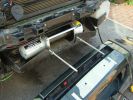
Marking the bumper for the cutout1098 views
|
|
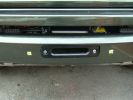
Hawse almost flush, not the neatest cutout but it won't be on view much941 views
|
|
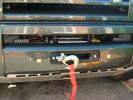
Nearly done, just need the number plate plinth to tidy it up972 views
|
|
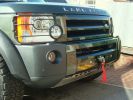
It's done!1103 views
|
|
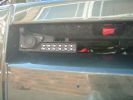
Socket for control lead and switch for radio-remote moved from solenoid pack to bumper1037 views
|
|
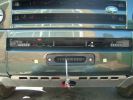
Cable wound in and hooked to recovery point964 views
|
|
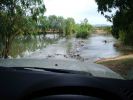
D3 in the Mary River Flood plains47 viewsIn this part of the world, on the flood plains out to Kakadu, you never get out to wade a creek first as the theory says you should. If the water isn\'t clear, like it was on this causeway, and it is this wide, you either wait for someone else who is braver than you to cross first, or you turn around and go home. These rivers are full of estuarine (salt-water) crocodiles, and they are starting to reach 7 metres in size in some still rare instances. However, seeing as a 2.5m crocodile can kill a grown man,
|
|
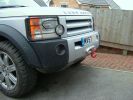
858 views
|
|
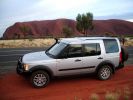
Calendar 2010 - D3 at Uluru323 viewsCalender 2010 - D3 at Uluru in April - Autumn, hence the colder skies and a brisk desert morning.
|
|
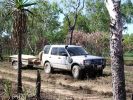
D3 in Kakadu National Park, on the track into the Alligator Billabong47 viewsThis whle area is down on the flood-plain, so in the Wet it is all under a few inches of water. In the dry it has a hard but brittle surface, which is then chewed up in many places by the feral animals with hard hoofs such as buffalo, pigs and horses. This then turns the track into a big dust bowl which is primarily bull-dust - a soft fine powder like talcum powder, which can be many feet deep, and gets into everything. The cover on the trailer is actually black.
|
|

Local WA newspaper article on D3 Theft168 viewsThe article is info by police public affairs. They wanted something to keep people locking doors and taking care during the holiday period. There are also TV public service announcements on air in WA featuring my wife confessing to leaving 1 door unlocked leading to the theft.
|
|
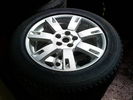
2009XSD4Alloy19inch35 views
|
|
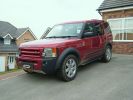
Hidden Winch333 views
|
|
40 views
|
|
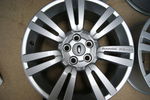
2010 FFRR 20inch SE alloy37 views
|
|
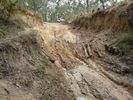
Northern entry to Palm Creek - near Bramwell Junction Cape York20 views
|
|

Boiling the Billy - Bramwell Junction Cape York24 views
|
|
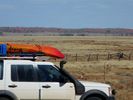
Cordillo Downs Road between Birdsville and Innamincka37 views
|
|
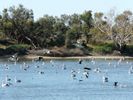
Thousands od Sea Birds Thousands of Km from Ocean - Innamincka28 views
|
|
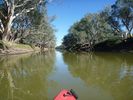
Kayaking - Cooper Creek Innamincka24 views
|
|

Sun up - camp on Cooper Creek Innamincka19 views
|
|
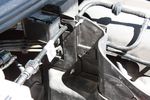
110 viewsBolts through the plastic box. These function as studs for the traxide brain to be mounted to.
|
|
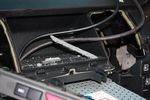
94 viewsCutting a trench in the dash pocket floor to wedge the bottom edge of the screen into
|
|
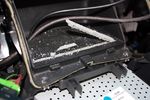
91 viewsCutting the trench in the dash pocket.
|
|

97 viewsOut at the C pillar. From here wires were threaded through the rear seatbelt anchor point into the commercial box, which is the hub of all the wiring and CarPC installation
|
|

81 viewsBench testing the CarPC
|
|
spigot torque wrench91 views
|
|
79 views
|
|
G4 kayak kit --7.5cm / 3 inch 39 views
|
|
rock anchor point17 views
|
|
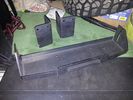
Hidden winch mounting plate discovery 3 4 RRS Mudtech4x4.com120 views
|
|
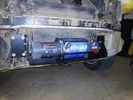
Hidden winch mounting plate discovery 3 4 RRS Mudtech4x4.com187 views
|
|
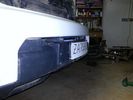
Hidden winch mounting plate discovery 3 4 RRS Mudtech4x4.com181 views
|
|
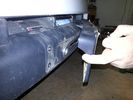
Hidden winch mounting plate discovery 3 4 RRS Mudtech4x4.com199 views
|
|
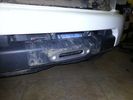
Hidden winch mounting plate discovery 3 4 RRS Mudtech4x4.com191 views
|
|
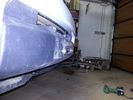
Hidden winch mounting plate discovery 3 4 RRS Mudtech4x4.com168 views
|
|
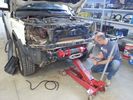
Hidden winch 12000 Disco 4 /2158 views
|
|
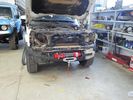
Hidden winch 12000 Disco 4154 viewsHidden winch mounting on a Discovery 4 3.0 TDV6 using Mudtech4x4 plate and 12000xc dual speed ALANWINCH
|
|
Hidden winch 12000 Disco 4 /3139 views
|
|
Modified Winch10 views
|
|
Modified Winch8 views
|
|
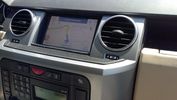
ta-dah! the final result36 viewscomplete GPS satNav system, with iGO software and ALL maps from europe 2012, including POIs speedcams, and personalized land rover skins
|
|

Mum and the little munchkin :-)14 views
|
|

Terratrip 202 V4 possible discrete location140 viewsAttached to ashtray - allowing removal / unplugging when not in use by pulling out the ashtray.
Terratrip is an odometer for use in rallies / raids - very popular with the French when used in conjunction with a roadbook. A mechanical backup in case GPS signal is lost on modern odometers like the Globe 800 I propose to use.
We'll see if there are reflection issues from the screen.
|
|

Spare wheel winch38 views
|
|
Thread upload10 viewsImage uploaded in thread 130480
|
|
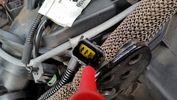
Test probe measure resistance14 views
|
|
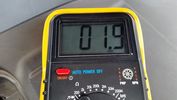
Resistance Ohms12 views
|
|
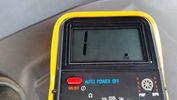
Resistance Ohms Failed glow plug13 views
|
|
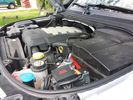
Winch Power upgrade318 viewsUsing 2 warn kits, and removing one of the wires to use on another project. The purpose was to replace the power and ground wire. I used Warn kits, which are 4/0 Welding cable. The original red #4 warped from getting a little too worn. The 2nd
Battery #1 Deka 9A94 AGM Intimidator, Battery #2 Deka 9A47 AGM Intimidator WARN 36080 28" Quick Connect Cable X 2, WARN 26405 Quick Connect Cable 7' X 2, WARN 15901 Black Cable X 1 -- winch control 72" X 1 https://www.facebook.com/DifferentialPartsUS
|
|
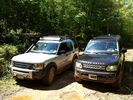
discrete winch mount415 viewsThe D44 winch mount on the trails. Like it on Facebook https://www.facebook.com/DifferentialPartsUS
|
|

mont blanc promo15 views
|
|
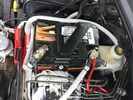
Wiring342 viewsThis is the final wiring configuration. It shows the dual battery wiring, 75A wiring run to the boot, the winch and in the lower right you can see a few turns of coax with a snap on ferrite near the base of a VHF Antenna.
|
|

Thread upload12 viewsImage uploaded in thread 130923
|
|

2inch reciever16 views
|
|

Thread upload17 viewsImage uploaded in thread 148229
|
|
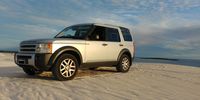
Lancelin dunes2 views
|
|
France 201839 views
|
|

Thread upload3 viewsImage uploaded in thread 155907
|
|
Thread upload4 viewsImage uploaded in thread 155907
|
|

Thread upload0 viewsImage uploaded in thread 183097
|
|
RAW jack2 viewsAccess to winch between folded seats.
|
|
Thread upload7 viewsImage uploaded in thread 203917
|
|

Thread upload12 viewsImage uploaded in thread 203917
|
|
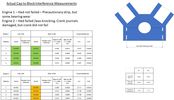
Thread upload8 viewsImage uploaded in thread 203917
|
|
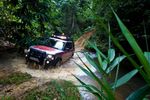
D3 Ambulance LR Experience Tour Malaysia 200841 views
|
|

Front Differential Description and Operation1543 viewsThe 4 page pdf describes of the operation of the front differential plus displays an exploded view of the front differential.
The fill plug is item 36 and the drain plug, item 8.
It is suggested one first unscrew the fill plug before unscrewing the drain plug - and it might take two different wrench sizes, hence get this detail sorted out before any oil drains out.
|
|

Anti Lock and Traction Control description and operation.1987 viewsNote on page 6 of this 17 page pdf the significance of the Steering Angle sensor mounted on the steering wheel shaft. The paragraph regarding the plausibility check as related to the brake pedal being not depressed is why the clean operation of the second set of contacts on the brake switch matters so much.
|
|

Clearance between arch and wheel92 views
|
|
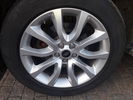
Thread upload3 viewsImage uploaded in new thread
|
|
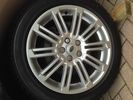
Thread upload10 viewsImage uploaded in new thread
|
|
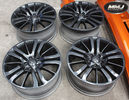
Thread upload9 viewsImage uploaded in thread 133311
|
|
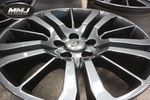
Thread upload7 viewsImage uploaded in thread 133311
|
|

Thread upload4 viewsImage uploaded in new thread
|
|
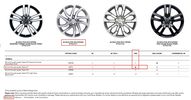
Thread upload6 viewsImage uploaded in thread 175426
|
|

TFC Liquid Lunch157 views
|
|
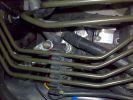
Allbright Solenoid in Place & Wired to Winch101 views
|
|
Allbright Solenoid in Place & Wired to Winch102 views
|
|
Tour de France - Yorkshire Stage 18 views
|
|
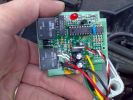
Front of Superwinch Remote Circuit93 views
|
|
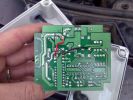
Rear of Superwinch Remote Circuit Board85 views
|
|
Journey home4 viewsOur first journey on our way home to France
|
|

5 views
|
|
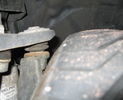
265/50x20 clerance pic362 views
|
|
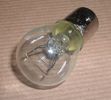
Land Rover Stop Tail Light dual filament bulb nominal 12 volt 21 / 5 watt filaments1427 viewsThis is the Land Rover part number 264590 dual filament bulb, (P21/5), that inserts into the upper two tail lamp receptacles. In the upper one, both filaments function, in the lower one, only the 5 watt tail light filament functions.
I regard it as not a good practice to routinely switch bulbs when the tail light filament, (5 watt), burns out on the lower bulb. The broken filament can jiggle over onto the brake light filament, (21 watt), and short the circuit to ground or something else not predicable.
There are also arguments to say that quality control is better on the Land Rover marketed bulbs than say far east sourced bulbs. Filament construction, and hence resistance can vary and mislead the current sensing circuits monitoring the signal light systems. Also when the bulbs are properly installed, all filaments should be standing vertically and not at any slope.
These are the sort of obscure circumstances that can lead to false trouble messages on the display, dropping to the stops, and subsequent concerns - all over a tail/signal light bulb.
For example, the filament life of both the tail light and the brake light filaments in the P21/5 bulb is significantly less than the USA common 1157 dual filament bulb, (1000/250 vs 5000/1200 hours); brightness in the P21/5 is a bit more, (3cp/35cp vs 3cp/32cp where cp is candle power), but current consumption is oddly less, (0.44a/1.86a vs 0.59a/2.10a where a is amps). It is the quest for efficiency vs maintenance trade off.
|
|
Legless winching out220 views
|
|

14 views
|
|
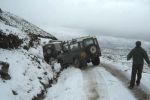
2 90's off at Lochearnhead208 viewsGuess this was why we turned round.
Photo pinched from SLROC website!
|
|

2 Maintenance Schedules - Gasoline Engines17 views2 Maintenance Schedules - Gasoline Engines
|
|
SGANCIATO120 views
|
|

Bracket to hold emergency cable132 views
|
|

Engine Accessory Drive Description and Operation882 viewsThis 2 page pdf shows both belts for the 4.4L petrol V8; the primary serpentine belt, (the long one), and the shorter secondary that drives only the radiator cooling fan.
The various accessory pulleys the two belts are each associated with are numbered and an included table describes each.
When replacing belts and pulleys, count the number of grooves on both your old items and your new replacement parts. It has been known for an pulley with the wrong number of grooves to come with a replacement part or the replacement belt has the incorrect number of grooves; hence make certain the groove count on the new parts are the same as the removed items.
|
|
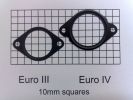
Photo of Euro III and Euro IV plates to show difference127 views
|
|
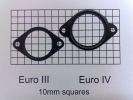
Photo of Euro III and Euro IV plates to show difference145 views
|
|
What 4x4's are for ...150 viewsThrowing a bunch of kit in back of an taking it places.
|
|
Lunch Stop49 views
|
|

20 viewsPermette di svitare i bulloni delle ruote, ma anche di altro, con rapidità e senza grosso sforzo.
Si collega alla batteria dell'auto e non necessita del motore acceso.
|
|
L.R.Experience Skipton14 views
|
|

Billing Off-Road Course Water Splash43 viewsLottie\'s first off-road experience at the Billing off-road course with MikeS providing some vital guidance!
|
|
Thread upload14 viewsImage uploaded in new thread
|
|

3 Maintenance Schedules - Diesel Engines12 views3 Maintenance Schedules - Diesel Engines
|
|
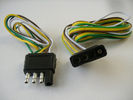
4 pin NAS flat connector from NAS small trailer382 viewsThe connector with the three exposed pins is the end that would commonly be located at the trailer hitch end, (front), of a small NAS lightweight trailer that has no electric brakes. This plug would connect into the flat 4 pin connector at the rear of the 3.
Note the order of the pin functions and wire colours: White is ground; the next pin is for tail/marker lights using the Brown wire; the Yellow conductor is for the left turn signal, and the far pin uses the Green conductor for the right turn signal.
There is no separate brake light conductor as NAS spec vehicles most often combine the brake and signal light functions to the same bulb filament rather separate filaments in different bulbs. The LR factory harness resolves that design difference.
Fortunately, the Land Rover NAS assembly pin order for the 4 pin flat plug maintains the above described conventions.
|
|
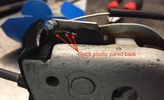
Close-up of lock showing emergency cable and pared back plastic tab141 views
|
|
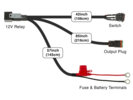
Thread upload10 viewsImage uploaded in thread 135796
|
|

Air Distribution and Filtering Systems2084 viewsThis is 3 page pdf with coloured drawings of the air distribution ducting for the front air system.
Also included is a sketch of the pollen filter location within the front heater ducting. Note that two types of filters are available: a) the cheaper dust/pollen filter and b), the activated carbon filter that removes smells from the air. Installing the more expensive activated carbon filter means you never smell a cattle truck or chicken farm again. It really works.
|
|

Air Conditioner Specifications 4.4L V81570 viewsThis 2 page pdf is just the specifications for the AC system. The refrigerant type is R134A.
Note that when topping the system up, it can be a good idea to include some of that ultra violet light dye that will glow to show leaks and loose fitting.
|
|

Rear Area Climate Control System1161 viewsThis 14 page pdf describes how the rear heating AC system is supposed to operate in conjunction with the front system.
The air transfer ducts are shown as coloured sketches as is the air flow within the rear blower setup.
|
|

Alternator and Regulator Wiring Diagrams, TDV6 and petrol V8 and V61989 viewsThis is a three page pdf that shows the alternator and regulator wiring for the petrol V6, petrol V8 and TDV6. The pdf can be either printed or by right clicking on the displayed pdf, rotated as required for viewing.
Of interest is that the regulator gets its instructions primarily from the Engine Control Module (ECM) and only secondarily from the vehicles electrical buss. The conductor from the battery thru the 5 amp fuse F20E is to provide initial power to excite the alternator at startup and then secondarily, to instruct it if the PWM signals were not available. Primary instructions to and from the ECM are thru the two other conductors via a digital like Pulse Width Modulated (PWM) signal.
If F20E, the 5 amp engine compartment fuse box fuse is blown, the red alternator light on the dash will be illuminated. This means that the alternator could be OK, but if the F20E fuse is blown, no electricity will be generated. Hence check the F20E fuse if you get a red ALT light or some indication of the alternator not working.
Regarding operation of the red ALT light on the dash, it is not the regulator within the alternator that tells the red light to illuminate, or not, but instead the ECM. This is the reason the red light does not function in the same manner as with older vehicles. With the 3, sometimes you have illumination and sometimes not depending upon what the ECM is thinking. What this means is that you can have an alternator that is failing but the red light does not illuminate as the ECM is compensating for reduced alternator output - maybe by draining the battery and or cutting back on vehicle electrical loads such as shutting off or cycling the radio amplifier or heated seats.
|
|
Thread upload9 viewsImage uploaded in thread 134532
|
|

Wipers, Front and Rear, plus Washers description and operation.818 viewsThis 17 page pdf describes how the wipers, front and rear, plus the washers are intended to operate. Also described is how the rain sensor is designed to function along with a table of the wiper delay timing parameters.
|
|
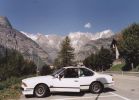
BMW635 at MonteBlanc Sept'02328 views
|
|
ANA_1Y23 views
|
|

Concept trailer310 views
|
|
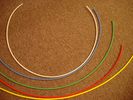
6mm Heat Shrink colours 362 viewsI decided to colour code the tubing so I used 6mm electrical heat shrink.
As there is no apparent colour coding re the 3, I tried to emulate the P38 coding; #1 LR red, #2 RR blue, #3 LF yellow, and #4 RF green. This was not doable as both left side air springs have green coloured tubing coming off the top of the front and rear air springs. I therefore arbitrarily chose the Left Rear to be red; Left Front green; Right Front yellow; Right Rear blue; and for the air compressor supply line, White coloured heat shrink. Since two new lines tie into each air spring line, I made the line between the air spring and the FASKIT, a single solid colour, and the line from the FASKIT to the valve block, White, plus the related appropriate solid colour.
|
|
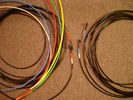
6mm PA12 grade nylon tubing with heat shrink applied 544 viewsShows some of the 6mm air line with heat shrink applied to one end of tubing. Shrink will be applied to the other end once field cut to length. These four tubes, each about 20 ft (6m) long, feed to the rear. Re the front air lines, (not shown), four additional lengths, each about 10 ft (3m) long, are required plus one more 3 metre length for compressor air. The 6mm tubing is a Nylon product specified as PA12. There is also a very similar Transport grade PA11 material, however it seems that PA12 is the more common Transport grade now in use. Also the applicable DIN standard seems to be both DIN 73378 and DIN 74324 for the nylon tubing. The working pressure of the 6mm tubing is about 27 Bar and bursting 82 Bar @ 20C. This is for the 1mm nominal wall thickness material, (4mm ID, 6mm OD).
|
|
31 views
|
|

14 views
|
|
French Line - Simpson Desert near \'Lake\' Thomas115 views
|
|
Thread upload2 viewsImage uploaded in new thread
|
|

Thread upload15 viewsImage uploaded in thread 162572
|
|
Lunch137 views
|
|
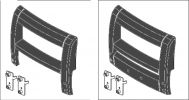
A-Bar Varients221 viewsWinch Version on Left / Non-Winch Version on Right
|
|

66 views
|
|
61 views
|
|
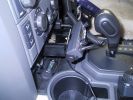
UHF CB439 viewsThe remote head of the GME TX3400 was mounted on the front of the ashtray after unclipping the ashtray facia. The head is very light, double sided tape was used plus 1 screw to hold it.
|
|
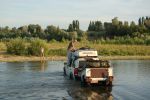
CALENDAR 2008 ENTRY698 viewsCALENDAR 2008 ENTRY
Crossing the Gard (France)
|
|
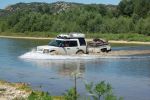
CALENDAR 2008 ENTRY821 viewsCALENDAR 2008 ENTRY
Crossing the Gard (France)
|
|

24 views
|
|

Thread upload13 viewsImage uploaded in thread 128934
|
|
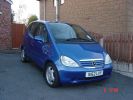
Wifes A Class 1.7 tdi Elegance Manual100 views
|
|
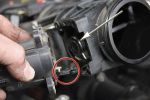
Removing the EGR Butterfly Valve Actuator1538 viewsRemove the 4 TORX screws to remove the actuator. The small black link (circled) connects the actuator drive arm with the butterfly valve spindle (arrowed). The spindle can now be very carefully levered out using a screwdriver inserted beneath the arrowed bit in the photo. A bit scary to do as it takes a fair bit of pressure before the spindle will free itself from the butterfly. Once it starts moving though, it gets easier to pull out.
|
|

24 views
|
|

18 views
|
|

Thread upload17 viewsImage uploaded in new thread
|
|

Thread upload14 viewsImage uploaded in new thread
|
|

Fin cell phone aerial drawing190 viewsThe factory aerial for the factory NAV / GPS on my 2005 HSE is within the high mounted stop light lens at the top of the upper hatch door. I do not have the factory installed phone kit, and as such, do not have the fin installed; instead there is just a plastic blanking insert to fill the cell phone aerial wiring hole in the metal portion of the roof; hence this requirement for an "external" cell antenna. For those that do have the fin on their glass roof, the fin is screwed on to a glued on plastic gasket, (sort of), and not bolted thru as per the metal roof 3's.
|
|
Big winch110 views
|
|

Almost a Bridge10 viewsAnother bridge this one we had to rent the branches and use our sand ladders
|
|
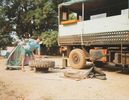
Puncture repair13 viewsI think in total we did this about 10 times, in 6 months, not a bad record, but not easy in the Bush !!
|
|
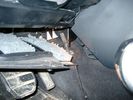
Air Conditioner Drain Hose on Drivers Side (LHD)2297 viewsThe corrugated rubber bit above and to the right of the gas pedal is the drain hose that goes down thru the carpet and floor sheet metal.
While it is bit hard to figure out from the jpg above, there is a rubber "strap" attached to the top of the corrugated hose that one uses to pull on to drag the hose up back around the black plastic heater "pan" drain. The same drain hose arrangement is on the other side as well.
One could I suppose run a plastic snap tie around the vertical pull strap if one was concerned about the hose slipping off again. See also the other jpg sketch which is from the Land Rover manual.
|
|

95 views
|
|
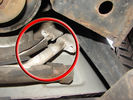
Air Conditioning Pipes (File 1)983 viewsIt\'s the smaller of the 2 pipes that is leaking. Both pipes are encased full length in the foam sleeve. You can see where the support bracket has \'crushed\' the sleeve. The bracket is what holed the small pipe. There is a bracket at each end and one in the middle. You need to remove the suspension reservoir to get to the centre bracket. Be aware that the bolts securing the brackets may be corroded and are likely to shear off on removal!
|
|
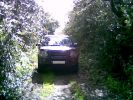
Lunchtime Lane201 viewsNot 200 yards from Manchester Airport can be found a little 1/2 mile lane - did it for the first time today - a few minutes fun in a dreary day
|
|
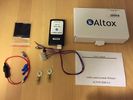
Thread upload7 viewsImage uploaded in new thread
|
|

FOR SALE - ONE OFF Land Rover Disco 3 37 viewsOne of a kind Landrover Discovery TDV6 HSE LUX Model 5 door automatic 4x4 diesel evo blue. Upgrades: sidesteps, roof rails, privacy glass, front and rear heated seats/elec seats, landrover tv and headphones, 7 seater black leather, piano black dash/steering wheel, built in fridge, 6 disc changer, sat nav and bluetooth, harman kardon premium entertainment pack, by-xenon adaptive headlights , cruise control and front and rear park distance control, panoramic electric glass roof, 22inch alloy wheels, body kit
|
|
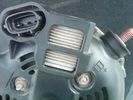
Alternator Plug and B+ terminal919 viewsPictured is the rear of the older Land Rover part # YLE500190 alternator showing the shiny cooling fin of the Regitar VRH2005-142 regulator under.
The first pin in the far left side of the connector is numbered #1 in the LR electrical wiring diagrams and is Battery Voltage Sensing (BVS); the middle pin, #2 receives a Pulse Width Modulated (PWM) signal from the Engine Control Module (ECM), and the right pin, #3 carries a PWM signal back to the ECM. Terminal Pin #2 on the LR wiring diagrams is called Alternator Control or ALT CON; Pin #3 per LR is called Alternator Monitoring or ALT MON.
Pin #1 is similar to what in older designs used to be called A or Batt, but is now called by Denso, S, AS, or Alternator Sensing for this design. Pin #1 also provides power to excite the alternator at startup until the PWM instructions over ride the battery voltage info. Land Rover calls the electronics under the pins a Smart Regulator, ironic, as it has to follow orders from the ECM rather than give the orders - new age thinking I guess. This is different from older design internal regulators that look at just the battery or the electrical buss voltage and then decides itself what to do.
It is almost like we are back to the external regulator designs of old, except that the ECM may decide that instead of telling the alternator to make more power, to load shed, and hence shut down the heated windscreen, seats, or whatever other electrical loads it decides are appropriate. My view is that the "smarts" are in the ECM and that the "regulator" should be regarded if not dumb, then as being a slave to the ECM.
|
|

Thread upload6 viewsImage uploaded in thread 109110
|
|

www.dinnerinthesky.com112 views
|
|

101 views
|
|

Thread upload5 viewsImage uploaded in thread 198773
|
|
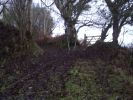
Anchor Tree110 views
|
|
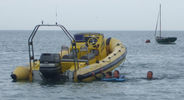
77 viewsThe Smaller Nashers and Friend using \'The Nashers Revenge\' as a diving platform in Start Bay, Devon
|
|

77 views
|
|
AndrewS winching BobbyCrispBox\'s motor out of the bog83 views
|
|

Thread upload15 viewsImage uploaded in thread 174456
|
|
Thread upload2 viewsImage uploaded in thread 108008
|
|
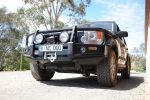
ARB bar and winch136 views
|
|
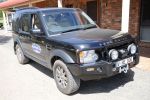
ARB bar and winch159 views
|
|
![Filename=august_08_145[1] [].jpg
Filesize=151KB
Dimensions=1200x900
Date added=15.Jan 2009 august_08_145[1] [].jpg](albums/userpics/11603/thumb_august_08_145%5B1%5D%20%5B%5D.jpg)
EGR\'S GONE IN THE FRENCH PYRANEES154 views
|
|

Our Trip Apr-Aug 2008135 viewsGosford to: Broken Hill, Innamincka, Birdsville, Alice Springs, Bungle Bungle NP, Broome, Gibb River Rd to Mitchell Falls and then Kunnunurra, Darwin (for tail gate Repair), Normanton (via Roper Bar, Borroloola, Lawn Hill, Burketown), Townsville, down coast to Noosa then inland to home. TRACK TRACE BY TRACKRANGER SOFTWARE ON ASUS UMPC.
|
|
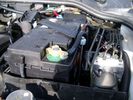
Aux Battery showing ground cable bolt "upside" down 1577 viewsIn order to obtain sufficient height clearance to get the plastic cover back on, I had to install the ground cable to the underside of the battery post connector.
Note the battery vent hose, (approx 5 ft required) is run down into where the windshield washer fluid container is located. There is not much electrical or metal in that area to be corroded by battery gas plus the open end of the vent hose tends to be protected from dirt and stays clean as well.
|
|
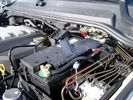
BCI Group 40R Deka 640RMF battery showing vent hose run forward to windshield washer reservoir area 1430 viewsRecessed post "Euro profile" battery to "match" OEM and stock Land Rover bracket; note that the Traxide SC80-LR module is mounted at an angle to allow for the main cable to sit under the cover so cover still closes.
The battery is a nominal 7", (180mm), high, but sits on a 1" battery spacer set under to raise the bottom front end of the battery such that the approx 11", (290 mm), length of the BCI 40R battery rises above the angled plastic nibs at the forward end bottom of the case front; hence sufficient space, (1/4", 5mm) remains at the brake reservoir end.
Also the 40R battery does not have hold down "flanges" on each end; on the sides yes, but not the ends so no additional length is required.
When I had to replace the 40R, this time I installed the shorter, (9.625"), taller, (7.5") Interstate BCI 47 / DIN H5 battery which eliminated the spacer on the bottom and better fit the stock LR tie down bolt lengths. Deka also has a BCI 47 / DIN H5 that would work fine as well.
|
|
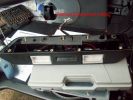
Didn\'t see reference to these anywhere - had to remove them143 views
|
|
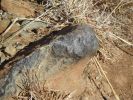
Bad Rock61 viewsbenign looking rock that punctured the sidewall of my new General Grabber AT2 (500km done on tyre)
|
|

got one shot on 4x5 transparency film. then it was gone.143 views
|
|
Shower at sea100 views
|
|
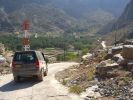
Bald Seet village164 viewsDescendign a steep concrete track over gravel into the villaeg of Ballad Seet. Curious in a dry, desert country to find verdent growth of palms, and agricultural produce on well watered terraces.
|
|

Balanced23 views
|
|

Thread upload12 viewsImage uploaded in new thread
|
|

Thread upload1 viewsImage uploaded in thread 200758
|
|
223 views
|
|
189 views
|
|

BAS remap interface after dealer software update287 viewsBAS remap interface after dealer software update,This is what you will be presented with after the dealer updates your cars engine software.
This is no problem IF you have returned the car to standard before the dealer visit.
When faced with this screen it will show you tht the dealer has changed the software and NOT let you put the BAS mapping back on your car because of the differences.
|
|
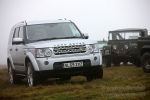
The new with the old694 viewsCALENDAR 2011
The new with the old: a Discovery 4 and a Series 1 during the Scottish Land Rover Owners Club (SLROC) Tyro event at Ballencrieff Farm, Bathgate, Saturday, 5th of December 2009.
|
|

Caterpillar Battery Size cross reference chart and battery profiles including post layout753 viewsThis pdf has a dimension, (metric and inches), cross reference chart plus another sheet that provides BCI and DIN cross reference numbers and shows post locations plus bottom ridge tie down locations, (or the lack of).
This data was for me, hard to find, and helps one in selecting a suitable physical size of Aux battery for the space available.
|
|

16 views
|
|
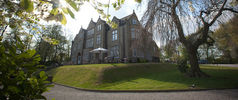
Woodlands Hotel6 viewsGreen Oval Garage would like to say thank you to the Woodlands Hotel in Leeds for allowing us the use of their beautiful grounds for all our future photos shoots.
Woodlands is one of the finest luxury hotels in Leeds. This boutique hotel is set in beautiful landscaped grounds on the outskirts of Leeds city centre, just 2 minutes drive from junction 27 of the M62 motorway, with 23 individually designed bedrooms and an award winning restaurant. Packed with character, this lovingly restored hotel is only three miles from the vibrant, cosmopolitan city of Leeds with superb nightlife and unrivalled shopping.
Woodlands also offers a stylish and contemporary functions venue for all kinds of social and business events. Our three stunning event spaces are suitable for everything from wedding ceremonies and receptions, to corporate meetings and events. The permanent marquee, attached to the hotel, can accommodate up to 150 for dining and 200 for evening parties and receptions, making it one of the most elegant settings for a wedding venue in the Leeds area.
For more information or to make a booking, please contact us on enquire@woodlandsleeds.com or 0113 2381 488
|
|
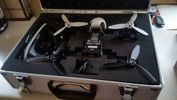
Parrot Bebop 2 Drone in case32 views£30 maplin case for Parrot Bebop 2 and Sky Controller 2
|
|

View of bed from entrance32 views
|
|

Rear Light416 views
|
|

Thread upload3 viewsImage uploaded in thread 159579
|
|
Thread upload13 viewsImage uploaded in thread 162353
|
|
Thread upload18 viewsImage uploaded in thread 162353
|
|
Thread upload21 viewsImage uploaded in thread 187006
|
|
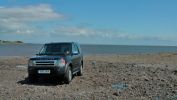
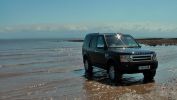
Calendar 2010355 viewsSolway Coast July 09
|
|
Calendar 2010376 views
|
|
Calendar 2010372 views
|
|
Calendar 2010341 viewsSolway Coast July 09
|
|
Calendar 2010353 viewsSolway coast July 09
|
|
Another lunchtime excursion194 views
|
|
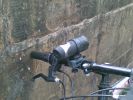
Another mounted camera - my Oregon ActionCam 200075 views
|
|

168 views
|
|
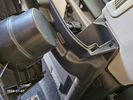
Bin Cover removed showing forward release clips that clip into the two rectangular slots.10 viewsOne has to pull up on the Bin Cover to unlatch the two metal clips, hence why release of the C pillar cover makes the bin cover removal and reinstall easier.
|
|

77 views
|
|
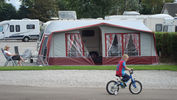
13 viewsa few pics of my tincan and old freelander, also a 1980's ford escort and caravan i saw in blackpool , and a huge motorhome parked near us in chester.
|
|
Thread upload6 viewsImage uploaded in new thread
|
|

Thread upload7 viewsImage uploaded in new thread
|
|

Thread upload6 viewsImage uploaded in new thread
|
|
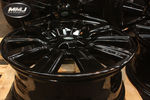
Thread upload6 viewsImage uploaded in new thread
|
|
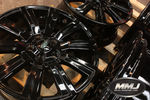
Thread upload7 viewsImage uploaded in new thread
|
|
41 views
|
|
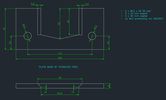
Thread upload14 viewsImage uploaded in thread 164479
|
|
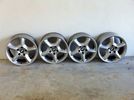
BMW X5 17" wheels52 views
|
|

Thread upload14 viewsImage uploaded in new thread
|
|
Thread upload7 viewsImage uploaded in thread 163677
|
|

Thread upload17 viewsImage uploaded in new thread
|
|
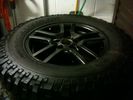
BMW X5 17" Wheel 79 viewsBMW X5 17" V-Spoke wheel with BFG MT 255/75 R17
|
|

Forest of Dean Wild Boar at Blakeney Straits / Wenchford Picnic Site74 views
|
|

Bodsy Brake Bible en Francais 1.6a4073 views
|
|

OLD VERSION - Bodsy's Brake Bible v 1.611171 viewsUSE Version 1.6a
Clarified EPB shoe instructions & corrected references to other sections. Added paypal donations information (requested by users of the guide.) Internationalised wheel location references by removing UK based reference to OS/NS, replaced with physical Front Left or Front Right descriptions.
|
|

Bolt holding exhaust silencer behind the front wheel26 views
|
|
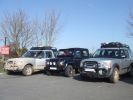
\'da boss\' and his two most-trusted henchmen273 views
|
|
330 views
|
|
260 views
|
|

260 views
|
|

Thread upload5 viewsImage uploaded in thread 200758
|
|
29 views
|
|

24 views
|
|

Thread upload2 viewsImage uploaded in thread 194599
|
|
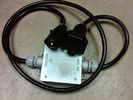
Box Closed with 7 Blade NAS connectors586 viewsBox closed up and ready for use. The box and cable connectors are reasonably weather tight and hence can be submerged for a bit while doing a creek crossing but as with the 3, do not use the creek bed as a parking stall. Similarly, the connector recessed into the bumper will probably remain somewhat dry as long as you keep moving but if you get stopped, well that is another story.
As such, I put a vial of desiccant in the metal box prior to closing it up to reduce corrosion due to moisture build up.
|
|

Brake Light Switch, Find, Remove, and Install Instructions 7853 viewsThis is a two page doc outlining where to find the brake light switch, how to remove it, and then install the new one.
Note, do not move the brake pedal when removing or installing the switch. Let the brake pedal hang where it wants to. The switch design is actually cunning, and as such is supposed to make the removal and install fool proof. Hence if you think too much about it, you can wreck the new switch.
If you want to inspect the interior of the switch, wait until you have removed the old switch. You can then just unsnap the blue from the white to get it apart. Inside, the switch is quite simple, (no circuit boards), but it will probably show black dust from failing contacts.
I think the reason the switch fails is that the Normally Open, (NO), contacts of the brake light contacts were made too light to carry the current load for make and break of the tail light filaments. I also think the black dust created then fouls the Normally Closed, (NC), second set of contacts for the ABS circuit. As such, the Normally Closed contacts become intermittent in operation and display as a fluctuating open and closed circuit condition to the ABS system when the ABS should be seeing a steady closed circuit. Hopefully the replacement switch contacts are more robust and may be as I recently replaced my switch again just as a matter of maintenance. While in a redesign, ideally the NC contacts should be sealed or at least separated from the NO contacts, when I inspected the removed switch, this time there was no black dust present.
Probably the removed switch will have a Land Rover oval logo moulded into it, the new one, FOMOCO.
|
|
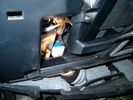
Brake Switch Visible thru Opening4975 viewsThe blue and white bit is the switch; the sort of gold appearing box,(it is really black), you will not see in your 3 as it is a Smooth Talker brand amplifier for my Blackberry phone antenna. This install is detailed in the SmoothTalker phone antenna section of my gallery.
One way to remove and install the switch is to lower the "horizontal" panel above the brake pedal as shown where the flashlight head is located. To actually remove the switch, you slide your hand thru the gap and rotate the switch clockwise 1/4 turn while watching thru the rectangular opening. Installation of the new switch is the reverse of above - 1/4 turn counterclockwise.
Before you remove the switch, note its orientation - horizontal with electrical wires to the left. That is the way it should look after replacement as well.
The second time I replaced the switch, I did it all thru the rectangular opening and did not remove the horizontal panel - that is experience helping out.
The knee kick you have to remove regardless. It is sort of hinged at the bottom so you just pull at the top and sort of rotate the knee panel and then pull upwards for two plastic "fingers" to clear the slots they reside in.
|
|

Black Deposits on Brake Light Switch Plunger2758 viewsThis jpg I got off another forum and is typical of what one will see when one opens up the removed brake light switch. The black powder is residue from arcing of one of the pair of contacts within.
Hopefully the newer switches with the FOMOCO logo moulded into the plastic are improved from the Land Rover logo marked early units, however I doubt it.
The Ford part number is SW-6572 and/or 7E5Z-13480-A as used on the 2006 to 2009 Ford Fusion's and Mercury Milan's; the Land Rover part number is XKB500110. Cost of switch could be about twenty five dollars. A previous LR part number for the switch was XKB500030, so hopefully the newer LR part number, XKB500110, reflects some improvement in reliability.
It is possible that the new switches are better as I installed a replacement 72,000 km, (45,000 miles) later, at 195,000 km (121,000 miles). When I took the removed switch apart to inspect, it was clean inside. There was no black dust - the switch looked like new, hence they must be improved now.
|
|

Brembo Harmonic Dampers31 views
|
|

fancy bridge19 views
|
|

Thread upload142 viewsImage uploaded in thread 174456
|
|

11 views
|
|
9 views
|
|

Thread upload5 viewsImage uploaded in thread 172661
|
|

Thread upload21 viewsImage uploaded in new thread
|
|
Thread upload4 viewsImage uploaded in new thread
|
|

Thread upload21 viewsImage uploaded in thread 190718
|
|

Thread upload20 viewsImage uploaded in thread 190718
|
|

Clarence River Cod8 viewsWe spent a whole day pulling these and Bass out of the Nymboida River
|
|
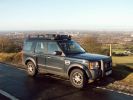
The Blue Beastie fully kitted out overlooking Manchester131 views
|
|
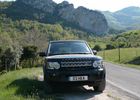
Bugarach France222 views
|
|
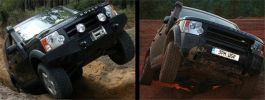
Comparison with OEM bumper, shows approach clearance gained305 views
|
|
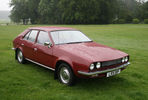
4 views
|
|

319 views
|
|

253 views
|
|

Me on the K5 launching over the "Mountain" at Cadwell64 views
|
|
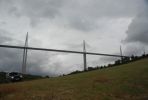
Calendar 2008 Entry569 viewsMy car in a field below the Milau Bridge in France.
|
|

Thread upload3 viewsImage uploaded in thread 192845
|
|
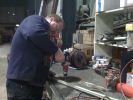
D3 Side Step Repairs186 viewsThere are about 10 rivets to drill out. I also increased the hole size to 5.5mm as I will be using larger rivets to hold the trim back in place. 5.5mm is the larger rivet size commonly available at motor factors etc.
|
|
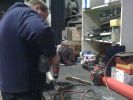
D3 Side Step Repairs147 viewsCarefully drill out the old rivet ends. Some were a bit stubborn and I used a small chisel and drift to punch them, out.
|
|
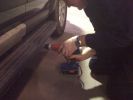
D3 Side Step Repairs163 viewsAgain there are 10 holes to incresae the size of.
|
|
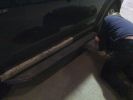
D3 Side Step Repairs150 viewsI then punched out the remaining rivets from the step edge. I used a small hammer and a small punch.
|
|

Thread upload9 viewsImage uploaded in new thread
|
|

Thread upload9 viewsImage uploaded in new thread
|
|

Thread upload11 viewsImage uploaded in thread 186201
|
|
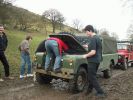
Betsy receiving some tratment after splashing through a puddle179 views
|
|
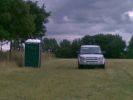
DG using the facilities ;-)98 views
|
|
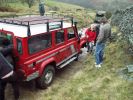
Top of Roych - a tyre change required!201 views
|
|
100 views
|
|

Thread upload9 viewsImage uploaded in thread 128368
|
|

Thread upload29 viewsImage uploaded in thread 100040
|
|
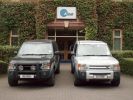
Funny who you meet in the car park....227 viewsParked in a stupid place this lunchtime...
...and guess who parked next to me?
|
|
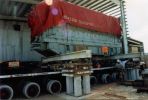
Grand Cayman97 viewsA 120tonnes Diesel Engine being skidded from road transport vehicle to final position in Grand Cayman,we were responsible from Stockport up to final job site,including al shipping and transportation.
|
|
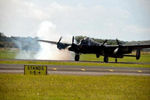
Thread upload36 viewsImage uploaded in thread 117873
|
|

Central Door Locking Operation Description1458 viewsThis 17 page pdf explains how the door locks are supposed to operate. Note that on page 9/17, the explanation of the operation of the hood ajar switch is wrong. It operates similar to the door and tailgate ajar switches; that is when a "door" is closed, the switch is closed to maintain a ground back to the CJB. Opening the hood, door, or tailgate removes the ground breaking the circuit and hence allows for an alarm condition.
|
|

winch warn234 views
|
|
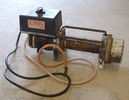
Champion C9000G winch16 viewsBrought this on a whim for a tenner.
What have I done?
|
|

Thread upload9 viewsImage uploaded in thread 157984
|
|

Mvubu in Botswana 2014119 viewsMvubu 2014 Discovery 4 TDV6 XS, Corris Grey.Snorkel, OL Bull Bar, Winch,OME Heavy Duty Coil Springs,Light Guards,17" Black Wheels,Cooper ST max,Dual Battery+Inverter,Drawer Storage,FR Rear Ladder,Hannibal Roof Rack,80L Excel Long Range Fuel Tank,HiLift Jack Points,75L Water Tank.
|
|
This show that the angel of the radio body is diffrent from the original, hence shall some plasic be removed - I used a dremmel and removed 7 mm of the horizontal bar inside 160 views
|
|
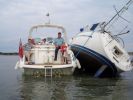
When having a beer with a chum it is wise to check the tide once in a while....107 views
|
|
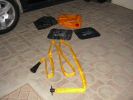
The kit as supplied180 viewsContains carry bag, 2 protector mats, exhaust jack and 7m reinfoced woven hose with bayonet connector to bag (inc non-return valve) and rubber cone for exhaust fitting
|
|
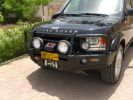
Front end327 viewsARB deluxe winch bar is very well made. Still allows Mantec sump guard to be used. Warn M8000 winch fitted - (wish I could\'ve found an M15000!) and IPF 900XS Extreme Series mounted with light stays to grille. Fog lights work fine with the replacement bumper, and indicators in bumpoer are effective too.
|
|
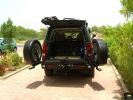
Rear end open330 viewsEccentric latch clamps for wheel carriers are very strong. No rattles on graded roads. Canvas seat covers from \'Escape\' in SA on rear jump seats can be seen, and Front Runner Wolfpack storage boxes - great for toolkit, winch and recovery straps etc.
|
|
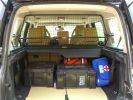
Load space368 viewsShows the SA Front Runner Wolfpack stacking plastic storage boxes that I keep laod straps etc in and the 2nd is tool kit, spare belts, jerry can funnel and tools, plus airline and tyre inflator/deflaotr for ARB on-board compressor, HD jump leads. ARB Winch pack (Orange)with strops, snatch blocks, shackles, gloves, and 2 ARB recovery dampers. Really great 4x4 1st Aid kit from Outdoors warehouse in SA. LRs own loadspace guard - not the best design if you want to store a long load. Mods to be carried out!
|
|
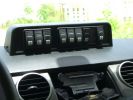
Mud UK switch binnacle453 viewsToo many switches for the roof mounted console, so this binnacle from Mud UK (desigend for the Defender) is an almost perfect match for the leather finished dash in the LR3. Switches, connectors etc bought from them too. From L - R switch functions are:
LH side mounted rack lamps
Driving lamps rack mounted
Spot lamps rack mounted
Bumper mounted driving lamps
RH side mounted rack lamps
Warn winch isolator
Rear mounted rack lamps (reversing)
Telescopic work lamp (fitted behind RH spare wheel)
|
|
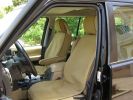
\'Escape\' canvas seat covers269 viewsFull set of these well made SA seat covers fitted to protect the Alpaca leather from constant exposure to Middle EAst sunlight and sand. They fit well, and to date have proved very durable. They include headrest and arm rest covers too.
|
|
Auxiliary power sockets - TracTronics, Australia382 viewsA complete kit including two outlets, wiring etc connected to auxiliary Optima Blue top battery using their very effective SC40 split charge relay. One outlet between rear and front seats, and 2nd alongside loadspace 12v outlet, enables fridge to run when engine is not running, without affecting start capacity or vehicle functions.
|
|
LongRanger auxiliary fuel tank358 viewsThe LR fuel tank imported from ARB in Australia with its 115 litre capacity has more than doubled the range of the car. This is important in the desert where fuel consumption increases at times to 10mpg or less. On a cruise on highways, the car now has a range approaching 850 miles. The tank fits neatly, has not affected handling in a detectable way apart from over speed humps, when a little more bounce from the rear suspension is detected! Suspension copes with the additonal loads without any problem.
|
|

nice quiet spot to sleep204 views3 week spring road trip from NC to Colorado.
|
|
63 views
|
|
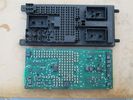
central junction box, without fuses.204 viewsthe print circuit board is easily dropped, after you pull out all the fuses.
|
|
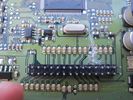
Central Junction Box - Broken! 187 viewsfound 2 resistors badly desoldered and a big scratch.
|
|
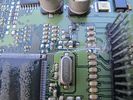
central junction box - resistors badly pulled 181 viewscentral junction box - two resistors pulled, PCB scratched
|
|
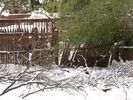
cleanup40 viewsI cut the branch up myself and will replace the fence when the weather clears. It snowed again after I cut it up.
|
|
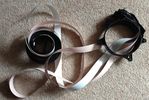
42 views
|
|
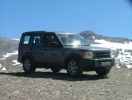
317 viewsCalendar 2010
Summit of the Col de l\'Iseran pass, France
|
|

D3 and D4 Underbody Protection inc. bracketry 115 views
|
|

Thread upload6 viewsImage uploaded in thread 187407
|
|
| 1794 files on 5 page(s) |
 |
1 |  |
 |
 |
 |
|