| Search results - "Manual" |

My Second Discovery, 2001 TD5 Manual38 views
|
|

14 Manual Transmission Transaxle, Clutch and Transfer Case18 views14 Manual Transmission Transaxle, Clutch and Transfer Case
|
|
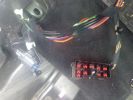
Under seat loom - manual120 views
|
|

Under seat connector - manual124 views
|
|
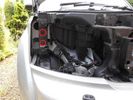
Remove Headlights and Grille using bulb replacement instructions in Manual - Push the fixings supplied into these holes circled in red152 views
|
|

1 General Information, Identification Codes and Jacking and Lifting27 viewsPart 1 of Discovery 3/4 Workshop Manual - General Information, Identification Codes and Jacking and Lifting
|
|
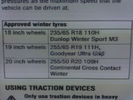
h rating tyres 19/20"22 viewsfound it at last. knew I had seen H rated in LR manual for 19/20"
|
|

38 views
|
|

KONI manual34 views
|
|

82 views
|
|
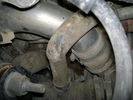
Charge Air Pipe - turbo end.101 viewsThe maint manual identifies releasing the pipe hose clip in the center of the photo. Pity who ever built this engine Put the hose in such a position that access to it was near impossible. I released the other clip at the turbo end of the flexi hose. Easy to get to but a right git to release the hose of the turbo.
|
|

Thread upload10 viewsImage uploaded in thread 189350
|
|

130 viewsThis is the installation guide from the manufacturer
|
|

Wifes A Class 1.7 tdi Elegance Manual100 views
|
|

1587 views
|
|

EPB Adjustment178 viewsWorkshop manual section for adjustment of EPB
|
|
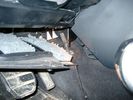
Air Conditioner Drain Hose on Drivers Side (LHD)2300 viewsThe corrugated rubber bit above and to the right of the gas pedal is the drain hose that goes down thru the carpet and floor sheet metal.
While it is bit hard to figure out from the jpg above, there is a rubber "strap" attached to the top of the corrugated hose that one uses to pull on to drag the hose up back around the black plastic heater "pan" drain. The same drain hose arrangement is on the other side as well.
One could I suppose run a plastic snap tie around the vertical pull strap if one was concerned about the hose slipping off again. See also the other jpg sketch which is from the Land Rover manual.
|
|

Ipod interface in Spanish for the touchscreen205 views
|
|

21 views
|
|

6 views
|
|

Grommit20 viewsOn manual D3's this is used by the clutch. Om Autos it may be free for routing a cable
|
|
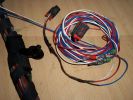
Burnt Bit98 viewsThis bit of wiring going to the connector was so close to bulkhead it got a bit burnt, Its for the clutch switch on a manual used for EPB, It will be replaced connector to pin with the wiring shown.
|
|

Citroen Manual27 views
|
|

22 views
|
|

4 views
|
|

219 views
|
|

208 views
|
|

Connects 2 Manual for CT90-LR0383 views
|
|

XS3600 official user manual172 views
|
|
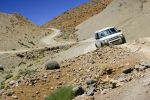
454 viewsMore photos coming soon. 7000 km with NO problem. Only took a 6th spare wheel, a tool box, air compressor, window shades. What a great Disco !
PS: note that my disco has manualy inflatable air sping in addition of the standar terrain response.
|
|

manual and brochure6 views
|
|

Thread upload10 viewsImage uploaded in thread 194306
|
|

15 views
|
|
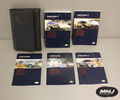
Thread upload5 viewsImage uploaded in new thread
|
|

71 views
|
|

dsco 3 manual15 viewsaudio amp disco 3
|
|

Thread upload1 viewsImage uploaded in thread 206858
|
|

Manuale Discovery3199 views
|
|

Discovery 3 TDV6 SE Manual - Buckingham Blue327 views
|
|

Thread upload2 viewsImage uploaded in new thread
|
|

D4 Headlight Wiring Diagram 1 VIN 51332638 views
|
|

D4 Headlight Wiring Diagram 2 VIN 52454535 views
|
|

FBH Webasto Thermo Top V Workshop Manual97 views
|
|

Disco_3_FBH_Workshop_Manual_Thermo_Top_V.pdf87 views
|
|

Thread upload14 viewsImage uploaded in thread 197548
|
|

FBH Workshop Manual78 views
|
|

Webasto Thermo Top V Workshop Manual62 views
|
|

Disco_3_ZF_Gearbox_Fault_Finding_Manual.pdf102 views
|
|

Thread upload14 viewsImage uploaded in thread 193252
|
|

480 viewsMy 3rd DISCO 1 week old
TDV6 HSE Manual
|
|

DVB-T Tuner Operations60 views
|
|

163 views
|
|

EPB Maual Release224 viewsEmergency Release procedure
|
|
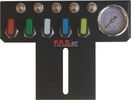
FASKIT air panel unmounted846 viewsThis is the manual air valve panel that is mounted in the "empty" space where the FBH normally resides. The gauge reads to a maximum of 25 Bar. The air tank relief valve is set just over 16.5 Bar (240 psig); the front air springs run maybe 9 Bar, (130 psig) and the rear, somewhat less, perhaps between 5 and 8 Bar. (70 to 115 psig). Max theoretical air spring pressure at full compression due to a big bump and full gross is approximately 27 Bar (390 psig).
|
|
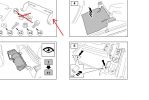
LR D3 Fire Extinguisher Bracket - Manual Seats390 views
|
|

FORD_F-150_3_0_POWERSTROKE_WSM39 viewsWorkshop Manual for 3.0 ford power stroke TDV6
|
|
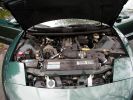
46 viewsCorvette 5.7 litre engine with 6 speed (7 if one counts reverse) manual trans. Car was custom built for me at the factory in Canada.
|
|

70 viewssuper extended- manually selected after auto extended mode invoked
|
|
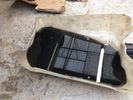
39 viewsmanual gearbox oil at 72k the transfer box oil look the same as this
|
|
Thread upload4 viewsImage uploaded in thread 188079
|
|

Thread upload3 viewsImage uploaded in thread 188079
|
|

Altox WBUS-4 Users Manual57 views
|
|

GVIF Manual64 views
|
|

gvif manual rev 383 views
|
|

Thread upload14 viewsImage uploaded in thread 172403
|
|
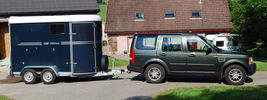
2009 My first (manual) D3 with our Fautras Oblic 2 Horse trailer at home.130 views
|
|

D4 Sat Nav Manual - How It Works section121 views
|
|
Thread upload12 viewsImage uploaded in thread 125428
|
|

64 viewsAdded a lead coming from the 12V outlet in the front console. That one is activated only when the ignition is set to I. So that's actually what is referred to as accessories in the manual of the radio. The OEM connector for the head unit did not have any similar lead. The yellow is permanent 12V, the red (on the converting OEM 2 ISO) is the accessories 12V.
|
|

An extra twist on running lights30 viewsAdded those nice 120mm LED rings on the covers of the roofrack lights and have them connected to my roofrack lights switch, as I wanted to control the LED manually as well (I don't believe this is 'road-legal', hence why I opted for the manual solution).
|
|

NEW CAR58 views
|
|

NEW CAR56 views
|
|
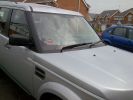
New car54 views
|
|

107 viewsMassingir dam wall, with winches for manual opening of locks in back ground.
|
|
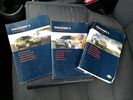
33 viewsManuals
|
|

Black Leather Heated Manual seats6 views
|
|

Black Leather Heated Manual seats6 viewsBlack Leather Heated Manual seats
|
|
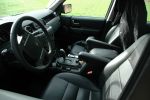
Ebony interior253 viewsWith the armrests on the S version manual seats...
|
|

The rebuid data missing from Land Rover Workshop Manual39 viewsFrom PSA
- Engine Type
- Matching Bearing Sheels
- Thightening Torques Nm
|
|

JLR_Battery_Care_Manual_v232 views
|
|

Key Fob Repair Manual32 viewsHere is a way to diagnose problem and change key fob battery.
|
|

Thread upload18 viewsImage uploaded in thread 171455
|
|

L319_MK4_ALTOX_GSM_remote_control_installation_manual39 views
|
|

Upgrade manual FBH to parking heater40 viewsManual to upgrade FBH to full parking heater functionality
Translated in English from an official German language factory manual.
|
|

Suspension14 viewsWorkshop Manual
|
|

OSRAM DLR/FOGLIGHT Installation Manual30 views
|
|

Instructions for the connects2 interface215 views
|
|
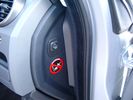
Air Suspension ECU Fuse 35P cut off switch.3824 viewsThis shows the SPST rocker switch mounted in the blank plate installed in lieu of a manual passenger side air bag shut down switch - now automatic via passenger seat pressure switch. Fuse 35P (5 amps) is located in the interior fuse box behind the lower glove box and protects the ignition power supply to the Air Suspension ECU. When the SPST switch is moved to the OFF position, the RAISE /LOWER switch on the centre console is not powered, and hence does not function. As such, some signals from the wheel height sensors and CPU are ignored. By itself however, removing F35P will probably not stop the 3 from self dropping, particularly after the engine is turned off.
Fuse F3E, (5 amps), located in the engine bay fuse box by the starting battery protects the circuit that provides feedback to the Air System ECU indicating that the Compressor Relay has successfully operated and that the Air Compressor is or should be operational, can also be removed, (but is probably not totally necessary), as it gets its power thru F26E. Hence Fuse F26E, (20 amp), also located in the engine compartment fuse box is the fuse that must be removed. This fuse protects the circuit that provides full time battery power to the Air System ECU. When in place, current thru the fuse powers the periodic re-levelling action, (usually lowering a bit with that brief air release noise), that often occurs when the vehicle is parked and the engine is off.
Removing F26E fuse will stop the auto levelling action and also inhibit any other down to the stops signals, (engine running or not). When F26E is removed, no power can flow thru to F3E, hence removing F3E is more for insurance than an absolute requirement. The same with F35P, removing F26E removes primary full time power from the Air Suspension ECU, and hence removing the F35P fuse should not really be required either as long as F26E has been removed.
|
|
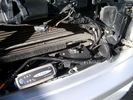
Battery Maintainer switching box plug and CTEK Multi US 3300 charger. 709 viewsThe CTEK Multi US 3300 maintainer is just sitting there for the picture. In addition to topping up both batteries, the CTEK can provide power such that if the batteries were completely dead, there would be power to the door locks and hence, one could most likely still gain access via the remote once the starting battery charged up a bit.
The Land Rover recommended method is via the hidden key hole which is mechanical, however that presumes the mechanism is not frozen from lack of use. As such, the manual lock should be exercised at least once a year to ensure that it still functions.
The blanking plug sitting on top of the plastic box is of the GM Weather Pack series. That is what I like to use for vehicle wiring that is subject to moisture, (or not).
|
|
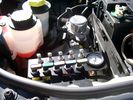
View of mounted panel from front left side880 viewsNote that all valve handles are shown in the OFF position, (the trouble position). In this case, the air that is in the air springs, (if any), is trapped in there - that is the valve blocks cannot vent whatever air is already in the air springs as the air lines between the springs and respective valve blocks are closed off by the FASKIT valves. In operation, there may be only trouble with one air spring, (perhaps a wheel height sensor), and as such, only one valve would need to be closed. If there was complete air compressor failure, then all valves would be closed and then as required, each spring could be manually filled from an outside clean dry oil free air source.
|
|
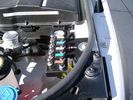
View from front left side looking towards rear aux battery compartment under cover 649 viewsAs there is no Fuel Burning Heater in the NAS V8 petrol vehicles, there is space available to install the FASKIT panel here. The piping is such that each air spring can be isolated from the air system and then filled one at a time manually via the Schrader valve. There are five Schrader valves and five shutoff valves. The fifth valve nearest the gauge controls air from the compressor, and can provide fill up air via a jumper fill line assuming the compressor is still operational.
|
|
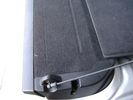
Flexible wire rope fishing leader 0.032" diameter exiting carpet 1950 viewsThis is all you see of the completed mod.
The short little angled "line" about an inch long that looks like a piece of debris and is located a few inches "above" the support cable is actually the wire rope release cable exiting from under the carpeted lift gate cover.
I drilled a very small hole in the carpet and pushed the 0.032" diameter release wire thru and then slipped the loose end under the black plastic.
To release with the lift gate etc closed, from the inside, just pull the loose end free from under the black plastic and gently pull wire about 5mm, (1/4"), and the upper door catch should release. You will have to manually push the upper door out wards to actually effect opening, but you will already be inside the rear cargo area so that part is easy to do.
The assumption is that the lower door latch still works electrically and hence, the lower lift gate half will open as normal by pressing the usual button on the top left of the lower door half.
|
|

Rosen A10 Land Rover Installation Manual841 viewsThis is a 11 page pdf which is the Land Rover version of the A10 installation manual for our 3. It consists of a hundred plus sketches showing how and where to connect various cables, conductors and plugs.
|
|

17 views
|
|

LTB00221 - Technical Bulletin - Tire Valve Stem Damage During Manual Tire Pressure Checking58 views
|
|

76 views
|
|
79 views
|
|
77 views
|
|

100 views
|
|
83 views
|
|
76 views
|
|

manual transmission45 views
|
|

Thread upload11 viewsImage uploaded in thread 174685
|
|

Thread upload14 viewsImage uploaded in thread 166641
|
|

Thread upload9 viewsImage uploaded in thread 166641
|
|

Thread upload6 viewsImage uploaded in thread 205885
|
|

67 viewsThe cover that you remove to access the cable, for manual release of the electronic parking brake.
|
|

Thread upload5 viewsImage uploaded in new thread
|
|

MOT TESTERS MANUAL 201324 views
|
|

MSV-2 Extreme_plus disk and manual59 views
|
|
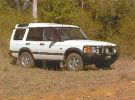
The Original Discovery, new April 1999 one of the first ones off the boat of the new series 2 - TD5 Manual39 views
|
|

Parking control Work shop manual16 views
|
|

P4 Manual42 views
|
|
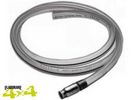
26 viewspompa a sifone manuale per travaso gasolio
|
|

D4 Sat Nav Manual - Quick POI\'s section101 views
|
|

Service manual pdf35 views
|
|

Workshop manual page - brakes28 views
|
|

Rosen A10 Manufacturer Installation Manual763 viewsThis is a 30 page pdf from Rosen that explains how to install the A10 unit. It is Generic in nature and hence carries detail not found in the LR specific install instructions. It also uses words and pictures instead of just pictures, hence can be a bit easier to figure out, particularily if you wish to take advantages of some of the hidden features not described in the LR material.
One of these features is how to hook up to a headrest display or I suppose even to the NAV in front.
|
|

Rosen Owners Manual894 viewsThis 28 page Owners Manual is the Rosen version written specifically for the A10 model DVD Video Game Entertainment System player that may in attached to the roof of your 3.
Discussed is how to use the remote control, the wireless headphones, the TV feature if installed, and how to change from 16:9 widescreen format back to the older 4:3 format.
|
|

DVD Region Coding Info88 views
|
|

ScanGauge II Manual 343 viewsThese are the setup instructions etc for the ScanGauge II version 5.1 There are newer versions that can be downloaded from the website www.scangauge.com as the software is subject to update; also the ScanGauge unit you purchase can later be sent in for updates as you might wish.
|
|

128 views
|
|

Manual gearbox specs22 views
|
|

PDF of the steps to add manual emergency tailgate release cable121 views
|
|
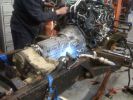
TDV8 engine+D3manual+LT230defender274 views
|
|

Terrain Response Dial Explained412 viewsSource - I've forgotten - but still useful as it describes a bit more than the manual.
|
|
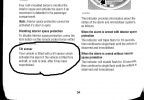
manual p34212 views
|
|
89 views
|
|

restraint system, components229 views
|
|

Manual Transmission Draining and Filling447 views
|
|

26 views
|
|

VPLAT0136 Towing Electrics Installation Manual32 viewsVPLAT0136 Towing Electrics Installation Manual
|
|

Webasto Discovery I intallation manual25 views
|
|
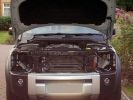
What no grill!425 viewsAccording the manual this is what you have to do when you get off the ferry to access the lights!!!
|
|

Workshop Manual Rear Seats Cover Removal17 views
|
|

Workshop Manual Seatbelts7 views
|
|

Thread upload0 viewsImage uploaded in new thread
|
|

Workshop Manual Seats9 views
|
|

Workshop Manual Seatbelts6 views
|
|

Workshop Manual Seats6 viewsWorkshop Manual Seats
|
|

Workshop manual for the Webasto Thermo Top Z and C59 views
|
|

FBH Workshop Manual210 views
|
|

Nissan X-Trail 2.2dci SVE 6spd Exterior (silver!)106 views
|
|
25 views
|
|
|
|