| Search results - "Just" |
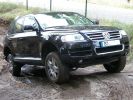
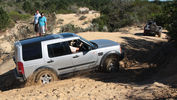
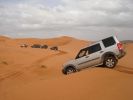
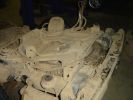
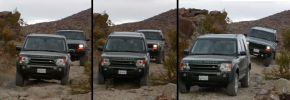
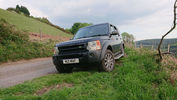
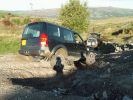
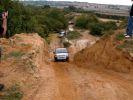
241 viewsThis Toureg is stuck - doesn´t look like it. After 8 hours of driving everyone agreed that with the big 10cyl. diesel engine you should probably oder the rear difflock as well... In this picture the rear left anf front right wheels have no grip, esp or whatever just doesn´t do it.
|
|
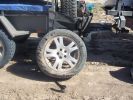
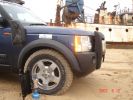
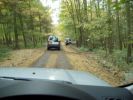
04 Damaged Tyre301 viewsYes, there\'s no doubt that this was a flat tyre. The ultra hot wheel nuts, look of the flat (note in a later photo that the back of the tyre appeared okay) and increased fuel consumption should have been a clue, but it was 45 deg C, and we had been doing about 105 km/hr on a dirt road for hours, so we just assumed it was a flat = WRONGO!
|
|
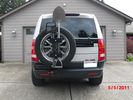
New mods for carrier. Backup sensor moved to the tire carrier. Toy rack and highlift mounts.38 viewsSon wanted all the toys on the carrier. I just wanted easy removal for a good clean look.
|
|
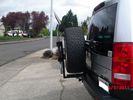
Receiver for toy rack39 viewsSensor bar was made of same heavy tube that the carrier was made from allowing a small 1 1/4" receiver to be placed on it for a multitude of toy racks of my choice. Rack adjust in and out of receiver.
|
|
Casters just touch the carpet23 views40%
|
|
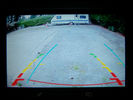
Red and yellow lines on fixed on the camera, blue lines gvif and adjustable77 views
|
|
Photos don't due the unit justice, the ball can be seen.48 views
|
|
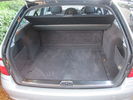
Mercedes E320 Boot19 viewsPlease note, any marks are just the pile of the carpet.
|
|

12 Half way through removing a jammed disk brake in the Outback296 viewsThis was just before breaking the sledge hammer. Note we luckily carried a spare hammer. Ended up using (or breaking) every tool we had on this little repair job. Bed sheets are a good way of gathering the bits to show for the inevitable warranty claim.
|
|
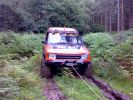
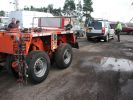
93 viewsJUST WINCHING A JEEP OUT OF A BOG
|
|
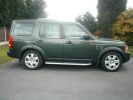
my new car282 views
|
|
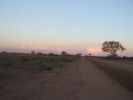
18 Brake "repairs" finished at sunset296 viewsWe just finished the repair at sunset and were driving slowly with 3 brakes. Oddly the D3 didn\'t behave any differently at 50 km/hr than it did normally. We had 4 instances of hitting the (3) skids for kangaroos before arriving in Wilcannia 3 hrs later. The brake light warning was making very distinctive noises and flashing randomly, though.
|
|

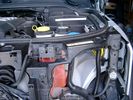
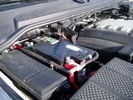
Whatissit139 viewsPicture of a thing in the engine bay, just to the left of the coolant bottle and just behind the edge of the radiator.
|
|

Ready to winch a friends disco 4 194 viewsback of the picture you can just see another freinds (luvbus) disco 3 acting as balast to stop the disco 4 pulling me down hill
|
|
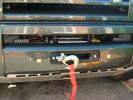
Nearly done, just need the number plate plinth to tidy it up972 views
|
|
Just needs a file to neaten the edges878 views
|
|
Just to prove we made it88 views
|
|
79 viewsHole for 12V accessory socket. This hole has a blanking plate on it on Commercial D3s. It just needed to be filed down in some areas to fit the socket I bought.
|
|

79 viewsExtra USB sockets mounted to front of commercial box, just behind cubby box
|
|
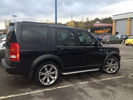
16 viewswhen I just bought her
|
|
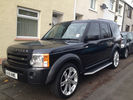
18 viewsjust washed her
|
|
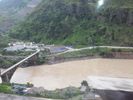
just crossed that18 views
|
|
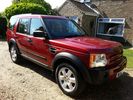
My D3201 viewsJust washed and polished.
|
|
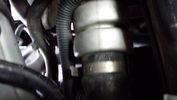
Thread upload129 viewsOriginal LR rubber hose just before removing (turbo end).
|
|
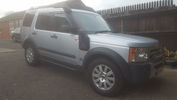
0 viewsNew purchase just got home
|
|
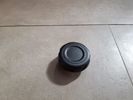
Lumbar Adjuster3 views
|
|
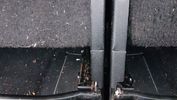
RAW jack4 viewsCasing just catches the inner legs of the seat backs.
|
|
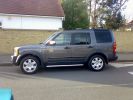
Just so chuffed320 views
|
|
Rape at no mans heath just turning53 views
|
|
just washed..:)175 views
|
|

You just pull over and wait - Gibb River Road93 views
|
|
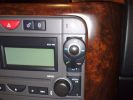
position of buttons for Parrot phone102 viewsthis can be put basically anywhere as it connect via bluetooth to the rest of the system. It is self powered (lithiam battery in it) so just stick it anywhere with no requirements for finding a live wire etc
|
|

126 views
|
|

3 Point Hitch on Series 90152 viewsUsually one sees the Series units with just a conventional field plow hooked to a drawbar hitch, tractor style. This jpg however is the full meal deal - a 3 point hitch, probably off a Fordson tractor, in the long tradition of Ford/Land Rover cooperation.
|
|

Air Conditioner Specifications 4.4L V81569 viewsThis 2 page pdf is just the specifications for the AC system. The refrigerant type is R134A.
Note that when topping the system up, it can be a good idea to include some of that ultra violet light dye that will glow to show leaks and loose fitting.
|
|
275 viewsjust before delivery...
|
|

Land Rover298 viewsjust been cleaned hard work lol
|
|
AirBag Pins79 viewsNew Wiring at AirBag ECU just need to back out the pins of the old and clip in the new.
|
|
Thread upload1 viewsImage uploaded in new thread
|
|

EPB Adjustment177 viewsWorkshop manual section for adjustment of EPB
|
|

Fin cell phone aerial drawing190 viewsThe factory aerial for the factory NAV / GPS on my 2005 HSE is within the high mounted stop light lens at the top of the upper hatch door. I do not have the factory installed phone kit, and as such, do not have the fin installed; instead there is just a plastic blanking insert to fill the cell phone aerial wiring hole in the metal portion of the roof; hence this requirement for an "external" cell antenna. For those that do have the fin on their glass roof, the fin is screwed on to a glued on plastic gasket, (sort of), and not bolted thru as per the metal roof 3's.
|
|
Air Conditioning Pipes (file 2)808 viewsShows location of front-to-rear air con pipes behind NS front wheel. You can just see the Vredestein tyre. The pipe connectors are tucked in behind the wheel arch inner cover. This has to be partially removed for access to bolts holding pipes together.
|
|
Thread upload28 viewsImage uploaded in thread 106398
|
|
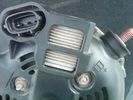
Alternator Plug and B+ terminal918 viewsPictured is the rear of the older Land Rover part # YLE500190 alternator showing the shiny cooling fin of the Regitar VRH2005-142 regulator under.
The first pin in the far left side of the connector is numbered #1 in the LR electrical wiring diagrams and is Battery Voltage Sensing (BVS); the middle pin, #2 receives a Pulse Width Modulated (PWM) signal from the Engine Control Module (ECM), and the right pin, #3 carries a PWM signal back to the ECM. Terminal Pin #2 on the LR wiring diagrams is called Alternator Control or ALT CON; Pin #3 per LR is called Alternator Monitoring or ALT MON.
Pin #1 is similar to what in older designs used to be called A or Batt, but is now called by Denso, S, AS, or Alternator Sensing for this design. Pin #1 also provides power to excite the alternator at startup until the PWM instructions over ride the battery voltage info. Land Rover calls the electronics under the pins a Smart Regulator, ironic, as it has to follow orders from the ECM rather than give the orders - new age thinking I guess. This is different from older design internal regulators that look at just the battery or the electrical buss voltage and then decides itself what to do.
It is almost like we are back to the external regulator designs of old, except that the ECM may decide that instead of telling the alternator to make more power, to load shed, and hence shut down the heated windscreen, seats, or whatever other electrical loads it decides are appropriate. My view is that the "smarts" are in the ECM and that the "regulator" should be regarded if not dumb, then as being a slave to the ECM.
|
|
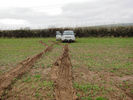
Muddy field162 viewsDid we just dig that?
|
|
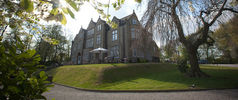
Woodlands Hotel6 viewsGreen Oval Garage would like to say thank you to the Woodlands Hotel in Leeds for allowing us the use of their beautiful grounds for all our future photos shoots.
Woodlands is one of the finest luxury hotels in Leeds. This boutique hotel is set in beautiful landscaped grounds on the outskirts of Leeds city centre, just 2 minutes drive from junction 27 of the M62 motorway, with 23 individually designed bedrooms and an award winning restaurant. Packed with character, this lovingly restored hotel is only three miles from the vibrant, cosmopolitan city of Leeds with superb nightlife and unrivalled shopping.
Woodlands also offers a stylish and contemporary functions venue for all kinds of social and business events. Our three stunning event spaces are suitable for everything from wedding ceremonies and receptions, to corporate meetings and events. The permanent marquee, attached to the hotel, can accommodate up to 150 for dining and 200 for evening parties and receptions, making it one of the most elegant settings for a wedding venue in the Leeds area.
For more information or to make a booking, please contact us on enquire@woodlandsleeds.com or 0113 2381 488
|
|
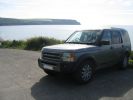
2008 Calendar Entry - D3 go mad in Cornwall670 viewsMy D3 just above Pendower beach on the Roseland Peninsula in Cornwall in August 2007. Wife and kids are out of shot.... standing in the road to prevent other cars parking!!
|
|
G4 with trailer124 viewsTaken with digital SLR - slow shutter, narrow ap. zoom during exposure - so I\'m told - great effect just don\'t look at it for too long!
|
|

OLD VERSION Please check folder for newer. Bodsy's Brake Bible V1.2a6906 views
|
|

OLD VERSION Please check folder for newer. Bodsy's Brake Bible V1.32420 views
|
|

OLD VERSION 1.5 - See v1.62885 viewsOLD VERSION - See v1.6
|
|
Thread upload0 viewsImage uploaded in thread 195722
|
|
Thread upload0 viewsImage uploaded in thread 195722
|
|

Thread upload21 viewsImage uploaded in thread 152975
|
|

Brake Light Switch, Find, Remove, and Install Instructions 7851 viewsThis is a two page doc outlining where to find the brake light switch, how to remove it, and then install the new one.
Note, do not move the brake pedal when removing or installing the switch. Let the brake pedal hang where it wants to. The switch design is actually cunning, and as such is supposed to make the removal and install fool proof. Hence if you think too much about it, you can wreck the new switch.
If you want to inspect the interior of the switch, wait until you have removed the old switch. You can then just unsnap the blue from the white to get it apart. Inside, the switch is quite simple, (no circuit boards), but it will probably show black dust from failing contacts.
I think the reason the switch fails is that the Normally Open, (NO), contacts of the brake light contacts were made too light to carry the current load for make and break of the tail light filaments. I also think the black dust created then fouls the Normally Closed, (NC), second set of contacts for the ABS circuit. As such, the Normally Closed contacts become intermittent in operation and display as a fluctuating open and closed circuit condition to the ABS system when the ABS should be seeing a steady closed circuit. Hopefully the replacement switch contacts are more robust and may be as I recently replaced my switch again just as a matter of maintenance. While in a redesign, ideally the NC contacts should be sealed or at least separated from the NO contacts, when I inspected the removed switch, this time there was no black dust present.
Probably the removed switch will have a Land Rover oval logo moulded into it, the new one, FOMOCO.
|
|
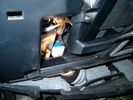
Brake Switch Visible thru Opening4973 viewsThe blue and white bit is the switch; the sort of gold appearing box,(it is really black), you will not see in your 3 as it is a Smooth Talker brand amplifier for my Blackberry phone antenna. This install is detailed in the SmoothTalker phone antenna section of my gallery.
One way to remove and install the switch is to lower the "horizontal" panel above the brake pedal as shown where the flashlight head is located. To actually remove the switch, you slide your hand thru the gap and rotate the switch clockwise 1/4 turn while watching thru the rectangular opening. Installation of the new switch is the reverse of above - 1/4 turn counterclockwise.
Before you remove the switch, note its orientation - horizontal with electrical wires to the left. That is the way it should look after replacement as well.
The second time I replaced the switch, I did it all thru the rectangular opening and did not remove the horizontal panel - that is experience helping out.
The knee kick you have to remove regardless. It is sort of hinged at the bottom so you just pull at the top and sort of rotate the knee panel and then pull upwards for two plastic "fingers" to clear the slots they reside in.
|
|
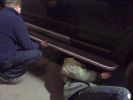
D3 Side Step Repairs169 viewsNearly finished - just the last two rivets to put in. We used a very basic and cheap hand rivet gun which can be bought in places like Halfords for about £10.00 and usually come with a supply of rivets to do the job.
|
|
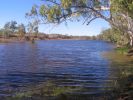
Camping in the Pilbara69 viewsWater hole just before the Harding Dam
|
|
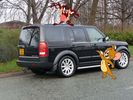
Discovery 3 TDV6 2.7 HSE250 viewsJust traded in for Discovery 4 SDV6 3.0 HSE (Feb 2012)3rd Landrover
|
|
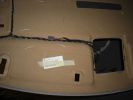
Hidden Mic Connector142 viewsMic connector on upper side of head lining just above & behind sun visor
|
|
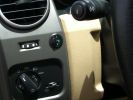
Long Ranger auxilairy fuel tank pump switch and tank gauge308 viewsFitted to the right of the air vent thumbwheel, the neat combination switch and gauge take sup no room at all. Switch locks on or off, but no pump running warning lamp! Contents of the tank are indicated by 5 LEDS, 4 green and 1 red for full, 3/4, 1/2, 1/4 and empty. Pump transfer rate of just 2 litres p/min is disappointing. I transfer on the move when main tank is at 1/4.
|
|
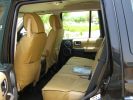
Escape seat covers rear254 viewsJust shwing the good fit of these canvas seat covers made in South Africa. The whole set for a 7 seat HSE £542 with air freight as unaccompanied baggage (inside 5 Front Runner Wolf pack boxes) costing and additional £150 - still a bargain out here!
|
|
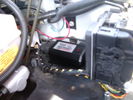
CounterAct Power Supply mounted 246 viewsPicture is blurred, however power supply is 3M two sided tape to the flat black plastic of the second battery compartment just under the antilock brake pipes to the fender side of the brake fluid reservoir. The white wire to the left rear coupler pad runs thru the firewall hole near the steering column. The blue wire to the right front coupler runs across and above the engine following the other wiring looms that cross the vehicle.
|
|
Just in case the D3 scrabbles about a bit!115 views
|
|
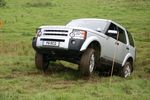
dicky just about to not make progress59 views
|
|
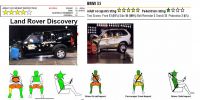
D3 vs X5 in NCAP crash test412 views Looks that D3 was as close as it can be to get 5 stars but falled JUST below the 5 star limit.
|
|
D3 strangely now only just Cool242 views
|
|

Seat Base cover partially removed - just hog rings to go45 views
|
|

DDin Xtron kit first fit - slight adjustments needed top and bottom.102 views
|
|
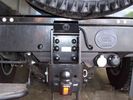
Defender27 viewsDefender with adjustable tow bar with TrailAir fitted
|
|
Defender22 viewsDefender with adjustable tow bar showing trailair camera fitment
|
|

Defender in the Fog, another day on the job.459 viewsThis is another normal work day for a Defender - actually the jpg is from a Land Rover advertising shot, but it may just not be a set up one. I think it is an actual working Defender. Note the visible front tow hook and how the hi lift is just rope tied on; also the normal stock headlights and I guess dual spare tyres - just another day on the job.
|
|
New Arrival253 views
|
|
New Disco 4 arrives Home209 views
|
|
The new member of the family comes home172 views
|
|
Just before picking up my D35 viewsJust before picking up my D3
|
|

just bought it 233 views
|
|

just bought it!23 views
|
|
Just before picking up my D37 viewsJust before picking up my D3
|
|
Just my D3212 views
|
|
Just before picking up my D34 viewsJust before picking up my D3
|
|

Just a bit too much snow131 viewsOut on a drive and didn\'t manage to get through.....
|
|
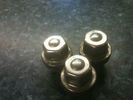
Nuts to you sir?25 views5 not just 3
|
|
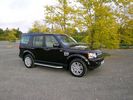
Disco 4 in west Midlands321 viewsDisco 4 (MY10) in Bournville, just out of show room.
|
|

Disco 4263 viewsDisco 4 (MY10) in Bournville. Just out of the show room!
|
|
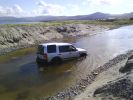
disco 3 wading82 viewsa nice river crossing, the ground was mostly sand and a bit of silt. just remember to turn off dsc. and its salt water. ekkkk
|
|
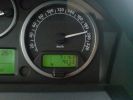
Just Before the speed limiter!!349 views
|
|
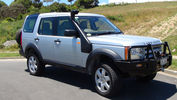
Disco 3 - 21 December 2012165 viewsJust back from having Front & Rear Bar, Compressor and Snorkel fitted.
|
|

Up date on car repair, just 2 more weeks to go!302 views
|
|
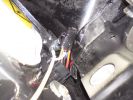
Again just another pic of the wiring into the main175 views
|
|
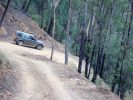
Disco Driver (Justin) and Emily - heading down the Dampier FT97 views
|
|
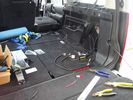
75 viewsTailgate of the disco makes for a good height adjustable work bench!
|
|
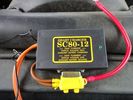
63 viewsI have no idea what's in there, or what it does, but with just one green light to tell me everything is OK it's speaking my language.
|
|
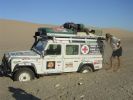
Papa King shows us why you never travel alone198 viewsAll of a sudden the sand became spongy, and Kingsley\'s vehicle just sunk in up to the chassis. Took the guys quite a while to dig and winch it out.
|
|
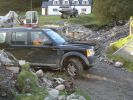
BN just through the diversion563 views
|
|
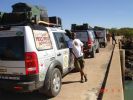
Crossing the bridge across the ruacana falls, just past the border post into Angola172 viewsWill - a chef of note, and a great companion. Kept us well fed, and well entertained
|
|
Just having a look60 views
|
|
Just to prove you don\'t need to miss out on your espresso!187 views
|
|
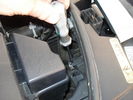
Headlight adjuster O/S80 views
|
|
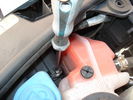
Headlight adjuster N/S78 views
|
|
89 viewsRear of car, note control? box just behind and above rear diff
|
|
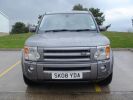
2008 Discovery HSE color coded74 viewsi just got done my 2008 discovery color coded.
|
|
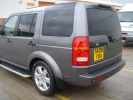
2008 Discovery HSE color coded64 viewsi just got done my 2008 discovery color coded.
|
|
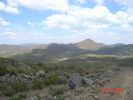
The A5 to Semonkong, the countryside is just breath taking.99 views
|
|
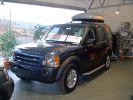
My D3 before I bought it704 viewsThis pic was sent to me by the dealer - just to keep me awake at nights looking at my PC screen!!
|
|
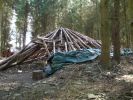
Just pull on the right bit of string and the roof will go on61 views
|
|
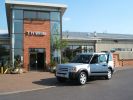
Collection278 viewsMe sitting in the D3 just after purchase on 7-6-06, getting to know all the controls!
|
|
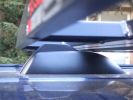
PTI \'hull\' just cleared292 views
|
|

rear vents trim181 viewsto remove just pull starting from the lower part
|
|
Oops276 viewsWeren't we just pointing the other way a minute ago??
|
|
2.5yrs old, just before I sold him.323 views
|
|
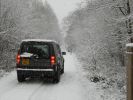
Bourne Woods 19-12-09500 viewsThe entry track to Bourne Woods just after heavy snowfall. Taking my 7 month old Lab puppy for her first walk in the snow!
|
|
Ice crean van mate, yes mate , just over there58 views
|
|
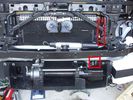
Installed winch with hydraulic hoses178 viewsThe hydraulic hoses are stiff, so I had to run them up the side of the radiator (can just see inside red boxes) to near the top of the radiator, then back down inside the engine compartment, then underneath the engine (behind the radiator) to the D4's power steering rack, where the hoses become metal. This hose routing may not be possible if the fuel-burning heater is in place (we don't have those in Aust and the space allowed room for my hands to bend and run the hoses without kinking).
|
|
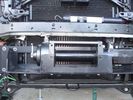
Close-up front view of partially-installed winch121 viewsNote that the sheet-metal flange just above the winch had to be notched to allow winch controller to be actuated. Also this same bracket had to be bent upwards to allow the winch hydraulic:electic solenoid to fit without rubbing. The nut on the upper-left bolt (the one with a very faint circle around it) stripped on re-installation, so the tray and winch pulling load is held only by the threads on 7 bolts....
|
|

Photo showing inside sock.166 viewsThere is a double layer inside. Just like a conventional tent, the waterproof layer, then a flysheet. Both can be zipped/unzipped when vehicle is not in place.
|
|

Just Purchased!15 views
|
|
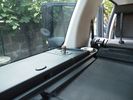
air connector3 viewsposition air connector
|
|
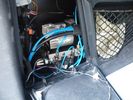
air compressor1 viewsair compressor
|
|

33 viewsAre these just the perfect Christmas tree decorations?
|
|
The morning after193 viewsJust how good does she look today!
|
|
TG vandalism ...... not guilty, just recording the evidence191 views
|
|
45 ers 228 viewsagain, picture does not do the angle any justice. getting out of the car was pretty difficult. great pay and play site
|
|
45ers - 31 viewslooks tame, but the car was at a pretty extreme angle. picture does not do it justice.
|
|
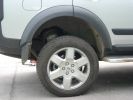
Suspension on extended mode266 viewsJust look at that ground clearence!
|
|
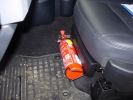
Mounting a non-LR fire extinguisher410 viewsSimply fixed it to the plastic cover for now, but will remove cover and mount further back later - just need to make up a metal plate first.
|
|
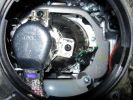
Lever to adjust the beam direction229 views
|
|
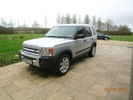
My new baby75 viewsJust given the first wash & polish.
|
|
Fitted "echo" drawers in one of the front doors. an almost perfect fit, just a little sheetmetal work needed. the cho guys would probably vomit if they saw this107 views
|
|
121 viewsthis shows the fridge on the 2 x 180kg sliders. i had to slightly modify the door opening to fir the fridge hinges thru. I just gently bent it, and fitted additional seals, hence it can easily be returned to standard. having the fridge in the kitchen is a major bonus, plus the back door of the trailer is now used for easy access to the cavernous interior, whereas prior to this youhad only access thru the front doors, which are only 500mm wide
|
|
Discovery 3 SE98 viewsJust arrived back from Bradford
|
|
It does NOT look like a van!840 viewsBrand new, just delivered.
|
|

149 viewsThis is a JPEG Taken from the CAD drawing, it has nothing to do with NEXT BASE OR LAND ROVER,FORD TATA, its just a FUN Model and not to be used.......
|
|

13 views
|
|
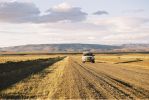
CALENDAR 2008709 viewsin the middle of nowhere (just before Perito Moreno, this time the city)
|
|
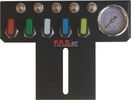
FASKIT air panel unmounted842 viewsThis is the manual air valve panel that is mounted in the "empty" space where the FBH normally resides. The gauge reads to a maximum of 25 Bar. The air tank relief valve is set just over 16.5 Bar (240 psig); the front air springs run maybe 9 Bar, (130 psig) and the rear, somewhat less, perhaps between 5 and 8 Bar. (70 to 115 psig). Max theoretical air spring pressure at full compression due to a big bump and full gross is approximately 27 Bar (390 psig).
|
|

just starting to fill7 viewsafter 1 day draining / cleaning
|
|

pump just started7 viewsafter 1.5 days draining / cleaning / filling, pump just turned on
|
|
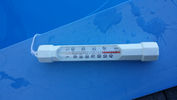
water temp6 viewsjust filled pool and checked water temp
|
|
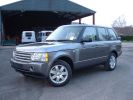
Just arrived off the transporter172 views
|
|

79 viewsJust after the first river crossing there is a sunny field of blue flowers.
|
|
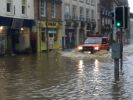
G4 wading down the high street203 viewsTaken by a passer-by as I was enroute to an emergency - just luck that I found the shots.
|
|

Fluid, Filter/Pan Combo removal and install5979 viewsThese are the LR instructions re removal and install of the plastic pan/filter combo for the ZF 6HP26X transmission on the 4.4L petrol V8 LR3.
The instructions tend to ignore the reason you have to lift the right hand side of the engine about 40 mm. This is because of a frame cross member that interferes with dropping down of the plastic pan. The real problem is a vertical "oil filter spout" that rises out of the filter/pan combo up into the transmission. The spout is the suction pipe for filtered transmission oil back up into the tranny.
On the metal pan versions, the filter is separate from the pan, hence the filter remains with the tranny when the metal pan is dropped. The filter is then removed or installed independent of the metal pan, hence with the metal pan, there is no need to lift the engine.
If one is removing the plastic pan so as to install the metal pan, then some do not lift the engine but just drop the plastic pan enough to gain access to saw off the vertical plastic spout - it is a one time procedure.
Be aware however that the metal pan uses a flat gasket and the plastic pan uses a O ring like perimeter gasket that sits in a half round groove in the tranny casing. Also the metal pan uses 21 shorter torx M6x22.5 metric cap screws for the perimeter bolts. The plastic pan uses longer M6x28.5 torx metric cap screws.
|
|
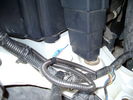
Front coupler pad to right front under air filter housing 158 viewsCoupler Pad is attached to the flat metal surface just behind the rectangular drain off of the air filter housing. The last 3 inches (75mm) of the 1/4" (5mm) black flex wiring loom was then threaded over the last bit of wiring. One of the other jpg's is less washed out and shows the coupler pad a bit better.
|
|
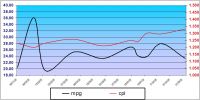
MS Excel chart of fuel usage in TDV6 first 3 months of ownership201 viewsReason for distortion at beginning is not known - average so far is 11.55l/100k (25.09mpg) for the 6 199k travelled. The fuel usage 'bumps' correspond with the city driving although they did mirror the cost for a while! A copy of the spreadsheet (105kb) that shows MPG and l/100k (but not miles) is available for the asking - just PM me.
|
|
Tigger - Justgiving.com/durtydisco page address81 views
|
|

79 views
|
|

Headlamp Adjustment370 views
|
|
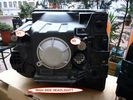
Left Headlight15 viewsLeft Xenon headlight showing adjusters
|
|
And then I spotted the lane up to the ex MoD site ... Well, you just have to don\'t you ..144 views
|
|
No one about .. Left it running .. just in case ... LRA would take awhile !164 views
|
|

Just after delivery to dealer - yet to be registered.41 views
|
|
just bracket stuck to Smoke alarm :)80 views
|
|

New switch18 viewsNearly 5 years ago, I fiddled with some push-buttons, until one day I came across those marine Contura rocker switches :)
The remote control is the switch just behind the EPB.
|
|
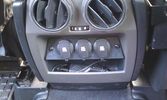
12V outlets for the 2nd row13 viewsI used a part of the old front (which was broke) to cut out a 'mount' for three 12V outlets for the second row.
The outer outlets are switched on whenever the ignition is on as I used the connector that originally was out there.
The middle outlet is connected to the auxiliary battery and is switched on/off through a rocker switch in the central console. (other picture)
This middle one is going to be used for our small fridge that usually resides just there when we're on holiday.
|
|

Looking good318 viewsJust a couple of shots of my pride and joy
|
|

GanGuo yummy spicy food27 viewsjust enough for four people
|
|

just got it23 viewsthe girls like to dress up and think I am snapping them but look behind at the yaks head
|
|
just what the dvd is for303 views
|
|
New Disco 4 3.0 HSE as it arrived at the dealers the day I just happend to be there190 views
|
|

68 viewsA short trip to the French/ Italian Alps.
The boy isn't quite big enough to ski just yet.. maybe next year..
|
|
Maplins mount working just fine with my ActionCam84 views
|
|
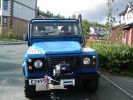
nearing completion 82 viewstruck cab
300 tdi - full intercooler - erg removed - fuel pump adjusted
roll cage to MSA spec
new Mantec bumper & 8274 winch
|
|
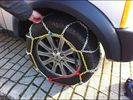
Snow chains.12 viewsJust practicing snow chain figment before having to do it in anger and minus 5*
|
|

Castleton Car Park. Just us!16 views
|
|

At home20 viewsJust had a nice clean ready for towing the caravan on holiday
|
|

Vice and Adjustables26 views
|
|
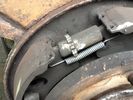
Shoe adjuster35 views
|
|
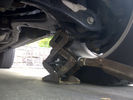
off road height, jack in position, no pressure, just touching547 views
|
|

just after the rebuild17 views
|
|
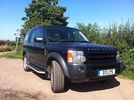
My Disco 3108 viewsMy D3 just before I bought it.
|
|
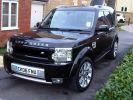
just messing about with photoshop - not sure if to revert to plain black grille - comments welcome!232 views
|
|
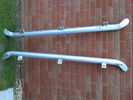
bottom of the side bars - they are 100% straight, just that dent on the bottom of one.132 views
|
|
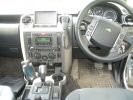
Gadgets840 viewsI Just love my "gagets"
|
|

Switch is blue colour thing thru the rectangular opening.3177 viewsThe blue coloured plastic bit thru the rectangular opening is the brake light switch. The fist time, I found it easier remove the switch by dropping the horizontal plastic panel, (two screws), and then slipping my hand in and rotating the switch clockwise 1/4 turn. The second time, I was able to remove the switch thru the rectangular opening and did not need to remove the horizontal lower panel. Obviously, I had to remove the sloping knee pad panel, (note sort of hinged at the bottom so pull back from the top.)
Regardless, do not touch the brake pedal - just let it sit where it wants to. One has to first remove the angled knee pad panel that sits under the steering wheel. It can be pulled from the top corner at the door side. Pulling releases a pair of those U shaped metal clips that LR loves so dearly. You have to pull quite hard. The bottom is held by a couple of plastic fingers in a couple of slots so you pull at the top till the two clips release and then rotate the panel and pull upwards a bit.
To remove the switch, you rotate it clockwise and pull outwards. Rotating the switch clockwise automatically retracts the plunger back into the switch body away from the brake pedal arm.
Similarly when you install the new switch, the required 1/4 turn anti clockwise rotation action releases the plunger so it lays up against the brake pedal arm and at the same time, secures the switch in place.
To remove the electrical wires, the switch will drop below the horizontal pad and hang from the wires so unclipping the electrical connector plug is fairly easy to do.
|
|
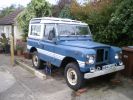
New door tops now fitted. Just needs new fuel tank, replacement footwells and a spot weld or two on the chassis!! 58 views
|
|
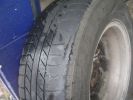
Worn Wrangler153 viewsOn trip to QLD both rear tyres went from slightly worn on inside edges to worn to carcass in just over 1000km. Wheel alignment(thanks to very helpful LR dealer in Maroochydore) and 4 new Continental tyres as no replacement wranglers in Aus.
|
|

Broken Rear Wheel Carrier166 viewsOpposite Lock rear wheel carrier 7 months old, one outback trip. Weld has broken. OL replaced with new improved unit free of charge (has just covered 20000 klm of outback roads without problem)
|
|
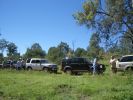
Rest stop after our first hill descent.190 viewsMode: TR Rock Crawl with HDC turned off as I found that the ABS kicked in too much. As we were in convoy I maintained a safe distance from car in front and just "feathered the brakes" as suggested by an instructor.
|
|
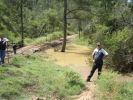
Chief instructor (left) and another instructor explaining water crossings204 viewsWhilst no one tested the waters this time (they did last week with another group) you can just see the stick floating in the water (near second instructor's right elbow). Satisfied that the rains hadn't changed the depth dramatically, they let us through - those that elected to take the water crossing of course.
|
|

our hope78 viewshi all just thought you may like to see our new avreel and hopefuly the youngest member to the disco3 family
|
|

child cage70 viewsdont call the NSPPC just yet just to show how a 2yr look in the cage
|
|

ditch it77 viewsjust another view of the ditch. i had a worry on as i came skating down the hill backwards with no means to do anything
|
|
Blinking new Discovery3 just from the dealer, made by Sanne (10 years) , CALENDAR ENTRY 2009624 viewsHere the first picture from the brand new blining D3 made by sanne, 10 years old. CALENDAR ENTRY 2009
|
|
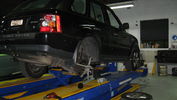
Rear Wheel Alignment.72 viewsBruce Davis Equipment for adjusting alignment alows the machine to hold the wheel camber caster etc after the wheel is removed to allow adjustments. The two spanners cannot be put on the adjusters with the wheel on the hub. His equipment has been modified to hold settings in its computer but allow accurate adjustment with the wheel off.
|
|
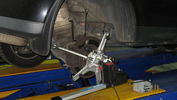
Bruce Davis Specialised Wheel Alignment Photo 280 viewsBruce claims that it is trial and error with standard wheel alignment equipment as you have to remove the wheel to make an adjustment and then recheck, a difficult task.
|
|

10 viewsJust been repaired :)
|
|
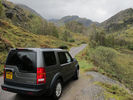
Glen Nevis253 viewsOn our tour of the Highlands and the Isle of Skye we ended up on a road that didn't seem to be on the map. It took us right up through Glen Nevis and then just carried on and on to the Falls of Steil (apologies if spelt incorrectly). The falls were amazing and were only about 1KM walk from where we ended up parking the Disco.
|
|
The Thing !301 viewsGuess where it was build ? Let me just tell you that it does not rain so often then than here...
|
|
![Filename=IMG_0336[1].JPG
Filesize=365KB
Dimensions=1706x1280
Date added=14.Jan 2014 IMG_0336[1].JPG](albums/userpics/39057/thumb_IMG_0336%5B1%5D.JPG)
My D3107 viewsJust Washed
|
|

Thread upload5 viewsJust back from picking up from dealer
|
|
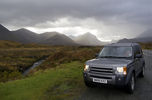
Isle of Skye229 viewsHaving just seen the view in my rear view mirror i thought i'd stop and get a photo of the Disco. This was about 15 minutes north of Portree on the Isle of Skye. A stunning place to visit. With the clouds in the distance just letting the sun peek through them i thought it was worth uploading. Hope you like it.
|
|
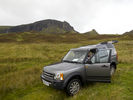
Isle of Skye217 viewsStopping for some lunch just at the foot of Quiraing on the Isle of Skye.
|
|
Just arrived in France98 views
|
|
Off Road height with adjustable rods173 views
|
|

Front adjustable rods188 views
|
|
Off Road height with adjustable rods191 views
|
|
Just outside Glenshee226 views
|
|
2 viewsThe girl still works. Not just a pretty thing!
|
|
Just needs a few chrome bits94 views
|
|
In show room just doing the paperwork before collecting keys92 views
|
|
Just park up after picking up84 views
|
|

Adjustable Towing options107 views
|
|
scafel pike 3108 viewsJust picked up my new car from Lakeland Land Rover & couldn't resist the opportunity to climb Scafel Pike
|
|
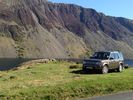
scafel pike 299 viewsJust picked up my new car from Lakeland Land Rover & couldn't resist the opportunity to climb Scafel Pike
|
|
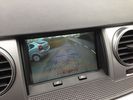
8 viewsNo buttons to press, simply stick it in reverse! This camera is also great @ night. More pictures to follow later this evening, so happy when I was done I just wanted to reverse in & out of car parks lol
|
|
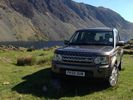
scafel pike 1100 viewsJust picked up my new car from Lakeland Land Rover & couldn't resist the opportunity to climb Scafel Pike
|
|
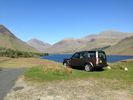
Helvelyn 117 viewsJust picked up my new car from Lakeland Land Rover & couldn't resist the opportunity to climb Scafel Pike
|
|
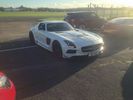
17 viewsMercedes,just after filming for Top Gear
|
|
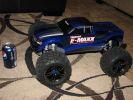
32 viewsNew Christmas toy to try to learn the finer points of speed control over obstacles... Now I just need an LR3 body that will fit this monster...
|
|
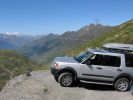
Col de la Tourmalet France 200952 viewsHolidays in France high up in the Pyrenees we decided to drive up to the top of the Pic du Midi at an altitude of 2877m instead of taking the £60-00 cable car. Just don\'t look down. What a Day!
|
|
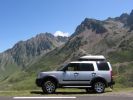
222 viewsHolidays in France high up in the Pyrenees we decided to drive up to the top of the Pic du Midi at an altitude of 2877m instead of taking the £60-00 cable car. Just don\'t look down. What a Day!
|
|
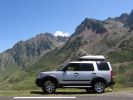
59 viewsHolidays in France high up in the Pyrenees we decided to drive up to the top of the Pic du Midi at an altitude of 2877m instead of taking the £60-00 cable car. Just don\'t look down. What a Day!
|
|
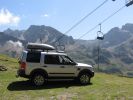
Why take the lift when you have a Landrover49 viewsHolidays in France high up in the Pyrenees we decided to drive up to the top of the Pic du Midi at an altitude of 2877m instead of taking the £60-00 cable car. Just don't look down. What a Day!
|
|
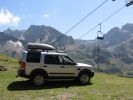
Why take the lift when you have a Landrover233 viewsHolidays in France high up in the Pyrenees we decided to drive up to the top of the Pic du Midi at an altitude of 2877m instead of taking the £60-00 cable car. Just don\'t look down. What a Day!
|
|
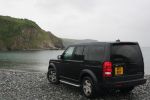
DISCO 3 Porthallow Beach Cornwall 13 Aug 07 - CALENDAR 2008 ENTRY744 viewsCALENDAR 2008 ENTRY. Picture of my Disco 3 on the beach at Porthallow in Cornwall.
Picture taken in the height of the british summer on the 13th August 07 at approx 2:30 in the afternoon! (notice the hint of sarcasm there as even at that time of the day I had my lights on!).
Getting the car from where we were staying on to that beach was quite an entertaining drive, with the roads (more like lanes) only being just wide enough to fit the car through.
Hope you like it!
|
|
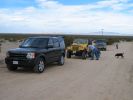
Just starting the run with my 4x4 group.309 views
|
|

This is a night photo of the completed installation. The controller and screen brightness can be adjusted.499 views
|
|
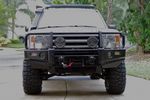
Offroad mode (with lift)....529 viewsJust need some mud to eat....
|
|

UHF Antenna Mount384 viewsView from underside of bonnet. The lower half of the mount is folded from stainless steel and bolted through an exisitng oval shaped hole in the bonnet. This hole is throught the heavy steel plate that the bonnet hinges bolt to - not just the aluminium panel. A specially machined rectangular nut was made to pass through the oval hole, rotate 90 degrees and then stopped from turning by a slight shoulder on the nut.
|
|

22 views1000T crane had just been used to lift a rail bridge in
|
|
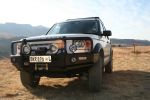
I just love this car71 views
|
|
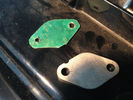
BAS Remap UK blanks for the EGR's 18 viewsnotice i also added a garage made seal, just to make sure there are no problems
|
|
Subwoofer Install275 viewsThe stock sub has 2 sets of wires running to it. Both of these wires lead back to the stock amp.
The new sub only needs two wires - a positive and a ground. So, we just cut the stock wiring harness off the wires in the tail gate and wired them together. On the other end of these wires, we did the same thing.
|
|

Multi-height adjustable42 viewsMulti-heoght adjustable towbar
|
|

Replacement switch from RRS installed on LR3864 viewsThe switch shown is LR part number YUZ500020, the upper rear hatch release switch that is found on the Range Rover Sport.
The switch body is the same switch as on the LR3 except that there is no wiring disconnect on the LR3. Hence when the switch corrodes and requires replacement, the LR solution is to purchase a new handle and license plate light assembly. I instead cut off the old switch and installed a JAE mating connector to the existing wiring and hence just plugged the RRS switch in.
The replacement RRS switch snaps into the same rectangular space in the same manner as the removed LR3 switch, the difference is the JAE male wiring connector.
|
|

Jeep Commander, Rocky Mountain National Park, Colorado156 viewsA 5.7 litre V8 330bhp POS!
When you plant the throttle, engine noise just gets louder, nothing else happens!
|
|
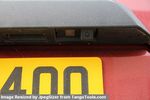
Number plate Camera 68 viewsThe camera includes a number plate light lens - left hand side of the camera.
Just plug in existing number plate bulb
|
|

Just like that47 views
|
|

Thread upload13 viewsImage uploaded in new thread
|
|

63 views
|
|

80 views
|
|
Thread upload12 viewsImage uploaded in new thread
|
|

Thread upload14 viewsImage uploaded in new thread
|
|

Thread upload6 viewsImage uploaded in thread 149910
|
|

Thread upload8 viewsImage uploaded in thread 149910
|
|

Thread upload13 viewsImage uploaded in new thread
|
|

Modification so that the headrest is adjustable840 views
|
|

Modification so that the headrest is adjustable1022 views
|
|

Modification so that the headrest is adjustable821 views
|
|

Modification so that the headrest is adjustable1088 viewsmax. height
|
|

Modification so that the headrest is adjustable786 views
|
|
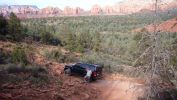
Just finished the difficult stairway decent...106 views
|
|

Just chatting232 views
|
|

LA501-004 - Technical Bulletin - Hood Adjustment and Alignment76 views
|
|
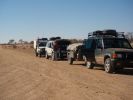
On the Birdsville Track142 viewsStoped for a dingoes breakfast, a quick pee and a look around,also just checking whats under the bonnit of the D3,dont know so just shut it.
|
|
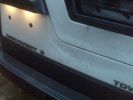
Damage ? just a slight indentation80 views
|
|
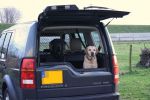
Dogs in car76 viewsMy 2 labradors just like it to be in teh car
|
|

130 views
|
|
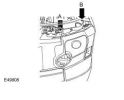
164 views
|
|
Light housing out383 viewsShows the leaver to adjust the lights!
|
|

Headlight Adjust59 views
|
|
My new Disco just arrived at Dealer279 views
|
|

61 views
|
|

LR Suspension Height Adjustment add on Electronic Box95 views
|
|

LR3 Air Conditioner Drain Tubes behind centre console2131 viewsThis shows the two air conditioner drain tubes located left and right under the radio stack.
The tube on the left side, (steering wheel side, LHD), disattached itself and the carpet on the floor under the gas pedal etc became soaked. I think rain water from outside that comes in the outside cowl vents also exits via the tubes as I first noticed the carpet was wet after parking outside during a big rain storm.
It was relatively easy to slide up and reattach the rubber hose that runs from the rectangular shaped plastic discharge hole(s) of the heater "pan" down along the transmission hump area and thru the floor pan. There is a hose on each side of the transmission hump, but only one hose had let go on my 3. The rubber hoses just slide over the rectangular plastic openings of the two heater housing drain outlets.
To get at each drain hose, remove the vertical sort of triangle carpeted piece below each side of the radio stack. The triangles of carpet will just pull away as each is held on with those metal U clips Land Rover so likes. Dislodge each triangle at least sufficiently to get ones hand in to slide the rubber hose back on.
You will rarely see AC water on the ground as the front drains pour onto a metal underside protection skid plate and the rear drain onto the top of the left rear muffler.
|
|
Battery Maintainer pigtail sticking out of Grill726 viewsThis is all you see when everything is put back together - just the pigtail and Weather Pack blanking plug. Most often, I have it all tucked back behind the grill.
In winter, there may be a second cord hanging out as well - the 120 VAC power cord for the engine block heater, a tea kettle like element inserted in the engine block. NAS petrol V8's do not have the Fuel Burning Heater, (FBH), installed, but instead in cold area markets have the block heater element assembly available as a dealer installed option. There is an argument to say that the heating element is factory installed in all cold climate V8 gasoline engines, however the appropriate power cord is not. If true, this means that all one needs to purchase is the area specific power cord and plugging in / attachment to the engine block located block heater.
As such, you will often see a conventional 120VAC three prong power plug hanging loose out of the grill of most vehicles here in the wintertime. In summer, most drivers tuck the plug back behind the grill as it is no beauty mark.
|
|
Battery Maintainer switching box plug and CTEK Multi US 3300 charger. 706 viewsThe CTEK Multi US 3300 maintainer is just sitting there for the picture. In addition to topping up both batteries, the CTEK can provide power such that if the batteries were completely dead, there would be power to the door locks and hence, one could most likely still gain access via the remote once the starting battery charged up a bit.
The Land Rover recommended method is via the hidden key hole which is mechanical, however that presumes the mechanism is not frozen from lack of use. As such, the manual lock should be exercised at least once a year to ensure that it still functions.
The blanking plug sitting on top of the plastic box is of the GM Weather Pack series. That is what I like to use for vehicle wiring that is subject to moisture, (or not).
|
|
Boot lighting panel, finish side up 309 viewsThe above jpg shows the two 15 LED light assemblies as well as the SPST rocker switch mounted beside the W5W Land Rover supplied light.
The reality is that with the recent development of LED lighting that can replace a W5W T10 bulb, one can almost achieve the same results just by installing a LED bulb within the factory light.
|
|
Compressor Air Drier 2044 viewsA view of the air drier - the black round thing to the right of the actual compressor cylinder head.
The general feeling is that the air dryer is responsible for most of the compressor problems now and that replacement of either the assembly or just the beads inside will probably revive one's compressor. In reality, the beads may have for the most part broken down and turned to dust plugging the internal filters. Hence replacement of the complete dryer unit has some merit.
The part number for the dryer assemble complete with the desiccant is VUB504700.
|
|
View of mounted panel from front left corner737 viewsI drilled a hole for the supplied 6 mm tie down toggle bolt in a flat portion of the wing on which the panel sits. I inserted a 50 mm flat rubber washer between the wing metal surface and the underside of the black painted panel plate; also a 40 mm flat rubber washer between the supplied fender washer and the metal plate - just seemed like a good idea so surfaces mate well even if wing metal not completely flat.
|
|
Flexible wire rope fishing leader 0.032" diameter exiting carpet 1948 viewsThis is all you see of the completed mod.
The short little angled "line" about an inch long that looks like a piece of debris and is located a few inches "above" the support cable is actually the wire rope release cable exiting from under the carpeted lift gate cover.
I drilled a very small hole in the carpet and pushed the 0.032" diameter release wire thru and then slipped the loose end under the black plastic.
To release with the lift gate etc closed, from the inside, just pull the loose end free from under the black plastic and gently pull wire about 5mm, (1/4"), and the upper door catch should release. You will have to manually push the upper door out wards to actually effect opening, but you will already be inside the rear cargo area so that part is easy to do.
The assumption is that the lower door latch still works electrically and hence, the lower lift gate half will open as normal by pressing the usual button on the top left of the lower door half.
|
|
Carpeted cover removed showing uncut dust seal and underside of carpeted cover. 1628 viewsNote that there are all sorts of electrical wires sticking to the underside of the dust shield - so be very careful when you cut thru the shield.
I used a box knife very slowly and was surprised at how many conductors there were running just under the shield membrane.
|
|
Dust seal rolled back showing electrical conductors 1658 viewsNote power conductors just under the dust seal which makes cutting the seal more interesting.
Also shown are the two 8mm nuts located in slots. One must loosen each nut to effect removal of the actuator. This will then reveal two T15 Torx screws that one must completely un-thread to remove the top gold plate from the actuator assembly.
|
|
Wiring (tubing) loom at left headlight showing FASKIT panel 584 viewsThis shows the wiring (tubing) loom and FASKIT panel mounted to left wing. The loom moves a a couple of inches (50mm) towards the bottle once the headlight is put back in as there is not enough free space for the loom as located. The FASKIT panel is just visible at the top left corner of the picture.
|
|
Wiring, (tubing), loom exiting temporarily from the front right fog light.569 viewsThe front axle air valve block is located just behind and below the fog light. Access to the valve block is by removing the right front fender liner, (or the bumper). The FASKIT lines are attached to the left and right front air spring lines at this location; also compressor air is taken from this location as well. Cutting the lines at as few different locations makes it easier to find leaks at a later date. As above, five 6mm air lines run from the FASKIT panel to the front axle air valve assembly and run within the loom. Two pair of the lines are for control of the air springs, and the fifth line taps the air supply at the valve block assembly off the compressor. This will be the air source line rather than tapping in directly to the high pressure air tank.
|
|
Smooth off road ride!399 viewsThis was the first time I took my LR3 off-road. I traded my Jeep Wrangler for this vehicle so I was used to heading into the rugged mountains. I was very amazed (as were my friends in their Jeeps) just how level the LR3 remained as I navigated over various dips and mounds. You can see the Cherokee behind me couldn't say the same.
|
|

LR3 Denso Alternator YLE500390 rear view709 viewsThis picture shows the rear of the YLE500390, the Land Rover part number for a newer design alternator utilizing the Transpo IN6349 regulator with the "hidden" cooling fins. Note the visual difference in the rear view of the next file jpg.
If the alternator is a rebuilt, (service exchange unit), but Land Rover supplied, then the part number is LR008860 or similar. (Note that 0 in LR0 is zero.)
Two Denso part numbers exist for the alternator as well, 4280003690 and 4280003691. The rating of the petrol V8 alternator is nominal 12 VDC and 150 amps. In normal day to day operation, they seem to run about 14VDC - usually between 13.9 and 14.1 volts at the OBD port.
For the petrol V6, the LR service exchange number is LR008862, and the 2.7TDV6 is LR008861.
The bridge rectifier within the alternator is a 12 diode avalanche type, 117mm diameter, as used in Nippondenso 120 to 160 amp alternators with the Hair Pin stator. It is similar to a Transpo INR421 which is rated for 120 to 150 amp alternators. That is probably our primary problem - the rectifier is just too light. Alternate part numbers for the bridge rectifier are Cargo 237607, Mobiltron RM-29 and AS ARC6021.
Re the B+ stud, the INR421 calls it up as an M8 x 1.25 x 30 mm long course threaded stud; some say 34 mm but that may be longer than desirable.
|
|

Door Lock Wiring Diagrams1730 viewsNear the bottom of this 5 page pdf on page 224 are shown the pushbuttons and locking mechanisms for the rear hatch and tail gate.
The pdf will open vertically but you can download and print it out or just rotate the image clockwise by right clicking on your screen and selecting the "Rotate Clockwise" button.
|
|

Power and Heated Seats Electrical Schematic979 viewsThis 6 page pdf shows the wiring for the power adjustment of the front seats and seat heating for all the seats.
Re seat movement or the lack of, not only are there four related fuses, two 30 amp and two 5 amp, (one of each per seat), there are are two separate ground wires, perhaps of more significance than the power, if all movement on either side quits.
|
|

Stop Light Lamp Circuit pdf2491 viewsThis pdf shows the brake light circuit for the NAS LR3.
Note that power for the brake light bulbs can come either thru the brake light switch power feed /contacts plus also from the Hill Decent Control, (HDC), system relay located within the Central Junction Box, (CJB) - yes two separate sources of power for the brake light bulbs. This would tend to explain how a brake light circuit concern shows up as a hill decent fault message; also why lesser vehicles without hill decent braking mechanisms, (HDC), never display this sort problem when a brake light bulb or switch acts up. You never have a problem related to a system that does not exist.
Additional evidence of the relationship of the HDC and the tail light circuit is demonstrated by when the HDC actually acts to slow the 3 down, the brake lights automatically illuminate even if the slowing action was merely retarding the engine speed or shifting to a lower gear, (in other words, no foot on the brake pedal).
There is also a tie in to the Cruise Control and hence a failing brake light switch can affect cruise operation or just create false Cruise Control messages. To further complicate the issue, while there are no messages generated, operation of the radiator electro viscous fan can also be negatively affected by the fouled set of secondary contacts within the brake light switch. This is all because the NC contacts within the brake switch send misleading messages to the ECU.
While the ground wire design is similar to other vehicles, note the grounds for the brake light filament and the reverse light filament are common on each side. That means that if one has a non functioning brake light on one side, the reverse light may not also work or that some problem with the reverse lights could back feed into the brake lights. This situation while unusual, can result when grounds are corroded probably due to swimming in rivers and creeks or just routine driving in a marine environment.
|
|

ZF 6HP26 Land Rover Transmission specs1677 viewsThis is just two sheets of paper with various numbers related to the 6HP26 such as oil capacity, gear ratios, and torque wrench settings for the fill and drain plugs.
You may note that LR calls this ZF transmission the 6HP26 whereas ZF calls out the LR3 transmission as the 6HP26X. Just what the differences are, I am not certain however the X refers to 4WD or AWD use as opposed to solely 2WD.
Zahnradfabrik is what ZF is short for and translated from German, roughly means Gear Factory.
|
|
Pumped Up Freelander on Roych192 viewsJust to prove that Freelanders really can do Roych
|
|

LTB00354 - Technical Bulletin - Parking Brake Shoe Lining Adjustment130 views
|
|
191k on the clock and just about to depart for an easy life.....4 views
|
|
Main starting battery showing 1/2" hole drilled for power cable egress909 viewsView of OEM battery in Left Hand Drive LR3. This is supposed to be a Battery Group BCI 49 or H8 sized battery but in reality is the slightly shorter BCI 94R or H7 battery that fits easier lengthwise, (12 3/8" vs 14").
Note the 10mm hole drilled in plastic of surround to allow for entry of main power cable that runs between batteries. The cable bolts to a spare 6mm threaded hole in the OEM battery cable end; the light gauge wire runs to the front of vehicle to a connector for the CTEK MULTI US 3300 charger. Coloured felts, (red and green), are a material treated to reduce battery post corrosion. The OEM battery ground cable is only about a foot long and runs to an 8mm stud located on the inner fender just to the rear of the fuse case.
|
|

Australia Compared188 viewsJust so that others get some idea of the magnitude of the Canning Stock Route (see RichardK's gallery). It is 2000 kilometres on unsealed roads. On top of that is the journey on the sealed roads from and to home. Japan is only a couple of thousand kilometres from top to bottom.
|
|

Yes, that is Marilyn in better days.1594 viewsIf she had just been content to fool around with blokes who liked Land Rovers ...
|
|

PDF of Mini Fuse data re LR3 / Disco 3 fuses.1854 viewsThis is just a data sheet regarding the MINI fuses that are common in the 3.
|
|

Split nuts26 viewsI just had one of my nuts fail, the top split in two!
In the end took a couple of mins to get off with a lump hammer & coal chisel.
|
|

not just any water will do58 views
|
|
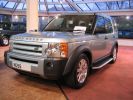
Disco 3 - Just before collection727 views
|
|

my new disco 377 viewsdoesn\'t look like much but it has just been delivered by the current lady owner who has traded it for a new R R sport. Will look a lot better once it has been valeted, serviced and mot\'d and then even better once i get my hands on it.
|
|
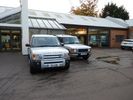
New and Old!16 viewsJust picking up the new D3 - sad to see the old one go after 7 good years though.
|
|

Rust nuts39 viewsI just had one of my nuts fail, the top split in two!
In the end took a couple of mins to get off with a lump hammer & coal chisel.
|
|
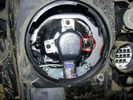
Headlight Adjustment32 views
|
|
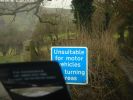
Just what you want to see..!!!!202 views
|
|
G4 side on145 viewsStill not sure about those wheels, I fancy a set of std HSE wheel with MTRs just as it should be
|
|
Spanking new, just looking forward to the mud!213 views
|
|
Picture of old bus just prior to trading it in .... Jan 03 S model 35000 ish on clock - Had the infamous problem with liquid ingress on injector loom but after that was great car127 views
|
|
My Disco 328 viewsJust out for a drive in the country
|
|
My Disco 3 a28 viewsJust our for a drive in the lanes
|
|
Lane just after entering100 views
|
|
50t capacity trailer for D3 !!!80 viewsD3 comes in handy for splitting away 2 axles of a larger modular hydraulic heavy haulage trailer, just delivered an 80t transformer for me into Scotland, and we shortened the trailer for the journey back to Italy.
|
|
Just not getting any further...141 views
|
|

90 tonnes Transformer - Tooley Street84 viewsOur 300t Lift System with a 90 tonnes transformer hanging from it just before lowering 9 metres into a basement.
|
|
Slowly walking the LR3493 viewsJust went through gate 3, used hill decent to slowly walk the LR3 down this steeper section of the hill.
|
|

Coraki - flowers on side of road south of Coraki123 viewsJust one small patch of them and no others within sight.
|
|
Fingal Road - Northern end187 viewsOnly sand driving we did was on this well packed and still damp sand leading to the sand pumping station (used for erosion control). Didn't even need to select Sand mode from the terrain tamer although I did put it in Extended Mode just in case.
|
|
My New Discovery 4 SDV6 HSE222 viewsJust bought Ex Demo 5K miles (Feb 2012)4th Landrover
|
|
Calendar Entry 2008 - Mareeba Aug 2007237 viewsJust washed, late afternoon shot
|
|
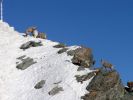
74 viewsWild goats (Gämse) just beside the top station of the Gornergrat railway, Zermatt
|
|
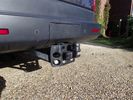
LR height adjustable tow bar 33 views
|
|
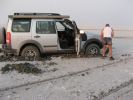
271 viewsAs you drive you just sink in ?
|
|

Paradise - for him154 viewsDue apologies to JB (he posted the image originally), but I just noted the smiling face of a lone male in the group and wanted to share it...
|
|

EPB Adjust Feb 2011122 views
|
|

Thread upload24 viewsImage uploaded in thread 52130
|
|
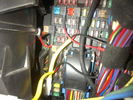
Fuse Panel showing F35P Add A Circuit installed1241 viewsFive amp fuse F35P is located towards the top left in this jpg. The other three Add A Circuit devices are for other items - powering my cell phone base etc.
Note the orientation of the Add A Circuit as this matters. Also one can just see a red tab sticking out from behind the device. The red is the conductor crimp end of a narrow 2.8mm male spade type connector that inserts into one of the "fuse" slots.
|
|
calendar entry853 viewscalendar entry: Extended mode - having just recovered from an almost sideways slide down the dune, Perron Dunes, nr St Helens, Tasmania.
|
|
Just brought her home164 viewscomments please
|
|
278 viewsSilverstone Circuit.
The first proper trip off-road. Raised £1400 for the Air Ambulance Charity doing ride-arounds for people at the Silverstone Classic. Hasten to add it wasn't just me!
|
|

D327 viewsJust before she goes
|
|

parked or abandoned 15 viewsOnly just about fitted into this spot........
|
|

looking on to see if i get stuck..suzuki just pulled landy out30 viewsbargrips arn't all that good really. thats my excuse and I'm sticking to it. but managed to get some fun places
|
|
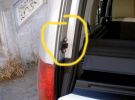
plastic guide407 viewsif you ever hear a knock in the back of your car just put some grease over these guides...
|
|
257 viewsSystem testing. Nothing caught fire, which is a success in my book! Just know that the rover gets very angry when all of those control panels are disconnected.
|
|
255 viewsAlmost completed install. Just the controllers need mounting.
|
|
hole drilled and camera just pushes in329 views
|
|
Articulation - Yeah!263 viewsAt the top of pindale there is an excellent articulation test - I am on three wheels ... and on two - I could actually flip 3 wheel sets (via just 2 inbetween) just by rocking myself in the drivers seat
|
|
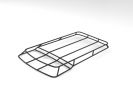
Tubular frame236 viewsView of just the tubular frame of the expedition roof rack
|
|
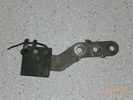
Radio Noise Suppression Capacitor NNW502820699 viewsThis is the radio noise suppression capacitor, part number LR020488 (previous NNW502820), that is mounted underneath and near the transmission. It is powered by fuse 10 amp F30E in the engine compartment. If F30E blows, (the fuse that also powers the transmission ECU), the problem is probably caused by the failed capacitor, not the ECU. A quick fix is just to disconnect the capacitor and replace the fuse as nothing bad seems to immediately result.
The above radio noise capacitor is not to be confused with LR004160, the ignition noise capacitor which is located under the black plastic engine cover on the right hand side above the air intake towards the rear of the engine.
The ignition capacitor is held on with a single 8mm bolt and a three wire electrical connector. Replacing the ignition capacitor as a routine maintenance prevention action at 100,000 miles, 160,000 km), has merit. It is a do it yourself kind of thing and easier to get at than the radio capacitor underneath.
|
|
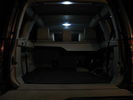
With just normal interior lights (but HID\'s High Intensity LED Replacement)78 views
|
|

Brake servo recall work - new pipework121 viewsThis is the new visible result of the recall work just done
|
|
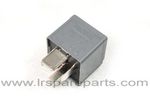
Air Compressor 70 amp replacement relay1393 viewsThere is a software update, 09 April 2010, LTB00270, for the compressor which reduces the shut down pressure to about 205 psig (14 bar). The update is usually done when changing to a new compressor and also includes replacing the R7 relay in the engine compartment fuse box, 07 DEC 2010 LTB00331.
The newer grey case coloured relay, part # YWB500220, shows to be rated at 70 amps, (the relay, not the compressor), however the previous black case coloured relay also indicates 70 amps.
Both the new and replaced relay show on their wiring diagrams to have a parallel voltage spike resistor, (probably 560 ohms), across the coil terminals, #1 and #2. This means one does not just replace the relay with any four prong 70 amp ISO sized relay that one happens upon.
One presumes the grey relay is either upgraded or just being installed for good measure. The relay is common on Ford Fiesta for the seat heater relay, Ford part number 5M5T 14B 192 EA; also Volvo, part number 30765034. The Tyco part number moulded on the grey body is V23136-J4-X62.
|
|
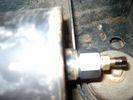
Reservoir Air In fitting installed 1660 viewsSchrader valve installed. Shop air can now be introduced into the tank to facilitate the raising of the 3 when there has just been a failure of the onboard air compressor rather than the electronics or valve block wiring etc.
Air could also be sourced from this point, however the purpose of the modification is air in, not air out as the air pressure normally runs above 200 psig, too high to be safe for routine use unless a pressure reducing regulator is added per the Mitchell Bros kit.
|
|

ride height adjustments(60.90.03).pdf281 views
|
|

Adjust Calibration Value by +3384 views
|
|

Thread upload11 viewsImage uploaded in thread 160151
|
|

Thread upload15 viewsImage uploaded in thread 160151
|
|

Thread upload14 viewsImage uploaded in thread 160151
|
|

Thread upload12 viewsImage uploaded in thread 160151
|
|

Thread upload12 viewsImage uploaded in thread 160151
|
|
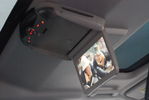
340 viewsThe Rosen Z10 fits (just) where the rear roof lights were once fitted!
|
|

Rosen A10 Manufacturer Installation Manual763 viewsThis is a 30 page pdf from Rosen that explains how to install the A10 unit. It is Generic in nature and hence carries detail not found in the LR specific install instructions. It also uses words and pictures instead of just pictures, hence can be a bit easier to figure out, particularily if you wish to take advantages of some of the hidden features not described in the LR material.
One of these features is how to hook up to a headrest display or I suppose even to the NAV in front.
|
|
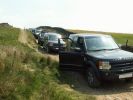
Traffic Jam at Roych231 viewsGroup 1 set off half an hour after Group 2 and yet still arrived at the Roych before Group 2, who arrived just as Group 1 were sizing up the obstacle - thus causing a traffic jam of 7 D3\'s (Gareth has already gone down). Some lame excuse about HAVING to go to the pub because they had no packed lunch... yeah right!
|
|
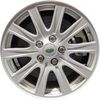
LR3 Silver 10 spoke grooved wheel Cromodora of Italy 18 inch x 8 ALY72201U85385 viewsThis is Land Rover part number RRC505360MNH or RRC505360XXX, a grooved ten spoke 18" wheel rated at 940 kg and found on circa 2006 RR Sports and some 2007 LR3's. An alternative part number is ALY72201U85.
This is an example of a wheel factory spec on the full frame older RRS that is also factory spec on the 3 or 4 and hence can be moved from the RRS to the 3 or 4. This is rare however. A factory spec wheel for a 3/4 can always go onto an older full frame RRS but not necessarily vice versa.
Just because a wheel is a 5 lug, 120mm bolt circle, +53 mm offset and made by Cromodora does not mean it has the required 940 km load rating. That also has to be confirmed by looking on the backside of one of the spokes for the moulded in load number in kg.
|
|
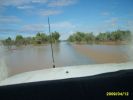
Easter 2009 - g25 viewsDiamantina Development Road just SE of Windorah towards Quilpie
|
|
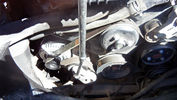
67 viewsThis is easy to remove. You will notice the tensioner at the bottom left near the alternator. There is a sqaure slot on the tensioner into which fits a 3/8" square drive. Just turn anti-clockwise and the tensioner is moved away to slacken the belt and off it comes.
|
|

Thread upload31 viewsImage uploaded in thread 137355
|
|

Signs you see126 viewsI can't imagine many people wanting to eat potting mix, but just in case, this supplier wanted to cover their options and ensure that no one ate and sued as a result of thinking that you could eat potting mix.
|
|

Blown Xenon Bulb14 viewsThis is a blown xenon bulb. The headlight would not turn on, just flickered for a couple of seconds.
|
|

They just fit!469 views
|
|
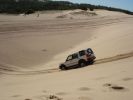
Down we go - the photo doesn\'t do justice!148 views
|
|
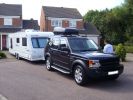
My D3 all hitched up to tin tent 242 viewsfor summer holiday, just 3 days after I bought the car
|
|
Taking letters off124 viewsUse Garden twine doesn\'t damage the paint, the remaining 3M tape can be removed easily without any chemicals, just scrape it off with your finger nails, a little polish and you can\'t tell anything was ever there.
|
|
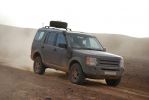
Morocco,,,,,,,,,,don\'t you just luv it!219 views
|
|
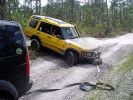
D2 pwned by LR3 :D264 viewsTransmission in D2 went out so I kindly towed my poor friend over hill & val (literally!) to safety. Just got the tow strap attached in this pic & ready to roll. What fun!!
|
|
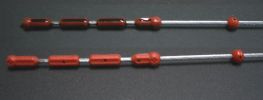
TDv6 Oil dip stick280 viewsPhoto shows oil level on rear stick (cleaned front stick). Note that diesel oil when fresh may not be black like the sample shown (car had travelled 5 000km on delivery oil). You can see small indentations in both sticks. This is where I observe the current oil level. Note also the two arrows at either end of the red plastic indicators showing lower and upper limits (I do not know what the red ball is for however - it just may be a guide.)
|
|

Tekonsha P3 Electric Trailer Brake Controller model 90195290 viewsOne model of electric brake controller that is commonly used on the LR3 is the Tekonsha P3 unit, model number 90195. It mates up to the LR3 with a custom "Ford" adapter cable, Tekonsha part number 3035P. No wire cutting or splicing is necessary - just mount unit and plug adapter cable in.
|
|
"Just Floor it"526 views
|
|

Thread upload24 viewsImage uploaded in thread 169748
|
|
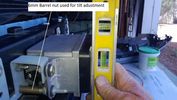
Thursday Suspension Height151 viewsSecond of two photos showing my suspension had dropped by nearly two inches in just over three days sat on the drive
|
|

Chains JUST clearing - SuperT Chains model ZT73584 viewsSnow Chains that seem to fit a Land Rover LR3HSE
|
|
84 views
|
|
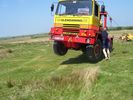
Just a bit too heavy Beford TM 4x425 views
|
|
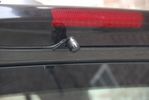
Rear view camera123 viewsRear view camera mounted to the center brake light. It produces a mirrored image. The camera is placed just a little of center to allow it to see the tow hook. When placed in the exact center the view on the tow hook would be blocked by the rear screen whiper
|
|

Airbag removal tool249 viewsMake something like this out of welding rod or coathanger
Picture courtesy of Alinton ( hope you dont mind ..if you do just say and i will remove )
|
|
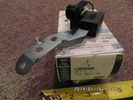
Radio Noise Filter Transmission Electronic Control Unit913 viewsThe jpg shows part number LR020488, a noise suppression capacitor located underneath on a bracket on the right side of the transmission forward of the selector shaft lever. The suppressor is connected to the transmission wiring harness and prevents solenoid operating noise affecting the audio system.
Failure of the capacitor is most often discovered as a result of either black smoke from below and or the blowing of 10 amp fuse F30E located in the engine compartment fuse box. This fuse protects the power circuit to the Transmission Engine Control Unit. When the fuse blows, the engine will still run however you have no gears, hence movement of the 3 is inhibited.
Anything over eight years in service is considered good capacitor life. If the capacitor does fail and fuse 30 blows, a quick fix is just to disconnect the capacitor and replace the fuse.
The capacitor might be missed by the DOT/FCC but the 3 does not seem to mind. With the filter disconnected, solenoid noise might be heard on some radio stations but at least the 3 would be in motion.
|
|
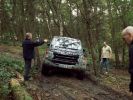
Just fold your mirror in and it will fit203 views
|
|

Thread upload1 viewsImage uploaded in new thread
|
|
Thread upload0 viewsImage uploaded in thread 157090
|
|

Thread upload21 viewsImage uploaded in thread 168911
|
|

Thread upload2 viewsImage uploaded in thread 181384
|
|
Thread upload4 viewsImage uploaded in thread 181384
|
|

Thread upload2 viewsImage uploaded in thread 181384
|
|

Thread upload12 viewsImage uploaded in thread 167940
|
|
Thread upload10 viewsImage uploaded in thread 167940
|
|
Thread upload10 viewsImage uploaded in thread 167940
|
|

Thread upload11 viewsImage uploaded in thread 168466
|
|

Thread upload12 viewsImage uploaded in thread 168466
|
|

Thread upload11 viewsImage uploaded in thread 168466
|
|

Thread upload15 viewsImage uploaded in new thread
|
|
Thread upload6 viewsImage uploaded in new thread
|
|
Thread upload5 viewsImage uploaded in new thread
|
|
Thread upload6 viewsImage uploaded in new thread
|
|
Thread upload5 viewsImage uploaded in new thread
|
|
Thread upload7 viewsImage uploaded in new thread
|
|
Thread upload15 viewsImage uploaded in thread 160155
|
|
Thread upload6 viewsImage uploaded in thread 181384
|
|
Thread upload9 viewsImage uploaded in thread 181384
|
|
Thread upload23 viewsImage uploaded in new thread
|
|

Thread upload0 viewsImage uploaded in thread 181384
|
|

Thread upload3 viewsImage uploaded in thread 165231
|
|
Thread upload19 viewsImage uploaded in thread 153919
|
|
Thread upload0 viewsImage uploaded in thread 165231
|
|
Thread upload1 viewsImage uploaded in thread 165231
|
|

Thread upload2 viewsImage uploaded in thread 165231
|
|
Thread upload1 viewsImage uploaded in thread 165231
|
|
Thread upload2 viewsImage uploaded in thread 165231
|
|
Thread upload3 viewsImage uploaded in thread 181384
|
|
Thread upload3 viewsImage uploaded in thread 181384
|
|

Thread upload0 viewsImage uploaded in thread 165231
|
|
Thread upload7 viewsImage uploaded in thread 181384
|
|
Thread upload2 viewsImage uploaded in thread 165231
|
|
Thread upload1 viewsImage uploaded in thread 165231
|
|
Thread upload0 viewsImage uploaded in thread 165231
|
|
Thread upload2 viewsImage uploaded in thread 165231
|
|
Thread upload0 viewsImage uploaded in thread 165231
|
|
Thread upload0 viewsImage uploaded in thread 165231
|
|
Thread upload1 viewsImage uploaded in thread 165231
|
|
| 422 files on 2 page(s) |
 |
1 |  |
|