| Search results - "General" |

11-20200928_Vigor166_General_Setup_VLAN_Tag_10115 views
|
|
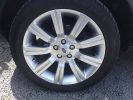
Stormer alloy45 viewsReplica stormer alloy, 20\'\' with 275 45 r20 general grabber uhp.
|
|
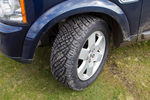
D4 HSE Baltic Blue with 255/55/19 General AT Tyres93 views
|
|
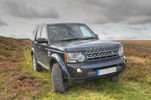
D4 HSE Baltic Blue with 255/55/19 General AT Tyres276 views
|
|
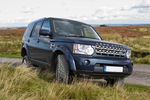
D4 HSE Baltic Blue with 255/55/19 General AT Tyres270 views
|
|
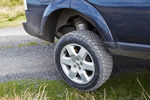
D4 HSE Baltic Blue with 255/55/19 General AT Tyres84 views
|
|
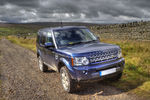
D4 HSE Baltic Blue with 255/55/19 General AT Tyres367 views
|
|

1 General Information, Identification Codes and Jacking and Lifting26 viewsPart 1 of Discovery 3/4 Workshop Manual - General Information, Identification Codes and Jacking and Lifting
|
|
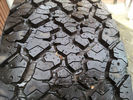
27 viewsGeneral Grabber AT2
|
|

8 Engine System - General Information17 views8 Engine System - General Information
|
|
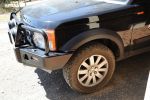
General Grabber AT2147 views
|
|
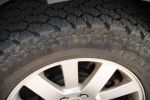
General Grabber AT2153 views
|
|

General Grabber AT2125 views
|
|
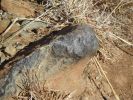
Bad Rock61 viewsbenign looking rock that punctured the sidewall of my new General Grabber AT2 (500km done on tyre)
|
|

TTB causes backlog43 viewsMy generally slow driving caused a few others to get held up - sorry
|
|
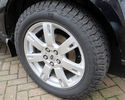
General Grabber AT317 viewsGeneral Grabber AT3
|
|
General Photos134 views
|
|
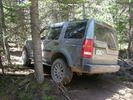
General Photos147 views
|
|

General Photos124 views
|
|
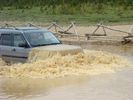
General Photos125 views
|
|
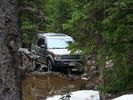
General Photos122 views
|
|

Another view50 viewsA view of the general area showing the damaged part, lower centre. The second occurrence shows similar damage.
|
|
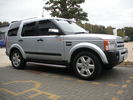
General AT 19"254 viewsLooking Good!
|
|
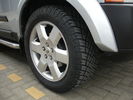
General AT 19"226 viewsget that tread!
|
|
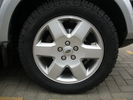
General AT 19"180 viewsside view
|
|
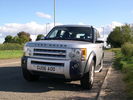
My Discovery148 viewsGeneral Pics
|
|
Thread upload6 viewsImage uploaded in thread 142860
|
|
Thread upload6 viewsImage uploaded in thread 142860
|
|
Thread upload6 viewsImage uploaded in thread 145011
|
|
Thread upload16 viewsImage uploaded in thread 54746
|
|
Thread upload9 viewsImage uploaded in thread 129491
|
|
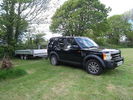
Thread upload9 viewsImage uploaded in thread 129491
|
|
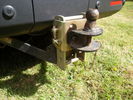
Thread upload13 viewsImage uploaded in thread 129491
|
|
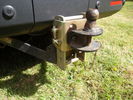
Thread upload19 viewsImage uploaded in thread 152057
|
|
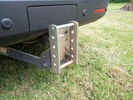
Thread upload12 viewsImage uploaded in thread 129491
|
|
Thread upload19 viewsImage uploaded in thread 152057
|
|
Thread upload11 viewsImage uploaded in thread 129491
|
|
106 views
|
|
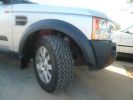
New Generl Grabber AT2 255 60 R18"253 views
|
|
49 views
|
|
439 views
|
|
404 views
|
|

438 views
|
|

416 views
|
|

403 views
|
|

391 views
|
|

348 views
|
|
178 views
|
|

555 views
|
|

Thread upload17 viewsImage uploaded in thread 135589
|
|
Thread upload28 viewsImage uploaded in new thread
|
|
Thread upload25 viewsImage uploaded in new thread
|
|
Thread upload11 viewsImage uploaded in thread 163880
|
|
Thread upload6 viewsImage uploaded in thread 57247
|
|

Thread upload11 viewsImage uploaded in new thread
|
|

Thread upload10 viewsImage uploaded in new thread
|
|

Thread upload10 viewsImage uploaded in new thread
|
|

Thread upload10 viewsImage uploaded in new thread
|
|

Thread upload11 viewsImage uploaded in new thread
|
|

80 viewsGeneral Grabber AT2
|
|

Thread upload11 viewsImage uploaded in new thread
|
|

Thread upload10 viewsImage uploaded in new thread
|
|

Thread upload12 viewsImage uploaded in new thread
|
|

Thread upload12 viewsImage uploaded in new thread
|
|
Thread upload10 viewsImage uploaded in new thread
|
|
Thread upload9 viewsImage uploaded in new thread
|
|
Thread upload7 viewsImage uploaded in new thread
|
|

Thread upload11 viewsImage uploaded in new thread
|
|
Thread upload17 viewsImage uploaded in thread 159698
|
|
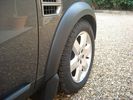
General Grabber AT94 viewsFinally got the 255/55/19 TAs fitted.
|
|

GeneralTire AT2185 views
|
|
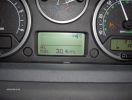
At the 1303 mile mark, Av MPG was 30.4 !!!!!!!!!!!!! With all teh start / stop, and general moochign about, this was quite good !307 views
|
|

General AT169 views19" General AT with Pirelli Scorpion
|
|
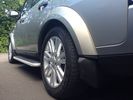
General49 viewsGeneral photos
|
|

LP scoped 222 viewsBy connecting a Low Amps probe to the fuel pump's voltage supply wire, you can view the pump's current waveform on a digital storage oscilloscope (DSO). The scope pattern will reveal internal wear in the brushes and commutator that may not show up in a traditional pressure or volume test.
Observing the waveform will show if the pump's amp draw is normal for the application or is high or low, and if the pump is operating at normal speed or is running slow. Problems such as a bad spot on a commutator or a short or open in the armature also will be obvious in the waveform.
A "good" electric fuel pump waveform will generally seesaw back and forth with relative consistency and minimal variation between the highs and lows. A "bad" waveform will show large or irregular drops in the pattern, with large differences between the highs and lows.
|
|
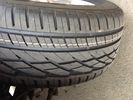
New tyres on SWMBO's Disco21 viewsThe new General GT tyre 255/55 18R 109Y
Road tyre S+M
|
|

New 20" Supercharged alloys on General UHP 275/45/20 110 Load ratting200 views
|
|
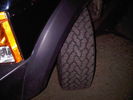
general grabbers at258 views
|
|
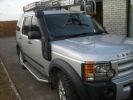
General View431 views
|
|
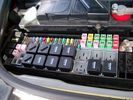
Picture of the engine compartment fuse panel5779 viewsEngine compartment fuse panel located near the battery. This is where F3E, (5 amp), F26E, (20 amp), Fuseable link 10E, (60 amp) and Relay 7E, the now upgraded 70 amp air compressor motor relay, part number YWB500220, (E is for Engine compartment fuse box), are all located. Fuse F35P, (5 amp), is inside the Passenger compartment behind the lower glove box door.
To keep the suspension from going down to the stops when driving, (or parked), it appears that it is only really necessary to remove F26E to depower the exhaust valve and generally keep all the valve block solenoid valves in a closed position trapping whatever air is within the air springs. F3E gets its power thru F26E, so when F26E is removed, the F3E circuit is automatically de-powered. F35P is more interesting in that battery power goes thru the ignition switch and F35P and then into the air suspension control unit. Apparently however, if F26E is removed, removing the F35P is not needed even when the engine is running.
With all fuses still in, if you have a problem, in practice, ideally, the compressor still works and will raise the 3 to an appropriate height. If so, one can then shut the engine off and allow the computers to go to sleep and then you remove the fuse(s). In actual practice, it seems that one need only pull the F26E fuse and can do so with the engine running. All the same, one might consider that the 3 is first a mobile computer, and secondly a 4x4. Computers prefer to go to sleep before the plug is pulled on them, however given that F26E circuit is always alive, then the computer never sleeps. With the fuse(s) pulled, and if you are still up, you can now be a 4x4 instead of a low rider. The whole purpose of the fuse pulling exercise is to depower the one and only system exhaust valve that is physically located within the compressor unit, (to keep it from opening), and secondarily to keep closed the four air spring solenoids within the block valves. This also shuts the air compressor down and stops the air compressor from making air even if the compressor is still good. That is why you initially need the fuse(s) in to allow the compressor to make air if it can.
|
|
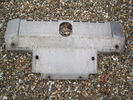
Mantec general view168 views
|
|

Style 1\'s with General Grabber AT2_ Supplied By Ken95 views
|
|
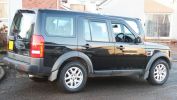
Style 1\'s with General Grabber AT2_ Supplied By Ken106 views
|
|

4 new General Grabber ATs suppled by these guys in Colchester35 views
|
|

New General Grabber ATs fitted today (14.1.2013)26 views
|
|

Wildebeest (Gnu) Etosha182 viewsYou generally see these together with Zebra in large herds, they are complimentary grazers
|
|
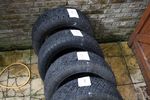
General AT 255 55 r196 views
|
|
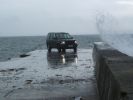
Stormy day in Islay505 viewsCALANDER ENTRY - Summer (?) holiday on Isle of Islay, Scotland. Good weather generally, but a storm came through mid-week. Car is parked at the end of the pier at Port Charlotte, looking towards Bowmore (!).
Sorry not much of a background or good light - but it was a storm. Oh and this is the highest res image I have, 5mp.
|
|
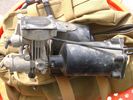
Compressor Air Drier 2044 viewsA view of the air drier - the black round thing to the right of the actual compressor cylinder head.
The general feeling is that the air dryer is responsible for most of the compressor problems now and that replacement of either the assembly or just the beads inside will probably revive one's compressor. In reality, the beads may have for the most part broken down and turned to dust plugging the internal filters. Hence replacement of the complete dryer unit has some merit.
The part number for the dryer assemble complete with the desiccant is VUB504700.
|
|

General Drivers area18 views
|
|

Pine Road107 viewsForestry track but generally good condition. Later discovered Forestry had closed the track. Had to seek alternate access.
|
|

Access road to Pyrocarpa Flora Reserve120 viewsGenerally well formed road - a mixture of decomposed granite and sand in places. Evidence that it is used heavily used by trail bikes but we did not observe any that day.
|
|
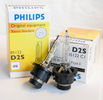
Philips D2S 85122 C1 Xenon 4300K projector HID bulb962 viewsThis is the 4300K OEM bulb in our HID Xenon projector headlights. People who design illumination systems regard the 4300K colour as a good compromise to provide what is called definition. This is effectively the ability to actually determine what an object being illuminated probably is. The more blue colour bulbs, say 5000K and greater, result in a reduction in the ability to distinguish detail, (regardless of brightness), of the object being illuminated. Effectively, you can see the object but you cannot quite figure out what it is. This is because the more blue frequencies means there are fewer other frequencies of light that allow our eyes to actually discern what an object really is.
The 4300K colour temperature applies to clear air conditions; for rain, dust, snow, fog, etc, then a yellow 2500K colour temperature is preferable. 2500K provides more contrast and there is less back splash of light off the air particles. In blowing snow, this means less sparkle back. Flat top cut off of the light beam, (which is the pattern our projector lights have), is important to reducing back splash - hence you do do not want roof mounted lighting for adverse conditions - as low down as possible is preferable, (which is why fog lights generally sit low.)
|
|
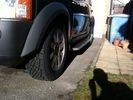
General Tyre AT's on 18" HSE Rims36 views
|
|
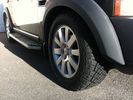
General Tyre AT's on 18" HSE Rims37 views
|
|
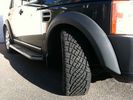
General Tyre AT's on 18" HSE Rims39 views
|
|
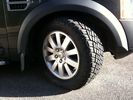
General Tyre AT's on 18" HSE Rims33 views
|
|

General Grabber UHP 8mm Tread133 views
|
|

General Grabber UHP 8mm Tread148 views
|
|
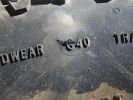
Puncture71 viewsNew General Grabber AT2 sidewall punctured by benign looking rock
|
|
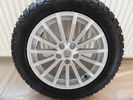
RRS SE 19"Alloy + General Grabber AT 255/55127 views
|
|
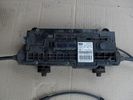
344 viewsBox, general view
|
|

Tekonsha P3 Brake Controller 90195 to Ford 3035-P wiring adapter plug311 viewsThis two page pdf is the general instruction for hooking up the Tekonsha part number 3035-P adapter cable between a Tekonsha P3 controller and the existing Land Rover/Ford plug, (called C2590 in the Land Rover wiring diagrams), that is hidden above the brake pedal.
The "Ford" plug, (C2590), is grey and is stuffed up above the brake pedal arm.
Mount the P3 controller appropriately and then connect one end of the custom cable to the P3 and the other to the "hidden" plug.
You will now have power for your trailer electric brakes in the round socket at the rear of your LR3; also no computer update from the Land Rover T4 unit is required. For once, it is plug and play.
If however, your trailer has LED tail lights, you may have trouble with the flashing of the trailer signal lights or non recognition by the 3 that a trailer is connected. As such, the little green trailer signal will not illuminate when a trailer is connected and the signal lights are used. This can affect the shifting of the transmission and much to your annoyance, the backup sensors will still be functioning rather than being auto disabled.
|
|

General GTs9 views
|
|

Water Leaks - General Info118 views
|
|

1st Disco18 viewsI fell in love but she broke my heart with her unloved braking system and generally being not cared for by her previous!!!
|
|
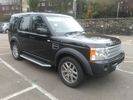
1st Disco13 viewsI fell in love but she broke my heart with her unloved braking system and generally being not cared for by her previous!!!
|
|

ZF 6HP26X-28X Plastic and Metal Pan part numbers and list583 viewsThis 3 page pdf lists the ZF part numbers for the factory metal and plastic pans. Note that the plastic pan is listed as the General pan, and the two metal pans as the BMW and Ford pans. The differences are subtle - drain related it appears.
Torx cap screw descriptions are provided as well as data on the differing gaskets and oil filters.
|
|
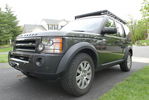
LR3 Front Shot8 viewsShot of my 2006 LR3 HSE with 18" wheels, General Grabber AT2 tires, hidden winch install, and Front Runner Slimline II Roof Rack.
|
|
|
|
|
|
|