| Search results - "Drain" |
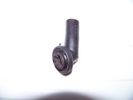
sunroof drain fitting63 views
|
|
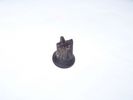
sunroof drain grommet - piece that broke off61 views
|
|

Transfer box drain/fill27 views
|
|

Rear Diff drain/fill27 views
|
|

Front Differential Description and Operation1544 viewsThe 4 page pdf describes of the operation of the front differential plus displays an exploded view of the front differential.
The fill plug is item 36 and the drain plug, item 8.
It is suggested one first unscrew the fill plug before unscrewing the drain plug - and it might take two different wrench sizes, hence get this detail sorted out before any oil drains out.
|
|

41 views
|
|

Alternator and Regulator Wiring Diagrams, TDV6 and petrol V8 and V61989 viewsThis is a three page pdf that shows the alternator and regulator wiring for the petrol V6, petrol V8 and TDV6. The pdf can be either printed or by right clicking on the displayed pdf, rotated as required for viewing.
Of interest is that the regulator gets its instructions primarily from the Engine Control Module (ECM) and only secondarily from the vehicles electrical buss. The conductor from the battery thru the 5 amp fuse F20E is to provide initial power to excite the alternator at startup and then secondarily, to instruct it if the PWM signals were not available. Primary instructions to and from the ECM are thru the two other conductors via a digital like Pulse Width Modulated (PWM) signal.
If F20E, the 5 amp engine compartment fuse box fuse is blown, the red alternator light on the dash will be illuminated. This means that the alternator could be OK, but if the F20E fuse is blown, no electricity will be generated. Hence check the F20E fuse if you get a red ALT light or some indication of the alternator not working.
Regarding operation of the red ALT light on the dash, it is not the regulator within the alternator that tells the red light to illuminate, or not, but instead the ECM. This is the reason the red light does not function in the same manner as with older vehicles. With the 3, sometimes you have illumination and sometimes not depending upon what the ECM is thinking. What this means is that you can have an alternator that is failing but the red light does not illuminate as the ECM is compensating for reduced alternator output - maybe by draining the battery and or cutting back on vehicle electrical loads such as shutting off or cycling the radio amplifier or heated seats.
|
|
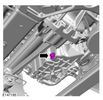
Thread upload13 viewsImage uploaded in thread 158668
|
|

378 views
|
|
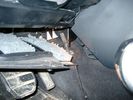
Air Conditioner Drain Hose on Drivers Side (LHD)2297 viewsThe corrugated rubber bit above and to the right of the gas pedal is the drain hose that goes down thru the carpet and floor sheet metal.
While it is bit hard to figure out from the jpg above, there is a rubber "strap" attached to the top of the corrugated hose that one uses to pull on to drag the hose up back around the black plastic heater "pan" drain. The same drain hose arrangement is on the other side as well.
One could I suppose run a plastic snap tie around the vertical pull strap if one was concerned about the hose slipping off again. See also the other jpg sketch which is from the Land Rover manual.
|
|

Auto Gearbox Drain and Refill145 views
|
|

Coolant - Draining Refilling134 views
|
|

Thread upload6 viewsImage uploaded in thread 206753
|
|

Transfer Case Draining and Filling.pdf181 views
|
|

Transmission Fluid Drain and Refill.pdf210 views
|
|

Thread upload8 viewsImage uploaded in thread 22757
|
|

Rear diff draining and filling620 views
|
|
Thread upload10 viewsImage uploaded in thread 126959
|
|

Thread upload5 viewsImage uploaded in thread 191154
|
|

Thread upload5 viewsImage uploaded in thread 191154
|
|

Thread upload5 viewsImage uploaded in thread 191154
|
|

Thread upload8 viewsImage uploaded in thread 191154
|
|

Thread upload1 viewsImage uploaded in new thread
|
|

Thread upload1 viewsImage uploaded in new thread
|
|

Thread upload1 viewsImage uploaded in new thread
|
|
Thread upload1 viewsImage uploaded in new thread
|
|
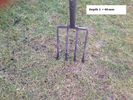
Thread upload2 viewsImage uploaded in new thread
|
|
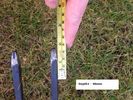
Thread upload1 viewsImage uploaded in new thread
|
|
Thread upload2 viewsImage uploaded in new thread
|
|
Thread upload1 viewsImage uploaded in new thread
|
|

Thread upload2 viewsImage uploaded in thread 187422
|
|
59 views
|
|
47 views
|
|

48 views
|
|

10 views
|
|

24 views
|
|

28 views
|
|
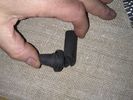
Sunroof drain hose15 views
|
|
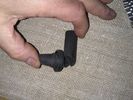
Thread upload14 viewsImage uploaded in thread 116740
|
|

Thread upload2 viewsImage uploaded in thread 125790
|
|

28 views
|
|

Thread upload0 viewsImage uploaded in thread 125790
|
|
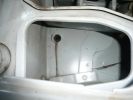
Driver (RHD) Sunroof Drain Pipe98 views
|
|
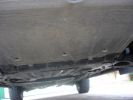
Sump guard, note drain holes to rear454 viewsThe sump guard runs back to the crossmember, it\'s a good idea to drill some large - ish drain hiles as there is no way water and mud can escape once it has entered round the revovery point
|
|

sunroof drain tube 81 views
|
|
Fuel filter drain valve/water sensor34 views
|
|
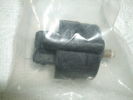
Fuel filter drain valve/water sensor30 views
|
|
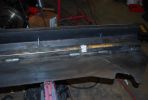
190 viewsA closer look at the drainage channels.
|
|
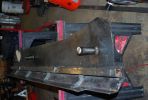
182 viewsAnother shot of the right slider. The center support channel has drainage channels welded in that match the locations of the drain holes on the sill frame.
|
|

just starting to fill7 viewsafter 1 day draining / cleaning
|
|

nearly full9 viewsafter 1 days draining / cleaning / filling
|
|

pump just started8 viewsafter 1.5 days draining / cleaning / filling, pump just turned on
|
|
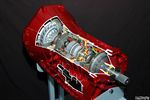
Ford 6R60 six speed cutaway showing torque converter.2198 viewsThis is a cutaway of the Ford 6R60 six speed which is a Ford license built version similar to our ZF 6HP26 six speed speced on early 3's.
The newer 3's and 4's have the ZF 6HP28. The Ford version is called the 6R80 and variations of it are used on the Raptor. As such, the Raptor metal pan can be installed on the 3's tranny but the deeper Ford Raptor pan does not have a drain plug.
|
|
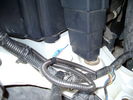
Front coupler pad to right front under air filter housing 160 viewsCoupler Pad is attached to the flat metal surface just behind the rectangular drain off of the air filter housing. The last 3 inches (75mm) of the 1/4" (5mm) black flex wiring loom was then threaded over the last bit of wiring. One of the other jpg's is less washed out and shows the coupler pad a bit better.
|
|
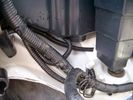
Front Coupler pad to right front under air filter housing 156 viewsThe brighter white "square" behind the black air cleaner drain is the Coupler Pad location I chose for the right front corner. The 1/4", (5mm), black wiring loom carries a single blue colour conductor between the power supply and pad.
A second coupler pad, (white conductor), is located near the left rear tail light. The mounting location is accessible from the rear compartment access "door" where the trailer hitch wiring attaches to the factory loom.
|
|

front diff draining and filling539 views
|
|

Front Diff - drain and fill99 views
|
|

Thread upload97 viewsImage uploaded in thread 103878
|
|

78 views
|
|
Thread upload1 viewsImage uploaded in new thread
|
|

Thread upload1 viewsImage uploaded in new thread
|
|
Thread upload1 viewsImage uploaded in new thread
|
|

Thread upload1 viewsImage uploaded in new thread
|
|

Thread upload1 viewsImage uploaded in new thread
|
|

Thread upload1 viewsImage uploaded in new thread
|
|

Thread upload2 viewsImage uploaded in new thread
|
|

Thread upload1 viewsImage uploaded in new thread
|
|

Thread upload2 viewsImage uploaded in new thread
|
|

Thread upload1 viewsImage uploaded in new thread
|
|

Thread upload2 viewsImage uploaded in new thread
|
|
Thread upload0 viewsImage uploaded in thread 127088
|
|

Thread upload2 viewsImage uploaded in new thread
|
|
Thread upload2 viewsImage uploaded in new thread
|
|
Thread upload1 viewsImage uploaded in new thread
|
|

Thread upload2 viewsImage uploaded in new thread
|
|

Thread upload1 viewsImage uploaded in thread 127088
|
|

Thread upload2 viewsImage uploaded in thread 127088
|
|

Thread upload1 viewsImage uploaded in thread 127088
|
|

Thread upload2 viewsImage uploaded in thread 127088
|
|
Thread upload1 viewsImage uploaded in thread 127088
|
|

Thread upload1 viewsImage uploaded in thread 127088
|
|

Thread upload1 viewsImage uploaded in thread 127088
|
|
Thread upload1 viewsImage uploaded in thread 127088
|
|

Thread upload1 viewsImage uploaded in thread 127088
|
|

Thread upload1 viewsImage uploaded in thread 127088
|
|
Thread upload2 viewsImage uploaded in thread 127088
|
|

Thread upload2 viewsImage uploaded in thread 127088
|
|

Thread upload1 viewsImage uploaded in thread 127088
|
|

Thread upload2 viewsImage uploaded in new thread
|
|

Thread upload2 viewsImage uploaded in new thread
|
|

Thread upload2 viewsImage uploaded in new thread
|
|

Thread upload2 viewsImage uploaded in new thread
|
|

Thread upload2 viewsImage uploaded in new thread
|
|

Thread upload1 viewsImage uploaded in new thread
|
|

sunroof drain pipe156 views
|
|

drainage end disco 4 with greater whole434 views
|
|

67 viewsfill and drain plugs (rear diff)
|
|
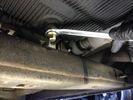
Draining the last bit out of the sump15 views
|
|
Checking the final level at the drain plug14 views
|
|
Thread upload9 viewsImage uploaded in thread 139742
|
|

Thread upload4 viewsImage uploaded in new thread
|
|

Thread upload1 viewsImage uploaded in new thread
|
|

Thread upload1 viewsImage uploaded in new thread
|
|

Thread upload2 viewsImage uploaded in new thread
|
|

Thread upload1 viewsImage uploaded in new thread
|
|

Thread upload2 viewsImage uploaded in new thread
|
|

Thread upload1 viewsImage uploaded in new thread
|
|

Thread upload1 viewsImage uploaded in new thread
|
|

Thread upload1 viewsImage uploaded in new thread
|
|

LAND ROVER DISCOVERY 3 istruzioni CAMBIO OLIO of Transmission Fluid Drain and Refill140 viewsLAND ROVER DISCOVERY 3 istruzioni CAMBIO OLIO of Transmission Fluid Drain and Refill
|
|

LAND ROVER DISCOVERY 3 istruzioni CAMBIO OLIO of FluidPan160 viewsLAND ROVER DISCOVERY 3 istruzioni CAMBIO OLIO of FluidPan
|
|

LR3 Air Conditioner Drain Tubes behind centre console2132 viewsThis shows the two air conditioner drain tubes located left and right under the radio stack.
The tube on the left side, (steering wheel side, LHD), disattached itself and the carpet on the floor under the gas pedal etc became soaked. I think rain water from outside that comes in the outside cowl vents also exits via the tubes as I first noticed the carpet was wet after parking outside during a big rain storm.
It was relatively easy to slide up and reattach the rubber hose that runs from the rectangular shaped plastic discharge hole(s) of the heater "pan" down along the transmission hump area and thru the floor pan. There is a hose on each side of the transmission hump, but only one hose had let go on my 3. The rubber hoses just slide over the rectangular plastic openings of the two heater housing drain outlets.
To get at each drain hose, remove the vertical sort of triangle carpeted piece below each side of the radio stack. The triangles of carpet will just pull away as each is held on with those metal U clips Land Rover so likes. Dislodge each triangle at least sufficiently to get ones hand in to slide the rubber hose back on.
You will rarely see AC water on the ground as the front drains pour onto a metal underside protection skid plate and the rear drain onto the top of the left rear muffler.
|
|

LR3 AJV8 block heater location639 viewsThis 1 page pdf shows the screw in block heater location as related to the lower left side of the engine block.
|
|
Thread upload4 viewsImage uploaded in thread 22757
|
|

ZF 6HP26 transmission fluid drain and refill procedure4040 viewsThis is the Land Rover instruction pdf and I note they have it right - that is remove the filler plug first, then the drain plug. Also before you attempt that, not only do you need oil, but also new fill and drain plugs as the sealing washers are deemed single use only.
|
|

ZF 6HP26 Land Rover Transmission specs1677 viewsThis is just two sheets of paper with various numbers related to the 6HP26 such as oil capacity, gear ratios, and torque wrench settings for the fill and drain plugs.
You may note that LR calls this ZF transmission the 6HP26 whereas ZF calls out the LR3 transmission as the 6HP26X. Just what the differences are, I am not certain however the X refers to 4WD or AWD use as opposed to solely 2WD.
Zahnradfabrik is what ZF is short for and translated from German, roughly means Gear Factory.
|
|
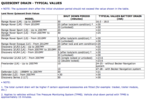
LR Quiescent Drain Table41 views
|
|

LTB00218 - Technical Bulletin - Water Leak into Footwell From Roof Opening Panel Drain Tube97 views
|
|
25 views
|
|
Thread upload17 viewsImage uploaded in thread 146294
|
|
Thread upload7 viewsImage uploaded in thread 22757
|
|

Oil drain plug16 views
|
|

Thread upload6 viewsImage uploaded in thread 200579
|
|

Thread upload6 viewsImage uploaded in thread 200579
|
|
Thread upload5 viewsImage uploaded in thread 200579
|
|

Thread upload13 viewsImage uploaded in thread 146294
|
|
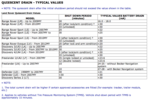
Quiescent Drain Values36 views
|
|

Rear diff - drain and fill96 views
|
|
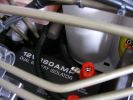
12v Isolator876 viewsEnsures that aux ery won\'t charge until the main batt is topped up and won\'t drain the main batt. I used the biggest I could find to take the load with no stress - especially the higher voltage on the landy. Came as a compete kit and works well.
|
|
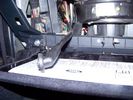
84 viewsSunroof drain with connector
|
|
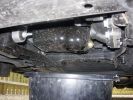
TDV6 sump drain293 views2006 TDV6 oil drain from sump
|
|

Thread upload6 viewsImage uploaded in thread 186792
|
|

Transfer Case Draining and Filling.pdf809 views
|
|

Transfer_Case_Draining_and_Filling36 views
|
|

Manual Transmission Draining and Filling447 views
|
|

Transmission Fluid Drain and Refill.pdf1406 views
|
|

Transmision Fluid Drain and Refill.pdf187 views
|
|
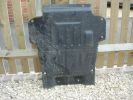
Lower engine bay tray319 viewsLower engine bay tray, 2006 Disco3 TDV6. Needs removing to gain access to sump drain plug.
|
|
Thread upload36 viewsImage uploaded in thread 181159
|
|

Willochra Creek849 viewsCALENDAR 2008 ENTRY
parking in the shade for some tea and lunch in Willochra Creek bed which drains into lake Torrens in South Australia. Three weeks prior, this creek was 300m wide with recent flooding rainfalls.
|
|

ZF 6HP26X-28X Plastic and Metal Pan part numbers and list583 viewsThis 3 page pdf lists the ZF part numbers for the factory metal and plastic pans. Note that the plastic pan is listed as the General pan, and the two metal pans as the BMW and Ford pans. The differences are subtle - drain related it appears.
Torx cap screw descriptions are provided as well as data on the differing gaskets and oil filters.
|
|

ZF 6HP26 Metal Pans, (top and bottom views), and separate Filter top and bottom views.1765 viewsThis single sheet pdf two views of the ZF metal pan for the 6HP26 transmission. The inside view shows the two magnets; the other is the bottom view. Also visible are the transmission bottom oil fill and oil drain holes that are sometimes utilized where access to the side fill is not possible. The ZF part number for the metal pan kit for our 6HP26X six speed is 1068_103_820_01 This includes the 21 shorter Torx screws, the metal pan gasket, and the separate oil filter as well as round filter seal. The ZF six speed LifeGuard6 transmission oil is extra.
|
|

ZF6HP26X fluid fill checking procedure2257 viewsThis are the single page ZF instructions for checking the fluid level in the 6HP26X six speed automatic that is in the LR3.
Included sketches show where the fill and drain plugs are located and that it requires a 8mm hex wrench for the filler plug and a 10mm for the drain for the plastic pan.
|
|
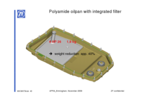
ZF_6HP26_Plastic_Filter_Pan_ combo.png1104 viewsThis is the plastic oil pan on the bottom of our ZF 6HP26X transmissions. Note the two round magnets at the right end of the pan; the drain plug is between them. The filter is the grey part and the vertical oil suction pipe is to draw oil up to the transmission from the filter element. There are 21 Torx screws around the perimeter and the pan gasket is O ring like in design where a half round channel is moulded into the plastic of the pan. The metal pan uses a more conventional flat gasket and in both cases, the metal mating surface of the transmission case is a flat machined metal surface.
|
|

Mechatronic Replacement Hints plus drains for steel and plastic pans1111 viewsThis 22 page pdf shows colour views of the Mechatronic unit as well as good illustrations of the drain and fill ports in both the plastic, page 17, and steel pans, page 18.
Page 8 details the replacement of the sealing sleeve where the electric wire feed thru the case into the Mechatronic unit. The seal is normally replaced when a new pan is installed as the seal is a known leakage point.
|
|

Thread upload18 viewsImage uploaded in thread 110191
|
|
Thread upload13 viewsImage uploaded in thread 110785
|
|
|
|
|