| Search results - "CLOSE" |
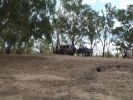
02 On banks of Darling River, Back of Bourke158 views"Back of Bourke" is the typical definition of the start of the Australian Outback. This was after crossing the Darling River "back of Bourke" on 8 Jan 08. We were the first vehicle to start driving after floods had closed (first time in 8 yrs there was any water in the river).
|
|
116 viewsFinal placement after 3rd row seats closed down
|
|
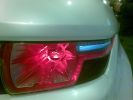
LRX Rear Light Close Up52 views
|
|
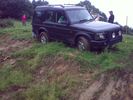
Almost a roll, but not quite...55 viewsI\'d \'launched\' myself at a 6ft hill and got to the top- but at an angle- the offside rear gripped and pulled us around to the right- perilously close to the edge... time for spare undies I think...
|
|

09 Starting to remove the seized brake assembly296 viewsBy this time we\'d poured about 8l of water on the dull-red glowing and burning wheel assembly (too close to 140l of 98 octane petrol). Sudden cooling cracked the disk brake which showed mangled park brake parts. How to remove a brake disk without the right star fitting? First remove the caliper then get a sledge hammer?!!
|
|

22 views
|
|
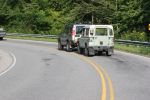
Following too close369 views
|
|
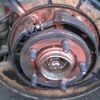
close up view of of rear hub assembly85 views
|
|
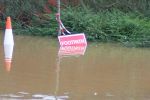
Footpath Closed157 views
|
|
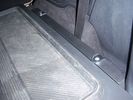
Sliding door bracket floor in closed position26 views
|
|
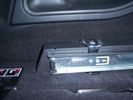
Close up of side runner, showing load hooks countersunk into runner .24 views50%
|
|

This picture was taken with garage doors closed.43 views
|
|
![Filename=100_2781[1].JPG
Filesize=252KB
Dimensions=1280x960
Date added=13.Oct 2014 100_2781[1].JPG](albums/userpics/22146/thumb_100_2781%5B1%5D.JPG)
front cam close up26 views
|
|

Virgin Snow134 viewsWent for a play in some new snow so I could practice and get my driving style right on close to zero friction surfces. Hard to tell from this photo, but car is parked on a 1:6 slope heading uphill, with hard packed ice under the fresh snow covering. I stopped here to practice my hill starts on ice...I was there for some time :)
|
|
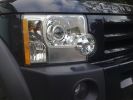
led close176 views
|
|
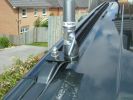
353 views
|
|
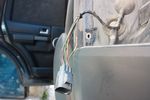
94 viewsReverse wire stripped. I then soldered the wires which I need to this wire and close up with self amalgamating tape. This way I don't damage any original wires (except for the insulation) and it's easily reversible by desoldering
|
|
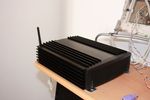
84 viewsCarPC closed
|
|
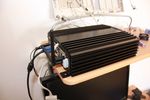
81 viewsCarPC closed and ready for mounting. Note the modification to the rear of the case to allow extra USB sockets attached to the motherboard pins.
|
|
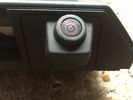
Reverse Camera/ from My 2013/14 close up10 views
|
|

Repair Closeup2177 viewsWOW! Paint saved!
|
|

Repair Closeup177 viewsWOW! Paint saved!
|
|

Damage closeup 2195 views
|
|

Damage closeup 1150 viewsWhat happens when you lean the car on a mud wall.
|
|
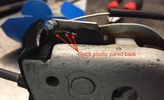
Close-up of lock showing emergency cable and pared back plastic tab141 views
|
|
Thread upload18 viewsImage uploaded in new thread
|
|
6 close view of where the pocket is bonede to bottom of dash58 views
|
|

Alternator female plug looking down into top373 viewsThis shows the plug connected to the alternator wiring harness looking down into the top of the plug.
The cavity marked 1 is the AS or BATT SENSE and the wire colour most likely has Brown/Green on it.
The cavity marked 2 is the RC or ALT CON and the wire colour most likely has Red/White on it.
The cavity marked 3 is the L1 or ALT MON and the wire colour likely has Green/White on it.
I say "most likely" as the wire colours are not always the same on all vehicles.
Also the terminal 1 conductor destination is more likely C0570-175 rather than per the jpg.
The #3 pin is located closest to the big B+ terminal.
|
|
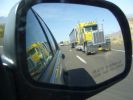
Objects in the rear view mirror are closer than they appear.251 views
|
|
Thread upload49 viewsImage uploaded in new thread
|
|
Thread upload28 viewsImage uploaded in new thread
|
|

Annex closed up40 views
|
|
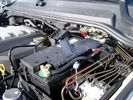
BCI Group 40R Deka 640RMF battery showing vent hose run forward to windshield washer reservoir area 1430 viewsRecessed post "Euro profile" battery to "match" OEM and stock Land Rover bracket; note that the Traxide SC80-LR module is mounted at an angle to allow for the main cable to sit under the cover so cover still closes.
The battery is a nominal 7", (180mm), high, but sits on a 1" battery spacer set under to raise the bottom front end of the battery such that the approx 11", (290 mm), length of the BCI 40R battery rises above the angled plastic nibs at the forward end bottom of the case front; hence sufficient space, (1/4", 5mm) remains at the brake reservoir end.
Also the 40R battery does not have hold down "flanges" on each end; on the sides yes, but not the ends so no additional length is required.
When I had to replace the 40R, this time I installed the shorter, (9.625"), taller, (7.5") Interstate BCI 47 / DIN H5 battery which eliminated the spacer on the bottom and better fit the stock LR tie down bolt lengths. Deka also has a BCI 47 / DIN H5 that would work fine as well.
|
|
Thread upload82 viewsImage uploaded in thread 52879
|
|
Thread upload11 viewsImage uploaded in new thread
|
|

Thread upload11 viewsImage uploaded in new thread
|
|

Thread upload10 viewsImage uploaded in thread 167376
|
|
86 views
|
|
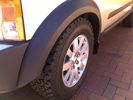
Close-up of BFG51 views
|
|

Biker163 viewsLook closely and laugh... I dare you to! (image courtesy of moob.com)
|
|
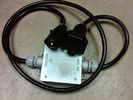
Box Closed with 7 Blade NAS connectors586 viewsBox closed up and ready for use. The box and cable connectors are reasonably weather tight and hence can be submerged for a bit while doing a creek crossing but as with the 3, do not use the creek bed as a parking stall. Similarly, the connector recessed into the bumper will probably remain somewhat dry as long as you keep moving but if you get stopped, well that is another story.
As such, I put a vial of desiccant in the metal box prior to closing it up to reduce corrosion due to moisture build up.
|
|

Black Deposits to interior of Brake Light Switch2862 viewsThere are two contacts, one on each side of the vertical plunger under the copper metal. The set of normally open contacts on the left side that carries the power for the brake light filaments, (15 amp fuse F15P), is apparently not heavy enough as the contacts deteriorate and generate the black residue.
The set of normally closed contacts on the other side appear to be sized OK. There is not as much current, (5 amp fuse F66P), flowing thru the contacts to the ABS module, however the contacts are likely adversely affected by the black residue produced by the other deteriorating set of contacts.
One presumes/hopes that the newer replacement switch now has contacts heavy enough to carry the brake light power. It would be ideal if the ABS set of contacts were sealed from the brake light contacts to prevent contamination of the normally closed set of contacts.
|
|

Brake Light Switch, Find, Remove, and Install Instructions 7853 viewsThis is a two page doc outlining where to find the brake light switch, how to remove it, and then install the new one.
Note, do not move the brake pedal when removing or installing the switch. Let the brake pedal hang where it wants to. The switch design is actually cunning, and as such is supposed to make the removal and install fool proof. Hence if you think too much about it, you can wreck the new switch.
If you want to inspect the interior of the switch, wait until you have removed the old switch. You can then just unsnap the blue from the white to get it apart. Inside, the switch is quite simple, (no circuit boards), but it will probably show black dust from failing contacts.
I think the reason the switch fails is that the Normally Open, (NO), contacts of the brake light contacts were made too light to carry the current load for make and break of the tail light filaments. I also think the black dust created then fouls the Normally Closed, (NC), second set of contacts for the ABS circuit. As such, the Normally Closed contacts become intermittent in operation and display as a fluctuating open and closed circuit condition to the ABS system when the ABS should be seeing a steady closed circuit. Hopefully the replacement switch contacts are more robust and may be as I recently replaced my switch again just as a matter of maintenance. While in a redesign, ideally the NC contacts should be sealed or at least separated from the NO contacts, when I inspected the removed switch, this time there was no black dust present.
Probably the removed switch will have a Land Rover oval logo moulded into it, the new one, FOMOCO.
|
|
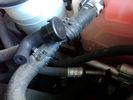
Breather line with factory cap cut off.2320 viewsIf you expand the jpg by clicking on it, in the bottom right corner if you look closely, one can see the black plastic factory vent tubing with the OEM cap cut off.
Note the tubing is cut at a 45 degree angle facing to the rear. Also shown in the top right is the cut off portion sitting on the coolant water hose and on the top left also sitting on the coolant hose, the new to be installed Gore manufactured replacement breather cap.
|
|

Wild Stag Up Close & Personal123 views
|
|
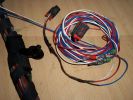
Burnt Bit97 viewsThis bit of wiring going to the connector was so close to bulkhead it got a bit burnt, Its for the clutch switch on a manual used for EPB, It will be replaced connector to pin with the wiring shown.
|
|

Central Door Locking Operation Description1458 viewsThis 17 page pdf explains how the door locks are supposed to operate. Note that on page 9/17, the explanation of the operation of the hood ajar switch is wrong. It operates similar to the door and tailgate ajar switches; that is when a "door" is closed, the switch is closed to maintain a ground back to the CJB. Opening the hood, door, or tailgate removes the ground breaking the circuit and hence allows for an alarm condition.
|
|

37 viewsClosed and close
|
|
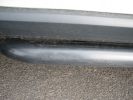
Side rails259 viewsThe side rails have been bent up and are touching the sill. At least they have protected the sill.
|
|
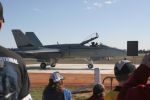
Close shot Fa-18 Temora124 views
|
|

Thread upload5 viewsImage uploaded in thread 200758
|
|
Thread upload3 viewsImage uploaded in thread 185287
|
|

Thread upload16 viewsImage uploaded in thread 184913
|
|

Thread upload7 viewsImage uploaded in thread 207733
|
|

Thread upload11 viewsImage uploaded in thread 137816
|
|
Thread upload15 viewsImage uploaded in thread 149781
|
|
Thread upload9 viewsImage uploaded in thread 156978
|
|
Thread upload12 viewsImage uploaded in thread 167940
|
|

357 viewsIf you look closely you can see the fuel burning heater exhausting!
|
|
41 views
|
|
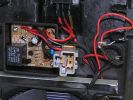
Wire photo210 viewscut wire close up
|
|
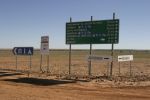
Close to the Dig Tree67 views
|
|
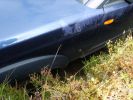
Close for comfort....316 views
|
|

ARB air compressor switch, gauge, outlet.313 views
|
|
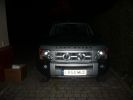
LF close together190 views
|
|
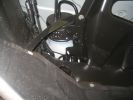
86 viewsCloseup of the cylinder/reservoir on front LHS of spare wheel well.
|
|
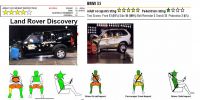
D3 vs X5 in NCAP crash test412 views Looks that D3 was as close as it can be to get 5 stars but falled JUST below the 5 star limit.
|
|
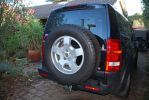
311 views
|
|
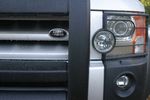
Front badge close up83 views
|
|
157 views
|
|

Hog Rings and Hog Ring Pliers47 viewsHog Rings and Hog Ring Pliers showing an open and closed hog ring with 20p for scale
|
|

sunvisor close1 views
|
|
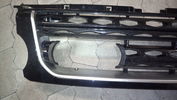
Modified grill - close up91 views
|
|

27 views
|
|

Ford at Packington - West Mids470 viewsHard to belive this is right by the M42 and M6, and really close to the NEC
|
|

Nearside close up shot with boot trim removed252 views
|
|
closer look38 views
|
|
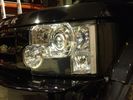
Close up90 views
|
|
Thread upload6 viewsImage uploaded in thread 126959
|
|
Thread upload7 viewsImage uploaded in thread 158202
|
|
Thread upload2 viewsImage uploaded in thread 187040
|
|
Thread upload7 viewsImage uploaded in thread 165363
|
|
Thread upload10 viewsImage uploaded in thread 166723
|
|
Thread upload16 viewsImage uploaded in thread 168601
|
|
Thread upload6 viewsImage uploaded in thread 176189
|
|
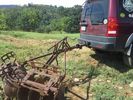
LR3 to plow your garden298 viewsI found this jpg where a current LR owner is using his LR3 for a similar purpose as the original Series units were designed to do - that is serve as a tractor for plowing a field or I suppose a garden.
In this case, I note the hitch is one of those that attach to the factory tow loop, (Rhino Hitch), rather than the factory product that inserts from the bottom and hangs down - (like a plow), but all the time. One of the other jpg's in this album shows the two factory variations plus a third jpg shows a closeup of the Rhino Hitch.
|
|

13 views
|
|

Garage door closer12 views
|
|
Thread upload6 viewsImage uploaded in thread 157786
|
|

ding close-up131 views
|
|

v8161 viewsclose call this weekend
|
|
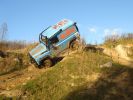
v8133 viewsClose call this weekend
|
|
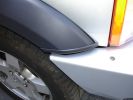
ARB Bull bar - closeup of drivers side showing trim finish.244 views
|
|
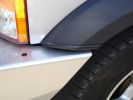
ARB Bull Bar - closeup showing trim finish of Wheel trim.224 views
|
|
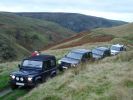
Gate Closers Group406 views
|
|
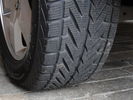
Winter tread close-uo68 views
|
|
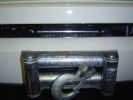
Closer look.201 views
|
|
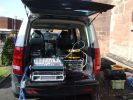
Expensive table?198 viewsOne of the better, if little, publicised advantages of the Disco3 is the split tailgate. Here its serving as the desk area at an outdoor event I was doing sound for. Rain was threatening so the amps got slung back inside rather than sat on the floor, other stuff was either in closed boxes or had to take its chances....
|
|
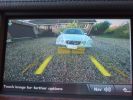
Getting Closer (yellow)292 views
|
|
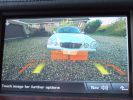
Getting Closer (Amber)281 views
|
|
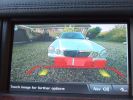
Getting Closer (red)332 views
|
|
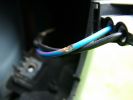
Close-up on wire408 views
|
|
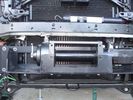
Close-up front view of partially-installed winch121 viewsNote that the sheet-metal flange just above the winch had to be notched to allow winch controller to be actuated. Also this same bracket had to be bent upwards to allow the winch hydraulic:electic solenoid to fit without rubbing. The nut on the upper-left bolt (the one with a very faint circle around it) stripped on re-installation, so the tray and winch pulling load is held only by the threads on 7 bolts....
|
|
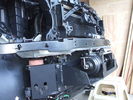
Front-right view (looking forward) of partially installed winch and mount124 viewsThe closest bracket, with three rubber grommets, is the air bag sensor. Before beginning any of this work, be sure to disconnect battery and discharge any remaining electrical power. I didn't want to accidently drop this assembly and cause the airbags to deploy.
|
|

400 viewsCloser view of leftside impact absorber. Note the thin piece of plastic I placed between the absorber and the cooling system component. Note air suspension hoses covered by protective tubing at bottom of photo.
|
|
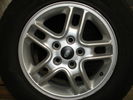
17" rim171 views1x with some kerbing, see close up photo for worst bit.
|
|
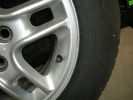
17" rim157 viewsclose up of kerbing on 1 rim
|
|
Roof Bars closer84 viewsRoof bars for sale, showing small cut/nick
|
|
190 viewsA closer look at the drainage channels.
|
|
190 viewsGetting closer to the finished product. The steel tube in the middle reaches up to the body mounts on the frame.
|
|
The swinging lump of iron that sit under the back,871 viewsLook how close it is to the wiring!
|
|

tent closed from the backside415 views
|
|
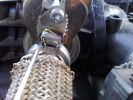
How to re-close the EGR clip with common tools160 views
|
|

Thread upload14 viewsImage uploaded in thread 156670
|
|
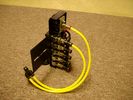
FASKIT on end view 864 viewsEnd and rear view of the FASKIT. Yellow lines are as shipped for hooking to the air supply; one line to valve/filler and other is to gauge. I will modify the arrangement to delete one of the yellow lines such that gauge line plugs into where the second yellow line is right now,(will be only one yellow tube), and then the air source line will plug into the port controlled by the valve, (hidden in this view but visible in other view). When white valve is in the ON position, gauge will read air source pressure, and be available to supply air to any of the selected four air springs. When valve is closed, the gauge will show individual air pressure in each of the air springs when a jumper is run between the gauge Schrader valve and the appropriate air spring Schrader valve.
|
|

Pass seat wiring108 viewsClose up showing the re worked Pass seat wiring on the D3 loom next to the sport one.
|
|
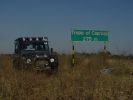
Close to the capricorn121 views
|
|

40 views
|
|

Thread upload4 viewsImage uploaded in thread 186018
|
|

Thread upload3 viewsImage uploaded in new thread
|
|

Thread upload2 viewsImage uploaded in new thread
|
|

Thread upload2 viewsImage uploaded in new thread
|
|

Thread upload2 viewsImage uploaded in new thread
|
|

Thread upload2 viewsImage uploaded in new thread
|
|

Thread upload2 viewsImage uploaded in new thread
|
|

Thread upload2 viewsImage uploaded in new thread
|
|

Thread upload2 viewsImage uploaded in new thread
|
|

Thread upload1 viewsImage uploaded in new thread
|
|
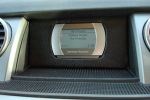
169 viewsClose up view of Drive & Play screen
|
|
Heat_seat_close view76 views
|
|
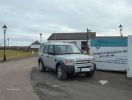
It was mostly closed ...169 views
|
|

close up side tints 15% mesh63 views
|
|

close up of side tint 15% mesh61 views
|
|
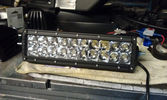
close up of E Series 71 views
|
|
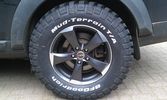
Close up17 views
|
|

Close up - Solenoid16 viewsA close up of the solenoid which is installed close to the auxiliary battery bay.
|
|

Close up - key removed18 viewsIn the center is the added switch with removable key.
Here the key is removed.
This is to add an additional 'protection' from discharging the auxiliary battery in case other people are working on the car and accidentally switches on any electrical bit :)
|
|

Close up - key in place16 viewsThe key placed and turned in order to turn the switch on.
Everything connected to the fuse box in the rear and the fog lights on the roofrack will work now.
|
|
mountains getting closer22 views
|
|
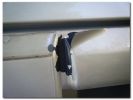
drivers side close up165 views
|
|
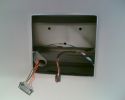
close-up of dome light wiring loom189 views
|
|

I\'ve been offroad120 viewsSee the raised suspension and close proximity of some real mud.
Didnt put a foot wrong all trip!
|
|

Close up 72 views
|
|

Aux battery fuse box19 viewsClose up of fuse box
|
|
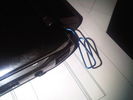
Netbook external switch closed69 views
|
|
All four wheels off224 viewsHopefully the closest I\'ll come to the whole body off!
Note: Those aren\'t my new tyres.
|
|
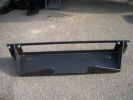
1519 viewsHere is a close up shot of the winch mounting bracket
|
|
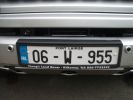
1523 viewsA close up of the numberplate in its origonal place
|
|
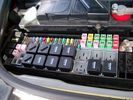
Picture of the engine compartment fuse panel5780 viewsEngine compartment fuse panel located near the battery. This is where F3E, (5 amp), F26E, (20 amp), Fuseable link 10E, (60 amp) and Relay 7E, the now upgraded 70 amp air compressor motor relay, part number YWB500220, (E is for Engine compartment fuse box), are all located. Fuse F35P, (5 amp), is inside the Passenger compartment behind the lower glove box door.
To keep the suspension from going down to the stops when driving, (or parked), it appears that it is only really necessary to remove F26E to depower the exhaust valve and generally keep all the valve block solenoid valves in a closed position trapping whatever air is within the air springs. F3E gets its power thru F26E, so when F26E is removed, the F3E circuit is automatically de-powered. F35P is more interesting in that battery power goes thru the ignition switch and F35P and then into the air suspension control unit. Apparently however, if F26E is removed, removing the F35P is not needed even when the engine is running.
With all fuses still in, if you have a problem, in practice, ideally, the compressor still works and will raise the 3 to an appropriate height. If so, one can then shut the engine off and allow the computers to go to sleep and then you remove the fuse(s). In actual practice, it seems that one need only pull the F26E fuse and can do so with the engine running. All the same, one might consider that the 3 is first a mobile computer, and secondly a 4x4. Computers prefer to go to sleep before the plug is pulled on them, however given that F26E circuit is always alive, then the computer never sleeps. With the fuse(s) pulled, and if you are still up, you can now be a 4x4 instead of a low rider. The whole purpose of the fuse pulling exercise is to depower the one and only system exhaust valve that is physically located within the compressor unit, (to keep it from opening), and secondarily to keep closed the four air spring solenoids within the block valves. This also shuts the air compressor down and stops the air compressor from making air even if the compressor is still good. That is why you initially need the fuse(s) in to allow the compressor to make air if it can.
|
|
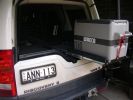
Fridge will slide above closed bottom tailgate222 views
|
|

in the ditch70 viewsanother view of my car getting close to the edge
|
|

Carbon wrap close up47 views
|
|
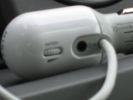
Close up...406 viewsSorry, this is blurry ! Oops...
This is a close up of the adapter itself... There is a 3,5mm input for the connection to the iPod. There is also a volume button. I don\'t use this because of interference between my quite old iPod and that system. But it does charge the iPod through the dock adapter.
|
|

Arse end with new chrome tails, dog box and DVD if you look closer468 views
|
|
Mantec close up144 views
|
|

led boot space light upgrade96 viewsClose up showing how easy the led ultra bright modules fits into original housing
|
|
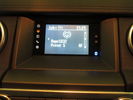
D4 Lowest Grade Radio - Screen Closeup72 viewsThe monochrome screen with colour-lit icons on the left to indicate source, and bluetooth icon on the right to indicate connectivity. There are also two hardware buttons for hour/minute clock setting.
|
|
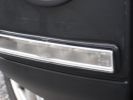
Day Light Driving lights236 viewsClose up of the outside.
|
|
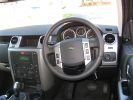
Interior Close MY200879 views
|
|
81 viewsNowhere closer to get a grip
|
|
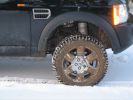
Exnteded Mode Close Up225 views
|
|

RRS wheels closeup34 views
|
|

Close trees55 views
|
|

Dribbling into footwell here from closed door23 views
|
|

Close up of the 6-LED bulb that I used to replace the standard bulb.372 views
|
|
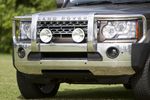
Australian LR D4 Bumper/bar close up63 views
|
|
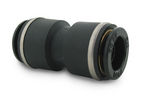
John Guest DOT all plastic fitting718 viewsThis is a picture of the John Guest DOT all plastic union. If you look closely, you can see the DOT imprinted in raised letters on the end of the fitting. This is of a 1/4" connector rather than the 6mm that the 3 requires.
The picture is similar to the air suspension pneumatic fitting union that Land Rover sells as replacement part # STC8580. This is for 6mm OD tubing size. The STC8580 comes with what are called "Collets" at each end that cover up the press to release feature underneath. See the John Guest web site www.johnguest.com under the Pneumatics section and also in Downloads for their catalog for install and remove instructions.
The actual "air brake spec" fitting that Land Rover provides has an interior 4mm OD ferrule that slips inside the 4mm ID of the nominal 6mm tubing. I have not yet been able to obtain the John Guest part number for the LR fitting, only the LR part number. This part number was generated for the RR Classic air systems.
|
|
112 views
|
|

Thread upload3 viewsImage uploaded in new thread
|
|

29 views
|
|
Thread upload1 viewsImage uploaded in new thread
|
|
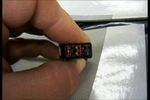
mat plug close103 views
|
|
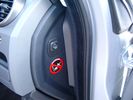
Air Suspension ECU Fuse 35P cut off switch.3821 viewsThis shows the SPST rocker switch mounted in the blank plate installed in lieu of a manual passenger side air bag shut down switch - now automatic via passenger seat pressure switch. Fuse 35P (5 amps) is located in the interior fuse box behind the lower glove box and protects the ignition power supply to the Air Suspension ECU. When the SPST switch is moved to the OFF position, the RAISE /LOWER switch on the centre console is not powered, and hence does not function. As such, some signals from the wheel height sensors and CPU are ignored. By itself however, removing F35P will probably not stop the 3 from self dropping, particularly after the engine is turned off.
Fuse F3E, (5 amps), located in the engine bay fuse box by the starting battery protects the circuit that provides feedback to the Air System ECU indicating that the Compressor Relay has successfully operated and that the Air Compressor is or should be operational, can also be removed, (but is probably not totally necessary), as it gets its power thru F26E. Hence Fuse F26E, (20 amp), also located in the engine compartment fuse box is the fuse that must be removed. This fuse protects the circuit that provides full time battery power to the Air System ECU. When in place, current thru the fuse powers the periodic re-levelling action, (usually lowering a bit with that brief air release noise), that often occurs when the vehicle is parked and the engine is off.
Removing F26E fuse will stop the auto levelling action and also inhibit any other down to the stops signals, (engine running or not). When F26E is removed, no power can flow thru to F3E, hence removing F3E is more for insurance than an absolute requirement. The same with F35P, removing F26E removes primary full time power from the Air Suspension ECU, and hence removing the F35P fuse should not really be required either as long as F26E has been removed.
|
|
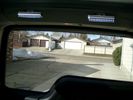
Boot lighting, looking to rear - hatch closed 543 viewsView shows the lights mounted in the rear on an early spring day.
In operation, the lights are tilted so that they shine downwards. The lights are mounted high enough up that one cannot see the LEDs from the front thru the rear view mirror; also the LEDs are so directional, that no light is thrown on the side glass.
Each assembly contains 15 LEDs, however the reflector is such that the LEDs appear to double.
|
|
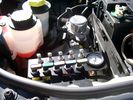
View of mounted panel from front left side878 viewsNote that all valve handles are shown in the OFF position, (the trouble position). In this case, the air that is in the air springs, (if any), is trapped in there - that is the valve blocks cannot vent whatever air is already in the air springs as the air lines between the springs and respective valve blocks are closed off by the FASKIT valves. In operation, there may be only trouble with one air spring, (perhaps a wheel height sensor), and as such, only one valve would need to be closed. If there was complete air compressor failure, then all valves would be closed and then as required, each spring could be manually filled from an outside clean dry oil free air source.
|
|
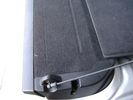
Flexible wire rope fishing leader 0.032" diameter exiting carpet 1949 viewsThis is all you see of the completed mod.
The short little angled "line" about an inch long that looks like a piece of debris and is located a few inches "above" the support cable is actually the wire rope release cable exiting from under the carpeted lift gate cover.
I drilled a very small hole in the carpet and pushed the 0.032" diameter release wire thru and then slipped the loose end under the black plastic.
To release with the lift gate etc closed, from the inside, just pull the loose end free from under the black plastic and gently pull wire about 5mm, (1/4"), and the upper door catch should release. You will have to manually push the upper door out wards to actually effect opening, but you will already be inside the rear cargo area so that part is easy to do.
The assumption is that the lower door latch still works electrically and hence, the lower lift gate half will open as normal by pressing the usual button on the top left of the lower door half.
|
|

lr3-kaymar-closed with 20"405 viewsthe kaymar carrier, designed to allow two tires, sets them both a bit outboard, thus blocking the lamp. that\'s when I realized why they put the fully functional lamps in the bumper (functions: running, brakes, signals, hazard)
I plan to re-weld the locating section more towards the middle of the rear similar to Disco II orrientation.
|
|

relocation of stuff to allow gigantic battery installation. The hood/bonnet barely closes wihout trouble.383 views
|
|

Ashtray Slide6 viewsThis is a quick drawing describing how the ashtray stays in. There's a pin that rides through this channel, gets caught to stay closed, and pushing t in releases the catch.
|
|

LR3 Brake Wear Sensor Wiring1517 viewsThis 1 page wiring diagram pdf shows that both the front and rear brake pad wear sensors are part of a closed series circuit to ground.
In operation, when all is good, the series circuit is grounded and the amber brake wear warning indicator on the instrument panel is not illuminated.
When the pads on one wheel, either the left front, or right rear, become too worn, the respective sensor is "cut" which results in an open circuit condition. This causes the dash brake wear indicator to illuminate.
The circuit is like the old style Christmas light strings where one burned out bulb caused the whole string to go out.
A quick field fix to get the dash light to extinguish in lieu of replacing the sensor and pads etc is to disconnect the brake pad wear sensor and short across the two open conductors of the vehicle side connector plug. This of course means you now have a normal vehicle, one of the thousands that do not feature brake pad wear information systems.
|
|

LTB00313 - Technical Bulletin - Ashtray Will Not Close Ashtray Carrier Availability117 views
|
|
328 views
|
|
239 views
|
|
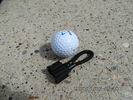
MOST fiber optic loop tool469 viewsThe looping tool in the jpg uses the Land Rover type plastic fiber optic cable with both ends feeding back into a female fiber optic connector that mates with the male fiber optic connectors on the Land Rover system.
The purpose of the loop is to allow one to disconnect MOST connected items such the BlueTooth module or the HK amplifier but allow the MOST system to still transmit signal from the head unit as the circuit would remain closed and hence complete. Of course with the Bluetooth module disconnected, there would be no Bluetooth available, however the radio and NAV would still function.
The looping tool allows one to troubleshoot the system by removing one component at at time from the MOST loop. In other words, what might appear to be a radio problem could be a Bluetooth problem - that sort of thing.
|
|
88 views
|
|
Thread upload8 viewsImage uploaded in new thread
|
|
![Filename=naked_ass-close_up [iPhone].jpg
Filesize=34KB
Dimensions=480x320
Date added=09.Feb 2011 naked_ass-close_up [iPhone].jpg](albums/userpics/13223/thumb_naked_ass-close_up%20%5BiPhone%5D.jpg)
556 views
|
|
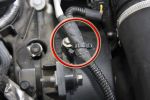
Tie-Wraps774 viewsWhen the EGR pipes are removed, you lose the brackets these cables are normally secured to because the brackets are part of the pipes. This is my solution to the problem - refit the bolts with an almost closed tie-wrap around them, then slip a new tie-wrap through the loop on that one and around the cable.
|
|

new wild friend16 viewstwo wild pigeons kept coming to the garden, putting food down allowed us to get close for the photo.
|
|
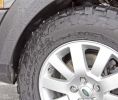
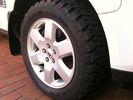
Front tire clearance288 viewsNote the close fit in normal height of the Nitto Terra Grappler 285/60 R18. I\'ve had no rubbing yet.
|
|
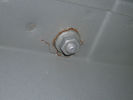
Disco 3 Roof Rail Failure74 views
|
|
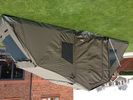
RV4 & Tag a Long side closed in36 views
|
|
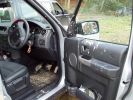
Somebody forgot to close the window!!!199 views
|
|
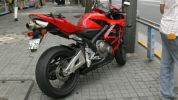
Honda CBR166 viewsNote nice wear on rear tyre edges in the close up view.
|
|
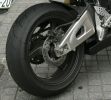
Closeup View - Honda CBR193 viewsShowing feathered edge on a bike that is obviously ridden like the rider stole it!
|
|
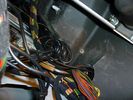
firewall plug run855 viewsThrough the firewall to the right of the brake master cylinder. On left hand drive, this hole would be closest to the outside edge of vehicle.
|
|
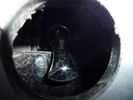
close up of 1 1/4" access hole493 viewsView of the 1.25" inch access hole. You can reach your finger or a screwdriver in this hole to move the lever up or down. It will be fitted with a rubber plug when not in use (and when found).
|
|
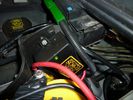
Traxide SC80-LR mounted598 viewsA close up showing the angle, mounting bolt. Only a single top bolt can be used, there are metal lines behind the lower bolt hole.
|
|
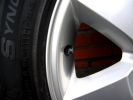
Close up of powder coated wheel225 views
|
|
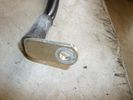
Negative Battery Cable159 viewsClose up of the corrosion damage to negative cable.
|
|
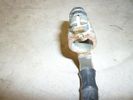
Negative Battery Cable164 viewsClose up of the corrosion damage to negative cable.
|
|
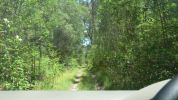
Pine Road107 viewsForestry track but generally good condition. Later discovered Forestry had closed the track. Had to seek alternate access.
|
|
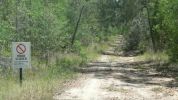
Pine Road - Road closed sign108 viewsForestry track/road (11 km north of Iluka turnoff along Pacific Highway) but blocked about 3 km along. Took Thompsons Road to rejoin highway but had to negotiate a swampy area with fallen trees across track. Road impassible without chainsaw so found a private road and headed towards Glencoe Road using a Telstra track.
|
|
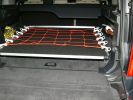
Sliding floor - closed position515 viewsMaterials: 17mm formply, ex 1000mm piano hinge, 2x Haefele 160 kg sliders, timber brackets for the floor to connect the sliders, aluminium angle for leading edge, 50x3mm aluminium flat drilled for the tie-down net connectors, 2x galv iron flat folded to form angle brackets (to secure sliding loadspace to floor), 1 square metre of black carpet to match the back of the seats.
|
|
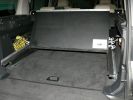
Sliding floor - in closed position with floor panel open to gain access to tools, etc.500 views
|
|
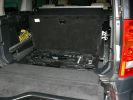
Sliding floor - in closed position with floor panel open to gain access to tools, etc.477 views
|
|
close up409 viewsdetailed poor fit
|
|
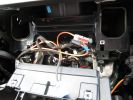
278 viewsClose up of the cavity for the Nav screen. Here you can see the XM Satellite receiver antenna cable snaking across. It\'s the thin wire not bundled to anything. In the lower corner you can also see the power cable going to the glove box.
|
|
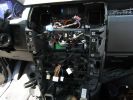
278 viewsA mess of cables. You can see the HD Radio antenna adapter coming out into the slot for the IHU. You can also see, if you look very closely, the original diversity antenna connector plugged into another adapter to go down to the HD radio unit.
|
|
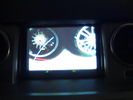
close up306 views
|
|
Raised air close up85 views
|
|
89 views
|
|
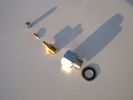
Reservoir Air In fittings exploded view 1893 viewsThis shows the fittings required for the mod. The reducer adaptor requires a 27mm socket and is M20 x 1.5 male thread x 1/4" NPT female. The 1/4" male NPT Schrader valve has the standard valve core removed and an AN/MIL spec aircraft oleo strut valve installed instead.
A standard automobile valve is rated at 200 psig, (14 bar); the air tank runs closer to 244 psig, (16.8 bar), with the relief valve set to open between 334 psig, (23 bar) and 370 psig (25.5 bar). The aircraft valve is rated at 2,000 psig, (138 bar).
|
|
close cam68 views
|
|
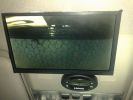
close reverse cam139 views
|
|

Thread upload17 viewsImage uploaded in new thread
|
|
Thread upload1 viewsImage uploaded in new thread
|
|
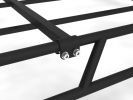
Close up of cross bar fixings263 viewsClose up showing how our crossbars fit our rack
|
|
Thread upload2 viewsImage uploaded in new thread
|
|

Frodo53 viewsIf you look closely will will find a Frodo Figure.
|
|
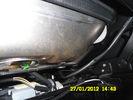
76 viewsup close wiring to the seat
|
|
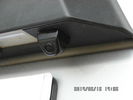
Tailgate Camera located above license plate.598 viewsThis aftermarket camera is mounted on my 2005 LR3 in almost the same location as the factory cameras. The factory units are mounted somewhat more forward closer to the metal of the tail gate and I could have done the same as well.
Note that the camera above is aimed a bit towards the centreline of the vehicle per the factory install.
|
|
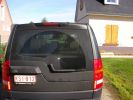
what you see tailgate closed125 views
|
|

Close to the Geographical centre of the Simpson desert34 views
|
|

Snake Pass Road Closed95 views
|
|
358 views
|
|

Superinjunction85 viewsBefore Ryan Giggs was exposed as the two faced, nice as pie in public yet screwing any that moves behind closed doors hypocrite he is it was public knowledge that the woman in the story was some slapper from Big Brother but the footballer could not be named. Here we see TNT magazine's top story about her saying the footballer can't be named. Directly underneath is a link to a "related story" was a link to "Ryan Giggs, wife and kids celebrate Manchester United victory"
|
|
Thread upload0 viewsImage uploaded in thread 133933
|
|
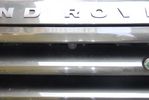
front view camera133 viewsThere is a small front view camera. which allows me to see the street and objects close in front of me. It actually is a D4 Rear view camera that turned out to be useless in the back because it did not produce a mirrored image.
In the front it looks like it is designed to be there.
|
|

Thread upload7 viewsImage uploaded in thread 161807
|
|

Front Runner Y style rear tyre carrier 583 viewsThis is the new Y or D shaped Front Runner, (out of South Africa), brand of rear bumper mount tyre carrier.
The big deal is the new self latching mechanism.
|
|

Bono and Larry up close253 views
|
|
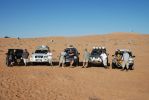
The team photo104 viewsTaken at the finish point - just 60 km from the nearest blacktop road! A Challenge indeed, especially as at this point fuel in 3 cars was close to the red line with 20 litres of reserve between all 5 cars!
|
|
Thread upload16 viewsImage uploaded in thread 133335
|
|
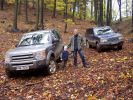
close to Buchlov Castle123 views
|
|
|
|
|