| Search results - "Air" |

RRSport Auto TDV6 0-100-0 times and G Forces156 viewsAir Temp 18, Dry conditions.
Best Acceleration G was .785 and decelleration G was 1.55
|
|

0000 LR Bluetooth dealer Kit install instructions1608 viewsThis 17 page pdf is mostly a series of pictures showing how to install the original Land Rover dealer installed Bluetooth kit for circa 2005 / 2006 three's. Also included are three wiring diagrams sheets related to the pairing code 0000 Bluetooth install.
This pdf is useful if you are now removing the 0000 kit to install the optical 2121 MOST D4 module, an easier install than the 0000 kit ever was.
|
|

remove relay 7 - pair of plyers is proberly easiest 862 views
|
|

Put a link wire in these 2 holes (use a fairly thick wire ) - compressor will start ..you do not need the ignition on 941 views
|
|
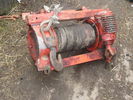
fairey 1.15 views
|
|
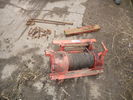
fairey 1.26 views
|
|
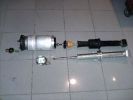
415 views
|
|
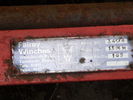
fairey 1.37 views
|
|

370 views
|
|
374 views
|
|
386 views
|
|
381 views
|
|

369 views
|
|
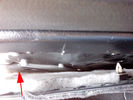
Riparazione attuatore sponda posteriore - Tailgate actuator repair38 viewsL'attuatore si trova dietro la pellicola nera incollata alla carrozzeria che va strappata.
The actuator is located behind the black film glued to the body must be torn.
|
|
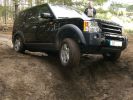
249 viewsMy baby showing off it´s air suspension :)
|
|
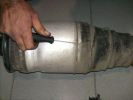
372 views
|
|
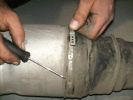
352 views
|
|
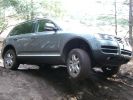
223 viewsThis is the Touareg with the 6cyl engine and rear difflock. did well, useless air-suspension though.
|
|
348 views
|
|
358 views
|
|
356 views
|
|
379 views
|
|
386 views
|
|
384 views
|
|
397 views
|
|
461 views
|
|
462 views
|
|
469 views
|
|

Morsetto - Clamp34 viewsPer la riparazione ho utilizzato un morsetto per fili elettrici.
To repair I used a clamp for electrical wires.
|
|
481 views
|
|
555 views
|
|
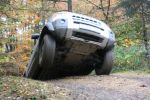
spiderbaby getting air209 views
|
|
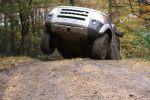
hobgoblin getting air174 views
|
|

Air Suspension Air Filter52 views
|
|
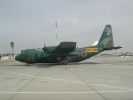
Club AC-130150 views
|
|

Thread upload55 viewsImage uploaded in thread 119357
|
|
Air intake 236 views
|
|
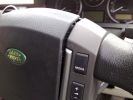
1 Removing air bag46 views
|
|

The Middle - Steering Wheel with Airbag Removed92 views
|
|
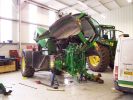
Oil Leak Repair82 views
|
|
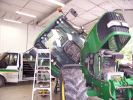
Oil Leak Repair74 views
|
|
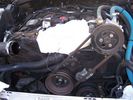
221 viewsRemove the air intake shuttle cut off valve, covering hole with rag
|
|
D4 353 viewsRear seat aircon gone missing
|
|
Standard towbar grounds fairly easily285 views
|
|
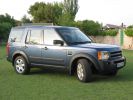
Discovery on the lawn446 viewsBrand new 2.7 TDV6 HSE posing at sunset. Cairns Blue, hence Blue.
|
|

12 Half way through removing a jammed disk brake in the Outback296 viewsThis was just before breaking the sledge hammer. Note we luckily carried a spare hammer. Ended up using (or breaking) every tool we had on this little repair job. Bed sheets are a good way of gathering the bits to show for the inevitable warranty claim.
|
|

TB 149584 - Air Suspension Compressor and Relay Replacement41 views
|
|
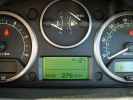
fuel range????????295 viewsfilled tank up and climbed the 21 hairpins into Alpe d\'Huez 1860m - as you can see the projected fuel range (due to the climb) suffered. The reality was different as it used virtually no fuel on the descent.
|
|

seat air bag module105 views
|
|
18 Brake "repairs" finished at sunset296 viewsWe just finished the repair at sunset and were driving slowly with 3 brakes. Oddly the D3 didn\'t behave any differently at 50 km/hr than it did normally. We had 4 instances of hitting the (3) skids for kangaroos before arriving in Wilcannia 3 hrs later. The brake light warning was making very distinctive noises and flashing randomly, though.
|
|
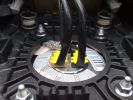
2 Airbag Connectors58 views
|
|
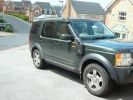
Raised Air Intake Fitted356 views
|
|

Local WA newspaper article on D3 Theft168 viewsThe article is info by police public affairs. They wanted something to keep people locking doors and taking care during the holiday period. There are also TV public service announcements on air in WA featuring my wife confessing to leaving 1 door unlocked leading to the theft.
|
|
hole repair40 views
|
|
Nut repair34 views
|
|

hair cut?18 views
|
|
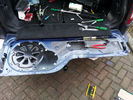
Tailgate Lock failure and repair276 views
|
|
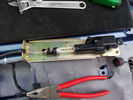
Tailgate Lock failure and repair105 views
|
|
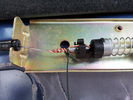
Tailgate Lock failure and repair101 views
|
|

Clean166 viewsClean with my new HSE wheels
|
|
Narpy Wiggs and me136 views
|
|
![Filename=20140816_205723[2].jpg
Filesize=286KB
Dimensions=2275x1280
Date added=17.Aug 2014 20140816_205723[2].jpg](albums/userpics/25538/thumb_20140816_205723%5B2%5D.jpg)
Floor Frame159 views
|
|
![Filename=20140816_215418[1].jpg
Filesize=302KB
Dimensions=2275x1280
Date added=17.Aug 2014 20140816_215418[1].jpg](albums/userpics/25538/thumb_20140816_215418%5B1%5D.jpg)
Raised Floor Covered148 views
|
|
![Filename=20140816_223610[1].jpg
Filesize=406KB
Dimensions=2275x1280
Date added=17.Aug 2014 20140816_223610[1].jpg](albums/userpics/25538/thumb_20140816_223610%5B1%5D.jpg)
Rear floor Completed144 views
|
|
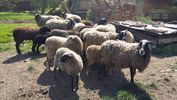
before hair cut9 viewsFlock before shearing
|
|
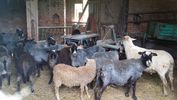
After hair cut6 viewsAdults after Shearing
|
|
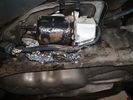
old air compressor5 viewsImage uploaded in thread 177818
|
|
new hitachi air compressor fitted1 viewsImage uploaded in thread 177818
|
|
air compressor cover, lower1 viewsImage uploaded in thread 177818
|
|
Thread upload2 viewsImage uploaded in thread 17923
|
|

Thread upload1 viewsImage uploaded in thread 206617
|
|

Thread upload8 viewsImage uploaded in thread 202510
|
|

Thread upload8 viewsImage uploaded in thread 205377
|
|
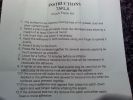
repair instructions159 views
|
|
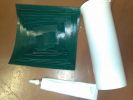
Contents of repair kit154 views
|
|
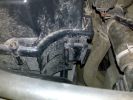
Unused clip slot to the front of the airfiler housing102 views
|
|
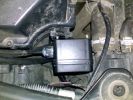
Possible Location for wireless remote box situated to the front of the airfilter housing112 views
|
|
Thread upload17 viewsImage uploaded in thread 162288
|
|
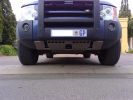
44mm holes added to aid airflow to the intercooler192 views
|
|
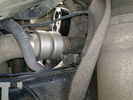
Charge Air Inlet hose - front mounting bkt86 views
|
|

AIr con pipe81 views
|
|
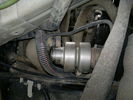
Charge Air Inlet hose67 views
|
|
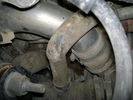
Charge Air Pipe - turbo end.101 viewsThe maint manual identifies releasing the pipe hose clip in the center of the photo. Pity who ever built this engine Put the hose in such a position that access to it was near impossible. I released the other clip at the turbo end of the flexi hose. Easy to get to but a right git to release the hose of the turbo.
|
|

Air con pipe65 viewsIts the brown pipe in the center of the photo. To remove this first you need to remove the "charge air cooler inlet hose" to allow access to the air con pipe securing fixings. But with the "charge air cooler inlet hose" disconnected it can\'t be removed from the veh because the air con pipe is in the way???
|
|

Thread upload2 viewsImage uploaded in thread 200758
|
|

3 old friends79 viewsLaser & Pepper with Oscar (JMC's) on the Cairn
|
|
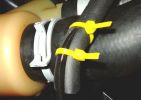
Repair to prevent hose damage245 views
|
|

Air suspension Control Module107 viewsDescription: Air suspension Control Module
Location: RH 'A' post
Part No.: YPC500830 Colour: NATURAL Cavities: 20WY
Harness: CABIN HARNESS
|
|

Repair Closeup2177 viewsWOW! Paint saved!
|
|

Repair Closeup177 viewsWOW! Paint saved!
|
|

Air Distribution and Filtering Systems2083 viewsThis is 3 page pdf with coloured drawings of the air distribution ducting for the front air system.
Also included is a sketch of the pollen filter location within the front heater ducting. Note that two types of filters are available: a) the cheaper dust/pollen filter and b), the activated carbon filter that removes smells from the air. Installing the more expensive activated carbon filter means you never smell a cattle truck or chicken farm again. It really works.
|
|

Front Heater Doors Description and Operation1396 viewsThis 6 page pdf shows with coloured drawings the air flow thru the front heater as well as discusses the operation of the various air flow doors.
|
|

Air Conditioner Specifications 4.4L V81569 viewsThis 2 page pdf is just the specifications for the AC system. The refrigerant type is R134A.
Note that when topping the system up, it can be a good idea to include some of that ultra violet light dye that will glow to show leaks and loose fitting.
|
|

Rear Area Climate Control System1161 viewsThis 14 page pdf describes how the rear heating AC system is supposed to operate in conjunction with the front system.
The air transfer ducts are shown as coloured sketches as is the air flow within the rear blower setup.
|
|

Air Conditioning and Heater Control Components2425 viewsThis is a 21 page pdf that really explains how the air system is supposed to work. Discussed are the exterior ambient air sensor, where and how it operates; the interior temperature sensor as well as humidity sensor.
|
|
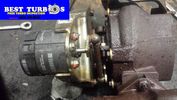
Thread upload175 viewsImage uploaded in new thread
|
|

Siemens VDO Piezo Common Rail injection PCR 2.321 viewsAfter sales info and exact system discription.
Also fault finding and repair.
This is for Ford 3litre 4 cyl. engine ,Ranger 3.0 TDCI, but Disco 3 is the same with 6 cyl.
|
|

Thread upload1 viewsImage uploaded in thread 156005
|
|

Air intake 131 views
|
|
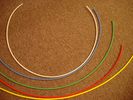
6mm Heat Shrink colours 362 viewsI decided to colour code the tubing so I used 6mm electrical heat shrink.
As there is no apparent colour coding re the 3, I tried to emulate the P38 coding; #1 LR red, #2 RR blue, #3 LF yellow, and #4 RF green. This was not doable as both left side air springs have green coloured tubing coming off the top of the front and rear air springs. I therefore arbitrarily chose the Left Rear to be red; Left Front green; Right Front yellow; Right Rear blue; and for the air compressor supply line, White coloured heat shrink. Since two new lines tie into each air spring line, I made the line between the air spring and the FASKIT, a single solid colour, and the line from the FASKIT to the valve block, White, plus the related appropriate solid colour.
|
|
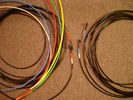
6mm PA12 grade nylon tubing with heat shrink applied 543 viewsShows some of the 6mm air line with heat shrink applied to one end of tubing. Shrink will be applied to the other end once field cut to length. These four tubes, each about 20 ft (6m) long, feed to the rear. Re the front air lines, (not shown), four additional lengths, each about 10 ft (3m) long, are required plus one more 3 metre length for compressor air. The 6mm tubing is a Nylon product specified as PA12. There is also a very similar Transport grade PA11 material, however it seems that PA12 is the more common Transport grade now in use. Also the applicable DIN standard seems to be both DIN 73378 and DIN 74324 for the nylon tubing. The working pressure of the 6mm tubing is about 27 Bar and bursting 82 Bar @ 20C. This is for the 1mm nominal wall thickness material, (4mm ID, 6mm OD).
|
|

Shift Lock Solenoid Problems14 viewsHow to repair and/or get home when the solenoid fails
|
|

125 views
|
|
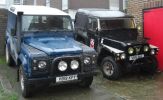
My pair59 views
|
|

A380 leaving Brisbane191 viewsOn its way to Sydney and to drum up some business for the Airbus people.
|
|
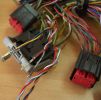
AirBag Pins79 viewsNew Wiring at AirBag ECU just need to back out the pins of the old and clip in the new.
|
|

Next seasons haircut, apparently.154 views
|
|
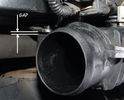
Airbox Bracket Bent causing Leak81 views
|
|
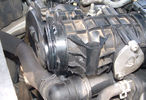
Airbox to EGR Butterfly Valve Housing Leak96 views
|
|
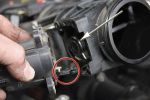
Removing the EGR Butterfly Valve Actuator1538 viewsRemove the 4 TORX screws to remove the actuator. The small black link (circled) connects the actuator drive arm with the butterfly valve spindle (arrowed). The spindle can now be very carefully levered out using a screwdriver inserted beneath the arrowed bit in the photo. A bit scary to do as it takes a fair bit of pressure before the spindle will free itself from the butterfly. Once it starts moving though, it gets easier to pull out.
|
|
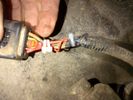
Repaired Transfer box actuator motor harness 2 - temp sensor wire24 viewsRepaired Transfer box actuator motor harness 2 - temp sensor wire
|
|
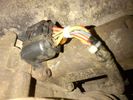
Repaired Transfer box actuator motor harness 3 - temp sensor wire26 viewsRepaired Transfer box actuator motor harness 3 - temp sensor wire
|
|

ADL780010_L319_Raised Air Intake ADL78001043 views
|
|
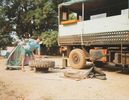
Puncture repair13 viewsI think in total we did this about 10 times, in 6 months, not a bad record, but not easy in the Bush !!
|
|
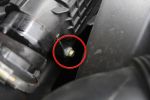
Air Box Lower Securing Bolt1072 viewsThis bolt must be undone in order to remove the air box. It is long and tricky to get out and could be dropped easily.
|
|
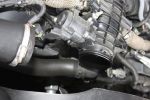
Air Box Removed1058 viewsView showing air box removed from front of EGR butterfly valve housing
|
|

Air Con102 views
|
|
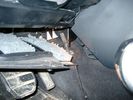
Air Conditioner Drain Hose on Drivers Side (LHD)2296 viewsThe corrugated rubber bit above and to the right of the gas pedal is the drain hose that goes down thru the carpet and floor sheet metal.
While it is bit hard to figure out from the jpg above, there is a rubber "strap" attached to the top of the corrugated hose that one uses to pull on to drag the hose up back around the black plastic heater "pan" drain. The same drain hose arrangement is on the other side as well.
One could I suppose run a plastic snap tie around the vertical pull strap if one was concerned about the hose slipping off again. See also the other jpg sketch which is from the Land Rover manual.
|
|
286 views
|
|
249 views
|
|
268 views
|
|
250 views
|
|
290 views
|
|
82 views
|
|
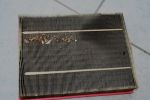
air filter 258 views
|
|
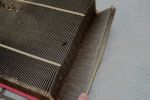
air filter 53 views
|
|

Air Intake Grille274 views
|
|
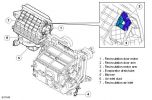
404 views
|
|
Takla 2.5t Air Jack535 views
|
|

Air Suspension - parts diagram pic171 views
|
|
223 views
|
|

95 views
|
|
Thread upload3 viewsImage uploaded in thread 175561
|
|
Thread upload6 viewsImage uploaded in thread 175561
|
|

296 views
|
|
Thread upload3 viewsImage uploaded in new thread
|
|
Air101 views
|
|

74 views
|
|

Thread upload10 viewsImage uploaded in thread 149425
|
|

Thread upload18 viewsImage uploaded in thread 159579
|
|
244 views
|
|
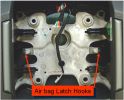
airbag latch hooks342 viewsAirbag retained to steering wheel by 2 latch springs located onto latch hooks of steering wheel
|
|
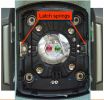
airbag latch springs326 viewsAirbag retained to steering wheel by 2 latch springs located onto latch hooks of steering wheel
|
|

221 viewsSide view of airbag with home made tool connected.
|
|
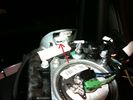
75 views
|
|
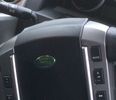
Thread upload4 viewsImage uploaded in new thread
|
|
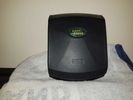
Thread upload2 viewsImage uploaded in new thread
|
|
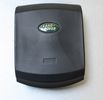
Thread upload6 viewsImage uploaded in new thread
|
|

Thread upload1 viewsImage uploaded in thread 91127
|
|
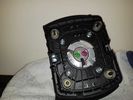
Thread upload0 viewsImage uploaded in new thread
|
|
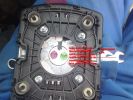
209 viewsBack view of airbag
|
|
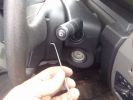
178 viewsTool inserting hole.
|
|

3 views
|
|

Thread upload2 viewsImage uploaded in thread 209420
|
|

Thread upload1 viewsImage uploaded in thread 209420
|
|

Thread upload3 viewsImage uploaded in new thread
|
|

Thread upload7 viewsImage uploaded in new thread
|
|
Thread upload5 viewsImage uploaded in new thread
|
|
35 views
|
|
Thread upload3 viewsImage uploaded in thread 154757
|
|
Thread upload3 viewsImage uploaded in thread 154757
|
|
Thread upload4 viewsImage uploaded in thread 154757
|
|
Thread upload4 viewsImage uploaded in thread 154757
|
|
Thread upload3 viewsImage uploaded in thread 154757
|
|
34 views
|
|

Thread upload12 viewsImage uploaded in new thread
|
|
Thread upload9 viewsImage uploaded in new thread
|
|
Thread upload10 viewsImage uploaded in new thread
|
|
Thread upload8 viewsImage uploaded in new thread
|
|

Thread upload11 viewsImage uploaded in new thread
|
|

6 views
|
|

Thread upload7 viewsImage uploaded in new thread
|
|

Thread upload16 viewsImage uploaded in new thread
|
|

Thread upload9 viewsImage uploaded in new thread
|
|
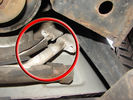
Air Conditioning Pipes (File 1)983 viewsIt\'s the smaller of the 2 pipes that is leaking. Both pipes are encased full length in the foam sleeve. You can see where the support bracket has \'crushed\' the sleeve. The bracket is what holed the small pipe. There is a bracket at each end and one in the middle. You need to remove the suspension reservoir to get to the centre bracket. Be aware that the bolts securing the brackets may be corroded and are likely to shear off on removal!
|
|
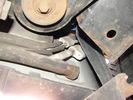
Air Conditioning Pipes (file 2)808 viewsShows location of front-to-rear air con pipes behind NS front wheel. You can just see the Vredestein tyre. The pipe connectors are tucked in behind the wheel arch inner cover. This has to be partially removed for access to bolts holding pipes together.
|
|
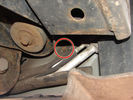
Air Conditioning Pipes188 viewsFront-to-rear aircon HP and LP pipes. The circled bit shows where the bolt securing the support bracket (removed)has sheared off
|
|
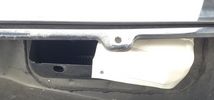
Thread upload19 viewsImage uploaded in thread 86429
|
|

Thread upload4 viewsImage uploaded in thread 199871
|
|

Thread upload0 viewsImage uploaded in thread 208658
|
|
Thread upload10 viewsImage uploaded in thread 120720
|
|

Screws to open to lift air filter lid119 views
|
|

Lift air filter lid115 views
|
|

Thread upload12 viewsImage uploaded in new thread
|
|

Thread upload18 viewsImage uploaded in thread 186796
|
|

Thread upload14 viewsImage uploaded in thread 173319
|
|
Thread upload3 viewsImage uploaded in thread 132287
|
|
161 views
|
|
![Filename=AirJack[1].jpg
Filesize=215KB
Dimensions=1440x960
Date added=16.Apr 2007 AirJack[1].jpg](albums/userpics/10439/thumb_AirJack%5B1%5D.jpg)
316 views4T AirJack from Bushranger
|
|
Thread upload21 viewsImage uploaded in thread 149425
|
|

Thread upload17 viewsImage uploaded in thread 163046
|
|
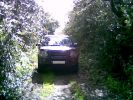
Lunchtime Lane201 viewsNot 200 yards from Manchester Airport can be found a little 1/2 mile lane - did it for the first time today - a few minutes fun in a dreary day
|
|

207 views
|
|
Thread upload7 viewsImage uploaded in thread 136282
|
|
Thread upload34 viewsImage uploaded in thread 148911
|
|

Thread upload5 viewsImage uploaded in new thread
|
|

Thread upload13 viewsImage uploaded in thread 166400
|
|

7 views
|
|

Thread upload19 viewsImage uploaded in thread 133549
|
|

Air Suspension - parts diagram156 views
|
|
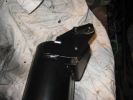
original front bracket144 views
|
|
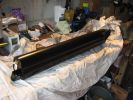
new air tank - LR part number LRQN500070171 views
|
|
original rear bracket144 views
|
|
old front bracket cut off148 views
|
|
new front bracket 150 views
|
|
drill 2 holes for fixing front of airtank152 views
|
|
drill 1 hole for rear mounting 145 views
|
|
home made bracket for rear mounting147 views
|
|
new front bracket painted146 views
|
|
original rear bracket159 views
|
|
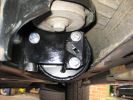
rear bracket fitted 160 views
|
|
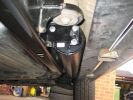
tank in place167 views
|
|
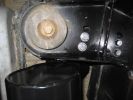
front of tank fitted 147 views
|
|
fitted ..tucked away 155 views
|
|
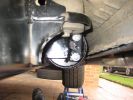
tank fitted to rear bracket196 views
|
|

Thread upload8 viewsImage uploaded in new thread
|
|

Thread upload5 viewsImage uploaded in new thread
|
|

Thread upload3 viewsImage uploaded in new thread
|
|

27 views
|
|
27 views
|
|
Thread upload1 viewsImage uploaded in thread 746
|
|
Thread upload1 viewsImage uploaded in thread 190256
|
|
11 views
|
|
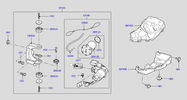
Thread upload413 viewsImage uploaded in thread 113599
|
|
9 views
|
|
Thread upload17 viewsImage uploaded in new thread
|
|

32 views
|
|

26 views
|
|
Thread upload6 viewsImage uploaded in thread 184239
|
|
Thread upload10 viewsImage uploaded in thread 176039
|
|
Thread upload7 viewsImage uploaded in thread 176039
|
|

V8 defender air filter21 views
|
|
Thread upload9 viewsImage uploaded in thread 188745
|
|
Thread upload11 viewsImage uploaded in new thread
|
|

Thread upload4 viewsImage uploaded in new thread
|
|
Thread upload4 viewsImage uploaded in new thread
|
|
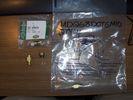
Air parts64 viewsSubstitute airs spring parts - reuseable
|
|
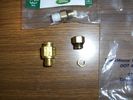
Air Parts57 viewsSubstitue push fit air spring terminators for Disco 3
|
|
Thread upload5 viewsImage uploaded in thread 189910
|
|
Air pipe leak3 viewsImage uploaded in thread 177818
|
|
Thread upload13 viewsImage uploaded in new thread
|
|

Thread upload13 viewsImage uploaded in new thread
|
|

Thread upload2 viewsImage uploaded in thread 178588
|
|

Thread upload3 viewsImage uploaded in thread 193523
|
|

43 views
|
|
Thread upload12 viewsImage uploaded in new thread
|
|

Thread upload4 viewsImage uploaded in thread 185498
|
|

Thread upload2 viewsImage uploaded in new thread
|
|

Thread upload1 viewsImage uploaded in new thread
|
|
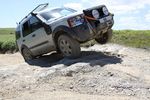
Calendar 2011 entry - MrH in Basic Coil Sprung D3 on 2010 Pot Noodle Challenge Rock Crawl Section477 views
|
|

Locandina18 views
|
|

Thread upload8 viewsImage uploaded in thread 187409
|
|
Thread upload8 viewsImage uploaded in thread 166499
|
|
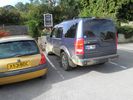
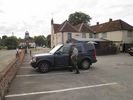
168 viewsAfter a nice day out with lot of fun at Avon Dasset Quarry.
|
|
155 views
|
|
Got back to the airport after a few days in London to This!!!281 viewsThis is one of the many reasons we sold our first D3........
|
|

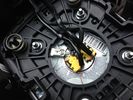
Riparazione attuatore rotante volante - Steering rotary coupling repairing22 viewsCome riparare l'attuatore rotante del volante quando si accende la spia dell'airbag.
How to repair the steering rotary coupling when airbag warning light turns on.
|
|

Our Trip Apr-Aug 2008135 viewsGosford to: Broken Hill, Innamincka, Birdsville, Alice Springs, Bungle Bungle NP, Broome, Gibb River Rd to Mitchell Falls and then Kunnunurra, Darwin (for tail gate Repair), Normanton (via Roper Bar, Borroloola, Lawn Hill, Burketown), Townsville, down coast to Noosa then inland to home. TRACK TRACE BY TRACKRANGER SOFTWARE ON ASUS UMPC.
|
|
168 views
|
|
142 views
|
|
162 views
|
|
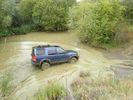
147 views
|
|
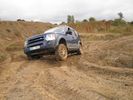
142 views
|
|
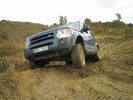
Wheel Lift136 views
|
|
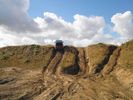
152 views
|
|

A320 USAirway81 views
|
|
![Filename=ba2236-air-to-coil-conversion-kit-discovery-3-931977-p[ekm]170x113[ekm].jpg
Filesize=3KB
Dimensions=170x113
Date added=20.Sep 2017 ba2236-air-to-coil-conversion-kit-discovery-3-931977-p[ekm]170x113[ekm].jpg](albums/userpics/33392/thumb_ba2236-air-to-coil-conversion-kit-discovery-3-931977-p%5Bekm%5D170x113%5Bekm%5D.jpg)
Thread upload12 viewsImage uploaded in new thread
|
|
29 views
|
|

32 views
|
|
28 views
|
|
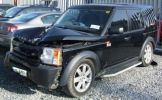
Bent Black Betty228 viewshard to believe that in this condition she\'s a write off, what got her was the cost of tricknology repairs, seatbelt pretensioners, airbags etc etc, & declining values, repair estimates €12500, value €13000. a no brainer really
Note TASTEFULL G4 sticker
|
|

494 views
|
|

Big Airbags166 views
|
|

Thread upload19 viewsImage uploaded in thread 173468
|
|

Thread upload23 viewsImage uploaded in new thread
|
|

58 views
|
|

Thread upload6 viewsImage uploaded in new thread
|
|

Thread upload21 viewsImage uploaded in thread 156800
|
|
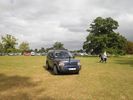
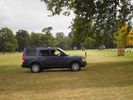
Summer 2011 Blenheim Palace130 views
|
|
130 views
|
|
3 old pals55 viewsLaser, Oscar and Pepper on the Cairn
|
|

Black Deposits on Brake Light Switch Plunger2757 viewsThis jpg I got off another forum and is typical of what one will see when one opens up the removed brake light switch. The black powder is residue from arcing of one of the pair of contacts within.
Hopefully the newer switches with the FOMOCO logo moulded into the plastic are improved from the Land Rover logo marked early units, however I doubt it.
The Ford part number is SW-6572 and/or 7E5Z-13480-A as used on the 2006 to 2009 Ford Fusion's and Mercury Milan's; the Land Rover part number is XKB500110. Cost of switch could be about twenty five dollars. A previous LR part number for the switch was XKB500030, so hopefully the newer LR part number, XKB500110, reflects some improvement in reliability.
It is possible that the new switches are better as I installed a replacement 72,000 km, (45,000 miles) later, at 195,000 km (121,000 miles). When I took the removed switch apart to inspect, it was clean inside. There was no black dust - the switch looked like new, hence they must be improved now.
|
|
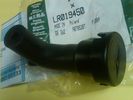
Breather Cap part # LR0194501540 viewsThis is the replacement breather cap as manufactured by the Gore Tex people, (Gore), for the engine compartment end of the front differential breather line.
You can with some difficulty, both blow and suck thru the breather filter material. The Gore Tex filter material has what are called hydrophobic and oleophobic properties. This means the filter material keeps oil in and water out, while at the same time, allowing air pressure to slowly equalize, (air permeable). Additionally, the transfer of dust, salt, and road debris is inhibited.
|
|
Thread upload3 viewsImage uploaded in thread 158599
|
|
Thread upload14 viewsImage uploaded in thread 152582
|
|

Even a D3 cant get through this!745 viewsPicture taken on the B974. My 300TDi is behind the photographer and wasnt going any further.
|
|
Thread upload5 viewsImage uploaded in thread 155787
|
|
287 views
|
|
269 views
|
|
371 views
|
|
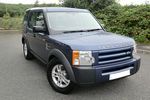
Cairns Blue240 views
|
|
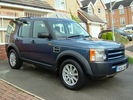
Cairns Blue288 views
|
|
D3 View 2147 views
|
|
D3 View 1189 views
|
|
Thread upload7 viewsImage uploaded in thread 149996
|
|
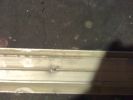
D3 Side Step Repairs153 viewsHow I repaired my damaged side step after a days offroading at Tong in November 2008
|
|
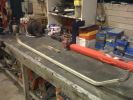
D3 Side Step Repairs156 viewsAluminium trim has been straightend out but need to remove all the old rivets from the rear of the trim.
|
|
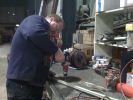
D3 Side Step Repairs186 viewsThere are about 10 rivets to drill out. I also increased the hole size to 5.5mm as I will be using larger rivets to hold the trim back in place. 5.5mm is the larger rivet size commonly available at motor factors etc.
|
|
D3 Side Step Repairs162 viewsI then drilled out the holes in the step edge to 5.5mm to accomodat my larger rivets.
|
|
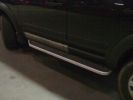
D3 Side Step Repairs165 viewsFinished job all I need to do now is wash it all off. I had already replaced the front door trim using new trim fixers and as you can see it was still dirty.
|
|
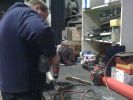
D3 Side Step Repairs147 viewsCarefully drill out the old rivet ends. Some were a bit stubborn and I used a small chisel and drift to punch them, out.
|
|
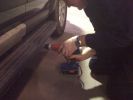
D3 Side Step Repairs163 viewsAgain there are 10 holes to incresae the size of.
|
|
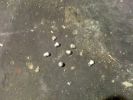
D3 Side Step Repairs146 viewsThe old rivet ends which I removed from the trim. I took one rubber end off the trim and let them all out by shaking it to save them rattling around inside the trim for years to come.
|
|

D3 Side Step Repairs167 viewsWhilst I held the trim in place a second person inserted the rivets from behind the step edge. We started in the middle and worked out either way to ensure a snug fit of the aluminium trim.
|
|
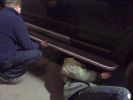
D3 Side Step Repairs169 viewsNearly finished - just the last two rivets to put in. We used a very basic and cheap hand rivet gun which can be bought in places like Halfords for about £10.00 and usually come with a supply of rivets to do the job.
|
|
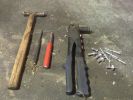
D3 Side Step Repairs152 viewsTools needed for the repair.
|
|
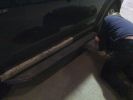
D3 Side Step Repairs150 viewsI then punched out the remaining rivets from the step edge. I used a small hammer and a small punch.
|
|

Thread upload28 viewsImage uploaded in thread 106657
|
|
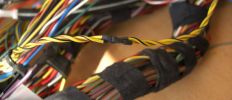
Can Pair After73 viewsThe can pair repaired with twist maintained
|
|
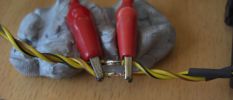
Can Pair Repair83 viewsThis is the high speed CAN bus Pair. By over twisting and keeping the repair short i will maintain the very important twist. Good soldering is a must it looks ropey in this shot but it is not, note the heat shrink pre placed on the wires to the right.
|
|
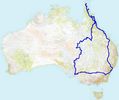
Cape York 201147 views12969km May/August 2011 - Cairns, Cape York, Longreach, Birdsville
|
|

14 views
|
|

20 views
|
|
Thread upload1 viewsImage uploaded in new thread
|
|

66 views
|
|
Thread upload20 viewsImage uploaded in thread 128837
|
|
66 views
|
|
65 views
|
|
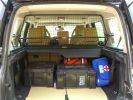
Load space368 viewsShows the SA Front Runner Wolfpack stacking plastic storage boxes that I keep laod straps etc in and the 2nd is tool kit, spare belts, jerry can funnel and tools, plus airline and tyre inflator/deflaotr for ARB on-board compressor, HD jump leads. ARB Winch pack (Orange)with strops, snatch blocks, shackles, gloves, and 2 ARB recovery dampers. Really great 4x4 1st Aid kit from Outdoors warehouse in SA. LRs own loadspace guard - not the best design if you want to store a long load. Mods to be carried out!
|
|
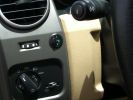
Long Ranger auxilairy fuel tank pump switch and tank gauge308 viewsFitted to the right of the air vent thumbwheel, the neat combination switch and gauge take sup no room at all. Switch locks on or off, but no pump running warning lamp! Contents of the tank are indicated by 5 LEDS, 4 green and 1 red for full, 3/4, 1/2, 1/4 and empty. Pump transfer rate of just 2 litres p/min is disappointing. I transfer on the move when main tank is at 1/4.
|
|
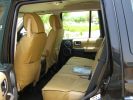
Escape seat covers rear254 viewsJust shwing the good fit of these canvas seat covers made in South Africa. The whole set for a 7 seat HSE £542 with air freight as unaccompanied baggage (inside 5 Front Runner Wolf pack boxes) costing and additional £150 - still a bargain out here!
|
|
Thread upload6 viewsImage uploaded in thread 155072
|
|
Thread upload23 viewsImage uploaded in thread 108943
|
|
Thread upload18 viewsImage uploaded in thread 108943
|
|
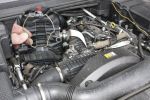
Remove Clip951 viewsRemoving the air box/EGR butterfly housing securing clip
|
|
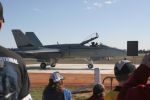
Close shot Fa-18 Temora124 views
|
|
Thread upload4 viewsImage uploaded in thread 172488
|
|

87 views
|
|
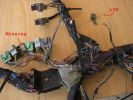
example problems113 viewsInspection showed another Cut Airbag connector, a Missing connector and a few rogue wires at the bottom, the silver one marked Lin, is for the LIN BUS and is supposed to be like that though
|
|
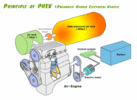
Compressed Air Engine Schematic35 views
|
|
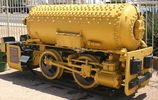
Compressed Air Mining Loco21 views
|
|
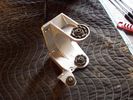
Air Compressor mounting bracket new907 viewsFound this jpg on a forum - thought it was good and is what one breaks when one jacks on the plastic air compressor cover.
|
|

Thread upload27 viewsImage uploaded in thread 173730
|
|

Thread upload3 viewsImage uploaded in thread 111638
|
|
Thread upload6 viewsImage uploaded in new thread
|
|

Cooling system hoses - 4.4L petrol V81108 viewsThese are the cooling system hoses on the 4.4L petrol V8. The little odd shaped bleeder hose, (LR006158), shown in the top right hand corner can give problems. There is a plastic tee with a threaded air bleeder outlet located in the middle of the hose. The plastic tee can or will fail due to I guess heat distress.
A BIC pen can serve as a field fix, however for your parts kit, a nominal 3/8" ID hose size brass hose barb inline connector plus a couple of hose clamps is suggested. Better yet is a threaded hose barb brass coupling or a tee and bleeder valve to allow bleeding of the line. Land Rover now makes the plastic bleeder valve that breaks available as a separate part, # LR027661, where 0 is a zero. As such, one can now purchase that part only for addition to your field fix parts kit.
|
|
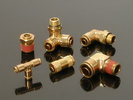
Detroit Fluid DOT air line fittings718 viewsThe picture shows the internal ferrule that is characteristic of the DOT / TUV accepted fittings for highway vehicles. Most often these fittings are metal however the Land Rover John Guest 6mm straight connector is all plastic and has the internal ferrule.
|
|
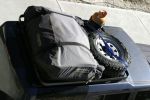
Roof rack loaded - tent, chairs & sleeping gear in bag146 views
|
|
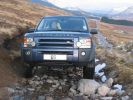
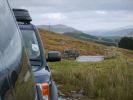
Start of Corrieyairack Pass481 views
|
|
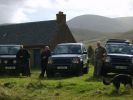
DSL, JMC & Alex08289 views
|
|
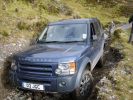
Tight fit347 views
|
|
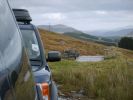
Looking back after a mile258 views
|
|
Calendar 2008 Entry531 viewsLooking back down Scotlands only \'greenlane\'
|
|
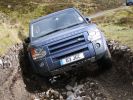
Not getting further #2331 views
|
|
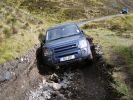
Not getting much further306 views
|
|
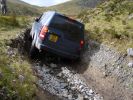
Not getting further #1303 views
|
|
Close for comfort....316 views
|
|
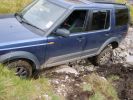
Backing out admting defeat320 views
|
|

DSL examines the trench321 views
|
|
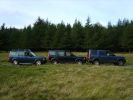
Access, Off-Road & Super Extended324 views
|
|
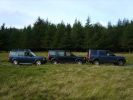
Calendar 2008 Entry563 viewsLeft to right: Access Height, Off Road Height & Super Extended Mode
|
|

Discovery 3 AC Repair20 views
|
|

Discovery 3 AC Repair136 views
|
|

Discovery 3 AC Repair22 views
|
|

Not much left of bonnet!281 viewsCrash in a Renault Scenic
Head on colition with a Nissan Terrano he lost control came over the central reservation & ended coming at us sideways!
We hit him in the back wheel arch & spun him around so he then hit my drivers side, I walked away having a air bag wife had broken solder coursed by the seat belt, but it did save her life!
Our car was trashed but it did its gob (was only 2 weeks old!) the bonnet tacking lots of energy out of the collision & the inertia staying relatively in tacked.
|
|
Cross link air pipe194 views
|
|

Bike on the trip, our "outrider".188 views
|
|

Cubby Lid Repair58 views
|
|

41 viewsCorrieyairack
|
|

36 viewsCorrieyairack
|
|

35 viewsCorriryairack
|
|

C pillar cover removed to facilitate removal of bin cover.9 viewsNote the "ribbon" behind the top left corner of the C pillar cover. This is something to do with the curtain air bags, hence do not mess with it. I dislodged the cover to make it easier to pull up and extract the black plastic bin moulding. It is not necessary to totally remove it and would be what I call a big deal - seat belt, air vent and ducting as well as that curtain concern.
|
|

ARB air compressor switch, gauge, outlet.313 views
|
|
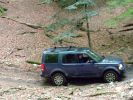
Cairns Blue in the woods409 views
|
|
air for john50 views
|
|
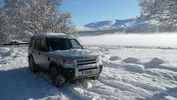
Loch Morlich Cairngorm440 viewscalendar 2011
|
|
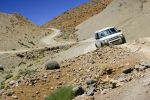
453 viewsMore photos coming soon. 7000 km with NO problem. Only took a 6th spare wheel, a tool box, air compressor, window shades. What a great Disco !
PS: note that my disco has manualy inflatable air sping in addition of the standar terrain response.
|
|
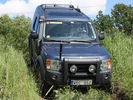
Offroading Sweden157 views
|
|
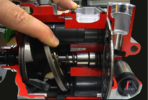
D3_aircon_compressor_maximum_swash_plate19 views
|
|
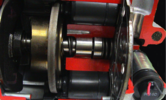
D3_aircon_compressor_minimum_swash_plate19 views
|
|

D3 Air Filter Change by thesettler609 views
|
|

Thread upload8 viewsImage uploaded in new thread
|
|

Thread upload12 viewsImage uploaded in thread 149996
|
|

Thread upload10 viewsImage uploaded in new thread
|
|
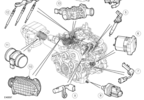
D3_Engine_Control_Sensors_Air_Charge_Temp_Sensor26 views
|
|
Thread upload14 viewsImage uploaded in thread 43009
|
|

D4 5.0 V8 Air intake69 views
|
|
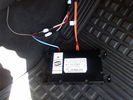
D4 Bluetooth AH42 10F845 AA module connected to 12VDC and MOST1210 viewsThis jpg shows the MOST bus connected to the AH42 10F845 AA module used in the D4 as well as +12VDC power from F58P connected. The power is split with a Y harness as the IHU (radio) for some reason required +12VDC power to the C2115-10 "mute" pin to keep the radio/CD audio from muting all the time.
With power on the pin, the radio audio does mute as it should when the cell phone rings and the hands free connects. The brown conductor feeds to C2115-10 and the blue to the module.
The module tucks up and hides behind the grey plastic section covering the forward portion of the passenger side tranny hump for left hand drive vehicles; for RHD, it would be located on the left side.
The pairing code is 2121 with this setup and not 1234 or 0000.
|
|
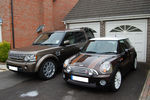
Disco4 & Cooper90 viewsdiscoDB\'s D4 HSE
Mrs discoDB\'s Mini Cooper Mayfair
|
|
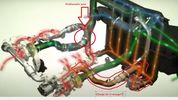
Thread upload3 viewsImage uploaded in thread 203132
|
|
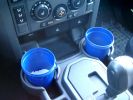
375 ml jam container369 viewsThese are the 375ml Danish Orchard brand jam containers. They fit fairly tightly into the original old style, (2005/6) Land Rover 3 factory cup holders. The extra height provided by the containers can be an advantage. I have a similar assortment of containers in some of the door panel located wine bottle holders to better hold containers of lesser valued products.
|
|
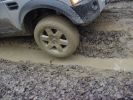
Wheel in the air380 views
|
|

188 views
|
|
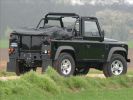
170 views
|
|
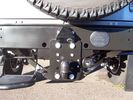
Defender 19 viewsDefender showing trailair camera fitment
|
|
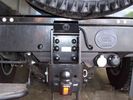
Defender27 viewsDefender with adjustable tow bar with TrailAir fitted
|
|
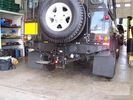
Defender22 viewsDefender with adjustable tow bar showing trailair camera fitment
|
|

Defender30 viewsDefender with TrailAir mirror
|
|
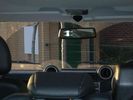
Defender31 viewsInternal Defender TrailAir mirror
|
|
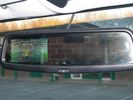
Defender32 viewsTrailAir reverse image with distance and hitch guidelines.
|
|
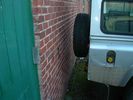
Defender 25 viewsReverse using TrailAir camera guideline
|
|

Air Conditioning Details + Fan27 views
|
|

Air Distribution and Filtering6 views
|
|
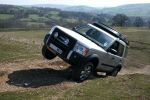
DG gets air !1192 viewsTaken in near Boughrood, Mid Wales - 8 April 2007
|
|

Dimensions - Air suspension vehicles89 views
|
|
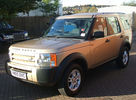
My new D3 Nov. 2010 161 views7 seater base with air.
|
|
Interior Summer 2011157 views
|
|

DS126 views
|
|

3 Cairns33 views
|
|
Thread upload7 viewsImage uploaded in thread 5
|
|
|
|