| Search results - "/" |

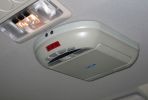
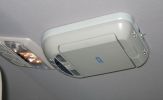
0000 LR Bluetooth dealer Kit install instructions1615 viewsThis 17 page pdf is mostly a series of pictures showing how to install the original Land Rover dealer installed Bluetooth kit for circa 2005 / 2006 three's. Also included are three wiring diagrams sheets related to the pairing code 0000 Bluetooth install.
This pdf is useful if you are now removing the 0000 kit to install the optical 2121 MOST D4 module, an easier install than the 0000 kit ever was.
|
|
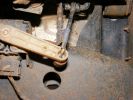
754 viewsNew control rod is carbonfibre/fibreglass hollow tube, with a rubber grommet fitted to one end (screwed and epoxy-ed) and steel rod bent into shape at the other (epoxy-ed).
|
|
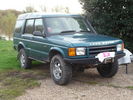
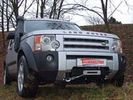
51 viewsD44 front winch bumper. Ali washer bottle. D44 rear h/d bumper. centre diff lock. 235x85x16 pirelli muds. OME +2" springs & shocks. front diff guard. side tree bars. wired for roof CB. Aux fuse block. safari snorkel. extended wading tubes. the list goes on...
|
|

find relay 7 in engine compartment fuse / relay box 806 views
|
|

Burnt seat pad/ heating element22 viewsYou can see where the rod has broken and breached the heating element
|
|
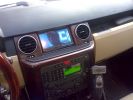
Navigation/Video screen fits perfectly387 views
|
|
Rear / Standard Links / Standard Height234 views
|
|

Front / Standard Links / Standard Height.348 views
|
|

Clearance to top arm - approx 10mm. Standard Links / Standard Height.200 views
|
|
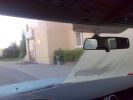
Windshield heating / defrosting179 views
|
|
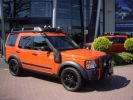
A look alike G4 from 2008 122 viewsA look alike G4 from 2008 (for sale in Holland)
http://autoscout24.nl/Details.aspx?id=vnyzslgvfoja
|
|
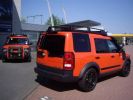
A look alike G4 from 2008111 viewsA look alike G4 from 2008 (for sale in Holland)
http://autoscout24.nl/Details.aspx?id=vnyzslgvfoja
|
|
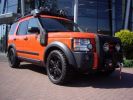
A look alike G4 from 2008121 viewsA look alike G4 from 2008
http://autoscout24.nl/Details.aspx?id=vnyzslgvfoja
|
|
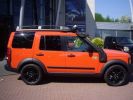
A look alike G4 form 2008128 viewsA look alike G4 from 2008 (for sale in Holland)
http://autoscout24.nl/Details.aspx?id=vnyzslgvfoja
|
|
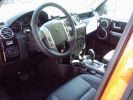
A look alike G4 from 2008117 viewsA look alike G4 from 2008 (for sale in Holland)
http://autoscout24.nl/Details.aspx?id=vnyzslgvfoja
|
|
Got Married!244 viewsOccasionally the car does get a clean/polish, this was a special occasion :-)
|
|
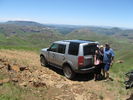
Bastervoetpad pass 25/12/20153 viewsPart of 8 passes route Northern Eastern Cape near Rhodes/Ugie
|
|
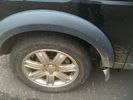
255/55/19 goodyear mtr53 views
|
|
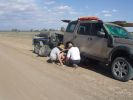
03 First bit of tyre/wheel trouble245 viewsIn the outback a tyre suddenly blew. "No worries" we thought, as we had 3 spares (+ two more if we abandoned the trailer), 150l of water, 3 days of food, and an EPIRB if things got really bad. At the time I didn\'t fully appreciate the fact that my index got a blister from the burning heat of one of the wheel nuts. It was 45 deg C at the time, so everything was hot.
|
|
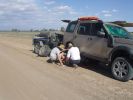
03 The first bit of tyre/wheel problem251 viewsSomewhere in the Australian outback on a 45 deg C day in Jan 08, a D3 had a bit of a flat tyre problem. "No worries, mate" st we had 3 spares (plus 2 more if we abandon the trailer), 150l of water, 4 days of food, and an EPIRB if things really go crook. The first clue that this was not a "normal" flat was when I handled a wheel nut and ended up with a blister from a burning hot nut (the ambient wasn\'t THAT hot).
|
|

03/0927 views
|
|
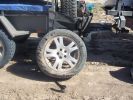
04 Damaged Tyre301 viewsYes, there\'s no doubt that this was a flat tyre. The ultra hot wheel nuts, look of the flat (note in a later photo that the back of the tyre appeared okay) and increased fuel consumption should have been a clue, but it was 45 deg C, and we had been doing about 105 km/hr on a dirt road for hours, so we just assumed it was a flat = WRONGO!
|
|

Maxxis Bighorn 265/70/17117 views
|
|
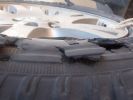
05 No doubt the tyre is flat276 viewsThis is the view of the flat tyre. Again, didn\'t think it anything more than a "normal" explosive blowout, as the tyre was about 90% worn, we were heavily loaded, it was 45 deg C, and driving 105 km/ho on a rough dirt road in the outback.
|
|
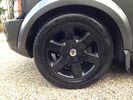
19" Black HSE Alloys/Tyres59 views
|
|

07 Back side of failed tyre340 viewsThis is the back of the blown tyre. It looks like any other worn tyre which has run a bit while flat. Note that we were running on wider 19" RRS wheels (have 4 19" MTRs + 1 old A/T on the original 5 wheels). Also have a rear-mount spare tyre holder which is really convenient with the wider rim and the fact that the tyre was still hot (it had some melted rubber on the other side!!)
|
|
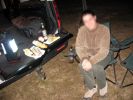
kitchenette it is.912 viewsEjoying Baguette, Saucison sec and of course Fois Gras.
|
|
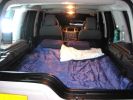
Ensuite or presidential suite ?1213 views
|
|
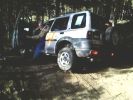
Freelander trying hard.107 viewsStill not stuck but getting there. In the end pulled it out with a Defender. Picture taken at Offroad-Training in Linthe/Germany
|
|
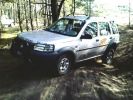
Still trying to prove it can hold up104 viewsFreelander not stuck - yet :)Picture taken at Offroad-Training in Linthe/Germany
|
|
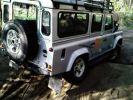
Same holes as the disco, took a picture from the right side. Picture taken at Offroad-Training in Linthe/Germany112 views
|
|
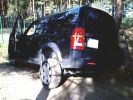
Not stuck - only got out to take a picture :) Picture taken at Offroad-Training in Linthe/Germany142 views
|
|
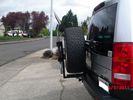
Receiver for toy rack39 viewsSensor bar was made of same heavy tube that the carrier was made from allowing a small 1 1/4" receiver to be placed on it for a multitude of toy racks of my choice. Rack adjust in and out of receiver.
|
|

A few mods later27 viewsPro-Speed rock/tree sliders
LED side lights
LED interior lights
|
|
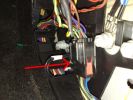
10 ICE Loom - Drivers kick ICE Loom / Dash Loom connector87 views
|
|
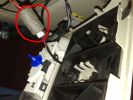
10 Telephone / Voice Mic Plugs70 views
|
|
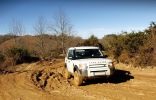
Riding around the local 4X4 speed track829 viewsthe 12 heures de St Pée are held here once a year.
|
|
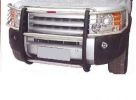
S/steel bullbar55 views
|
|
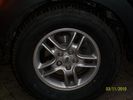
D3 new Wheels 77 views
|
|
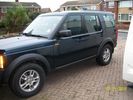
new Boots 75 views
|
|
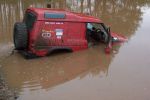
bit of water70 viewsdidnt think it was so deep. I got my feet a little wet. Car is still running and it also survived this and is still in use now. Bet a Disco 3/4 wouldn't work after this.
|
|
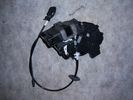
Door latch Drvs O/S27 viewsFreelander 2 door latch.
|
|
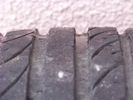
255/60/18 Bridgestone HP sport53 views
|
|
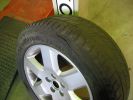
Busted tire/tyre411 views
|
|

Radio location539 viewsMy remote head UHF CB mounted on the front of the ashtray, ham HF/VHF/UHF remote head radio mounted on a block in the coin tray and my GPS on a turned wooden block in the cup holder. Both radios are under tha driver and passenger seat and the antenna for the GPS is suction mounted inside the windscreen.
|
|
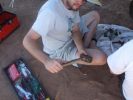
13 How to care for tools303 viewsWhat happened to the sledge hammer after 2 hours of beating my seized and cracked disk/park brake assembly to bits. Now down to 1 hammer remaining. At least by this time it was getting cooler (down to 40 deg C)
|
|
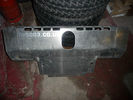
L/R sump guard34 views
|
|
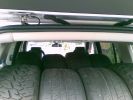
Thirteen Up93 views4 MTR\'s and 4 Sport 255/55 19\'s inside, One 18" Type 2 Mark 1 underneath and 4 18" Type 2 Mark 2\'s on the road
|
|

Thread upload134 viewsImage uploaded in thread 92365
Chinese garbage knock off stolen from ARB / Rigid
|
|
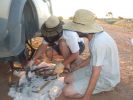
16 All the remains of a D3\'s parking brake373 viewsAfter 4 hours of hammering, finally removed the disk/park brake drum, and nearly all the parking brake bits fell to the ground. Cut rhe remaining brake cable loose as it was wrapped around the hub and a bit melted. Also having 2 jacks + 2 jack stands will support 4 hrs of hammering on the side of my D3.
|
|
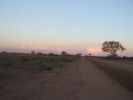
18 Brake "repairs" finished at sunset296 viewsWe just finished the repair at sunset and were driving slowly with 3 brakes. Oddly the D3 didn\'t behave any differently at 50 km/hr than it did normally. We had 4 instances of hitting the (3) skids for kangaroos before arriving in Wilcannia 3 hrs later. The brake light warning was making very distinctive noises and flashing randomly, though.
|
|
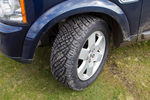
D4 HSE Baltic Blue with 255/55/19 General AT Tyres94 views
|
|
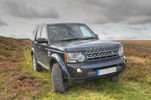
D4 HSE Baltic Blue with 255/55/19 General AT Tyres279 views
|
|
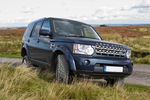
D4 HSE Baltic Blue with 255/55/19 General AT Tyres274 views
|
|
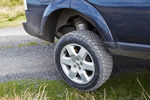
D4 HSE Baltic Blue with 255/55/19 General AT Tyres86 views
|
|
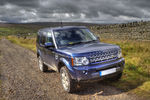
D4 HSE Baltic Blue with 255/55/19 General AT Tyres369 views
|
|
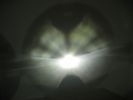
This is a normal H7 HID bulb installed in a BMW headlight to show glare above cut off line99 viewsThis is what the light pattern is that causes glare in most retofit applications including some projector lights. this is in fact a projector headlight on a BMW but the old projectors were only actually half projectors and half reflective bowls. the beam pattern should be clean cut like this ___/
|
|

1 General Information, Identification Codes and Jacking and Lifting27 viewsPart 1 of Discovery 3/4 Workshop Manual - General Information, Identification Codes and Jacking and Lifting
|
|
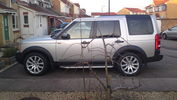
New 295/45R20 114V XL Hankook Ventus ST tyres fitted on 20" RRS Supercharged 20" Alloys123 views
|
|
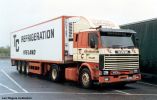
177 viewsFrom http://www.hankstruckpictures.com/pix/trucks/len_rogers/july7a/scania_143m.jpg
|
|
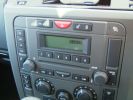
Base Spec Radio/CD2471 views
|
|
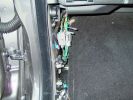
N/S Kickpanel wiring harness for AUX input4292 views
|
|
2010 Calender Entry360 viewsNeVeTaS & Tony686 - Kings Forest Suffolk
|
|

Oil leak on autobox/engine100 views
|
|
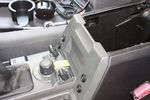
100 viewsAll 4 switches in place.
Driver's side switches are:
. Parking sensors master switch
. Reverse camera off/on/reverse-tiggered
Passenger side switches are:
. CarPC off/on/ignition-triggered
. 12V Regulator off/on/ignition-triggered
|
|

usb/ipod connector 264 views
|
|

usb/ipod connector 55 views
|
|

most connector with 4 pin plug for usb/ipod module 57 views
|
|

Sump guard 1/413 views
|
|
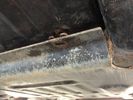
Sump guard 4/416 views
|
|
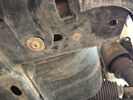
Sump guard 3/414 views
|
|

Sump guard 2/413 views
|
|
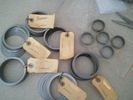
Custom Shim Assortment673 viewsMfd from https://www.facebook.com/DifferentialPartsUS
|
|
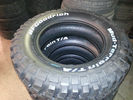
BFG MUD Terrain KM2 245/70/1764 views
|
|
Duratrac 265/70R1760 views
|
|
G4 kayak kit --7.5cm / 3 inch 39 views
|
|
26 views10 Spoke 18" with 255/60/18 AT2
|
|
Bee-sting 1/4 wave VHF antenna25 views
|
|
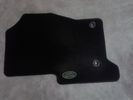
Set tappetini Land Rover per Discovery 3/4.19 viewsSet tappetini Land Rover per Discovery 3/4.
|
|

Fuel Consumption 05/1325 views
|
|
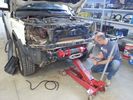
Hidden winch 12000 Disco 4 /2158 views
|
|
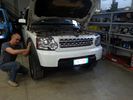
Hidden winch 12000 Disco 4 /3139 views
|
|

snapped cv joint n/s/f93 views
|
|
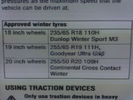
h rating tyres 19/20"22 viewsfound it at last. knew I had seen H rated in LR manual for 19/20"
|
|

Terratrip 202 V4 possible discrete location143 viewsAttached to ashtray - allowing removal / unplugging when not in use by pulling out the ashtray.
Terratrip is an odometer for use in rallies / raids - very popular with the French when used in conjunction with a roadbook. A mechanical backup in case GPS signal is lost on modern odometers like the Globe 800 I propose to use.
We'll see if there are reflection issues from the screen.
|
|
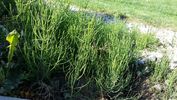
what plant22 viewswant to find out what this plant is and how best to control / remove it from garden
|
|
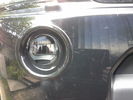
osram fog/drl's72 views
|
|
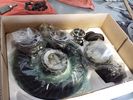
Locking Kit639 viewsready to install
Mfd from https://www.facebook.com/DifferentialPartsUS
|
|
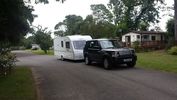
Thread upload196 viewsLR Disco 3 SE Buckingham Blue. along with our Coachman 535/4 caravan.
|
|
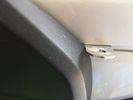
284 viewsLabtronx Aerial mount http://www.labtronx.com.au/
|
|
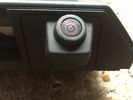
Reverse Camera/ from My 2013/14 close up10 views
|
|
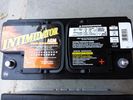
Deka 9A49 AGM Intimidator329 viewsThe Deka 9A49 AGM Intimidator makes an excellent primary battery alternative to the factory or Interstate. Made in US of premium quality. This is an excellent match with the Traxide system w/another Deka or Yellow Top optima.
This will behave properly in your D3/4 LR3 with slightly less wear and tear on your alternator.
|
|
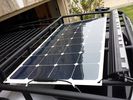
solar roof install444 viewsMore or less wrapped up my solar installation today. I added a Grape Solar Flex 100W panel, it's adequate to keep the vehicle topped off with the Fridge running, and Ham, but it could lose some ground if transmitting depending on how much, 2 would be awesome. One is enough, but barely. I am quite impressed with the Grape Solar flex panel version 2.0.
https://www.facebook.com/DifferentialPartsUS
|
|
low profile solar panel211 viewsThe low profile solar panel, can be seen here, as the fine white line under the light bar. The way it's laid out, the panel should generate decent power between 10am and 4pm depending on the time of year, from the sides or front, with no shadows. Grape Solar 100W flex panel.
https://www.facebook.com/DifferentialPartsUS
|
|
Traxide USI-160 Install517 viewsOverview picture of Traxide USI-160 upgrade install. This was an upgrade from the SC80 which performed flawlessly. The USI-160 had two relays and can deliver more amperage. As a result, the wiring was upgraded to 4/0 Welding Cable (warn) and heat shielding was added. The unit performs flawlessly to support 2 HAM Radios, Fridge, etc. Like me https://www.facebook.com/DifferentialPartsUS
|
|
Winch Power upgrade319 viewsUsing 2 warn kits, and removing one of the wires to use on another project. The purpose was to replace the power and ground wire. I used Warn kits, which are 4/0 Welding cable. The original red #4 warped from getting a little too worn. The 2nd
Battery #1 Deka 9A94 AGM Intimidator, Battery #2 Deka 9A47 AGM Intimidator WARN 36080 28" Quick Connect Cable X 2, WARN 26405 Quick Connect Cable 7' X 2, WARN 15901 Black Cable X 1 -- winch control 72" X 1 https://www.facebook.com/DifferentialPartsUS
|
|
Rigid SR2 40" combo133 viewshttps://www.facebook.com/DifferentialPartsUS
|
|
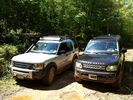
discrete winch mount415 viewsThe D44 winch mount on the trails. Like it on Facebook https://www.facebook.com/DifferentialPartsUS
|
|
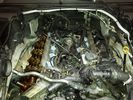
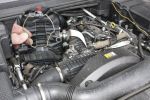
4.4 L Petrol Engine214 viewsIntake removed on V8 4.4L Petrol Engine to remove hose with T in it.
plse like my facebook page https://www.facebook.com/DifferentialPartsUS
|
|
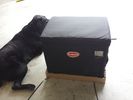
Snomaster 40L fridge/freezer142 viewsPO https://www.facebook.com/snomasterusa
|
|
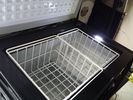
Snomaster 40L fridge/freezer158 viewsPO https://www.facebook.com/snomasterusa
|
|
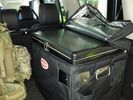
Snomaster 40L fridge/freezer185 viewsPO https://www.facebook.com/snomasterusa
|
|
Snomaster 40L fridge/freezer189 views(c) https://www.facebook.com/snomasterusa
|
|
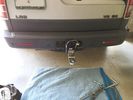
Rhino Hitch206 viewsRhino hitch https://www.facebook.com/DifferentialPartsUS
|
|
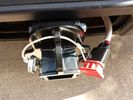
Rhino Hitch229 viewsRhino Hitch https://www.facebook.com/DifferentialPartsUS
|
|
66L 174 views66L Fridge Freezer running in 90F heat. https://www.facebook.com/snomasterusa
|
|
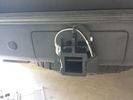
Rhino Hitch431 viewsCover fitted over the 75A Anderson plug with Rhino Hitch fitted which is a Class IV hitch. https://www.facebook.com/DifferentialPartsUS
Fits the Disco 3, Disco 4 and Range Rover Sport
|
|
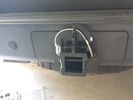
Rhino Hitch311 viewshttps://www.facebook.com/DifferentialPartsUS
|
|
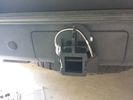
Rhino Hitch395 viewsMore info from https://www.facebook.com/DifferentialPartsUS
|
|
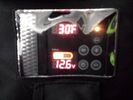
Snomaster 40L fridge/freezer225 views(c) https://www.facebook.com/snomasterusa
|
|
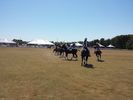
Victory Cup Polo Match141 viewsVictory Cup Bi Plane Polo Match2 viewsLand Rover event at Victory Cup Polo match 10/17/15. http://victorycup.org/bootsandpearls/
VIP Section by Texas Rovers and Land Rover Austin http://texasrovers.org and http://landroveraustin.com/ https://www.facebook.com/DifferentialPartsUS https://www.facebook.com/snomasterusa
https://www.facebook.com/DifferentialPartsUS
|
|
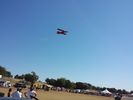
Victory Cup Bi Plane Polo Match121 viewsLand Rover event at Victory Cup Polo match 10/17/15. http://victorycup.org/bootsandpearls/
VIP Section by Texas Rovers and Land Rover Austin http://texasrovers.org and http://landroveraustin.com/ https://www.facebook.com/DifferentialPartsUS
https://www.facebook.com/DifferentialPartsUS
|
|

Transfer box drain/fill27 views
|
|

Rear Diff drain/fill27 views
|
|
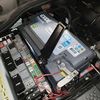
new battery, exide EA1000 / 100Ah/900A7 viewsImage uploaded in thread 177818
|
|
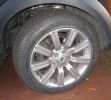
20\'s with 265/50 Yokohams481 views
|
|
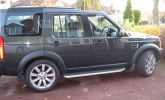
On Stormers with 265/50x20 111W Yokohama Advan ST\'s554 views
|
|
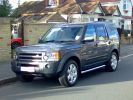
F/N/S386 views
|
|
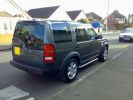
R/O/S320 views
|
|
265/50x20 clerance pic363 views
|
|
D3 LowLine 1CD/Tuner33 views
|
|
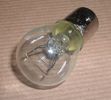
Land Rover Stop Tail Light dual filament bulb nominal 12 volt 21 / 5 watt filaments1428 viewsThis is the Land Rover part number 264590 dual filament bulb, (P21/5), that inserts into the upper two tail lamp receptacles. In the upper one, both filaments function, in the lower one, only the 5 watt tail light filament functions.
I regard it as not a good practice to routinely switch bulbs when the tail light filament, (5 watt), burns out on the lower bulb. The broken filament can jiggle over onto the brake light filament, (21 watt), and short the circuit to ground or something else not predicable.
There are also arguments to say that quality control is better on the Land Rover marketed bulbs than say far east sourced bulbs. Filament construction, and hence resistance can vary and mislead the current sensing circuits monitoring the signal light systems. Also when the bulbs are properly installed, all filaments should be standing vertically and not at any slope.
These are the sort of obscure circumstances that can lead to false trouble messages on the display, dropping to the stops, and subsequent concerns - all over a tail/signal light bulb.
For example, the filament life of both the tail light and the brake light filaments in the P21/5 bulb is significantly less than the USA common 1157 dual filament bulb, (1000/250 vs 5000/1200 hours); brightness in the P21/5 is a bit more, (3cp/35cp vs 3cp/32cp where cp is candle power), but current consumption is oddly less, (0.44a/1.86a vs 0.59a/2.10a where a is amps). It is the quest for efficiency vs maintenance trade off.
|
|

265/50x20 fronts436 views
|
|

265/50x20 rear499 views
|
|
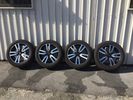
Ruote LR023736 con Continental 265/50R2026 views
|
|

Ruote LR023736 con Continental 265/50R2034 views
|
|
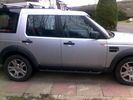
My new slider/steps272 views
|
|
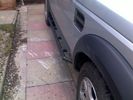
My new slider/steps - sideview offside264 views
|
|
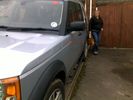
My new slider/steps - nearside146 views
|
|
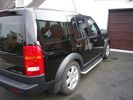
compound polish 27/02/2013157 views
|
|

3 GPS/Telephone Pre drilled Holes61 views
|
|
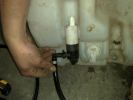
bottle with H/L washer pump and leveling sensor to the right - the space on the far right is for the w/screen pump87 views
|
|

Mud/rock scrapes.177 viewsWhat happens when you lean the car on a mud wall.
|
|

3 Point Hitch on Series 90152 viewsUsually one sees the Series units with just a conventional field plow hooked to a drawbar hitch, tractor style. This jpg however is the full meal deal - a 3 point hitch, probably off a Fordson tractor, in the long tradition of Ford/Land Rover cooperation.
|
|
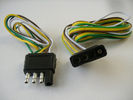
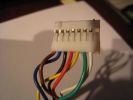
4 pin NAS flat connector from NAS small trailer383 viewsThe connector with the three exposed pins is the end that would commonly be located at the trailer hitch end, (front), of a small NAS lightweight trailer that has no electric brakes. This plug would connect into the flat 4 pin connector at the rear of the 3.
Note the order of the pin functions and wire colours: White is ground; the next pin is for tail/marker lights using the Brown wire; the Yellow conductor is for the left turn signal, and the far pin uses the Green conductor for the right turn signal.
There is no separate brake light conductor as NAS spec vehicles most often combine the brake and signal light functions to the same bulb filament rather separate filaments in different bulbs. The LR factory harness resolves that design difference.
Fortunately, the Land Rover NAS assembly pin order for the 4 pin flat plug maintains the above described conventions.
|
|

Air Distribution and Filtering Systems2089 viewsThis is 3 page pdf with coloured drawings of the air distribution ducting for the front air system.
Also included is a sketch of the pollen filter location within the front heater ducting. Note that two types of filters are available: a) the cheaper dust/pollen filter and b), the activated carbon filter that removes smells from the air. Installing the more expensive activated carbon filter means you never smell a cattle truck or chicken farm again. It really works.
|
|

156 viewsAlmond/Arabica trim
|
|

135 viewsAlmond/Arabica trim
|
|

4x4 Reliability Comparison - 201127 viewsTaken from Warranty direct survey / reliability index.
|
|
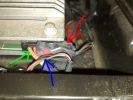
5 ICE Loom - Location of pre fitted Voice / Speed pulse connector67 views
|
|

501-12-cool-box install instructions / german language66 viewsCool Box Discovery 4 installation instructions - german version
|
|

D4/LR4 501-12-floor console upper panel install instructions / german language72 viewsD4/LR4 501-12-floor console upper panel install instructions / german language
|
|
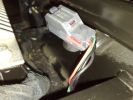
6 ICE Loom - Voice / Telephone & speed pule connector65 views
|
|
rrs n/s10 views
|
|
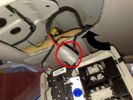
7 Voice / Telephone Mic Cable - pre fitted in roof70 views
|
|
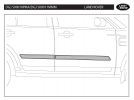
DGJ 500010PMA/DGJ 500011MMM74 viewsFITTING INSTRUCTION
Rubbing Strips
|
|
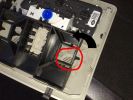
8 Where Voice / Telephone Mic goes65 views
|
|

Shift Lock Solenoid Problems14 viewsHow to repair and/or get home when the solenoid fails
|
|
65 viewshttp://www.disco3.co.uk/gallery/albums/edit/preview_9984c66c.JPG
|
|
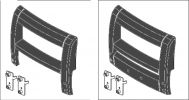
A-Bar Varients222 viewsWinch Version on Left / Non-Winch Version on Right
|
|

Antenna Mount448 viewsA light dual band VHF/UHF antenna mounted on an 3mm x 25 alloy bracket
|
|
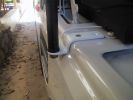
Antenna Bracket388 viewsThis was bent from a piece of 3mm x 25mm alloy flat bar. I used automotive grade double sided tape and two screws to fasten it. I have a dual band VHF/UHF antenna on this bracket
|
|

A/C Compressor26 views
|
|
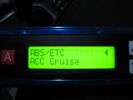
ABS/ECT & Adaptice Cruise Menu in the Faultmate FCR93 views
|
|
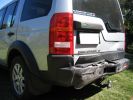
Rear left103 viewsDamage to car after ~60km/h rear end collision
|
|
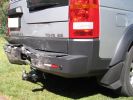
Rear right94 viewsDamage to car after ~60km/h rear end collision
|
|
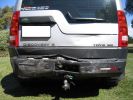
Rear114 viewsDamage to car after ~60km/h rear end collision
|
|

fiat service / mot8 views
|
|

Land Rover Aerial Fin images for both Glass and Metal Roof Disco3 / LR3864 viewsAs well as the two different fins, this pdf also shows the plastic blanking plate for glass roof vehicles where no fin is installed.
The glass roof fin is secured by two security screws from the top into a plastic frangible glue on gasket. The hope is that when struck, the fin will shear off and not crack the glass roof. Re the metal roof design, the fin is secured from underneath via two nuts.
The pdf also shows the various electrical bits related to the antennas. In the UK, the fin would house not only a cell phone antenna but the TV and satellite radio antenna electronics as well; in the States, the Sirius sat radio antenna and a G type cell phone antenna if the phone kit was installed would reside within the fin. The SAT NAV GPS antenna is located within the High Mount Brake Light plastic mounted to the upper rear hatch.
|
|

Fin cell phone aerial drawing190 viewsThe factory aerial for the factory NAV / GPS on my 2005 HSE is within the high mounted stop light lens at the top of the upper hatch door. I do not have the factory installed phone kit, and as such, do not have the fin installed; instead there is just a plastic blanking insert to fill the cell phone aerial wiring hole in the metal portion of the roof; hence this requirement for an "external" cell antenna. For those that do have the fin on their glass roof, the fin is screwed on to a glued on plastic gasket, (sort of), and not bolted thru as per the metal roof 3's.
|
|
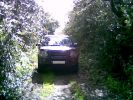
Lunchtime Lane202 viewsNot 200 yards from Manchester Airport can be found a little 1/2 mile lane - did it for the first time today - a few minutes fun in a dreary day
|
|
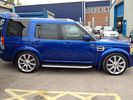
FOR SALE - ONE OFF Land Rover Disco 3 37 viewsOne of a kind Landrover Discovery TDV6 HSE LUX Model 5 door automatic 4x4 diesel evo blue. Upgrades: sidesteps, roof rails, privacy glass, front and rear heated seats/elec seats, landrover tv and headphones, 7 seater black leather, piano black dash/steering wheel, built in fridge, 6 disc changer, sat nav and bluetooth, harman kardon premium entertainment pack, by-xenon adaptive headlights , cruise control and front and rear park distance control, panoramic electric glass roof, 22inch alloy wheels, body kit
|
|

Alternator female plug looking down into top374 viewsThis shows the plug connected to the alternator wiring harness looking down into the top of the plug.
The cavity marked 1 is the AS or BATT SENSE and the wire colour most likely has Brown/Green on it.
The cavity marked 2 is the RC or ALT CON and the wire colour most likely has Red/White on it.
The cavity marked 3 is the L1 or ALT MON and the wire colour likely has Green/White on it.
I say "most likely" as the wire colours are not always the same on all vehicles.
Also the terminal 1 conductor destination is more likely C0570-175 rather than per the jpg.
The #3 pin is located closest to the big B+ terminal.
|
|
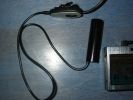
The cam with microphone/control buttons180 views
|
|
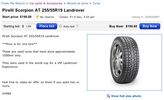
Pirelli ATR49 viewsPirelli ATR's and MT/R used in Rugby World Cup
|
|
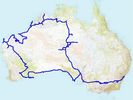
17 views23867km March/September 2010 - The Nullarbour, Pilbra, Kimberley, Gregory NP, The Centre
|
|
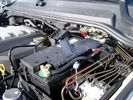
BCI Group 40R Deka 640RMF battery showing vent hose run forward to windshield washer reservoir area 1434 viewsRecessed post "Euro profile" battery to "match" OEM and stock Land Rover bracket; note that the Traxide SC80-LR module is mounted at an angle to allow for the main cable to sit under the cover so cover still closes.
The battery is a nominal 7", (180mm), high, but sits on a 1" battery spacer set under to raise the bottom front end of the battery such that the approx 11", (290 mm), length of the BCI 40R battery rises above the angled plastic nibs at the forward end bottom of the case front; hence sufficient space, (1/4", 5mm) remains at the brake reservoir end.
Also the 40R battery does not have hold down "flanges" on each end; on the sides yes, but not the ends so no additional length is required.
When I had to replace the 40R, this time I installed the shorter, (9.625"), taller, (7.5") Interstate BCI 47 / DIN H5 battery which eliminated the spacer on the bottom and better fit the stock LR tie down bolt lengths. Deka also has a BCI 47 / DIN H5 that would work fine as well.
|
|

157 viewsAux Cover R/Hand
|
|

TransK9/B10 in Discovery 442 views
|
|
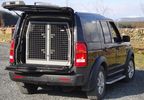
K9/B10 Dog Crate111 views
|
|

TransK9/B10 in Discovery 436 views
|
|
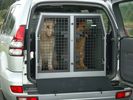
TransK9/B10 in Toyota LC26 views
|
|

TransK9/B12 in Discovery 4 33 views
|
|
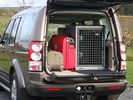
TransK9/B24 in Discovery 4 with storage48 views
|
|
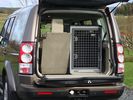
TransK9/B24 in Discovery 4 with 6th seat in use37 views
|
|

13 viewsTransK9/B24 with Lola the Dalmation!
|
|

21 viewsTransK9/B24 with fully grown Boxer
|
|

13 viewsTransK9/B24 with Boxer
|
|
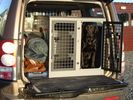
TransK9/B8 in Discovery 496 viewsTransK9/B8 in Discovery 4
|
|
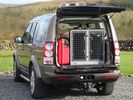
TransK9/B8 in Discovery 4 with storage49 views
|
|
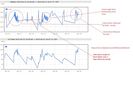
154 viewsRunning a 72L fridge on 100W solar with some driving. Conditions, overcast with some occasional sun. Overnight on Battery power. https://www.facebook.com/snomasterusa
|
|

LTZ21 viewsCooper Zeon LTZ 255/55/19
|
|

Tread pattern of BF Goodrich Mud Terrain KM2 in LT245/70R17120 views
|
|
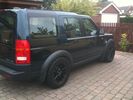
255/75 R17 BFG MT 98 viewsAccess height with shortened rods & spacers
|
|
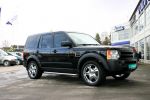
Chrome1445 viewsCerberus 20" Chrome rims with Pirelli Scorpio Zero Asymetrico 295/40/20
|
|
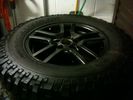
BMW X5 17" Wheel 79 viewsBMW X5 17" V-Spoke wheel with BFG MT 255/75 R17
|
|
Forest of Dean Wild Boar at Blakeney Straits / Wenchford Picnic Site74 views
|
|
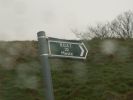
This definitely needs investigating.....177 viewsI had already picked this BOAT out on the O/S map but now I\'ve seen it in the flesh, it needs to be investigated
|
|

OLD VERSION - Bodsy's Brake Bible v 1.611197 viewsUSE Version 1.6a
Clarified EPB shoe instructions & corrected references to other sections. Added paypal donations information (requested by users of the guide.) Internationalised wheel location references by removing UK based reference to OS/NS, replaced with physical Front Left or Front Right descriptions.
|
|
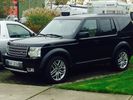
Bodykit front / Evoque 20" Wheels79 views
|
|
o/s/f16 views
|
|
o/s16 views
|
|
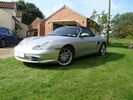
n/s/f15 views
|
|

Black Deposits to interior of Brake Light Switch2866 viewsThere are two contacts, one on each side of the vertical plunger under the copper metal. The set of normally open contacts on the left side that carries the power for the brake light filaments, (15 amp fuse F15P), is apparently not heavy enough as the contacts deteriorate and generate the black residue.
The set of normally closed contacts on the other side appear to be sized OK. There is not as much current, (5 amp fuse F66P), flowing thru the contacts to the ABS module, however the contacts are likely adversely affected by the black residue produced by the other deteriorating set of contacts.
One presumes/hopes that the newer replacement switch now has contacts heavy enough to carry the brake light power. It would be ideal if the ABS set of contacts were sealed from the brake light contacts to prevent contamination of the normally closed set of contacts.
|
|
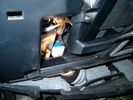
Brake Switch Visible thru Opening4982 viewsThe blue and white bit is the switch; the sort of gold appearing box,(it is really black), you will not see in your 3 as it is a Smooth Talker brand amplifier for my Blackberry phone antenna. This install is detailed in the SmoothTalker phone antenna section of my gallery.
One way to remove and install the switch is to lower the "horizontal" panel above the brake pedal as shown where the flashlight head is located. To actually remove the switch, you slide your hand thru the gap and rotate the switch clockwise 1/4 turn while watching thru the rectangular opening. Installation of the new switch is the reverse of above - 1/4 turn counterclockwise.
Before you remove the switch, note its orientation - horizontal with electrical wires to the left. That is the way it should look after replacement as well.
The second time I replaced the switch, I did it all thru the rectangular opening and did not remove the horizontal panel - that is experience helping out.
The knee kick you have to remove regardless. It is sort of hinged at the bottom so you just pull at the top and sort of rotate the knee panel and then pull upwards for two plastic "fingers" to clear the slots they reside in.
|
|
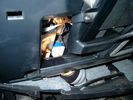
Smooth Talker Amplifier Box mounted below near steering column.180 viewsThe gold look box due to the lighting, (actually black), is the antenna amplifier located near the steering column. It can be put anyway but this seemed an OK location as I ran the antenna connector cable rearward from here to the back corner of the 3 and then up to the underside of the roof glass at the rear. The blue/white thing is the brake light switch that often must be replaced. See the Brake Light Switch file within this Gallery regarding the switch replacement.
|
|

Black Deposits on Brake Light Switch Plunger2764 viewsThis jpg I got off another forum and is typical of what one will see when one opens up the removed brake light switch. The black powder is residue from arcing of one of the pair of contacts within.
Hopefully the newer switches with the FOMOCO logo moulded into the plastic are improved from the Land Rover logo marked early units, however I doubt it.
The Ford part number is SW-6572 and/or 7E5Z-13480-A as used on the 2006 to 2009 Ford Fusion's and Mercury Milan's; the Land Rover part number is XKB500110. Cost of switch could be about twenty five dollars. A previous LR part number for the switch was XKB500030, so hopefully the newer LR part number, XKB500110, reflects some improvement in reliability.
It is possible that the new switches are better as I installed a replacement 72,000 km, (45,000 miles) later, at 195,000 km (121,000 miles). When I took the removed switch apart to inspect, it was clean inside. There was no black dust - the switch looked like new, hence they must be improved now.
|
|
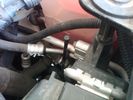
Vertical Breather Hose before cutting off OEM cap.1786 viewsThis shows the plastic vertical breather tubing and OEM cap prior to being cut off. The tubing is located on the driver side at the front near the radiator. One cuts about 3/4" to 1" off from the top. The TSB says 20mm.
I tried blowing thru the cut off piece and was not very successful. The cap seemed plugged. I am beginning to think that there was a very good reason for Land Rovers's Technical Service Bulletin, (TSB).
|
|
T-Max Adventurer 160lt/min Compressor too big for spare battery slot73 views
|
|
Camera Control Module D451 viewsHarness connection detail, camera module, located beneath L/H passenger side front seat UK D4 spec 2012.
|
|

Can Bus14 views0s - Start of trace
5s - unlock 1
10s - ignition on (In-I-II)
30s - ignition off (II-I-Out)
Non accurate timings - +/- ~2s.
|
|
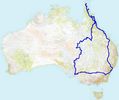
Cape York 201148 views12969km May/August 2011 - Cairns, Cape York, Longreach, Birdsville
|
|
![Filename=Capodanno Assisi 31-12-2008 128 - 01 gen 2009 - 128 [1280x768].JPG
Filesize=88KB
Dimensions=1024x768
Date added=02.Jan 2009 Capodanno Assisi 31-12-2008 128 - 01 gen 2009 - 128 [1280x768].JPG](albums/userpics/12685/thumb_Capodanno%20Assisi%2031-12-2008%20128%20-%2001%20gen%202009%20-%20128%20%5B1280x768%5D.JPG)
La Rocca di Assisi - Italy95 viewsLa Rocca di Assisi - Italy
|
|

Central Door Locking Operation Description1458 viewsThis 17 page pdf explains how the door locks are supposed to operate. Note that on page 9/17, the explanation of the operation of the hood ajar switch is wrong. It operates similar to the door and tailgate ajar switches; that is when a "door" is closed, the switch is closed to maintain a ground back to the CJB. Opening the hood, door, or tailgate removes the ground breaking the circuit and hence allows for an alarm condition.
|
|
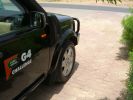
RHS view372 viewsSHows the Front Runner (SA) slimline windcheetah rack which is immensely strong. Takes my 110kg (oh gawd, I must get back on the diet and exercise regime) tramping over it when loading/unloading gear without a problem. Fittings are simply fixed or removed, and IMO very well designed and made. IPF 800 series driving and spots fitted to the front of the rack. IPF cam/reversing fitted each side and to rear of rack for negotiating rocky wadis at night. The G4 stickers were bought off E-bay as a set.
|
|
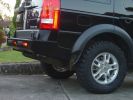
Rear end294 viewsLocally made wheel covers. LH is zipped from bottom to top to fit over registration plate with zip fasteners top and bottom. Rear IPF Reversing /camp lights on rack linked to reverse light circuit.
|
|
Load space369 viewsShows the SA Front Runner Wolfpack stacking plastic storage boxes that I keep laod straps etc in and the 2nd is tool kit, spare belts, jerry can funnel and tools, plus airline and tyre inflator/deflaotr for ARB on-board compressor, HD jump leads. ARB Winch pack (Orange)with strops, snatch blocks, shackles, gloves, and 2 ARB recovery dampers. Really great 4x4 1st Aid kit from Outdoors warehouse in SA. LRs own loadspace guard - not the best design if you want to store a long load. Mods to be carried out!
|
|
Long Ranger auxilairy fuel tank pump switch and tank gauge308 viewsFitted to the right of the air vent thumbwheel, the neat combination switch and gauge take sup no room at all. Switch locks on or off, but no pump running warning lamp! Contents of the tank are indicated by 5 LEDS, 4 green and 1 red for full, 3/4, 1/2, 1/4 and empty. Pump transfer rate of just 2 litres p/min is disappointing. I transfer on the move when main tank is at 1/4.
|
|
LR towing electrics pack 12N/12S313 viewsThe LR trailer electrics fitted before the Kaymar bumper and spare wheel carriers required no modifications are perfectly accessible. Good strong recovery point between the sockets too. The swing awau wheel carrier securing latches can be seen quite clearly here. Long Ranger tank (painted black) nestles where orignal spare was fitted.
|
|
2009 MY?239 viewsThe wheelarches, door sills, and door mirror bodies have all been sprayed to match the body colour. Same as 2009 MY? I think this looks really good, and is so much easier to keep clean than the textured plastic that suffered badly out here from dust/dirt ingraining and UV discolouration.
|
|
Kumho KL71 265/70/17 + Kaymar bar208 views
|
|
Remove Clip951 viewsRemoving the air box/EGR butterfly housing securing clip
|
|
Clock Spring / Rotary Coupler Connector from horn controls210 views
|
|
Halogen/HID comparison80 views
|
|

Cooling system hoses - 4.4L petrol V81113 viewsThese are the cooling system hoses on the 4.4L petrol V8. The little odd shaped bleeder hose, (LR006158), shown in the top right hand corner can give problems. There is a plastic tee with a threaded air bleeder outlet located in the middle of the hose. The plastic tee can or will fail due to I guess heat distress.
A BIC pen can serve as a field fix, however for your parts kit, a nominal 3/8" ID hose size brass hose barb inline connector plus a couple of hose clamps is suggested. Better yet is a threaded hose barb brass coupling or a tee and bleeder valve to allow bleeding of the line. Land Rover now makes the plastic bleeder valve that breaks available as a separate part, # LR027661, where 0 is a zero. As such, one can now purchase that part only for addition to your field fix parts kit.
|
|
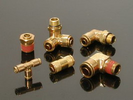
Detroit Fluid DOT air line fittings720 viewsThe picture shows the internal ferrule that is characteristic of the DOT / TUV accepted fittings for highway vehicles. Most often these fittings are metal however the Land Rover John Guest 6mm straight connector is all plastic and has the internal ferrule.
|
|
new 20s with 295/45/20 Nexen158 views
|
|
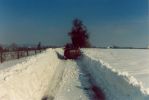
the road between home and work292 viewsthe day before returning from work, I got stuck here in the middle of the snow storm. The plow didn\'t pass yet and wind was blowing snow everywere. Since then I always carry during winter a survival pack consisting of warm coat,cap, warm, high boots and gloves.
It is no fun recovering a car stuck in the snow and sliding down from the road when moving in nothing more than a business outfit (no gloves, city shoes, no coat) with a snowy wind blowing 100km/h..... .
|
|
Cooper STT 245/70R17106 views
|
|
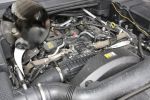
Engine Cover Removed902 viewsView of the engine before blanking off the EGRs. The inset sort of shows one of the EGR valve/pipe flange securing bolts. The EGR valves are not easy to get at!
|
|
d/4 front grille conversion/ foglamps and chrome bezzells(courtesy of nismo)336 views
|
|
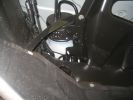
86 viewsCloseup of the cylinder/reservoir on front LHS of spare wheel well.
|
|
68 viewsHidden winch solution for D3 and D4.
Supplier: Taubenreuther in Germany.
Link: http://www.offroad24.de/shop/index.php?pli=1005055010&artnr=16-4950&view=detail
|
|

Stick an LRX/F2 front end on a D3 and this is what you get...183 views
|
|
20\'s - 2nd time around - 295/45 Grabbers this time624 views
|
|

28 viewsShort clip of turbo actuator rod moving after key turned to position2/3
|
|

D/3/4 wheel stud aligner11 viewsPDF drawing of dimensions to manufacture your own.
Alternatively, I can do it for you.
( One for Defender coming shortly)
Suggestions welcome.
|
|
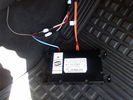
D4 Bluetooth AH42 10F845 AA module connected to 12VDC and MOST1215 viewsThis jpg shows the MOST bus connected to the AH42 10F845 AA module used in the D4 as well as +12VDC power from F58P connected. The power is split with a Y harness as the IHU (radio) for some reason required +12VDC power to the C2115-10 "mute" pin to keep the radio/CD audio from muting all the time.
With power on the pin, the radio audio does mute as it should when the cell phone rings and the hands free connects. The brown conductor feeds to C2115-10 and the blue to the module.
The module tucks up and hides behind the grey plastic section covering the forward portion of the passenger side tranny hump for left hand drive vehicles; for RHD, it would be located on the left side.
The pairing code is 2121 with this setup and not 1234 or 0000.
|
|

Disco3 17" alloys and Cooper S/T in LT245/70R17 on D432 views
|
|

Maintenance Check Sheet Arduous 3.0 TDV6 Models to 11MY Discovery 4 / LR424 viewsMaintenance Check Sheet Arduous 3.0 TDV6 Models to 11MY Discovery 4 / LR4
|
|

Maintenance Check Sheet Rest of World 3.0 TDV6 Models to 11MY Discovery 4 / LR419 viewsMaintenance Check Sheet Rest of World 3.0 TDV6 Models to 11MY Discovery 4 / LR4
|
|

Maintenance Check Sheet All Models UK & EU to 11MY Discovery 4 / LR412 viewsMaintenance Check Sheet All Models UK & EU to 11MY Discovery 4 / LR4
|
|
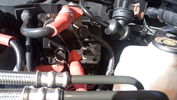
+12V supply143 views+12V taken from the regulator used to power the start/stop battery from MY14 onwards
|
|
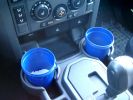
375 ml jam container372 viewsThese are the 375ml Danish Orchard brand jam containers. They fit fairly tightly into the original old style, (2005/6) Land Rover 3 factory cup holders. The extra height provided by the containers can be an advantage. I have a similar assortment of containers in some of the door panel located wine bottle holders to better hold containers of lesser valued products.
|
|
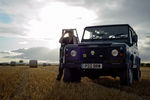
My Defender22 viewsDefender TD5 looking to keep it long term with a chassis replacement this year.but the quality / ride contrast between it and our Disco 3 is very apparent.
|
|
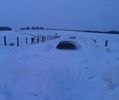
41 viewsGoing nowhere fast, Daviot to Wartle road, Aberdeenshire 23/1/13
|
|
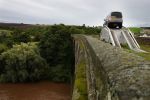
D4 / RRS Launch - Picture Nick Dimbleby127 views
|
|
D4 / RRS Launch - Picture Nick Dimbleby103 views
|
|

Deka Battery Dimension Data617 viewsThe battery size that I installed for my auxiliary was a BCI 40R battery as it was for me the easiest to fit and was also a cranking battery. The case profile was such that no tie down fins were located on either bottom end, (sides yes), and length wise, it was only about 11" (290 mm) long. As such, I did not have to grind the nibs at the front bottom of the plastic surround.
I did however raise the bottom of the battery above the angled nibs as I set the battery on a 1" (25mm) high plastic spacer. The total height, (battery plus spacer), was about 8" (200mm) so the battery top still fit under the Land Rover factory cover.
For the Aux battery, when I replaced the 40R, I installed an Interstate BCI 47 which is similar in size to a DIN H5. I was therefore able to eliminate the vertical spacer as the Group 47/H5 is the same height as the DIN H7/H8 stock LR spec starting battery. As such, the standard battery tie down bolts can be used without modification. The Group 47 battery is 9 11/16" long x 6 7/8" wide x 7 1/2" (190mm) high.
|
|

Cooling System - Description and Operation 4.0L and 4.4L petrol engines 5 pages1032 viewsThis is a 5 page pdf that provides some insight into how the coolant flows thru all the hoses. Of interest is the paragraph,(page 3/5), that attempts to explain how and why the thermostat is designed to open at different engine operating temperatures - in brief, the reason for the spaghetti tangle of small hoses on the top of the engine.
There is also reference to an engine oil cooler that I gather cools something I think related to a supercharger, if fitted.
|
|

415-02 Antenna systems for AM/FM, Satellite, GPS and TV systems543 viewsThis is a 5 page pdf related to the antenna systems for the AM/FM radio, Satellite radio, the GPS/NAV and the optional TV.
|
|

Essential info for visiting Maroc and/or France113 views
|
|
Different Llams knob c/w large washer102 views
|
|

D3 reqar diff lock186 viewsView from right rear tyre well, left rear tire/rim visible on other side. Actuator motor visible
|
|
224 viewsTyre cleanrances with Bridgestone 265/65/70 -17 AT
|
|
Good Year MTR 255/55/19 ARB bar warn winch144 views
|
|
Good Year MTR 255/55/19 ARB bar warn winch125 views
|
|
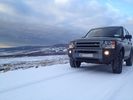
Snow152 viewsSnowy day in March in the Dublin/Wicklow mountains
|
|

Perth to Shark Bay spearing trip. 9 viewsDisco 3 Tdv6 auto. Air suspension. Arb bullbar. BFG All Terrain KO 265/65r18. 6m Seafarer Honda 150hp
|
|
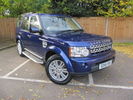
Discovery 4 HSE, 3/4 View54 views
|
|
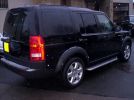
Rear 3/4 shot135 views
|
|
Other Rear 3/4 view147 views
|
|
LR with A/C AOG 26 views
|
|
Snow181 viewsSnowy day in March in the Dublin/Wicklow mountains
|
|
Don't forget the plastic clip63 viewshttp://www.disco3.co.uk/gallery/albums/edit/preview_8ffce58e.JPG
|
|
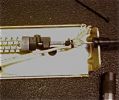
Actuator box underside 63 viewsUsed a clove hitch with plastic zip tie with 1/8" Kevlar rope
|
|
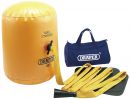
Draper air jack258 viewsDraper air jack, stock no. 61432, part no. AJ3 at http://www.drapertools-online.com/b2c/b2citmdsp.pgm?pp_skmno=61432
|
|
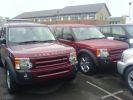
Old and New Red for D3 - Decisions/decisions414 views
|
|
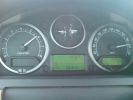
Max Speed 195KM/H378 views
|
|
Charging voltage with a/c on127 views
|
|
My new wheels and 275/55 tires211 views
|
|
275/55 R19 pirelli tires180 views
|
|
disco commercials accross a ploughed field99 viewsstandard continental 235/70/17 and didnt get stuck
|
|

Lead Car Entering the Finish116 views7 May 2007 - My D3 on duty as lead car in shinfield 10K road race. what a nightmare driving at low speed in the rain. Clock was mounted on standard crossbars. connection to additional batteries in boot cable thru side window. There is a small offroad section (actually an un-made road) Oaklands Road, Shinfield, Reading (suggest anyone test driving in the Reading area take this road)
|
|

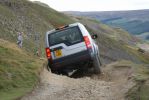
Greenlaning in North Yorkshire / Co Durham287 views
|
|
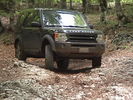
Greenlaning in North Yorkshire / Co Durham302 views
|
|
Greenlaning in North Yorkshire / Co Durham325 viewsMy fav pic, you never know until you try!
|
|

Big Kev, and IanR/Anne coming down Dampier Mountain FT78 views
|
|
LR Day Lazio 23/05/201048 views
|
|
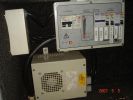
Detail of 20A ac charger/adaptor & breakers for 2 x 10⁵AH batteries, lights, pump etc218 views
|
|
Cooper Zeon tyres15 viewsCooper Zeon ATZ 255/55/19 for the trip
|
|
Headlight adjuster O/S80 views
|
|
Headlight adjuster N/S78 views
|
|
Laning in Cornwall 10/09/09134 views
|
|
Lanining in Cornwall 10/09/09208 views
|
|
Lanining in Cornwall 10/09/09232 views
|
|
Laning in Cornwall 10/09/09145 views
|
|
Laning in Cornwall 10/09/09146 views
|
|
Laning in Corwall 10/09/09226 views
|
|
Bulkhead grommet O/S167 views
|
|

219 viewsD3/RRS/Freelander 2 colour wall
|
|
Winter and summer tyres437 views 255/60 R18 Nokia SUV4 with spikes
and the standard Continentals of Disco 3
|
|
Zermatt / Ebony Discovery 4 HSE534 views
|
|
Zermatt / Ebony Discovery 4 HSE491 views
|
|
Zermatt / Ebony Discovery 4 HSE487 views
|
|
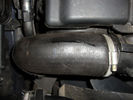
66 viewsPART NUMBER PNH/500024 D05WA >CR<
FAULT CODE UNDER TDV6 DISPLAYED IS P0299 DESCRIPTION DISPLAYED UKNOWN BUT IS I THINK (UNDER BOOST)
|
|
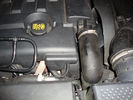
intercooler hose split51 viewsPART NUMBER PNH/500024 D05WA >CR<
FAULT CODE UNDER TDV6 DISPLAYED IS P0299 DESCRIPTION DISPLAYED UKNOWN BUT IS I THINK (UNDER BOOST)
|
|
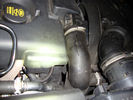
Split Intercooler Hose51 viewsPART NUMBER PNH/500024 D05WA >CR<
FAULT CODE UNDER TDV6 DISPLAYED IS P0299 DESCRIPTION DISPLAYED UKNOWN BUT IS I THINK (UNDER BOOST)
|
|
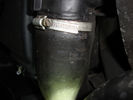
42 viewsPART NUMBER PNH/500024 D05WA >CR<
FAULT CODE UNDER TDV6 DISPLAYED IS P0299 DESCRIPTION DISPLAYED UKNOWN BUT IS I THINK (UNDER BOOST)
|
|
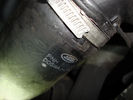
49 viewsPART NUMBER PNH/500024 D05WA >CR<
FAULT CODE UNDER TDV6 DISPLAYED IS P0299 DESCRIPTION DISPLAYED UKNOWN BUT IS I THINK (UNDER BOOST)
|
|
V2: Cooper ATR LT265/70/17, simple homemade mudflaps240 views
|
|
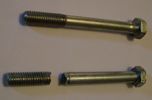
Straight shank / reduced shank25 views
|
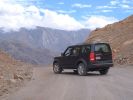
|
Oman/UAE Border136 views
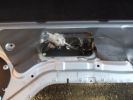
|
|
An alternative approach132 viewsDue to low temperature, and the size/mobility of my hands I decided that the easiest way to open the tail gate was to destroy the old Bowden cable and then pull centre core to release the tailgate - it worked, and doing this earlier would have saved a few cuts and grazes.
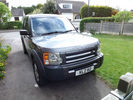
|
|
My new (to me) D3139 viewsBought on 08/05/13
|
|
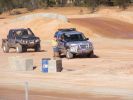
239 viewsLining up the D3 for our first run. Mud/ruts, DSC off, HDC off, Jimi Hendrix on the stereo ... yup, ready to go!
|
|
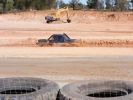
204 viewsGQ Nissan ute got to 3/4 the way through pit 2
|
|
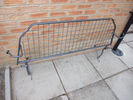
Dog/cargo guard7 views
|
|
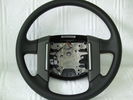
steering wheel c/w horn buttons. No airbag or cruise/audio controls20 views
|
|
Fuel filter drain valve/water sensor34 views
|
|
Fuel filter drain valve/water sensor30 views
|
|
Boughrood 7/4/7318 viewsHow many wheels has Chris got on the ground?
|
|
255/60/18 AT2408 views
|
|

Photo showing inside sock.166 viewsThere is a double layer inside. Just like a conventional tent, the waterproof layer, then a flysheet. Both can be zipped/unzipped when vehicle is not in place.
|
|

Winter 2010/1121 views
|
|
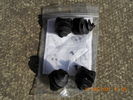
Carpet/mat screw fittings ( enough for two carpets/mats 038 views
|
|
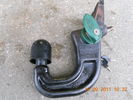
LR detachable towbar c/w two keys35 views
|
|

247 viewskent 10.30 27/12/2005
|
|
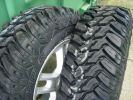
Cooper Discoverer STT tyre on 17" rim300 viewsNew Cooper Discoverer STT 246/70 R17 tyres. 80% off road, 20% on road.
|
|
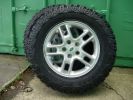
Cooper Discoverer STT tyre on 17" rim283 viewsCooper Discoverer STT 246/70 R17
|
|
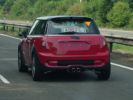
New Mini 2 on a road test 26/7/06138 viewsNew Mini 2 on a road test with very little disguise.
|
|
Gatcombe Park, 09/06 - Grass/mud track section117 views
|
|
Gatcombe Park, 09/06 - Grass/mud track section134 views
|
|
Gatcombe Park, 09/06 - Grass/mud track section127 views
|
|

Gatcombe Park, 09/06 - Claudia frightened of the hills167 views..her friend wasn't
|
|
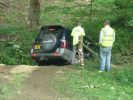
Gatcombe Park, 09/06 - Dropping into the stream156 views
|
|
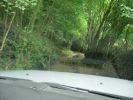
Gatcombe Park, 09/06 - Driving in the stream139 views
|
|
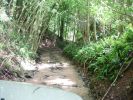
Gatcombe Park, 09/06 - Driving in the stream159 views
|
|
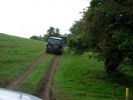
Gatcombe Park, 09/06 - Grass/mud track section156 views
|
|
Gatcombe Park, 09/06 - Grass/mud track section148 views
|
|
Gatcombe Park, 09/06 - Grass/mud track section147 views
|
|
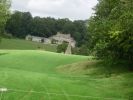
Gatcombe Park, 09/06 - Princess Anne\'s house160 views
|
|
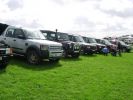
Gatcombe Park, 09/06 - our group183 views
|
|
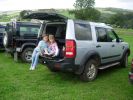
Gatcombe Park, 09/06209 views
|
|

31 viewsSpare wheel never fitted with unused 255/60 x 18 112v
|
|

28 viewsSpare wheel never fitted with unused 255/60 x 18 112v
|
|

30 viewsUnused 255/60 x 18 112v Goodyear M+S wranglers
|
|
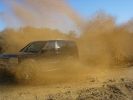
Playing in the "Yarwell Rain"1092 viewsCALENDAR 2008 ENTRY - Taken at the Disco3.co.uk Training/Playday at Yarwell in November 2006. Picture taken by D3Matt, D3 driven by DiscoStu
|
|
Roof Bars closer84 viewsRoof bars for sale, showing small cut/nick
|
|
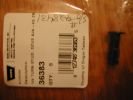
Warn number plate screws/fittings206 viewsPart no. of Warn fitting used to attached number plate to Warn winch carrier.
|
|
Warn Winch gromet/retainer for Warn Winch screws200 viewsPart no. for warn winch grommet/washer for warn number plate holder
|
|
Warn Winch grommet/retainer for number plate holder246 viewsPart no. for Warn grommets for numbe rplate holder.
|
|
Téléthon 2011/127 views
|
|
Téléthon 2011/233 views
|
|
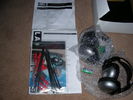
Instructions / parts etc (Un-opened)58 views
|
|
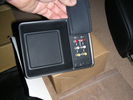
Video inputs / outputs74 views
|
|
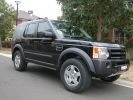
raised suspension setting - 275/65-18 Mickey Thompson ATZ265 views
|
|
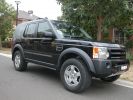
Mickey Thompson ATZ 275/65-18\'s - at raised suspension height576 views
|
|
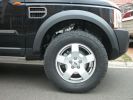
raised suspension setting - 275/65-18 Mickey Thompson ATZ540 views
|
|
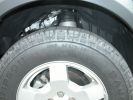
Mickey Thompson ATZ 275/65-18\'s - at raised suspension height536 views
|
|

calendar entry 2009541 viewsCrossing a river in Iceland June 2008 - some of the rivers have deep sticky black basalt sand on their edges and some times needs a running approach! Car is G4 Challenge Event Car from 2006 - Team Germany / Spain - Stage 3/4 Bolivia
|
|
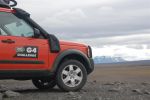
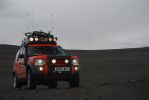
calendar entry 2009528 viewsHigh in the Iceland Interior June 2008 - F88 to Askjar Volcanoe - The mountain is called the "Queen of the Mountains - Herðubreið" Car is G4 Challenge Event Car from 2006 - Team Germany / Spain - Stage 3/4 Bolivia
|
|
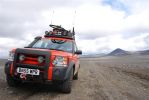
calendar entry 2009583 viewsHigh in the Iceland Interior June 2008 - Car is G4 Challenge Event Car from 2006 - Team Germany / Spain - Stage 3/4 Bolivia
|
|
calendar entry 2009543 viewsHigh on the Iceland Interior - On the Road to Askja - G4 D3 Discovery V8 HSE - Team vehicle from 2006 G4 Stage 3/4 Bolivia -
|
|

calendar entry 2009525 viewsCrossing a river in Iceland June 2008 - some of the rivers have deep sticky black basalt sand on their edges and some times needs a running approach! Car is G4 Challenge Event Car from 2006 - Team Germany / Spain - Stage 3/4 Bolivia
|
|
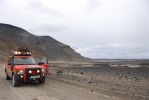
calendar entry 2009541 viewsRoad F88 to Askja - Iceland Interior June 2008 - Car is a G4 challenge event car from 2006 - Stage 3/4 Bolivia - Team Germany / Spain
|
|

calendar entry 2009522 viewsCrossing a river in Iceland June 2008 - some of the rivers have deep sticky black basalt sand on their edges and some times needs a running approach! Car is G4 Challenge Event Car from 2006 - Team Germany / Spain - Stage 3/4 Bolivia
|
|
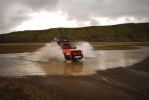
calendar entry 2009539 viewsCrossing a river in Iceland June 2008 - some of the rivers have deep sticky black basalt sand on their edges and some times needs a running approach! Car is G4 Challenge Event Car from 2006 - Team Germany / Spain - Stage 3/4 Bolivia
|
|

calendar entry480 viewsHigh in the Iceland Interior June 2008 - View towards the Vatnajökull Glacier range - Car is G4 Challenge Event Car from 2006 - Team Germany / Spain - Stage 3/4 Bolivia
|
|
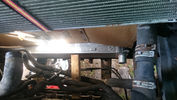
Cardboard to protect the a/c condenser28 viewsEssential while extracting/repositioning rad and intercooler
|
|

240V / 12V Power Board and Battery Charger103 views
|
|
Minuma Range F/T49 views
|
|
Minuma Range F/T46 views
|
|

Dampier Mountain F/T47 views
|
|

DVD / RSE Retrofit Guide139 views
|
|

roof mounted DVD/TV419 views
|
|
dvd/tv361 views
|
|
dvd/tv373 views
|
|
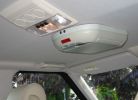
dvd/tv375 views
|
|
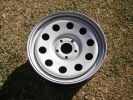
Dynamic 17" steel wheel for V6/TDV6 Disco3s79 views17"x7"; offset +30mm; weight 15.3kg.
|
|
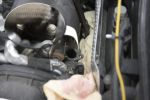
EGR Valve/Pipe Flange897 viewsThe bolts in the inset are the ones to be removed. Note the rag stuffed down beside the EGR to prevent dropped bolts or gaskets disappearing for ever. Don\'t forget to take the rag out if you don\'t want your D3 to go up in flames next time you use it!
|
|
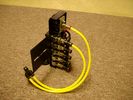
FASKIT on end view 867 viewsEnd and rear view of the FASKIT. Yellow lines are as shipped for hooking to the air supply; one line to valve/filler and other is to gauge. I will modify the arrangement to delete one of the yellow lines such that gauge line plugs into where the second yellow line is right now,(will be only one yellow tube), and then the air source line will plug into the port controlled by the valve, (hidden in this view but visible in other view). When white valve is in the ON position, gauge will read air source pressure, and be available to supply air to any of the selected four air springs. When valve is closed, the gauge will show individual air pressure in each of the air springs when a jumper is run between the gauge Schrader valve and the appropriate air spring Schrader valve.
|
|
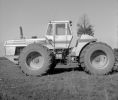
My favourite 4wd , spent thousands of hours farming with this. Sold it in immaculate condition.130 viewsVery well engineered Tractor. 16 Fwd grs,4 speed P/Shift weighed 1800 lb alone (if I remember correctly), 4 equall sized clutch packs, alternates 2 lay shafts with clutch packs, dry sump. no master clutch or TQ/C,Cat 3306DTA. 1 of 12 in Australia.
|
|

just starting to fill7 viewsafter 1 day draining / cleaning
|
|

nearly full10 viewsafter 1 days draining / cleaning / filling
|
|

pump just started8 viewsafter 1.5 days draining / cleaning / filling, pump just turned on
|
|
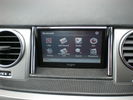
6" kogan gps/media/bluetooth system124 views
|
|
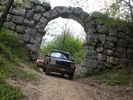
LR Day Lazio 23/05/2010 - Arco di Trevi48 views
|
|
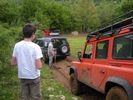
LR Day Lazio 23/05/2010 - Disco impantanato48 views
|
|
LR Day Lazio 23/05/2010 - Duri e puri47 views
|
|

LR Day Lazio 23/05/2010 - Io alla guida50 views
|
|
LR Day Lazio 23/05/2010 - Pausa di riflessione55 views
|
|

LR Day Lazio 23/05/2010 - Io e mia sorella75 views
|
|
LR Day Lazio 23/05/2010 - Una strada nel bosco72 views
|
|
LR Day Lazio 23/05/2010 - Fine69 views
|
|
87 viewsVista 3/4
|
|
Some mud in the tyre treads at last!278 viewsThe D3 behaved herself beautifully on this little lane/track near me
|
|
DVD / RSE Fitted103 views
|
|

Fluid, Filter/Pan Combo removal and install5987 viewsThese are the LR instructions re removal and install of the plastic pan/filter combo for the ZF 6HP26X transmission on the 4.4L petrol V8 LR3.
The instructions tend to ignore the reason you have to lift the right hand side of the engine about 40 mm. This is because of a frame cross member that interferes with dropping down of the plastic pan. The real problem is a vertical "oil filter spout" that rises out of the filter/pan combo up into the transmission. The spout is the suction pipe for filtered transmission oil back up into the tranny.
On the metal pan versions, the filter is separate from the pan, hence the filter remains with the tranny when the metal pan is dropped. The filter is then removed or installed independent of the metal pan, hence with the metal pan, there is no need to lift the engine.
If one is removing the plastic pan so as to install the metal pan, then some do not lift the engine but just drop the plastic pan enough to gain access to saw off the vertical plastic spout - it is a one time procedure.
Be aware however that the metal pan uses a flat gasket and the plastic pan uses a O ring like perimeter gasket that sits in a half round groove in the tranny casing. Also the metal pan uses 21 shorter torx M6x22.5 metric cap screws for the perimeter bolts. The plastic pan uses longer M6x28.5 torx metric cap screws.
|
|
FM/AM/TCM Location56 viewsThis is the location and connections for the FM/AM and TCM
|
|

Exploded Parts view calling up 6R60/80 and 6HP26/28 variations3120 viewsThis single page jpg exploded parts view indicates some commonality between the Ford and ZF versions of the early and later six speed units. Technically this sheet is for the RWD units as there are variations between plain RWD units, 4WD, and AWD. The transmission in the LR3 is called by ZF to be a 6HP26X and by LR in some publications, the 6HP26
|
|

Ford Sounder 4L1Z-15K864 A that I installed.12 viewsThis is the Ford sounder, part number 4L1Z-15K864 that I purchased and installed in lieu of the official Land Rover sounder. Note the part number is what is printed on the box (and also my invoice) but the part number on the sounder body is a bit different. I think a new box/invoice related part number is created each time the price of a part is changed. Regardless the Ford sounder was about half the cost of the Land Rover part and sounds the same as the removed factory buzzer.
|
|

huge everage km/l84 views
|
|

Damaged doorpost left-front/ left-rear20 views
|
|
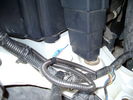
Front coupler pad to right front under air filter housing 160 viewsCoupler Pad is attached to the flat metal surface just behind the rectangular drain off of the air filter housing. The last 3 inches (75mm) of the 1/4" (5mm) black flex wiring loom was then threaded over the last bit of wiring. One of the other jpg's is less washed out and shows the coupler pad a bit better.
|
|
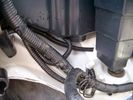
Front Coupler pad to right front under air filter housing 156 viewsThe brighter white "square" behind the black air cleaner drain is the Coupler Pad location I chose for the right front corner. The 1/4", (5mm), black wiring loom carries a single blue colour conductor between the power supply and pad.
A second coupler pad, (white conductor), is located near the left rear tail light. The mounting location is accessible from the rear compartment access "door" where the trailer hitch wiring attaches to the factory loom.
|
|
My TD5 with 19" RRS in Zambezi with Dastek/ITG/Allisport 197BHP285 views
|
|
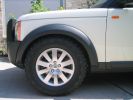
Front_access_mode725 views275/65/18 Cooper Discoverer STT mud tires - front in access mode
|
|

Front_clearance_offroad_mode754 views275/65/18 Cooper Discoverer STT mud tires - minimum clearance between front wheel and crappy plastic wheel arch. Although it lokos tight, there is actually more room between the tire and arch than the pictures shows.
|
|

Front control arm clearance739 views275/65/18 Cooper Discoverer STT mud tires - clearance between tire and control arm
|
|
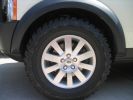
Front_normal_mode576 views275/65/18 Cooper Discoverer STT mud tires - front in normal mode
|
|
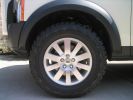
Front_offroad_mode566 views275/65/18 Cooper Discoverer STT mud tires - front in offroad mode
|
|

Front_offroad_mode_turned751 views275/65/18 Cooper Discoverer STT mud tires - tread view while turned
|
|
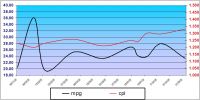
MS Excel chart of fuel usage in TDV6 first 3 months of ownership201 viewsReason for distortion at beginning is not known - average so far is 11.55l/100k (25.09mpg) for the 6 199k travelled. The fuel usage 'bumps' correspond with the city driving although they did mirror the cost for a while! A copy of the spreadsheet (105kb) that shows MPG and l/100k (but not miles) is available for the asking - just PM me.
|
|

Fuel consumption to 15/2/07161 views
|
|
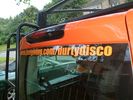
Tigger - Justgiving.com/durtydisco page address82 views
|
|
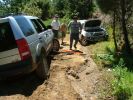
Winch/snatch block113 viewsThis picture shows the winch in position.
|
|
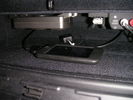
Glovebox 1142 viewsLocated D&P box on underside of glovebox, same as LR iPod/MP3 box
|
|

Opinione sulle gomme per la DISCO3/487 views
|
|

Aggiornamento 4 Novembre 2010 - giudizi su prenumatici per DISCO 3/495 views
|
|
|
|