| Last additions - DingMark's Gallery |
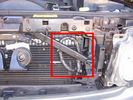
Installed winch electrical wires147 viewsWires which only power the solenoid are inside spiral wrap. They are also connected inside the wrap at the high point of the loop. Cable tied into place to prevent vibration rubbing. 07 Jul 2012
|
|
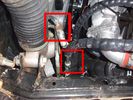
View of both hose connections to power steering system152 viewsBoth connections are shown. My friendly Qantas hydraulic hose expert cut off the elbow and modified it so I can re-install it to the PS rack before warranty work (and certainly before the vehicle is lifted off the body!!). 07 Jul 2012
|
|
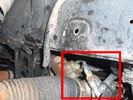
Further detail of attachment of the winch hoses to power steering system144 viewsThis is under the right (looking forward) lower plastic radiator cover. 07 Jul 2012
|
|
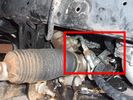
Detail of hydraulic hoses attached to power steering hoses154 viewsHoses are attached to the upstream side of power steering rack. When winch not running, PS rack sees full pressure (ie, no change from design). Biggest challenge is running stiff hoses so that they align with attach points. I got Qantas employee who repairs hydraulic baggage loaders to braise in fittings (very tight spaces and tough access).07 Jul 2012
|
|
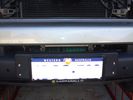
Winch as installed177 viewsLicence plate is held on by winch cable and 4 metal pins which fit into modified bumper body. Winch rope is green07 Jul 2012
|
|
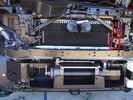
Installed winch with electrical solenoid connections162 viewsI routed the electrical supply (2 small wires) up the side of the radiator. You can see the unconnected wires inside the red boxes. I ended up connecting them on the radiator diagonal strut with cable ties. They are out of the way for any deep water transits there. 07 Jul 2012
|
|
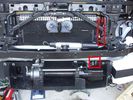
Installed winch with hydraulic hoses177 viewsThe hydraulic hoses are stiff, so I had to run them up the side of the radiator (can just see inside red boxes) to near the top of the radiator, then back down inside the engine compartment, then underneath the engine (behind the radiator) to the D4's power steering rack, where the hoses become metal. This hose routing may not be possible if the fuel-burning heater is in place (we don't have those in Aust and the space allowed room for my hands to bend and run the hoses without kinking). 07 Jul 2012
|
|
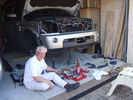
Installed winch, with bumper partially re-installed203 viewsPutting the D4 back together. Shows the tools and owner lying about.07 Jul 2012
|
|
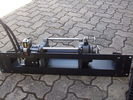
Hidden winch mount with winch in place123 viewsHydraulic hoses are now installed. Note notch for hydraulic:electric solenoid to fit in mount.07 Jul 2012
|
|
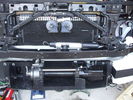
Front bumper view of semi-installed winch119 viewsNote the left-side (looking forward) bracket holding the white windscreen washer bottle. 07 Jul 2012
|
|
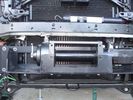
Close-up front view of partially-installed winch120 viewsNote that the sheet-metal flange just above the winch had to be notched to allow winch controller to be actuated. Also this same bracket had to be bent upwards to allow the winch hydraulic:electic solenoid to fit without rubbing. The nut on the upper-left bolt (the one with a very faint circle around it) stripped on re-installation, so the tray and winch pulling load is held only by the threads on 7 bolts....07 Jul 2012
|
|
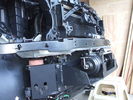
Front-right view (looking forward) of partially installed winch and mount124 viewsThe closest bracket, with three rubber grommets, is the air bag sensor. Before beginning any of this work, be sure to disconnect battery and discharge any remaining electrical power. I didn't want to accidently drop this assembly and cause the airbags to deploy. 07 Jul 2012
|
|
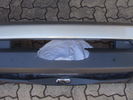
Front bumper with cutout for winch rope entry117 viewsBumper was initially cut "too small" with a low speed hand-held jig saw. It was then progressively filed to about the right size. Finally a very sharp box cutter was used to provide a smooth edge to the cut. This cutout is hidden behind the licence plate. 07 Jul 2012
|
|
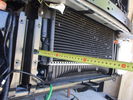
Front view of radiator after removal of grill, fenders, and bumper118 views07 Jul 2012
|
|
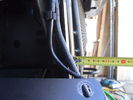
Left side (looking forward) of radiator after grill and bumpers removed.101 viewsTape measure is shown for illustration of dimensions only. 07 Jul 2012
|
|
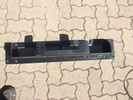
Top view of "Uncle Ray" discrete winch tray, after painting.105 viewsNote that towards the upper right there is a notch in the tray. This is needed for the specific winch's electric solenoid. The winch is a Mile Marker 12,000 lb hydraulic unit. 07 Jul 2012
|
|
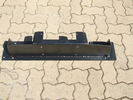
106 views"Uncle Ray" discrete winch tray, back and rear views. After painting. 07 Jul 2012
|
|

79 views10 Mar 2010
|
|

Suggested Tyre Pressures75 viewsTyre pressures used onroad and offroad, using both OEM HT and Goodyear MTR tyres.10 Mar 2010
|
|
162 views10 Jan 2010
|
|

Local WA newspaper article on D3 Theft168 viewsThe article is info by police public affairs. They wanted something to keep people locking doors and taking care during the holiday period. There are also TV public service announcements on air in WA featuring my wife confessing to leaving 1 door unlocked leading to the theft.05 Jan 2010
|
|
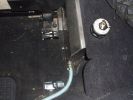
Top view Left side of water tank128 viewsThis view shows the protective cap off, displaying tank vent point. 19 Jul 2009
|
|

2nd Row footwell, showing water dispensing hose144 views19 Jul 2009
|
|
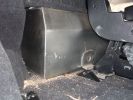
Right side floor-level view of water tank.150 viewsShows tie-down bolt (one of 2 securing the tank). Also note small void on side, which permits tank area to dry out if accidentally overfilled. 19 Jul 2009
|
|
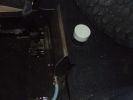
Internal 40 Litre water tank - top view of left side of tank105 viewsShows my spare tyre, but also bright white protective cap of top fill point and vent. Blue hose is water dispensing point. Note seat bracket bolt secures tank to D3. Similar bolt point on other side. Only these two bolts secure the tank and it is very secure. 19 Jul 2009
|
|
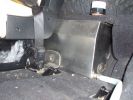
Left hand side of internal 40 Litre water tank161 viewsView from floor looking towards tank. Top white cover is 50mm plastic pipe cap. It protects the tank vent valve. Dispensing hose is at lower corner of tank19 Jul 2009
|
|
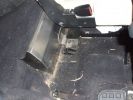
Internal water tank right side view161 viewsShows right front side of tank, with RH seat lifted. Note seat bolt is used to also hold the tank secure. This is a 5-seat D3, which has a cover over what is normally the 3rd row footrest. This is where the water tank is located. 19 Jul 2009
|
|

140 views19 Jul 2009
|
|

Historical Perth Fuel Prices147 viewsAverage prices for diesel and all petrol grades in Perth, Western Australia from 2004 to Oct 200928 Nov 2008
|
|
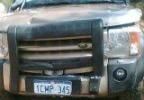
Collision with pesky Hilux (5)303 views04 Nov 2008
|
|

Hilux that collided with Disco3227 views04 Nov 2008
|
|
Separating Hilux from Disco3212 views04 Nov 2008
|
|
Impact Skid after hitting wayward Hilux207 viewsDisco3 was stopped when a skidding Hilux collided with it. Collision caused Disco3 to slide backwards04 Nov 2008
|
|
Collision with Hilux 3239 viewsImpression an wayward Hilux\'s roo bar on the front of my Disco304 Nov 2008
|
|

Collision with Hilux 2207 viewsHilux\'s roo bar is tougher than LR\'s A Frame04 Nov 2008
|
|

Collision with Hilux181 views04 Nov 2008
|
|
18 Brake "repairs" finished at sunset295 viewsWe just finished the repair at sunset and were driving slowly with 3 brakes. Oddly the D3 didn\'t behave any differently at 50 km/hr than it did normally. We had 4 instances of hitting the (3) skids for kangaroos before arriving in Wilcannia 3 hrs later. The brake light warning was making very distinctive noises and flashing randomly, though. 05 Feb 2008
|
|
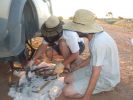
16 All the remains of a D3\'s parking brake372 viewsAfter 4 hours of hammering, finally removed the disk/park brake drum, and nearly all the parking brake bits fell to the ground. Cut rhe remaining brake cable loose as it was wrapped around the hub and a bit melted. Also having 2 jacks + 2 jack stands will support 4 hrs of hammering on the side of my D3. 05 Feb 2008
|
|

15 First sign of bits of parking brake failure335 viewsNote the complete lack of pad from the parking brake. Not only was there no composite brake material left, but the drum was somewhat twisted and connecting bits all smashed. Also a small drip of melted rubber from wheel bearing parts....05 Feb 2008
|
|
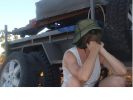
14 "Are we having fun yet?"349 viewsSWMBO is pondering why attempting to drive 3,900 kms across the outback on dirt roads is more fun than, say, spending New Years in Paris......05 Feb 2008
|
|
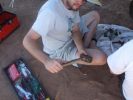
13 How to care for tools303 viewsWhat happened to the sledge hammer after 2 hours of beating my seized and cracked disk/park brake assembly to bits. Now down to 1 hammer remaining. At least by this time it was getting cooler (down to 40 deg C)05 Feb 2008
|
|

12 Half way through removing a jammed disk brake in the Outback296 viewsThis was just before breaking the sledge hammer. Note we luckily carried a spare hammer. Ended up using (or breaking) every tool we had on this little repair job. Bed sheets are a good way of gathering the bits to show for the inevitable warranty claim.05 Feb 2008
|
|
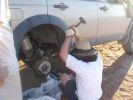
11 Lesson in removing a jammed brake assembly in the Outback378 viewsSpent the next 4 hours doing this to my D3. Gave the photos to Land Rover dealer and they did not think this constituted abuse of the vehicle. I thought that was charitable, but if we hadn\'t done this, the tow back to civilisation would have been even longer.05 Feb 2008
|
|

10 Cracked smoking parking brake drum338 viewsNote the crack in the face of the brake. This showed mangled parking brake springs and other bits. Also a bit of melted rubber was drooling out of the crack. Started to remove the brake caliper and enjoying the flies in 45 deg C heat. Ah, the wonderful Aussie climate in January.05 Feb 2008
|
|

09 Starting to remove the seized brake assembly295 viewsBy this time we\'d poured about 8l of water on the dull-red glowing and burning wheel assembly (too close to 140l of 98 octane petrol). Sudden cooling cracked the disk brake which showed mangled park brake parts. How to remove a brake disk without the right star fitting? First remove the caliper then get a sledge hammer?!!05 Feb 2008
|
|
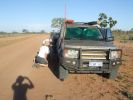
08 D3 stranded with a seized smoking wheel314 viewsAbout 1 hr after replacing the blown tyre, strange noises emanated from the stability control system and speed dropped off. Then I looked in the rear view mirror, and noted a cloud of dust along with a whiff of black smoke. This led to a very quick stop (no traffic on this route for over a week, so no worries about having to signal exiting the road). Took a look and WOW. The right rear wheel was glowing a dull red colour, and burning rubber smoke was wafting from the red glow over the fuel lines.05 Feb 2008
|
|

07 Back side of failed tyre340 viewsThis is the back of the blown tyre. It looks like any other worn tyre which has run a bit while flat. Note that we were running on wider 19" RRS wheels (have 4 19" MTRs + 1 old A/T on the original 5 wheels). Also have a rear-mount spare tyre holder which is really convenient with the wider rim and the fact that the tyre was still hot (it had some melted rubber on the other side!!)05 Feb 2008
|
|
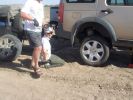
06 Spare tyre on and still suffering from hot wheel nuts296 viewsManaged to get ultra hot wheel nuts back on the spare (using the original 19" D3 wheel, vs the 19" RRS wider wheel which blew - shown in left of photo). Pity we didn\'t note that the disk brake was EXTREMELY hot at this time. 05 Feb 2008
|
|
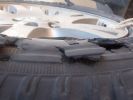
05 No doubt the tyre is flat274 viewsThis is the view of the flat tyre. Again, didn\'t think it anything more than a "normal" explosive blowout, as the tyre was about 90% worn, we were heavily loaded, it was 45 deg C, and driving 105 km/ho on a rough dirt road in the outback. 05 Feb 2008
|
|
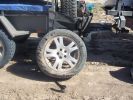
04 Damaged Tyre300 viewsYes, there\'s no doubt that this was a flat tyre. The ultra hot wheel nuts, look of the flat (note in a later photo that the back of the tyre appeared okay) and increased fuel consumption should have been a clue, but it was 45 deg C, and we had been doing about 105 km/hr on a dirt road for hours, so we just assumed it was a flat = WRONGO!05 Feb 2008
|
|
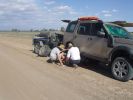
03 The first bit of tyre/wheel problem251 viewsSomewhere in the Australian outback on a 45 deg C day in Jan 08, a D3 had a bit of a flat tyre problem. "No worries, mate" st we had 3 spares (plus 2 more if we abandon the trailer), 150l of water, 4 days of food, and an EPIRB if things really go crook. The first clue that this was not a "normal" flat was when I handled a wheel nut and ended up with a blister from a burning hot nut (the ambient wasn\'t THAT hot). 05 Feb 2008
|
|
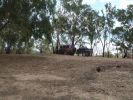
02 Last Photo before the little wheel problem saga222 viewsThis is my D3 with trailer on the banks of the Darling River, literally "back of Bourke" (the regional definition of the start of the Australian Outback). We were the first vehicle in a week to try and drive this route from Bourke to Wilcannia on the account of floods (first water in 7 years). Little did we know that 3 hours later there\'d be a bit of a wheel and tyre problem appearing...05 Feb 2008
|
|
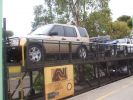
01 Start of Xmas 07 trip across the Australian Nullabor242 viewsThis is the preferred method of travelling 2500km of Nullabor desert when time is short (the Indian Pacific train). Next stop is Adelaide.05 Feb 2008
|
|
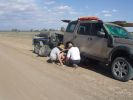
03 First bit of tyre/wheel trouble244 viewsIn the outback a tyre suddenly blew. "No worries" we thought, as we had 3 spares (+ two more if we abandoned the trailer), 150l of water, 3 days of food, and an EPIRB if things got really bad. At the time I didn\'t fully appreciate the fact that my index got a blister from the burning heat of one of the wheel nuts. It was 45 deg C at the time, so everything was hot.05 Feb 2008
|
|
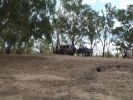
02 On banks of Darling River, Back of Bourke157 views"Back of Bourke" is the typical definition of the start of the Australian Outback. This was after crossing the Darling River "back of Bourke" on 8 Jan 08. We were the first vehicle to start driving after floods had closed (first time in 8 yrs there was any water in the river).05 Feb 2008
|
|
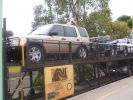
01 D3 on Train183 viewsEasiest method of crossing 2300 km of Nullabor Desert - on the Indian Pacific train. D3 with trailer - effectively have 5 spare tyres if it really gets desperate!05 Feb 2008
|
|
|
|