| Last additions |
36 views27 Jul 2010
|
|
32 views27 Jul 2010
|
|
45 views27 Jul 2010
|
|

39 views27 Jul 2010
|
|
20 views26 Jul 2010
|
|
21 views26 Jul 2010
|
|

30 views26 Jul 2010
|
|
22 views26 Jul 2010
|
|
18 views26 Jul 2010
|
|
20 views26 Jul 2010
|
|
16 views26 Jul 2010
|
|
17 views26 Jul 2010
|
|
13 views26 Jul 2010
|
|
13 views26 Jul 2010
|
|
11 views26 Jul 2010
|
|
14 views26 Jul 2010
|
|
96 views26 Jul 2010
|
|
88 views26 Jul 2010
|
|
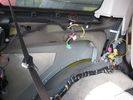
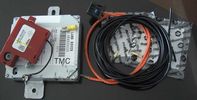
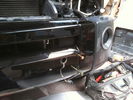
red is PDC sounder ...Yellow is PDC module 342 views26 Jul 2010
|
|
78 views26 Jul 2010
|
|
80 views26 Jul 2010
|
|
67 views26 Jul 2010
|
|

43 views26 Jul 2010
|
|

51 views26 Jul 2010
|
|
223 views25 Jul 2010
|
|
214 viewspolished in detail25 Jul 2010
|
|
241 views25 Jul 2010
|
|

72 views25 Jul 2010
|
|
should have let her drive!67 views25 Jul 2010
|
|
whats this then?50 views25 Jul 2010
|
|
all clear now54 views25 Jul 2010
|
|

ruggedpeak's G4 campsite pic96 viewsG4 Bolivia saltfalts campsite 25 Jul 2010
|
|

Brickarms50 views25 Jul 2010
|
|

68 views25 Jul 2010
|
|

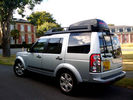
Roof rack added85 views25 Jul 2010
|
|
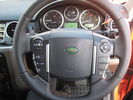
162 views25 Jul 2010
|
|
115 views25 Jul 2010
|
|
109 views25 Jul 2010
|
|
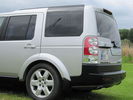
Left side rear38 views25 Jul 2010
|
|

front left36 views25 Jul 2010
|
|
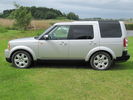
Left side37 views25 Jul 2010
|
|
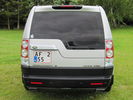
Rear33 views25 Jul 2010
|
|
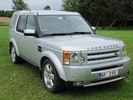
front left37 views25 Jul 2010
|
|

Rear right34 views25 Jul 2010
|
|
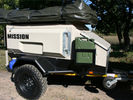
58 views25 Jul 2010
|
|
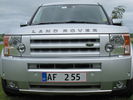
Body Styling - front29 views25 Jul 2010
|
|
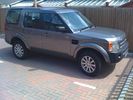
233 views25 Jul 2010
|
|
195 views25 Jul 2010
|
|
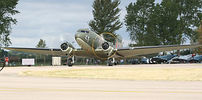
DC338 viewsDC3 taxi prior to takeoff25 Jul 2010
|
|

48 views24 Jul 2010
|
|

41 views24 Jul 2010
|
|
49 views24 Jul 2010
|
|
td4 freelander 147 views24 Jul 2010
|
|
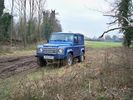
td5 9035 views24 Jul 2010
|
|

300tdi 9038 views24 Jul 2010
|
|
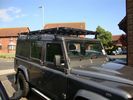
35 views24 Jul 2010
|
|
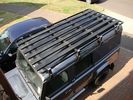
34 views24 Jul 2010
|
|
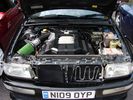
Green Cotton Air Filter fitted to Audi Coupe Quattro 2.8 V648 views24 Jul 2010
|
|
139 views24 Jul 2010
|
|

37 views24 Jul 2010
|
|

102 views23 Jul 2010
|
|
Tread 427 views23 Jul 2010
|
|
Tread 321 views23 Jul 2010
|
|
Tread 218 views23 Jul 2010
|
|
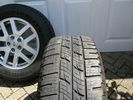
Tread 119 views23 Jul 2010
|
|
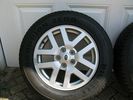
Wheel 417 views23 Jul 2010
|
|
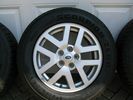
Wheel 324 views23 Jul 2010
|
|
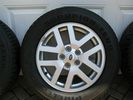
Wheel 218 views23 Jul 2010
|
|
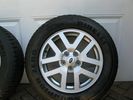
Wheel 117 views23 Jul 2010
|
|
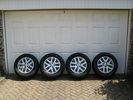
All18 views23 Jul 2010
|
|

37 views23 Jul 2010
|
|

35 views23 Jul 2010
|
|

28 views23 Jul 2010
|
|
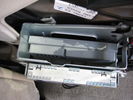
Proper D4 bracket with D4 tv tuner in a D4 ...why is the bracket so big ...?294 views23 Jul 2010
|
|

Disco3 Roof Rack round up49 views23 Jul 2010
|
|
76 views23 Jul 2010
|
|
62 views23 Jul 2010
|
|
56 views23 Jul 2010
|
|

Billing Off-Road Course Water Splash43 viewsLottie\'s first off-road experience at the Billing off-road course with MikeS providing some vital guidance!23 Jul 2010
|
|
69 views23 Jul 2010
|
|
62 views23 Jul 2010
|
|
73 views23 Jul 2010
|
|
63 views23 Jul 2010
|
|
113 views23 Jul 2010
|
|
95 views23 Jul 2010
|
|

122 views23 Jul 2010
|
|

97 views23 Jul 2010
|
|
80 views23 Jul 2010
|
|
147 views23 Jul 2010
|
|
144 views23 Jul 2010
|
|
146 views23 Jul 2010
|
|

83 views23 Jul 2010
|
|

100 views23 Jul 2010
|
|

115 views23 Jul 2010
|
|
97 views23 Jul 2010
|
|
72 views23 Jul 2010
|
|
74 views23 Jul 2010
|
|
77 views23 Jul 2010
|
|

82 views23 Jul 2010
|
|
68 views23 Jul 2010
|
|
81 views23 Jul 2010
|
|
76 views23 Jul 2010
|
|
85 views23 Jul 2010
|
|
72 views23 Jul 2010
|
|
64 views23 Jul 2010
|
|
64 views23 Jul 2010
|
|
67 views23 Jul 2010
|
|
72 views23 Jul 2010
|
|

60 views23 Jul 2010
|
|

78 views23 Jul 2010
|
|

70 views23 Jul 2010
|
|
63 views23 Jul 2010
|
|

56 views23 Jul 2010
|
|
61 views23 Jul 2010
|
|
56 views23 Jul 2010
|
|
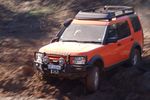
Friend\'s G4 at play in Ellisras RSA41 views23 Jul 2010
|
|
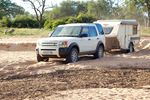
Gona Re Zhou Nationat Park Zimbabwe50 viewsThis is where I got stuck with the Defender in 2009...23 Jul 2010
|
|

Sentinel R139 views22 Jul 2010
|
|
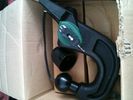
new tow bar - boxed130 views22 Jul 2010
|
|

67 views22 Jul 2010
|
|

102 views22 Jul 2010
|
|

73 views22 Jul 2010
|
|

71 views22 Jul 2010
|
|

84 views22 Jul 2010
|
|

49 views22 Jul 2010
|
|
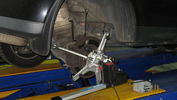
Bruce Davis Specialised Wheel Alignment Photo 280 viewsBruce claims that it is trial and error with standard wheel alignment equipment as you have to remove the wheel to make an adjustment and then recheck, a difficult task.22 Jul 2010
|
|
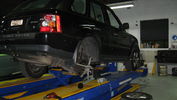
Rear Wheel Alignment.72 viewsBruce Davis Equipment for adjusting alignment alows the machine to hold the wheel camber caster etc after the wheel is removed to allow adjustments. The two spanners cannot be put on the adjusters with the wheel on the hub. His equipment has been modified to hold settings in its computer but allow accurate adjustment with the wheel off.22 Jul 2010
|
|

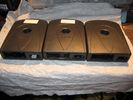
LR Suspension Height Adjustment add on Electronic Box95 views22 Jul 2010
|
|
208 views21 Jul 2010
|
|
228 views21 Jul 2010
|
|

208 views21 Jul 2010
|
|
205 views21 Jul 2010
|
|
198 views21 Jul 2010
|
|
234 views21 Jul 2010
|
|
204 views21 Jul 2010
|
|
225 views21 Jul 2010
|
|

213 views21 Jul 2010
|
|

214 views21 Jul 2010
|
|

223 views21 Jul 2010
|
|
204 views21 Jul 2010
|
|
120 views21 Jul 2010
|
|
95 views21 Jul 2010
|
|
97 views21 Jul 2010
|
|

Loose tube... ?!?!55 views21 Jul 2010
|
|

Loose tube...!?!?!45 views21 Jul 2010
|
|
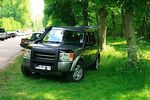
149 views21 Jul 2010
|
|

92 views21 Jul 2010
|
|
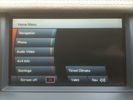
90 views21 Jul 2010
|
|
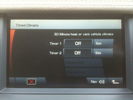
80 views21 Jul 2010
|
|
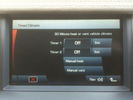
89 views21 Jul 2010
|
|
34 views21 Jul 2010
|
|

38 views21 Jul 2010
|
|

97 views21 Jul 2010
|
|
93 views20 Jul 2010
|
|
86 views20 Jul 2010
|
|
80 views20 Jul 2010
|
|
50 views20 Jul 2010
|
|
45 views20 Jul 2010
|
|
48 views20 Jul 2010
|
|
51 views20 Jul 2010
|
|
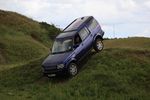
57 views20 Jul 2010
|
|
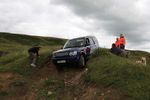
47 views20 Jul 2010
|
|
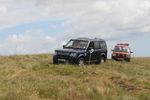
47 views20 Jul 2010
|
|
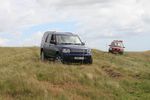
51 views20 Jul 2010
|
|
40 views20 Jul 2010
|
|
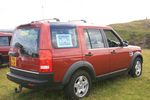
46 views20 Jul 2010
|
|
40 views20 Jul 2010
|
|
39 views20 Jul 2010
|
|
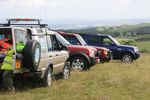
71 views20 Jul 2010
|
|
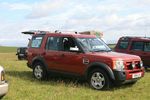
37 views20 Jul 2010
|
|
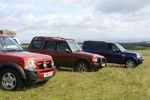
34 views20 Jul 2010
|
|
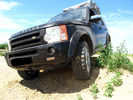
MT/R145 views20 Jul 2010
|
|

134 views20 Jul 2010
|
|

101 views20 Jul 2010
|
|
195 views20 Jul 2010
|
|

64 views20 Jul 2010
|
|
58 views20 Jul 2010
|
|
61 views20 Jul 2010
|
|

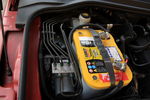
Optima Yellow - with split charge72 views20 Jul 2010
|
|
63 views20 Jul 2010
|
|

59 views20 Jul 2010
|
|
63 views20 Jul 2010
|
|
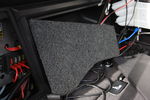
New cover for back panel64 views20 Jul 2010
|
|
55 views20 Jul 2010
|
|
54 views20 Jul 2010
|
|
50 views20 Jul 2010
|
|
58 views20 Jul 2010
|
|
204 views20 Jul 2010
|
|
54 views20 Jul 2010
|
|
Aux 12v 67 views20 Jul 2010
|
|
Morocco 2008 Ray84 views20 Jul 2010
|
|
76 views20 Jul 2010
|
|
154 views20 Jul 2010
|
|
91 views20 Jul 2010
|
|
86 views20 Jul 2010
|
|
85 views20 Jul 2010
|
|
108 views20 Jul 2010
|
|
82 views20 Jul 2010
|
|
109 views20 Jul 2010
|
|
104 views20 Jul 2010
|
|
88 views20 Jul 2010
|
|
93 views20 Jul 2010
|
|

73 views20 Jul 2010
|
|
109 views20 Jul 2010
|
|
Sunny Weather75 views20 Jul 2010
|
|
Wet weather76 views20 Jul 2010
|
|
Bas Cars89 views20 Jul 2010
|
|

42 views20 Jul 2010
|
|

73 views19 Jul 2010
|
|
106 views19 Jul 2010
|
|
128 views19 Jul 2010
|
|
98 views19 Jul 2010
|
|
231 views19 Jul 2010
|
|

230 views19 Jul 2010
|
|

grille on37 views19 Jul 2010
|
|

grille off33 views19 Jul 2010
|
|

40 views19 Jul 2010
|
|
45 views19 Jul 2010
|
|
36 views19 Jul 2010
|
|
36 views19 Jul 2010
|
|
40 views19 Jul 2010
|
|
36 views19 Jul 2010
|
|

94 views19 Jul 2010
|
|

Coming off the Wayfarer.172 views19 Jul 2010
|
|

Coming off the Wayfarer.168 views19 Jul 2010
|
|
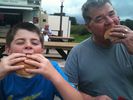
Yummy burgers at the Rhug estate near Corwen190 views19 Jul 2010
|
|

The V gulley Llangollen N.Wales166 views19 Jul 2010
|
|

The V gulley Llangollen N.Wales164 views19 Jul 2010
|
|

The V gulley Llangollen N.Wales175 views19 Jul 2010
|
|
The V gulley Llangollen N.Wales161 views19 Jul 2010
|
|
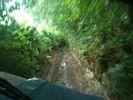
The V gulley Llangollen N.Wales156 views19 Jul 2010
|
|
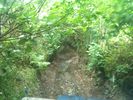
The V gulley Llangollen N.Wales152 views19 Jul 2010
|
|

31 views18 Jul 2010
|
|
177 views18 Jul 2010
|
|
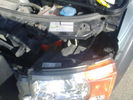
light undo166 views18 Jul 2010
|
|
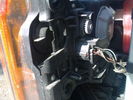
back of the light163 views18 Jul 2010
|
|
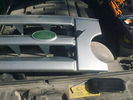
157 views18 Jul 2010
|
|
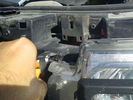
light stops X 2148 views18 Jul 2010
|
|
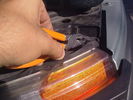
light stops X 2153 views18 Jul 2010
|
|
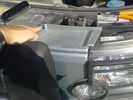
grille clips 1 X 4146 views18 Jul 2010
|
|
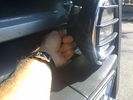
grille clips 2 position147 views18 Jul 2010
|
|
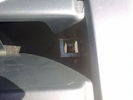
glille clips 2 X 2138 views18 Jul 2010
|
|
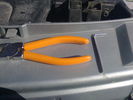
tools133 views18 Jul 2010
|
|
griglie undo137 views18 Jul 2010
|
|
clips undo133 views18 Jul 2010
|
|

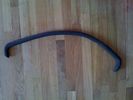
LR3 Air Conditioner Drain Tubes behind centre console2105 viewsThis shows the two air conditioner drain tubes located left and right under the radio stack.
The tube on the left side, (steering wheel side, LHD), disattached itself and the carpet on the floor under the gas pedal etc became soaked. I think rain water from outside that comes in the outside cowl vents also exits via the tubes as I first noticed the carpet was wet after parking outside during a big rain storm.
It was relatively easy to slide up and reattach the rubber hose that runs from the rectangular shaped plastic discharge hole(s) of the heater "pan" down along the transmission hump area and thru the floor pan. There is a hose on each side of the transmission hump, but only one hose had let go on my 3. The rubber hoses just slide over the rectangular plastic openings of the two heater housing drain outlets.
To get at each drain hose, remove the vertical sort of triangle carpeted piece below each side of the radio stack. The triangles of carpet will just pull away as each is held on with those metal U clips Land Rover so likes. Dislodge each triangle at least sufficiently to get ones hand in to slide the rubber hose back on.
You will rarely see AC water on the ground as the front drains pour onto a metal underside protection skid plate and the rear drain onto the top of the left rear muffler.18 Jul 2010
|
|
Oztent52 views18 Jul 2010
|
|
Oztent50 views18 Jul 2010
|
|
amy one life adventure96 views18 Jul 2010
|
|
67 views18 Jul 2010
|
|
67 views18 Jul 2010
|
|
82 views18 Jul 2010
|
|
36 views18 Jul 2010
|
|
37 views18 Jul 2010
|
|
36 views18 Jul 2010
|
|
36 views18 Jul 2010
|
|
30 views18 Jul 2010
|
|
34 views18 Jul 2010
|
|
32 views18 Jul 2010
|
|
40 views18 Jul 2010
|
|
41 views18 Jul 2010
|
|
43 views18 Jul 2010
|
|
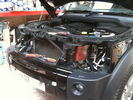
58 views17 Jul 2010
|
|
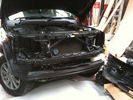
49 views17 Jul 2010
|
|
50 views17 Jul 2010
|
|
179 views17 Jul 2010
|
|
157 views17 Jul 2010
|
|

38 views17 Jul 2010
|
|

38 views17 Jul 2010
|
|

Oil Specifications95 views16 Jul 2010
|
|

Rear diff - drain and fill95 views16 Jul 2010
|
|

Front Diff - drain and fill97 views16 Jul 2010
|
|

66 views16 Jul 2010
|
|
63 views16 Jul 2010
|
|

53 views16 Jul 2010
|
|

59 views16 Jul 2010
|
|
NEW LED SIDE LIGHTS AND INDICATORS (headlight MOD complete baby)88 views16 Jul 2010
|
|
68 views16 Jul 2010
|
|
Hogmoor 201073 views16 Jul 2010
|
|

57 views16 Jul 2010
|
|
69 views16 Jul 2010
|
|

54 views16 Jul 2010
|
|
164 views16 Jul 2010
|
|
87 views16 Jul 2010
|
|
184 views16 Jul 2010
|
|
159 views16 Jul 2010
|
|
127 views16 Jul 2010
|
|
110 views16 Jul 2010
|
|
153 views16 Jul 2010
|
|
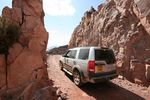
Morocc0 200828 views15 Jul 2010
|
|
166 views15 Jul 2010
|
|
101 views15 Jul 2010
|
|
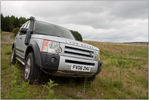
On Epynt Ranges129 views15 Jul 2010
|
|

Who said this was steep ?96 views15 Jul 2010
|
|
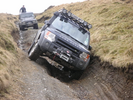
80 views15 Jul 2010
|
|

78 views15 Jul 2010
|
|

54 views15 Jul 2010
|
|
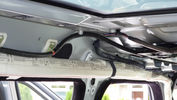
346 views15 Jul 2010
|
|
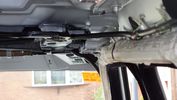
363 views15 Jul 2010
|
|
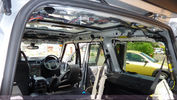
383 views15 Jul 2010
|
|
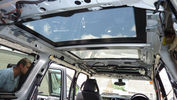
469 views15 Jul 2010
|
|
365 views15 Jul 2010
|
|
333 views15 Jul 2010
|
|
341 views15 Jul 2010
|
|
376 views15 Jul 2010
|
|
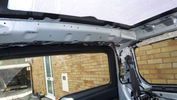
335 views15 Jul 2010
|
|
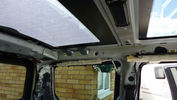
352 views15 Jul 2010
|
|
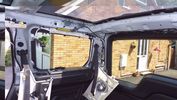
362 views15 Jul 2010
|
|
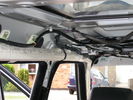
397 views15 Jul 2010
|
|
295 views15 Jul 2010
|
|
295 views15 Jul 2010
|
|
339 views15 Jul 2010
|
|
294 views15 Jul 2010
|
|
297 views15 Jul 2010
|
|
302 views15 Jul 2010
|
|
312 views15 Jul 2010
|
|
301 views15 Jul 2010
|
|
294 views15 Jul 2010
|
|
331 views15 Jul 2010
|
|
89 views15 Jul 2010
|
|

84 views15 Jul 2010
|
|
85 views15 Jul 2010
|
|
282 views15 Jul 2010
|
|
321 views15 Jul 2010
|
|
305 views15 Jul 2010
|
|
296 views15 Jul 2010
|
|

286 views15 Jul 2010
|
|
292 views15 Jul 2010
|
|
309 views15 Jul 2010
|
|
297 views15 Jul 2010
|
|

296 views15 Jul 2010
|
|
317 views15 Jul 2010
|
|
312 views15 Jul 2010
|
|
85 views15 Jul 2010
|
|
344 views15 Jul 2010
|
|
330 views15 Jul 2010
|
|
312 views15 Jul 2010
|
|
315 views15 Jul 2010
|
|
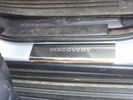
Rear Plate93 views15 Jul 2010
|
|
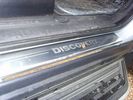
Front Plate96 views15 Jul 2010
|
|

44 views15 Jul 2010
|
|

nullaosta gancio traino154 views15 Jul 2010
|
|
112 views14 Jul 2010
|
|

75 views14 Jul 2010
|
|
97 views14 Jul 2010
|
|
111 views14 Jul 2010
|
|
92 views14 Jul 2010
|
|

89 views14 Jul 2010
|
|
82 views14 Jul 2010
|
|
91 views14 Jul 2010
|
|
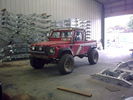
81 views100" wheelbase,dana axles,big v8 :)14 Jul 2010
|
|
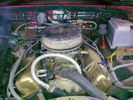
64 viewschevy v8,straight through pipes :)14 Jul 2010
|
|
63 viewsMy new projec14 Jul 2010
|
|

39 views14 Jul 2010
|
|
244 views14 Jul 2010
|
|
229 views14 Jul 2010
|
|
212 views14 Jul 2010
|
|
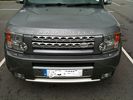
291 views14 Jul 2010
|
|
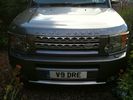
222 views14 Jul 2010
|
|

87 views14 Jul 2010
|
|
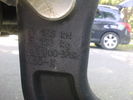
remouvable tow bar italian certification number123 views14 Jul 2010
|
|
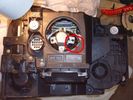
headlight D3142 views14 Jul 2010
|
|

GVIF v6.171 views14 Jul 2010
|
|
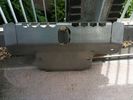
Sump Plate37 views14 Jul 2010
|
|

Drivers Mat29 views14 Jul 2010
|
|
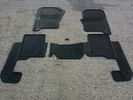
Mats24 views14 Jul 2010
|
|
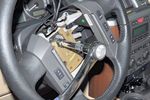
103 views13 Jul 2010
|
|
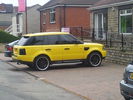
123 views13 Jul 2010
|
|

7706 views13 Jul 2010
|
|
99 views13 Jul 2010
|
|

Removal of C-Pillar Lower Trim85 views13 Jul 2010
|
|
81 views13 Jul 2010
|
|
66 views13 Jul 2010
|
|

134 views13 Jul 2010
|
|
Jan 201065 views12 Jul 2010
|
|
346 views12 Jul 2010
|
|
LRE Malverns 349 viewsLRE Malverns 200512 Jul 2010
|
|
LRE Malverns 249 viewsLRE Malverns 200512 Jul 2010
|
|
LRE Malverns 150 viewsLRE Malverns 200512 Jul 2010
|
|
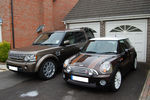
Disco4 & Cooper90 viewsdiscoDB\'s D4 HSE
Mrs discoDB\'s Mini Cooper Mayfair12 Jul 2010
|
|
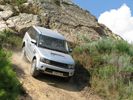
80 views12 Jul 2010
|
|
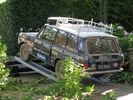
64 views12 Jul 2010
|
|
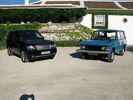
58 views12 Jul 2010
|
|
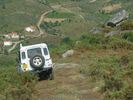
56 views12 Jul 2010
|
|
47 views12 Jul 2010
|
|
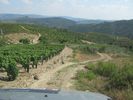
52 views12 Jul 2010
|
|

230 views12 Jul 2010
|
|
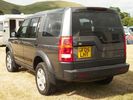
114 views12 Jul 2010
|
|

110 Td5110 viewsThe old Td5 with Alive re map. Great car, much missed12 Jul 2010
|
|
D3108 views12 Jul 2010
|
|
D3 dogs141 views12 Jul 2010
|
|

D386 views12 Jul 2010
|
|

D384 views12 Jul 2010
|
|

Sheigra in North West Scotland with the Td5101 views12 Jul 2010
|
|

58 views12 Jul 2010
|
|
60 views12 Jul 2010
|
|
![Filename=IMG_0023 [1600x1200].JPG
Filesize=173KB
Dimensions=1280x960
Date added=12.Jul 2010 IMG_0023 [1600x1200].JPG](albums/userpics/10454/thumb_IMG_0023%20%5B1600x1200%5D.JPG)
They work then117 views12 Jul 2010
|
|
![Filename=IMG_0024 [1600x1200].JPG
Filesize=175KB
Dimensions=1280x960
Date added=12.Jul 2010 IMG_0024 [1600x1200].JPG](albums/userpics/10454/thumb_IMG_0024%20%5B1600x1200%5D.JPG)
Oooh105 views12 Jul 2010
|
|
![Filename=IMG_0021 [1600x1200].JPG
Filesize=186KB
Dimensions=1280x960
Date added=12.Jul 2010 IMG_0021 [1600x1200].JPG](albums/userpics/10454/thumb_IMG_0021%20%5B1600x1200%5D.JPG)
Ouch again117 views12 Jul 2010
|
|
![Filename=IMG_0022 [1600x1200].JPG
Filesize=182KB
Dimensions=1280x960
Date added=12.Jul 2010 IMG_0022 [1600x1200].JPG](albums/userpics/10454/thumb_IMG_0022%20%5B1600x1200%5D.JPG)
Ouch94 views12 Jul 2010
|
|
| 235574 files on 589 page(s) |
 |
 |
 |
 |
 |
 |
 |
508 |  |
 |
 |
 |
 |
|