| Last additions |

43 views10 May 2011
|
|
86 views10 May 2011
|
|
73 views10 May 2011
|
|
80 views10 May 2011
|
|
69 views10 May 2011
|
|
241 views10 May 2011
|
|
215 views10 May 2011
|
|
98 views10 May 2011
|
|
81 views10 May 2011
|
|
81 views10 May 2011
|
|

cool dog82 views10 May 2011
|
|
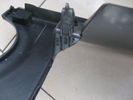
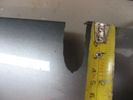
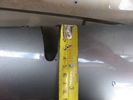
95 viewsbottom lug inside upside down round & round we go view10 May 2011
|
|
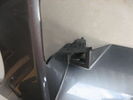
116 viewsbottom lug. try to cut around & leave intact10 May 2011
|
|
102 views10 May 2011
|
|
89 views10 May 2011
|
|
150 views10 May 2011
|
|
97 viewsupright cut outs10 May 2011
|
|
135 views10 May 2011
|
|
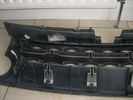
111 viewsnew inner fitted to existing outter10 May 2011
|
|
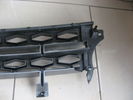
115 views10 May 2011
|
|
100 views10 May 2011
|
|
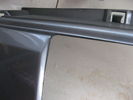
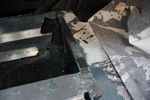
105 viewsexisting grille cut out along rib/line10 May 2011
|
|
90 views10 May 2011
|
|
59 views10 May 2011
|
|

Exploded Parts view calling up 6R60/80 and 6HP26/28 variations3100 viewsThis single page jpg exploded parts view indicates some commonality between the Ford and ZF versions of the early and later six speed units. Technically this sheet is for the RWD units as there are variations between plain RWD units, 4WD, and AWD. The transmission in the LR3 is called by ZF to be a 6HP26X and by LR in some publications, the 6HP2610 May 2011
|
|
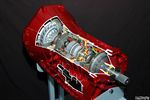
Ford 6R60 six speed cutaway showing torque converter.2189 viewsThis is a cutaway of the Ford 6R60 six speed which is a Ford license built version similar to our ZF 6HP26 six speed speced on early 3's.
The newer 3's and 4's have the ZF 6HP28. The Ford version is called the 6R80 and variations of it are used on the Raptor. As such, the Raptor metal pan can be installed on the 3's tranny but the deeper Ford Raptor pan does not have a drain plug. 10 May 2011
|
|

41 views10 May 2011
|
|
28 views10 May 2011
|
|
23 views10 May 2011
|
|

78 views09 May 2011
|
|
142 views09 May 2011
|
|

67 views09 May 2011
|
|
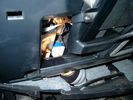
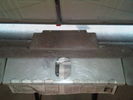
Smooth Talker Amplifier Box mounted below near steering column.179 viewsThe gold look box due to the lighting, (actually black), is the antenna amplifier located near the steering column. It can be put anyway but this seemed an OK location as I ran the antenna connector cable rearward from here to the back corner of the 3 and then up to the underside of the roof glass at the rear. The blue/white thing is the brake light switch that often must be replaced. See the Brake Light Switch file within this Gallery regarding the switch replacement.09 May 2011
|
|
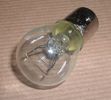
Land Rover Stop Tail Light dual filament bulb nominal 12 volt 21 / 5 watt filaments1419 viewsThis is the Land Rover part number 264590 dual filament bulb, (P21/5), that inserts into the upper two tail lamp receptacles. In the upper one, both filaments function, in the lower one, only the 5 watt tail light filament functions.
I regard it as not a good practice to routinely switch bulbs when the tail light filament, (5 watt), burns out on the lower bulb. The broken filament can jiggle over onto the brake light filament, (21 watt), and short the circuit to ground or something else not predicable.
There are also arguments to say that quality control is better on the Land Rover marketed bulbs than say far east sourced bulbs. Filament construction, and hence resistance can vary and mislead the current sensing circuits monitoring the signal light systems. Also when the bulbs are properly installed, all filaments should be standing vertically and not at any slope.
These are the sort of obscure circumstances that can lead to false trouble messages on the display, dropping to the stops, and subsequent concerns - all over a tail/signal light bulb.
For example, the filament life of both the tail light and the brake light filaments in the P21/5 bulb is significantly less than the USA common 1157 dual filament bulb, (1000/250 vs 5000/1200 hours); brightness in the P21/5 is a bit more, (3cp/35cp vs 3cp/32cp where cp is candle power), but current consumption is oddly less, (0.44a/1.86a vs 0.59a/2.10a where a is amps). It is the quest for efficiency vs maintenance trade off.09 May 2011
|
|

D3 infotainment38 views09 May 2011
|
|

D4 infotainment34 views09 May 2011
|
|
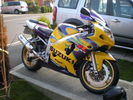
gsxr60069 views09 May 2011
|
|
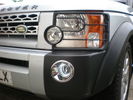
halo club101 views09 May 2011
|
|
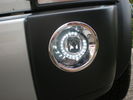
halo club89 viewshalo club09 May 2011
|
|

86 views09 May 2011
|
|

85 views09 May 2011
|
|

65 views09 May 2011
|
|

95 views09 May 2011
|
|
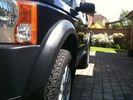
Before spacers66 views09 May 2011
|
|
Increased standard height via MSV264 views09 May 2011
|
|
38 views09 May 2011
|
|
41 views09 May 2011
|
|

41 views09 May 2011
|
|
35 views09 May 2011
|
|
35 views09 May 2011
|
|
34 views09 May 2011
|
|
33 views09 May 2011
|
|
40 views09 May 2011
|
|
35 views09 May 2011
|
|
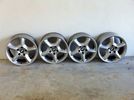
BMW X5 17" wheels52 views09 May 2011
|
|
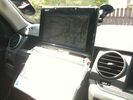
Netbook mount with Fugawi55 views09 May 2011
|
|
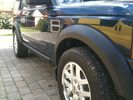
Standard Height50 views09 May 2011
|
|

Brake Light Switch, Find, Remove, and Install Instructions 7807 viewsThis is a two page doc outlining where to find the brake light switch, how to remove it, and then install the new one.
Note, do not move the brake pedal when removing or installing the switch. Let the brake pedal hang where it wants to. The switch design is actually cunning, and as such is supposed to make the removal and install fool proof. Hence if you think too much about it, you can wreck the new switch.
If you want to inspect the interior of the switch, wait until you have removed the old switch. You can then just unsnap the blue from the white to get it apart. Inside, the switch is quite simple, (no circuit boards), but it will probably show black dust from failing contacts.
I think the reason the switch fails is that the Normally Open, (NO), contacts of the brake light contacts were made too light to carry the current load for make and break of the tail light filaments. I also think the black dust created then fouls the Normally Closed, (NC), second set of contacts for the ABS circuit. As such, the Normally Closed contacts become intermittent in operation and display as a fluctuating open and closed circuit condition to the ABS system when the ABS should be seeing a steady closed circuit. Hopefully the replacement switch contacts are more robust and may be as I recently replaced my switch again just as a matter of maintenance. While in a redesign, ideally the NC contacts should be sealed or at least separated from the NO contacts, when I inspected the removed switch, this time there was no black dust present.
Probably the removed switch will have a Land Rover oval logo moulded into it, the new one, FOMOCO.09 May 2011
|
|
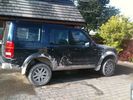
Driffield cack!68 views09 May 2011
|
|
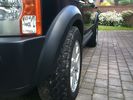
After fitting spacers71 views30mm spacers fitted front & rear.09 May 2011
|
|
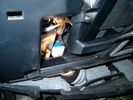
Brake Switch Visible thru Opening4949 viewsThe blue and white bit is the switch; the sort of gold appearing box,(it is really black), you will not see in your 3 as it is a Smooth Talker brand amplifier for my Blackberry phone antenna. This install is detailed in the SmoothTalker phone antenna section of my gallery.
One way to remove and install the switch is to lower the "horizontal" panel above the brake pedal as shown where the flashlight head is located. To actually remove the switch, you slide your hand thru the gap and rotate the switch clockwise 1/4 turn while watching thru the rectangular opening. Installation of the new switch is the reverse of above - 1/4 turn counterclockwise.
Before you remove the switch, note its orientation - horizontal with electrical wires to the left. That is the way it should look after replacement as well.
The second time I replaced the switch, I did it all thru the rectangular opening and did not remove the horizontal panel - that is experience helping out.
The knee kick you have to remove regardless. It is sort of hinged at the bottom so you just pull at the top and sort of rotate the knee panel and then pull upwards for two plastic "fingers" to clear the slots they reside in.09 May 2011
|
|

Switch is blue colour thing thru the rectangular opening.3153 viewsThe blue coloured plastic bit thru the rectangular opening is the brake light switch. The fist time, I found it easier remove the switch by dropping the horizontal plastic panel, (two screws), and then slipping my hand in and rotating the switch clockwise 1/4 turn. The second time, I was able to remove the switch thru the rectangular opening and did not need to remove the horizontal lower panel. Obviously, I had to remove the sloping knee pad panel, (note sort of hinged at the bottom so pull back from the top.)
Regardless, do not touch the brake pedal - just let it sit where it wants to. One has to first remove the angled knee pad panel that sits under the steering wheel. It can be pulled from the top corner at the door side. Pulling releases a pair of those U shaped metal clips that LR loves so dearly. You have to pull quite hard. The bottom is held by a couple of plastic fingers in a couple of slots so you pull at the top till the two clips release and then rotate the panel and pull upwards a bit.
To remove the switch, you rotate it clockwise and pull outwards. Rotating the switch clockwise automatically retracts the plunger back into the switch body away from the brake pedal arm.
Similarly when you install the new switch, the required 1/4 turn anti clockwise rotation action releases the plunger so it lays up against the brake pedal arm and at the same time, secures the switch in place.
To remove the electrical wires, the switch will drop below the horizontal pad and hang from the wires so unclipping the electrical connector plug is fairly easy to do.09 May 2011
|
|

Black Deposits to interior of Brake Light Switch2839 viewsThere are two contacts, one on each side of the vertical plunger under the copper metal. The set of normally open contacts on the left side that carries the power for the brake light filaments, (15 amp fuse F15P), is apparently not heavy enough as the contacts deteriorate and generate the black residue.
The set of normally closed contacts on the other side appear to be sized OK. There is not as much current, (5 amp fuse F66P), flowing thru the contacts to the ABS module, however the contacts are likely adversely affected by the black residue produced by the other deteriorating set of contacts.
One presumes/hopes that the newer replacement switch now has contacts heavy enough to carry the brake light power. It would be ideal if the ABS set of contacts were sealed from the brake light contacts to prevent contamination of the normally closed set of contacts. 09 May 2011
|
|

Black Deposits on Brake Light Switch Plunger2737 viewsThis jpg I got off another forum and is typical of what one will see when one opens up the removed brake light switch. The black powder is residue from arcing of one of the pair of contacts within.
Hopefully the newer switches with the FOMOCO logo moulded into the plastic are improved from the Land Rover logo marked early units, however I doubt it.
The Ford part number is SW-6572 and/or 7E5Z-13480-A as used on the 2006 to 2009 Ford Fusion's and Mercury Milan's; the Land Rover part number is XKB500110. Cost of switch could be about twenty five dollars. A previous LR part number for the switch was XKB500030, so hopefully the newer LR part number, XKB500110, reflects some improvement in reliability.
It is possible that the new switches are better as I installed a replacement 72,000 km, (45,000 miles) later, at 195,000 km (121,000 miles). When I took the removed switch apart to inspect, it was clean inside. There was no black dust - the switch looked like new, hence they must be improved now.09 May 2011
|
|
65 views09 May 2011
|
|
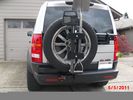
This is how to make it all work. Backup sensor on carrier43 viewsHighlift, ax and shovel. Yes they are matching colors. What else?09 May 2011
|
|
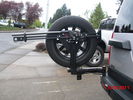
highlift and new sensor wire loom30 viewsNew wire loom added to protect sensor wires and keep things sanitary looking
. Highlift jack mount arms added and gas strut09 May 2011
|
|
Highlift mount added27 viewsHighlift mounted in this position allows for any length with out overhead clearance issues if stood upright09 May 2011
|
|
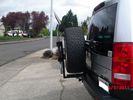
Receiver for toy rack39 viewsSensor bar was made of same heavy tube that the carrier was made from allowing a small 1 1/4" receiver to be placed on it for a multitude of toy racks of my choice. Rack adjust in and out of receiver.09 May 2011
|
|
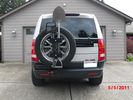
New mods for carrier. Backup sensor moved to the tire carrier. Toy rack and highlift mounts.38 viewsSon wanted all the toys on the carrier. I just wanted easy removal for a good clean look. 09 May 2011
|
|
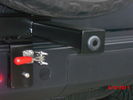
Sensor bar33 viewsSensor has been moved out to tire carrier where it should be. It does not pick up the tire anymore. "no faults". 09 May 2011
|
|

Land Rover Brake Light switch XKB5001102680 viewsThis is what the switch looks like when removed from the parts box. Note that the plunger is recessed back into the body and when installing, the process of rotating the switch body 1/4 turn anticlockwise releases the plunger so it pops longer and engages the brake pedal. If you look down on the plunger you can see curved slots where the rotation takes place.
Do not try to rotate the new one - play with the one you remove. Also do not press on the brake pedal when removing or installing as you will damage the plunger - this is one of the reasons the plunger is retracted into the body for installation. It is also for this reason that if you try to confirm the operation of the switch contacts with an ohm meter by pressing the plunger, the switch will appear not to function as one might anticipate. Have faith, the switch will however, once installed and the plunger is in full motion.09 May 2011
|
|

Stop Light Lamp Circuit pdf2473 viewsThis pdf shows the brake light circuit for the NAS LR3.
Note that power for the brake light bulbs can come either thru the brake light switch power feed /contacts plus also from the Hill Decent Control, (HDC), system relay located within the Central Junction Box, (CJB) - yes two separate sources of power for the brake light bulbs. This would tend to explain how a brake light circuit concern shows up as a hill decent fault message; also why lesser vehicles without hill decent braking mechanisms, (HDC), never display this sort problem when a brake light bulb or switch acts up. You never have a problem related to a system that does not exist.
Additional evidence of the relationship of the HDC and the tail light circuit is demonstrated by when the HDC actually acts to slow the 3 down, the brake lights automatically illuminate even if the slowing action was merely retarding the engine speed or shifting to a lower gear, (in other words, no foot on the brake pedal).
There is also a tie in to the Cruise Control and hence a failing brake light switch can affect cruise operation or just create false Cruise Control messages. To further complicate the issue, while there are no messages generated, operation of the radiator electro viscous fan can also be negatively affected by the fouled set of secondary contacts within the brake light switch. This is all because the NC contacts within the brake switch send misleading messages to the ECU.
While the ground wire design is similar to other vehicles, note the grounds for the brake light filament and the reverse light filament are common on each side. That means that if one has a non functioning brake light on one side, the reverse light may not also work or that some problem with the reverse lights could back feed into the brake lights. This situation while unusual, can result when grounds are corroded probably due to swimming in rivers and creeks or just routine driving in a marine environment.09 May 2011
|
|

42 views08 May 2011
|
|
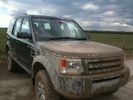
A bit of muck!48 views08 May 2011
|
|
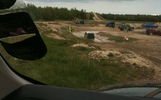
Defender stuck in the mud run!42 views08 May 2011
|
|

Course35 views08 May 2011
|
|

Hill climb37 views08 May 2011
|
|
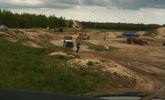
Defender recovered by RRC & tray back.39 views08 May 2011
|
|

Front Runner Y style rear tyre carrier 581 viewsThis is the new Y or D shaped Front Runner, (out of South Africa), brand of rear bumper mount tyre carrier.
The big deal is the new self latching mechanism.07 May 2011
|
|

new ATs20 views07 May 2011
|
|

33 views07 May 2011
|
|

wha's35 views06 May 2011
|
|
44 views06 May 2011
|
|
55 views06 May 2011
|
|

60 views06 May 2011
|
|
71 views06 May 2011
|
|
50 views06 May 2011
|
|
51 views06 May 2011
|
|
50 views06 May 2011
|
|
49 views06 May 2011
|
|
47 views06 May 2011
|
|
57 views06 May 2011
|
|

55 views06 May 2011
|
|
58 views06 May 2011
|
|
52 views06 May 2011
|
|
50 views06 May 2011
|
|
59 views06 May 2011
|
|
55 views06 May 2011
|
|
57 views06 May 2011
|
|
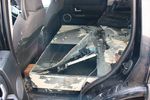
58 views06 May 2011
|
|

58 views06 May 2011
|
|
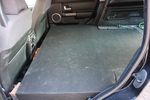
62 views06 May 2011
|
|

59 views06 May 2011
|
|

58 views06 May 2011
|
|

53 views06 May 2011
|
|

59 views06 May 2011
|
|

37 views06 May 2011
|
|

Sloth in the wild53 views06 May 2011
|
|

33 views06 May 2011
|
|

One of England's finest arses86 views05 May 2011
|
|

37 views05 May 2011
|
|
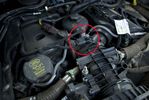
40 views05 May 2011
|
|

27 views05 May 2011
|
|

dalyan24 viewsblack&white05 May 2011
|
|

my toy47 views05 May 2011
|
|

Engel37 views05 May 2011
|
|

25 views05 May 2011
|
|

32 views05 May 2011
|
|

26 views05 May 2011
|
|
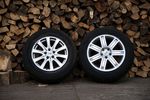
FFRR 19" 7-spoke and Disco3 18" Style2 (from MY08.5)50 views05 May 2011
|
|
26 views04 May 2011
|
|
25 views04 May 2011
|
|

58 views04 May 2011
|
|
46 views04 May 2011
|
|
44 views04 May 2011
|
|
40 views04 May 2011
|
|
43 views04 May 2011
|
|
42 views04 May 2011
|
|
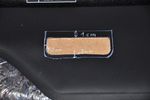
Grab handle - Cut-out dimensions35 views04 May 2011
|
|
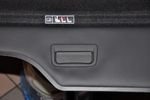
Grab handle - fitted37 views04 May 2011
|
|
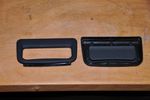
Grab handle #135 views04 May 2011
|
|

81 views04 May 2011
|
|

79 views04 May 2011
|
|

99 views04 May 2011
|
|

83 views04 May 2011
|
|

90 views04 May 2011
|
|

43 views03 May 2011
|
|

46 views03 May 2011
|
|

40 views03 May 2011
|
|

43 views03 May 2011
|
|

78 views03 May 2011
|
|
77 views03 May 2011
|
|

map light137 views03 May 2011
|
|

Lower arm fitting instruction152 views03 May 2011
|
|
40 views03 May 2011
|
|
39 views03 May 2011
|
|
39 views03 May 2011
|
|
38 views03 May 2011
|
|
43 views03 May 2011
|
|
40 views03 May 2011
|
|
48 views03 May 2011
|
|
43 views03 May 2011
|
|
46 views03 May 2011
|
|
45 views03 May 2011
|
|
43 views03 May 2011
|
|
180 views03 May 2011
|
|
173 views03 May 2011
|
|
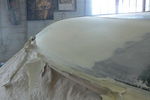
177 views03 May 2011
|
|
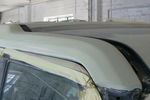
164 views03 May 2011
|
|
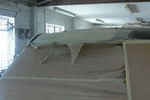
175 views03 May 2011
|
|
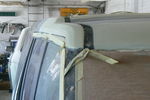
178 views03 May 2011
|
|
202 views03 May 2011
|
|
166 views03 May 2011
|
|
192 views03 May 2011
|
|
54 views03 May 2011
|
|
38 views03 May 2011
|
|
61 views03 May 2011
|
|

external lights d3185 views03 May 2011
|
|

external lights D4 251 views03 May 2011
|
|

38 views03 May 2011
|
|
Walking Stick (Insect Order: Phasmida)51 views03 May 2011
|
|
60 views02 May 2011
|
|
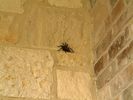
Aphonopelma hentzi, the Texas Brown tarantula54 views02 May 2011
|
|
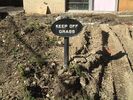
Irony320 viewsSelf Explanatory, there is no grass.02 May 2011
|
|
47 views02 May 2011
|
|
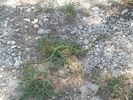
ROUGH GREEN SNAKE, Opheodrys aestivus53 views02 May 2011
|
|

whie faced monkey Cebus capucinus53 views02 May 2011
|
|
Owl52 views02 May 2011
|
|
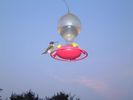
Calliope Hummingbird (Stellula calliope)48 views02 May 2011
|
|
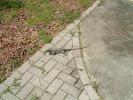
Ctenosaur (Ctenosaura similis)52 views02 May 2011
|
|
ROUGH GREEN SNAKE, Opheodrys aestivus44 views02 May 2011
|
|

Hartmann's Mountain Zebra, (Equus Zebra Hartmannae)50 views02 May 2011
|
|
Great Horned Owl (Bubo virginianus)50 views02 May 2011
|
|

Eastern Fox Snakes (Elaphe gloydi)66 views02 May 2011
|
|
68 views02 May 2011
|
|
66 views02 May 2011
|
|
69 views02 May 2011
|
|
168 views02 May 2011
|
|
131 views02 May 2011
|
|
134 views02 May 2011
|
|
134 views02 May 2011
|
|

30 views01 May 2011
|
|

27 views01 May 2011
|
|
![Filename=IMG_0440[1].JPG
Filesize=152KB
Dimensions=1280x960
Date added=01.May 2011 IMG_0440[1].JPG](albums/userpics/17669/thumb_IMG_0440%5B1%5D.JPG)
36 views01 May 2011
|
|
![Filename=IMG_0433[1].JPG
Filesize=116KB
Dimensions=1280x960
Date added=01.May 2011 IMG_0433[1].JPG](albums/userpics/17669/thumb_IMG_0433%5B1%5D.JPG)
31 views01 May 2011
|
|
![Filename=IMG_0435[1].JPG
Filesize=196KB
Dimensions=1280x960
Date added=01.May 2011 IMG_0435[1].JPG](albums/userpics/17669/thumb_IMG_0435%5B1%5D.JPG)
34 views01 May 2011
|
|
![Filename=IMG_0436[1].JPG
Filesize=112KB
Dimensions=1280x960
Date added=01.May 2011 IMG_0436[1].JPG](albums/userpics/17669/thumb_IMG_0436%5B1%5D.JPG)
30 views01 May 2011
|
|
![Filename=IMG_0437[1].JPG
Filesize=193KB
Dimensions=1280x960
Date added=01.May 2011 IMG_0437[1].JPG](albums/userpics/17669/thumb_IMG_0437%5B1%5D.JPG)
31 views01 May 2011
|
|
![Filename=IMG_0439[1].JPG
Filesize=155KB
Dimensions=1280x960
Date added=01.May 2011 IMG_0439[1].JPG](albums/userpics/17669/thumb_IMG_0439%5B1%5D.JPG)
34 views01 May 2011
|
|
63 views01 May 2011
|
|

35 views01 May 2011
|
|
33 views01 May 2011
|
|
66 views01 May 2011
|
|
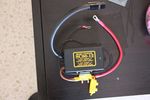
Traxide SC-80 brain146 viewsTraxide SC-80 brain01 May 2011
|
|
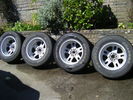
alloys 217 views30 Apr 2011
|
|
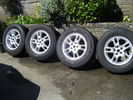
alloys 116 views30 Apr 2011
|
|
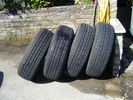
tyres 315 views30 Apr 2011
|
|
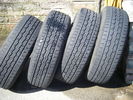
tyres 115 views30 Apr 2011
|
|

tyres 319 views30 Apr 2011
|
|
88 views30 Apr 2011
|
|
69 views30 Apr 2011
|
|
66 views30 Apr 2011
|
|

113 views30 Apr 2011
|
|
122 views30 Apr 2011
|
|

77 views30 Apr 2011
|
|
46 views30 Apr 2011
|
|
54 views29 Apr 2011
|
|
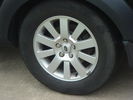
D3 SE 18"100 views29 Apr 2011
|
|
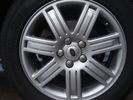
FFRR 19"109 views29 Apr 2011
|
|
147 views28 Apr 2011
|
|

127 views28 Apr 2011
|
|

83 views28 Apr 2011
|
|
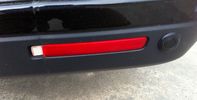
Reflector52 views28 Apr 2011
|
|
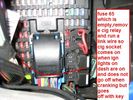
95 views28 Apr 2011
|
|
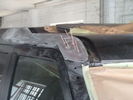
217 views28 Apr 2011
|
|

49 views28 Apr 2011
|
|

50 views28 Apr 2011
|
|
46 views27 Apr 2011
|
|
HEVAC148 views27 Apr 2011
|
|
52 views27 Apr 2011
|
|
49 views27 Apr 2011
|
|
45 views27 Apr 2011
|
|
47 views27 Apr 2011
|
|
44 views27 Apr 2011
|
|
37 views27 Apr 2011
|
|
25 views27 Apr 2011
|
|
27 views27 Apr 2011
|
|
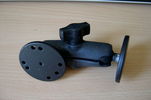
ram44 views27 Apr 2011
|
|
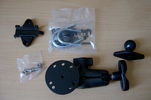
RAM Mount40 views27 Apr 2011
|
|
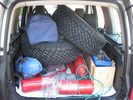
fire test stuff and ATs48 views27 Apr 2011
|
|

fire test stuff45 views27 Apr 2011
|
|
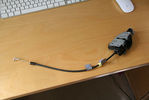
24 views27 Apr 2011
|
|
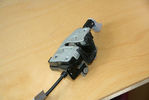
24 views27 Apr 2011
|
|
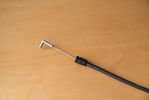
23 views27 Apr 2011
|
|
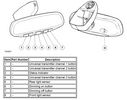
Mirror69 views26 Apr 2011
|
|
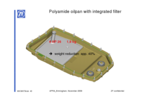
ZF_6HP26_Plastic_Filter_Pan_ combo.png1096 viewsThis is the plastic oil pan on the bottom of our ZF 6HP26X transmissions. Note the two round magnets at the right end of the pan; the drain plug is between them. The filter is the grey part and the vertical oil suction pipe is to draw oil up to the transmission from the filter element. There are 21 Torx screws around the perimeter and the pan gasket is O ring like in design where a half round channel is moulded into the plastic of the pan. The metal pan uses a more conventional flat gasket and in both cases, the metal mating surface of the transmission case is a flat machined metal surface.26 Apr 2011
|
|
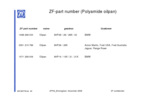
ZF Plastic Pan / Filter part numbers845 viewsZF, not Land Rover, part numbers for the various types of plastic pan depending upon vehicle manufacturer. The BMW pan is apparently different from the Land Rover pan even though the transmissions are 6HP26 units. No wonder each manufacturer has his own oil - maybe it is different as well. What I find interesting is the mention of Ford Australia and Ford USA separately rather than just Ford. 26 Apr 2011
|
|

ZF Transmission parts exploded views1283 viewsA 35 page pdf showing exploded views of the inside of the transmission along with oil fill procedures and part numbers. There is also the suggestion of a metal pan but no part number given and the appearance of a more usual type of oil pan gasket, flat rather than O ring. 26 Apr 2011
|
|

ZF 6HP26 transmission fluid drain and refill procedure4020 viewsThis is the Land Rover instruction pdf and I note they have it right - that is remove the filler plug first, then the drain plug. Also before you attempt that, not only do you need oil, but also new fill and drain plugs as the sealing washers are deemed single use only.26 Apr 2011
|
|

ZF 6HP26 Land Rover Transmission specs1669 viewsThis is just two sheets of paper with various numbers related to the 6HP26 such as oil capacity, gear ratios, and torque wrench settings for the fill and drain plugs.
You may note that LR calls this ZF transmission the 6HP26 whereas ZF calls out the LR3 transmission as the 6HP26X. Just what the differences are, I am not certain however the X refers to 4WD or AWD use as opposed to solely 2WD.
Zahnradfabrik is what ZF is short for and translated from German, roughly means Gear Factory.26 Apr 2011
|
|

LR 6HP26 transmission oil part number TYK5000501413 viewsThis jpg shows the genuine Land Rover transmission oil, part number TYK500050, for the 6HP26X tranny. The Shell product number is M-1375.4 but you cannot buy the oil retail from Shell. The container size is one litre.
A routine oil change where the pan/filter combo is not changed takes about 3.5 to 4 litres of oil. When the tranny is brand new, a dry fill can take up to 9.5 litres of oil however around 7 litres is more common for when a new pan/filter combo is installed on an already in service transmission. 26 Apr 2011
|
|

Manufacturers brochure re plastic pan1029 viewsI found this ad from a German manufacture called LANXESS Deutschland GmbH saying that they manufacture the plastic oil pan/filter combo for ZF that is used on the 6HP26 six speed transmission.26 Apr 2011
|
|
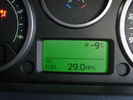
Northern Sweden October 201033 viewsHeading North to the Nordkapp.26 Apr 2011
|
|
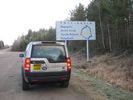
Crossing the Arctic Circle. October 201034 views26 Apr 2011
|
|
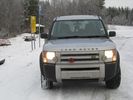
A short stop before entering Finland. October 201029 views26 Apr 2011
|
|
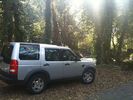
My new pride & joy29 views26 Apr 2011
|
|
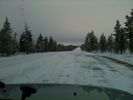
Heading North in Finland. October 201034 views26 Apr 2011
|
|
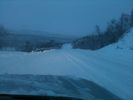
Heading North in Finland. October 201034 views26 Apr 2011
|
|
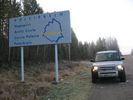
Crossing the Arctic Circle. October 201034 viewsHeading North26 Apr 2011
|
|
46 views26 Apr 2011
|
|
60 views26 Apr 2011
|
|
49 views26 Apr 2011
|
|
59 views26 Apr 2011
|
|
20 " RRS Y Spokes45 views26 Apr 2011
|
|
20 " RRS Y Spokes39 views26 Apr 2011
|
|
20 " RRS Y Spokes37 views26 Apr 2011
|
|
20 " RRS Y Spokes38 views26 Apr 2011
|
|
20 " RRS Y Spokes40 views26 Apr 2011
|
|
20 " RRS Y Spokes42 views26 Apr 2011
|
|
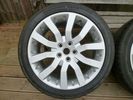
20 " RRS Y Spokes40 views26 Apr 2011
|
|
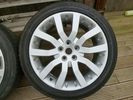
20 " RRS Y Spokes36 views26 Apr 2011
|
|

101 views26 Apr 2011
|
|

92 views26 Apr 2011
|
|

76 views26 Apr 2011
|
|
70 views26 Apr 2011
|
|
71 views26 Apr 2011
|
|
54 views26 Apr 2011
|
|
46 views26 Apr 2011
|
|
61 views26 Apr 2011
|
|
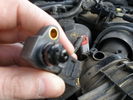
MAP - 168 views26 Apr 2011
|
|
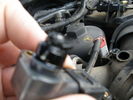
MAP - 254 views26 Apr 2011
|
|
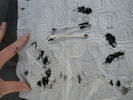
MAP - 348 views26 Apr 2011
|
|

100 views25 Apr 2011
|
|
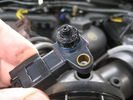
MAP Sensor39 views37,000 miles. EGRs replaced @ 22,000 & 29,000 miles.25 Apr 2011
|
|
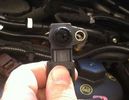
MAP sensor top39 views25 Apr 2011
|
|
MAP sensor side41 views25 Apr 2011
|
|
42 views25 Apr 2011
|
|
67 viewsGibb River Rd, Kimberley25 Apr 2011
|
|
81 viewsWhy D4 mudflaps are no good25 Apr 2011
|
|

64 viewsBroome WA25 Apr 2011
|
|
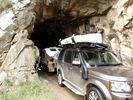
78 viewsConvict tunnel, hand dug25 Apr 2011
|
|
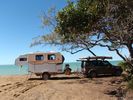
72 viewsNth Queensland25 Apr 2011
|
|

36 views24 Apr 2011
|
|
37 views24 Apr 2011
|
|
40 views24 Apr 2011
|
|
43 views24 Apr 2011
|
|
36 views24 Apr 2011
|
|
43 views24 Apr 2011
|
|
Before 2122 views24 Apr 2011
|
|
Before 1104 views24 Apr 2011
|
|
After 289 views24 Apr 2011
|
|
After 187 views24 Apr 2011
|
|
19's are back on95 views24 Apr 2011
|
|

d44 steering guard130 views24 Apr 2011
|
|
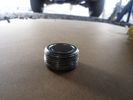
Front Diff Oil Plug 70k After75 views24 Apr 2011
|
|
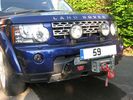
D4 LR Winch Mount & Bumper Mounted Spots505 views24 Apr 2011
|
|
68 views24 Apr 2011
|
|

LR3 Denso Alternator YLE500390 pulley view817 viewsNote the DENSO sticker on the side. Denso calls their nominal 150 amp 12 Volt alternator an SC2 design. SC means Segment Conductor which apparently increase the winding density of the stator coil, hence yielding a physically smaller lighter alternator for a given output. I presume the 2 means the second try at getting it right. A Denso part number is 4280003690 for the alternator, (there are others, as below).
Rotation is clockwise and the 54mm diameter pulley has 6 grooves (PV6x54). Count the pulley grooves on both the one you remove and your new one - some replacement alternators seem to ship with 5 or 7 grooves so you might be swapping pulleys.
A previous LR part number was YLE500190 for the older variation of the newer YLE500390 unit.
An additional part number for a factory rebuilt is Nippon Denso 210-0569 for the petrol V8 alternator. Other Nippon Denso numbers include 104210-3690 and 104210-3691. The Lester number is 11206 which relates to another Denso number of 290-5287. WAI uses 11206N.
From 2006 to 2009, the internal regulator is a Transpo IN6349 and of the B circuit type if it can be said that applies to PWM, (Pulse Width Modulated), regulators.
The "regulator" inside the alternator is therefore really not a regulator in the old sense of the term but instead an instruction receiver from the ECM that translates Pulse Width Modulated (PWM) signals into a form that the alternator understands – digital like signals from the Engine Control Module(ECM) into analogue like signals that the windings understand.23 Apr 2011
|
|

LR3 Denso Alternator YLE500390 rear view706 viewsThis picture shows the rear of the YLE500390, the Land Rover part number for a newer design alternator utilizing the Transpo IN6349 regulator with the "hidden" cooling fins. Note the visual difference in the rear view of the next file jpg.
If the alternator is a rebuilt, (service exchange unit), but Land Rover supplied, then the part number is LR008860 or similar. (Note that 0 in LR0 is zero.)
Two Denso part numbers exist for the alternator as well, 4280003690 and 4280003691. The rating of the petrol V8 alternator is nominal 12 VDC and 150 amps. In normal day to day operation, they seem to run about 14VDC - usually between 13.9 and 14.1 volts at the OBD port.
For the petrol V6, the LR service exchange number is LR008862, and the 2.7TDV6 is LR008861.
The bridge rectifier within the alternator is a 12 diode avalanche type, 117mm diameter, as used in Nippondenso 120 to 160 amp alternators with the Hair Pin stator. It is similar to a Transpo INR421 which is rated for 120 to 150 amp alternators. That is probably our primary problem - the rectifier is just too light. Alternate part numbers for the bridge rectifier are Cargo 237607, Mobiltron RM-29 and AS ARC6021.
Re the B+ stud, the INR421 calls it up as an M8 x 1.25 x 30 mm long course threaded stud; some say 34 mm but that may be longer than desirable. 23 Apr 2011
|
|

Bolster and lumber support options151 views23 Apr 2011
|
|

Deflated141 views23 Apr 2011
|
|

Inflated136 views23 Apr 2011
|
|

Inflated132 views23 Apr 2011
|
|

Deflated126 views23 Apr 2011
|
|
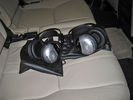
51 views23 Apr 2011
|
|
41 views23 Apr 2011
|
|
49 views23 Apr 2011
|
|
74 views23 Apr 2011
|
|
57 views23 Apr 2011
|
|
55 views23 Apr 2011
|
|
45 views23 Apr 2011
|
|
47 views23 Apr 2011
|
|
42 views23 Apr 2011
|
|
55 views23 Apr 2011
|
|
50 views23 Apr 2011
|
|
41 views23 Apr 2011
|
|
41 views23 Apr 2011
|
|
52 views23 Apr 2011
|
|

45 views23 Apr 2011
|
|
48 views23 Apr 2011
|
|
49 views23 Apr 2011
|
|
44 views23 Apr 2011
|
|
48 views23 Apr 2011
|
|

design with a lamp at night..35 views23 Apr 2011
|
|

design with a lamp at night.34 views23 Apr 2011
|
|

design with a lamp at night35 views23 Apr 2011
|
|

new boots130 views23 Apr 2011
|
|

venture cam291 views22 Apr 2011
|
|
418 views22 Apr 2011
|
|

405 views22 Apr 2011
|
|

389 views22 Apr 2011
|
|

416 views22 Apr 2011
|
|
347 views22 Apr 2011
|
|
80 views22 Apr 2011
|
|
74 views22 Apr 2011
|
|
95 views22 Apr 2011
|
|
73 views22 Apr 2011
|
|
HELP!!67 views22 Apr 2011
|
|
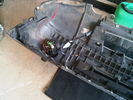
Rear of Fog Light119 views22 Apr 2011
|
|
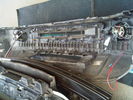
Rear View of Fogs116 views22 Apr 2011
|
|

Job Done113 views22 Apr 2011
|
|

LED's 127 views22 Apr 2011
|
|
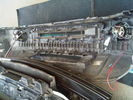
Pipes Fitted for Jets130 views22 Apr 2011
|
|

Jets Fitted/Job Done171 views22 Apr 2011
|
|
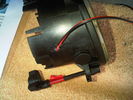
Hole Drilled/Cable Pulled Through118 views22 Apr 2011
|
|
Rear View once Glued122 views22 Apr 2011
|
|
LED's Fitted to Fogs123 views22 Apr 2011
|
|
41 views22 Apr 2011
|
|
43 views22 Apr 2011
|
|
52 views22 Apr 2011
|
|
46 views22 Apr 2011
|
|
42 views22 Apr 2011
|
|
46 views22 Apr 2011
|
|
51 views22 Apr 2011
|
|
56 views22 Apr 2011
|
|
62 views22 Apr 2011
|
|
Template on Rear of Bumper Drilled120 views21 Apr 2011
|
|
First Hole Drilled & Bezel Fitted118 views21 Apr 2011
|
|
Sensor Fitted130 views21 Apr 2011
|
|
Hole Marked on Bumper Only to be Drilled & Cut119 views21 Apr 2011
|
|
Underside View of Jet/Retainer Clip121 views21 Apr 2011
|
|
D4 Jets Fitted171 views21 Apr 2011
|
|
Front Stripped141 views21 Apr 2011
|
|
Bottle as Fitted114 views21 Apr 2011
|
|
Hole Drilled for New Pump120 views21 Apr 2011
|
|
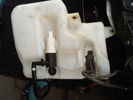
New Pump Fitted115 views21 Apr 2011
|
|
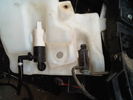
Hole Drilled for Sensor113 views21 Apr 2011
|
|

102 views21 Apr 2011
|
|
my new sump gaurd winch type 74 views21 Apr 2011
|
|
84 views21 Apr 2011
|
|
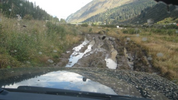
103 views21 Apr 2011
|
|
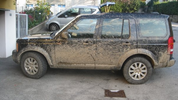
99 views21 Apr 2011
|
|
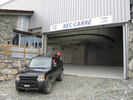
99 views21 Apr 2011
|
|

58 views20 Apr 2011
|
|
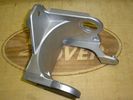
Replacement Bracket, LR part # RQU500064 for Air Compressor1024 viewsThis is a jpg of an aluminum replacement air compressor bracket, Land Rover part number RQU500064. The three rubber noise isolators are to be removed from the old bracket and inserted in the new bracket.20 Apr 2011
|
|

42 views20 Apr 2011
|
|

46 views20 Apr 2011
|
|

Bali Blue Van115 views20 Apr 2011
|
|
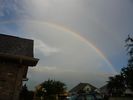
Triple Rainbow123 viewsTriple rainbow spotted, last ring is hard to see in picture.20 Apr 2011
|
|

Disco 195 views20 Apr 2011
|
|

Kibbles and Bits97 viewsDrake retrieving20 Apr 2011
|
|

Kibbles and Bits104 viewsDrake retrieving20 Apr 2011
|
|

Roof Rack Project PROTO-2 dett. barre giu47 viewsBarra trasversale instalata in basso20 Apr 2011
|
|

Roof Rack Project PROTO-2 dett. barre su45 viewsBarra trasversale instalata in alto20 Apr 2011
|
|
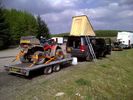
90 views20 Apr 2011
|
|
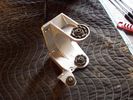
Air Compressor mounting bracket new907 viewsFound this jpg on a forum - thought it was good and is what one breaks when one jacks on the plastic air compressor cover.20 Apr 2011
|
|
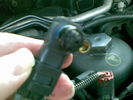
MAP sensor57 viewsMAP sensor gunky but hole clean. 108k miles non-blanked EGR.19 Apr 2011
|
|

24 views19 Apr 2011
|
|
157 views19 Apr 2011
|
|
| 235578 files on 589 page(s) |
 |
 |
 |
 |
 |
 |
 |
494 |  |
 |
 |
 |
 |
|