| Last additions - 12,000 lb Hydraulic Winch Installation |
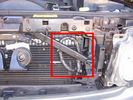
Installed winch electrical wires148 viewsWires which only power the solenoid are inside spiral wrap. They are also connected inside the wrap at the high point of the loop. Cable tied into place to prevent vibration rubbing. 07 Jul 2012
|
|
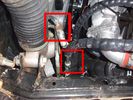
View of both hose connections to power steering system153 viewsBoth connections are shown. My friendly Qantas hydraulic hose expert cut off the elbow and modified it so I can re-install it to the PS rack before warranty work (and certainly before the vehicle is lifted off the body!!). 07 Jul 2012
|
|
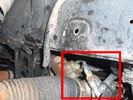
Further detail of attachment of the winch hoses to power steering system145 viewsThis is under the right (looking forward) lower plastic radiator cover. 07 Jul 2012
|
|
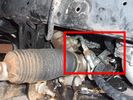
Detail of hydraulic hoses attached to power steering hoses155 viewsHoses are attached to the upstream side of power steering rack. When winch not running, PS rack sees full pressure (ie, no change from design). Biggest challenge is running stiff hoses so that they align with attach points. I got Qantas employee who repairs hydraulic baggage loaders to braise in fittings (very tight spaces and tough access).07 Jul 2012
|
|
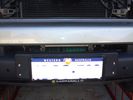
Winch as installed177 viewsLicence plate is held on by winch cable and 4 metal pins which fit into modified bumper body. Winch rope is green07 Jul 2012
|
|
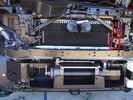
Installed winch with electrical solenoid connections163 viewsI routed the electrical supply (2 small wires) up the side of the radiator. You can see the unconnected wires inside the red boxes. I ended up connecting them on the radiator diagonal strut with cable ties. They are out of the way for any deep water transits there. 07 Jul 2012
|
|
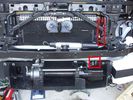
Installed winch with hydraulic hoses178 viewsThe hydraulic hoses are stiff, so I had to run them up the side of the radiator (can just see inside red boxes) to near the top of the radiator, then back down inside the engine compartment, then underneath the engine (behind the radiator) to the D4's power steering rack, where the hoses become metal. This hose routing may not be possible if the fuel-burning heater is in place (we don't have those in Aust and the space allowed room for my hands to bend and run the hoses without kinking). 07 Jul 2012
|
|
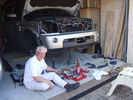
Installed winch, with bumper partially re-installed203 viewsPutting the D4 back together. Shows the tools and owner lying about.07 Jul 2012
|
|
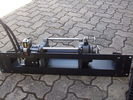
Hidden winch mount with winch in place124 viewsHydraulic hoses are now installed. Note notch for hydraulic:electric solenoid to fit in mount.07 Jul 2012
|
|
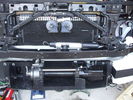
Front bumper view of semi-installed winch121 viewsNote the left-side (looking forward) bracket holding the white windscreen washer bottle. 07 Jul 2012
|
|
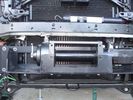
Close-up front view of partially-installed winch121 viewsNote that the sheet-metal flange just above the winch had to be notched to allow winch controller to be actuated. Also this same bracket had to be bent upwards to allow the winch hydraulic:electic solenoid to fit without rubbing. The nut on the upper-left bolt (the one with a very faint circle around it) stripped on re-installation, so the tray and winch pulling load is held only by the threads on 7 bolts....07 Jul 2012
|
|
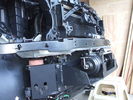
Front-right view (looking forward) of partially installed winch and mount124 viewsThe closest bracket, with three rubber grommets, is the air bag sensor. Before beginning any of this work, be sure to disconnect battery and discharge any remaining electrical power. I didn't want to accidently drop this assembly and cause the airbags to deploy. 07 Jul 2012
|
|
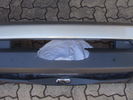
Front bumper with cutout for winch rope entry117 viewsBumper was initially cut "too small" with a low speed hand-held jig saw. It was then progressively filed to about the right size. Finally a very sharp box cutter was used to provide a smooth edge to the cut. This cutout is hidden behind the licence plate. 07 Jul 2012
|
|
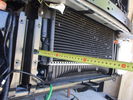
Front view of radiator after removal of grill, fenders, and bumper119 views07 Jul 2012
|
|
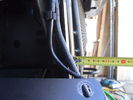
Left side (looking forward) of radiator after grill and bumpers removed.103 viewsTape measure is shown for illustration of dimensions only. 07 Jul 2012
|
|
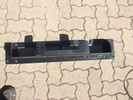
Top view of "Uncle Ray" discrete winch tray, after painting.106 viewsNote that towards the upper right there is a notch in the tray. This is needed for the specific winch's electric solenoid. The winch is a Mile Marker 12,000 lb hydraulic unit. 07 Jul 2012
|
|
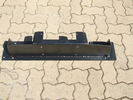
107 views"Uncle Ray" discrete winch tray, back and rear views. After painting. 07 Jul 2012
|
|
|
|
|
|
|